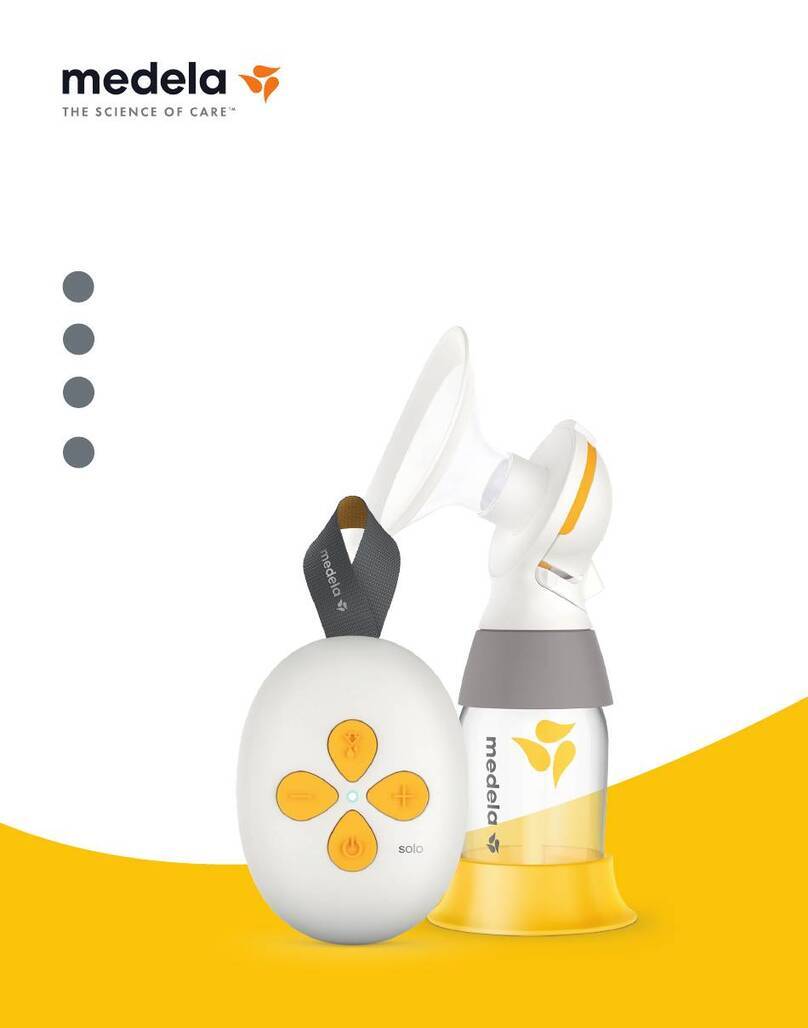
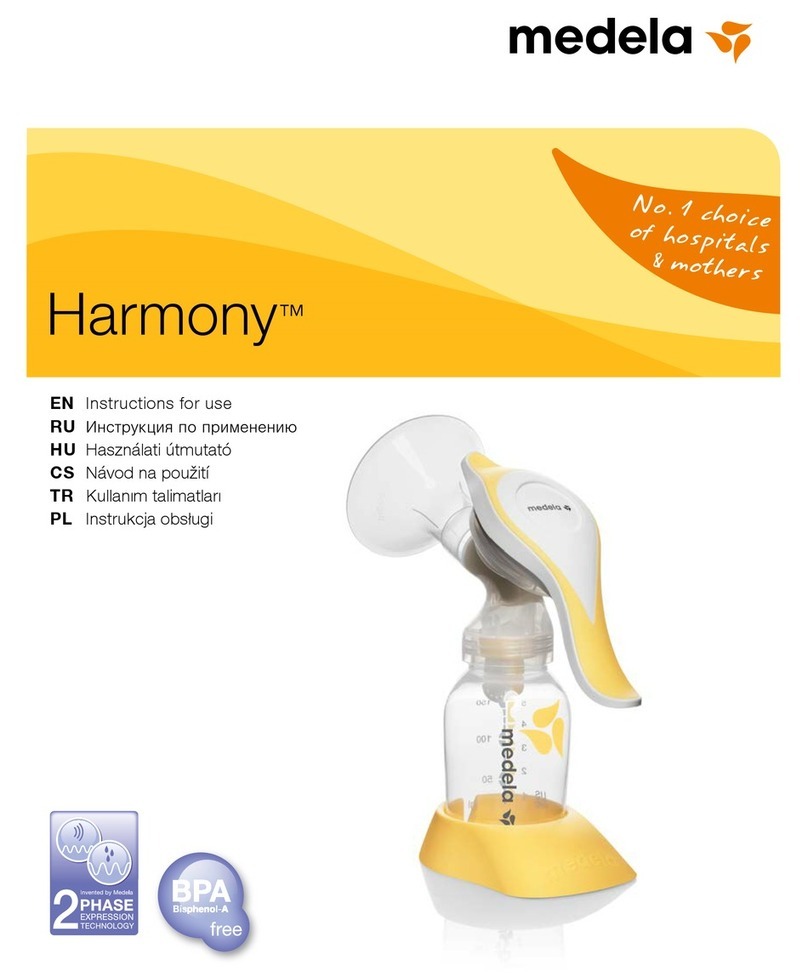
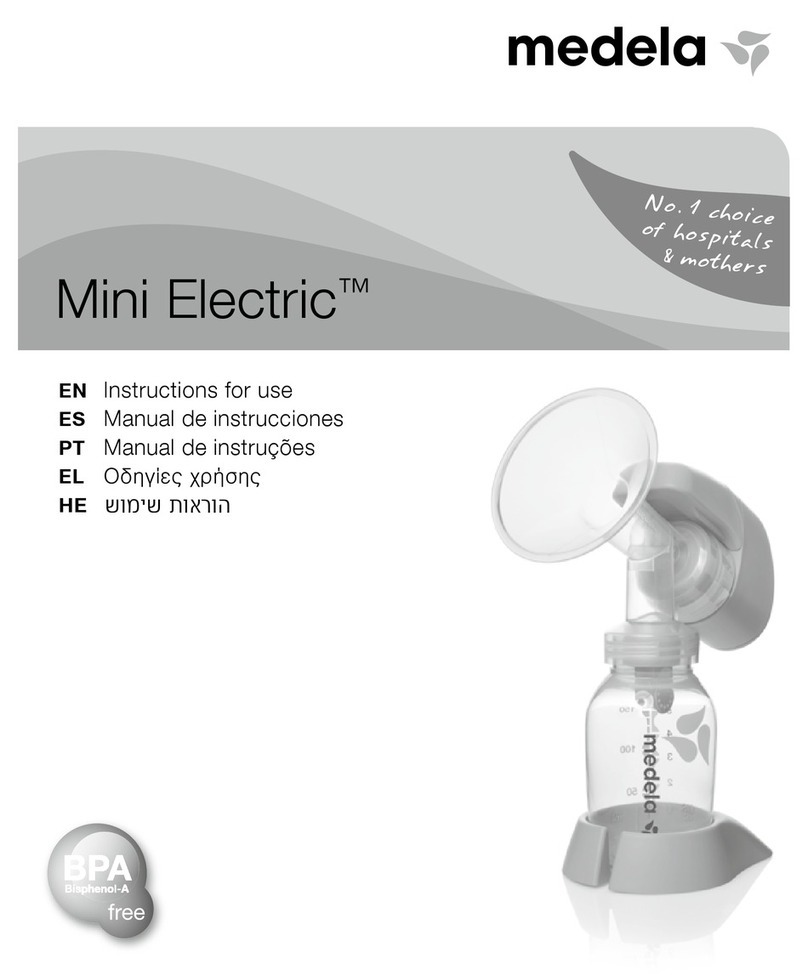
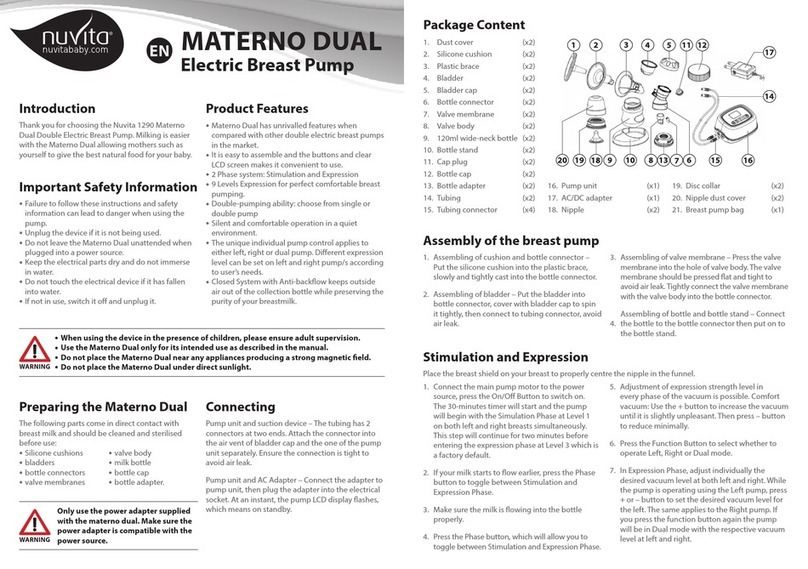
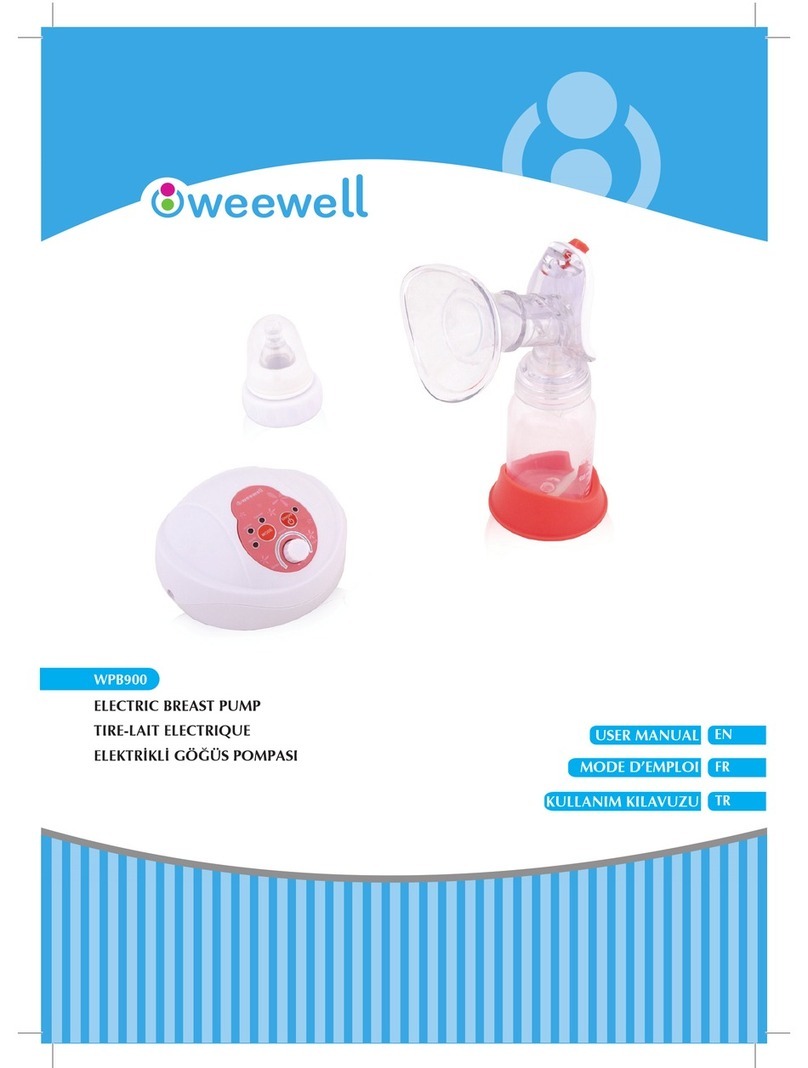
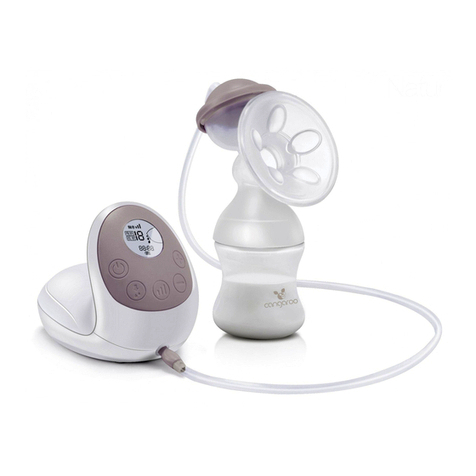
Medela symphon User manual

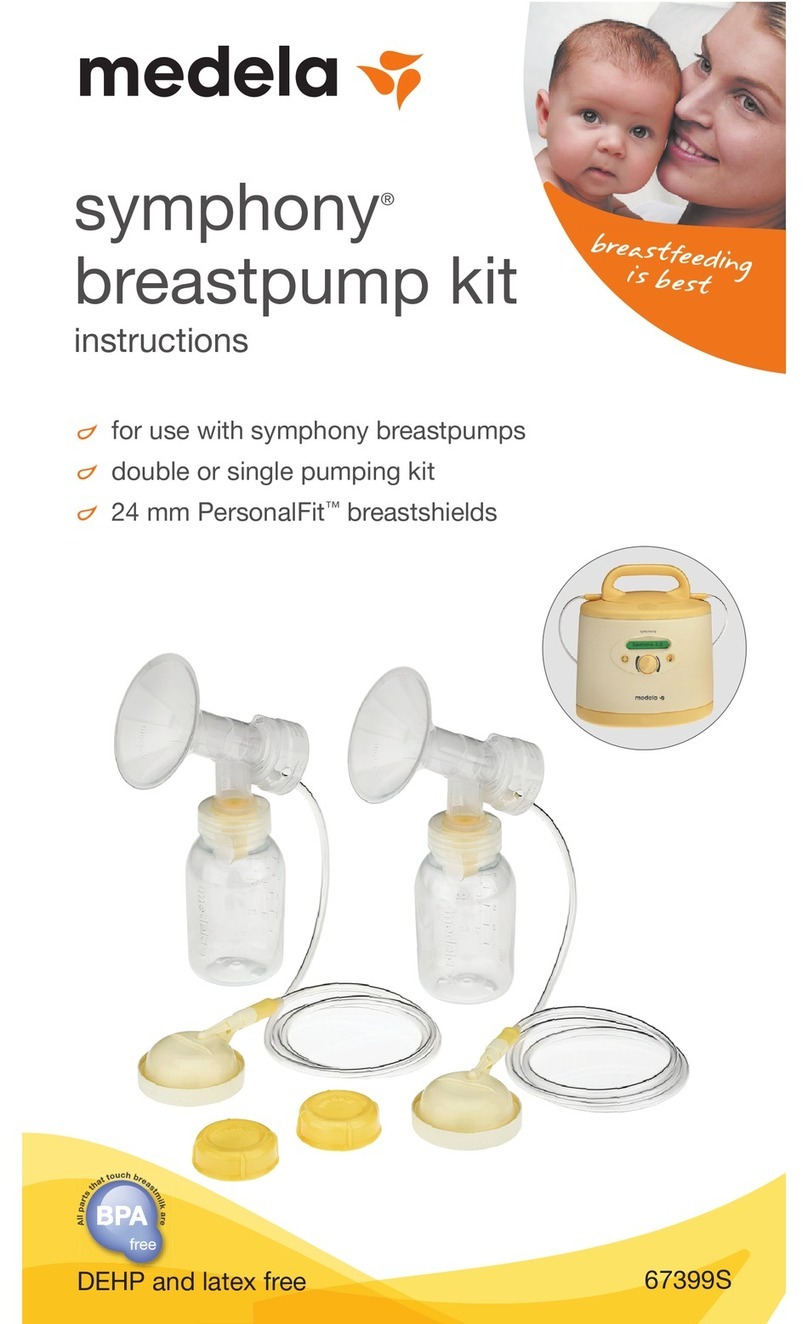
symphony®
breastpump kit
juego extractor de leche
materna symphony®
for use with symphony breastpumps
for double or single pumping
para usarse con extractores de leche symphony
para extracción doble o simple
made
without
made
made
without
Not made with natural rubber latex or DEHP.
EN instructions | ES instrucciones
No está hecho con látex de caucho natural ni DEHP.
made
without
fabricadas
fabricadas
sin

Questions? Visit www.medela.com or call us at 1-800-435-8316. 3
2
1. Important Safeguards....................................................................................................4
2. Accessories....................................................................................................................5
3. Cleaning Overview..................................................................................................... 6-7
4. Wash – Before first use & after each use................................................................. 8-9
5. Sanitize – Before first use & once per day........................................................... 10-11
6. Tubing Care ............................................................................................................ 12-13
7. Assembly of the Pump Kit..................................................................................... 14-17
8. Breastshield Sizing ......................................................................................................18
9. Storing, Preparing & Feeding Breastmilk ..................................................................19
9A. Storing Breastmilk ....................................................................................................19
9B. Preparing Breastmilk.................................................................................................19
9C. Feeding Breastmilk...................................................................................................19
10. Troubleshooting ..................................................................................................... 20-21
11. Supplemental Information...........................................................................................22
PLEASE SAVE THESE INSTRUCTIONS.
Intended Use
The Symphony®Breastpump is a powered breastpump to be used by
lactating women to express and collect milk from their breast.
Product Description
Symphony is a multi-user, hospital grade electric breastpump that
includes 2-Phase Expression®technology and is capable of single and
double pumping.
IMPORTANT
• Plastic bottles and component parts become brittle when frozen and
may break when dropped.
• Bottles and component parts may become damaged if mishandled,
e.g. dropped, over-tightened, or knocked over.
• Take appropriate care in handling bottles and components.
• Do not use the breastmilk if bottles or components become damaged.
T
The warning symbol identifies all instructions that are important to safety.
Failure to observe these instructions can lead to injury or damage to the
breastpump. When used in conjunction with the following words, the
warning symbols stand for:
WARNING Can lead to serious injury or death.
CAUTION Can lead to minor injury.
NOTE Can lead to material damage.
TIP Useful or important information that is not related to safety.
Table of Contents

Questions? Visit www.medela.com or call us at 1-800-435-8316. 5
4
1. Important Safeguards
When using electrical devices, basic safety precautions should always be followed,
including the following:
READ ALL INSTRUCTIONS BEFORE USING THIS PRODUCT.
WARNING: To avoid health risk and reduce the risk of injury:
• Breastpump kits are a personal care item intended for use by a single user only and
should not be shared between users.
• Inspect the breastpump kit components prior to each use.
o Do not use the components if they are damaged.
o Do not use the components if dirt, mold or other contamination is visible.
• Inspect all appropriate components before each use.
• Clean and sanitize all parts that come in contact with your breast and breastmilk prior
to first use. Sterile kits are ready to use and do not require washing prior to first use.
• Never use while pregnant, as pumping can induce labor.
• Wash all parts that come in contact with your breast and breastmilk after every use.
• Do NOT continue pumping for more than 2 consecutive pumping sessions if no
results are achieved.
• Do not thaw frozen breastmilk in a microwave or in a pan of boiling water.
• If tubing becomes moldy, discontinue use and replace tubing.
• If breastmilk backup occurs, you must clean tubing before your next pumping
session.
• If problems or pain occur, consult your lactation consultant or physician.
CAUTION: Can lead to minor injury:
• Pump only with the breastpump in an upright position.
• Do NOT shorten tubing between breastshield and pump.
• Make sure the voltage of the device is compatible with the power source.
• Plug the power cord into the breastpump first and then into the wall socket.
• Do NOT use abrasive cleaners/detergents when cleaning breastpump or
breastpump parts.
• Never put breastpump motor in water or a sterilizer, as you can cause permanent
damage to the breastpump.
• Do not attempt to remove the breastshield from your breast while pumping. Turn the
breastpump off and break the seal between your breast and breastshield with your
finger, then remove breastshield from your breast.
• If pumping is uncomfortable or causing pain, turn the unit off, break the seal
between the breast and the breastshield with your finger and remove the
breastshield from your breast.
• Do not store wet or damp parts as mold may develop.
• Do not use the breastpump kit with a non-compatible breastpump.
• Do not use the breastpump kit for any other purpose than expressing breastmilk.
AUTHENTIC
medela spare parts
Quality & performance
you can trust
Authentic Medela Spare Parts are made with the quality materials
and workmanship you expect and trust, only from Medela.
Non-Medela spare parts can vary signicantly in
terms of product design, materials, and
workmanship; all of which may affect
the performance of your
Medela breastpump.
AUTHENTIC
medela spare parts
Quality &performance
you can trust
Authentic Medela Spare Parts are made with the quality materials
and workmanship you expect and trust, only from Medela.
Non-Medela spare parts can vary signicantly in terms of
product design, materials, and workmanship; all of
which may affect the performance of your
Medela breastpump.
AUTHENTIC
medela spare parts
Quality &performance
you can trust
Authentic Medela Spare Parts are made with the quality materials and workmanship you
expect and trust, only from Medela.
Non-Medela spare parts can vary signicantly in terms of product
design, materials, and workmanship; all of which may affect
the performance of your Medela breastpump.
AUTHENTIC
medela spare parts
Quality &performance
you can trust
Authentic Medela Spare Parts are made with the quality materials
and workmanship you expect and trust, only from Medela.
Non-Medela spare parts can vary signicantly in terms of
product design, materials, and workmanship; all of
which may affect the performance of your
Medela breastpump.
Symphony®Membrane Cap 8100769
Symphony Protective Membrane 8200094
PVC Tubing - Symphony, Lactina®,Classic™8007213
PersonalFit™Connectors 87071
PersonalFit 21 mm Breastshield 87072
PersonalFit 24 mm Breastshield 87073
PersonalFit 27 mm Breastshield 87274
PersonalFit 30 mm Breastshield 87075
PersonalFit 36 mm Breastshield 87084
Replacement Membranes 87088
Replacement Valves & Membranes 87089
2. Accessories
Questions? Visit www.medela.com or call us at 1-800-435-8316. 7
6
Parts to clean:
• Breastshields
• Breastmilk bottle/collection containers
• Lids
• Connectors
• Membranes
• Valves
Breastshield assemblies come
assembled. Separate all parts that will
come into contact with the breast and
breastmilk before cleaning.
Kit components may vary from pictures in this instruction manual.
Note
It's important for you to do the following before using Symphony®for the first time:*
1. For models that include a rechargeable battery, fully charge the battery 12 hours
uninterrupted.
2. Separate all parts.
3. Clean - see instructions:
• Wash – section 4, pages 8-9
• Sanitize – section 5, pages 10-11
3. Cleaning Overview
Note
*Sterile kits are ready to use and do not require washing prior to first use.
Breastpump kits are a personal care item intended for use by a single user
only and should not be shared between users.
Warning
Note
*Sterile kits are ready to use and do not require washing prior to first use.
Detailed cleaning instructions on pages 8-13:
• Wash – page 8
• Sanitize – page 10
• Tubing care – pages 12-13
Breastpump kit &
bottles/containers Tubing
Before 1st use* ✓ wash
✓ sanitize
After each use ✓ wash
Once per day ✓ sanitize
As needed ✓ wash only if milk or
condensation is in tubing

Questions? Visit www.medela.com or call us at 1-800-435-8316. 9
8
4. Wash – Before first use and after each use*
Breastpump kits are a
personal care item intended
for use by a single user only
and should not be shared
between users.
Warning
You may also wash your kit parts
by following the instructions on the
Quick Clean™Breastmilk Removal
Soap bottle. (sold separately)
Supplies needed:
• Mild dish soap
• Clean dish towel or soft
brush
• Clean sink or bowl
• Drinking-quality water
Parts to wash:
• Breastshields
• Breastmilk bottles/
containers
• Lids
• Valves
• Connectors
• Membranes
5
Note
Store the pump kit in a clean bag/container until
next use.
• Place parts on a clean surface
and/or towel.
• Allow all parts to air dry.
• Store dry parts in a clean, cool
place when not in use. Do NOT
store wet or damp parts.
Rinse all separated parts that
came in contact with breast and
breastmilk in cool water in order
to remove breastmilk residue.
• Soak all separated parts in warm
soapy water for 5minutes.
• Wash each part with a clean dish-
cloth or soft brush.
• Rinse all separated parts with clear
water.
Wash in sink
Separate and wash all parts that come in
contact with breastmilk immediately after
use to avoid dry up of breastmilk residue and
prevent growth of bacteria.
Caution
Only use drinking-quality tap or bottled
water for cleaning.
Caution
2 3
Note
If the individual components of the pump
kit are cleaned in a dishwasher, parts may
be discolored by food pigments. This will not
impact part function.
Wash in dishwasher
4
• Wash all separated parts on top
rack of dishwasher.
• Allow all breastpump parts to air
dry in a clean area.
• Store dry parts in a clean, cool
place when not in use.
1
• Separate parts for washing.
Note
• Wash breastpump kit parts after each use.
• Take care not to damage parts of the pump
kit during cleaning.
• It is not necessary to wash tubing,
membrane cap or protective membrane
prior to first use.
• Only wash tubing if condensation or
milk is present.
OR
Note
*Sterile kits are ready to use and
do not require washing prior to
first use.

Questions? Visit www.medela.com or call us at 1-800-435-8316. 11
10
5. Sanitize – Before first use and once per day*
Allow water to cool and gently
remove parts from water with
tongs.
You may also sanitize your
kit parts by following the
instructions on Medela’s Quick
Clean™Micro-Steam™bag.
(sold separately)
5
Note
Store the pump kit in a clean
bag/container until next use.
4
Supplies needed:
• Clean pot for boiling water
• Drinking-quality water
• Tongs
Parts to sanitize:
• Breastshields
• Breastmilk bottles/
containers
• Lids
• Connectors
• Membranes
• Valves
• Place parts on a clean surface
and/or towel.
• Allow all parts to air dry.
• Store dry parts in a clean,
cool place when not in use.
Do NOT store wet or damp
parts.
• Fill a pot with enough water to
cover all parts.
• Bring water to a boil.
• Place parts in boiling water for
10 minutes.
Note
Sanitize breastpump kit parts once daily.
2 3
• Wash hands thoroughly.
• Separate all parts that come in
contact with breastmilk.
Note
If you notice a white residue on your
parts after boiling, you may have a
high mineral content in your water.
Remove residue by wiping parts with
a clean washcloth and air dry. We
recommended that you boil parts with
distilled water to prevent substantial
mineral build-up over time which may
compromise your parts.
Breastpump kits are a personal
care item intended for use by a
single user only and should not
be shared between users.
Warning
1
Note
*Sterile kits are ready to use and do
not require washing or sanitizing
prior to first use.

Questions? Visit www.medela.com or call us at 1-800-435-8316. 13
12
Remove tubing from
breastshield.
6. Tubing Care
1
6
2
3 5
Caution
Unplug breastpump from
power source.
Remove tubing, protective
membrane, and membrane cap.
Clean following steps in section 4.
Rinse tubing in cool water to
remove breastmilk.
• Wash tubing in warm soapy water.
• Rinse tubing with clear water.
• Hang to air dry or shake out any
drops of water from the tubing
and let the pump run with tubing
attached for 1-2 minutes until dry.
Turn off breastpump.
Supplies needed:
• Mild dish soap
• Clean dish towel
• Clean sink or bowl
• Drinking quality water
• Damp (not wet cloth)
Parts needed:
• Tubing
• Symphony®pump
• Membrane cap
• Protective membrane
Note
Only wash tubing if condensation or
milk is present.
Breastpump kits are a personal
care item intended for use by a
single user only and should not
be shared between users.
Refer to breastpump instructions
for use for important safeguards
and operating information.
Warning Warning
• Do not store wet or damp parts as mold
may develop.
• If tubing becomes moldy, discontinue
use and replace tubing. Contact Medela
Customer Service at customer.service@
medela.com or call 1-800-435-8316.
• Inspect tubing after each pumping
session.
4

Questions? Visit www.medela.com or call us at 1-800-435-8316. 15
14
7. Assembly of Pump Kit
1
4
2
5
3
6
Note
• Use Authentic Medela Spare Parts
only. See page 5 for details.
• Check pump kit components for
wear or damage before use and
replace if necessary.
• All components must be completely
dry before use for proper
performance and to prevent
damage to the pump.
Tip
Carry out all the steps with care and
assemble the pump kit correctly for
optimum performance.
T
Push yellow valve onto inner
ring of connector bottom.
Carefully snap membrane onto
yellow valve until membrane
l i e s fl a t .
Push the breastshield onto
the connector.
Screw connector onto the
bottle/container.
Insert the tubing into
the corresponding opening
in the connector.
Place the protective membrane
onto a flat surface and carefully
push the membrane cap down
until it engages.
Insert the tubing adapter into
the opening in the membrane
cap.
7 8
Wash hands thoroughly with soap and
water before touching breastpump, kit
and breasts. Avoid touching the inside
of containers or lids.
Caution
Parts Needed:
• Tubing
• Symphony®pump
• Breastshields
• Breastmilk bottles/containers
• Lids
• Connectors
• Valves
• Membranes
• Membrane cap
• Protective membrane
Refer to breastpump instructions
for use for important safeguards
and operating information.
Warning

Questions? Visit www.medela.com or call us at 1-800-435-8316. 17
16
7. Assembly of Pump Kit (cont.)
9
13
12
16
Note
Note
• For step 12:
Always close the lid when pumping.
The lid keeps the membrane cap
pushed down to prevent a loss
of vacuum that could occur if the
membrane cap came off.
If single pumping, only seat one
membrane cap.
Close the lid.
When your pumping session is
over, store your breastmilk and
clean your kit. Refer to sections
3-6 for cleaning instructions.
Refer to section 9 for breastmilk
storage guidelines.
Open the lid of the breastpump.
➙Press the oval button on the
top of the Symphony®and lift
the handle.
Center breastshields over your
nipples and start pumping.
(Caution: pushing shields too
firmly onto breasts may affect
milk flow.)
10
14
11
15
Position the membrane cap
firmly on the breastpump
membrane to form a seal.
Center the tubing connector
in the recess in the pump
housing.
➙Make sure that the
membrane cap engages
and lies flush to the surface.
To turn the pump on, press
the power button. You will
be starting in the Stimulation
Phase. After 2 minutes, the
pump will automatically change
to the Expression Phase.
Center the tubing connector in the
recess in the pump housing.
➙Make sure that the membrane cap
engages and lies flush to the surface.
If let-down occurs before the
Expression Phase begins,
press the let-down button to
begin the Expression Phase.

Questions? Visit www.medela.com or call us at 1-800-435-8316. 19
18
Correctly fitting breastshields
Properly fitting breastshields will ensure comfort and efficient milk expression.
To determine if you have the correct size, look at the following diagram:
• The nipple should be centered in the tunnel of the shield.
• The nipple should move freely without rubbing when the pump is turned on.
• Minimal or no part of your areola should be pulled into the
tunnel of the breastshield.
• You should see a gentle, rhythmic motion in the breast with
each cycle of the pump.
• After pumping, your breast should feel less full with no areas
of hardness.
PersonalFit™
Breastshields
21 mm
Item 87072
24 mm
Item 87073
27 mm
Item 87274
30 mm
Item 87075
36 mm
Item 87084
PersonalFit™Breastshields are available at many local retailers or visit
www.shopmedela.com.
8. Breastshield Sizing 9. Storing, Preparing & Feeding Breastmilk
• While some discomfort may be felt when first using a breastpump, using a breastpump
should not cause pain.
• If you are experiencing discomfort at the base of the nipple due to rubbing of your breast
tissue with the breastshield tunnel, use of a lubricant such as Tender Care™Lanolin may
be beneficial.
• For assistance with correct breastshield sizing and comfort please visit www.
medelabreastshields.com or see a lactation consultant / breastfeeding specialist.
Caution
Choosing the right size PersonalFitTM
breastshield:
1. Determine the size you’re currently using. If you’re
not sure, look for the size embossed on your
breastshield (see picture).
24 mm breastshields
are provided with
Medela breastpumps.
2. While pumping, compare your fit to the images below
as a sizing guideline.
Your breastshield
is too large;
try a smaller size
Correct fit
Your breastshield
is too small;
try a larger size
24 mm
Choosing the right size PersonalFitTM
breastshield:
1. Determine the size you’re currently using. If you’re
not sure, look for the size embossed on your
breastshield (see picture).
24 mm breastshields
are provided with
Medela breastpumps.
2. While pumping, compare your fit to the images below
as a sizing guideline.
Your breastshield
is too large;
try a smaller size
Correct fit Your breastshield
is too small;
try a larger size
24 mm
Room
Temperature
Cooler with
Ice Pack Refrigerator Freezer
Freshly Expressed Breastmilk
Storage Guidelines
(For Healthy Term Babies)
4–6 hours
at 66–78 °F
(19–26 °C)
24 hours
at 59 °F
(15 °C)
3–8 days
at 39 °F
or lower
(4 °C)
6–12
months
0–-4 °F
(-18–-20 °C)
References: www.BreastmilkGuidelines.com
Caution
9B. Preparing breastmilk
• Do not thaw frozen breastmilk in a microwave or in a pan of boiling water.
• Do not microwave breastmilk. Microwaving can cause severe burns to baby’s mouth
from hot spots that develop in the milk during microwaving. (Microwaving can also
change the composition of breastmilk.)
• Thaw breastmilk overnight in the refrigerator. Thawed breastmilk is safe
in the refrigerator for 24hours. Do not refreeze thawed breastmilk.
• Quickly thaw breastmilk by holding the bottle under warm running water.
• Place the sealed bottle in a bowl of warm water for 20minutes to bring it
to body temperature.
• If you are adding expressed breastmilk to a container of already frozen
breastmilk, make sure to add a lesser amount than the already frozen
amount.
9C. Feeding breastmilk
It is recommended that breastfeeding is well established prior to bottle
feeding your baby.
• Always inspect the bottle, nipple and other components immediately
before and after each use. If nipple appears cracked or torn, discontinue
use immediately.
• To prevent possible choking hazard, test strength of nipple by pulling on
bulb portion of the nipple.
• Do not attempt to enlarge the nipple hole.
• Infants must not be bottle fed without adult supervision.
• Nipple should not be used as a pacifier.
9A. Storing breastmilk

Questions? Visit www.medela.com or call us at 1-800-435-8316. 21
20
10. Troubleshooting
If the
breastpump
is not running
Check whether electrical outlet power/battery is available.
Check that the device is switched on.
Check whether program card is inserted correctly in the card
compartment on the back of the breastpump.
If there is low
or no suction
Assemble the pump kit in accordance with the instructions in
Section 7.
• Check whether all connections of the pump kit and breastpump
are secure.
• Make sure that the breastshield forms a complete seal around the
breast.
• The white valve membrane must lie flat against the yellow valve
head.
• Check that the valve head and membrane are clean and not
damaged.
•The ends of the tubing must be firmly connected to the connector
and the opening in the membrane cap.
•The protective membrane and membrane cap should be correctly
assembled and the membrane cap must be firmly fitted to the
breastpump membrane to form a seal.
•The protective membrane must be intact.
•Do not kink or pinch the tubing during expression.
•All components must be completely dry.
Valve and Membrane Check
• Remove and separate valve from the membrane.
• Inspect the valve for chips or cracks. Inspect the membrane for
holes or tears. If flawed or damaged, replace the valve and/or
membrane prior to pumping.
• Wash valve and membrane per Cleaning Instructions in
Sections 3-5.
• Reassemble. Make sure the membrane lays flat on the valve, and if
it does not, replace the valve and/or membrane prior to pumping.
Breastshield and Breastshield Connector Check
• Inspect breastshield and breastshield connector to make sure there
are no cracks and they securely attach to each other.
• Make sure the breastshield forms a complete seal around the
breast.
Other Checks
Inspect the following to check for damage and secure connections.
• Secure tubing adapter to the breastshield connector.
• Test vacuum. If suction is not improved, contact Medela Customer
Service at 1-800-435-8316.
Tubing Check
• If damaged replace prior to pumping.
• Inspect tubing for damage and secure connections.
• Check that the ends of the tubing are firmly connected to the
connector and the opening in the membrane cap.
• If single pumping, make sure only one membrane cap is seated.
Take care not to kink or pinch tubing.
If you have not resolved the problem with your breastpump or you have
further questions, please contact Medela Customer Service at 1-800-435-
8316 or fill out the contact us form at www.medelabreastfeedingus.com.
Condensation or
Milk in Tubing • Turn off the pump and unplug from power source.
• Use a damp (not wet) cloth to wipe the pump.
• Refer to cleaning instructions “Tubing Care” Section 6.
• If necessary, clean the pump kit.
• When components are completely dry, reassemble
breastpump and kit.
No “Let-Down”
or Breastmilk
Expression
• Ensure your breastpump kit is assembled correctly and
suction is available.
• Relax and take a 10-15 minute break if let-down is not
achieved.
• Consult with a healthcare or lactation professional if
expression does not occur after 2 consecutive pumping
sessions.
If there is an
overflow 1. Place the pump set into the bottle holder.
2. Turn off the pump and unplug the power cord from the
electrical outlet.
3. Use a damp (not wet) cloth to wipe the pump and membrane
area.
4. If there is milk in the tubing:
Remove tubing, protective membrane and membrane cap
and clean in accordance with Sections 4 & 6.
If there is condensation in the tubing:
Let the pump run with tubing attached for 1–2 minutes or
until dry.
5. When components are completely dry, reassemble
breastpump and accessories set.
Questions? Visit www.medela.com or call us at 1-800-435-8316. 23
22
11. Supplemental Information
Supplemental Information
Following are some common breastfeeding related conditions. If you
experience any of these symptoms, contact a healthcare professional or
lactation professional.
Symptom Potential Causes
Engorgement Breasts are hard and uncomfortable,
possibly with reddened areas.
Milk not draining properly
from breast. Milk can
drain back into the tissue
causing areas to swell and
become tender.
Blocked/
Plugged Ducts Area of breast will look reddened and
may be tender to touch.
Milk not being drained
from a specific duct. The
area becomes “clogged”
up and milk is then
prevented from flowing.
Mastitis It often follows engorgement but can
occur suddenly. The initial symptoms
are similar to flu – fatigue, headache
and muscle aches, fever and localized
breast tenderness. It can be in one
or even both breasts and needs
immediate treatment.
A bacterial infection in
the breast tissue which
is often accompanied by
cracked nipples.
A Healthcare Professional or Lactation Professional can give you guidance in
breastfeeding your baby and using a breastpump. Their guidance is valuable in terms
of the lifetime of health benefits for both you and your baby. A listing of lactation
professionals are available at www.medelalocator.com or calling 1-800-TELL-YOU
(1-800-835-5968).

Questions? Visit www.medela.com or call us at 1-800-435-8316. 25
24
CONSERVE ESTAS INSTRUCCIONES.
Uso destinado
El extractor Symphony®es un extractor eléctrico que las mujeres
lactantes usan para extraer y recoger leche de sus pechos.
Descripción del producto
Symphony es un extractor eléctrico multiusuario de grado de hospital
queincluye tecnología 2-Phase Expression®y es capaz de extracción
sencilla y doble.
IMPORTANTE
• Los biberones de plástico y sus componentes se vuelven quebradizos
cuando se congelan y pueden romperse al dejarlos caer.
• Los biberones y los componentes pueden dañarse si se manipulan
incorrectamente, por ejemplo, si se caen, se aprietan demasiado o se
golpean.
• Tenga cuidado al manipular los biberones y los componentes.
• No utilice la leche materna si los biberones o las partes presentan
daños.
T
El símbolo de advertencia identifica todas las instrucciones que son
importantes para la seguridad. La inobservancia de estas instrucciones
puede provocar lesiones o daños al extractor de leche. Cuando los
símbolos de advertencia se utilizan junto con los siguientes términos,
tienenel significado a continuación:
ADVERTENCIA Puede provocar lesiones graves o la muerte.
PRECAUCIÓN Puede provocar lesiones menores.
NOTA Puede provocar daños materiales.
CONSEJO Información útil o importante que no está relacionada
con la seguridad.
Índice
1. Medidas de seguridad importantes............................................................................. 26
2. Accesorios ..................................................................................................................... 27
3. Vistazo general de la limpieza................................................................................ 28-29
4. Lavado – Antes de cada uso y después de cada uso .......................................... 30-31
5. Esterilización – Antes del primer uso y una vez al día ......................................... 32-33
6. Cuidado del tubo ..................................................................................................... 34-35
7. Armado del extractor .............................................................................................. 36-39
8. Tamaño del embudo......................................................................................................40
9. Conservación, preparación y alimentación con leche materna ...............................41
9A. Conservación de la leche materna ...........................................................................41
9B. Preparación de la leche materna .............................................................................41
9C. Alimentación con leche materna..............................................................................41
10. Solución de problemas ......................................................................................... 42-43
11. Información complementaria .....................................................................................44

Questions? Visit www.medela.com or call us at 1-800-435-8316. 27
26
1. Medidas de seguridad importantes
Cuando use dispositivos eléctricos, siempre deben seguirse las precauciones
básicas de seguridad, que incluyen lo siguiente:
LEA TODAS LAS INSTRUCCIONES ANTES DE USAR ESTE
PRODUCTO.
ADVERTENCIA: Para evitar riesgos en la salud y reducir el riesgo
de sufrir lesiones:
• Los juegos de extractores de leche son artículos de cuidado personal hechos para
una sola usuaria y no deben compartirse entre los usuarias.
• Inspeccione los componentes del juego del extractor de leche antes de cada uso.
o No use los componentes si están dañados.
o No use los componentes si tienen suciedad, moho o cualquier otro tipo de
contaminación visible.
• Inspeccione todos los componentes apropiados antes de cada uso.
• Limpie y esterilice todas las partes que están en contacto con el pecho y la leche
materna antes de utilizarlas por primera vez. Los juegos estériles están listos para
usarse y no requieren de lavado antes del primer uso.
• No utilice este producto durante el embarazo, ya que la extracción de leche puede
inducir el parto.
• Lave todas las partes que están en contacto con el pecho y la leche materna
después de cada uso.
• Si no logra los resultados deseados, NO continúe probando por más de 2 sesiones
consecutivas de extracción.
• No descongele la leche materna en un horno de microondas o en una olla con agua
hirviendo.
• Si aparecen hongos en el tubo, interrumpa su uso y reemplácelo.
• Si se produce el retorno de la leche materna, debe limpiar el tubo antes de su
siguiente sesión de extracción.
• Si ocurren problemas o dolor, consulte con su asesor de lactancia o con su médico.
PRECAUCIÓN: Puede provocar lesiones menores:
• Bombee únicamente con el extractor de leche en posición vertical.
• NO acorte el tubo entre el embudo y el extractor.
• Asegúrese de que el voltaje del dispositivo sea compatible con la fuente de
alimentación.
• Primero conecte el adaptador de corriente en el extractor de leche y luego en el
tomacorriente.
• NO use limpiadores/detergentes abrasivos al limpiar el extractor de leche o las
partes del extractor de leche.
• Nunca coloque el motor del extractor de leche en agua ni en un desinfectante, ya
que puede dañarlo en forma permanente.
• No intente retirar el embudo del pecho mientras está bombeando. Apague el
extractor de leche y despegue con el dedo el sello formado entre el pecho y el
embudo, luego retire el embudo del pecho.
• Si el bombeo es molesto o provoca dolor, apague la unidad, despegue con el dedo
el sello formado entre el pecho y el embudo y saque el embudo del pecho.
• No almacene las partes mojadas o húmedas, ya que se pueden producir hongos.
• No use el juego del extractor de leche con un extractor de leche no compatible.
• No use el juego del extractor de leche para ningún otro propósito más que para
extraer la leche materna.
AUTHENTIC
medela spare parts
Quality & performance
you can trust
Authentic Medela Spare Parts are made with the quality materials
and workmanship you expect and trust, only from Medela.
Non-Medela spare parts can vary signicantly in
terms of product design, materials, and
workmanship; all of which may affect
the performance of your
Medela breastpump.
AUTHENTIC
medela spare parts
Quality &performance
you can trust
Authentic Medela Spare Parts are made with the quality materials
and workmanship you expect and trust, only from Medela.
Non-Medela spare parts can vary signicantly in terms of
product design, materials, and workmanship; all of
which may affect the performance of your
Medela breastpump.
AUTHENTIC
medela spare parts
Quality &performance
you can trust
Authentic Medela Spare Parts are made with the quality materials and workmanship you
expect and trust, only from Medela.
Non-Medela spare parts can vary signicantly in terms of product
design, materials, and workmanship; all of which may affect
the performance of your Medela breastpump.
AUTÉNTICAS
Piezas de repuesto Medela
Calidad ydesempeño en
los que puede conar
Las piezas de repuesto Medela auténticas están hechas con materiales y
mano de obra de alta calidad en los que usted confía y espera exclusivamente
de Medela.
Las piezas de repuesto que no son Medela pueden variar considerablemente
en c a diseño del producto, materiales y mano de obra, todo
lo cual podría afectar el esempeño de su extractor de
leche Medela.
Tapa de membrana Symphony®8100769
Membrana protectora Symphony 8200094
Tubo de PVC - Symphony, Lactina®,Classic™8007213
Conectores PersonalFit™87071
Embudo PersonalFit de 21 mm 87072
Embudo PersonalFit de 24 mm 87073
Embudo PersonalFit de 27 mm 87274
Embudo PersonalFit de 30 mm 87075
Embudo PersonalFit de 36 mm 87084
Membranas de reemplazo 87088
Válvulas y membranas de reemplazo 87089
2. Accesorios

Questions? Visit www.medela.com or call us at 1-800-435-8316. 29
28
Partes a limpiar:
• Embudos
• Biberón/recipientes de recolección de leche materna
• Tapas
• Conectores
• Membranas
• Válvulas
Los ensambles del embudo vienen
ensamblados. Separe todas las partes
que están en contacto con su pecho y
la leche materna antes de limpiarlas.
Los componentes del juego pueden variar de las imágenes en el manual de
instrucciones.
Nota
Es importante que usted haga lo siguiente al usar Symphony®por primera vez:*
1. Para modelos que incluyen una batería recargable, cargue totalmente la batería
durante 12 horas sin interrupción.
2. Separe todas las partes.
3. Limpie - vea las instrucciones
• Lavado – sección 4, páginas 30-31
• Esterilización – sección 5, páginas 32-33
3. Vistazo general de la limpieza
Nota
*Los juegos estériles están listos para usarse y no requieren de lavado antes del primer uso.
Los juegos de extractores de leche son un artículo de cuidado personal
hechos para un solo usuario y no deben compartirse entre los usuarios.
Advertencia
Nota
*Los juegos estériles están listos para usarse y no requieren de lavado antes del primer uso.
Las instrucciones detalladas de limpieza se encuentran en las
páginas 30 a 35:
• Lavado – página 30
• Esterilización – página 32
• Cuidado del tubo – páginas 34-35
Kit de extractor
y biberones/
recipientes
Tubo
Antes del primer
uso*
✓ lavado
✓ esterilización
Después de
cada uso ✓ lavado
Una vez al día ✓ esterilización
Según sea
necesario
✓ sólo lave si hay leche
o condensación en el
tubo

Questions? Visit www.medela.com or call us at 1-800-435-8316. 31
30
4. Lavado – Antes de cada uso y después de cada uso*
Los juegos de extractores de
leche son artículos de cuidado
personal diseñados para ser
utilizados por una sola usuaria
y no deberán ser compartidos
entre usuarias.
Advertencia
También puede lavar las partes del
juego siguiendo las instrucciones
incluidas en el envase del jabón
Quick Clean™ (que se vende por
separado)
Usted necesita:
• Detergente suave para
platos
• Toalla limpia para platos
o un cepillo suave
• Fregadero o recipiente
limpio
• Agua potable
Partes a lavar:
• Embudos
• Biberón/recipientes
para leche materna
• Tapas
• Válvulas
• Conectores
• Membranas
5
Nota
Almacene el extractor en una bolsa o recipiente
limpio hasta el siguiente uso.
• Coloque las partes sobre una
superficie y/o toalla limpia.
• Deje secar todas las partes.
• Almacene las partes secas en un lugar
limpio y fresco cuando no las use. NO
guarde partes húmedas o con agua.
Enjuague en agua fría todas
las partes separadas que
estuvieron en contacto con el
pecho y con la leche materna
para eliminar los residuos de
leche materna.
• Sumerja todas las partes por separado
en agua jabonosa durante 5 minutos.
• Lave cada parte con un paño limpio o
con un cepillo suave.
• Enjuague todas las partes por
separado con agua limpia.
Lave en el lavabo
Separe y lave todas las partes que están en
contacto con la leche materna inmediatamente
después de su uso para evitar que se seque la
acumulación de restos de leche materna y prevenir
el crecimiento de bacterias.
Precaución
Utilice únicamente agua potable o
envasada para limpiar el producto.
Precaución
2 3
Nota
Es posible que las partes individuales del
extractor que se lavan en un lavavajillas
pierdan el color debido a los pigmentos de
los alimentos. Esto no impacta la función de
la parte.
Lavar en el lavavajillas
4
• Lave todas las partes separadas en el
estante superior del lavavajillas.
• Deje secar todas las partes del extractor
de leche sobre una superficie limpia.
• Almacene las partes secas en un lugar
limpio y fresco cuando no las use.
1
• Separe las partes para lavarlas.
Nota
• Lave las partes del extractor de leche después
de cada uso.
• Tenga cuidado de no dañar las partes del
extractor cuando las limpie.
• No es necesario lavar el tubo, la tapa de la
membrana o la membrana protectora antes
del primer uso.
• Sólo lave si hay leche o condensación en
el tubo.
O
Nota
*Los juegos estériles están listos
para usarse y no requieren de
lavado antes del primer uso.

Questions? Visit www.medela.com or call us at 1-800-435-8316. 33
32
5. Esterilización – Antes del primer uso y una vez al día*
Deje enfriar el agua y utilice
tenazas para retirar las partes
del agua con cuidado.
Puede esterilizar las partes
siguiendo las instrucciones
incluidas en la bolsa
Quick Clean™Micro-Steam™
de Medela. (que se vende por
separado)
5
Nota
Almacene el extractor en una bolsa
o recipiente limpio hasta el siguiente
uso.
4
Usted necesita:
• Olla limpia para hervir
agua
• Agua potable
• Tenazas
Partes a esterilizar:
• Embudos
• Biberón/recipientes para
leche materna
• Tapas
• Conectores
• Membranas
• Válvulas
• Coloque las partes sobre una
superficie y/o toalla limpia.
• Deje secar todas las partes.
• Almacene las partes secas
en un lugar limpio y fresco
cuando no las use. NO guarde
partes húmedas o con agua.
• Llene un recipiente con la
cantidad suficiente de agua para
cubrir todas las partes.
• Hierva el agua.
• Coloque las partes en agua
hirviendo por 10 minutos.
Nota
Esterilice las partes del extractor de leche
una vez al día.
2 3
• Lávese bien las manos.
• Separe todas las partes que
están en contacto con la leche
materna.
Nota
Si nota un residuo blanco en las partes
después de hervirlas, es posible que
el agua tenga un alto contenido de
minerales. Retire el residuo limpiando
las partes con un trapo limpio y
séquelas al aire. Le recomendamos
que hierva las partes con agua
destilada para evitar una acumulación
sustancial de minerales con el tiempo
que puede dañar las partes.
Los juegos de extractores de
leche son artículos de cuidado
personal hechos para un sola
usuaria y no deben compartirse
entre los usuarias.
Advertencia
1
Nota
*Los juegos estériles están listos
para usarse y no requieren de
lavado o esterilización antes del
primer uso.

Questions? Visit www.medela.com or call us at 1-800-435-8316. 35
34
Quite el tubo del embudo.
6. Cuidado del tubo
1
6
2
3 5
Precaución
Desenchufe el extractor de leche
de la fuente de alimentación.
Retire el tubo, la membrana
protectora y la tapa de la
membrana. Limpie según los
pasos de la sección 4.
Enjuague el tubo en agua fría
para eliminar la leche materna.
• Lave el tubo en agua jabonosa
tibia.
• Enjuague el tubo con agua limpia.
• Cuelgue para secar al aire o agite
el tubo para retirar las gotas de
agua y deje la bomba funcionando
con el tubo unido durante
1-2minutos hasta que se seque.
Apague el extractor de leche.
Usted necesita:
• Detergente suave para
platos
• Toalla para platos limpia
• Fregadero o recipiente
limpio
• Agua potable
• Trapo húmedo (no
mojado)
Partes que necesita:
• Tubo
• Extractor Symphony®
• Tapa de la membrana
• Membrana protectora
Nota
Sólo lave si hay leche o condensación
en el tubo.
Los juegos de extractores de
leche son un artículo de cuidado
personal hechos para un solo
usuario y no deben compartirse
entre los usuarios.
Consulte las instrucciones de
uso del extractor para encontrar
medidas de seguridad importantes
así como información de su
operación.
Advertencia Advertencia
• No almacene las partes mojadas o
húmedas, ya que se pueden producir
hongos.
• Si aparecen hongos en el tubo, interrumpa
su uso y reemplácelo. Comuníquese con
el Servicio al cliente de Medela al correo
o llame al 1-800-435-8316.
• Inspeccione el tubo después de cada
sesión de extracción.
4

Questions? Visit www.medela.com or call us at 1-800-435-8316. 37
36
7. Armado del extractor
1
4
2
5
3
6
Nota
• Sólo use refacciones auténticas
Medela. Consulte la página 27 para
más detalles.
• Revise los componentes del
juego del extractor para ver si hay
desgaste o daño y reemplácelos si
es necesario.
• Todos los componentes deben estar
completamente secos antes de su
uso para obtener un desempeño
apropiado y para evitar daños al
extractor.
Consejo
Siga todos los pasos con cuidado y
ensamble correctamente el juego del
extractor para un óptimo desempeño.
T
Empuje la válvula amarilla en el
anillo interior de la parte inferior
del conector.
Coloque cuidadosamente
la membrana en la válvula
amarilla hasta que la
membrana esté plana.
Empuje el embudo en el
conector.
Atornille el conector en la botella/
recipiente.
Inserte el tubo en la abertura
correspondiente del conector.
Coloque la membrana protectora
en una superficie plana y empuje
cuidadosamente la tapa de la
membrana hacia abajo hasta que
se acople.
Inserte el adaptador del tubo
en la abertura de la tapa de la
membrana.
7 8
Lávese bien las manos con agua y jabón
antes de tocar el extractor, el juego y
los pechos. Evite tocar el interior de los
recipientes o de las tapas.
Precaución
Partes que necesita:
• Tubo
• Bomba Symphony®
• Embudos
• Biberón/recipientes para
leche materna
• Tapas
• Conectores
• Válvulas
• Membranas
• Tapa de la membrana
• Membrana protectora
Consulte las instrucciones
de uso del extractor para
encontrar medidas de
seguridad importantes así como
información de su operación.
Advertencia

Questions? Visit www.medela.com or call us at 1-800-435-8316. 39
38
7. Armado del extractor (cont.)
9
13
12
16
Nota
Nota
• Para el paso 12:
Siempre cierre la tapa cuando haga
extracciones. La tapa mantiene la
tapa de la membrana en su lugar
para evitar una pérdida de vacío que
pudiera ocurrir si se desprende la
tapa de la membrana.
Si realiza un bombeo simple, calce
únicamente una tapa de membrana.
Cierre la tapa.
Cuando su sesión de extracción
haya finalizado, almacene su
leche materna y limpie el juego.
Consulte las secciones 3 - 6 para
las instrucciones de limpieza.
Consulte la sección 9 para los
lineamientos de conservación de
la leche materna.
Abra la tapa del extractor.
➙Presione el botón ovalado en
la parte superior del extractor
Symphony®y levante la
manija.
Centre los embudos sobre sus
pezones y comience a bombear.
(Precaución: empujar los
embudos muy firmemente sobre
los pechos puede afectar el flujo
de leche.)
10
14
11
15
Coloque firmemente la tapa de
la membrana en la membrana
del extractor para formar
un sello. Centre el conector
del tubo en el espacio de la
carcasa del extractor.
➙Asegúrese que la tapa de la
membrana se acople y que
esté pareja con la superficie.
Para encender la bomba,
presione el botón de encendido.
Comenzará en la fase de
estimulación. Después de
2minutos, la bomba pasará
automáticamente al modo de
extracción.
Centre el conector del tubo en el
espacio de la carcasa del extractor.
➙Asegúrese que la tapa de la
membrana se acople y que esté
pareja con la superficie.
Si se produce descenso de
leche antes del comienzo de
la fase de extracción, presione
el botón de descenso para
comenzar la fase de extracción.
Table of contents
Languages:
Other Medela Breast Pump manuals

Medela
Medela Swing Flex User manual

Medela
Medela Swing Flex User manual

Medela
Medela Harmony User manual

Medela
Medela Mini Electric User manual

Medela
Medela PersonalFit PLUS User manual

Medela
Medela Symphony User manual

Medela
Medela Symphony User manual

Medela
Medela 101045671 User manual

Medela
Medela Symphony User manual

Medela
Medela Freestyle User manual

Medela
Medela Symphony Quick start guide

Medela
Medela Swing Maxi User manual

Medela
Medela Base User manual

Medela
Medela Mini Electric User manual

Medela
Medela Symphony User manual

Medela
Medela Symphony User manual

Medela
Medela Symphony PLUS User manual

Medela
Medela Swing User manual

Medela
Medela Symphony User manual

Medela
Medela Swing User manual