Media Pointe DMR300 User manual
D
DM
MR
R3
30
00
0
D
DI
IG
GI
IT
TA
AL
L
V
VI
ID
DE
EO
O
C
CO
ON
NF
FE
ER
RE
EN
NC
CE
E
M
ME
ED
DI
IA
A
R
RE
EC
CO
OR
RD
DE
ER
R
U
Us
se
er
r’
’s
s
G
Gu
ui
id
de
e
V
Ve
er
rs
si
io
on
n
1
1.
.0
0

DMR200 User’s Guide V1.1 2

DMR200 User’s Guide V1.1 3
Copyright and Trademarks
©2005, Advanced Media Design, Inc.
667 Rancho Conejo Blvd.
Newbury Park, CA
91320
USA
All rights reserved. This document contains information that is proprietary to
Advanced Media Design, the manufacturer of all MediaPOINTE®products. No part
of this publication may be reproduced, stored in a retrieval system, or transmitted,
in any form, or by any means, electronically, mechanically, by photocopying, or
otherwise, without the prior written permission of Advanced Media Design, Inc.
Nationally and internationally recognized trademarks and trade names are the
property of their respective holders and are hereby acknowledged.
MediaPOINTE®is a registered trademark of Advanced Media Design, Inc
Disclaimer
The information in this document is furnished for informational purposes only, is
subject to change without prior notice, and should not be construed as a
commitment by Advanced Media Design, Inc. Documentation may include
technical or other inaccuracies or typographical errors. The technical
documentation is being delivered to you AS IS and Advanced Media Design, Inc.
makes no warranty as to its accuracy or use.

DMR200 User’s Guide V1.1 4
Safety Precautions
For your protection, please read all related safety instructions, observe all
warnings and precautions, and exercise common sense while operating this
electronic equipment.
•Always place the unit on a stable cart, stand or table.
•Do not use the unit near water or sources of heat.
•Do not drop or shake the unit. Do not place or install the unit in environments
where it can be dropped or shaken. Make sure the unit is powered off while
being moved even for short distances.
•Observe the power requirements of the unit; if you are not sure of the power
available, consult your local dealer or power company.
•When plugging into a power outlet, insert the plug firmly into the outlet. Route
the power cord so as to avoid any activity that may result in fraying or other
damage to the cord or the plug.
•Do not attempt to defeat the polarization or grounding protection on the plug
under any circumstances.
•Do not overload wall outlets, extension cords, or integral convenience
receptacles.
•Unplug the unit from the wall before cleaning. Do not use liquid or aerosol
cleaners.
•For proper ventilation, do not block the slots and openings in the case. Do not
install the unit in a location where the ventilation slots and openings can be
plugged during everyday use.
•Do not place or install the unit under, on top of or near any heat-producing
equipment (i.e. radiators, stoves, or amplifiers), or in a heated place.
•Unplug the unit during lighting storms or when it will not be used for extended
periods of time.
If the unit is visibly damaged either by not observing the precautions above or for
any other reason, contact your local dealer immediately. If the unit does not
operate normally when you follow the operating instructions, or it exhibits a
distinct change in performance, this may be an indication of a problem needing
repair.

DMR200 User’s Guide V1.1 5
Table of Contents
Copyright and Trademarks------------------------------------------------------------------------3
Disclaimer-------------------------------------------------------------------------------------------3
Safety Precautions ---------------------------------------------------------------------------------4
Table of Contents ----------------------------------------------------------------------------------5
About This Guide -----------------------------------------------------------------------------------7
Reliability of Information ----------------------------------------------------------------------8
Service Support and Training -----------------------------------------------------------------8
Document Conventions ------------------------------------------------------------------------9
Contents of This Package----------------------------------------------------------------------9
Chapter 1: Introduction, Overview and Requirements -------------------------------------- 11
Introduction----------------------------------------------------------------------------------- 12
Front Panel------------------------------------------------------------------------------------ 12
Record Start / Stop Push Button ------------------------------------------------------------13
Yellow LED Indicator-------------------------------------------------------------------------13
RESET Button--------------------------------------------------------------------------------13
Power Indicator------------------------------------------------------------------------------13
USB Port-------------------------------------------------------------------------------------14
Uses & Features ------------------------------------------------------------------------------ 14
Overview -------------------------------------------------------------------------------------- 15
How It Works--------------------------------------------------------------------------------15
Requirements--------------------------------------------------------------------------------- 16
Video/Monitor Requirements ----------------------------------------------------------------16
Network Requirements ----------------------------------------------------------------------16
Optional Requirements ----------------------------------------------------------------------16
Chapter 2: Setup-------------------------------------------------------------------------------- 17
Connecting the DMR300--------------------------------------------------------------------- 18
The Rear Panel ------------------------------------------------------------------------------18
Auxiliary Connections------------------------------------------------------------------------19
Network Setup-------------------------------------------------------------------------------- 20
How to Assign an IP Address ----------------------------------------------------------------20
Logging In -----------------------------------------------------------------------------------21
Administrator Setup -------------------------------------------------------------------------22
Guest User Setup----------------------------------------------------------------------------22
IP Settings-----------------------------------------------------------------------------------23

DMR200 User’s Guide V1.1 6
Chapter 3: Internal Settings -------------------------------------------------------------------- 25
Security Settings ----------------------------------------------------------------------------- 26
Enable User Security ------------------------------------------------------------------------26
User Password / Confirm User Password ----------------------------------------------------27
Changing the Administrator Password-------------------------------------------------------27
Update Section ------------------------------------------------------------------------------- 28
Upgrade System Firmware ------------------------------------------------------------------28
Reset Configuration--------------------------------------------------------------------------29
Delete All Content ---------------------------------------------------------------------------29
System Information-------------------------------------------------------------------------- 30
Sys Info--------------------------------------------------------------------------------------30
Shutdown------------------------------------------------------------------------------------31
Reboot--------------------------------------------------------------------------------------------31
Chapter 4: -Archiving and Streaming --------------------------------------------------------- 33
Recordings ------------------------------------------------------------------------------------ 34
Recording Start / Stop-----------------------------------------------------------------------35
Playback on DMR300 ------------------------------------------------------------------------35
Refresh / Delete / Delete all-----------------------------------------------------------------36
Recording Information and Playback Window -----------------------------------------------37
Settings---------------------------------------------------------------------------------------- 40
Recording Mode------------------------------------------------------------------------------41
Live Playback While Recording --------------------------------------------------------------41
Video1 Video Connection --------------------------------------------------------------------42
Video2 Video Connection --------------------------------------------------------------------42
Set Recording Gain--------------------------------------------------------------------------43
Appendix A -Front Panel LED Status----------------------------------------------------------- 44
Appendix B -Factory Default Settings --------------------------------------------------------- 45

DMR200 User’s Guide V1.1 7
About This Guide
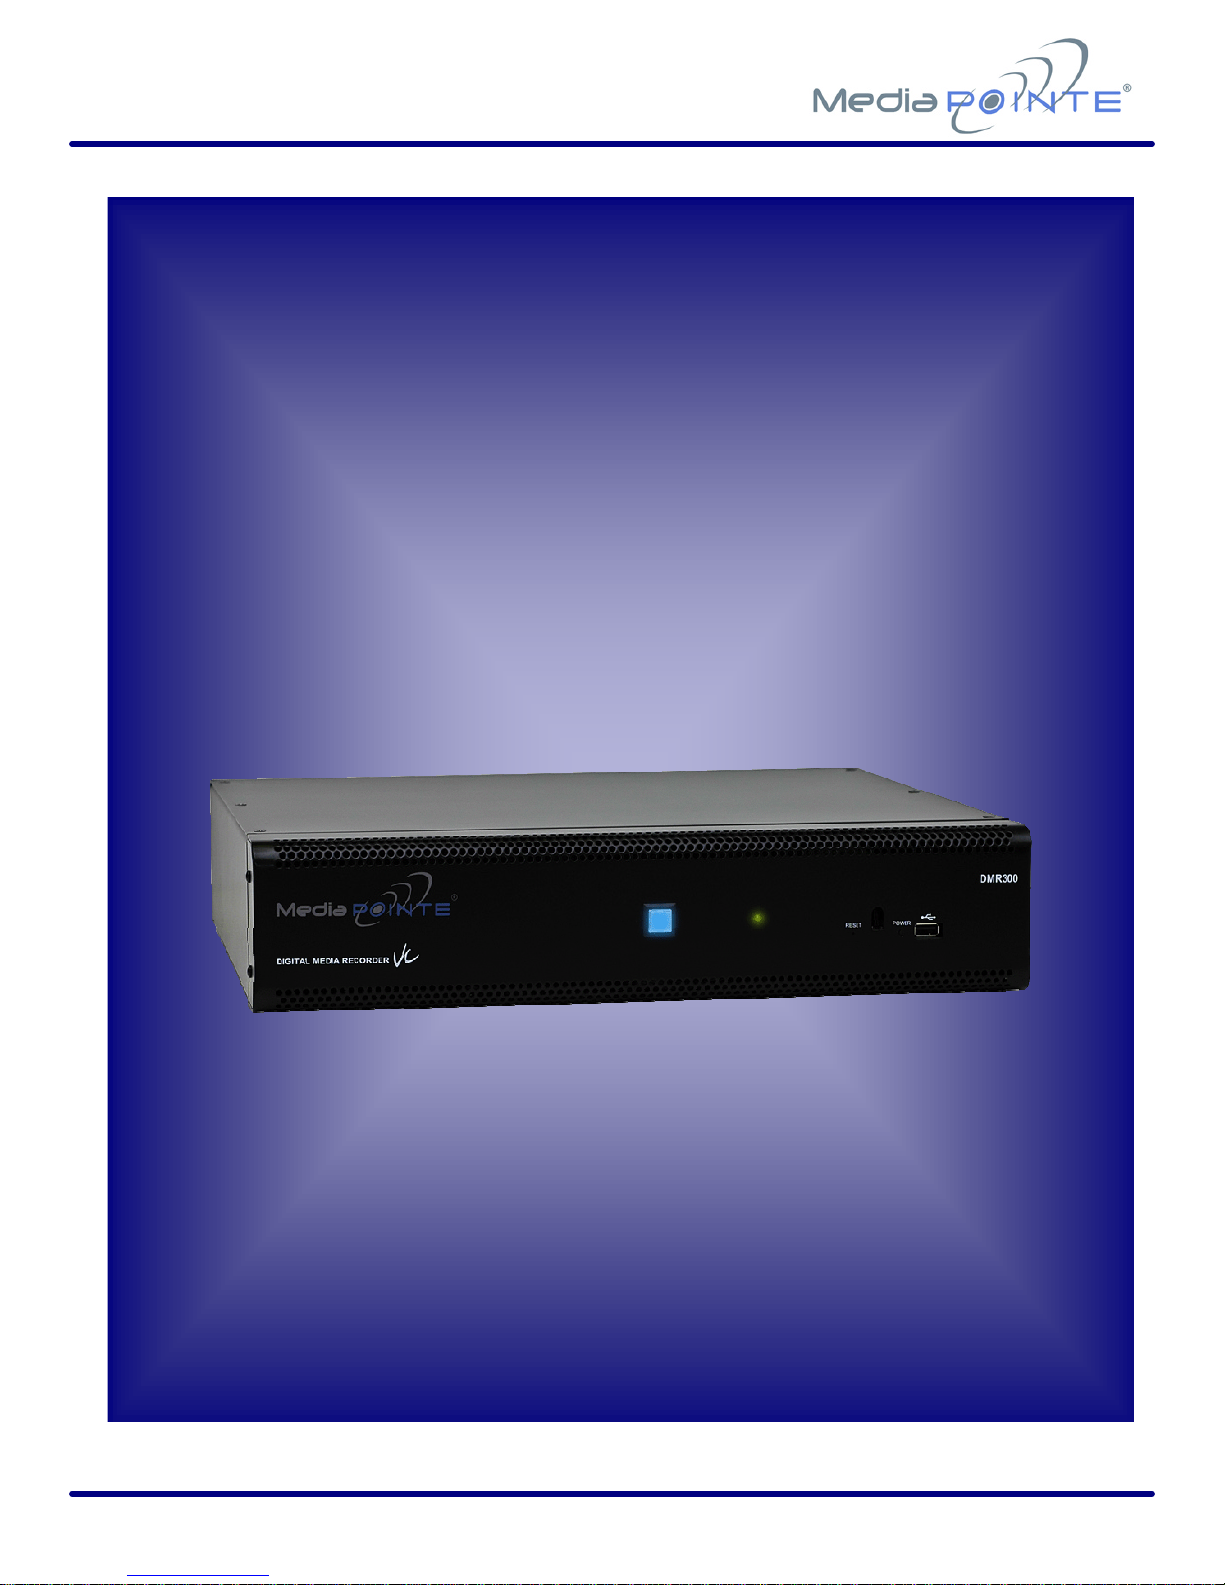
Welcome to the user’s guide to the MediaPOINTE®DMR300 digital
videoconference media recorder.
This user’s guide describes how to set up and use the DMR300 to record and transport
graphic video and audio content over IP networks.
Topics in This Section
Reliability of Information ----------------------------------------------------------------------8
Service Support and Training -----------------------------------------------------------------8
Document Conventions ------------------------------------------------------------------------9
Contents of This Package----------------------------------------------------------------------9

DMR200 User’s Guide V1.1 8
Reliability of Information
The information in this document is believed to be accurate and reliable; however
Advanced Media Design, Inc. assumes no responsibility or liability for any errors or
inaccuracies that may appear in this document, nor for any infringements of
patents or other rights of third parties resulting from its use. No license is granted
under any patents or patent rights of Advanced Media Design, Inc.
This document was written by the Development Department of Advanced Media
Design, Inc. We are fully committed to and take pride in maintaining high quality
documentation, so we welcome and appreciate any comments or suggestions you
may have regarding content, presentation, structure and distribution of this
document. Please use the contact information below for all correspondence:
Development Department
Advanced Media Design, Inc.
667 Rancho Conejo Blvd.
Newbury Park, CA 91320
USA
support@MediaPOINTE.com
Service Support and Training
MediaPOINTE®, Inc. is committed to providing the service support and training
needed to install, manage, and maintain you MediaPOINTE®equipment.
All MediaPOINTE®products are sold through a wide network of Authorized
MediaPOINTE®Dealers. For help with your products, contact your local dealer for
assistance first. If for any reason, you would like to contact MediaPOINTE®
directly for information regarding service programs and extended warranty
information, training, installation or usage, we are glad to be of assistance. You
can contact us at the phone number listed below, or visit our website.
MediaPOINTE®Technical Support
Hours: 8:30 a.m. –5:30 p.m. Pacific Standard Time
(866) 709-0444 –Office
support@MediaPOINTE.com

DMR200 User’s Guide V1.1 9
Document Conventions
The following conventions are used throughout this user’s guide.
The hand symbol indicates a note, containing special instructions, and in
some cases, circumstances that require caution.
The light bulb symbol highlights suggestions or hints.
Warning! Do not attempt to service the apparatus yourself as opening equipment
may expose you to dangerous voltages or other hazards and will void your
warranty. Refer all servicing to your MediaPOINTE®representative.
The lightning flash with an arrowhead symbol within a triangle is intended to alert
the user to the presence of un-insulated, dangerous voltages.
Contents of This Package
•MediaPOINTE®DMR300 Digital Video Conference Media Recorder
•2 –RCA Video Cables
•2 –S-Video Cables
•1– Male VGA Cable
•1 -CAT-5e LAN Cable
•1-RCA Stereo Audio Cable
•1 -AC Power Cable
•Documentation CD-ROM
•Warranty Document
•Registration Sheet

DMR200 User’s Guide V1.1 10

DMR200 User’s Guide V1.1 11
Chapter 1: Introduction, Overview and Requirements
This chapter provides a brief introduction and overview of the MediaPOINTE®DMR300
and describes the hardware components. A brief list of requirements is also shown.
Topics in This Chapter
Chapter 1: Introduction, Overview and Requirements -------------------------------------- 11
Introduction----------------------------------------------------------------------------------- 12
Front Panel------------------------------------------------------------------------------------ 12
Record Start / Stop Push Button ------------------------------------------------------------13
Yellow LED Indicator-------------------------------------------------------------------------13
RESET Button--------------------------------------------------------------------------------13
Power Indicator------------------------------------------------------------------------------13
USB Port-------------------------------------------------------------------------------------14
Uses & Features ------------------------------------------------------------------------------ 14
Overview -------------------------------------------------------------------------------------- 15
How It Works--------------------------------------------------------------------------------15
Requirements--------------------------------------------------------------------------------- 16
Video/Monitor Requirements ----------------------------------------------------------------16
Network Requirements ----------------------------------------------------------------------16
Optional Requirements ----------------------------------------------------------------------16

DMR200 User’s Guide V1.1 12
Introduction
Welcome to graphics archiving and streaming for your videoconferencing system that
is one of the easiest to use, reliable and cost-effective archiving and streaming products
on the market today. The DMR300 can archive important graphical data and
simultaneously transmit the same data to anywhere on your network. It is specifically
designed to provide superb video and audio quality by simultaneously recording three
distinct streams into one pre-determined layout of the users’ preference. Two video
streams for the near and far-end camera views and an XGA high-resolution stream are
captured each in their own native format for superior archiving and streaming of your
teleconference session.
As with almost all of MediaPOINTE’s AV-over-IP products, you can control the DMR300
via many different methods. Some of these methods include, web interface, contact
closure, RS-232 serial port, XML API or by the ultra convenient one-button control on
the front panel. One push of the BLUE button will start archiving and streaming (if
desired) your teleconference and another push of the same button will stop the
recording.
Front Panel
The front panel of the unit is shown below.
The front panel consists of the main operation Record Start / Stop button with a BLUE
LED Status indicator, a yellow LED status indicator, a small RESET button, a small power
switch and a USB port. The following is a brief description of each of these components.
Record Start / Stop
BLUE LED
Yellow
LED
Indicator
Reset
Button
Power
Switch
USB Port
(FUTURE)

DMR200 User’s Guide V1.1 13
Record Start / Stop Push Button
When pressed, the BLUE Start / Stop button will immediately begin (and subsequently
stop) recording and streaming (if defined in the setup) of the desired data. Pushing this
button has the same effect as pushing the “Record” button on the main menu page of
the unit. (See “Starting / Joining a Session” in this User Guide for more information)
The BLUE LED also functions as an indicator of the status of the unit. See Appendix A
for an explanation of the various states of the indicator. In general, the LED is ON when
the unit is ready to record, blinking when the unit is recording and OFF when the unit is
not ready.
Yellow LED Indicator
The Yellow LED indicator is used to show that the system is busy or in an error
condition. During normal operation of recording and streaming, the LED will remain off.
After each session is archived, the archive file must be fully indexed by the hard drive.
The yellow LED will blink during the indexing procedure indicating that the unit is busy
and cannot archive or stream until the process is complete. Depending on the length of
the archived material, this could be from several seconds up to 30 minutes to complete
the indexing process.The LED also serves as an internal error indicator. In the unlikely
event that an error occurs, the LED will blink. See Appendix Afor an explanation of
the various states of the indicator.
RESET Button
The RESET button is hidden behind a tiny hole in the front panel and requires activation
using a small device such as a pin. This is done to avoid inadvertent resetting of the
system. Pressing the reset button will reset ALL the settings on the DMR300 back to
the factory settings.This includes all IP settings and Passwords. For a complete list
of the factory settings, see Appendix B. This should only be done if the user has lost
communication with the unit and has lost records of the IP address information.
Power Switch
This switch powers the unit on and off. It is used in conjunction the with main power
switch on the rear of the unit. It is intentionally made small as the DMR300 us
expected to remain ON most of the time.

DMR200 User’s Guide V1.1 14
USB Port
The USB port in the front of the unit is for future use.
Uses & Features
The DMR300 may be used in a variety of situations for live communication and
collaboration.
You can start an archiving / streaming session to:
•Archive important high-resolution meeting or presentation content along with both
near and far end camera views for record keeping or corporate intellectual
property management for a complete and accurate record of each event
•Share visual information, designs, and concepts with dispersed groups of people to
gather input during a video conference
•Stream important videoconferences to other locations such as overflow rooms or
remote conference locations along your corporate network
•Conduct customer and employee training across vast geographical areas
•Discuss research, engineering, architecture, product design, or process analysis
when the participants are not able to meet in one central location
•Access a centralized bank of expertise from a field location
•Disseminate archived presentations and training seminars to remote employees

DMR200 User’s Guide V1.1 15
Overview
How It Works
The DMR300 captures up to three separate input streams from your videoconferencing
system. These include two video streams, usually associated with near and far-end
camera video and a third high-resolution stream from the videoconferencing system or
any laptop, PC, or document camera, etc. The DMR300 also accepts line level stereo
audio inputs. The three separate streams along with the associated audio are captured
and combined into a single file which can be simultaneously streamed out along your
network during the archival process if desired.
Users can select from several pre-defined layout templates for capturing and subsequent
playback of the recorded material. These templates typically display the high-resolution
content on the main area of the display and the near and far-end camera video in
picture-in-picture windows (PIPS) in various locations around the display. The user can
select where each image works best for their own playback requirements. Each of the
three separate archived streams is recorded in their native resolution for maximum
video quality.
The DMR300 combines all three recorded streams into a single file that is stored on-
board locally on a hard drive. The recorded file can then be viewed locally on your
videoconference system or replayed on a local monitor if desired. The content can also
be copied to a USB storage unit, downloaded over your network or streamed to standard
PCs.
The DMR300 records content in Microsoft Windows®Media format1. The file is a
standard “wmv” file readable by any viewer that can access this format. A free Windows
Media Player is available on the Microsoft®website. CD-quality audio is recorded in
MPEG-3 format.
The DMR300 also provides remote administration from any standard web browser for
easy network set up and configuration.
1Microsoft, Windows and the Windows logo are either registered trademarks or trademarks of Microsoft Corporation in the United
States and/or other countries.

DMR200 User’s Guide V1.1 16
Requirements
Video/Monitor Requirements
•VGA/XGA or higher resolution monitor.
Network Requirements
•10/100 Mb Ethernet Connection
•100 Kbps to 5 Mbps network bandwidth
•Web browser for administration and Internet functions
Optional Requirements
•Graphics input device (laptop/desktop computer, document camera)
•Line In/Out RCA input

DMR200 User’s Guide V1.1 17
Chapter 2: Setup
This chapter describes how to get started using the DMR300.
Configuring and using the DMR300 is very easy. You do not need to install an
application or remote configuration software. If you know how to browse the
internet, then you already know how to access and control the DMR300, simply
via a web browser.
Topics in This Chapter
Connecting the DMR300--------------------------------------------------------------------- 18
The Rear Panel ------------------------------------------------------------------------------18
Auxiliary Connections------------------------------------------------------------------------19
Network Setup-------------------------------------------------------------------------------- 20
How to Assign an IP Address ----------------------------------------------------------------20
Logging In -----------------------------------------------------------------------------------21
Administrator Setup -------------------------------------------------------------------------22
Guest User Setup----------------------------------------------------------------------------22
IP Settings-----------------------------------------------------------------------------------23
DMR200 User’s Guide V1.1 18
Connecting the DMR300
Use this procedure when you first purchase the DMR300 and when you are ready to
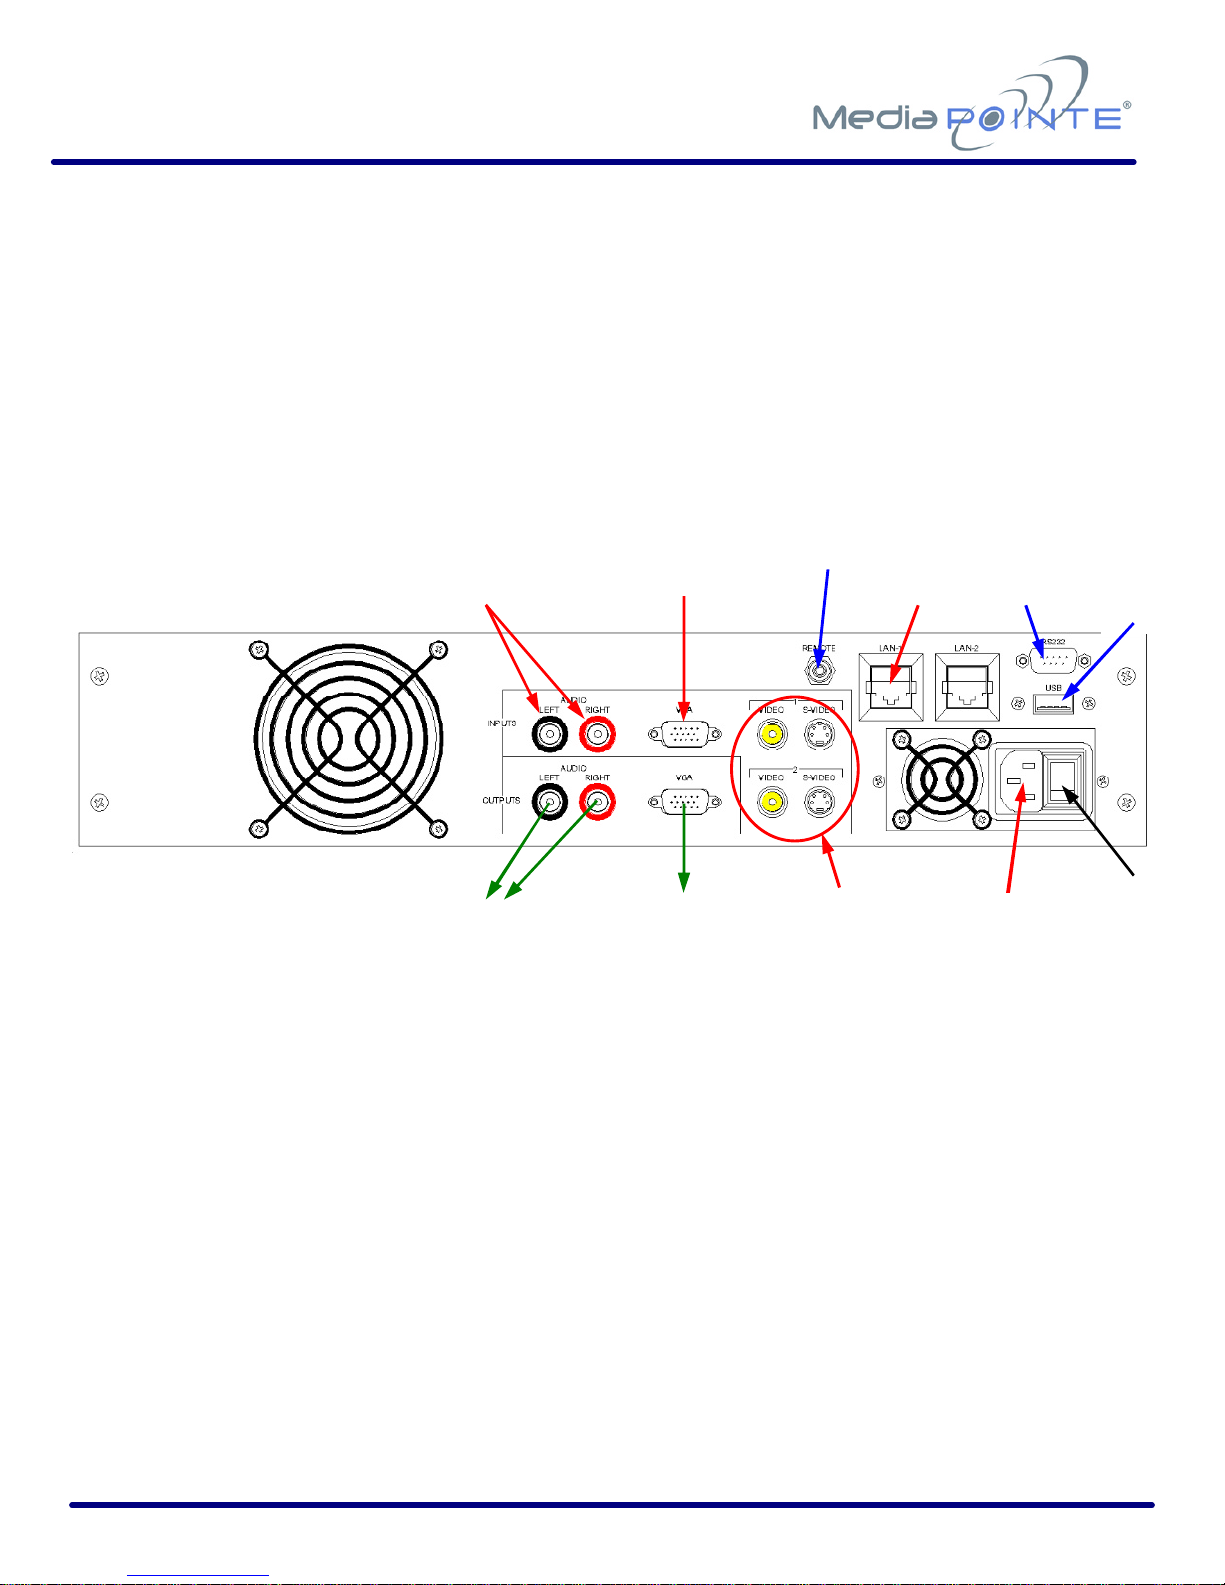
install the hardware at your site. This section shows the back panel and explains how to
connect the separate input connections to the unit. For clarity purposes, INPUTS are
shown in RED, OUTPUTS are shown in GREEN and CONTROL ports are shown in BLUE.
The Rear Panel
To connect to the DMR300, insert the following cables to the unit:
AC Power Cable –insert the IEC cable to the AC power input plug. Make sure the
on/off switch is in the off position before plugging in the power cable.
Video Inputs –insert the two video inputs from the videoconferencing system. These
connections can be either standard video via composite connectors or S-Video cables.
The video inputs on the DMR300 have both composite and S-Video connections.
High-resolution Input -Insert the VGA DB15 connector on the high-resolution input
connection on the DMR300.
Video
OUTPUT
High
Resolution
INPUT
Video
INPUTS
Stereo Audio
OUTPUTS
Stereo Audio
INPUTS
Remote
Contact
Closure
AC
Power
INPUT
Power
ON/OFF
LAN
INPUT
RS
-
232
USB
(FUTURE)

DMR200 User’s Guide V1.1 19
Stereo Audio Input –insert the left and right audio cables from the videoconference
system. These cables use standard RCA connectors.
LAN Cable Input –insert a standard 10/100mb CAT-5e LAN cable into the connector
labeled LAN1 on the DMR300. The connector labeled LAN2 is reserved for future use.
The above listed cables are all that are necessary to record and stream a
videoconference. The remaining cables and connectors not mentioned above are for
alternate methods of control or for viewing the output of the DMR300 locally; i.e.
connecting a local monitor.
Auxiliary Connections
Video Output –use this connection to use a local monitor to view the files on the hard
drive. This output can also be sent back to your videoconferencing system and be
displayed on the main display.
Stereo Audio Output –use this connection for the audio portion of the recorded
material on the display. These can be routed to local speakers or back into the main
videoconferencing audio system.
Remote Contact Closure –this connection uses a standard 3.5 mini mono connector.
This connector allows a remote switch (contact closure) to control the start / stop
function of the DMR300. This is the same as pushing the blue button on the front of
the unit.
RS-232 –This standard serial DB9 connector allows connection for serial control.
USB –The USB connection is for future use.

DMR200 User’s Guide V1.1 20
Network Setup
Use this procedure when you first purchase the DMR300 and when you are ready to
install the hardware at your site.
How to Assign an IP Address
IP addresses may be assigned to the DMR300 by two ways: DHCP and Fixed (Static)IP.
If your network is configured for DHCP, the IP address will be provided automatically.
To set a Fixed (Static) IP address, see the procedure below for setting fixed or static IP
addresses.
Fixed (Static) IP Address
1. Connect the Ethernet cable and power up the DMR300.
2. On your Internet browser, enter the IP address of the DMR300.
3. Login to the DMR300 using the procedure shown below in the “Logging In”
section.
4. Navigate to the network settings page by selecting “Config IP”.
This selection will take you to the Network settings page that lists the
current network settings and also has a section you can use to change these
settings.
5. In order to change to a Fixed or Static IP address, set the DHCP Client button
to Disabled.
This will allow you to set a fixed address. Enabling DHCP Client will not
allow any fixed settings to take effect.
6. Fill in the IP Address, IP Subnet Mask, Default Gateway fields.
7. Make note of the new Fixed (Static) IP Address for future reference. Without
this you will not be able to access the DMR300.
Table of contents
Other Media Pointe Media Player manuals


Popular Media Player manuals by other brands


Fantec
Fantec 4KS7700Air quick start guide

Conceptronic
Conceptronic cm3pvrd Firmware Upgrade Instructions

Western Digital
Western Digital WDBAAM0000NBK - TV Mini Media Player Quick install guide

August
August DA100D user manual

CAMANGI
CAMANGI Home-Pod IEF00 quick start guide

PROEL
PROEL SOURCE PRO user manual


