7
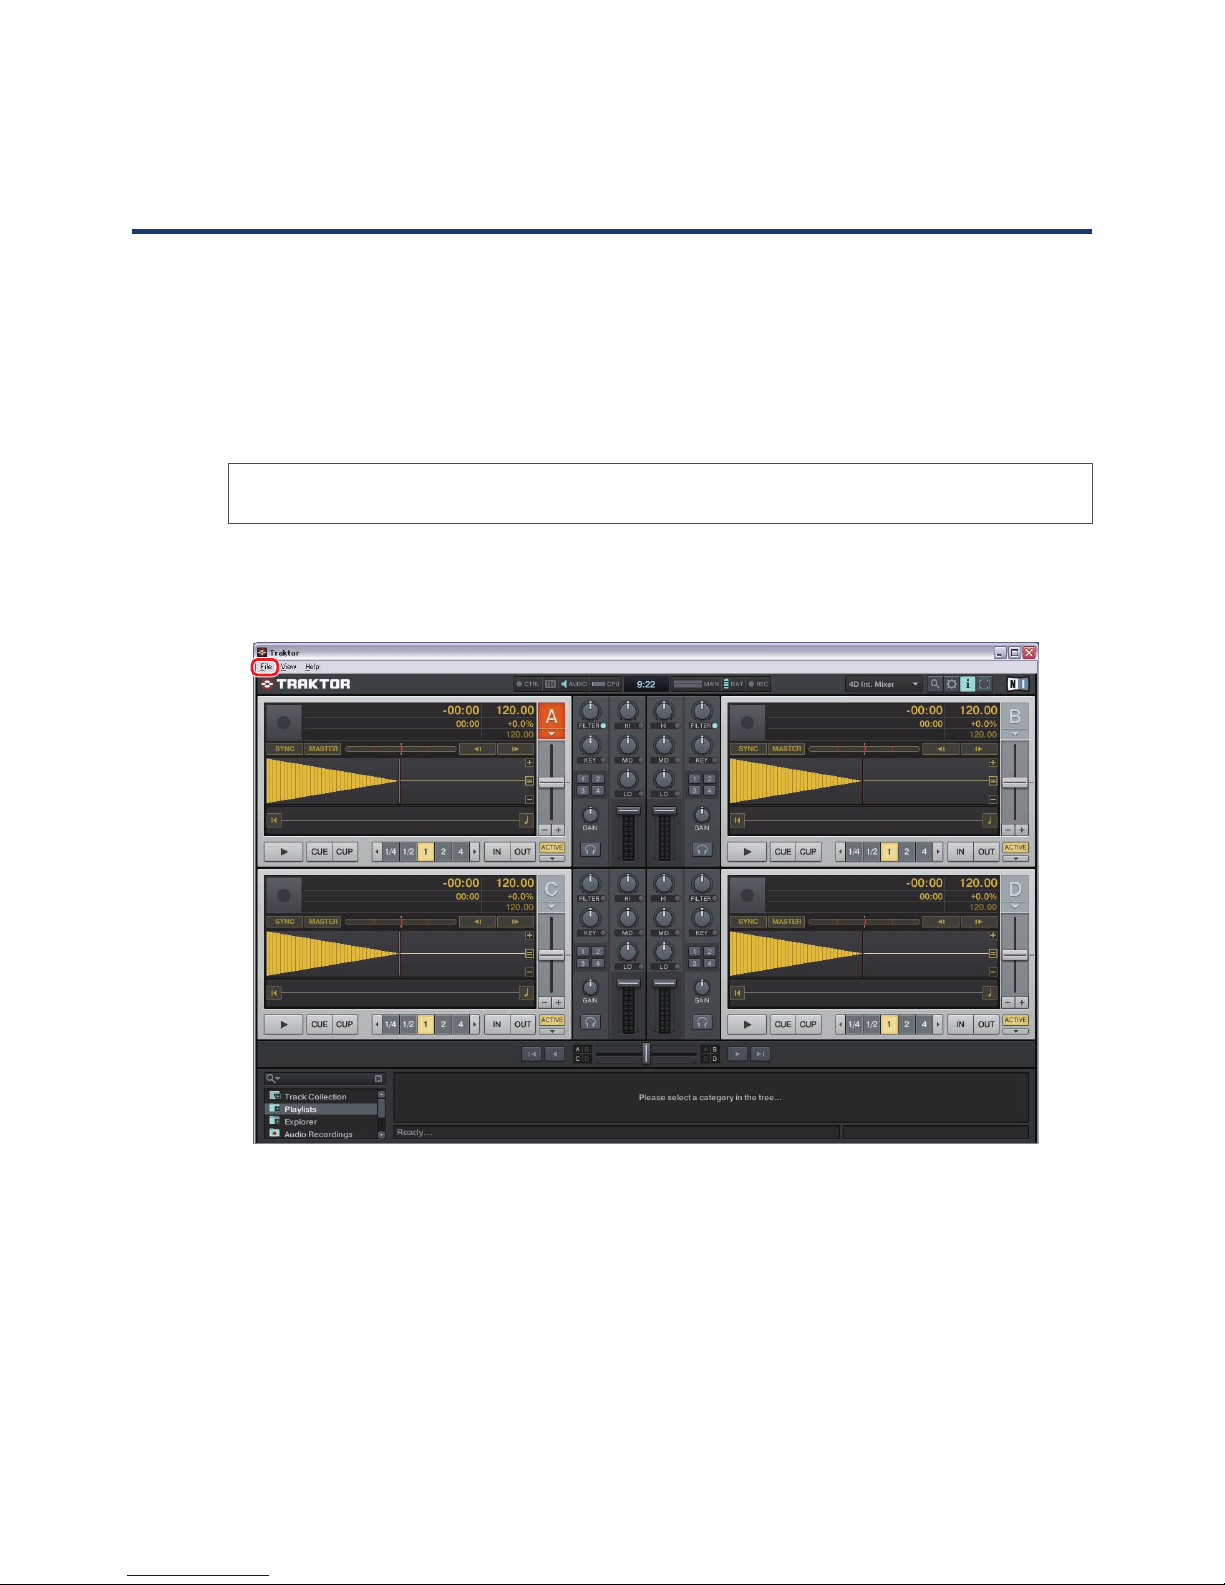
Using the Multi Player
as a TRAKTOR PRO/PRO 2 controller
After the equipment has been connected, turn on the power for each device, then configure the
TRAKTOR PRO/PRO 2 and the Multi Player according to the following procedure.
Downloading the MIDI mapping file
1
Download the MIDI mapping file from the Pioneer website: http://pioneer.jp/support/download/dj-e/cdj-350/
Since the download file is in the ZIP compressed format, extract the file before proceeding.
The file may automatically expand depending on your browser, in which case there will be no need for
you to expand it yourself.
Windows users
Right click the download file and select [Extract All].
After the expansion wizard is displayed, specify the destination folder for the extracted files.
Macintosh users
Double click the downloaded ZIP file to expand.
After the zip file is extracted, the file PIONEER_CDJ-350.tsi will be extracted.
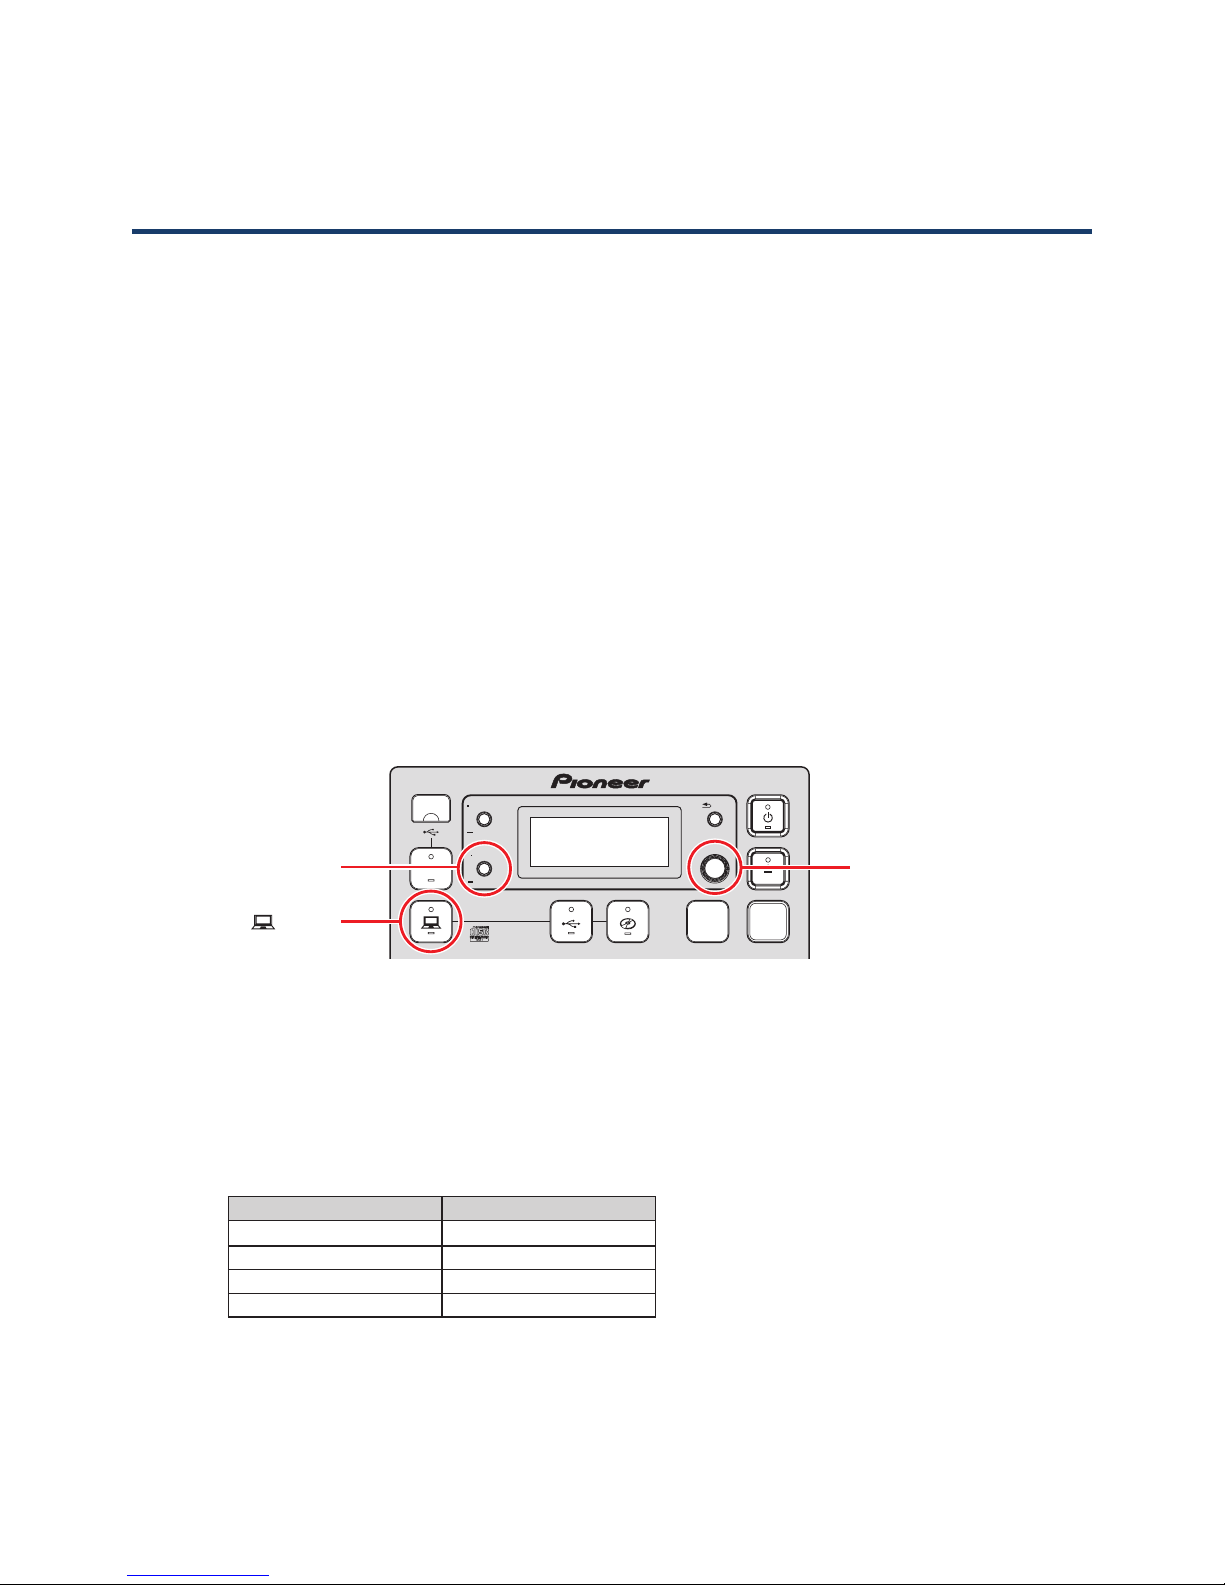
Configuring the Multi Player
2Configure the Multi Player’s MIDI channels.
1Press and hold the [DISPLAY (UTILITY)] button for 1 second or longer to switch to UTILITY mode.
2Turn the rotary selector and select [MIDI CH]. Press the rotary selector to choose your selection.
3Turn the rotary selector and select a MIDI channel (1–4). Press the rotary selector to choose your
selection.
The initial configuration of the MIDI mapping file will map the MIDI channels to corresponding
TRAKTOR PRO/PRO 2 decks as shown in the following table.
CDJ-350 MIDI channel TRAKTOR PRO/PRO 2 deck
MIDI CH 1 Deck A
MIDI CH 2 Deck B
MIDI CH 3 Deck C
MIDI CH 4 Deck D
The MIDI channel for the multi-player is set to CH 1 (Channel 1) by factory settings. Following the
mappings in the table above, set each CDJ-350 MIDI channel you wish to use to one of the channels
between CH 1 and CH 4.
4Press the rotary selector again to save the changes to the MIDI channel configuration.
Press the [DISPLAY (UTILITY)] button to exit UTILITY mode.