manuals.online logo
Brands
  1. Home
  2. •
  3. Brands
  4. •
  5. Medion
  6. •
  7. Laptop
  8. •
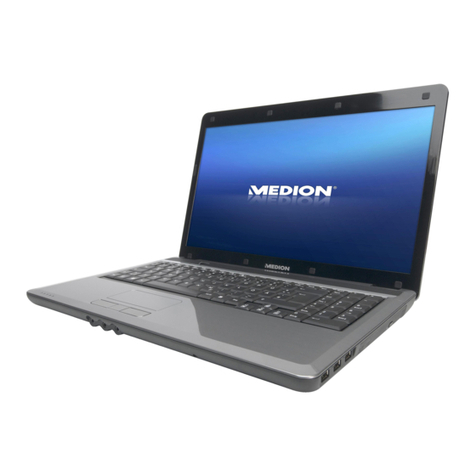
  9. Medion AKOYA E7416 User manual

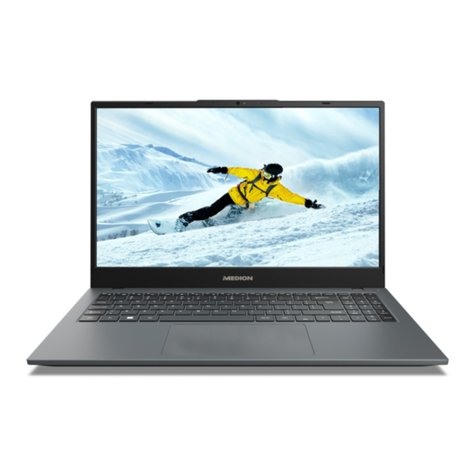
Medion AKOYA E7416 User manual

Deutsch English Français
Nederlands Dansk Italiano
1. 2. 3.
A protective foil is on the surfaces to protect the device against scratching during
production and transportation.
Pull off all the foil after you have set up the device correctly and before bringing
it into operation.
1 Connecting the mains adapter
Turn the switch on the mains cable to the position Ito power up your
notebook and charge the battery.
2. Start the Notebook
Flip up the screen and briefly press the on/off switch.
Do not turn off the notebook during the initial configuration. This may adversely
affect the configuration. Only switch the notebook off after the configuration
has been completed successfully and the initial screen appears.
Les surfaces sont recouvertes de films protecteurs afin de protéger l'appareil des
rayures lors de la fabrication et du transport.
Enlever tous les films après avoir correctement installé l'appareil et avant de le
mettre en service.
1. Brancher l'adaptateur secteur
Mettre l‘interrupteur de l‘adaptateur secteur en position Ipour alimenter le
notebook en courant et recharger l‘accu.
2. Démarrer le notebook
Relever l‘écran et maintenir le bouton de marche/arrêt brièvement enfoncé.
N'éteignez pas l'ordinateur portable pendant la configuration initiale. Cela
pourrait avoir des répercussions négatives sur la configuration. N'éteignez
l'ordinateur portable qu'une fois que la configuration est terminée et que
l'écran d'accueil apparaît.
De beschermfolie op de oppervlakten beschermen het toestel tijdens de
productie en het transport tegen krassen.
Verwijder alle folie nadat u het toestel correct hebt opgesteld en voordat u het
toestel in gebruik neemt.
1. Netadapter aansluiten
Schakelaar bij de netadapter in stand Iplaatsen, om de notebook van stroom
te voorzien en de accu op te laden.
2. Notebook starten
Beeldscherm openklappen en de aan/uitschakelaar even ingedrukt houden.
Schakel de notebook niet uit tijdens de eerste configuratie. Dat zou de
configuratie negatief kunnen beïnvloeden. Schakel de notebook pas uit,
wanneer de configuratie met succes is voltooid en het Start-scherm wordt
weergegeven.
For at beskytte apparatets overflader mod ridser under produktionen og
transporten er disse dækket med beskyttelsesfolier.
Træk alle folier af efter at du har opstillet apparatet korrekt og inden du tager det
i brug.
1. Tilslut strømadapteren
Sæt kontakten på strømadapteren på I, så den bærbare computer forsynes
med strøm og batteriet oplades.
2. Start den bærbare computer
Åbn displayet, og tryk kort på Tænd/Slukknappen.
Sluk ikke notebooken under den indledende konfiguration. Dette kan have en
negativ indvirkning på konfigurationen. Sluk først notebooken, når
konfigurationen er gennemført, og startskærmbilledet vises.
Sulla superficie del dispositivo si trovano delle pellicole che lo proteggono dai
graffi durante la produzione e il trasporto.
Asportare tutte le pellicole dopo avere posizionato correttamente il dispositivo e
prima di metterlo in funzione.
1. Collegare l'alimentatore
Spostare l’interruttore dell’alimentatore nella posizione Iper fornire corrente
al notebook e caricare la batteria.
2. Accendere il notebook
Aprire il display e tenere premuto brevemente l’interruttore on/off.
Non spegnere il notebook durante la prima configurazione. Ciò potrebbe avere
conseguenze negative sulla configurazione. Spegnere il notebook soltanto
quando la configurazione è stata completata e viene visualizzata la schermata
iniziale.
MSN 4005 4083
Auf den Oberflächen befinden sich Schutzfolien, um das Gerät vor Kratzern
während der Produktion und dem Transport zu schützen.
Ziehen Sie alle Folien ab, nachdem Sie das Gerät korrekt aufgestellt haben und
bevor Sie es in Betrieb nehmen.
1. Netzadapter anschließen
Schalter am Netzadapter auf die Stellung I stellen, um das Notebook mit
Strom zu versorgen und den Akku aufzuladen.
2. Notebook starten
Display aufklappen und den Ein-/Ausschalter kurz gedrückt halten.
Schalten Sie das Notebook während der Erstkonfiguration nicht aus. Dies könnte
sich negativ auf die Konfiguration auswirken. Schalten Sie das Notebook erst
dann aus, wenn die Konfiguration erfolgreich abgeschlossen wurde und der
Startbildschirm erscheint.
MEDION®AKOYA®E7416 (MD 99554)
43,9 cm / 17,3" Notebook
C
M
Y
CM
MY
CY
CMY
K
99554 E7416 ML MSN 4005 4083 QSG final.ai 1 30.01.2015 10:45:5599554 E7416 ML MSN 4005 4083 QSG final.ai 1 30.01.2015 10:45:55
En las supercies del aparato se encuentran láminas protectoras para protegerlo
contra rasguños durante la producción y el transporte.
Una vez colocado el aparato retire las láminas antes de ponerlo en marcha.
1. Conectar el adaptator
Poner el interruptor del adaptador de red en la posición I para abastecer de
corriente el ordenador portátil y para cargar la batería.
2. Iniciar el ordenador portátil
Abrir la pantalla y pulsar brevemente el conectador/desconectador.
Durante la primera instalación no apague el ordenador portátil. Esto podría
tener consecuencias negativas en la instalación. No desconecte el portátil hasta
que la instalación se haya concluido con éxito y aparezca la página inicial.
Español Português Polski
Magyar Türkçe
1. 2. 3.
Nas superfícies encontramse películas de protecção para proteger o aparelho de riscos
durante a produção e o transporte.
Retire todas as películas, depois de ter colocado o aparelho correctamente e antes de
colocálo em funcionamento.
1. Ligar adaptador de rede
Colocar o interruptor no adaptador de rede na posição I para alimentar o
Notebook com corrente e carregar a bateria.
2. Iniciar Notebook
Abrir o visor e manter o interruptor de ligar/desligar premido por breves instantes.
Não desligue o portátil durante a primeira configuração. Isto poderá influenciar
negativamente a configuração. Desligue o portátil apenas quando a instalação
tiver sido concluída com sucesso e aparecer o ecrã inicial.
A felületeken védõfólia található, mely védi a terméket a gyártás és a szállítás alatt
keletkezett esetleges sérülésektõl.
A készülék megfelelõ felállítása után, az üzembe vétel elõtt húzza le a fóliákat.
1. Csatlakoztassa a hálózati adaptert.
A notebook hálózati árammal történõ ellátásának biztosításához és az akkumulátor
feltöltéséhez helyezze a hálózati adapter kapcsolóját az I állásba.
2. Indítsa el a notebookot.
Nyissa fel a kijelzõt és kis ideig tartsa benyomva a be/kikapcsoló gombot.
Ne kapcsolja ki a notebook-ot az elsőkonfiguráció közben. Ez negatívan
befolyásolhatja a konfigurációt. Csak akkor kapcsolja ki a notebook-ot, ha a
konfiguráció sikeresen lezárult, és megjelenik a kezdőképernyő.
MSN 4005 4083
Na powierzchni znajduje się folia ochronna, zabezpieczająca urządzenie przed
porysowaniem podczas produkcji i transportu.
Po prawidłowym ustawieniu urządzenia, ale przed jego uźyciem, naleźy ściśgnąć
wszystkie folie ochronne.
1. Podłączanie zasilacza sieciowego
Ustawić przełącznik zasilacza sieciowego w pozycji I, aby zasilać notebook prądem
sieciowym i naładować akumulator.
2. Uruchamianie notebooka
Otworzyć wyświetlacz i przytrzymać krótko wciśniêty przycisk wł./wył.
Nie wyłączaj notebooka w czasie pierwszej konguracji. Może to mieć ujemny wpływ
na kongurację. Włącz notebooka dopiero po prawidłowym zakończeniu konguracji i
wyświetleniu ekranu początkowego.
MEDION®AKOYA®E7416 (MD 99554)
43,9 cm / 17,3" Notebook
Slovenščina
Na površini so zaščitne folije, ki napravo med proizvodnjo in prevozom zaščitijo pred
praskami.
Vse folije odstranite, ko ste napravo pravilno postavili in preden jo začnete uporabljati.
1. Priključite napajalni vmesnik
Stikalo na napajalnem vmesniku premaknite v položaj I, da prenosnik oskrbite z
električnim tokom in napolnite baterijo.
2. Prenosnik vključite
Odprite zaslon in kratko pritisnite tipko za vklop/izklop.
Prenosnika med prvim nastavljanjem ne izklapljajte, ker bi to lahko negativno vplivalo
na nastavljanje. Prenosnik izklopite šele po uspešno končanem nastavljanju, ko se
prikaže začetni zaslon.
Üretim ve nakliye sırasında çizilmesini önlemek için cihazın yüzeyleri koruyucu folyoyla
kaplanmıştır.
Cihazı doğru şekilde yerleştirdikten sonra çalıştırmaya geçmeden önce tüm folyoları
çıkarın.
1. Güç adaptörünü bağlayın.
Dizüstü bilgisayarı elektrikle beslemek ve aküyü şarj etmek için güç adaptöründeki
şalteri I konumuna getirin.
2. Dizüstü bilgisayarı çalıştırın.
Ekranı yukarı doğru kaldırarak açın ve açma/kapatma düğmesini kısa bir süre basılı
tutun.
İlk kongürasyon sırasında dizüstü bilgisayarı kapatmayın. Bu, kongürasyonu
olumsuz etkileyebilir. Sadece kongürasyon başarıyla tamamlandıktan ve başlangıç
ekranı görüntülendikten sonra dizüstü bilgisayarı kapatın.
C
M
Y
CM
MY
CY
CMY
K
99554 E7416 ML MSN 4005 4083 QSG final.ai 2 30.01.2015 10:46:0999554 E7416 ML MSN 4005 4083 QSG final.ai 2 30.01.2015 10:46:09

This manual suits for next models

1

Other Medion Laptop manuals

Medion Erazer Crawler E25 MD62301 User manual

Medion

Medion Erazer Crawler E25 MD62301 User manual

Medion Akoya P6685 User manual

Medion

Medion Akoya P6685 User manual

Medion MD 99499 User manual

Medion

Medion MD 99499 User manual

Medion Notebook Computer User manual

Medion

Medion Notebook Computer User manual

Medion AKOYA X7811 User manual

Medion

Medion AKOYA X7811 User manual

Medion E15415 User manual

Medion

Medion E15415 User manual

Medion Notebook Computer User manual

Medion

Medion Notebook Computer User manual

Medion AKOYA E4242 User manual

Medion

Medion AKOYA E4242 User manual

Medion Notebook Computer User manual

Medion

Medion Notebook Computer User manual

Medion Notebook Computer User manual

Medion

Medion Notebook Computer User manual

Medion AKOYA User manual

Medion

Medion AKOYA User manual

Medion Notebook Computer User manual

Medion

Medion Notebook Computer User manual

Medion Notebook Computer User manual

Medion

Medion Notebook Computer User manual

Medion ERAZER X6821 User manual

Medion

Medion ERAZER X6821 User manual

Medion Notebook Computer User manual

Medion

Medion Notebook Computer User manual

Medion Akoya LS User manual

Medion

Medion Akoya LS User manual

Medion MD 63310 User manual

Medion

Medion MD 63310 User manual

Medion Notebook Computer User manual

Medion

Medion Notebook Computer User manual

Medion Akoya E6222 User manual

Medion

Medion Akoya E6222 User manual

Medion ERAZER X7813 User manual

Medion

Medion ERAZER X7813 User manual

Medion AKOYA S4216 User manual

Medion

Medion AKOYA S4216 User manual

Medion Akoya E6240 User manual

Medion

Medion Akoya E6240 User manual

Medion AKOYA S2210 User manual

Medion

Medion AKOYA S2210 User manual

Medion Notebook Computer User manual

Medion

Medion Notebook Computer User manual

Popular Laptop manuals by other brands

Acer Aspire 6930G Series Service guide

Acer

Acer Aspire 6930G Series Service guide

Lenovo IdeaPad S405 Limited warranty

Lenovo

Lenovo IdeaPad S405 Limited warranty

Lenovo IdeaPad S205 Limited warranty

Lenovo

Lenovo IdeaPad S205 Limited warranty

Dell Latitude 2120 Technical specifications

Dell

Dell Latitude 2120 Technical specifications

Asus ExpertBook B9 E-manual

Asus

Asus ExpertBook B9 E-manual

Dell Studio Series PP33L Setup guide

Dell

Dell Studio Series PP33L Setup guide

Lenovo ThinkPad S2 Yoga Gen 8 user guide

Lenovo

Lenovo ThinkPad S2 Yoga Gen 8 user guide

UMAX Technologies Visionbook 13WA PLUS manual

UMAX Technologies

UMAX Technologies Visionbook 13WA PLUS manual

Lenovo ThinkPad X280 Setup guide

Lenovo

Lenovo ThinkPad X280 Setup guide

Toshiba T-Series T3200 user manual

Toshiba

Toshiba T-Series T3200 user manual

Acer Aspire 9510 user guide

Acer

Acer Aspire 9510 user guide

HP 4310s - ProBook - Core 2 Duo 2.1 GHz Maintenance and service guide

HP

HP 4310s - ProBook - Core 2 Duo 2.1 GHz Maintenance and service guide

Dell Inspiron 14 7430 2-in-1 owner's manual

Dell

Dell Inspiron 14 7430 2-in-1 owner's manual

UMAX Technologies visionbook 10Wi-S 64G manual

UMAX Technologies

UMAX Technologies visionbook 10Wi-S 64G manual

Toshiba P505-S8940 Specifications

Toshiba

Toshiba P505-S8940 Specifications

Dell E6400 - Latitude - Core 2 Duo 2.53 GHz Technical guide

Dell

Dell E6400 - Latitude - Core 2 Duo 2.53 GHz Technical guide

Dell XPS /Dimension Gen 2 Service manual

Dell

Dell XPS /Dimension Gen 2 Service manual

IBM THINKPAD X41 Service and troubleshooting guide

IBM

IBM THINKPAD X41 Service and troubleshooting guide

manuals.online logo
manuals.online logoBrands
  • About & Mission
  • Contact us
  • Privacy Policy
  • Terms and Conditions

Copyright 2025 Manuals.Online. All Rights Reserved.