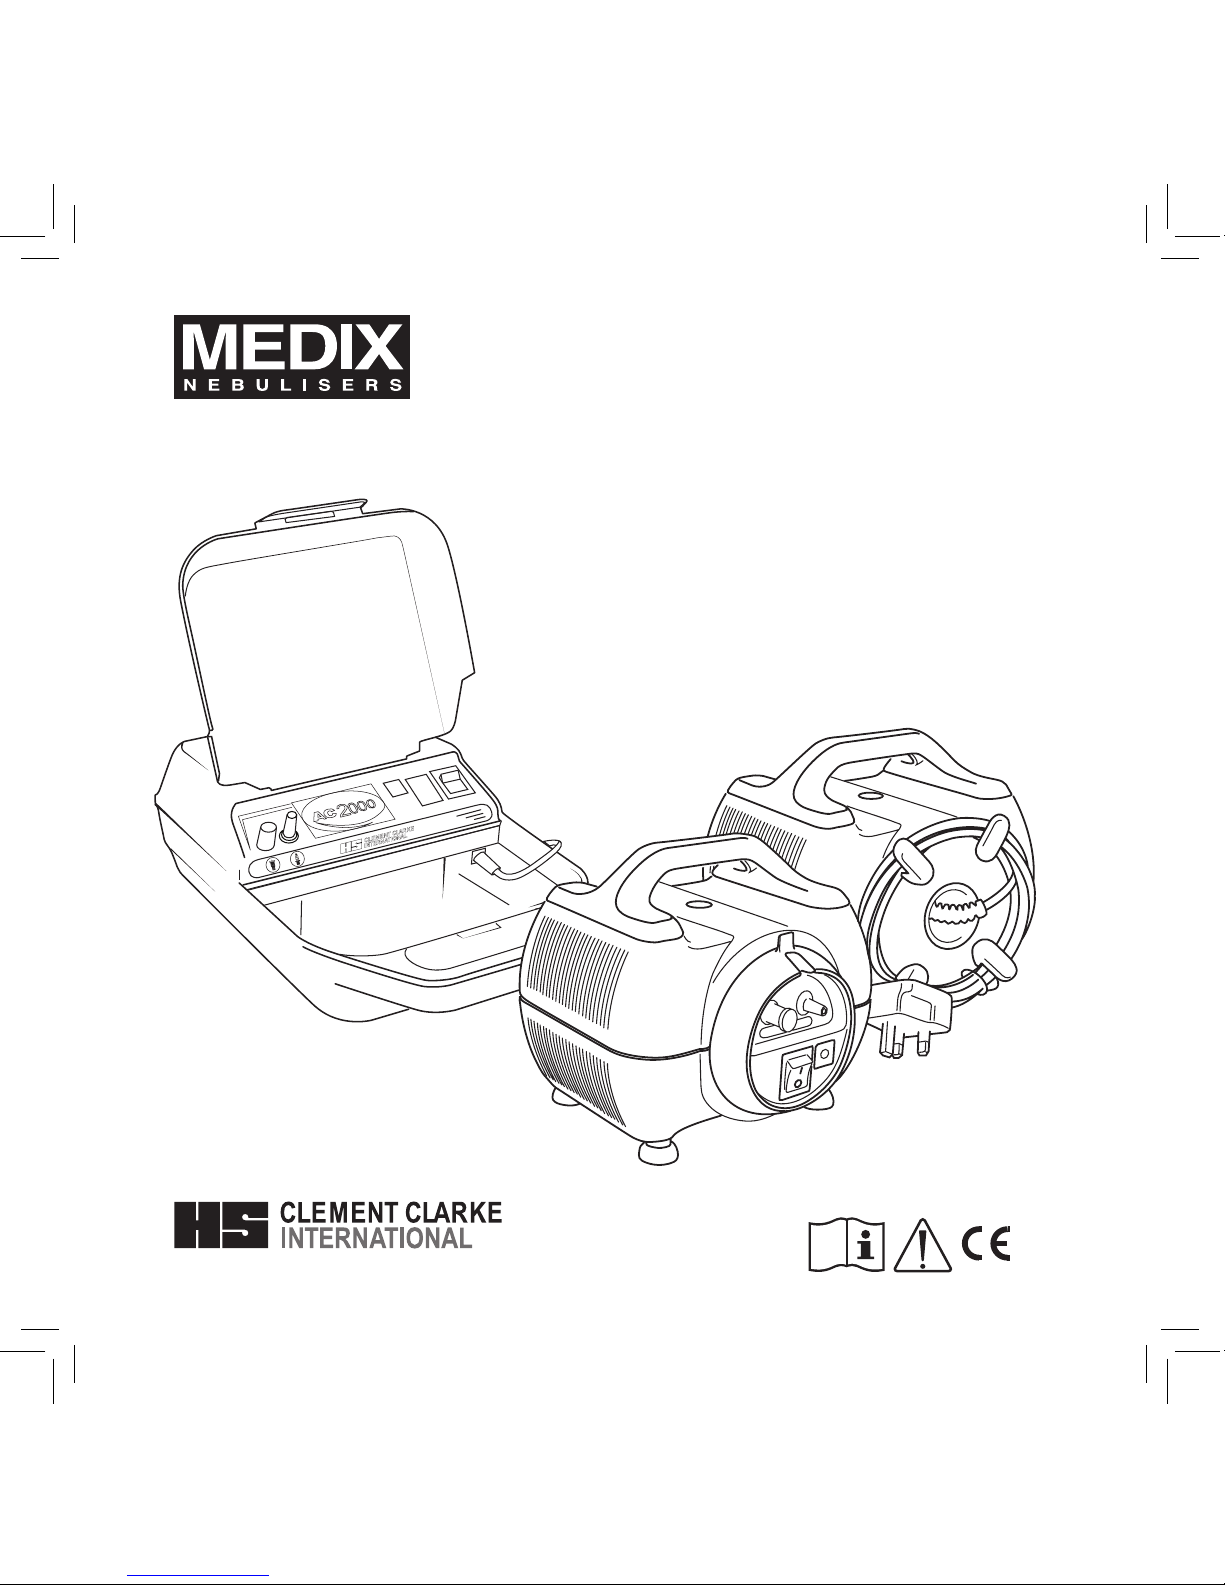
MEDIX AC2000 User manual
0120
AC2000, Econoneb & Turboneb 2
www.clement-clarke.com

AC2000
7.
1.
2.
6.
4.
5.
3.
Econoneb/Turboneb 2
2. 6.
3.
4.
5.
1.

Index
English - - - - - - - - - - - - - - - - - - - - - - - - - - - - - - - - - Page 2
Français - - - - - - - - - - - - - - - - - - - - - - - - - - - - - - - - Page 12
Español- - - - - - - - - - - - - - - - - - - - - - - - - - - - - - - - - Página 22
Deutsche - - - - - - - - - - - - - - - - - - - - - - - - - - - - - - - Seite 32
Nederlandse - - - - - - - - - - - - - - - - - - - - - - - - - - - - - Pagina 42
Danske - - - - - - - - - - - - - - - - - - - - - - - - - - - - - - - - - Side 52
hrvatski- - - - - - - - - - - - - - - - - - - - - - - - - - - - - - - - - Stranica 62
slovenščina - - - - - - - - - - - - - - - - - - - - - - - - - - - - - Stran 72

Contents
1. ProductIdentication........................... Page3
2. Symbols . . . . . . . . . . . . . . . . . . . . . . . . . . . . . . . . . . . . . Page 3
3. Introduction . . . . . . . . . . . . . . . . . . . . . . . . . . . . . . . . . . Page 3
4. Starter Kit . . . . . . . . . . . . . . . . . . . . . . . . . . . . . . . . . . . . Page 4
5. Notes on Nebuliser Care . . . . . . . . . . . . . . . . . . . . . . . . Page 4
6. Operating Instructions . . . . . . . . . . . . . . . . . . . . . . . . . . Page 4
6.1 Filling the Nebuliser Chamber . . . . . . . . . . . . . . . . Page 5
6.2 Administrating the Medication . . . . . . . . . . . . . . . . Page 5
6.3 Cleaning . . . . . . . . . . . . . . . . . . . . . . . . . . . . . . . . . Page 6
6.4 Changing the Attachments . . . . . . . . . . . . . . . . . . . Page 6
6.5 Replace Filters for the Econoneb/Turboneb 2 . . . . Page 6
6.6 Replace Fuse . . . . . . . . . . . . . . . . . . . . . . . . . . . . . Page 7
6.7 Servicing . . . . . . . . . . . . . . . . . . . . . . . . . . . . . . . . . Page 7
7. Safety Precautions . . . . . . . . . . . . . . . . . . . . . . . . . . . . . Page 7
8. Troubleshooting . . . . . . . . . . . . . . . . . . . . . . . . . . . . . . . Page 8
9. TechnicalSpecications ........................ Page8
10. Particle Size Distribution . . . . . . . . . . . . . . . . . . . . . . . . Page 9
11. Storage . . . . . . . . . . . . . . . . . . . . . . . . . . . . . . . . . . . . . . Page 9
12. Guarantee . . . . . . . . . . . . . . . . . . . . . . . . . . . . . . . . . . . . Page 10
13. EMC (Electromagnetic Compatibility) Declaration . . . . . Page 10
14. Disposal Instructions . . . . . . . . . . . . . . . . . . . . . . . . . . . Page 11
15. Spares and Accessories . . . . . . . . . . . . . . . . . . . . . . . . Page 11
2
en
1. Product Identication
1. Outletlter 5. O
2. Inletlter 6. Fuse (T1AL)
3. Mains switch 7. Hard wired lead
4. On
3. Introduction
Thesenebulisersystemsaredesignedtodeliveraneaerosolmistfromtheliquidmedication
prescribed by your doctor to treat your respiratory condition.
Use according to the instructions given by your doctor or physician.
Pleasereadtheinstructionscarefullytoobtainthemaximumbenetfromthenebulisersystems.
0120
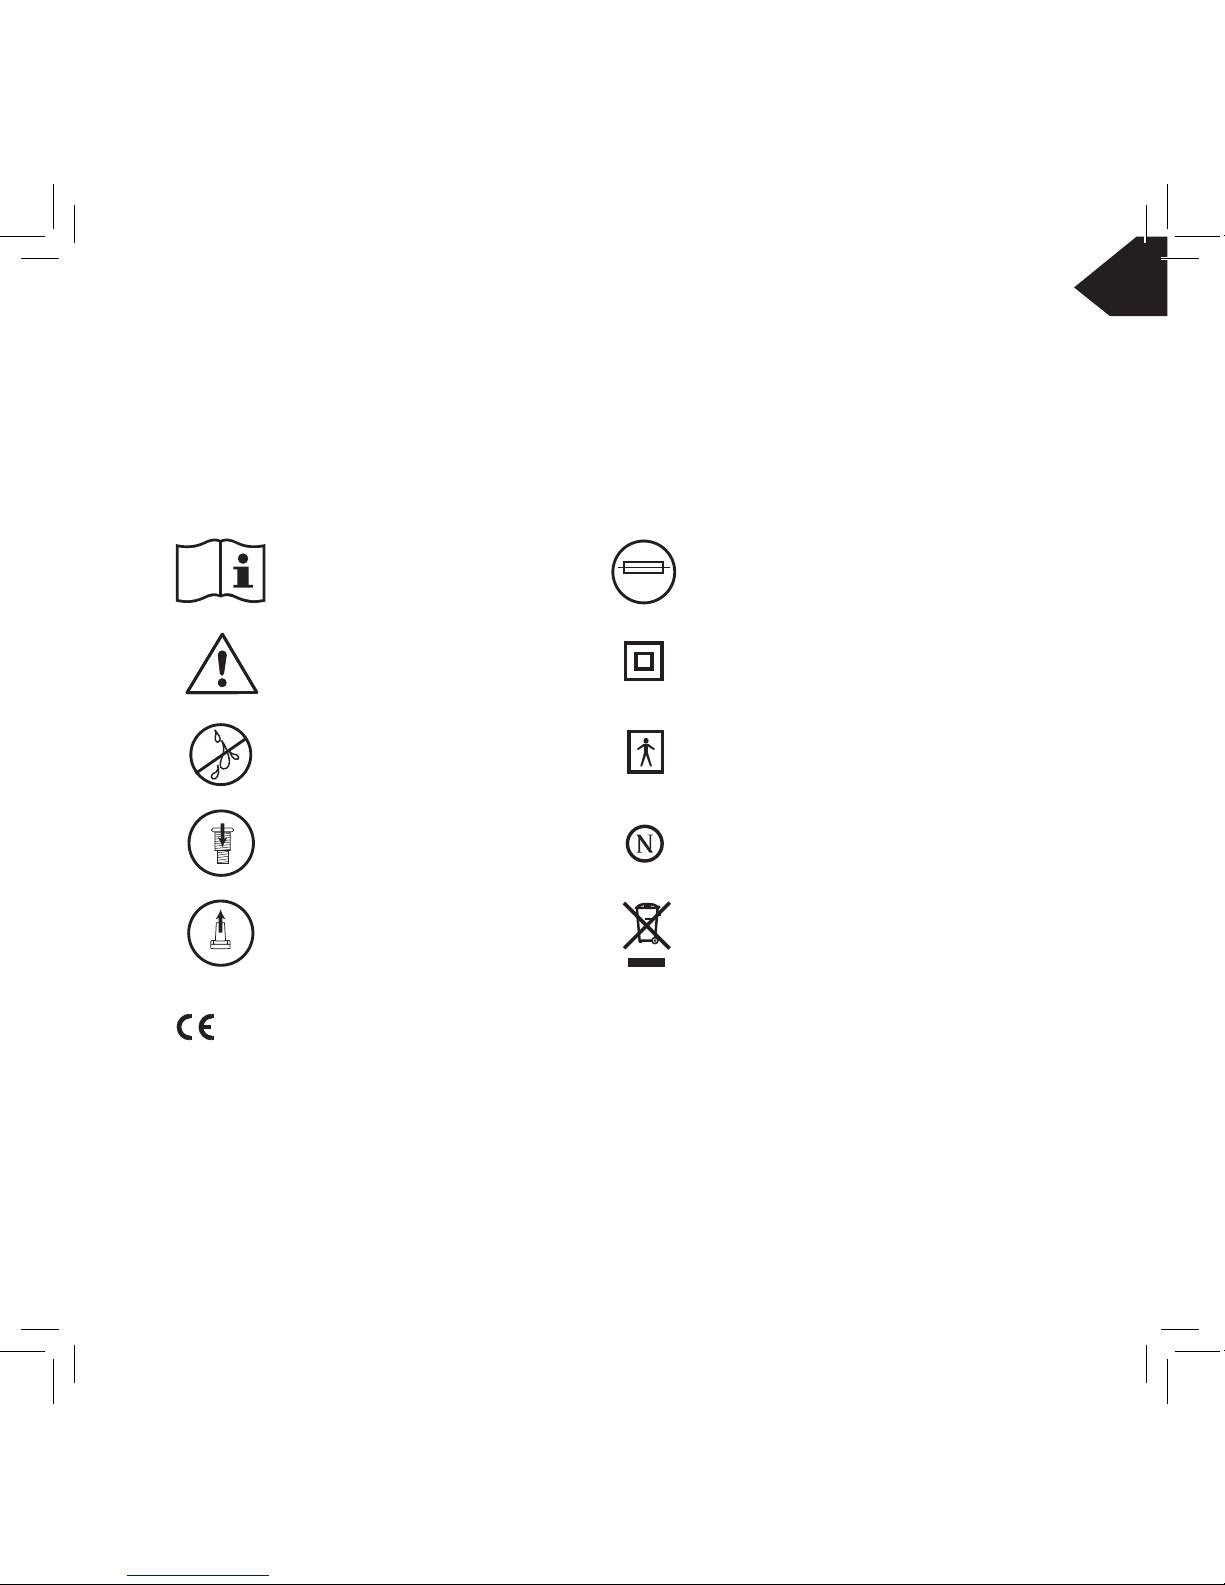
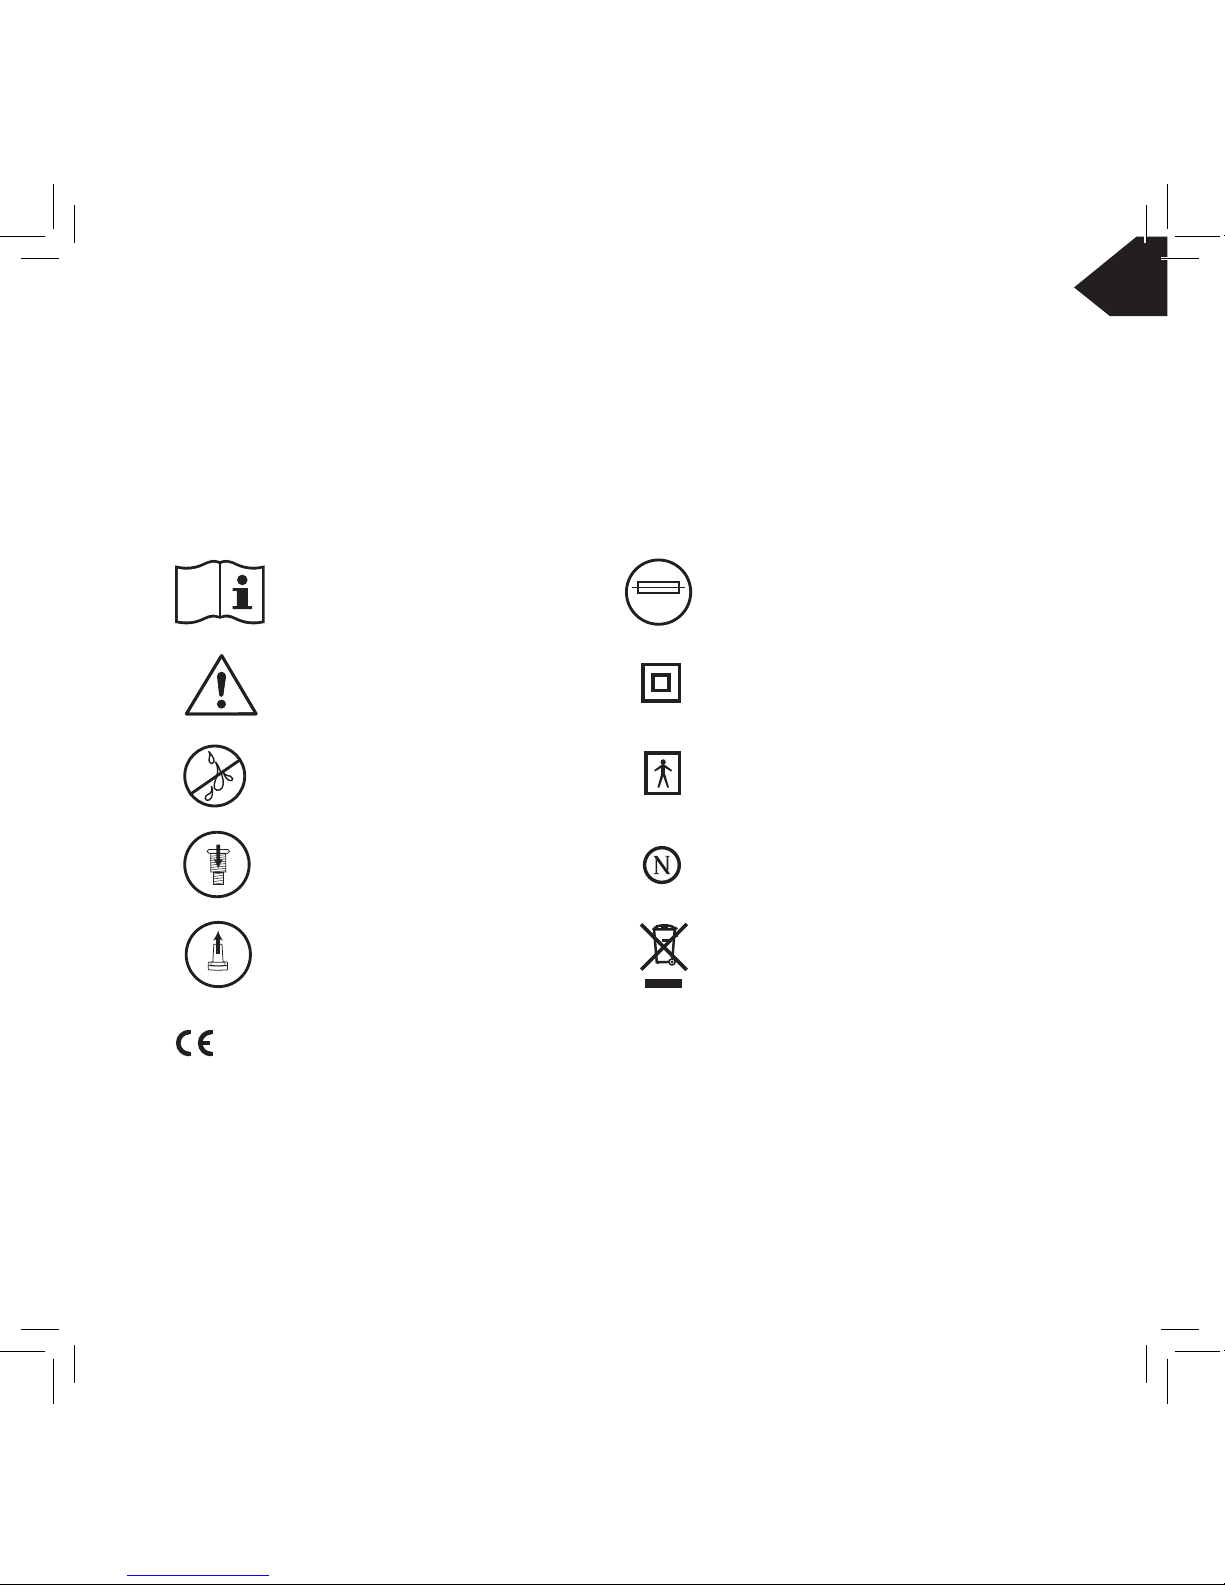
2. Symbols
Consult ‘Instructions for Use’ Fuse (T1AL)
Caution ClassIIEquipment
Donotallowliquidtoenter
mains input socket TypeBFEquipment
Tested and approved by Nemko, Norway.
Inletlter Complies with IEC 60601-1 and IEC
60601-1-2
Outletlter Donotdisposeofwithhouseholdrefuse
Thisproductcomplieswiththeessentialrequirementsofthemedicaldevices
directive (93/42/EEC).
CompliancehasbeenveriedbyUKnotiedbodyper0120(SGSUnitedKingdomLtd)
T1AL
3
en

4
en
4. Starter kits are supplied with the AC2000 and Econoneb containing:
1 x nebuliser chamber 1 x driveline
1xinletlter 1xlterspanner
1 x mouthpiece 1 x adult face mask
1 x child face mask
The Turboneb 2 is not supplied with a starter kit.
TheTurboneb2suppliesthehighestowratefornebulisingviscousantibioticsandhasbeen
designed to operate from mains voltage. Two versions are available, UK and EURO, (i.e plug type)
both 220-240V /50Hz.
Thiscompressor-onlyunitprovidesexibilityfortheusertochoosethemostappropriateaccessories
for demanding applications.
Note:
Both Econoneb and Turboneb 2 are continuously rated for repetitive use.
Please refer to the information label on the machine to establish that you have the correct
voltage for your mains supply.
5. Notes on Nebuliser Care
Caution
1. Do not immerse machine in water.
2. Physician prescribed use only.
3. Neverusemorefrequentlythanprescribed.
4. Iftherapyishavingnoeect,consultphysician.
6. Operating Instructions (Mains Operated)
1. Carefully withdraw nebuliser from the box.
2. Connect mains lead to a mains power supply.
3. Connectdrivelinetooutletlternozzle.
4. Connect nebuliser chamber, followed by mouthpiece or face mask, to the driveline.
5. Press mains switch on ( I ).Theswitchwillilluminateandtheequipmentcannowoperate.
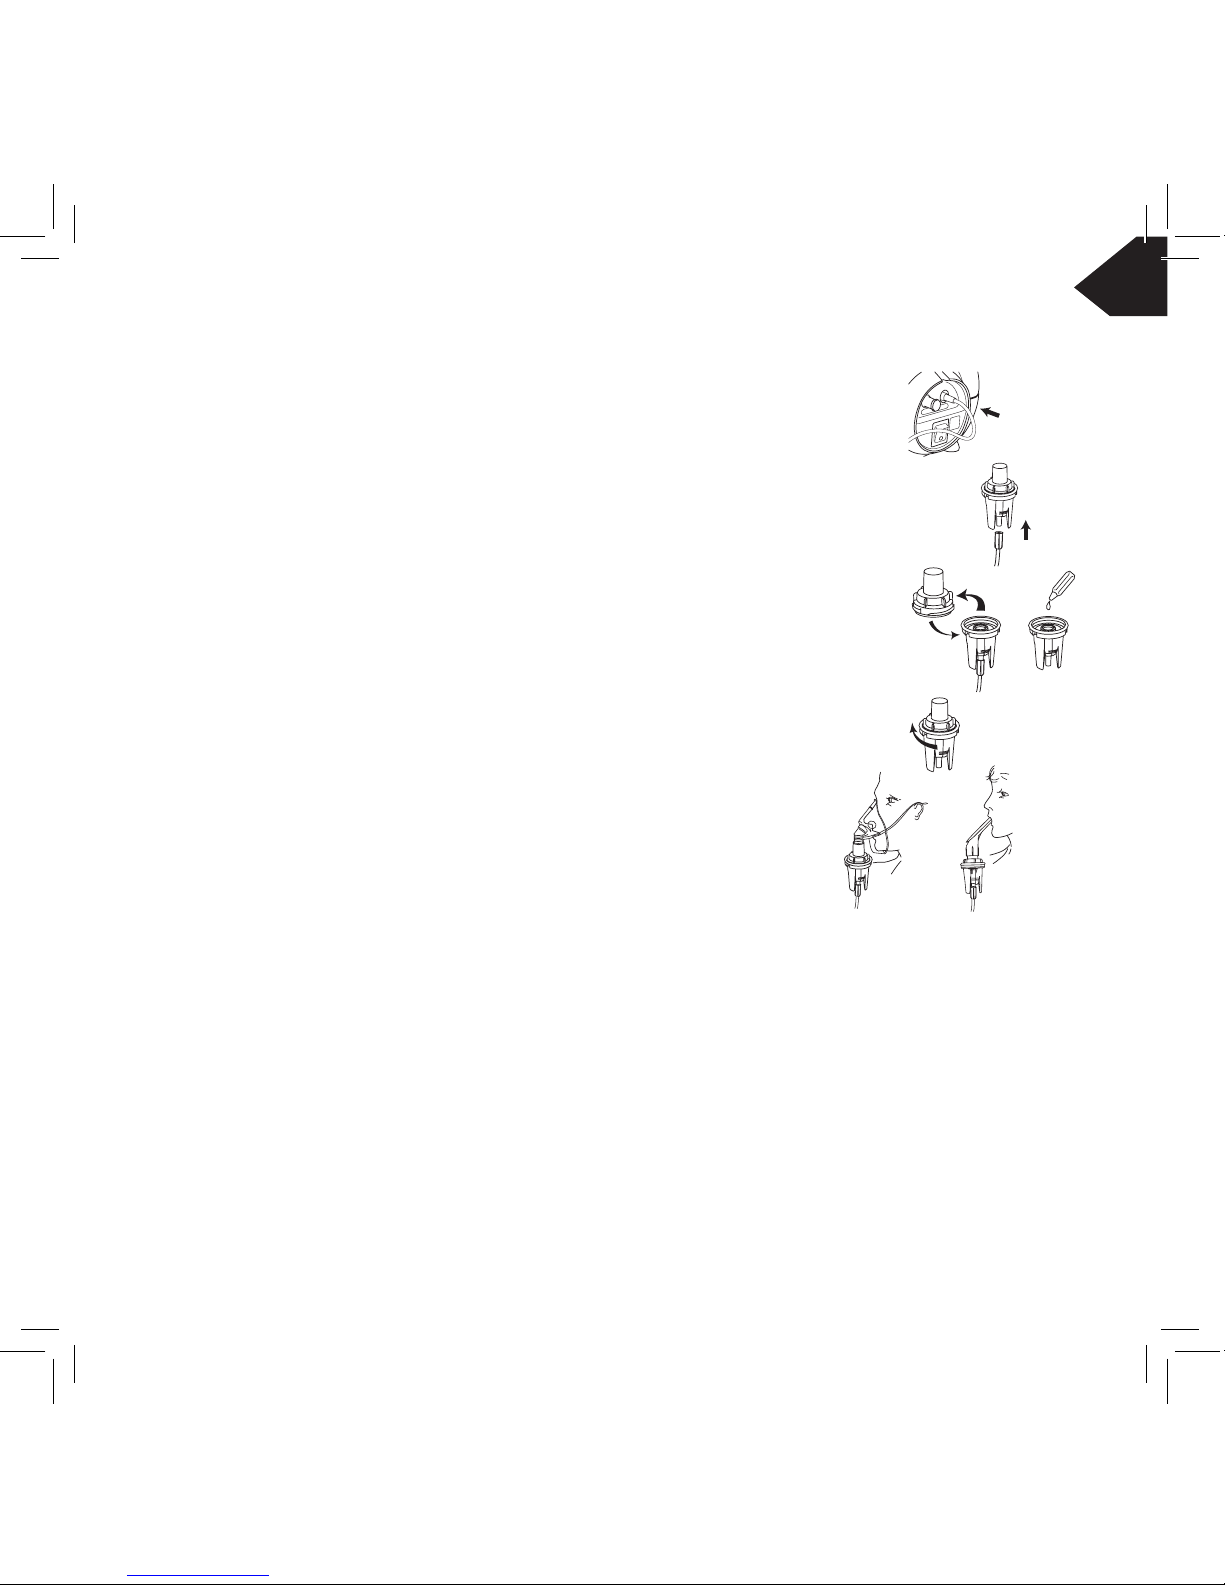
6.1 Filling the Nebuliser Chamber
For Single Patient Use
1.Connectoneendofthedrivelinetotheoutletlteronyourcompressor.
2. Connect the other end of the driveline to the bottom of the blue nebuliser cup.
3. Remove the nebuliser top from the cup and pour medication into the cup
(max. 10ml.)
4. Screw the top back onto the cup.
5. Connect either the face mask or mouthpiece to the nebuliser top.
All accessories must comply with EN 13544-1
6.2 Administering the Medication
Switch the compressor unit on. Sitting in an upright relaxed position, place mouthpiece into the
mouth (or face mask over the nose and mouth) and start breathing slowly and deeply. Do not try to
breathequickly.Ifyouhaveanyproblemsseekinstructionfromyourdoctororphysiotherapy
departmentatyourhospital.Switchothecompressorwhenthemistinghasstopped.Unplugthe
mains lead.
5
en
6
en
6.3 Cleaning
Inorderthatyoubenetfullyfromyourequipment,itisimportantthatthemachineandaccessories
are kept in a clean condition. Ensure that the medication chamber is taken apart and washed in warm
soapy water. Rinse and allow to dry after each use. The jet holes should be blown clear by attaching
the chamber to the air outlet from the compressor and running the machine for a couple of minutes.
Weadvisethatthetubeisdisconnectedfromboththeoutletlterandthechamberaftereachuseto
prolong the life of the connector.
6.4 Changing the Attachments
It is recommended that the following disposable items should be changed as follows:
Nebuliser chamber
Inletlter
Driveline change every 3 months
Face Mask
Mouthpiece
Outletlter change every 12 months
Only nebuliser chambers supplied or approved by CCI should be used.
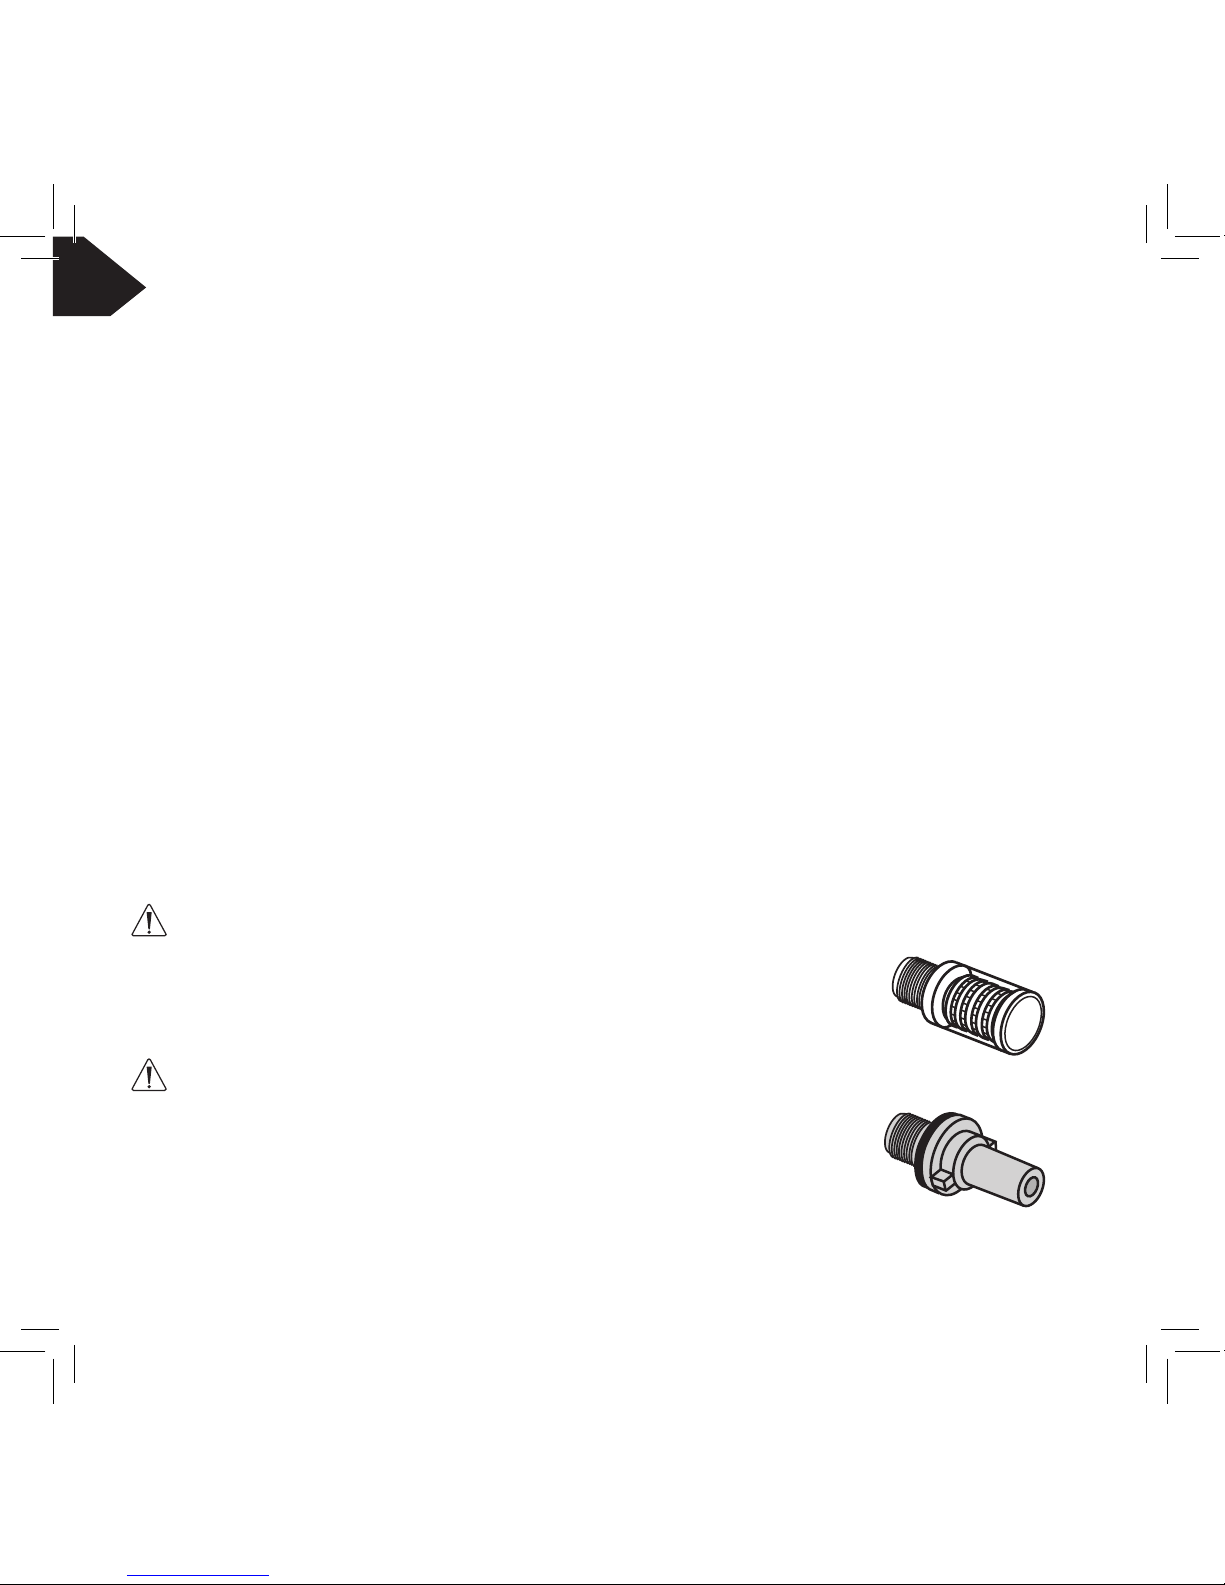
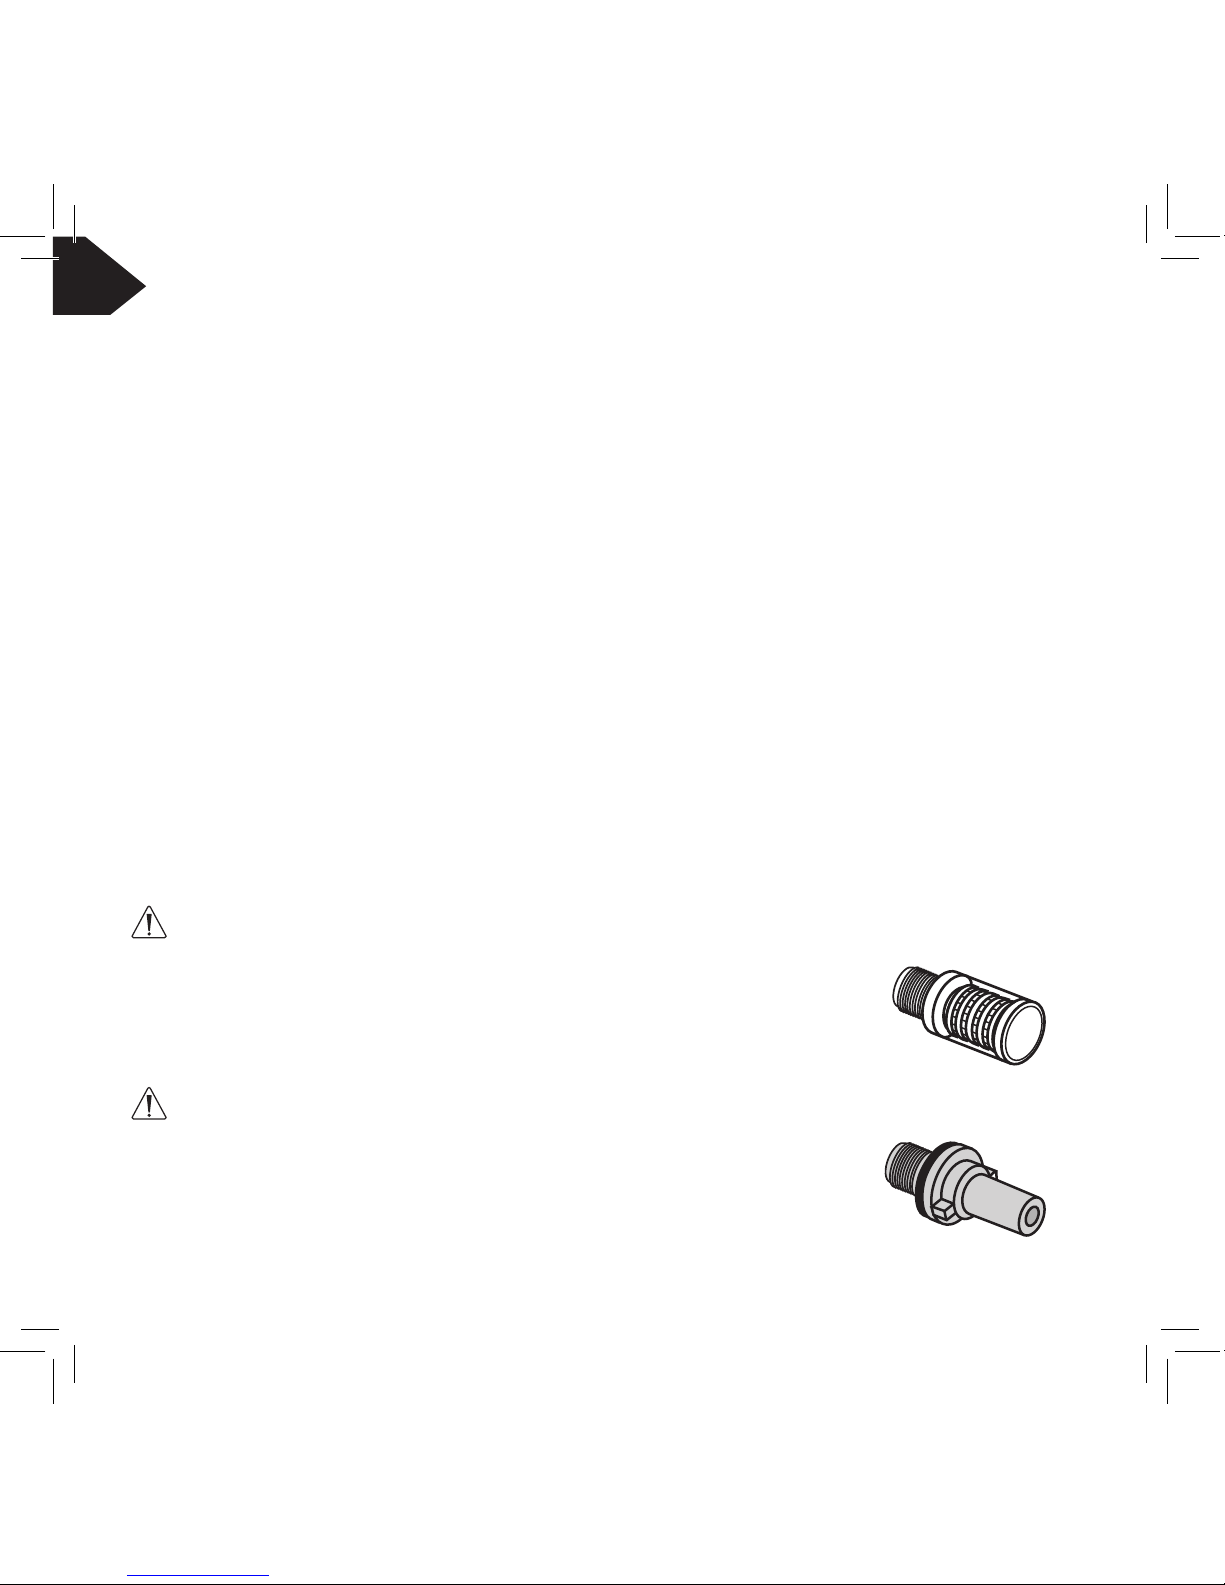
6.5 Replace lters for the Econoneb/Turboneb 2
Inlet lter:
Usingthelterspanner,unscrewyourused,white,inletlterinananti-clockwise
direction and discard.
Replacewithanewlter,ensuringyouhavethewhiteinletlter.
Screw the whiteinletlter,intotheleft-handholeonthefrontpanel,inaclockwise
direction,tighteningwiththelterspanner.
Outlet lter:
Usingthelterspanner,unscrewyourused,blue,outletlterinananti-clockwise
direction and discard.
Replacewithanewlter,ensuringyouhavetheblueoutletlter.
Screw the blueoutletlter,intotheright-handholeonthefrontpanel,ina
clockwisedirection,tighteningwiththelterspanner.
}
}

7
en
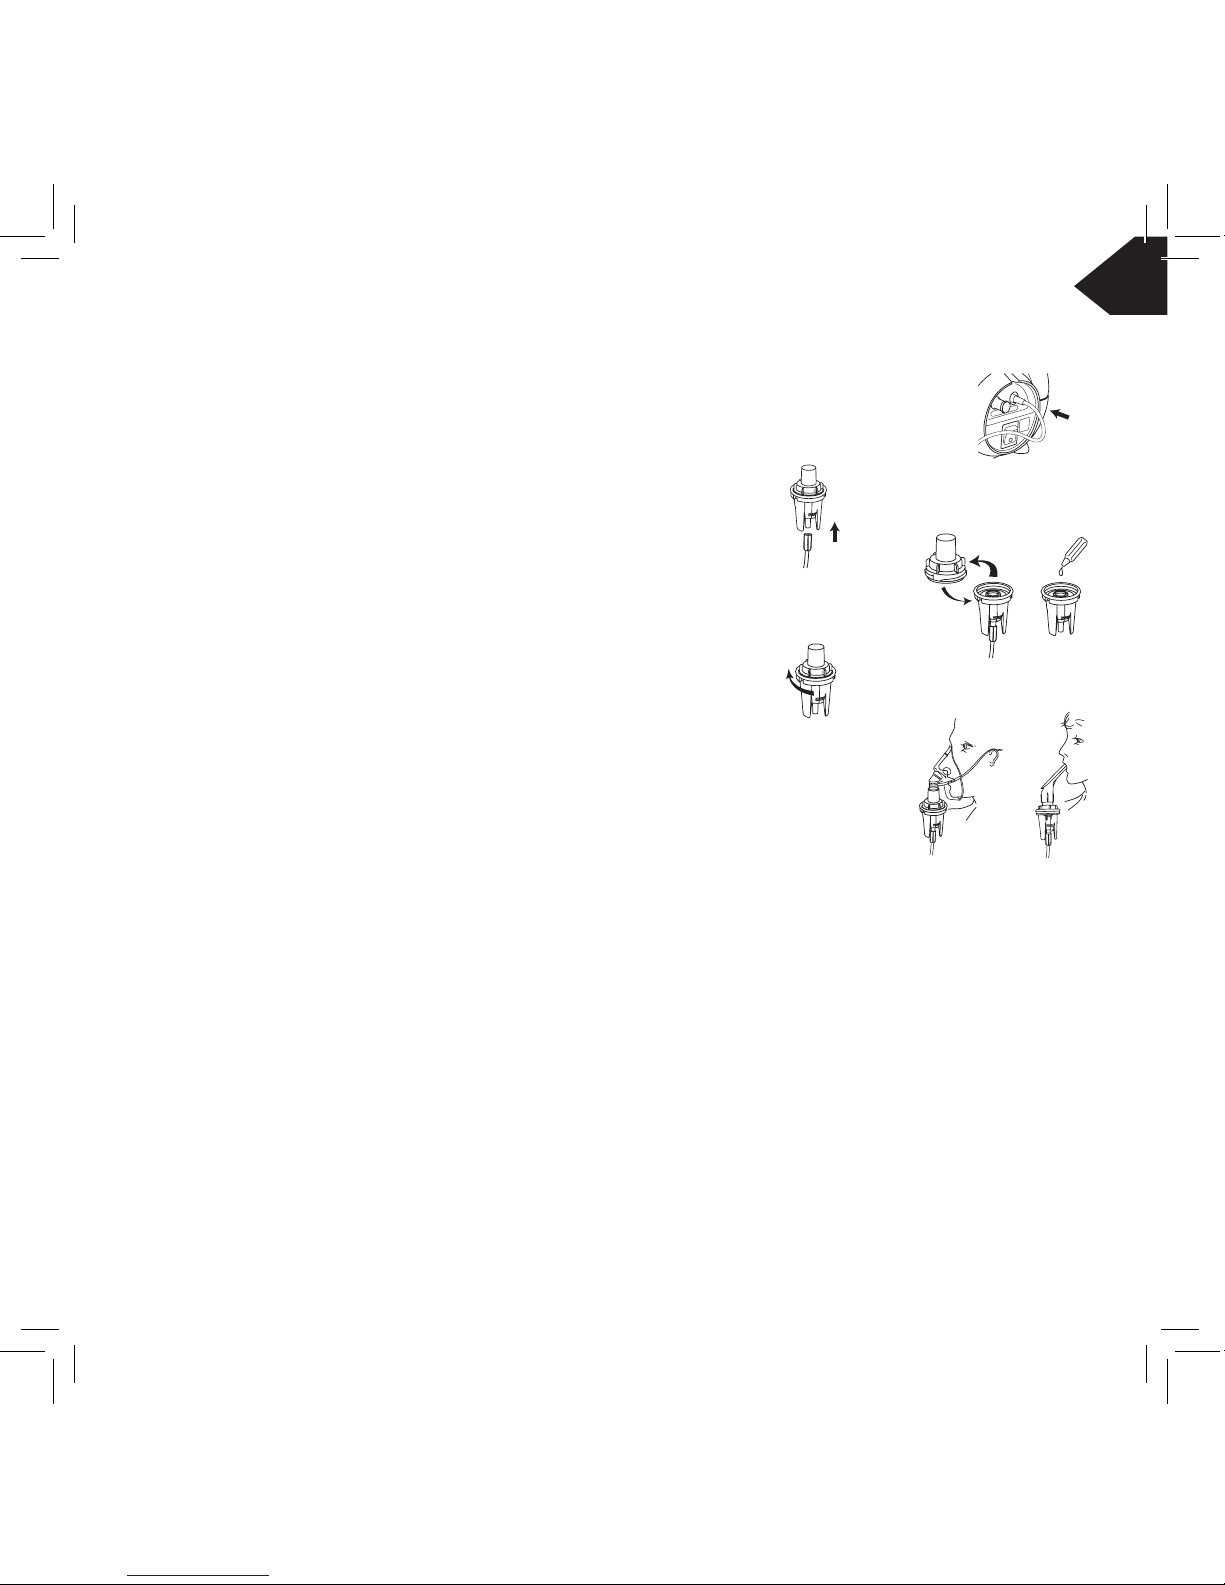
6.6 Replace Fuse
1.Switchoatmains.
2. Using a screwdriver or a coin, push and twist fuse in an anti-clockwise direction to
extract fuse.
3. Replace with new fuse.
6.7 Servicing
Inordertomaintainyourwarranty,yourunitisrequiredtobeservicedbyanapprovedserviceagent
every 12 months. Please contact the manufacturer or distributor for details of your nearest authorised
service agent.
Warning: Disconnect power supply before servicing. When servicing, use only identical replacement
parts.Notsuitableforusewithammableanaesthetics.
Caution: Do not immerse in water.
Please Note: When returning your nebuliser for servicing to Clement Clarke International, please
contact customer services for an authorised returns number.
Please do not return your consumables when returning your nebuliser for servicing.
The nebuliser case should be wiped clean with an alcohol wipe or similar, before returning
for servicing.
Please ensure wipe solution is compatible with ABS plastics.
7. Safety Precautions
• Alwaysdisconnectfromelectricitysupplybeforeundertakinganymaintainanceorcleaning.
• Neveroperatetheunitwhereitmaycomeintocontactwithwater.
Shouldthishappen,switchoatmainsandunplugimmediately.
• Neverblockairintakegrillsonthecarryingcase.
• Alwayskeepelectricalleadsclearofheatedsurfaces.
• Positiontheunitonacleansurface.Donotplaceoncarpetwherebrescanbedrawnintothe
unit when in use.
• Avoidusinginaroomwherepeoplesmoke.
• Storeinaclean,dry,dustfreeenvironmentatroomtemperature.
• Notsuitableforusewithammableanaestheticgases.
• Donotmodifytheequipmentoritsaccessoriesinanyway.
• Donotallowliquidtoenterthemainsinputsocket.
8
en
8. Troubleshooting
Problem Action
Air compressor will not If the green light in the mains switch is on, yet the motor does not
operate when switched on. function, there is an internal fault. The machine should be returned
to the point of purchase or an authorised person for examination.
Ifthegreenlight(s)ontheswitchesareo:
1. Check mains lead is securely connected each end.
2. For machines with a 3 pin plug (UK) remove and check the fuse
in the plug. Fuse - 3.15AL 25mm long.
3. Check mains fuse in the control panel. Fuse - T1AL 20mm long.
4. Disconnect unit from electricity supply. Check mains fuse in
the mains inlet socket.
Nebuliserchamberbubbles 1.Checkinletlter.Replaceifnecessary.
or produces little or no mist. 2. Wash nebuliser chamber. Replace if problem still occurs.
Time taken to nebulise 3. Check driveline tubing is not kinked or leaking. Replace if
signicantlyincreases. necessary.
4. Service compressor.
9. Technical Specications
AC2000 Econoneb Turboneb 2
Country UK/EU UK/EU UK/EU
Operating Voltage 220V-240V / 50Hz 220V-240V / 50Hz 230V / 50Hz
Power Consumption 62VA (260mA) 64VA (270mA) 68VA (296mA)
Fuse 1 x T1AL 20mm long 1 x T1AL 20mm long 1 x T1AL 20mm long
Normal Flow minow7L/min,max minow7L/min,max minow9.5L/min,max
ow9L/min@138kPa* ow9L/min@138kPa* ow10.5L/min@138kPa*
Weight 2.8kg (w/o starter pack) 2.7kg 2.7kg
Dimensions 375 x 235 x 115mm 210 x 185 x 185mm 210 x 185 x 185mm
Type Rating Class II BF Continuous Class II BF Continuous Class II BF Continuous
Sound Pressure Level 60 dbA approx. 63 dbA approx. 63 dbA approx.
*1kPa=0.01baror0.145psi
0.00
10.00
20.00
30.00
40.00
50.00
60.00
70.00
80.00
90.00
100.00
0.10 1.00 10.00 100.00
Cumulative Mass (%)
Aerodynamic Diameter (µm)
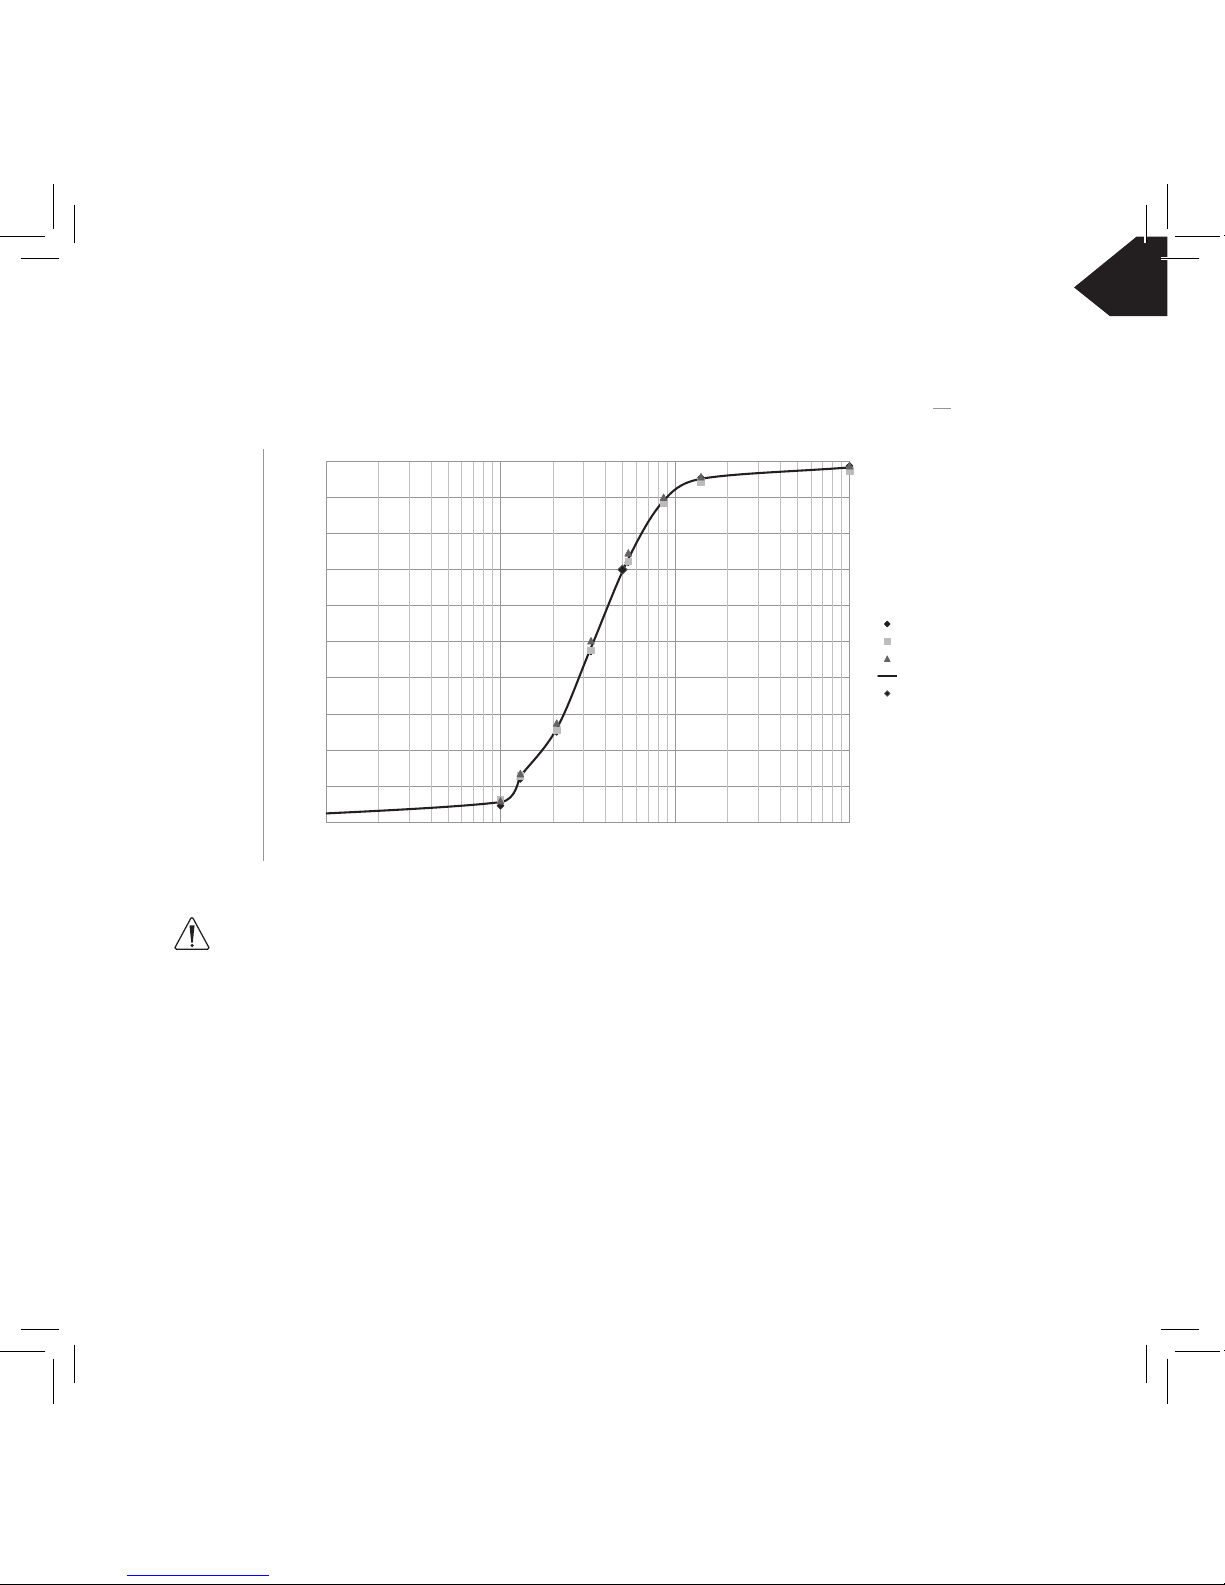
Results based on Melbourne Scientific BS EN 13544 - 1 Test Results (Ref AA118) 70% of particles <5µm
AC2000
Econoneb
Turboneb
Mean
Particles <5µm
Plot of Cumulative Size Distribution for Microneb III & Medix Compressors
9
en
10. Particle Size Distribution
Note:The performance information provided is in accordance with standard EN 13544-1 but may not apply
to drugs supplied in suspension or high viscosity form. In these cases, information should be sought from the
drug supplier.
11. Storage
The machine should be stored in a dust and smoke-free area.
Recommended: 0˚c-40˚c
RH: 15% - 95%
Pressure: 950hPa - 1020hPa
Plot of Cumulative Size Distribution for Microneb III & Medix Compressors
Results based on Melbourne Scientic BS EN 13544-1 Test Results (Ref AA118) 70% of particles <5µm
Cumulative Mass (%)
AC2000
Econoneb
Turboneb
Mean
Particles <5µm
Aerodynamic Diameter (µm)

10
en
12. Guarantee
Thisguaranteeisoeredtoyouasanextrabenetanddoesnotaectyourstatutoryrights.
CCI products are carefully designed, manufactured and inspected. CCI undertake to replace or repair any part
found to be defective in material or workmanship subject to the following terms and conditions:
The compressor/motor, excluding serviceable parts, are guaranteed for three years on condition that:
• theunitisservicedevery12monthsfortherstthreeyears
• cleanedandmaintainedinaccordancewiththeinstructions
• servicingisundertakenbyCCIapprovedengineers/agents
• onlyCCIapprovedpartsmaybeusedtoservicethisequipment.
This guarantee does not apply to:
• Thedisposablenebuliserchamber,driveline,facemask,mouthpieceandlters.
• Defectsarisingfrommisuse,negligence,impropermaintenance,accident,damageinshipmentorunauthorised
modicationorservice.
• Regularservicingat12monthlyintervals.
To register this guarantee please return the card, supplied with this handbook, within 15 days of purchase.
CCIshallnotbeliableforanythirdpartyorconsequentiallossordamageofwhatevernaturearisingfrom or in
connectionwiththisequipment.Shoulditbecomenecessarytomakeaclaimunderguarantee,returntheunit
properly packed (preferably in the original packaging) to the point of purchase (the manufacturer, shop, distributor
or outlet where the device was purchased).
Please include name and address, details of problem and proof of date of purchase (please retain original invoice).
Carriage costs to be paid by the customer.
13. EMC (Electromagnetic Compatibility) Declaration
With the increased number of electronic devices such as PC’s and mobiles, medical devices in use may be
susceptible to electromagnetic interference from these devices. Which may result in incorrect operation of
the medical device and create a potentially unsafe situation. Medical devices should also not interfere with
other devices.
InordertoregulatetherequirementsforEMCwiththeaimtopreventunsafeproductsituations,the EN60601-1-2
standardhasbeenimplemented.Thisstandarddenesthelevelsofimmunitytoelectromagneticinterferencesas
well as maximum levels of electromagnetic emissions for medical devices.
Medical devices manufactured by Clement Clarke International Ltd. conform to this EN60601-1-2 standard for both
immunity and emissions.
Nevertheless, special precautions need to be observed:
TheuseofaccessoriesandcablesotherthanthosespeciedbyClementClarkeInternationalLtd.,withthe
exception of cables sold by Clement Clarke International Ltd. as replacement parts for internal components, may
result in increased emission or decreased immunity of the device.
Themedicaldevicesshouldnotbeusedadjacenttoorstackedwithotherequipment.Ifadjacentorstacked use is
unavoidable, the medical device should be seen to operate normally as it should in this situation.
Further guidance regarding the EMC environment (in accordance with EN60601-1-2) in which the device should be
usedisavailableatwww.clement-clarke.com/medicalquality
14. Disposal Instruction
All Nebulisers, should NOT be disposed of with household waste as they are not biodegradable in
landllsites.TheyshouldNOTbeincinerated.
For safe disposal, take to:
The local (council/authority) environmental waste site, (in accordance with the European
Environmental directive).
For details contact your local authority/recycling centre.
IMPORTANT
The wires of the mains lead wire are coloured in accordance with the following code:
Blue - Neutral
Brown - Live
As these colours may not correspond to the coloured markings sometimes used to identify the
terminals in a plug, proceed as follows:
Connect the Blue wire to the terminal marked N or coloured black.
Connect the Brown wire to the terminal marked L or coloured red.
NB
Neither wire should be connected to the earth pin marked E or coloured green or yellow
and green.
15. Spares and Accessories
Fuse pack (2 x T1AL) . . . . . . . . . . . . . . . . . . . . . . . . . . . . . . . . . . . . . . . . . . . . . . . . . . . . . . . . . 3605534
Year Pack
Adult year pack . . . . . . . . . . . . . . . . . . . . . . . . . . . . . . . . . . . . . . . . . . . . . . . . . . . . . . . . . . . . L3605122
Contents: 4 x nebuliser chambers, 4 x drivelines, 4 x adult face masks, 1 x mouthpiece,
4xinletltersand1xoutletlter
Child year pack . . . . . . . . . . . . . . . . . . . . . . . . . . . . . . . . . . . . . . . . . . . . . . . . . . . . . . . . . . . . L3605123
Contents: as above but with child size face masks.
AC2000 only
Shoulder bag . . . . . . . . . . . . . . . . . . . . . . . . . . . . . . . . . . . . . . . . . . . . . . . . . . . . . . . . . . . . . . . 3607691
Adult year pack (2012) . . . . . . . . . . . . . . . . . . . . . . . . . . . . . . . . . . . . . . . . . . . . . . . . . . . . . . L3605125
Contents:asabovebutwithnooutletlter
Child year pack (2012) . . . . . . . . . . . . . . . . . . . . . . . . . . . . . . . . . . . . . . . . . . . . . . . . . . . . . . L3605124
Contents:asabovebutwithchildsizefacemasksandnooutletlter.
Please note: All our masks are made from a strong plastic with anti-microbial and low static
properties and are phthalate free.
11
en

12
fr
Table des Matières
1. IdenticationduProduit......................... Page13
2. Symboles . . . . . . . . . . . . . . . . . . . . . . . . . . . . . . . . . . . . Page 13
3. Introduction . . . . . . . . . . . . . . . . . . . . . . . . . . . . . . . . . . Page 13
4. Kit de Démarrage . . . . . . . . . . . . . . . . . . . . . . . . . . . . . . Page 14
5. Conseils d’entretien du nébuliseur . . . . . . . . . . . . . . . . . Page 14
6. Mode d’emploi . . . . . . . . . . . . . . . . . . . . . . . . . . . . . . . . Page 14
6.1 Remplissage du nébuliseur . . . . . . . . . . . . . . . . . . . Page 15
6.2 Administrating the Medication . . . . . . . . . . . . . . . . Page 15
6.3 Nettoyage . . . . . . . . . . . . . . . . . . . . . . . . . . . . . . . . Page 16
6.4 Changer les Accessoires . . . . . . . . . . . . . . . . . . . . Page 16
6.5
Remplacer les Filtres par l’Econoneb / le Turboneb 2
. . . Page 16
6.6 Remplacez le fusible . . . . . . . . . . . . . . . . . . . . . . . . Page 17
6.7 Entretien . . . . . . . . . . . . . . . . . . . . . . . . . . . . . . . . . Page 17
7. Consignes de sécurité . . . . . . . . . . . . . . . . . . . . . . . . . . Page 17
8. Dépannage . . . . . . . . . . . . . . . . . . . . . . . . . . . . . . . . . . Page 18
9. Spécicationstechniques ....................... Page18
10.Distributiongranulométrique ....................Page19
11. Stockage . . . . . . . . . . . . . . . . . . . . . . . . . . . . . . . . . . . . Page 19
12. Garantie . . . . . . . . . . . . . . . . . . . . . . . . . . . . . . . . . . . . . Page 20
13.DéclarationCEM(compatibilitéélectro-magnétique)... Page20
14. Fin de vie de votre produit - Recyclage . . . . . . . . . . . . . Page 21
15. Pièces et accessoires . . . . . . . . . . . . . . . . . . . . . . . . . . Page 21
13
fr
1. Identication du Produit
1. Filtre de sortie 5. O
2. Filtre d’entrée 6. Fusible (T1AL)
3. interrupteur 7. Cordon d’alimentation
4. On
3. Introduction
Cesdispositifsdenébulisationsontconçuspourdélivrerlemédicamentliquideprescritparvotre
médecinsouslaformed’unnbrouillardandetraitervotreétatrespiratoire.
Utiliser selon les instructions données par un médecin.
Veuillezlirelesinstructionsattentivementpourobtenirlebénécemaximumdusystème
de nébulisation.
2. Symboles
Consulter le manuel d’utilisation Fusible (T1AL)
Attention EquipementClasseII
Nepasmettrelapriseaucontactdel’eau EquipementdetypeBF
Testé et approuvé par Nemko, Norvège.
Filtre d’entrée Conforme avec IEC 60601-1 and IEC 60601-1-2
Filtre de sortie Ne pas jeter avec les ordures ménagères
Ce produit est conforme aux exigences de la directive sur les dispositifs médicaux (93/42/EEC)
Conformitévériéeparl’organismenotiéduRoyaume-Unipar0120(SGSUnitedKingdomLtd).
T1AL
0120

14
fr
4. Kits de Démarrage
fournisavecl’AC2000etl’Econonebquicontiennent:
1 nébuliseur 1 tubulure
1ltred’entrée 1cléàltre
1emboutbuccal 1masqueadulte
1masqueenfant
Le Turboneb 2 n’est pas fourni avec un kit de démarrage.
LeTurboneb2fournitleplushautdébitandenébuliserlesantibiotiquesvisqueuxet a été conçu
pour fonctionner sur secteur. Deux versions sont disponibles, UK et EURO, (soit la prise),
220-240V ~ 50Hz pour les deux.
Cecompresseuroreàl’utilisateurlaexibilitédechoisirlesaccessoireslesplusappropriéespour
les applications les plus exigeantes.
Remarque :
Les deux machines sont continuellement évaluées pour une utilisation répétée.
Veuillez-vousréféreràl’étiquettesituéeàlabasedelamachineandevérierquevousayezla
bonne tension d’alimentation.
5. Conseils d’entretien du nébuliseur
Mise en garde
1. Ne pas immerger l’appareil dans l’eau.
2. Utiliseruniquementselonlesprescriptionsdumédecin.
3. Nejamaisutiliserplussouventqueprescrit.
4. Silathérapien’aaucuneet,consulterunmédecin.
6. Mode d’emploi (Branchement alimentation)
1. Retirer précautionneusement le matériel de la boîte.
2. Connectezlecordond’alimentationàuneprisedecourant.
3. Connectezletuyauàlachedultredesortie.
4. Connectezlenébuliseur,assortid’unmasqueoudel’emboutbuccal,autuyau.
5. Mettez en marche ( I ).Theswitchwillilluminateandtheequipmentcannowoperate.
6.1 Remplissage du nébuliseur
Pour un patient unique
1.Connectezuneextrémitédelatubulureaultredesortiedevotrecompresseur.
2. Branchez l’autre extrémité au bas du nébuliseur.
3. Retirez le couvercle du nébuliseur et versez-y le médicament (max. 10 ml.)
4. Revissez le couvercle sur le nébuliseur.
5. Adaptezlemasqueoul’emboutbuccalsurlecouvercledunébuliseur.
Tous les accessoires doivent être conformes EN 13544-1
6.2 Administration du médicament
Allumez le compresseur. Asseyez-vous en position détendue et verticale, placez l’embout dans votre
bouche(ouunmasquesurlenezetlabouche)etcommencezàrespirerlentementetprofondément.
N’essayez pas de respirer rapidement. Si vous avez des problèmes prenez conseil auprès de votre
médecin ou de votre hôpital.
Éteignezlecompresseurquandlabrumisationacessé.Débranchezlecordond’alimentation.
15
fr
16
fr
6.3 Nettoyage
Andeproterpleinementdevotreéquipement,ilestimportantquelamachineetlesaccessoires
soientmaintenusàunbonniveaudepropreté.
Lenébuliseurcontenantlemédicament,doitêtredémontéetlavéàl’eausavonneuse.
Rincezetlaissezsécheraprèschaqueutilisation.Pourdégagerl’oricedugicleursituédansle
nébuliseur(etséchercedenier),xerlatubulurereliéeaunébuliseur(vide)surlasortied’airdu
compresseuretmettrelamachineenmarchependantquelquesminutes.
Nousconseillonsdedéconnecterlatubuluredultredesortieetdelachambreaprèschaque
utilisationandeprolongerlavieduconnecteur.
6.4 Changer les Accessoires
il est recommandé de changer les consommables comme suit :
Nébuliseur
Filtre d’entrée
Tubulure changer tous les 3 mois
Masque
Embout
Filtre de sortie changer tous les 12 mois
Seuls les nébuliseurs fournis et approuvés par CCI doivent être utilisés.
6.5 Remplacer les Filtres par l’Econoneb / le Turboneb 2
Filtre d’entrée :
Àl’aidedelaclédultre,dévissezvotreltred’entrée,blanc, usagé dans le sens
contraire aux aiguilles d’une montre et mettez-le au rebut.
Remplacez-leparunnouveaultre.Assurez-vousquevousdisposezdultre
d’entrée blanc.
Vissezleltred’entréeblanc dans le trou de gauche sur le panneau avant, dans
lesensdesaiguillesd’unemontre,enleserrantàl’aidedelaclédultre.
Filtre de sortie :
Àl’aidedelaclédultre,dévissezvotreltredesortie,bleu, usagé dans le sens
contraire aux aiguilles d’une montre et mettez-le au rebut.
Remplacez-leparunnouveaultre.Assurez-vousquevousdisposezdultrede
sortie bleu.
Vissezleltredesortiebleu dans le trou de droite sur le panneau avant, dans le
sensdesaiguillesd’unemontre,enleserrantàl’aidedelaclédultre.
}
}

17
fr
6.6 Remplacez le fusible
1. Eteignez l’interrupteur.
2. Avec un tournevis ou une pièce de monnaie, appuyez et tournez dans le sens contraire des
aiguilles d’une montre pour extraire le fusible.
3. Remplacez le fusible.
6.7 Entretien
Andeconservervotregarantie,votreappareildoitêtreentretenuparuntechnicienagréétousles
12 mois. Contactez le fabricant ou le distributeur pour plus d’informations sur l’agent agréé le plus
proche.
AVERTISSEMENT : Débrancher l’alimentation avant toute intervention. Lors de l’entretien, utilisez
uniquementdespiècesderechangeidentiques.Neconvientpaspouruneutilisationavecdes
anesthésiquesinammables.
ATTENTION : Ne pas immerger dans l’eau.
A noter : Avant tout retour du nébuliseur pour entretien chez Clement Clarke International veuillez
contacternotreserviceclientsquivousfourniraunnumérod’autorisationderetour.
Ne renvoyez pas vos consommables avec votre nébuliseur.
Lavalisedunébuliseurdoitêtrenettoyéeavecuntissuimbibéd’alcoolouéquivalent,avant
tout retour.
VeuillezSVPvousassurerquelasolutionutiliséeestcompatibleaveclesplastiquesABS.
7. Consignes de sécurité
• Débrancherl’appareilavantd’entreprendresonentretienounettoyage.
• Nejamaisfairefonctionnerl’appareils’ilpeutentrerencontactavecl’eau.
Si cela se produit, éteignez l’appareil et débranchez-le immédiatement.
• Nejamaisbloquerlesgrillesdeprised’airdelamallette.
• Eloignerlescâblesélectriquesdetoutesourcedechaleur.
• Placezl’appareilsurunesurfacepropre.Nepasplacersuruntapiscardesbrespeuvents’insérer
dans la machine lors de l’utilisation.
• Évitezd’utiliserledispositifdansunepièceoùlesgensfument.
• Stockerdansunenvironnementpropreetsec,exemptdepoussièreetàtempératureambiante.
• Neconvientpaspouruneutilisationavecdesgazanesthésiquesinammables.
• Nepasmodierl’appareilousesaccessoiresdequelquesortequecesoit.
• Nepaslaisserdeliquideàproximitédelaprise.

18
fr
8. Dépannage
Problème Action
Lecompresseurd’airne Silalumièrevertedel’interrupteurestalluméemaisquelemoteur
fonctionnepas,bienqu’il nefonctionnepas,ilyaunedéfaillanceinterne.L’appareildoitêtre
soitallumé. retournéaupointd’achatouàunepersonnecompétentepour
contrôle.
Si la lumière (s) verte (s) de l’interrupteur est éteinte (s) :
1.Vériezquelecâbled’alimentationestsolidementreliéà
chaqueextrémité.
2.pourlesmachinesavecunecheà3broches(UK)Retirezet
vériezlefusibledelaprise.Fusible-3.15AL25mmdelong.
3.Vériezlefusiblesurletableaudecommande.
Fusible - T1AL 20mm long.
4.Débranchezl’appareil.Vérierlefusible.
Lenébuliseurproduitdes 1.Vérierleltred’entrée.Remplacersinécessaire.
bulles ou fournit peu ou fournit 2. Nettoyez le nébuliseur. Remplacer si le problème persiste.
peu ou aucun brouillard. 3.Vérierquelatubulurenefuitpasouqu’ellen’estpaspliée.
Le temps de nébulisation s’est Remplacer si nécessaire.
signicativementallongé 4.Réparationducompresseur.
9. Spécications techniques
AC2000 Econoneb Turboneb 2
pays UK/EU UK/EU UK/EU
Voltage 220V-240V / 50Hz 220V-240V / 50Hz 230V / 50Hz
Consommation 62VA (260mA) 64VA (270mA) 68VA (296mA)
Fusible 1 x T1AL 20mm de long 1 x T1AL 20mm de long 1 x T1AL 20mm de long
Débit nominal Min 7 L/min, Max Min 7 L/min, Max Min 9.5 L/min, Max
9L/min@138kPa* 9L/min@138kPa* 10.5L/min@138kPa*
poids 2,8kg (sans le pack de démarrage) 2,7kg 2,7kg
Dimensions 375 x 235 x 115mm 210 x 185 x 185mm 210 x 185 x 185mm
Classication ClassIIBFContinu ClassIIBFContinu ClassIIBFContinu
Niveau sonore 60 dbA approx. 63 dbA approx. 63 dbA approx.
*1kPa=0,01barou0,145psi
This manual suits for next models
2
Table of contents
Languages:
Other MEDIX Medical Equipment manuals


