Reichert IOPac Advanced User manual

ADVANCED
User’s Guide
®

2009 Reichert, Inc. Reichertis a registered trademark of Reichert, Inc.
The information contained in this document was accurateat time of publication. Specifications subject to change without
notice. Reichert, Inc. reserves the right to make changes in the product describedin this manual withoutnotice and
without incorporating thosechangesin any products already sold.
No part of this publication may be reproduced, stored in a retrieval system, or transmitted in any form or by any means,
electronic, mechanical, recording, orotherwise, without the prior written permissionof Reichert, Inc.
2
16012-101 Rev. C

16012-101 Rev. C 3
Table Of Contents
Warnings & Cautions............................................................................................................................................................................. 4
Symbols................................................................................................................................................................................................... 6
Explanation of Symbols............................................................................................................................................................ 6
Introduction ............................................................................................................................................................................................ 7
Disclaimer and Limitation of Responsibility.............................................................................................................................. 7
FCC Statement......................................................................................................................................................................... 7
Copyright .................................................................................................................................................................................. 7
User Interface........................................................................................................................................................................... 8
IOPac Setup............................................................................................................................................................................................ 9
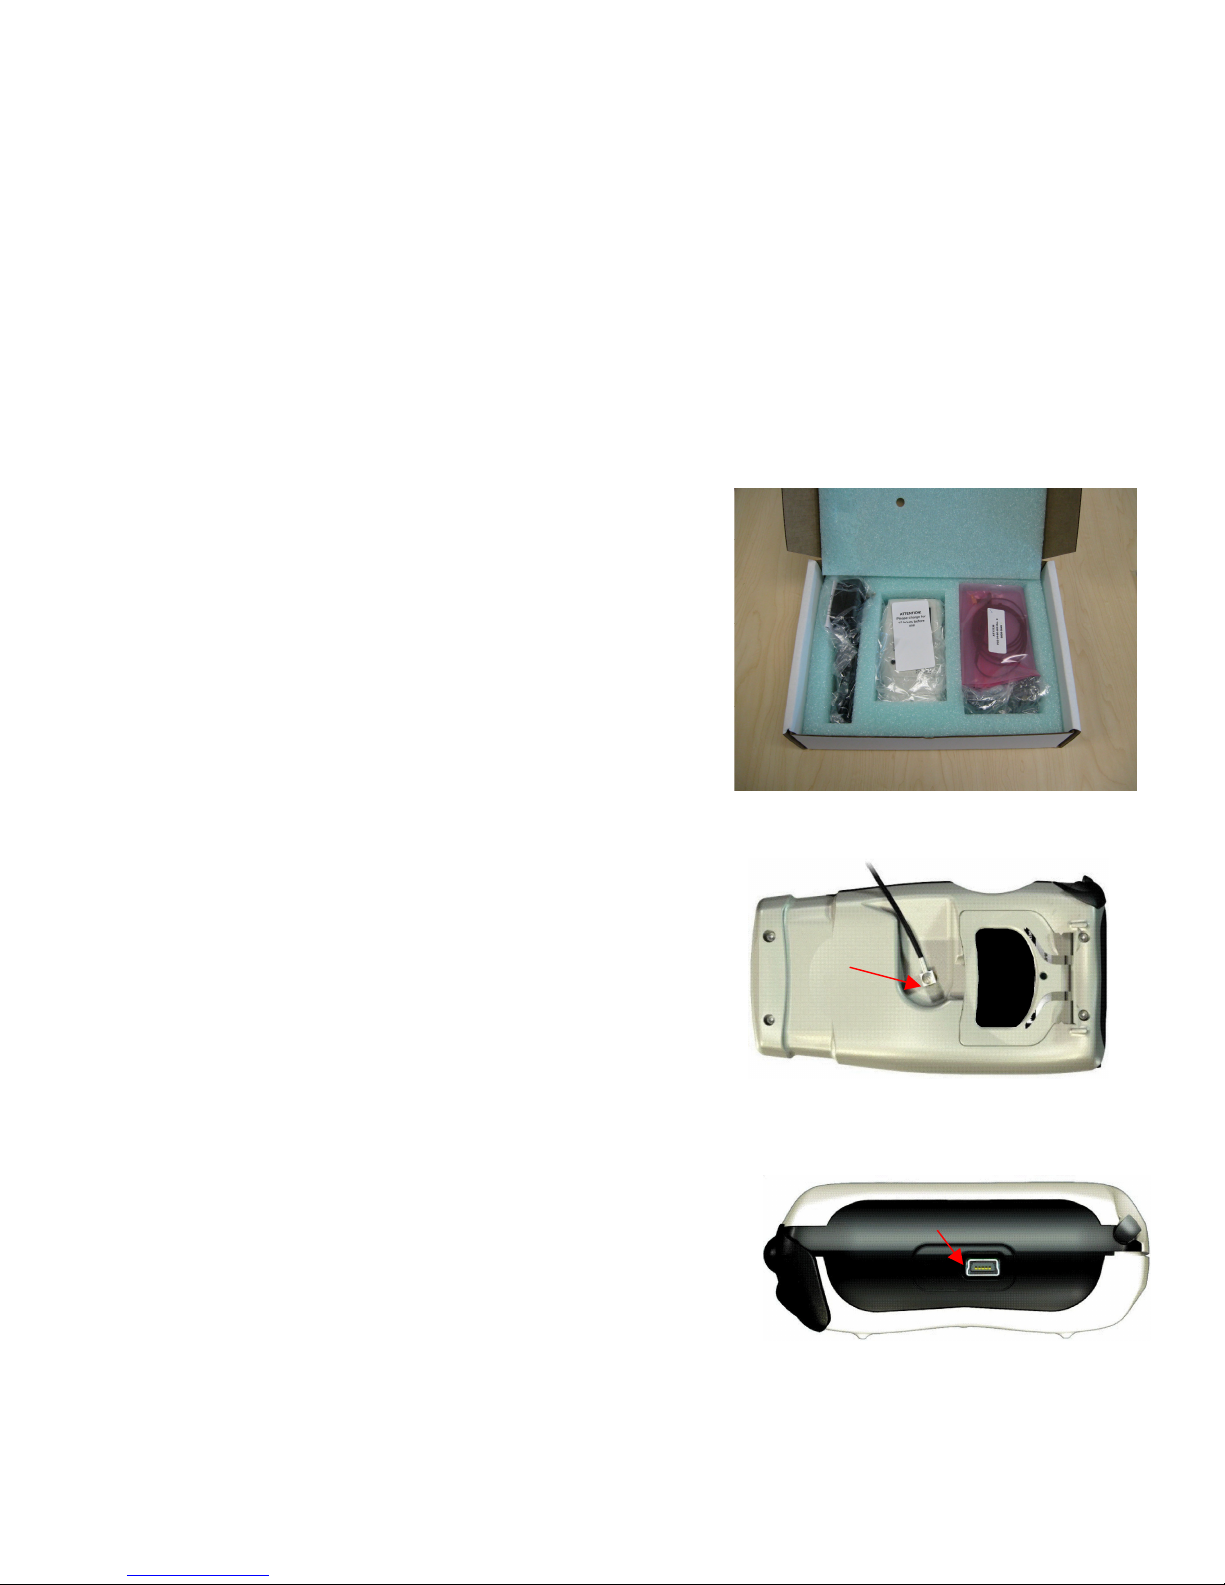
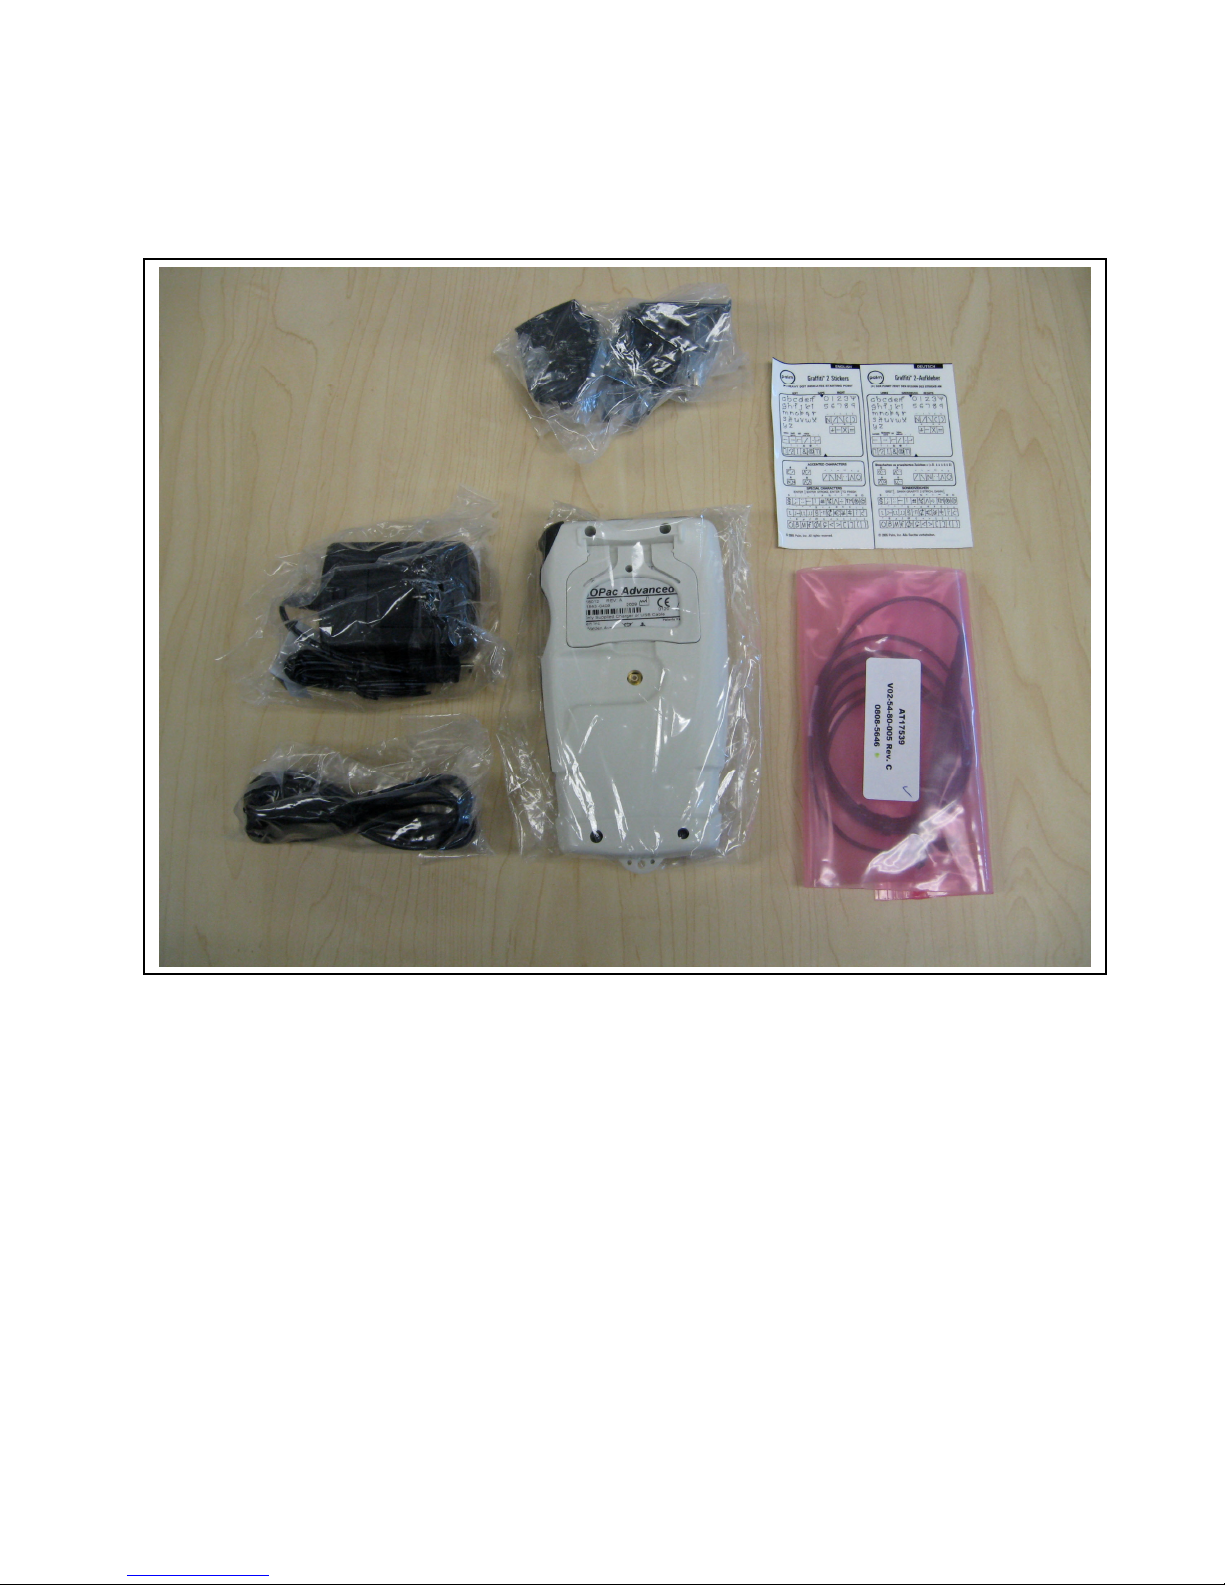
Unpacking Instructions ............................................................................................................................................................. 9
Parts Identification.................................................................................................................................................................. 10
Instructions for Use.............................................................................................................................................................................. 11
Turning On and Off................................................................................................................................................................. 11
Start Measuring Central Corneal Thickness (CCT) Measurement......................................................................................... 12
Risk Estimate.......................................................................................................................................................................... 15
View Database........................................................................................................................................................................ 17
Using the Refractive Module................................................................................................................................................... 18
System Menu Screen........................................................................................................................................................................... 19
Check Calibration ................................................................................................................................................................... 19
Delete Database..................................................................................................................................................................... 20
IOP Formulas.......................................................................................................................................................................... 20
IOP Formula References........................................................................................................................................................ 20
IOP Corrections Table............................................................................................................................................................ 20
About Pachymeter.................................................................................................................................................................. 21
HotSync the IOPac ............................................................................................................................................................................... 21
Archive Database ................................................................................................................................................................... 21
Printer Data........................................................................................................................................................................................... 22
Printing the Examination Information...................................................................................................................................... 22
Printing Multiple Exams at One Time ..................................................................................................................................... 22
Printing the Examination Information (Continued).................................................................................................................. 23
Cleaning................................................................................................................................................................................................ 24
External Cleaning ................................................................................................................................................................... 24
Probe Cleaning....................................................................................................................................................................... 24
Troubleshooting................................................................................................................................................................................... 25
Frequently Asked Questions................................................................................................................................................... 25
General Specifications......................................................................................................................................................................... 27
Specifications.......................................................................................................................................................................... 27
Storage Conditions................................................................................................................................................................. 27
Operating Conditions.............................................................................................................................................................. 27
Acoustic Output Powers ......................................................................................................................................................... 28
Definitions............................................................................................................................................................................... 28
Tissue Exposure To Ultrasound Energy................................................................................................................................. 29
Appendix A – Installing IOPac Support on a Windows PC (HotSync)............................................................................................. 30
Appendix B - Procedures forRetiring a Full IOPac Database.......................................................................................................... 33
Appendix C - Procedures forReinstalling Missing IOPac Program Files....................................................................................... 34
End User Software License Agreement............................................................................................................................................. 35
Reichert Warranty................................................................................................................................................................................. 36

416012-101 Rev. C
Warnings & Cautions
Reichert, Inc. (Reichert) is not responsible for thesafety and reliability ofthis instrument when:
• Assembly,disassembly, repair, ormodification is made by unauthorized dealers or persons
• Instrument is not used in accordance with this User’s Guide
WARNING: AN INSTRUCTION THAT DRAWS ATTENTION TO RISK OF INJURY OR DEATH.
WARNING: United States Federal law and European regulations require that this device be purchased only by a physician
or a person acting on behalf of a physician. Only operators trained in the use of ophthalmic instruments that
contact the eye should use this device. Reichert, Inc. cannot beheld responsible for any damage or injury
that results from a failure to follow directions in the user’s manual. Please ensure that you are entirely familiar
with the correct procedures for operating the instrument before use!
WARNING: In order to prevent patient-to-patient transfer of infection, after each use disinfect theprobe following
accepted local clinical procedures regarding the use of disinfectants. Any clinically approved chemical
disinfectant can be used. After each patient, we recommend wiping the probe with a cotton swab soaked in
70% isopropyl alcohol, and thenimmersing the probe tip for 10 minutes in 70% isopropyl alcohol or an
equivalent locally approved disinfectant. The probe and cable may be immersed in liquid, but the connector
and main unit CANNOT be immersed in ANY liquid. Do not sterilize the probe using ETO, Autoclaving, or
irradiation. After cleaning, rinse the end of the probe thoroughly with sterile distilled water. Dry the probe
with a lint free cloth or tissue. Always store the probe when not being used in the provided holder to protect
it. DO NOT use the probe as a stylus. Do not attempt to use the IOPac if there is any indication the Probe tip,
body, or cable has been damaged and/or their physical integrity has been compromised. If the probe tip has
made contact with anything between applanations, repeat disinfectingprocedure.
WARNING: Measurements should not be attempted when ocular integrity is questionable. The handheld transducer must
touch the eye during operation. Consequently, the operator needs to exhibit care in manipulating the
transducer. Force should not be exerted against the eye – the transducer tip only needs to lightly touch the
cornea.
WARNING: To ensure patient isolation from high electrical potential, DO NOT use the IOPac on a patient when the
instrument is charging. IOPac charging must only take place at a distance of at least 1.5 m from the patient.
WARNING: Do not use any transducer probe on the IOPac other than the ones supplied expressly for this purpose. Other
transducers may not generate acceptably low ultrasound energy levels.
WARNING: Care should be exercised when handling the transducer, to avoid breaking the tip at the elbow (angled
transducers only). Extreme force should never be applied when removing orstoring the transducer in its
holding clip.
CAUTION: AN INSTRUCTION THAT DRAWS ATTENTION TO THE RISK OF DAMAGE TO THE PRODUCT.
CAUTION: Do not install any additional software. Although this product uses the Palm operating system, it is a dedicated
Pachymeter and must not be used for any other purpose. The use of this device with any software other than
that supplied with the Pachymeter has not been validated. The manufacturer or distributor cannot be held
responsible for any failures resulting from the use of unauthorized software.
CAUTION: The IOPac is a precision ultrasound-measuring instrument. Protect the instrument against dust and moisture,
and avoid physical shocks and strong forces. Do not exert excess pressure onto the screen.
CAUTION: It is prudent to minimize thepatient’s exposure to ultrasound energy to a level As Low As Reasonably
Achievable (ALARA). With the IOPac, there are no adjustments that alter the amount of ultrasound energy
emitted by the transducer. However, by limiting scans to the minimum needed to obtain desired diagnostic
information, the patient’s exposure to ultrasound energy will be minimized. Preparing the patient before
scanning by advising him or her on what to expect is one way of reducing the number of scans that need to be

16012-101 Rev. C 5
performed. The American Institute of Ultrasound in Medicine (AIUM) has a publication “Medical Ultrasound
Safety” (1994) which has more information on this topic.
CAUTION: This device has not been tested in conjunction with HF surgical (e.g. electrocautery) equipment and should
not be used with such equipment.
CAUTION: When removing the protective cap from the transducer be careful not to pull too hard. Let some air under the
lip of the cap by lifting gently with a fingernail and it should come off easily.
CAUTION: Always ensure the IOPac is charged sufficiently. USE ONLY THE SUPPLIED PALM CHARGER PROVIDED
WITH THE UNIT, or a USB CABLE (such as the one supplied with the IOPac) CONNECTED TO A COMPUTER.
We recommend a minimum charge level of 50%. The IOPac is based on a Palm handheld computer that uses a
rechargeable battery to maintain stored data andprograms. Like similar computers, if the battery becomes
too drained it will not be able to function. At 40% battery level the IOPac software application will not start,
and at 20% the IOPac will not power on until it has been charged. To ensure the IOPac is always ready for use,
a good guideline is to charge it overnight at least weekly and to leave it attached to a charger when not in use
for longer periods.
CAUTION: Protect your data by archiving it. Good practice is to perform regular hot sync operations as described in
Appendix A of this Manual to archive your data in a secure location on your PC.
CAUTION: Changes or modifications tothis equipment, not expressly approved by the manufacturer, could void the
warranty and the user's authority to operate the equipment.

616012-101 Rev. C
Symbols
Explanation of Symbols
Type BF Patient-appliedparts are insulated.
Catalog Number
Serial Number
Attention, See Instructions for use
Date of Manufacture
Waste of Electrical and Electronic Equipment
Conformity with mandatory European
Safety requirements
SN

16012-101 Rev. C 7
Introduction
Congratulationson your purchase of the IOPac Advancedpachymeter.
This User’s Guide is designed as a training and reference manual. We recommend you carefully read and follow the
steps in this guide to ensure optimum performance from your new instrument.
Please retain this guide for future reference and to share with other users. Additional copies can be obtained from your
authorized Reichert, Inc. dealeror contact our Customer Service department directly at:
Tel: 716-686-4500
Fax: 716-686-4555
E-mail: info@reichert.com
Disclaimer and Limitation of Responsibility
Reichert, Inc. assumes no responsibility for any damage, loss or claims which may result from a failure to follow
the instructions contained in this Technical Manual. Reichert, Inc. assumes no responsibility for any damage or
loss caused by deletion of data as result of malfunction, dead battery, or repairs. Be sure to make copies of all
important data on other media to protect against data loss. Reichert, Inc. assumes no responsibility for any
damage, loss or claims, which may result from the use of the IOP correction formulas or lookup table, whether
predefined in the software or customized by the user. The use of any specific IOP correction algorithm is
entirely the responsibility of the pachymeter operator.
IMPORTANT Please read the End User Software License Agreement with this product before using the accompanying
software program. Using any part of the software indicates that you accept the terms of the End User Software License
Agreement
FCC Statement
This device complies with part 15 of the FCC rules. Operation is subject to the following two conditions:
(1) This device may not cause harmful interference and (2) this device must accept any interference received, including
interference that may cause undesired operation.
Copyright
Graffiti®, HotSync®, the Palm®logo, and Palm OS®are registered trademarks, and Palm™ and Palm Powered™ are
trademarks of Palm, Inc. Canon PIXMA iP-90 (printer) is a trademark of CanonCorporation.
IOPac is a registered trademarkof Reichert, Inc.

816012-101 Rev. C
Introduction (Continued)
User Interface
The IOPac is a Palm Powered device. For documentation on the Palm interface, Graffiti text entry system and other
general aspects of the Palm operating system please refer to the help file located on the Palm CD thatis supplied with the
IOPac.
Data can be entered by eitherusing the Graffiti interface or theinternal keyboard. Tapping 123 located on the lower right
corner on the IOPac screen activates the numeric keyboard. Tapping ABC located on the lower left corner on the IOPac
screen activates the alphabetic keyboard.
You can access the Graffiti help when in the main screen of the IOPac program by swiping the stylus from the bottom of
the screen tothe top of thescreen.
NOTE: You may adjust the screen contrast by tapping on the icon. Tap to the left or right of the slider to adjust the
contrast in small increments or drag the slider to change the contrastin large increments.
Contrast
Numeric Keyboard
Alphabetic Keyboard
Text Entry Area
Number Entry Area
Time and Date

16012-101 Rev. C 9
IOPac Setup
Great care has been taken to deliver your new IOPac Advanced pachymeter safely to you. The container and packaging
was specially designed totransport this unit. Please retain thispackaging for any future use if transportation is required.
This IOPac Pachymeter is intended for measuring corneal thickness of the human eyeusing ultrasound technology. It
features a 20 MHz probe capable of an accuracyof ±5 µm. The measurement takes 1– 2 seconds. A successful
measurementis announced by a high-pitch tone. An unsuccessful measurement (caused, for example, by the probe not
being placed correctly) isannounced by alower pitch tone. The IOPac incorporatesmultiple corrected Intraocular
Pressure (IOP) formulas, as well as the ability for the end user to create their owncustom IOP formula. The IOPac is a
portable battery operated device, can store approximately 1000 exams internally and has printing capability viainfrared to
an optional printer. The IOPac can also backup examination information toyour computer via theprovided USB cable
and features the popular and userfriendly Palm OS interface.
Unpacking Instructions
The instrument ispackaged in a shipping container to protect the
instrument from damage duringshipment. Please read the User’s
Guide before operating the unit.
Please unpackagethe instrument in the following manner:
1. Open the box and remove the accessories from the foam
packaging. Refer to the figure “IOPac inBox.”
•IOPac Advanced
•Ultrasound Probe
•Charging Power Cord
•Power Adapters
•USB Cord
•Palm Stylus
•Graffiti Labels
•Palm Software
•User’s Guide
2. Plug the Ultrasound Probe into the back ofthe IOPac. Refer
to the figure “IOPac Probe Connection.”
3. Plug the Power Adapter into the charging port and let it charge
the IOPac’s internal battery for 12 uninterrupted hours. Refer
to the figure “IOPac Charging Port Connection.”
Note: The battery icon at the top of the Home screenindicates how
fully charged thebattery is. When the battery icon is all blue it is
fully charged.
Note: At a battery level of40% and lower the IOPac software
application will not start, and at 20% the IOPac will not power on
until it has been charged.
IOPac in Box
IOPac Probe Connection
Probe
IOPac Charging Port Connection
Charging Port

10 16012-101 Rev. C
IOPac Setup (Continued)
Parts Identification
1
2
3
4
5
6
Parts:
1. Charging Power Cord
2. USB Cord
3. Power Adapters
4. IOPac Advanced
5. Graffiti Labels
6. Ultrasound Probe
7. Stylus (attached to the Palm)
8. Manuals and Software Disks (not shown)

16012-101 Rev. C 11
Instructions for Use
Turning On and Off
The power button is located on the front of the IOPac. Press it once to turn the instrument ON or OFF. The IOPac has
an inactivity timer set to3 minutes after which it will shut off. Data will NOT be lost if the unit shuts off automatically.
When turning on the instrument forthe first time the main screen will appear.
From the main screen you can select from Start Measuring, Risk Estimate, View Database, or access secondary
functions like calibration.
Power Button
Stylus

12 16012-101 Rev. C
Instructions for Use (Continued)
Start Measuring Central Corneal Thickness (CCT) Measurement
Preparation of the Patient
The patient should be in a seated position. It may be helpful to explain that they should relax and attempt not to blink as
the probe is going to gently contact their eye. A drop of ocular anesthetic should be placed in the eye or eyes that are
going to be measured. If the patient has dry eyes, a moisturizing dropmay also be used.
Entering a New Examination
On the start up screen, Tap: Start Measuring.
Note: The buttons are laid out where possible to facilitate tapping with your fingers. For data entry the stylus is the
recommended method.
Examination Registry – Screen
Tap on Operators located on the upper right side of the screen. From the pull down menu select an existing operator or
add a new operator name.
Add a new operator by selecting (add new name). A box will appear where you can input the operator’s name. Once
patient information is complete press: OK
Tap on the Recall button to retrieve the last patient information.

16012-101 Rev. C 13
Instructions for Use (Continued)
Start Measuring Central Corneal Thickness (CCT) Measurement (Continued)
Acquiring a Measurement
Caution: Do Not use the ultrasound probe as a stylus. This will cause damage to the probe and void the IOPac warranty.
The Measuring screen shows both the right (OD) andleft (OS) eyes. The instrument will default to the right(OD) eye.
You can switchthe eye that you want tomeasure by tapping either theOD or OS box at the top of the screen.
To start measuring, tap: Start. You will hear a beeping sound tolet you know the
Pachymeter is taking measurements. You may stop measurement acquisition
early by tapping the Stop button. Tapping the Cancel button will cancel measuring
and bring you back to the main screen.
Place the tip of the probe on thecenter of the cornea. Once the probe is
perpendicular to thecornea the Pachymeter will acquire up to8 (eight)
measurements. A successful measurement issignaled by a high tone. An
unsuccessfulmeasurement (caused, for example, by the probe not being placed
correctly) is signaled by a lower pitched tone.
After a set of measurements ismade the eye selection will
automatically switchand will be highlighted in blue. To
change selection, tap on theappropriate column box to
select the left or right eye and follow the above procedure.
A mean thickness in microns and standard deviation
(shown in brackets) will appear after completion of the
measurements.
Review the measurements ofboth eyes. You can
eliminate anymeasurement from the mean and standard deviation calculations by tapping on the checkmark in the box
next to the measurement reading that you want to eliminate. The mean and standard deviation will update accordingly.
To retake a measurement, select the eye (OD or OS) that you want to retake, and tap the Start button.
Note: you cannot redo measurements after Save is pressed.
To save the measurements, tap Save at the bottom of the measuring screen.

14 16012-101 Rev. C
Instructions for Use (Continued)
Start Measuring Central Corneal Thickness (CCT) Measurement (Continued)
Calculating a Corrected IOP (Intraocular Pressure)
Tap IOP at the bottom of the Measuring screen.
Select the Correction Method from the pull down menu by tapping Correction Method. You can select: 2-way Lookup
Table, Reference Formulas 1 to 4, or Custom Formulas 1 to 3. Please see the IOP Formulas section of this manual
for more detail.
Enter the patient’s tonometry readings using the Graffiti interface or the internalkeyboard. Once tonometry information is
entered, tap Calculate. The Adjusted IOP will be calculated according to the formula you choose. Tap Return to go
back to the previousscreen where you can save the adjustedIOP by tapping Save.

16012-101 Rev. C 15
Instructions for Use (Continued)
Risk Estimate
Calculating Glaucoma
The Glaucoma Risk Calculator feature provides you with a measure of the percentage of risk that a patient might develop
glaucoma within the next 5 years. The risk calculation algorithm is based on the methods proposed by Medeiros, et al.
(*) using risk factors identified in theOcular Hypertension Study (OHTS).
IMPORTANT: The results of the Glaucoma Risk Calculator should always be taken only as an indication of the
statistical probability of conversion from ocular hypertension to glaucoma. No conclusive determination from
these results alone should ever be drawn without an appropriate verification conducted by means of
independent diagnostic equipment.
The Calculation Screen
The calculator inthe IOPac may be used inone of three ways:
1. Using the current exam measurements
2. Using patient data from thedatabase
3. As a stand alone calculator where all patient details are manuallyentered
When using the calculator during an exam select Glaucoma Risk Calculator from the menu at the top of the screen. If
an average OD and OS CCT has just been calculated, these values will be shown in the Avg. OS, OD CCT data field on
the Risk Calculator page. The remaining data may be entered using the Graffiti interface at the bottom of the display.
Tap Calculate to display the percentage risk.
To calculate the risk for a patient in the database,tap on the Browse button and navigate to the patient'sfile. If the
selected examhas an average ODand OS CCT, these values will beaveraged and shown in the Avg. OS, OD CCT data
field on the Risk Calculator page.
Again simply fill in the remaining data and tap Calculate.
To use as a stand alone calculator, select Risk Calculator on the IOPac Main Screen, and using the Graffiti interface at
the bottom of the display, fill in the data fields and tap Calculate.
(*) F.A. Madeiros, R.N. Weinreb, P.A. Sample, et al., “Validation of a Predictive Model to Estimate the Risk of Conversion from
Ocular Hypertension to Glaucoma”, Archives of Ophthalmology, Vol. 123, (Oct. 2005).

16 16012-101 Rev. C
Instructions for Use (Continued)
Risk Estimate (Continued)
Risk Factors
Age Patient's age in years, entered manually in all cases
Avg. Baseline IOP Average Baseline Intraocular Pressure. This value must be entered manually in all cases.
Units are mmHg.
Avg. OS,OD CCT Average Right Eye/Left Eye Central Corneal Thickness. This value is entered automatically
when using the current exam measurement or a patient file from the database. It must be
entered manually when using the calculator in stand alone mode. Units are µm.
Vertical CD Ratio Vertical Cup-Disc Ratio . This value must be enteredmanually inall cases.
Pattern S.D. Pattern Standard Deviation. This value is entered manually in all cases from a visual field
tester (e.g., Perimeter). Units aredB.
History of Diabetes Tap inside the box if the patient has a history of diabetes. This field must be selected
manually in all cases.

16012-101 Rev. C 17
Instructions for Use (Continued)
View Database
To view savedentries, tap View Database on themain startup screen. You can select an examination by highlighting the
examination line and tapping View, or by double tapping the examination line. Examinations are sorted by examination
date – starting from the most recent. You can differentiate Refractive from CCT examination records by looking at the
REF, REF tags in the OD/OS column, used for Refractive exams – CCT examination records show mean values in this
column.
When the examination details appear, you can re-select data in the examination file, modify patient information and do
IOP corrections. If changes are made you willbe prompted to either ignore thosechanges or save to thedatabase.
When in the viewmeasurementsscreen, you can access the patient record by tapping on the top menu bar.

18 16012-101 Rev. C
Instructions for Use (Continued)
Using the Refractive Module
The Refractive Module allows data from non-central areas of the cornea to be stored in an easy and intuitive way. This
feature is particularly useful for refractive procedures such as Conductive Keratoplasty.
Preparation of the patient
Follow the same patient preparation used when taking astandard CCT measurement.
Acquiring Refractive Measurements
On the start up screen, Tap: Start Measuring and fill in the patient information in the registration screen as per usual
practice.
Tap the Refract button at the bottom to move to the Refractive screen. The
instrument will default to the right (OD) eye. You can switch the eye that you
want to measureby tapping either the OD (right) or OS (left) box at the top of
the screen.
To start measuring, tap on one of the 9 zones provided on the screen; the
circle around the selected zone being measured will be highlighted in red.
Place the tip of the probe on the corresponding point on the patient’s eye.
Once the probe is perpendicular to the eye surface the pachymeter will
automatically acquire up to 5 measurements. You will hear a beeping sound
to let you knowthe pachymeter is taking measurements.
After a particular zone has been completed, the values (in microns) of the 5
measurements for that zone will appear at the bottom of the screen,together
with the corresponding standard deviation. Thevalue of the meanthickness
will also appear inside the zone circle. You can eliminate any measurement
from the mean and standard deviation calculations by tapping on the check
mark in the box next to the measurement reading thatyou want to eliminate.
The mean and standard deviation will update accordingly.
To start with themeasurement of another zone, tap on anothercircle and
follow the above procedure. When finishedmeasuring both the OD and OS
eye, tap Done. A screen will prompt you toeither save or ignore the
measured values.

16012-101 Rev. C 19
System Menu Screen
The system menu screen is accessed by touching the “Reichert Pachymetry” menu at the top and left of the screen with
the stylus. When the “Reichert Pachymetry” menu is selected, the following options are shown. The details of each
menu selectionare indicated below:
•Check Calibration
•Delete Database
•IOP Formulas
•IOP Lookup Table
•IOP Reference List
•Glaucoma Risk Calculator
•About Pachymeter
Check Calibration
It is recommended that youcheck the calibration approximately every 14 days.
From the main screen, tap Reichert Pachymeter located on the upper leftcorner of the IOPac screen with the stylus.
Select: Check Calibration fromthe pull down menu.
Place a drop of water (Do not use ultrasonic gel) on the calibration phantom, tap the Calibrate button, and then place
the probe lightly on the calibration phantom. A tone signalscalibration is completeand the results of thecalibration are
reported.
Note: The probe mustbe perpendicular to the calibration phantom therefore some manualadjustment of probe
alignment may be required for the IOPac toobtain a reading. If the measured thickness is slightly greater or less
than the allowable range, try redoing the calibration while exerting less pressureonto the phantom. If the
measured thickness consistently measures outside of the tolerance range, please contactan authorized
Reichert dealer.

20 16012-101 Rev. C
System Menu Screen (Continued)
Delete Database
Tapping Delete Database will erase the entire database from memory, and delete all examination data. Do not perform
this action if the Pachymeter’s database has notbeen archived by hotsyncing, unless the data is no longer needed.
You may delete individual entries by entering the View Database page. Selectthe individual examination you wouldlike
to delete by tapping on the examinationline. The examination line will be highlighted. Tap the Delete button.
Note: A deleted database may be recoveredby using the Install Tool to install an identical copy archived on the PC.
In the event of filling the entire database, (around 1000 entries), you should backup the archivefile onto a PC before
deleting it from the IOPac. After a backup, the database filewill have beencopied to the PC’s C:\Program
Files\Palm\IOPac\Backup folder. The file P20DBASE.PDB (this is the archived file) should be movedto a
secure locationsuch as a floppy disk or a CD-R. It is recommended that 2 copies be kept. The full examination database
should then be deleted from the IOPac.
IOP Formulas
Formulas 1 through 4are all of the form:
Corrected IOP = UncorrectedIOP - (Correction × (Measured Corneal
Thickness – Normal Corneal Thickness)). Each is taken from a
published journal article as listed on theIOP Formula References
screen.
Within limits, the end usercan set up Custom Formulas 1 through 3 as
they like. These are the same format as the above4 pre-programmed
formulas, and require the user toinput a normal central corneal thickness
and a correction factor in mmHg/um. When finished, tap OK.
IOP Lookup Table
This screen displays the IOP Corrections Table. An alternative to the
formulas is a wellknown lookup table. The correction to the IOPis
obtained by locating the closest Central Corneal Thickness (CCT) and
Tonometry valuesto the actual measured ones, and interpolating a
correction value.
The pre-programmed table is based on: Ehlers et al Acta Ophthalmol
1975; 53:34-43
Table of contents
Other Reichert Medical Equipment manuals

Reichert
Reichert Longlife Project-O-Chart Quick start guide

Reichert
Reichert TONO-PEN XL User manual

Reichert
Reichert IOPac Standard User manual

Reichert
Reichert RK600 User manual

Reichert
Reichert 7CR User manual

Reichert
Reichert ClearChart 4 User manual

Reichert
Reichert 7 User manual

Reichert
Reichert Tono-Pen AVIA User manual

Reichert
Reichert Tono-Pen AVIA User manual

Reichert
Reichert OptoChek Plus User manual