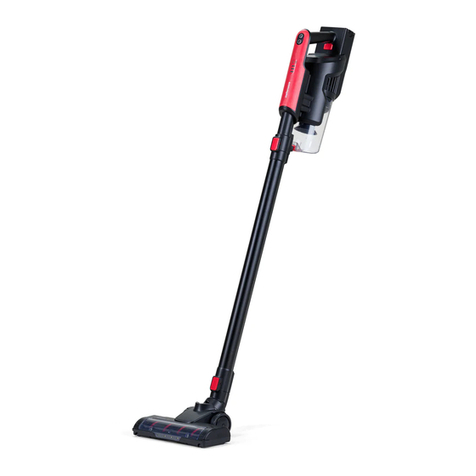
Mellerware Whooshy! Wireless User manual

Whooshy!
Wireless
Handy&Stick vacuum cleaner
Aspirador escoba
Aspirateur balai
Aspirador vertical
Standstaubsauger
Scopa elettrica


I
J
A2
A1
A
M
N
G
C
D
E
E1 E2
B
F
H
K
L

Fig. 1
Fig. 3
Fig. 5
Fig. 2
Fig. 4
MAX

Fig. 6
Fig. 7
Fig. 8

Fig. 9
Fig. 11
Fig. 10

ENENGLISH
Dear customer,
Many thanks for choosing to purchase
a Mellerware brand product.
Thanks to its technology, design and
operation and the fact that it exceeds
the strictest quality standards, a fully
satisfactory use and long product life
can be assured.
Read these instructions
carefully before
switching on the
appliance and keep
them for future
reference. Failure to
follow and observe
these instructions could
lead to an accident.
This appliance can
be used by children
aged from 8 years and
above and persons
with reduced physical,
sensory or mental
capabilities or lack
of experience and
knowledge if they have
been given supervision
or instruction
concerning use of the
appliance in a safe way
and understand the
hazards involved.
Safety advice
and warnings
Cleaning and user
maintenance shall not
be made by children
without supervision
This appliance is not a
toy. Children should be
supervised to ensure
that they do not play
with the appliance.
Disconnect the battery
charger from the mains
when not in use and
before undertaking any
cleaning task.
The battery must be
removed from the
appliance before it is
scrapped.
The appliance must
be disconnected from
the supply mains when
removing the battery.
The battery is to be
disposed of safely.
If the connection to
the mains has been
damaged, it must
be replaced, take
the appliance to an
authorised technical
support service. Do not
attempt to disassemble
or repair the appliance
1.
3.
4.
5.
6.
7.
2.
8.
9.

by yourself in order to
avoid a hazard.
This appliance is for
household use only, not
professional, industrial
use.
Only use the appliance
charger, provided with
the appliance.
Ensure that the voltage indicated
on the charger rating label
matches the mains voltage before
plugging in the charger.
Connect the appliance to a
socket that can supply a minimum
of 10 amperes.
correctly into the mains socket.
Do not alter the plug. Do not use
plug adaptors.
Do not force the power cord.
Never use the power cord to lift
up, carry or unplug the battery
charger.
Do not wrap the power cord
around the appliance.
Do not clip or crease the
power cord.
Check the state of the power
cord. Damaged or tangled cables
increase the risk of electric shock.
Do not touch the plug with wet
hands.
Do not use the appliance if the
cable or plug is damaged.
10.
11.
EN
If any of the appliance casings
breaks, immediately disconnect
the appliance from the mains to
prevent the possibility of an electric
shock.
Do not use the appliance if it has
visible signs of damage or if it has
a leak.
Avoid all contact with the liquid
that could be released from the
battery. In case of contact with
eyes, wash them thoroughly and
seek medical advice. The liquid
spilled from the battery may cause
irritation or burns.
USE AND CARE
Do not use the appliance without
Do not use the appliance if its
Do not use the appliance to gather
up water or any other liquid.
Do not use the appliance if the on/
Respect the MAX level indication
(Fig. 1).
Store this appliance out of reach
of children and/or persons with
physical, sensory or reduced
mental or lack of experience
and knowledge.
Do not work on areas where there
are metal objects, such as nails
and/or screws.
Never vacuum hot or sharp objects
(cigarette butts, ashes, nails, etc.).
Do not open the battery/ies under
any circumstances whatsoever.
–
–
–
–
–
–
–
–
–
–
–
–
–
–
–
–
–
–
–
–
–
ESPAÑOL ES
EN
B – Dust tank release button
C – Dust tank
D – Extension tube
E – Motorized brush
· E1 – Carpets brush
· E2 – Hard oors brush
F – Brush release button
G – Cyclone and lter
H – Battery indicator
I – Battery
J – Battery release button
K – Accesories/tuve release button
L – On/O button
M – Wall support
N – Power supply
If the model of your appliance does
not have the accessories described
above, they can also be bought
separately from the Technical
Assistance Service.
Installation
Be sure to remove all packaging
material from inside the appliance.
Make sure the battery is securely in
place. (Fig.2)
ASSEMBLING THE WALL BRACKET
The appliance has a wall bracket
(M) which must be xed to the wall.
Fix the wall bracket as you think
appropriate, using plugs, screws,
and adhesive…
Make sure that the bracket is rmly
xed; it should be able to support
twice the weight of the appliance.
Fit the appliance into the wall
support.
When the battery/ies is not in use,
keep it away from other metal
objects like paper clips, coins, keys,
screws... that could connect a
terminal to another.
Do not short-circuit the battery
terminals as this may cause an
explosion or re.
The battery/ies should be stored at
a temperature of below 40˚C.
Only use the appliance for carrying
out dry tasks.
Never leave the appliance
connected and unattended if is
not in use. This saves energy and
prolongs the life of the appliance.
Recharge the battery/ies only
with the charger supplied by the
manufacturer. A charger that is
suitable for one type of battery
may cause explosion or re hazard
when used with other battery/ies.
Use the device only with the
battery/ies for which has been
specically designed. The use of
any other battery/ies can cause an
explosion or re hazard.
Service
Any misuse or failure to follow the
instructions for use renders the
guarantee and the manufacturer’s
liability null and void.
Description
A – 2 in 1 accessory
· A1 – Upholstery nozzle
· A2 – Crevice tool
–
–
–
–
–
–
–
–
–
–
–
–
–

ESEN
–
–
–
–
–
–
–
–
–
–
–
–
–
–
–
–
–
–
–
–
–
–
–
CHARGING THE BATTERY
Caution: A new battery is not fully
charged and must therefore be
charged before the appliance is
Charge the battery at an
atmospheric temperature of
between 4 and 40˚C.
Plug the charger (N) into the mains.
A pilot light will come on to indicate
that the charger is ready to begin
charging the battery.
Approximately 3 to 4 hours are
needed for a complete charge
of the battery. Never attempt to
over-charge the battery (although
charge of the battery be of 5 hours
in duration).
Connect the charger to the jack
using the socket on the appliance.
The socket is located at the back
part of the appliance (Fig.3).
The pilot light will come on to
indicate that the charger is
charging the battery.
At the end of the time period
battery from the charger.
When the battery is charged
disconnect the charger from the
mains supply.
NB: Do not use the appliance while
it is connected to the charger.
CHANGE OF MOTORIZED BRUSH
At the bottom of the brush you
have to press the button to unpin
the brush. (Fig.10).
Choose the brush according to the
needs of aspiration:
E-1 Carpets brush.
INSTRUCTIONS FOR USE
BEFORE USE
Before using this product for the
full charge of batteries.
Prepare the appliance according
to the function you wish to use.
VACUUMING FUNCTION
Connect the tube in the air intake
and the brush at the end of the
extencion tube. (D)
To disconnect the extension tube
of the vacuum cleaner, press the
release button of accessories (K)
and pull out. (Fig.4)
USE
Turn the appliance on, by using the
Turn the appliance on, by using one
of the speed selection buttons.
FITTING AN ACCESSORY TO THE
HAND VACUUM
The following accessory is designed
to inster into handy vacuum
cleaner and extention tube. (Fig. 5)
Accessory 2 in 1:
A-1 Brush for furniture or textile.
A-2 Lance.

–
–
–
–
–
–
–
–
–
–
–
–
–
–
–
–
–
–
–
–
EN
CLEANING THE FILTERS
Disconnect the hose from the
vacuum cleaners air intake. (Fig.6).
Disconnect the dust tank pressing
the button (B), remove the cyclone
and the lter. (Fig.8)
Remove the lter from its housing
(Fig.9).
To reassemble the lter, proceed
with the above instructions, in
reverse order.
IMPORTANT: The lters can be
cleaned with cold water, but they
must be left to dry for a minimum of
24 hours before reusing them.
Dust tank EPA lter (ecient air lter
that eciently retains spores, ash,
sawdust, pollen…), it is advisable
to change it a least once a year or
after every 50 hours of use, or if its
potency diminishes remarkably.
BRUSH CLEANING
At the bottom of the brush you
have to press the button to unpin
the brush. (Fig.10).
Clean the brush with the help
of scissors.
SUPPLIES
Supplies can be acquired from
distributors and authorised
establishments (such as lters,
etc...) for your appliance model.
Always use original supplies,
designed specically for your
appliance model.
ONCE YOU HAVE FINISHED USING
THE APPLIANCE
Turn the appliance o using the on/
o button. (L)
Remove the battery from the
appliance if you are not intending
to use the appliance during an
extended period.
Clean the appliance.
Cleaning
Disconnect the battery charger
from the mains and allow it to
cool before undertaking any
cleaning task.
Clean the equipment with a damp
cloth with a few drops of washing-
up liquid and then dry.
Do not use solvents, or products
with an acid or base pH such as
bleach, or abrasive products, for
cleaning the appliance.
Never submerge the appliance in
water or any other liquid or place it
under running water.
EMPTYING THE DUST TANK
Empty the dust box when it is
full (observation facilitated by
transparent windows),
or when vacuuming power is
notably reduced.
Disconnect the hose from the
vacuum cleaners air intake. (Fig.6).
Disconnect the dust tank pressing
the button (B), remove the cyclone
from the tank and empty the dust
continer. (Fig.7)

EN
Anomalies and repair
Take the appliance to an
authorised technical support
service if product is damaged
or other problems arise. Do not
attempt to disassemble or repair
the appliance yourself as this may
be dangerous.
For EU product versions
and/or in case that
t is requested in
your country:
ECOLOGY AND RECYCLABILITY OF
THE PRODUCT
The materials of which the
packaging of this appliance
consists are included in a
collection, classi cation and
recycling system. Should you
wish to dispose of them, use the
appropriate public recycling bins
for each type of material.
The product does not contain
concentrations of substances that
could be considered harmful to the
environment.
- This symbol means that in
case you wish to dispose of
the product once its working
life has ended; take it to an
authorised waste agent for
the selective collection of
Waste from Electric and Electronic
Equipment (WEEE).
- This symbol means that
product may include a
battery or batteries; user must to
remove them before disposing
of the product. Remember that
batteries must be disposed of in
duly authorised containers. Do not
dispose of them in re.
HOW TO REMOVE THE BATTERIES
FROM THE INTERIOR OF
THE DEVICE
CAUTION: It is important that the
batteries are fully discharged
prior to its withdrawal from the
apparatus.
CAUTION: the appliance must
be disconnected from the supply
mains when removing the batteries.
To remove the batteries, once
the life of the appliance, proceed
as follows.
Press both butoons and remove the
battery from its housing. (Fig.11).
This appliance complies with
Directive 2014/35/EU on Low
Voltage, Directive 2014/30/EU on
Electromagnetic Compatibility,
Directive 2011/65/EU on the
restrictions of the use of certain
hazardous substances in electrical
and electronic equipment and
Directive 2009/125/EC on the
ecodesign requirements for
energy-related products
Warranty and
technical assistance
This product enjoys the recognition
and protection bof the legal
–
–
–
–
–

ESPAÑOL ES
Trademark
and address
Model
Input Voltage
Input AC
Frequency
Output Voltage
Output Current
Output Power
Average Active
Eciency
Eciency at low
load (10%)
No-load power
consumption
ENGINEERING AND TECHNOLOGY
FOR LIFE, S.L. Av. Barcelona, s/n,
25790 Oliana, Lleida, Spain
WHOOSHY! Wireless Black
WHOOSHY! Wireless Coral
100-240 V
50/60 Hz
26,0VDC
0,45 A
11,7 W
85,97% supplied at 230V 50Hz
77,18% supplied at 230V 50Hz
0,086W supplied at 230V 50Hz
The following information is regarding to energy labelling and ecodesign:
To establish compliance with the ecodesign requirements and for calculation of
energy labelling parameters the appliance the European standard EN 50563 is
used as reference.
guarantee in accordance with
current legislation. To enforce
your rights or interests you must
go to any of our ocial technical
assistance services. You can nd
the closest one by accessing the
following web link:
www.mellerware.com.
You can also request related
information by contacting us.
You can download this instruction
manual and its updates at
www.mellerware.com

ES
Distinguido cliente:
Le agradecemos que se haya
decidido por la compra de un
producto de la marca Mellerware.
Su tecnología, diseño y funcionalidad,
junto con el hecho de superar las
más estrictas normas de calidad
le comportarán total satisfacción
durante mucho tiempo.
Leer atentamente este
folleto de instrucciones
antes de poner el
aparato en marcha
y guardarlo para
posteriores consultas.
La no observación y
cumplimiento de estas
instrucciones pueden
comportar como
resultado un accidente.
Este aparato pueden
utilizarlo niños con
edad de 8 años y
superior y personas
con capacidades
físicas, sensoriales o
mentales reducidas o
falta de experiencia y
conocimiento, si se les
ha dado la supervisión
o formación apropiadas
respecto al uso del
aparato de una manera
segura y comprenden
los peligros que implica.
Consejos y advertencias
de seguridad
La limpieza y el
mantenimiento a
realizar por el usuario
no deben realizarlos los
niños sin supervisión.
Este aparato no
es un juguete. Los
niños deben estar
bajo vigilancia para
asegurar que no
jueguen con el aparato.
Desenchufar el
cargador de baterías
de la red cuando no se
use y antes de realizar
cualquier operación de
limpieza.
La batería debe ser
retirada del aparato
antes de que se
deseche.
El aparato debe estar
desconectado de la
red de alimentación al
quitar la batería.
La batería debe ser
eliminada de manera
segura.
Si el cable de
alimentación está
dañado, debe ser
substituido por el
fabricante, por su
servicio postventa o por
1.
3.
4.
5.
6.
2. 7.
9.
8.
ESPAÑOL

ES
personal cualicado
similar con el n de
evitar un peligro.
Este aparato está
pensado únicamente
para un uso doméstico,
no para uso profesional
o industrial
Usar el aparato
solamente con la
fuente de alimentación
especíca, suministrada
con el aparato.
9.
10.
11.
–
–
–
–
–
–
–
–
–
–
–
–
–
–
–
–
–
Antes de conectar el cargador
de baterías a la red, vericar que
el voltaje indicado en la placa
de características coincide con
el voltaje de red.
Conectar el aparato a una base
de toma de corriente
que soporte como mínimo
10 amperios.
La clavija del cargador de
baterías debe coincidir con la
base eléctrica de la toma de
corriente. Nunca modicar la
clavija. No usar adaptadores
de clavija.
No forzar el cable eléctrico
de conexión. Nunca usar el
cable eléctrico para levantar,
transportar o desenchufar el
cargador de baterías.
No enrollar el cable eléctrico de
conexión alrededor del aparato.
No dejar que el cable eléctrico
de conexión quede atrapado
o arrugado.
Vericar el estado del cable
eléctrico de conexión. Los cables
dañados o enredados aumentan el
riesgo de choque eléctrico.
No tocar la clavija de conexión con
las manos mojadas.
No utilizar el aparato con el cable
eléctrico o la clavija dañada.
Si alguna de las envolventes del
aparato se rompe, desconectar
inmediatamente el aparato de la
red para evitar la posibilidad de
sufrir un choque eléctrico.
No utilizar el aparato si ha caído, si
hay señales visibles de daños, o si
existe fuga.
Evite cualquier contacto con el
líquido que pueda desprender
la batería. Caso de contacto
accidental con los ojos lávelos
y acuda a un médico. El líquido
derramado por la batería puede
provocar irritación o quemaduras.
UTILIZACIÓN Y CUIDADOS
No usar el aparato sin su/s ltro/s
correctamente colocados.
No usar el aparato si sus
accesorios no están debidamente
acoplados.
No usar el aparato para recoger
agua ni cualquier otro líquido.
No usar el aparato si su dispositivo
de puesta en marcha/paro
no funciona.
Respetar la indicación de nivel MAX
(Fig.1).

ES
–
–
–
–
–
–
–
–
–
–
–
–
Guardar este aparato fuera
del alcance de los niños y/o
personas con capacidades físicas,
sensoriales o mentales reducidas
o falta de experiencia
y conocimiento
No actuar sobre áreas que
contengan objetos metálicos tales
como clavos y/o tornillos.
No aspirar nunca objetos
incandescentes o cortantes
(colillas, cenizas, clavos…).
No abrir la/s batería/s bajo ningún
motivo.
Cuando la/s batería/s no estén
en uso, éstas deben mantenerse
alejadas de otros objetos
metálicos como clips para papeles,
monedas, llaves, tornillos... que
pudieran establecer conexión de
un terminal a otro.
Evite provocar un cortocircuito
entre los terminales de la batería,
ya que existe riesgo de explosión o
incendio.
Guardar la/s batería/s en lugares
donde la temperatura no supere
los 40˚C.
Usar el aparato solamente en
tareas de trabajo en seco.
No dejar nunca el aparato
conectado y sin vigilancia.
Además, ahorrará energía y
prolongará la vida del aparato.
Recargue la/s batería/s solamente
con el cargador suministrado
por el fabricante. Un cargador
que es adecuado para un tipo
de baterías, puede ocasionar un
peligro de explosión o incendio
cuando es usado con otra/s
batería/s.
Use el aparato solamente con la/s
batería/s por las que ha estado
diseñado especícamente. El
uso de cualquier otra/s batería/s
puede ocasionar un peligro de
explosión o incendio.
Servicio
Toda utilización inadecuada, o en
desacuerdo con las instrucciones
de uso, puede comportar
peligro, anulando la garantía y la
responsabilidad del fabricante.
Descripción
A – Accesorio 2 en 1
· A1 – Cepillo para muebles
y tapicería
·A2 –Lanza
B – Botón para extraer el depósito
C – Depósito de polvo
D – Tubo de extensión
E – Cepillo motorizado
· E1 – Cepillo de cerdas para
alfombras y moquetas
· E2 – Cepillo para suelos duros
F – Botón de liberación del cepillo
G – Ciclón y ltro
H – Indicador estado de la batería
I – Bateria
J – Botón para extraer las baterías
K – Botón para extraer los
accesorios/ tubo de extensión
L – Botón de ON/OFF
M – Soporte mural
N – Fuente de alimentación

ES
–
–
–
–
–
–
–
–
–
–
–
–
–
–
–
–
–
–
En caso de que su modelo de
aparato no disponga de los
accesorios descritos anteriormente,
éstos también pueden adquirirse
por separado en los Servicios de
Asistencia Técnica.
Instalación
Asegurarse de retirar todo material
de embalaje del interior
del aparato.
Asegurarse que la batería está
bien colocada (Fig. 2).
MONTAJE DEL SOPORTE MURAL
El aparato dispone de un soporte
mural (M), el cual debe jarse en la
pared.
Fije el soporte mural de la forma
que considere más adecuada
mediante tacos, tornillos,
adhesivos…
Asegurarse que el soporte esté
anclado de forma que sea capaz
de aguantar al menos el doble del
peso del aparato.
Encajar el aparato en su
soporte mural.
CARGA DE LA BATERÍA
Advertencia: Una batería nueva no
viene con carga completa y debe
ser cargada al máximo antes de
usar el aparato por primera vez.
Cargar la batería a temperatura
ambiente entre 4 y 40˚C.
Enchufar la fuente de alimentación
(N) a la red eléctrica.
Se iluminará un piloto que indica
que el cargador está listo para
iniciar la carga de la batería.
El tiempo necesario para una
carga completa es de 3 a 4 horas
aproximadamente. Nunca intente
sobrecargar las baterías (aunque
es recomendable que la primera
carga se realice durante 5 horas
de carga).
Enchufar el conector del cargador
en la toma de corriente del
aparato, situada en la parte
superior del mango del aparato
(Fig.3).
Mientras la batería se esté
cargando, se iluminará el piloto
que indica que el cargador está
cargando la batería.
Quitar la batería del cargador
una vez transcurrido el tiempo
especicado.
Una vez nalizada la carga,
desenchufar el cargador de la red
eléctrica.
Nota: No utilizar el aparato
mientras esté conectado al
cargador.
CAMBIO DEL CEPILLO
MOTORIZADO
En la parte inferior de la zapata
hay que presionar el botón para
desanclar el cepillo. (Fig.10).
Elegir el cepillo según las
necesidades de aspriación:
E1 Cepillo de cerdas para
alfombras y moquetas
E2 Cepillo para suelos duros

ES
MODO DE EMPLEO
NOTAS PREVIAS AL USO
Antes de usar el producto por
primera vez, es importante hacer
una carga completa de las
baterías.
Preparar el aparato acorde a la
función que desee realizar.
FUNCIÓN ASPIRA
Acoplar el tubo a la entrada aire
del aspirador y la zapata al nal
del tubo de extensión (D).
Para desacoplar el tubo de
extension del aspirador, presione
botón de liberación de los
accesorios (K) y estire hacia fuera.
(Fig.4).
USO
Poner el aparato en marcha, ac-
cionando el botón marcha/paro. (L)
El piloto luminoso de la zapata y el
indicador de batería se iluminarán.
INSERCIÓN DE UN ACCESORIO AL
ASPIRADOR DE MANO O AL TUBO
DE EXTENSIÓN
El aspirador de mano o el tubo de
extensión está diseñado de tal
forma que permite la inserción de
los siguientes accesorios: (use la
combinación que más se ajuste a
sus necesidades). (Fig.5).
Accesorio 2 en 1:
A1 Cepillo para muebles y tapicería.
A2 Lanza
UNA VEZ FINALIZADO EL USO DEL
APARATO
Parar el aparato, accionando el
botón marcha/ paro (L).
Retirar las pilas/baterías del
aparato si no se va a usar el
aparato en mucho tiempo.
Limpiar el aparato.
Limpieza
Desenchufar el cargador eléctrico
de la red y dejarlo enfriar antes de
iniciar cualquier operación
de limpieza.
Limpiar el aparato con un paño
húmedo impregnado con unas
gotas de detergente y secarlo
después.
No utilizar disolventes, ni productos
con un factor pH ácido o básico
como la lejía, ni productos
abrasivos, para la limpieza
del aparato.
No sumergir el aparato en agua u
otro líquido, ni ponerlo bajo el grifo.
VACIADO DEL DEPÓSITO
DE POLVO
Vaciar el depósito de polvo
cuando se aprecie a través de sus
paredes transparentes que esté
lleno o bien cuando se produzca
una reducción importante de la
potencia de aspiración
del aparato.
Desacoplar los accesorios de la
entrada aire del aspirador. (Fig.6).
Desacoplar el deposito
presionando el botón (B), extraer
–
–
–
–
–
–
–
–
–
–
–
–
–
–
–
–
–
–
–
–

ES
–
–
–
–
–
–
–
–
–
–
el ciclón del depósito y vaciar el
depósito de polvo. (Fig.7)
LIMPIEZA DE FILTROS
Desacoplar los accesorios de la
entrada aire del aspirador. (Fig.6).
Desacoplar el deposito
presionando el botón (B), extraer el
(Fig.9).
de manera inversa a lo explicado
en el apartado anterior.
IMPORTANTE:
limpiar con agua fria, pero hay que
dejarlos secar durante minimo 24
horas antes de volver a usarlos.
cenizas, ácaros, polen…), se
recomienda revisar periódicamente
50 horas de uso.
LIMPIEZA DEL CEPILLO
En la parte inferior de la zapata
hay que presionar el botón para
desanclar el cepillo. (Fig.10).
Limpia el cepillo con la ayuda de
unas tijeras.
CONSUMIBLES
En los distribuidores y
establecimientos autorizados se
podrán adquirir los consumibles
modelo de aparato.
Usar siempre consumibles
originales, diseñados
ES
de aparato.
Anomalías y reparación
En caso de avería llevar el aparato
a un Servicio de Asistencia Técnica
autorizado. No intente desmontarlo
o repararlo ya que puede existir
peligro.
Para las versiones EU
del producto y/o en el
caso de que en su país
aplique:
ECOLOGÍA Y RECICLABILIDAD DEL
PRODUCTO
Los materiales que constituyen
el envase de este aparato,
están integrados en un sistema
reciclado de los mismos. Si desea
deshacerse de ellos, puede
utilizar los contenedores públicos
apropiados para cada tipo de
material.
El producto está exento de
concentraciones de sustancias
que se puedan considerar dañinas
para el medio ambiente.
que, si desea deshacerse
del producto, una vez
transcurrida la vida del
mismo, debe depositarlo por
los medios adecuados a manos de
un gestor de residuos autorizado
para la recogida selectiva de
Other manuals for Whooshy! Wireless
1
Table of contents
Languages:
Other Mellerware Vacuum Cleaner manuals

Mellerware
Mellerware Rider Lithium User manual

Mellerware
Mellerware Rider Pro User manual

Mellerware
Mellerware Handy! User manual

Mellerware
Mellerware VAC20002000W User manual

Mellerware
Mellerware VAC14001400W User manual

Mellerware
Mellerware EXECUTIVE VAC18001800W User manual

Mellerware
Mellerware Whooshy! Wireless User manual

Mellerware
Mellerware VORTEX User manual

Mellerware
Mellerware Tidy! Random User manual

Mellerware
Mellerware Broomy User manual