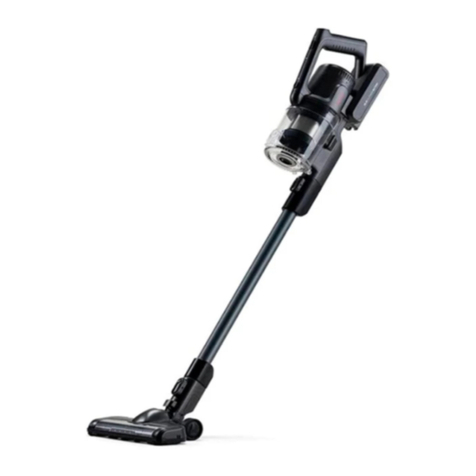
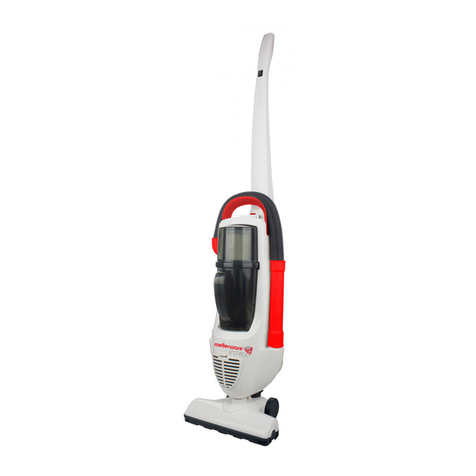
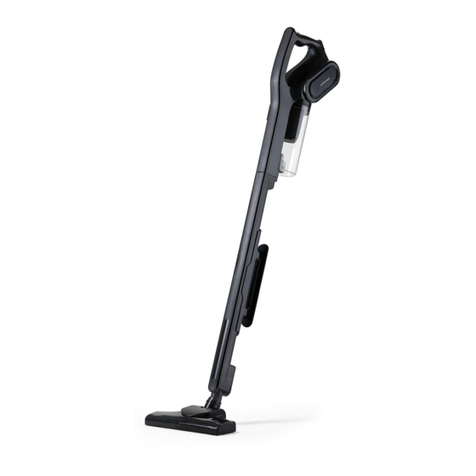
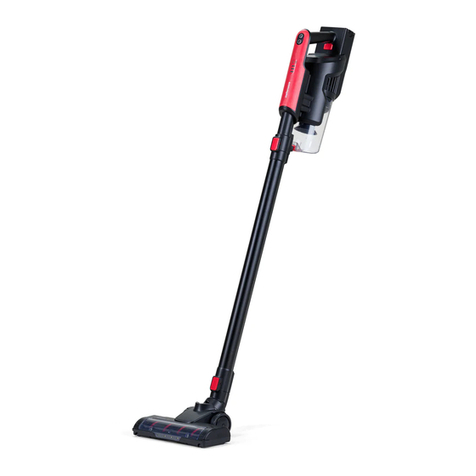
Mellerware Rider Pro User manual

Català
Rider Pro
Rider Pro Animal
Rider Pro Clean
Rider Pro Full Set
Stick vacuum cleaner
Aspirador escoba
Stoksofsuier
Aspirateur balai
Aspirador vertical
Bodenstaubsauger
Scopa elettrica

L
A
M
N
F
I
K
J
D
B
H
G
E
C

g
d
a
cb
e
f

MAX
Fig. 1
Fig. 3
Fig. 5
Fig. 2
Fig. 4
Fig. 6

Fig. 7
Fig. 9
Fig. 8
Fig. 10

ENGLISH
Stick vacuum cleaner
RIDER PRO
RIDER PRO ANIMAL
RIDER PRO CLEAN
RIDER PRO FULL SET
Dear customer,
Many thanks for choosing to purchase a
MELLERWARE brand product.
Thanks to its technology, design and operation
and the fact that it exceeds the strictest quality
standards, a fully satisfactory use and long prod-
uct life can be assured.
- Read these instructions carefully before switch-
ing on the appliance and keep them for future
reference. Failure to follow and observe these
instructions could lead to an accident.
SAFETY ADVICE AND
WARNINGS
- This appliance can be used
by children aged from 8 years
and above and persons with
reduced physical, sensory or
mental capabilities or lack of
experience and knowledge
if they have been given
supervision or instruction
concerning use of the appliance
in a safe way and understand
the hazards involved.
- Cleaning and user maintenance
shall not be made by children
without supervision.
- This appliance is not a toy.
Children should be supervised
to ensure that they do not play
with the appliance.
- Disconnect the battery charger
from the mains when not in use
and before undertaking any
cleaning task.
- The battery must be removed
from the appliance before it is
scrapped.
- The appliance must be
disconnected from the supply
mains when removing the battery.
- The battery is to be disposed of
safely.
- If the connection to the mains
has been damaged, it must be
replaced, take the appliance
to an authorised technical
support service. Do not attempt
to disassemble or repair the
appliance by yourself in order to
avoid a hazard.
- This appliance is for household
use only, not professional,
industrial use.
- This appliance contains
accessories with rotary parts.
Loose clothes, jewellery or long
hair can be caught in moving
parts. Dress properly. Do not wear
baggy or loose-hanging clothes
or accessories. Keep your hair,
clothing and gloves away from
moving parts.
- Only use the appliance with the
specic charger, provided with the
appliance.

- CAUTION: In order to avoid
a hazard due to inadvertent
resetting of the thermal
protector, this appliance must
not be supplied through an
external switching device, such
as a timer, or connected to a
circuit that is regularly switched
on and off by the utility.
- Ensure that the voltage indicated on the
charger rating label matches the mains voltage
before plugging in the charger.
- Connect the appliance to a socket that can
supply a minimum of 10 amperes.
- The charger’s plug must t correctly into the
mains socket. Do not alter the plug. Do not use
plug adaptors.
- Do not force the power cord. Never use the
power cord to lift up, carry or unplug the battery
charger.
- Do not wrap the power cord around the appli-
ance.
- Do not clip or crease the power cord.
- Check the state of the power cord. Damaged
or tangled cables increase the risk of electric
shock.
- Do not touch the plug with wet hands.
- Do not use the appliance if the cable or plug is
damaged.
- If any of the appliance casings breaks, immedi-
ately disconnect the appliance from the mains
to prevent the possibility of an electric shock.
- Do not use the appliance if it has fallen on the
oor, if there are visible signs of damage or if it
has a leak.
- Avoid all contact with the liquid that could be
released from the battery. In case of contact
with eyes, wash them thoroughly and seek
medical advice. The liquid spilled from the
battery may cause irritation or burns.
USE AND CARE:
- Do not use the appliance without its lter(s)
correctly in place.
- Do not use the appliance if its accessories are
not properly tted.
- Do not use the appliance to gather up water or
any other liquid.
- Do not use the appliance if the on/off switch
does not work.
- Respect the MAX level indicator. (Fig.1)
- Store this appliance out of reach of children
and/or persons with physical, sensory or
reduced mental or lack of experience and
knowledge.
- Do not work on areas where there are metal
objects, such as nails and/or screws.
- Never vacuum hot or sharp objects (cigarette
butts, ashes, nails, etc.).
- Do not open the battery/ies under any circum-
stances whatsoever.
- When the battery/ies is not in use, keep it away
from other metal objects like paper clips, coins,
keys, screws ... that could connect a terminal
to another.
- Do not short-circuit the battery terminals as
this may cause an explosion or re.
- The battery/ies should be stored at a tempera-
ture of below 40ºC.
- Only use the appliance for carrying out dry
tasks.
- Never leave the appliance connected and un-
attended if is not in use. This saves energy and
prolongs the life of the appliance.
- Recharge the battery/ies only with the charger
supplied by the manufacturer. A charger that
is suitable for one type of battery may cause
explosion or re hazard when used with other
battery/ies.
- Use the device only with the battery/ies for
which has been specically designed. The use
of any other battery/ies s can cause an explo-
sion or re hazard.
SERVICE:
- Any misuse or failure to follow the instructions
for use renders the guarantee and the manu-
facturer’s liability null and void.
DESCRIPTION
A Dust tank
B HEPA lter cover
C On/off button
D Release button of the tube
E Extension tube
F Battery
G Button to open dust tank
H Button to release the dust tank
I Battery indicator
J Speed control
K Speed indicator
L Wall mount screws
M Wall mount bracket
N Power supply
ACCESSORIES
a) Motorized brush “Power Brush”
b) Crevice tool
c) 2in1 upholstery nozzle
d) Pet brush (*) (***)
e) Sofa/bed motorized brush (*)
f) Motorized brush “Turbo Brush” (**)
g) Water tank (**)
(*) Only available in the model RIDER PRO ANI-
MAL and RIDER PRO FULL SET.
(***) Pet brush only fits with the motor body, not
with the extension tube.
(**) Only available in the model RIDER PRO
CLEAN and RIDER PRO FULL SET.
- If the model of your appliance does not have
the accessories described above, they can
also be bought separately from the Technical
Assistance Service.
INSTALLATION
- Be sure to remove all packaging material from
inside the appliance.
ASSEMBLING THE WALL BRACKET:
- The appliance has a wall bracket (M) which
- Fix the wall bracket as you think appropriate,
using plugs, screws, and adhesive…
- should be able to support twice the weight of
the appliance.
- Fit the appliance into the wall support.
CHARGING THE BATTERY
- Caution: A new battery is not fully charged and
must therefore be charged before the appli-
- Charge the battery at an atmospheric tempera-
ture of between 4 and 40ºC.
- Plug the charger (N) into the mains.
- A pilot light will come on to indicate that the
charger is ready to begin charging the battery.
- Approximately 3 to 4 hours are needed for a
complete charge of the battery. Never attempt
to over-charge the battery (although it is rec-
be of 5 hours in duration).
- Connect the charger to the jack using the
socket on the appliance. The socket is located
at the lower/back part of the appliance.
- The pilot light will come on to indicate that the
charger is charging the battery.
- remove the battery from the charger.
- When the battery is charged disconnect the
charger from the mains supply.
- NB: Do not use the appliance while it is con-
nected to the charger.
INSTRUCTIONS FOR USE
BEFORE USE:
- important to make a full charge of batteries.
VACUUMING FUNCTION:
- Fit the extension tube (E) to the air intake of the
vacuum cleaner and the motorized brush (a) at
the end of the extension tube.
- To disconnect the extension tube from the
vacuum cleaner and the motorized brush,
press the accessories release button and pull
outwards (Fig.2).
USE:
- Turn the appliance on, by using the on/off
button (C).
- The battery indicator (I) and speed indicator (K)
will turn on.
- Select the desired speed using the button (J).
FITTING AN ACCESSORY TO THE HAND
VACUUM OR TO THE EXTENSION TUBE:
- The hand vacuum is designed in such a way
that it allows the following accessories to be
your requirements).
RIDER PRO model:
- Motorized brush “Power Brush”
- 2in1 upholstery nozzle
- Crevice tool

RIDER PRO ANIMAL model:
- Motorized brush “Power Brush”
- 2in1 upholstery nozzle
- Crevice tool
- Pet brush
- Sofa/bed motorized brush
RIDER PRO CLEAN model:
- Motorized brush “Power Brush”
- 2in1 upholstery nozzle
- Crevice tool
- Motorized brush “Turbo Brush”
- Water tank
RIDER PRO FULL SET model:
- Motorized brush “Power Brush”
- 2in1 upholstery nozzle
- Crevice tool
- Pet brush
- Sofa/bed motorized brush
- Motorized brush “Turbo Brush”
- Water tank
FITTING THE WATER TANK TO THE
MOTORIZED BRUSH “TURBO BRUSH”
(ONLY IN RIDER PRO CLEAN MODEL OR
RIDER PRO FULL SET MODEL)
- The water tank (g) can only be used with the
“Turbo Brush” motorized brush (f).
- Fill the water tank through the opening mark
(Fig.9).
- Fit the brush over the water tank.
- To let the water out, press the button on the left
side of the tank with your foot.
- Remove the mop and clean (Fig.10).
ONCE YOU HAVE FINISHED USING THE
APPLIANCE:
- Turn the appliance off using the on/off button.
- Clean the appliance.
CLEANING
- Disconnect the battery charger from the mains
and allow it to cool before undertaking any
cleaning task.
- Clean the equipment with a damp cloth with a
few drops of washing-up liquid and then dry.
- Do not use solvents, or products with an acid or
base pH such as bleach, or abrasive products,
for cleaning the appliance.
- Never submerge the appliance in water or any
other liquid or place it under running water.
EMPTYING THE DUST BOX
- Empty the dust box when it is full (observation
facilitated by transparent windows), or when
vacuuming power is notably reduced.
- Remove the dust tank from the hand vacuum
by pressing the release button (H). (Fig.3).
- Open the lid of the dust tank (G) and empty the
contents into the appropriate waste disposal
receptacle (Fig.4).
- Close the lid of the dust tank.
CHANGING THE FILTERS:
- Air entry lter, it is advisable to be changed
at least once a year or every 50 hours of the
appliance’s use.
- Air outlet HEPA lter (high efciency air lter
that efciently retains spores, ash, sawdust,
pollen…), it is advisable to change it a least
once a year or after every 50 hours of use.
AIR INLET FILTER REMOVAL:
- Remove the dust tank from the hand vacuum
by pressing the release button (H). (Fig.3).
- Remove the lter (Fig.5).
- To reassemble the lter, proceed with the
above instructions, in reverse order.
AIR OUTLET FILTER REMOVAL:
- Open the lter cover (Fig.6).
- Remove the lter.
- To reassemble the lter, proceed with the
above instructions, in reverse order.
“POWER BRUSH” REMOVAL:
- Turn the rotary knob, located at the bottom
of the brush, counterclockwise to remove the
brush.
- Remove the brush and clean.
- To reassemble, follow the above instructions
but in reverse.
“TURBO BRUSH” REMOVAL (ONLY IN RIDER
PRO CLEAN MODEL AND RIDER PRO FULL
SET MODEL):
- Open the cover located on the bottom of the
brush (Fig.7).

- Remove the brush and clean.
- To reassemble, follow the above instructions
but in reverse.
“MINI BRUSH” REMOVAL (ONLY IN RIDER
PRO ANIMAL MODEL AND RIDER PRO FULL
SET MODEL):
- Open the cover located on the bottom of the
brush (Fig.8).
- Clean the brush.
ANOMALIES AND REPAIR
- Take the appliance to an authorised technical
support service if product is damaged or other
problems arise. Do not attempt to disassemble
or repair the appliance yourself as this may be
dangerous.
FOR EU PRODUCT VERSIONS AND/OR IN
CASE THAT IT IS REQUESTED IN YOUR
COUNTRY:
ECOLOGY AND RECYCLABILITY OF THE
PRODUCT
- The materials of which the packaging of this
appliance consists are included in a collection,
wish to dispose of them, use the appropriate
public recycling bins for each type of material.
- The product does not contain concentrations of
substances that could be considered harmful to
the environment.
This symbol means that in case you wish
to dispose of the product once its working
life has ended; take it to an authorised
waste agent for the selective collection of
Waste from Electric and Electronic
Equipment (WEEE).
This symbol means that product may
include a battery or batteries; user must
to remove them before disposing of the
product. Remember that batteries must
be disposed of in duly authorised containers. Do
This appliance complies with Directive 2014/35/
EU on Low Voltage, Directive 2014/30/EU on
Electromagnetic Compatibility, Directive 2011/65/
EU on the restrictions of the use of certain
hazardous substances in electrical and elec-
tronic equipment and Directive 2009/125/EC on
the ecodesign requirements for energy-related
products
WARRANTY
AND TECHNICAL ASSISTANCE
This product enjoys the recognition and protec-
tion bof the legal guarantee in accordance with
current legislation. To enforce your rights or inter-
assistance services.
following web link: www.mellerware-home.com.
You can also request related information by
contacting us.
You can download this instruction manual and its
updates at www.mellerware-home.com

THE FOLLOWING INFORMATION IS
REGARDING TO ENERGY LABELLING AND
ECODESIGN:
Trademark and address ENGINEERING AND TECHNOLOGY FOR LIFE, S.L.
Avda. Barcelona, s/n, 25790 Oliana, Lleida, Spain
Model
RIDER PRO
RIDER PRO ANIMAL
RIDER PRO CLEAN
RIDER PRO FULL SET
Input Voltage 100-240 V
Input AC frecuency 50/60 Hz
Output voltage 25,0VDC
29,0VDC
Output current 0,5 A
Output power 12,5 W
14,5 W
Average Active Efciency 25,0VDC 86.94%
29,0VDC 87.19%
Efciency at low load (10%) 25,0VDC 73.68%
29,0VDC 73.13%
No-load power consumption 0.06 W
To establish compliance with the ecodesign re-
quirements and for calculation of energy labelling
parameters the appliance the European standard
EN 50563 is used as reference.

Español
Aspirador escoba
RIDER PRO
RIDER PRO ANIMAL
RIDER PRO CLEAN
RIDER PRO FULL SET
Distinguido cliente:
Le agradecemos que se haya decidido por
la compra de un producto de la marca ME-
LLERWARE.
Su tecnología, diseño y funcionalidad, junto con
el hecho de superar las más estrictas normas de
calidad le comportarán total satisfacción durante
mucho tiempo.
- Leer atentamente este folleto de instruccio-
nes antes de poner el aparato en marcha y
guardarlo para posteriores consultas. La no
observación y cumplimiento de estas instruc-
ciones pueden comportar como resultado un
accidente.
CONSEJOS Y ADVERTENCIAS
DE SEGURIDAD
- Este aparato pueden
utilizarlo niños con edad de
8 años y superior y personas
con capacidades físicas,
sensoriales o mentales
reducidas o falta de experiencia
y conocimiento, si se les ha
dado la supervisión o formación
apropiadas respecto al uso del
aparato de una manera segura
y comprenden los peligros que
implica.
- La limpieza y el mantenimiento
a realizar por el usuario no
deben realizarlos los niños sin
supervisión.
- Este aparato no es un juguete.
Los niños deben estar bajo
vigilancia para asegurar que no
jueguen con el aparato.
- Desenchufar el cargador de
baterías de la red cuando no
se use y antes de realizar
cualquier operación de
limpieza.
- La batería debe ser retirada
del aparato antes de que se
deseche.
- El aparato debe estar
desconectado de la red de
alimentación al quitar la batería.
- La batería debe ser eliminada
de manera segura.
- Si el cable de alimentación está
dañado, debe ser substituido
por el fabricante, por su servicio
postventa o por personal
cualicado similar con el n de
evitar un peligro.
- Este aparato está pensado
únicamente para un uso
doméstico, no para uso
profesional o industrial
- Este aparato contiene
accesorios con partes
rotatorias. Ropas colgantes,
joyas o cabellos largos pueden
ser atrapados por las piezas
en movimiento.Vestir de forma
adecuada. No llevar prendas
amplias ni elementos colgantes.
Mantener los cabellos, ropa y

guantes alejados de las partes
móviles.
- Usar el aparato solamente
con la fuente de alimentación
especíca, suministrada con el
aparato.
- Conectar el aparato solamente
a una muy baja tensión de
seguridad que corresponda con
el marcado del aparato.
- PRECAUCIÓN: Con objeto
de evitar un peligro debido
al rearme no deseado del
protector térmico, no se tiene
que alimentar al aparato
a través de un dispositivo
interruptor externo, tal como
un programador, o conectarlo
a un circuito que se encienda y
apague regularmente a través
de la compañía de distribución
de energía eléctrica.
- Antes de conectar el cargador de baterías a
la red, vericar que el voltaje indicado en la
placa de características coincide con el voltaje
de red.
- Conectar el aparato a una base de toma de co-
rriente que soporte como mínimo 10 amperios.
- La clavija del cargador de baterías debe
coincidir con la base eléctrica de la toma de
corriente. Nunca modicar la clavija. No usar
adaptadores de clavija.
- No forzar el cable eléctrico de conexión. Nun-
ca usar el cable eléctrico para levantar, trans-
portar o desenchufar el cargador de baterías.
- No enrollar el cable eléctrico de conexión
alrededor del aparato.
- No dejar que el cable eléctrico de conexión
quede atrapado o arrugado.
- Vericar el estado del cable eléctrico de
conexión. Los cables dañados o enredados
aumentan el riesgo de choque eléctrico.
- No tocar la clavija de conexión con las manos
mojadas.
- No utilizar el aparato con el cable eléctrico o la
clavija dañada.
- Si alguna de las envolventes del aparato se
rompe, desconectar inmediatamente el apara-
to de la red para evitar la posibilidad de sufrir
un choque eléctrico.
- No utilizar el aparato si ha caído, si hay seña-
les visibles de daños, o si existe fuga.
- Evite cualquier contacto con el líquido que
pueda desprender la batería. Caso de contacto
accidental con los ojos lávelos y acuda a un
médico. El líquido derramado por la batería
puede provocar irritación o quemaduras.
UTILIZACIÓN Y CUIDADOS:
- No usar el aparato sin su/s ltro/s correcta-
mente colocados.
- No usar el aparato si sus accesorios no están
debidamente acoplados.
- No usar el aparato para recoger agua ni cual-
quier otro líquido.
- No usar el aparato si su dispositivo de puesta
en marcha/paro no funciona.
- Respetar la indicación de nivel MAX (Fig.1).
- Guardar este aparato fuera del alcance de los
niños y/o personas con capacidades físicas,
sensoriales o mentales reducidas o falta de
experiencia y conocimiento
- No actuar sobre áreas que contengan objetos
metálicos tales como clavos y/o tornillos.
- No aspirar nunca objetos incandescentes o
cortantes (colillas, cenizas, clavos…).
- No abrir la/s batería/s bajo ningún motivo.
- Cuando la/s batería/s no estén en uso, éstas
deben mantenerse alejadas de otros objetos
metálicos como clips para papeles, monedas,
llaves, tornillos... que pudieran establecer
conexión de un terminal a otro.
- Evite provocar un cortocircuito entre los ter-
minales de la batería, ya que existe riesgo de
explosión o incendio.
- Guardar la/s batería/s en lugares donde la
temperatura no supere los 40ºC.
- Usar el aparato solamente en tareas de trabajo
en seco.
- No dejar nunca el aparato conectado y sin vigi-
lancia. Además ahorrará energía y prolongará
la vida del aparato.

- Recargue la/s batería/s solamente con el
cargador suministrado por el fabricante. Un
cargador que es adecuado para un tipo de
baterías, puede ocasionar un peligro de ex-
plosión o incendio cuando es usado con otra/s
batería/s.
- Use el aparato solamente con la/s batería/s
-
mente. El uso de cualquier otra/s batería/s
puede ocasionar un peligro de explosión o
incendio.
SERVICIO:
- Toda utilización inadecuada, o en desacuerdo
con las instrucciones de uso, puede comportar
peligro, anulando la garantía y la responsabili-
dad del fabricante.
DESCRIPCIÓN
A Depósito de polvo
B
C Botón on/off
D Botón de liberación del tubo
E Tubo de extensión
F Batería
G Botón para abrir el depósito
H Botón para extraer el depósito
I Indicadores estado de la batería
J Control de velocidad
K Indicador de la velocidad
L Tornillos para el soporte mural
M Soporte mural
N Fuente de alimentación
ACCESORIOS:
a) Cepillo motorizado Power Brush
b) Lanza
c) Cepillo 2en1 para muebles y tapicerías
d) Cepillo para mascotas (*) (***)
e) Cepillo motorizado sofás y camas (*)
f) Cepillo motorizado Turbo Brush (**)
g) Depósito de agua (**)
(*) Solo disponible en los modelos RIDER PRO
ANIMAL y RIDER PRO FULL SET
(**) Solo disponible en los modelos RIDER PRO
CLEAN y RIDER PRO FULL SET
-
(***) El cepillo para mascotas solo encaja con
el cuerpo del motor, no con el tubo de extensión.
En caso de que su modelo de aparato no
disponga de los accesorios descritos ante-
riormente, éstos también pueden adquirirse
por separado en los Servicios de Asistencia
Técnica.
INSTALACIÓN
- Asegurarse de retirar todo material de embala-
je del interior del aparato.
MONTAJE DEL SOPORTE MURAL:
- El aparato dispone de un soporte mural (M), el
- Fije el soporte mural de la forma que consi-
dere más adecuada mediante tacos, tornillos,
adhesivos…
- Asegurarse que el soporte esté anclado de
forma que sea capaz de aguantar al menos el
doble del peso del aparato.
- Encajar el aparato en su soporte mural.
CARGA DE LA BATERÍA
- Advertencia: Una batería nueva no viene con
carga completa y debe ser cargada al máximo
antes de usar el aparato por primera vez.
- Cargar la batería a temperatura ambiente entre
4 y 40ºC.
- Enchufar el cargador (N) a la red eléctrica.
- Se iluminará un piloto que indica que el carga-
dor está listo para iniciar la carga de la batería.
- El tiempo necesario para una carga completa
es de 3 a 4 horas aproximadamente. Nunca
intente sobrecargar las baterías (aunque es
recomendable que la primera carga se realice
durante 5 horas de carga).
- Enchufar el conector del cargador en la toma
de corriente del aparato, situada en la parte
posterior del aparato.
- Mientras la batería se esté cargando, se ilumi-
nará el piloto que indica que el cargador está
cargando la batería.
- Quitar la batería del cargador una vez transcu-
- cargador de la red eléctrica.
- Nota: No utilizar el aparato mientras esté
conectado al cargador.

MODO DE EMPLEO
NOTAS PREVIAS AL USO:
- Antes de usar el producto por primera vez, es
importante hacer una carga completa de las
baterías.
FUNCIÓN ASPIRAR:
- Acoplar el tubo de extensión (E) a la entrada
de aire del aspirador y la zapata (a) al nal del
tubo de extensión.
- Para desacoplar el tubo de extensión del
aspirador y la zapata, presione el botón de
liberación de los accesorios y estire hacia
fuera (Fig.2).
USO:
- Poner el aparato en marcha, accionando el
botón on/off (C).
- El piloto luminoso de la batería (I) y de la velo-
cidad (K) se iluminaran.
- Seleccionar la velocidad deseada mediante el
botón (J).
INSERCIÓN DE UN ACCESORIO AL
ASPIRADOR DE MANO O AL TUBO DE
EXTENSIÓN:
- El aspirador de mano está diseñado de tal for-
ma que permite la inserción de los siguientes
accesorios: (use la combinación que más se
ajuste a sus necesidades):
Modelo RIDER PRO:
- Cepillo motorizado Power Brush
- Cepillo 2en1 para muebles y tapicerías
- Lanza
Modelo RIDER PRO ANIMAL:
- Cepillo motorizado Power Brush
- Cepillo 2en1 para muebles y tapicerías
- Lanza
- Cepillo para mascotas
- Cepillo motorizado para sofás y camas
Modelo RIDER PRO CLEAN:
- Cepillo motorizado Power Brush
- Cepillo 2en1 para muebles y tapicerías
- Lanza
- Cepillo motorizado Turbo Brush
- Depósito de agua
Modelo RIDER PRO FULL SET:
- Cepillo motorizado Power Brush
- Cepillo 2en1 para muebles y tapicerías
- Lanza
- Cepillo para mascotas
- Cepillo motorizado para sofás y camas
- Cepillo motorizado Turbo Brush
- Depósito de agua
INSERCIÓN DEL DEPÓSITO DE AGUA EN EL
CEPILLO MOTORIZADO “TURBO BRUSH”
(SOLO EN LOS MODELOS RIDER PRO
CLEAN Y RIDER PRO FULL SET:
- El depósito de agua (g) solo se puede utilizar
con el cepillo motorizado “Turbo Brush” (f).
- Rellenar el depósito de agua por la apertura
señalizada (Fig.9) .
- Colocar el cepillo encima del depósito de
agua.
- Para que el agua salga, pulsar con el pie el
botón que se encuentra en la parte izquierda
del depósito.
- Sacar la mopa y limpiar (Fig.10).
UNA VEZ FINALIZADO EL USO DEL
APARATO:
- Parar el aparato, accionando el botón on/off.
- Limpiar el aparato.
LIMPIEZA
- Desenchufar el cargador eléctrico de la red y
dejarlo enfriar antes de iniciar cualquier opera-
ción de limpieza.
- Limpiar el aparato con un paño húmedo
impregnado con unas gotas de detergente y
secarlo después.
- No utilizar disolventes, ni productos con un
factor pH ácido o básico como la lejía, ni pro-
ductos abrasivos, para la limpieza del aparato.
- No sumergir el aparato en agua u otro líquido,
ni ponerlo bajo el grifo.
VACIADO DEL DEPÓSITO DE POLVO:
- Vaciar el depósito de polvo cuando se aprecie
a través de sus paredes transparentes que
esté lleno o bien cuando se produzca una
reducción importante de la potencia de aspira-
ción del aparato.
- Desacoplar el depósito polvo del aparato,
pulsando el botón de extracción del depósito
(H). (Fig.3).
- Abrir la tapa de vaciado del depósito (G) y ver-

ter su contenido en un contenedor de basura
apropiado. (Fig.4).
- Cerrar la tapa de vaciado del depósito.
CAMBIO DE FILTROS:
- Filtro entrada aire, se recomienda revisar pe-
riódicamente el estado del ltro, este debe ser
limpiado / sustituido cada 50 horas de uso.
- Filtro salida aire tipo HEPA (ltro de aire de
alta eciencia que retiene ecazmente espo-
ras, ceniza, ácaros, polen…), se recomienda
revisar periódicamente el estado del ltro, este
debe ser limpiado / sustituido cada 50 horas
de uso, o si se observa una disminución impor-
tante de aspiración del aparato.
PARA LA RETIRADA DEL FILTRO DE
ENTRADA DE AIRE:
- Desacoplar el depósito polvo del aparato,
pulsando el botón de extracción del depósito
(H). (Fig.3).
- Retirar el ltro (Fig.5)
- Para el montaje del ltro, proceda de manera
inversa a lo explicado en el apartado anterior.
PARA LA RETIRADA DEL FILTRO DE
SALIDA DE AIRE:
- Abrir la tapa que contiene el ltro. (Fig.6).
- Retirar el ltro de su alojamiento.
- Para el montaje del ltro, proceda de manera
inversa a lo explicado en el apartado anterior.
PARA LA RETIRADA DEL CEPILLO “POWER
BRUSH”:
- En la parte inferior de la zapata hay que girar
el botón rotativo hacia la izquierda para desan-
clar el cepillo.
- Sacar el cepillo y limpiar.
- Para el montaje proceda de manera inversa a
lo explicado en los puntos anteriores.
PARA LA RETIRADA DEL CEPILLO “TURBO
BRUSH” (SOLO EN LOS MODELOS RIDER
PRO CLEAN Y RIDER PRO FULL SET):
- Abrir la tapa que se encuentra en la parte
inferior del cepillo (Fig.7).
- Sacar el cepillo y limpiar.
- Para el montaje proceda de manera inversa a
lo explicado en los puntos anteriores.
PARA LA RETIRADA DEL CEPILLO “MINI
BRUSH” (SOLO EN LOS MODELOS RIDER
PRO ANIMAL Y RIDER PRO FULL SET):
- Abrir la tapa que se encuentra en la parte
inferior del cepillo (Fig.8).
- Limpiar el cepillo.
ANOMALÍAS Y REPARACIÓN
- En caso de avería llevar el aparato a un
Servicio de Asistencia Técnica autorizado. No
intente desmontarlo o repararlo ya que puede
existir peligro.
PARA LAS VERSIONES EU DEL PRODUCTO
Y/O EN EL CASO DE QUE EN SU PAÍS
APLIQUE:
ECOLOGÍA Y RECICLABILIDAD DEL
PRODUCTO
- Los materiales que constituyen el envase de
este aparato, están integrados en un sistema
de recogida, clasicación y reciclado de los
mismos. Si desea deshacerse de ellos, puede
utilizar los contenedores públicos apropiados
para cada tipo de material.
- El producto está exento de concentraciones de
sustancias que se puedan considerar dañinas
para el medio ambiente.
Este símbolo signica que si desea
deshacerse del producto, una vez
transcurrida la vida del mismo, debe
depositarlo por los medios adecuados a
manos de un gestor de residuos
autorizado para la recogida selectiva de
Residuos de Aparatos Eléctricos y Electrónicos
(RAEE).
Este símbolo signica que el producto
puede disponer de pilas o baterías en
su interior, las cuales deben ser
retiradas previamente antes de
deshacerse del producto. Recuerde que las pilas/
baterías deben depositarse en contenedores
especiales autorizados. Y que nunca deben
tirarse al fuego.
Este aparato cumple con la Directiva 2014/35/
EU de Baja Tensión, con la Directiva 2014/30/
EU de Compatibilidad Electromagnética, con la
Directiva 2011/65/EU sobre restricciones a la
utilización de determinadas sustancias peligro-
sas en aparatos eléctricos y electrónicos y con
la Directiva 2009/125/EC sobre los requisitos
de diseño ecológico aplicable a los productos
relacionados con la energía.

GARANTÍA
Y ASISTENCIA TÉCNICA
Este producto goza del reconocimiento y
protección de la garantía legal de conformidad
con la legislaciónvigente. Para hacer valer sus
derechos o intereses debe acudir a cualquiera de
nuestros servicios de asistencia técnica ociales.
Podrá encontrar el más cercano accediendo al
siguiente enlace web: www.mellerware-home.
com
También puede solicitar información relacionada
poniéndose en contacto con nosotros por el telé-
fono que aparece al nal de este manual. Puede
descargar este manual de instrucciones y sus
actualizaciones en www.mellerware-home.com
LA SIGUIENTE INFORMACIÓN ES CON
RESPECTO AL ETIQUETADO ENERGÉTICO
Y EL DISEÑO ECOLÓGICO:
Marca y dirección ENGINEERING AND TECHNOLOGY FOR LIFE, S.L.
Avda. Barcelona, s/n, 25790 Oliana, Lleida, Spain
Modelo
RIDER PRO
RIDER PRO ANIMAL
RIDER PRO CLEAN
RIDER PRO FULL SET
Tensión de entrada 100-240 V
Frecuencia de la CA de entrada: 50/60 Hz
Tensión de salida 25,0VDC
29,0VDC
Intensidad de salida 0,5 A
Potencia de salida 12,5 W
14,5 W
Eciencia media en activo 25,0VDC 86.94%
29,0VDC 87.19%
Eciencia a baja carga (10%) 25,0VDC 73.68%
29,0VDC 73.13%
Consumo eléctrico en vacío 0.06 W
Para determinar el cumplimiento con los re-
quisitos de diseño ecológico y para el cálculo
de los parámetros de etiquetado energético la
normativa Europea EN 50563 es tomada como
referencia.

Afrikáans
Stoksofsuier
RIDER PRO
RIDER PRO ANIMAL
RIDER PRO CLEAN
RIDER PRO FULL SET
Liewe kliënt,
Baie dankie dat u gekies het om ‘n MELLERWA-
RE -handelsmerk te koop.
Lees hierdie instruksies sorgvuldig voordat die
apparaat aangeskakel word en hou dit vir toe-
komstige verwysingsdoeleindes.
- Lees hierdie instruksies sorgvuldig deur
voordat jy die toestel aanskakel en hou dit vir
toekomstige verwysing. Versuim om hierdie
instruksies te volg en waar te neem kan ‘n
ongeluk veroorsaak.
VEILIGHEIDSADVIES EN
WAARSKUWINGS
- Hierdie toestel kan gebruik word
deur kinders ouer as 8 jaar en
mense met beperkte siese,
sensoriese of verstandelike ver-
moëns of ‘n gebrek aan onder-
vinding en kennis indien hulle
toesighouding of instruksies
aangaande die veilige gebruik
van die toestel ontvang het en
die gevare wat daarby betrokke
is, verstaan.
- Die skoonmaak en gebruiker-
sonderhoud sal nie deur kinders
sonder toesighouding gedoen
word nie.
- Hierdie apparaat is nie ‘n speel-
ding nie. Toesighouding vir
kinders word benodig om te
verseker dat hulle nie met die
apparaat speel nie.
- Sit die batterylaaier af van die
hoofkragleiding wanneer die ap-
paraat in onbruik is en voordat
enige skoonmaaktake onder-
neem word.
- Die battery moet uit die toestel
verwyder word voordat dit ge-
skrap word.
- Die toestel moet van die hoof-
kragtoevoer diskonnekteer word
wanneer die battery verwyder
word.
- Die battery moet veilig wegge-
gooi word.
- Indien die aansluiting tot die
hoofkragstroom beskadig is,
moet dit vervang word; neem
die apparaat na ‘n gemagtigde
tegniese ondersteuningsdiens.
Moenie probeer om die appa-
raat self uitmekaar te haal of te
herstel om moontlike gevaar te
vermy nie.
- Hierdie apparaat is slegs vir
huishoudelike verbruik en nie
vir professionele of industriële
verbruik nie.
- Hierdie apparaat bevat bewe-
gende onderdele. Los klere,
juweliersware of lang hare kan
in die bewegende gedeeltes
vasgevang word. Trek behoor-

lik aan. Do not wear baggy or
loose-hanging clothes or acces-
sories. Hou jou hare, klere en
handskoene weg van bewegen-
de onderdele.
- Only use the appliance with the
specic charger, provided with
the appliance.
- WAARSKUWING: In order to
avoid a hazard due to inadver-
tent resetting of the thermal
protector, this appliance must
not be supplied through an
external switching device, such
as a timer, or connected to a
circuit that is regularly switched
on and off by the utility.
- Maak seker dat die stroomspanning wat op
die laaigraderingsetiket aangedui is, ooreen-
stem met die hoofstroom voordat u die toestel
inprop.
- Koppel die apparaat aan ‘n kontaksok wat ‘n
minimum van 10 ampère kan voorsien.
- Die laaier se prop moet korrek in die hoof-
stroom-kontaksok pas. Moenie die prop verstel
nie. Moenie aansluitproppe gebruik nie.
- Moenie die kragkoord forseer nie. Moet nooit
die kragkoord gebruik om die batterylaaier op
te tel, te dra of om die prop van die batterylaai-
er uit te trek nie.
- Moet nie die kragdraad om die toestel draai
nie.
- Moet nie die kragdraad sny of vou nie.
- Maak seker die kragdraad is in ‘n goeie
toestand. Beskadigde of verstrengelde kabels
verhoog die risiko van elektriese skok.
- Moenie die prop met nat hande aanraak nie.
- Moenie die apparaat gebruik nie indien die
kabel of prop beskadig is.
- Indien enige van die apparaat se voering
breek, ontkoppel onmiddellik die apparaat van
die hoofstroom om die moontlikheid van ‘n
elektriese skok te vermy.
- Moenie die apparaat gebruik indien die op
die vloer geval het nie, dit sigbare tekens van
skade het of indien dit ‘n lekplek het.
- Vermy alle kontak met die vloeistof wat van
die battery vrygestel kan word. In die geval
van oogkontak, was dit deeglik en kry mediese
advies. Die vloeistof wat uit die battery verspil
word kan irritasie of brandwonde veroorsaak.
VERBRUIK EN SORG:
- Moenie die toestel gebruik sonder dat die
lter(s) behoorlik op hul plekke is nie.
- Moenie die apparaat gebruik indien sy toebe-
hore nie behoorlik pas nie.
- Moenie die apparaat gebruik om water of enige
ander vloeistof op te gaar nie.
- Moenie die toestel gebruik indien die aan/
af-knoppie nie werk nie.
- Volg die MAKSIMUM-vlak aanwysing ten alle
tye. (Fig.1)
- Stoor hierdie apparaat buite die bereik van kin-
ders en/of persone met siese, sensoriese of
gebrekkige verstandelike vermoëns of persone
met ‘n gebrek aan ondervinding en kennis.
- Moenie op oppervlaktes werk waar daar metaal
voorwerpe soos spykers en/of skroewe is nie.
- Moet nooit warm of skerp voorwerpe (sigaret-
stompies, as, spykers, ens.) stofsuig nie.
- Moenie die battery(e) onder geen omstandig-
hede oopmaak nie.
- As die battery/e nie gebruik word nie, hou
dit weg van ander metaalvoorwerpe soos
skuifspelde, muntstukke, sleutels, skroewe ...
wat ‘n terminaal na ‘n ander kan koppel.
- Moenie ‘n kortsluiting by die batteryterminale
veroorsaak nie, aangesien dit ‘n ontplofng of
brand kan veroorsaak.
- Die battery/e moet teen ‘n temperatuur van
minder as 40ºC gestoor word.
- Gebruik slegs die toestel om droë take uit te
voer.
- Moet nooit die toestel aangeskakel hou of
onbewaak laat indien dit nie gebruik word nie.
Dit bespaar krag en verleng die gebruiksduur
van die toestel.
- Herlaai die battery(e) slegs met die laaier wat
deur die vervaardiger voorsien is. ‘n Laaier wat
voldoende is vir een soort battery kan ‘n ont-
plofng of ‘n vuurgevaar veroorsaak wanneer
dit met ‘n ander battery(e) gebruik word.

- Gebruik die apparaat slegs met die battery(e)
vuurgevaar veroorsaak.
DIENS:
- Enige misbruik of gebrek om die instruksies vir
gebruik na te volg, maak die waarborg asook
die vervaardiger se aanspreeklikheid ongeldig.
BESKRYWING
A
HEPA filter omslag
Stoftenk
B
C Aan-/afknoppie
D Laat die knoppie van die buis los
E Verlengingsbuis.
F Battery
G Knoppie om die stoftenk oop te maak
H Knoppie om die stoftenk vry te laat
I Battery-aanwyser
J Spoedbeheer
K Speed indicator
L Muurskroewe
M Muurskroewe
N Kragtoevoer
TOEBEHORE
a) Gemotoriseerde kwas “Power Brush”
b) Slypgereedskap
c) 2in1 bekleedsel spuitstuk
d) Troeteldierborsel (*) (***)
e) Gemotoriseerde kwas van die bank/bed (*)
f) Gemotoriseerde kwas “Turbo Brush” (**)
g) Watertenk (**)
(*) Slegs beskikbaar in die model RIDER PRO
ANIMAL en RIDER PRO FULL SET.
(***) Troeteldierborsel pas slegs by die
motorliggaam, nie by die verlengbuis nie.
(**) Slegs beskikbaar in die model RIDER PRO
CLEAN en RIDER PRO FULL SET.
- Indien die model van jou apparaat nie die toe-
behore het soos hierbo beskryf is nie, kan hulle
afsonderlik by die Tegniese Assistentdiens
aangekoop word.
INSTALLASIE
- Maak seker jy verwyder alle verpakkingsmate-
riaal binne die apparaat.
MONTERING VAN DIE MUURARM:
- Die toestel het ‘n muurarm (M) wat teen die
muur vasgeheg moet word.
- Maak die muurarm vas soos u dit nodig ag met
behulp van muurproppe, skroewe en gom.
- Maak seker dat die arm stewig vas is; dit moet
in staat wees om twee keer die gewig van die
toestel te ondersteun.
- Pas die toestel in die muur se steun.
OM DIE BATTERY TE LAAI
- Waarskuwing: ‘n Nuwe battery is nie ten volle
gelaai nie en moet dus gelaai word voordat die
toestel vir die eerste keer gebruik word.
- Laai die battery teen ‘n atmosferiese tempera-
tuur van tussen 4 en 40ºC.
- Prop die laaier (N) in die hoofkragstroom.
- ‘n Klikliggie sal aankom om aan te dui dat die
laaier gereed is om die battery te begin laai.
- Ongeveer 3 tot 4 uur is nodig om die battery
volledig te laai. Moet nooit probeer om die bat-
tery te oorlaai nie, alhoewel dit aanbeveel word
dat die eerste laai van die battery 5 uurduur.
- Konnekteer die laaier aan sy prop met behulp
van die sok op die toestel. The socket is loca-
ted at the lower/back part of the appliance.
- ‘n Klikliggie sal aankom om aan te dui dat die
laaier gereed is om die battery te begin laai.
- Teen die einde van die bogenoemde tydperk,
verwyder die battery van die laaier.
- Wanneer die battery gelaai is, ontkoppel die
laaier van die hoofkragtoevoer.
- NB: Moenie die toestel gebruik terwyl dit aan
die laaier gekoppel is nie.
INSTRUKSIES VIR GEBRUIK
VOOR GEBRUIK:
- Voordat u hierdie produk vir die eerste keer
gebruik, is dit belangrik om batterye ten volle
te laai.
STOFSUIERFUNKSIE:
- Sit die verlengbuis (E) aan die luginlaat van die
stofsuier en die gemotoriseerde kwas (a) aan
die einde van die verlengbuis.
This manual suits for next models
3
Table of contents
Languages:
Other Mellerware Vacuum Cleaner manuals

Mellerware
Mellerware VAC20002000W User manual

Mellerware
Mellerware Tidy! Random User manual

Mellerware
Mellerware Broomy User manual

Mellerware
Mellerware Rider Lithium User manual

Mellerware
Mellerware VORTEX User manual

Mellerware
Mellerware Whooshy! Wireless User manual

Mellerware
Mellerware Whooshy! Wireless User manual

Mellerware
Mellerware Handy! User manual

Mellerware
Mellerware VAC14001400W User manual

Mellerware
Mellerware EXECUTIVE VAC18001800W User manual