Memco Avire 2G GSM User manual

Avire 2G GSM Gateway
Installation Guide
Product Part No. 452 002/M
LED
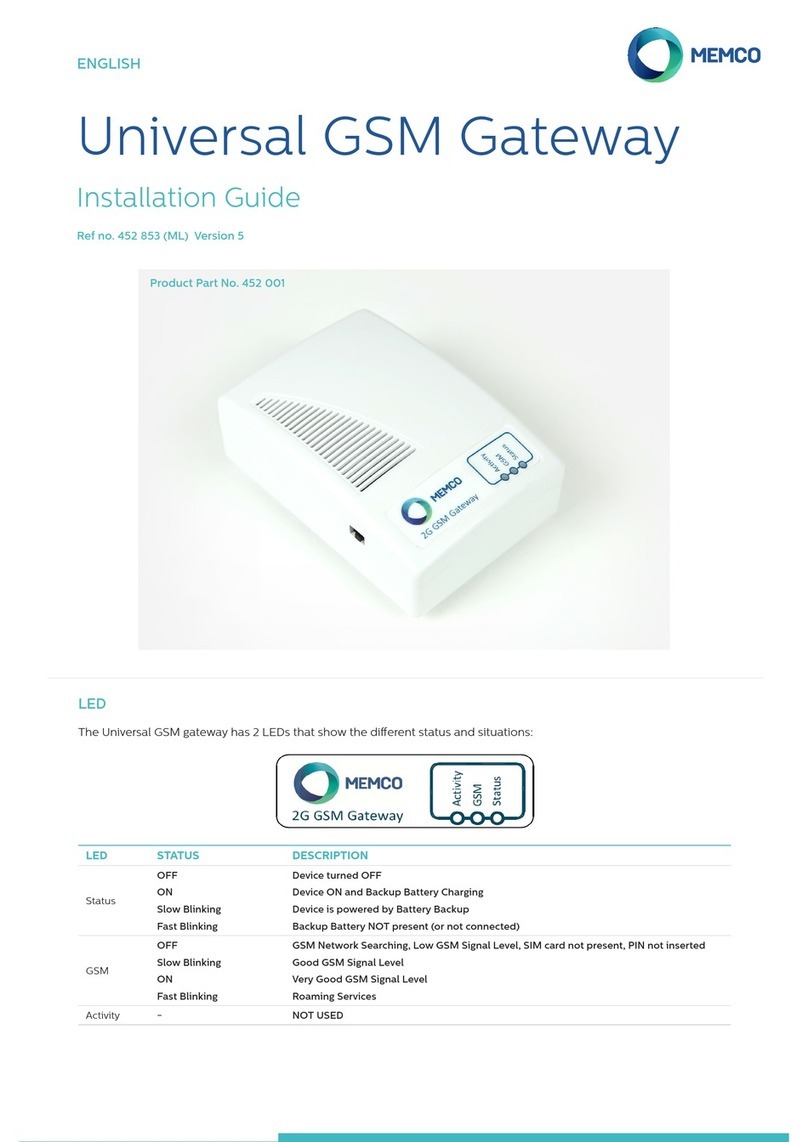
The Avire 2G GSM gateway has 2 LEDs that indicate the device status
2G GSM Gateway
GSM
Status
LED STATUS DESCRIPTION
Status OFF
Fast Blinking
Power supply not connected
Power supply connected
GSM
OFF
Slow Blinking
ON
Fast Blinking
GSM Network Searching, Low GSM Signal Level, SIM card not present, PIN not inserted
Good GSM Signal Level
Very Good GSM Signal Level
Roaming Services
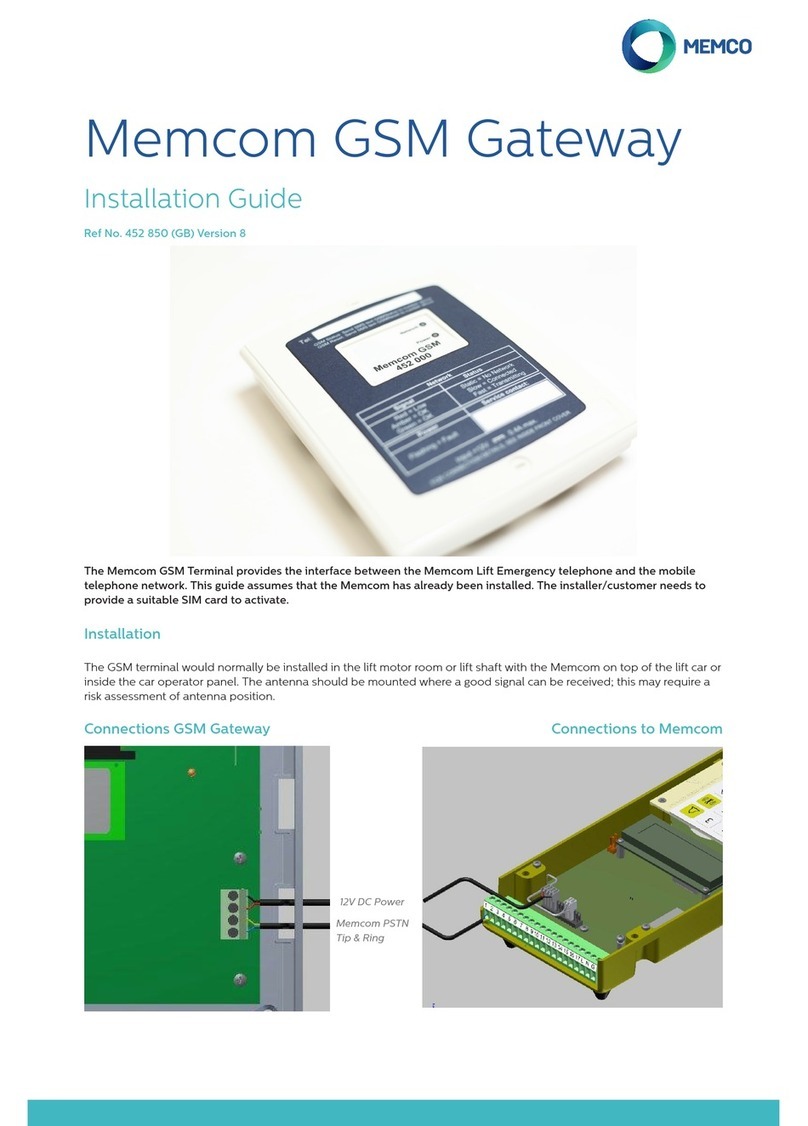
The Avire 2G GSM Terminal provides the interface between the Memcom+Lift Emergency telephone and the mobile
telephone network. This guide assumes that the Memcom+has already been installed. The installer/customer needs to
provide a suitable SIM card.
Ref no. 452 862 (ML) Version 2

CONNECTIONS
CONNECTOR DESCRIPTION
APWR Power supply connection
BUSB USB connector for upgrades
CTEL1/TEL2 RJ11 FXS connectors
DAntenna SMA/f connector for external GSM antenna
ESIM SIM connector
FSwitch Switch for the device power o-on
C B D A E F
1. Location: It is recommended that the device be installed at the highest point
(e.g. motor room or top of shaft)
2. Connect the GSM antenna to the SMA connector being careful not to over-
tighten. The antenna should be placed a minimum of 3 metres from the
GSM unit
3. Insert the SIM Card into the SIM holder. Be sure the SIM is inserted in the
correct orientation with the gold contacts facing downwards.
4. Connect the Emergency Telephone to the TEL1 connector. If connecting
more than one emergency telephone, either daisy chain the connection
between the telephones or use a junction block to split the connection from
the device.
5. Connect the power supply cable to the GSM (see ‘POWER’ below).
6. Turn the GSM Gateway on using the switch on the side.
It is possible to connect up to eight Memcom+Emergency Telephones to the
GSM; however a power connection should only be made to one of these
Memcom+units.
The battery backed +12V power supply from the Memcom+ is used to power the GSM. The power cable provided has a
+12V core sleeved red, and a 0V core is sleeved black. This cable is then connected to the travelling cables to take the
power supply to the GSM terminal. The maximum resistance for each core is 1ohm. Use more cores in parallel if it is a very
long run and the resistance is higher than 1ohm.
A grey connector is provided with the GSM to allow you to make the connection to the Memcom+(see above ‘Power
Supply Connection on Memcom+).
NOTE: If you require a GSM suitable for use with other Emergency Telephones see the Avire ‘2G Universal GSM’ (part
number 452 002).
INSTALLATION
POWER
Emergency Telephone
Power
Power supply connection on Memcom+

Regular situation: Check there is a good GSM signal level, in order to call and receive the voice call (GSM LED ON or
Blinking).
PIN required: enter the PIN code,
Roaming Services
Roaming allows multi-network access, which could improve signal stability in some cases. Note that enabling roaming
near national borders could result in roaming charges from foreign networks.
To disable roaming:
Disconnect the emergency telephone and connect a standard DTMF telephone handset to terminal TEL2. Lift the
handset, wait for the dial tone and dial the following code:
# # 1 1 1 1 # 1 # 2 # operator code #
2 3 4 0 2 for O2; 2 3 4 1 5 for Vodafone; 2 3 4 2 0 for 3; 2 3 4 3 0 for T-Mobile; 2 3 4 3 3 for Orange.
To enable roaming:
Disconnect the emergency telephone and connect a standard DTMF telephone handset to terminal TEL2. Lift the
handset, wait for the dial tone and dial the following code:
# # 1 1 1 1 # 1 # 1 #
Monitoring the 2G GSM
INITIAL SETUP
A few seconds after power on, at the end of the self test, you will see one of the following situations.
LED Regular situation PIN required Roaming/Virtual Operator
GSM Blinking / ON OFF Flashing
Status ON ON ON
The Memco Memcom+emergency telephone can monitor the GSM signal strength and SIM status of the 2G GSM. Select
‘GSM Status’ under ‘HW Monitoring’ on the Memcom+ to activate this feature.
When ‘GSM Status’ is active, the Memcom+will perform the following actions:
If the GSM signal strength is below the minimum required to place a call or a SIM fault is detected (e.g. the SIM card has
been removed), the Memcom+will treat this as a phone line failure.
The Memcom+communicates with the GSM over the ‘local loop’ (the immediate connection between the emergency
telephone and GSM).
HW Monitoring >
Power Supply
Battery
Phone Line
GSM low sig.
GSM no sig.
Spkr/mic.
GSM Status

The GSM can be congured remotely and send status information via SMS to a list of authorised users.
Two types of authorised user prole can be congured:
• Up to 4 users who have permission to congure and request information messages from the 2G GSM
• Up to 4 users who can receive SMS information messages from the 2G GSM.
NOTE: If no numbers are set to congure then any user can remotely manage the 2G GSM
The authorised user list can be setup by sending the following SMS to the 2G GSM unit:
*1 # ID # conf1 , conf2 , conf3 , conf4 # dest1 , dest2 , dest3 , dest4
Conguration of the Authorised User List
Command Description
*1 Conguration message start
# Separator
ID GSM ID - maximum 8 alphanumeric characters - Default: 2GLIFT
# Separator
conf1 Number enabled to congure GSM
, Separator
conf2 Number enabled to congure GSM
, Separator
conf3 Number enabled to congure GSM
, Separator
conf4 Number enabled to congure GSM
# Separator
dest1 Number enabled to receive messages from GSM
, Separator
dest2 Number enabled to receive messages from GSM
, Separator
dest3 Number enabled to receive messages from GSM
, Separator
dest4 Number enabled to receive messages from GSM
Notes: All telephone numbers must have the international prex e.g. +44 for UK
Example conguration message (two users):
*1#2GLIFT#+447987654321,+447123456789#+447987654321,+447123456789
SMS Remote Conguration and Management of the 2G GSM
When the GSM has received a message it will check if the message is from the list of authorised numbers.
• If the message is from an unauthorised number then it will be ignored
• If the message is from an authorised number, and is correctly formatted, then a message reading ‘ACK’ will be
received
• If the message is from an authorised number, and is incorrectly formatted, then a message ‘NACK’ will be received
All the messages from the GSM start with an index number followed by a #. This index number starts at 0 and will
increase to 255 before resetting to 0. This will reset if the GSM is powered down.
Example of successful conguration message:
2 # *1 2GLIFT # ACK
Conguration acknowledgement messages

To check conguration, send the following message to the 2G GSM:
*1?
Provided the sender is an authorised number then the following example will be received:
3#*1#2GLIFT#+447987654321,+447123456789#+447987654321,+447123456789
Conguration check
GSM status request message
Authorised numbers can request information about the GSM including signal level, battery & power status, GSM
rmware etc, by sending the following message:
INFO
An SMS detailing the following information will be sent by the device:
• Device ID
• GSM Operator
• GSM Signal
• GSM Network info
• Battery Status - not used see next page
• PCB Firmware
• GSM Firmware
• IMEI number
• Date and time
• Autotest SMS frequency and time
• List of Autotest SMS recipients
A full breakdown of the message is shown on the following page.
DEVICE REBOOT
Users can remotely reboot the 2G GSM with the following message:
RESET
After the reception of the message, the device answers with an ACK message then will re-boot.

2G GSM/M0 IG V02 (GB) PA_20.07.2017
Command Description
Message index SMS index - 0 to 255
# Separator
INFO
# Separator
ID Device ID - default = 2GLIFT
, Separator
GSM operator GSM operator name
, Separator
GSM signal GSM signal level indicated by a letter (H= high, M =
medium, L= low) and a value from 1 to 31. Example H27 =
very good signal.
, Separator
GSM network info Can be either Home, Roaming or Forbidden
# Separator
Battery status Absent - The GSM will always report an ‘absent’ status
as there is no onbard battery. Battery backup is provided
from the Memcom+
# Separator
PCB rmware Firmware of main PCB
# Separator
GSM rmware Firmware of the GSM module
, Separator
IMEI GSM Module IMEI
# Separator
YYMMDD Current date of the system
, Separator
hhmm Current time of the system
# Separator
Autotest SMS frequency Autotest period:
0 = disabled
1 = every day
2 = every 2 days etc
, Separator
Autotest SMS: hour Hour of sending autotest SMS
, Separator
Autotest SMS: Receiver 1 Recipient 1 of autotest SMS
, Separator
Autotest SMS: Receiver 2 Recipient 2 of autotest SMS
,Separator
Autotest SMS: Receiver 3 Recipient 3 of autotest SMS
,Separator
Autotest SMS: Receiver 4 Recipient 4 of autotest SMS
GSM status request message breakdown
Avire Ltd
Unit 1 The Switchback
Gardner Road
Maidenhead
Berkshire SL6 7RJ, UK
T: 01628 540 100
F: 01628 621 947
E: sales.uk@avire-global.com
W: www.avire-global.com

2G GSM brána Avire
Montážní návod
Art. č 452 002/M
LED
2G GSM brána Avire má 2 LED oznamující stav zařízení
2G GSM Gateway
GSM
Status
LED STAV POPIS
Stav VYPNUTO
Rychlé blikání
Napájecí zdroj nepřipojen
Napájecí zdroj připojen
GSM
VYPNUTO
SPomalé blikání
ZAPNUTO
Rychlé blikání
Vyhledávání sítě GSM, nízká úroveň signálu GSM, není přítomna karta SIM, nebyl vložen PIN.
Dobrá úroveň signálu GSM.
Velmi dobrá úroveň signálu GSM.
Roamingové služby.
Terminál Avire 2G GSM poskytuje rozhraní mezi nouzovým výtahovým telefonem Memcom+ a mobilní telefonní sítí.
Tento průvodce předpokládá, že Memcom+ byl již nainstalován. Montážní technik/zákazník potřebuje zajistit vhodnou
kartu SIM.
Ref. č. 452 862 (ML) Verze 2

PŘIPOJENÍ
KONEKTOR POPIS
ANAPÁJENÍ Konejktor napájení
BUSB Konektor USB na aktualizace software
CTEL1/TEL2 Konektory rozhraní RJ11 FXS
DAnténa Konektor rozhraní SMA/f pro externí anténu GSM
ESIM Konektor karty SIM
FSpínač Spínač na vypínání a zapínání zařízení
C B D A E F
1. Umístění: Doporučujeme nainstalovat zařízení do co nejvyššího místa
(například do strojovny nebo na vrchol šachty).
2. Připojte anténu GSM ke konektoru SMA, přičemž dbejte, abyste ji nedotáhli
nadměrně. Anténa by měla být umístěna alespoň 3 metry od jednotky GSM
3. Vložte kartu SIM do držáku karet SIM. Zajistěte, aby karta SIM byla vložena
se správnou orientací, a sice tak, aby zlacené kontakty směřovaly dolů.
4. Připojte havarijní telefon ke konektoru TEL1. Při připojování více nouzových
telefonů než jednoho buďto zapojte telefony sériově nebo pomocí
svorkovnice rozdělte výstup ze zařízení.
5. Připojte napájecí kabel ke GSM (viz ‘NAPÁJENÍ’ níže)..
6. Zapněte bránu GSM spínačem na boku.
Ke GSM je možno připojit až osm nouzových telefonů Memcom+; připojení
napájení by však mělo být provedeno jen k jednomu z těchto přístrojů
Memcom+.
K napájení GSM se používá zdroj napětí +12 V z Memcom+ s bateriovou zálohou. Dodávaný napájecí kabel má vodič na
napětí +12 V v červené izolaci, a vodič na napětí 0 V má černou izolaci. Tento kabel je pak připojen k vlečným kabelům, aby
dodával proud k terminálům GSM. Maximální odpor jednotlivých jader je 1 ohm. Je-li odpor vyšší než 1 Ohm, použijte více
vodičů v paralelním zapojení.
Společně s GSM je dodáván šedý konektor umožňující Vám provést připojení k Memcom+ (viz výše, ‘Připojení napájení na
Memcom+).
POZNÁMKA: Jestliže vyžadujete bránu GSM vhodnou k používání s jinými nouzovými telefony, viz univerzální bránu Avire
‘2G Universal GSM’ (číslo součásti 452 002).
INSTALACE
NAPÁJENÍ
Emergency Telephone
Power
Power supply connection on Memcom+

Běžná situace: Zkontrolujte, zda je dobrá síla signálu GSM, abyste mohli volat a přijímat hlasová volání (GSM LED
ZAPNUTA nebo blikání).
Je třeba zadat PIN: zadejte kód PIN,
Roamingové služby
Roaming umožňuje přístup k více sítím, což by v některých případech mohlo zvýšit stabilitu signálu. Pamatujte, že
povolení roamingu poblíž státních hranic může mít za následek účtování roamingových poplatků ze zahraničních sítí:
Chcete-li roaming zakázat:
Odpojte havarijní telefon a připojte standardní telefonní sluchátko DTMF ke koncovce TEL2. Zdvihněte sluchátko,
počkejte na vyzváněcí tón a vytočte následující kód:
# # 1 1 1 1 # 1 # 2 # operator code #
2 3 4 0 2 for O2; 2 3 4 1 5 for Vodafone; 2 3 4 2 0 for 3; 2 3 4 3 0 for T-Mobile
Chcete-li povolit roaming:
Odpojte havarijní telefon a připojte standardní telefonní sluchátko DTMF ke koncovce TEL2. Zdvihněte sluchátko,
počkejte na vyzváněcí tón a vytočte následující kód::
# # 1 1 1 1 # 1 # 1 #
Monitorování 2G GSM
PRVOTNÍ NASTAVENÍ
Několik sekund po zapnutí, po skončení autotestu, uvidíte jednu z následujících situací.
LED Běžná situace Je třeba zadat PIN Roaming/virtuální operátor
GSM Blikání / ZAPNUTO VYPNUTO Blikání
Stav ZAPNUTO ZAPNUTO ZAPNUTO
Nouzový telefon Memco Memcom+umí monitorovat sílu signálu GSM a stav brány SIM na 2G GSM. Tuto funkci můžete
aktivovat volbou ‘Stav GSM’ pod ‘Monitorování HW’ na Memcom+.
Když bude ‘Stav GSM’ aktivní, Memcom+provede následující úkony:
Bude-li síla signálu GSM nižší než minimální potřebná k realizaci hovoru, nebo bude-li detekována závada karty SIM
(např. byla-li karta SIM odstraněna), bude to Memcom+interpretovat jako závadu telefonní linky.
Memcom+komunikuje s GSM přes ‘místní smyčku’ (bezprostřední spojení mezi nouzovým telefonem a GSM).
Monitorování hardware >
Zdroj napájení
Baterie
Telefonní linka
Nízký signál GSM
Chybí signál GSM
Reproduktory/mikrofon
Stav GSM

GSM lze kongurovat dálkově a informace o stavu odesílat prostřednictvím SMS oprávněným uživatelům ze seznamu.
Lze nakongurovat dva typy prolů oprávněného uživatele:
• Až 4 uživatelé, kteří mají povolení kongurovat a vyžadovat informační zprávy z 2G GSM
• Až 4 uživatelé, kteří mohou přijímat informační SMS z 2G GSM.
POZNÁMKA: Nejsou-li pro kongurování nastavena žádná čísla, pak může 2G GSM dálkově spravovat kterýkoli uživatel.
Seznam oprávněných uživatelů lze nakongurovat zasláním následující SMS do jednotky 2G GSM:
*1 # ID # conf1 , conf2 , conf3 , conf4 # dest1 , dest2 , dest3 , dest4
Kongurace seznamu oprávněných uživatelů
Command Popis
*1 Začátek kongurační zprávy
# Oddělovač
ID GSM ID - maximálně 8 alfanumerických znaků - Implicitní: 2GLIFT
# Oddělovač
conf1 Číslu povoleno kongurovat GSM
, Oddělovač
conf2 Číslu povoleno kongurovat GSM
, Oddělovač
conf3 Číslu povoleno kongurovat GSM
, Oddělovač
conf4 Číslu povoleno kongurovat GSM
# Oddělovač
dest1 Číslu povoleno získávat zprávy z GSM
, Oddělovač
dest2 Číslu povoleno získávat zprávy z GSM
, Oddělovač
dest3 Číslu povoleno získávat zprávy z GSM
, Oddělovač
dest4 Číslu povoleno získávat zprávy z GSM
Poznámky: Všechna telefonní čísla musejí mít mezinárodní předvolbu, jako například +420 pro Českou republiku
Příklad kongurační zprávy (dva uživatelé)::
*1#2GLIFT#+447987654321,+447123456789#+447987654321,+447123456789
Vzdálená kongurace SMS a správa 2G GSM
Když GSM obdrží zprávu, zkontroluje, zda zpráva pochází z telefonu s číslem na seznamu oprávněných čísel.
• Pochází-li zpráva od neoprávněného čísla, bude ignorována
• Pochází-li zpráva od oprávněného čísla a má-li správný formát, bude obdržena zpráva ve tvaru ‘ACK’
• Pochází-li zpráva od oprávněného čísla a má-li nesprávný formát, bude obdržena zpráva ve tvaru ‘NACK’
Všechny zprávy z GSM začínají pořadovým číslem, po němž následuje křížek #. Toto pořadové číslo začíná od 0 a
postupně se zvyšuje na 255, načež bude resetováno na 0. Při vypnutí GSM se resetuje.
Příklad úspěšné kongurační zprávy:
2 # *1 2GLIFT # ACK
Zprávy potvrzení kongurace

Chcete-li zkontrolovat konguraci, odešlete do 2G GSM následující zprávu:
*1?
Je-li odesílatel na seznamu oprávněných čísel, bude obdržen následující příklad:
3#*1#2GLIFT#+447987654321,+447123456789#+447987654321,+447123456789
Kontrola kongurace
Zpráva o požadavku na stav GSM
Oprávněná čísla si mohou vyžádat informace o GSM, včetně síly signálu, stavu baterie a napájení, rmware GSM atd.,
odesláním následující zprávy:
INFO
Zařízení odešle SMS s uvedením následujících informací:
• ID zařízení
• Operátor sítě GSM
• Signál sítě GSM
• Informace o síti GSM
• Stav baterie – nevyužitá, viz na následující stránce
• Firmware desky tištěných spojů
• Firmware GSM
• Číslo IMEI
• Datum a čas
• Frekvence a čas SMS autotestu
• Seznam příjemců SMS autotestu
Úplný rozpis zprávy je uveden na následující stránce.
RESTART ZAŘÍZENÍ
Uživatelé mohou zařízení 2G GSM dálkově resetovat následující zprávou:
RESET
Po přijetí této zprávy zařízení odpoví zprávou ACK (potvrzení) a poté se samo restartuje.

2G GSM/M0 IG V02 (Cz) PA 20.07.2017
Command Popis
Message index SMS index - 0 až 255
# Oddělovač
INFO
# Oddělovač
ID ID zařízení - implicitní = 2GLIFT
, Oddělovač
GSM operator Název operátora sítě GSM
, Oddělovač
GSM signal Hladina signálu GSM vyjádřená písmenem (H= vysoká, M = střední, L=
nízká) a hodnota od 1 do 31. Příklad H27 = velmi dobrý signál.
, Oddělovač
GSM network info Může to být buďto Domácí, Roaming nebo Zakázáno
# Oddělovač
Battery status Nepřítomna = baterie nebyla vložena nebo je vložena vadná baterie
Nabíjení = baterie se nabíjí
Používána = není napájení ze sítě, avšak baterie přítomna je
Nízký stav = není napájení ze sítě a baterii zbývá < 60 minut životnosti
# Oddělovač
PCB rmware Firmware PCB (hlavní desky tištěných spojů)
# Oddělovač
GSM rmware Firmware modulu GSM
, Oddělovač
IMEI IMEI modulu GSM
# Oddělovač
YYMMDD Aktuální datum na systému
, Oddělovač
hhmm Aktuální čas na systému
# Oddělovač
Autotest SMS frequency Interval autotestu:
0 = zakázáno
1 = každý den
2 = každé 2 dny, atd.
, Oddělovač
Autotest SMS: hour Hodina zaslání SMS autotestu
, Oddělovač
Autotest SMS: Receiver 1 Příjemce 1 SMS autotestu
, Oddělovač
Autotest SMS: Receiver 2 Příjemce 2 SMS autotestu
,Oddělovač
Autotest SMS: Receiver 3 Příjemce 3 SMS autotestu
,Oddělovač
Autotest SMS: Receiver 4 Příjemce 4SMS autotestu
Rozpis zprávy o požadavku na stav GSM
Avire s.r.o.
Okruzni 2615
370 01 Ceske Budejovice
Czech Republic
T: +420 387 005 602
F: +420 387 005 695
E: sales.cz@avire-global.com
W: www.avire-global.com

Avire 2G GSM Gateway
Einbauanleitung
Product Part Nr. 452 002/M
LED
Das Avire 2G GSM besitzt zwei LEDs um die verschiedenen Betriebszustände anzuzeigen:
2G GSM Gateway
GSM
Status
LED STATUSANZEIGE BESCHREIBUNG
Status AUS
Schnelles Blinken
Gerät ausgeschaltet
Akku nicht vorhanden (oder angeschlossen)
GSM
AUS
Langsame Blinken
AN
Schnelles Blinken
Sucht GSM Netz, niedrige Signalstärke, keine SIM-Karte, keine PIN-Eingabe.
GSM Signal gut.
GSM Signal sehr gut.
Roaming
Das Avire 2G GSM stellt die Verbindung zwischen dem Memcom+Notruftelefon und dem Mobilfunknetzwerk her. Diese
Anleitung setzt voraus, dass das Memcom+bereits installiert worden ist, und eine passende SIM Karte aktiviert wurde
und verwendet wird.
Ref nr. 452 862 (ML) Ausgabe 2

STECKVERBINDUNGEN
STECKER BESCHREIBUNG
APWR Netzstecker
BUSB USB Stecker für Update
CTEL1/TEL2 RJ11 FXS Stecker
DAntenne SMA/f Stecker für externe GSM Antenne
ESIM-Karte SIM Karten Slot
FSchalter An- und Ausschalter
C B D A E F
1. Zur Installation, bitte Gerät ausschalten und die folgenden Schritte
beachten.
2. Stecken Sie die GSM Antenne in den SMA Steckplatz, bitte nicht zu fest
anziehen. Die Antenne sollte mindestens 3 Meter vom GSM-Gerät entfernt
sein.
3. Stecken Sie die SIM-Karte in den vorgesehenen Steckplatz. Vergewissern Sie
sich, dass die Kontakte nach unten weisen.
4. Verbinden Sie das Notruftelefon mit einem der beiden Steckplätze TEL1
oder TEL2 auf der Rückseite des Geräts. Beide Steckplätze sind identisch.
5. Verbinden Sie das Netzkabel mit dem GSM (siehe unten bei
‘STROMVERSORGUNG’)
6. Schalten Sie den GSM Gateway mit Schalter an der Seite ein.
Es können bis zu acht Memcom+Notruftelefone mit dem GSM verbunden
werden; eine Stromverbindung sollte jedoch nur zu einem dieser Memcom+
Geräte hergestellt werden.
Die batteriegestützte +12V Stromversorgung des Memcom+wird als Stromversorgung für das GSM genutzt. Das
mitgelieferte Netzkabel hat einen roten +12V-Leiter und einen schwarzen 0V-Leiter. Dieses Kabel wird mit den
Schleppkabeln verbunden, um die Stromversorgung zum GSM-Anschluss zu führen. Der maximale Widerstand für jeden
Leiter beträgt 1 Ohm. Verwenden Sie mehrere parallel geschaltete Leiter, wenn große Distanzen überbrückt werden
müssen und der Widerstand höher als 1 Ohm ist.
Im Lieferumfang des GSM bendet sich ein grauer Stecker, mit dem Sie die Verbindung zum Memcom+herstellen können
(siehe oben bei ‘Stromversorgung des Memcom+).
HINWEIS: Wenn Sie ein GSM für die Verwendung mit anderen Notruftelefonen benötigen, empfehlen wir Ihnen das Avire
‘2G Universal GSM’ (Artikel-Nr. 452 002).
INSTALLATION
STROMVERSORGUNG
Notfalltelefon Energieversorgung
Netzanschluss auf Memcom+

Normalbetrieb: Prüfen Sie ob ausreichendes GSM Signal vorliegt um Anrufe abzusetzen und empfangen zu können (GSM
LED an oder blinkend).
PIN Eingabe: Geben Sie den PIN-Code ein (vollständige Beschreibung im Download Bereich auf www.memco-global.
com).
Roaming-Diensten
Roaming ermöglicht den Zugri auf mehrere Netzwerke, was die Signalstabilität in einigen Fällen verbessern könnte.
Beachten Sie, dass Roaming in der Nähe von nationalen Grenzen Roaming-Gebühren von ausländischen Netzwerken
führen könnte.
deaktivieren Roaming:
Netzbetreiber Code der SIM Karte eingeben indem das Notruftelefon abgesteckt und ein Standard DTMF
Handapparat in Anschluss TEL1/TEL2 eingesteckt wird. Dann folgenden Code eingeben:
# # 1 1 1 1 # 1 # 2 # operator code #
23402 für O2 Netz; 23415 für Vodafone; 23420 für 3; 23430 für T-Mobile; 23433 für Orange/E Plus.
um Roaming zu ermöglichen:
Trennen Sie das Notruftelefon und verbinden Sie ein Standard DTMF Telefon/ Handset mit dem Anschluss TEL2.
Nehmen Sie den Hörer ab, warten Sie auf das Freizeichen und wählen Sie den folgenden Code:
# # 1 1 1 1 # 1 # 1 #
Überwachung des Universal 2G GSM
ERSTEINRICHTUNG
Einige Sekunden nach dem Einschalten, nach Abschluss des Selbsttests, tritt einer der folgenden Fälle ein.
LED Normalbetrieb PIN Abfrage Rufbereichswechsel
GSM Blinken / AN Aus Blinkanzeige
Status An An An
Das Memco Memcom+Notruftelefon kann GSM-Signalstärke und SIM-Status des 2G GSM überwachen. Um dieses
Merkmal zu aktivieren, wählen Sie am Memcom+den Menüpunkt ‘GSM Status’ unter ‘HW Monitoring’.
HW Monitoring >
Stromversorgung
Akku
Telefonleitung
GSM geringe Signalstärke
GSM kein Signal
Lautsprecher/Mikrofon
GSM Status
Wenn der ‘GSM-Status’ aktiviert ist, führt das Memcom+die folgenden Aktionen durch:
Wenn die GSM-Signalstärke unterhalb des für ein Telefongespräch erforderlichen Minimums liegt oder ein SIM-
Fehler erkannt wird (wenn z.B. die SIM-Karte entfernt wurde), wird dies vom Memcom+bzw. vom C100 wie ein
Telefonleitungsfehler behandelt.
Das Memcom+kommuniziert mit dem GSM über den ‘Teilnehmeranschluss’ (der direkten Verbindung zwischen Memcom+
und GSM).

Das GSM kann gerätefern konguriert werden und per SMS Status-Information an eine Reihe autorisierter Nutzer senden.
Es können zwei Arten von Autorisierungs-Prolen konguriert werden:
• Bis zu 4 Nutzer können berechtigt sein, das 2G GSM zu kongurieren bzw. Informationsmeldungen von diesem
anzufordern.
• is zu 4 Nutzer können Informationsmeldungen per SMS vom 2G GSM erhalten.
HINWEIS: Wenn keine Nummern für die Konguration hinterlegt sind, kann jeder Nutzer das 2G GSM gerätefern steuern.
Die Liste autorisierter Nutzer wird durch Senden der folgenden SMS an das G GSM eingerichtet:
*1 # ID # conf1 , conf2 , conf3 , conf4 # dest1 , dest2 , dest3 , dest4
Konguration der Liste autorisierter Nutzer
Command Beschreibung
*1 Beginn der Kongurationsnachricht
# Trennzeichen
ID GSM ID – maximal 8 alphanumerische Zeichen – Voreinstellung: 2GLIFT
# Trennzeichen
conf1 Zur Konguration des GSM berechtigte Nummer
, Trennzeichen
conf2 Zum Empfang von Nachrichten des GSM berechtigte Nummer
, Trennzeichen
conf3 Zur Konguration des GSM berechtigte Nummer
, Trennzeichen
conf4 Zur Konguration des GSM berechtigte Nummer
# Trennzeichen
dest1 Zum Empfang von Nachrichten des GSM berechtigte Nummer
, Trennzeichen
dest2 Zum Empfang von Nachrichten des GSM berechtigte Nummer
, Trennzeichen
dest3 Zum Empfang von Nachrichten des GSM berechtigte Nummer
, Trennzeichen
dest4 Zum Empfang von Nachrichten des GSM berechtigte Nummer
Hinweis: Alle Telefonnummern müssen die internationale Vorwahl beinhalten, z.B. +44 für GB.
Beispiel einer Kongurationsnachricht:
*1#2GLIFT#+447987654321,+447123456789#+447987654321,+447123456789
Geräteferne Konguration und Steuerung des 2G GSM per SMS
Wenn das GSM eine Nachricht empfängt, überprüft es, ob diese von einem autorisierten Nutzer stammt.
• Wenn die Nachricht von einem nicht autorisierten Nutzer stammt, wird diese ignoriert.
• Wenn die Nachricht von einem autorisierten Nutzer stammt und korrekt formatiert ist, wird eine Bestätigung mit
dem Text ‘ACK’ verschickt.
• Wenn die Nachricht von einem autorisierten Nutzer stammt, jedoch nicht korrekt formatiert ist, wird eine Meldung
mit dem Text ‘NACK’ verschickt.
Alle vom GSM verschickten Nachrichten beginnen mit einer Index-Nummer, gefolgt von #. Die Index-Nummern beginnen
bei 0 und erhöhen sich bis 255, bevor sie wieder auf 0 zurückgesetzt werden. Eine Rücksetzung erfolgt auch, wenn das
GSM ausgeschaltet wird.
Beispiel einer erfolgreichen Kongurationsnachricht:
2 # *1 2GLIFT # ACK
Kongurations-Bestätigungsmeldungen

Um die Konguration zu überprüfen, senden Sie die folgende Nachricht an das 2G GSM:
*1?
Wenn die Nachricht von einer autorisierten Nummer gesendet wird, erhalten Sie folgende Meldung (Beispiel):
3#*1#2GLIFT#+447987654321,+447123456789#+447987654321,+447123456789
Überprüfen der Konguration
Anfordern einer GSM-Statusmeldung
Autorisierte Nutzer können durch Senden der folgenden Nachricht Informationen vom GSM anfordern, u.a. über
Signalstärke, Akku- & Stromversorgungsstatus, Firmware, etc
INFO
Das Gerät sendet eine SMS mit den folgenden Informationen:
• Geräte-ID
• GSM-Operator
• GSM-Signal
• GSM-Netzwerk-Info
• Akku-Status (nicht verwendet, siehe nächste Seite)
• PCB-Firmware
• GSM-Firmware
• IMEI-nummer
• Datum und Uhrzeit
• Autotest SMS-Frequenz und Zeit
• Liste der Autotest SMS-Empfänger
Eine vollständige Aufschlüsselung der Nachricht nden Sie auf der folgenden Seite.
NEUSTART DES GERÄTS
Benutzer können das Gerät mit folgender Nachricht neu starten:
RESET
Nach dem Empfang der Nachricht antwortet das Gerät mit einer ACK-Nachricht und startet anschließend neu.

2G GSM/M0 IG V02 (D): PA_20.07.2017
Command Beschreibung
Message index SMS index - 0 bis 255
# Separator
INFO
# Separator
ID Geräte-ID – Voreinstellung = 2GLIFT
, Separator
GSM operator GSM-operator-name
, Separator
GSM signal GSM-Signalstärke – Angabe durch Buchstaben (H= high,
M = medium, L= low) und einen Wert von 1 bis 31. Beispiel
H27 = sehr gutes Signal.
, Separator
GSM network info Entweder Home, Roaming oder nicht erlaubt
# Separator
Battery status Nicht vorhanden – das GSM zeigt immer den Status ‘nicht
vorhanden’, da es über keine Stützbatterie verfügt. Die
Akkusicherung erfolgt durch das Memcom+
# Separator
PCB rmware Firmware der Hauptplatine
# Separator
GSM rmware Firmware des GSM-Moduls
, Separator
IMEI GSM-Modul IMEI
# Separator
YYMMDD Aktuelles Datum des Systems
, Separator
hhmm Aktuelle Uhrzeit des Systems
# Separator
Autotest SMS frequency Autotest-Intervall:
0 = deaktiviert
1 = täglich
2 = alle 2 Tage, etc.
, Separator
Autotest SMS: hour Sendezeit der Autotest-SMS
, Separator
Autotest SMS: Receiver 1 Empfänger 1 der Autotest-SMS
, Separator
Autotest SMS: Receiver 2 Empfänger 2 der Autotest-SMS
,Separator
Autotest SMS: Receiver 3 Empfänger 3 der Autotest-SMS
,Separator
Autotest SMS: Receiver 4 Empfänger 4 der Autotest-SMS
Aufschlüsselung der GSM-Statusmeldung
Avire Ltd
Handwerker Strasse 6
97526 Sennfeld
Deutschland
T: 09721/608511
F: 09721/608544
E: sales.de@avire-global.com
W: www.memco-global.com
W: www.avire-global.com

2G GSM Gateway
GSM
Status
Pasarela GSM Avire 2G
Guía de instalación
N.º de parte de producto 452 002/M
Diodo
La pasarela GSM Avire 2G tiene 2 diodos que indican el estado del dispositivo.
Diodo Estado Descripción
Estado OFF (apagado)
Parpadeo rápido
Suministro de energía no conectado.
Suministro de energía conectado.
GSM
OFF (apagado)
Parpadeo lento
ON (encendido)
Parpadeo rápido
Buscando red GSM, Bajo nivel de señal GSM, tarjeta SIM no detectada, PIN no insertado.
Buen nivel de señal GSM.
Muy buen nivel de señal GSM.
Servicios de itinerancia.
El Terminal GSM 2G de Avire ofrece la interfaz entre el Teléfono de emergencia Memcom+del ascensor y la red de
telefonía móvil. Esta guía da por sentado que ya se ha instalado Memcom+. El instalador/cliente tiene que proveer una
tarjeta SIM adecuada para activar.
N.º de Ref. 452 862 (ML) Versión 2

CONEXIONES
CONNECTOR DESCRIPTION
APWR Conector de Suministro de energía
BUSB Conector USB para modernizaciones
CTEL1/TEL2 RJ11 FXS connectors
DAntena Conector SMA/f para antena GSM exterior
ESIM Conector SIM
FInterruptor Interruptor para el encendido-apagado del dispositivo
C B D A E F
1. Ubicación: Se recomienda que el dispositivo sea instalado en el punto
más alto (p. ej., en la sala de máquinas o en la parte superior del eje).
2. Conecte la antena GSM al conector SMA con cuidado de no
sobretensar. La antena debe ser colocada a una distancia mínima de 3
metros desde la unidad GSM.
3. Inserte la tarjeta SIM en la ranura SIM. Asegúrese de que la tarjeta
SIM esté insertada en la dirección correcta con los contactos dorados
mirando hacia abajo.
4. Conecte el teléfono de emergencia al conector TEL1. Si conecta más
de un teléfono de emergencia, haga una conexión en cadena margarita
entre los teléfonos o bien, use un bloque de empalmes para dividir la
conexión desde el dispositivo.
5. Conecte el cable de suministro de energía a GSM (ver ‘ALIMENTACIÓN’
debajo).
6. Active la pasarela GSM usando el interruptor lateral.
Se pueden conectar hasta ocho Teléfonos de emergencia Memcom+a
GSM. Sin embargo, sólo se debería poder realizar una conexión de energía
a una de estas unidades Memcom+.
La batería de reserva de +12V de energía de Memcom+se usa para suministrar energía a GSM. El cable de energía incluido
tiene un núcleo de +12V con cubierta de color rojo y un núcleo de 0V con cubierta de color negro. Luego, este cable es
conectado a los cables desplazables para llevar el suministro de energía al terminal GSM. La resistencia máxima para
cada núcleo es de 1 ohmio. Use más núcleos en paralelo si es una sección muy larga y la resistencia es superior a 1 ohmio.
Se incluye un conector gris con GSM para permitirle hacer la conexión con Memcom+(Ver ‘Conector de Suministro de
energía en Memcom+).
NOTA: Si requiere GSM para usar con otros Teléfonos de emergencia, consulte ‘GSM universal 2G’ de Avire (número de
parte 452 002.
INSTALLATION
ALIMENTACIÓN
teléfono de emergencia alimentación
Power supply connection on Memcom+
Table of contents
Languages:
Other Memco Gateway manuals
Popular Gateway manuals by other brands

McQuay
McQuay MicroTech MAG Installation & maintenance data

OTE
OTE Speedport Entry 2i Maintenance Management Guide

ZyXEL Communications
ZyXEL Communications P-2301R/RL-P1C Support notes

Roger
Roger PR402DR installation guide

nilan
nilan Compact P2 installation instructions

Generac Power Systems
Generac Power Systems Power Zone 410 owner's manual