9
Instructions for use for REAL 8200 PLUS Mammography Medical Clinic Chairs Getting started
21-08996-UK-00
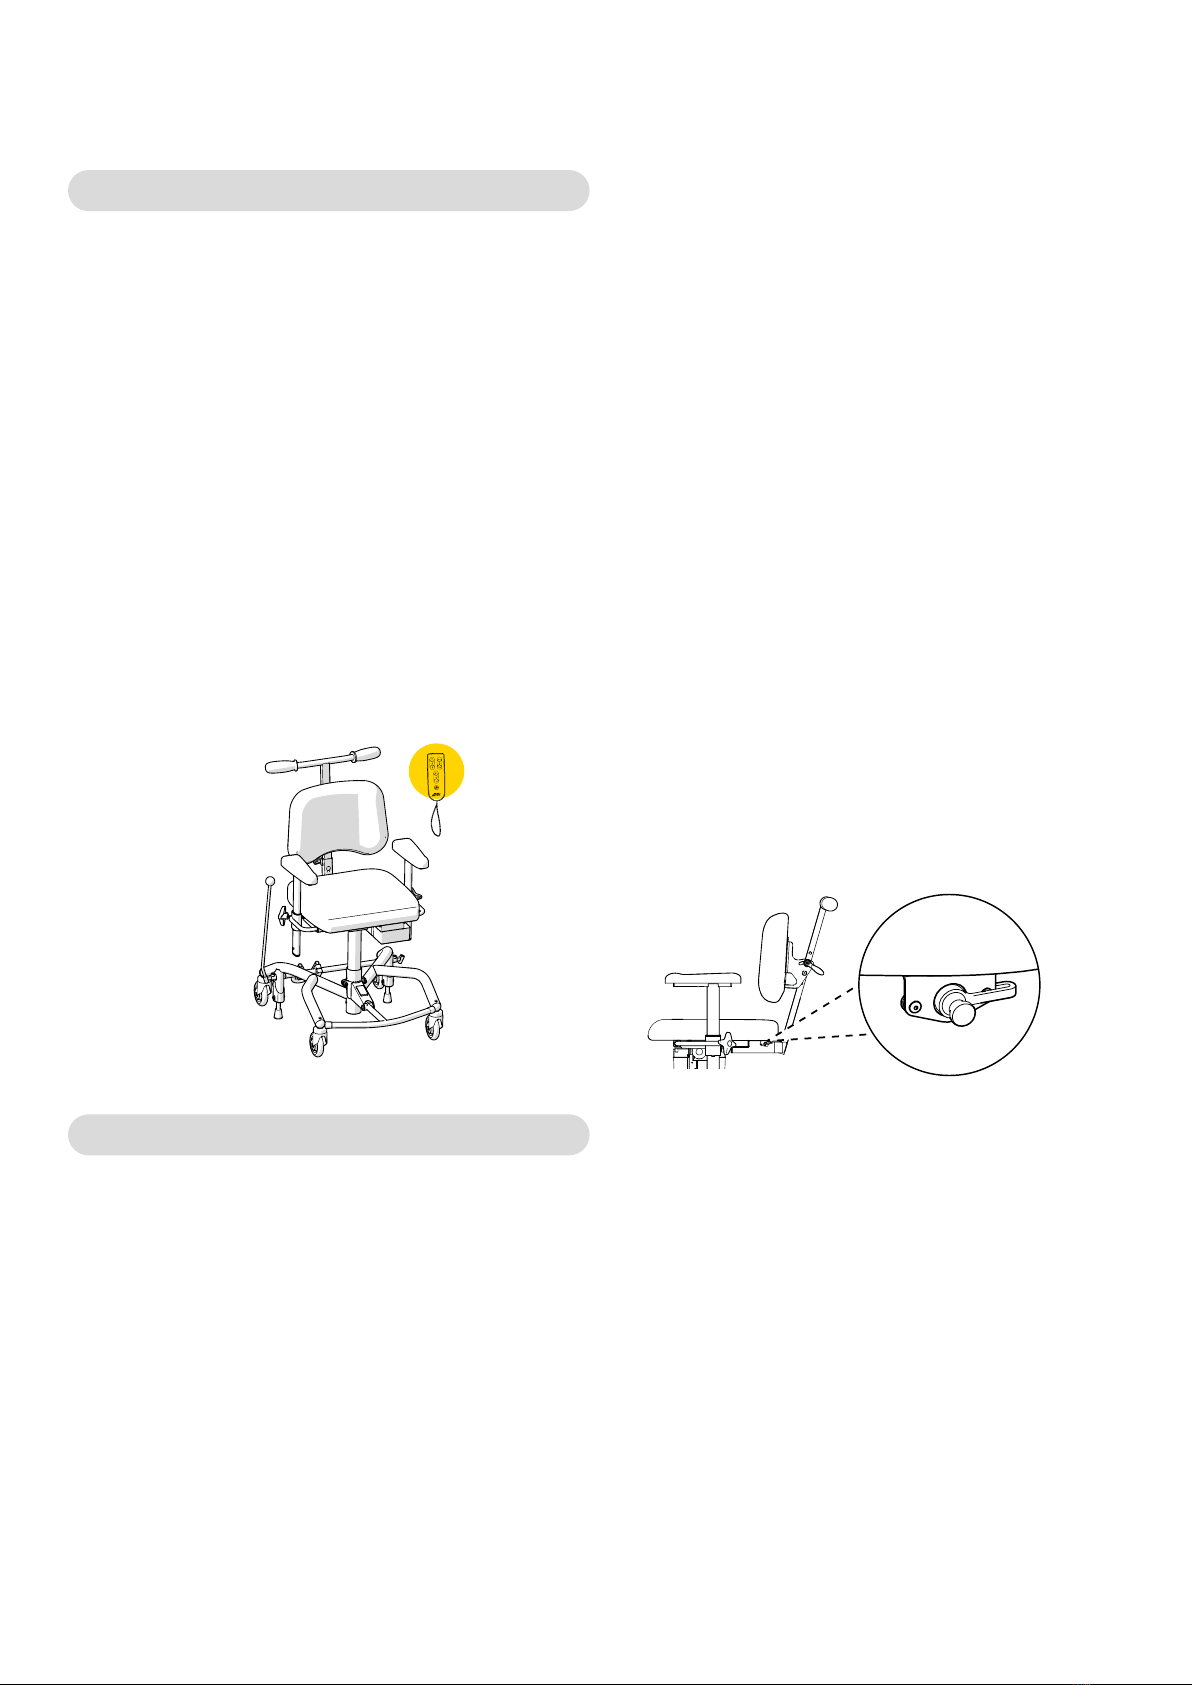
2.2. How to use the device’s functions
The device has remote-controlled electric
height adjustment, see Figure 2.2. The device
is also equipped with manual foot brake
and hand brake. The manual foot brake is
activated and deactivated via a pedal and the
manual hand brake is activated by pushing
the brake lever forwards and deactivated
by pulling the brake lever backwards, see
Figure 2.2. We recommend not mounting
the brake lever if you intend to use the foot
brake. Depending on the model, the device
may be equipped with an electric seat tilt
and an electric back rest mechanism. These
are remote-controlled, see Figure 2.2. See
5. Configurations and settings for detailed
information about all the features and
controls of the device.
2.3. Charging
The battery should be charged once every 24
hours. Fully charging the battery on a daily
basis will take 2 to 5 hours. It is important that
the battery is never completely discharged,
as this helps to prolong the life of the battery.
Daily battery charging is especially important
for configurations with an electric brake and
seat tilt. The device emits a low battery level
warning sound, for both low and critical. Low
battery is indicated by a short signal. Critical
battery level is indicated by a short signal
that ends with a loud beep.
The device must be charged in a safe
manner. The electrical functions cannot be
used when the device is charging. For this
reason, choose an easily accessible wall
socket to plug the charger into. The charger
cable to the wall socket is 1 metre long and
must not be extended. In case of emergency,
disconnect the device from the mains by
unplugging the charger from the wall socket.
How to charge the device
1. Inset the plug into the charging socket
(see Figure 2.3). The charging socket is
usually located at the rear edge under
theseat.
2. Connect the charger plug into the wall
socket. The LED on the charger will
indicate that charging is underway.
3. The battery is fully charged when the LED
on the charger changes colour from red
to green. This is shown by the three green
battery LEDs on the remote control’s
battery indicator flashing in sync.
If the electrical functions have not been
used for 7 days, the battery switches off
automatically. To reconnect the battery,
connect the battery charger to the charging
socket and the wall outlet and wait at least
5 seconds before unplugging the charger. It
is recommended to charge the battery fully
after the battery has been disconnected.
If no electrical functions are working, try
charging the battery. Contact your distributor
if electrical functions still do not work, see1.1.
Contact details.
Figure 2.2. Controls on the electric model.
Figure 2.3. Plug connection to the charging
socket under the seat.


