manuals.online logo
Brands
  1. Home
  2. •
  3. Brands
  4. •
  5. Smiths Medical
  6. •
  7. Medical Equipment
  8. •
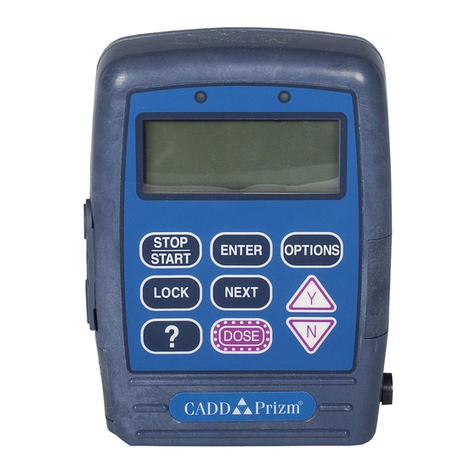
  9. Smiths Medical CADD-Solis User manual

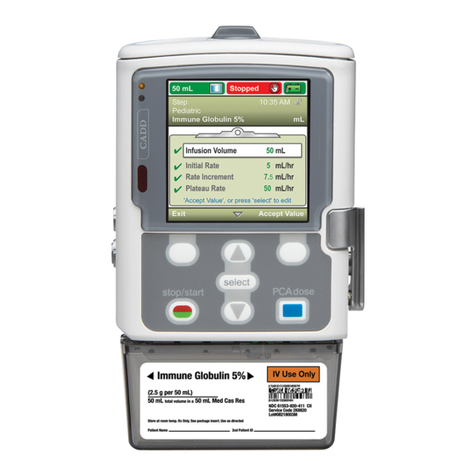
Smiths Medical CADD-Solis User manual

CADD®-Solis
WITH PIB/PIEB INFUSION MODE
Quick Start Guide
100 mL Stopped
PIB 2:07 PM
Qualifier name
Drug mL
Next
Review complet. Press 'Next'
Intermittent Bolus 10 mL
Bolus Interval 1 Hrs 0 Mins
Next Bolus 1 Hrs 0 Mins
PCA Dose 5mL
IN193521GB-082019.indd 1 22/08/2019 12:23
2| Quick guide
Infusion delivery methods
The CADD-Solis®pump allows the following infusions to
be programmed:
• Continuous rate: infusion of drug at a constant, programmed
flow rate
• Intermittent bolus (IB): a series of doses activated at regular,
programmed intervals
• PCA dose: a demand dose activated by the patient
• Clinician bolus: a dose activated by the clinician
01
34
Intermittent Bolus
Intermittent Bolus
Intermittent Bolus
PCA Dose
Intermittent Bolus Interval
PCA
Lockout
2
Dose
Time
Thanks to this delivery mode, you
can programme an intermittent
bolus; e.g., an automatic bolus
which is triggered at regular
intervals according to what
youprogramme.
In addition to intermittent bolus,
it is possible to programme
continuous delivery or a PCA dose
(bolus requested by the patient)
if necessary.
See page 12 for more details on the programming parameters for Intermittent Bolus Mode.
DEFINITION OF INTERMITTENT BOLUS DELIVERY MODE
IN193521GB-082019.indd 2 22/08/2019 12:23
Quick guide | 3
To install the batteries or
battery pack
• Install a new set of AA batteries or a rechargeable battery pack.
TURN ON OR OFF THE PUMP
• Turn on the pump using the power
switch on the side of the pump :
NEW PATIENT PROGRAMMING
The pump is off.
• After having turned on the pump, a message appears on the screen:
Do you want to start a new patient?Press Yes.
The pump is on.
• To start programming, select Tasks
• Press to highlight Start New Patient.
OR
stop/start
select
PCA Dose
02
Tasks
Tasks
Press 'select' to begin.
Back
Give Clinician bolus
Start New Patient
Start New Protocol, Same Patient
Prime tubing
Power switch to
turn pump on/off
IN193521GB-082019.indd 3 22/08/2019 12:23
4| Quick guide
• Highlight the appropriate therapy
with the keys or then
confirm with select .
• Next highlight a qualifier by
pressing or then confirm
with select .
• Then highlight the drug by
pressing or then confirm
with select .
• Enter the 3-digit security code.
Press or to display each
digit then press select to confirm
and advance to the next digit.
Once the complete 3-digit code
has been entered, press Accept
Value.
PCA IV
PIB
PIEB
PCEA
Select Therapy
Press 'select' to choose
Back
50 mL Stopped
10:28 AM
Peripheral Nerve Block
Qualifier name 2
Qualifier name 1
Qualifier name 3
Qualifier name 4
Select Qualifier
Press 'select' to choose
Back
50 mL Stopped
PIB 10:28 AM
Drug 1 1mg/mL
Drug 2 mL
Select Drug
Press 'select' to choose
Back
50 mL Stopped
PIB 10:28 AM
Qualifier 4
Use Key or Code to Continue
* *
Cancel Accept Value
0
Press 'select' to advance digit
IN193521GB-082019.indd 4 22/08/2019 12:23
Quick guide | 5
Cancel Review
Review pump settings.
100 mL Stopped
PIB 2:07 PM
Qualifier name.
Drug. mL
Exit Accept Value
‘Accept Value’, or press ‘Select’ to edit
Intermittent Bolus 10 mL
Bolus Interval 1 Hrs 0 Mins
Next Bolus 1 Hrs 0 Mins
PCA Dose 5mL
• The screen Are these correct?
appears. Confirm with Yes or
cancel with No.
• The screen Review pump settings
appears. Select Review.
• The various delivery settings then
appear on the screen.
• To confirm a setting, press on
Accept value; a symbol appears
on the left.
• To edit the highlighted delivery
setting, press select .
• Next, adjust the value with the
keys or then select Save.
• Confirm your choice by pressing
Accept Value, a symbol appears
on the left.
Are these correct?
Therapy PIB
Qualifier Qualifier name 4
Drug Drug
Units mL
No Yes
100 mL Stopped
PIB 2:07 PM
Qualifier name.
Drug. mL
Don’t Save Save
Intermittent Bolus
5 mL/h
0
30
100 mL Stopped
PIB 2:07 PM
Qualifier name.
Drug. mL
Exit Accept Value
‘Accept Value’, or press ‘Select’ to edit
Intermittent Bolus 10 mL
Bolus Interval 1 Hrs 0Mins
Next Bolus 1 Hrs 0Mins
PCA Dose 5mL
IN193521GB-082019.indd 5 22/08/2019 12:23
6| Quick guide
No Yes
Start pump?
• When you have confirmed all of the
settings, press Next.
• The pump will then require you
to attach the cassette or the bag,
if this has not yet been done (to
attach the disposable see the
section titled Attaching the cassette
or tubing on page 8).
• The pump will then explain to you
how to prime the tubing.
• If you have not yet locked the
cassette, the pump will ask you
to lock it with the pump key
(see page 8).
• The pump asks you if you want to
start delivery. Press Yes to start.
100 mL Stopped
PIB 2:07 PM
Qualifier name
Drug mL
Next
Review complet. Press 'Next'
Intermittent Bolus 10 mL
Bolus Interval 1 Hrs 0 Mins
Next Bolus 1 Hrs 0 Mins
PCA Dose 5mL
IN193521GB-082019.indd 6 22/08/2019 12:23
Quick guide | 7
I want to change a programme
setting during delivery
IT IS NOT NECESSARY TO STOP THE
PUMP TO MODIFY A DELIVERY SETTING.
100 mL
PIB 2:07 PM
Nom crit. qual.
Médic. mL
Reports Tasks
Intermittent Bolus 10 mL
Bolus Interval 1 Hrs 0 Mins
Next Bolus 1 Hrs 0 Mins
PCA Dose 5mL
Running
Home
Press ‘select’ to edit
100 mL Running
PIB 2:07 PM
Qualifier Name.
Drug. mL
Don’t save Save
PCA Dose
5 mL/h
0
30
PIB 2:07 PM
Qualifier name
Drug mL
PCA Dose
Confiirm soft limit
override?
is greater than the soft limit.
No Yes
Edit pending - Save required
9mL/hr
Lorem ipsum
Use Key or Code to Continue
* *
Cancel Accept Value
0
Press 'select' to advance digit
1. Use the keys or to highlight
the programme setting to edit
modify (e.g. Bolus Dose) and
press select .
2. Enter the 3-digit security code.
Press or to display each
digit then press select to confirm
and advance to the next digit.
Once the 3 digits have been
entered, press on Accept Value.
3. The screen displays the current
value of the selected setting.
The protocol parameter range
limits are displayed in green for
the soft limits and in orange for
hard limits.
Use the keys or to enter the
new value and press on Save.
4. If the standard limit is exceeded,
the message Confirm soft limit
override? appears. Press on Yes.
The value is saved and the
delivery continues with the new
setting.
IN193521GB-082019.indd 7 22/08/2019 12:23
8| Quick guide
Attaching the cassette or tubing
1. Clamp the tubing and lower the
cassette latch.
2. Insert the cassette hooks into the
hinge pins on the bottom of the pump.
Lower the latch to the bottom while
lifting the cassette at the same time
until it is firmly attached; a click will
indicate that it is properly in place.
3. Lift the cassette latch into the
closed position.
4. Lock the cassette to start delivery.
Insert the key and turn it clockwise.
Correct Incorrect
An uneven gap indicates that the
cassette is not properly latched.
Removing the cassette or tubing
1. Make sure that delivery has stopped
and clamp the tubing.
2. If the cassette is locked, insert the key
and turn it counter-clockwise until the
unlocked position.
3. Push down on the cassette latching lever
until it detaches.
IN193521GB-082019.indd 8 22/08/2019 12:23
Quick guide | 9
Attaching the cassette or tubing
1. Clamp the tubing and lower the
cassette latch.
2. Insert the cassette hooks into the
hinge pins on the bottom of the pump.
Lower the latch to the bottom while
lifting the cassette at the same time
until it is firmly attached; a click will
indicate that it is properly in place.
3. Lift the cassette latch into the
closed position.
4. Lock the cassette to start delivery.
Insert the key and turn it clockwise.
Removing the cassette or tubing
1. Make sure that delivery has stopped
and clamp the tubing.
2. If the cassette is locked, insert the key
and turn it counter-clockwise until the
unlocked position.
3. Push down on the cassette latching lever
until it detaches.
Attaching the cassette or tubing
Follow the standard procedure for the preparation and filling of the
cassette reservoir or the administration set.
1. Press Stop/Start. The pump
displays Stop pump?
2. Press Yes.
3. Clamp the tubing and
disconnect it from the patient.
Unlock the cassette reservoir
with the pump key.
4. Open the latch of the cassette
reservoir and remove the
empty cassette.
5. Attach a new filled cassette
reservoir (see section
Attachment of the cassette
reservoir) and lock the
cassette with the pump key.
6. Reservoir volume setting?
Press Yes.
7. Press Select to reinitialise the
reservoir volume previously
calibrated by the protocol or
press or to edit.
8. As soon as the value of the
reservoir volume is correct,
press Save. The pump displays
Reservoir volume saved.
9. Prime the tubing as requested.
10.Review delivery setting and
start pump? Press Yes.
11. Press Review, then check the
programme settings and
press Accept Value to confirm
each setting.
12.After this check, press Next
to continue. Start pump?
Press Yes.
100 mL Stopped
PIB
Qualifier Name
Drug 1mg/mL
Reservoir Vol.
Don’t Save
1mL
0
Press 'select' to reset to
100 mL
9,999
IN193521GB-082019.indd 9 22/08/2019 12:23
10 | Quick guide
I want to prime the tubing
Make sure that delivery has stopped, that the tubing is disconnected
from the patient and that the clamps are open.
If the pump displays the screen Prime the tubing?
1. The screen displays Prime tubing? Select Yes (unlock the keypad if
necessary).
2. Select Prime.
3. Once you have pressed Prime, you do not need to hold your finger
down on the key.
4. Once priming is complete and the air is removed from the line, select
Stop Priming.
If the pump does not display the screen: Prime the tubing?
1. In the Tasks menu press or to select Prime tubing and press
select (unlock the keypad if necessary).
2. Select Prime.
3. Once you have pressed Prime, you do not need to hold your finger
down on the key.
4. Once priming is complete and the air is removed from the line, select
Stop Priming.
IN193521GB-082019.indd 10 22/08/2019 12:23
Quick guide | 11
I want to consult the delivery reports
The reports can be viewed at any time whether the pump is running
or stopped.
Back
Intermittent Bolus Status
Given and PCEA Dose Counters
PCEA Dose Graph
Intermittent Bolus Graph
Reports
Press 'select' to view report
PCEA and intermittent graph
PCEA Attempted PCEA given
Intermittent Bolus
Back
11:00 15:00
0
2
4
6
8
10
D
o
s
e
s
PCEA and Intermittent
bolus Graphic
Intermittent bolus status
Back
3 Mins since last
intermittent bolus
Next intermittent
bolus in 17 Min
Intermittent bolus status
Delivery History and Pie Chart
1 Hrs 0 Min
Continuous rate 0.5 mL
PCA Dose 1.7 mL
Clinician Bolus 2 mL
Intermittent Bolus 0 mL
Latest
4.2 mL
Back
Delivery History/Pie Chart
1. In the menu Reports, press or to
highlight which report you want to view and
press select .
2. Press Back to return to the report selection
menu, then again on Back to return to the
first screen.
NB: To reset the report to zero Given and
PCEA Dose Counters select the report Given
and PCEA Dose Counters, position on Total
quantity and Total volume then press on Clear
receipts. Then position on Received bolus
doses, attempted bolus doses and press on
Clear the doses received.
3. According to your programming, you can
see the following 10 reports in the pump
CADD®-Solis:
• Intermittent bolus status
• Given and PCA Dose Counters (PCA and
PCEA)
• PCA Dose Graph (PCA and PCEA)
• Intermittent Bolus Graph
• PCA and Intermittent Graph
(PCA, PCEA and PIB)
• Delivery history and pie chart
• Delivery log
• Event log
• Protocol Library Summary
• Device information
IN193521GB-082019.indd 11 22/08/2019 12:23
12 | Quick guide
Clinician Bolus
The pump must be running.
1. From the home screen select Tasks.
2. Hightlight Give Clinican Bolus then press
Select.
3. Enter the clinician bolus security code.
4. Use the keys or until the desired value.
Press Deliver.
NB: If the desired value is outside the
standard limit press on Confirm.
Validate this change of standard limit by
pressing on Yes.
5. You may stop the bolus at any time by
selecting Stop Bolus.
PIB
Qualifier Name
Drug mL
Give Clinician Bolus
Start New Patient
Start New Protocol, Same Patient
Prime Tubing
Set Time and Date
Adjust Backlight Intensity
Adjust Alarm Volume
View Reports
Adjust Admin Settings
Tasks
Press 'select' to begin
Back
100 mL Stopped
IN193521GB-082019.indd 12 22/08/2019 12:23
Quick guide | 13
Definition of the parameters
to be programmed
PARAMETERS LINKED TO THE INTERMITTENT BOLUS:
• Intermittent bolus: dose of medicine that is delivered to the patient at
regular time intervals.
• Bolus interval: amount of time that elapses from the beginning of one
intermittent bolus to the beginning of the next one.
• Next bolus: planned starting time for the next programmed
Intermittent Bolus.
PARAMETERS LINKED TO THE PCA DOSE ACTIVATED BY THE PA
TIENT:
• PCA Dose: bolus of drug delivered, requested by the patient; e.g., the
quantity of drug delivered by pressing on the patient’s remote control
or the bolus dose key of the pump.
• PCA Lockout: minimum amount of time between 2 PCA doses activated
by the patient.
OTHER INFUSION PARAMETERS:
• Continuous rate: quantity of drug delivered in continuous flow.
• Hourly limit: this is the maximum cumulative dose over the allotted
hours. This option makes it possible to restrict the quantity of drug
delivered (continuous + intermittent bolus + patient PCA dose) except
for clinician bolus, to a chosen number of hours (from 1 to 12 hours).
• Max. doses/Hr: maximum number of PCA doses requested by the
patient authorized over 1 hour.
• Reservoir volume: amount of fluid that is contained in the reservoir
(CADD®cassette or solution bag).
The above infusion parameters
can be combined if needed with
the pump CADD®-Solis.
E.g.: you can programme at the same
time an Intermittent Bolus + a
PCA dose + a continuous delivery.
01
24
Intermittent Bolus
Intermittent Bolus
Intermittent Bolus
PCA Dose
Intermittent Bolus Interval
PCA
lockout
PCA Dose
PCA
lockout
3
Dose
Time
IN193521GB-082019.indd 13 22/08/2019 12:23
14 | Quick guide
Programming of forbidden periods:
Intermittent Bolus
04
123
Intermittent Bolus
Intermittent Bolus
Intermittent
Bolus Interval
Intermittent
Bolus Interval
Dose
Time
PCA
Lockout
PCA Dose
04
123
PCA
Lockout
PCA Dose
PCA Dose
Dose
Time
Intermittent Bolus
04
12
Intermittent Bolus
Intermittent Bolus
PCA
Lockout
PCA Dose
Dose
3
Time
1
Intermittent
Bolus Interval
Intermittent Bolus
012
Intermittent Bolus
Intermittent Bolus
PCA
Lockout
PCA Dose
Dose
3 4
Intermittent
Bolus
Interval
1
Intermittent
Bolus Interval
Intermittent Bolus
012
Intermittent Bolus
Intermittent Bolus
PCA
lockout
PCA dose
Dose
3 4
Model with limit = PCA lockout
Model with limit = Bolus Interval
• Between 2 Intermittent Bolus = Bolus
interval
• Between 2 PCA doses = PCA lockout
• Between an Intermittent Bolus and a
PCA dose = PCA lockout
• Between a PCA dose and an
Intermittent Bolus = 2 programming
possibilities:
4 either the PCA lockout
4or the Bolus interval.
To choose this forbidden period between
a Bolus Dose and an Intermittent
Bolus, the option to programme is the
type of interval.
NB: usually the most used interval type
is the refractory period.
IN193521GB-082019.indd 14 22/08/2019 12:23
Quick guide | 15
Help screens in case of alarm
Air in-line detected: high priority alarm = stops delivery
The air detector has detected air in the fluid path. The delivery in
progress stops automatically. Select Acknowledge to clear the alarm.
If the fluid path contains air bubbles, close the clamps and disconnect
the tubing from the patient. Then prime the tubing to remove the air and
restart the delivery.
Battery depleted: medium priority alarm (orange screen) or high
priority alarm (red screen)
Select Acknowledge to clear the alarm, otherwise it will stop
automatically after 5 seconds. You must install a fully charged
rechargeable battery pack or 4 new AA batteries.
Downstream Occlusion: high priority alarm = stops delivery
The pump has detected an occlusion between the pump and the patient,
which may be resulting from a kink on the fluid path, a closed clamp
or a blockage. Delivery is paused and will resume if the occlusion is
removed. This alarm has associated help screens. To access them press
Silence then Help.
Reservoir volume low: medium priority alarm (orange screen) or high
priority alarm (red screen)
Depending on your pump’s settings, an alarm will sound to inform you
that the volume in the reservoir (bag or cassette) is low and that a new
bag or cassette must be installed quickly.
Upstream Occlusion: high priority alarm = stops delivery
Clear occlusion between the pump and the reservoir. Liquid is not
flowing between the bag/cassette and the pump. This malfunction may
result from a kink on the fluid path, a closed clamp or an air bubble in
the tubing. Delivery is paused and will automatically resume once the
occlusion is removed. If the alarm has been activated then cleared more
than 3 times within 15 minutes, you are required to acknowledge the
alarm before it can clear.
IN193521GB-082019.indd 15 22/08/2019 12:23
CADD®-Solis
WITH PIB /PIEB INFUSION MODE
Smiths Medical ASD, Inc.
6000 Nathan Lane North
Minneapolis, MN 55442, USA
Tel: 1-614-210-7300
Toll-Free USA: 1-800-258-5361
Smiths Medical International Ltd
1500, Eureka Park,
Lower Pemberton,
Ashford Kent, TN25 4BF, UK
Tel +44 (0)1303-260551
www.smiths-medical.com
Find your local contact information at: www.smiths-medical.com/customer-support
Smiths Medical is part of the global technology business Smiths Group plc. Please see
the Instructions for Use/Operator’s Manual for a complete listing of the indications,
contraindications, warnings, and precautions. CADD and the Smiths Medical design mark are
trademarks of Smiths Medical. The symbol ®indicates the trademark is registered in the U.S.
Patent and Trademark Office and certain other countries.
©2019 Smiths Medical. All rights reserved. IN193521GB-082019
PRODUCT(S) DESCRIBED MAY NOT BE LICENSED OR AVAILABLE FOR SALE IN CANADA AND
OTHER COUNTRIES.
Compartment for
batteries or battery pack
Keypad
Cassette Latch
Keypad/cassette lock
Power Switch
Indicator lights
USB port
Blue AC Power Light
AC Power Jack
Remote dose
Cord Jack
MPAUCA-1646
100 mL
PIB 2:07 PM
Nom crit. qual.
Médic. mL
Reports Tasks
Intermittent Bolus 10
mL
Bolus Interval 1 Hrs 0
Mins
Next Bolus 1 Hrs 0
Mins
PCA Dose 5
mL
Running
Home
Press ‘select’ to edit
IN193521GB-082019.indd 16 22/08/2019 12:23

Other manuals for CADD-Solis

5

Other Smiths Medical Medical Equipment manuals

Smiths Medical BCI 3304 User manual

Smiths Medical

Smiths Medical BCI 3304 User manual

Smiths Medical CADD-Prizm VIP User manual

Smiths Medical

Smiths Medical CADD-Prizm VIP User manual

Smiths Medical CADD-Solis User manual

Smiths Medical

Smiths Medical CADD-Solis User manual

Smiths Medical Portex Blue Line Ultra User manual

Smiths Medical

Smiths Medical Portex Blue Line Ultra User manual

Smiths Medical Graseby 1200 User manual

Smiths Medical

Smiths Medical Graseby 1200 User manual

Smiths Medical CADD-Solis Reference guide

Smiths Medical

Smiths Medical CADD-Solis Reference guide

Smiths Medical PORTEX acapella choice User manual

Smiths Medical

Smiths Medical PORTEX acapella choice User manual

Smiths Medical 1850 User manual

Smiths Medical

Smiths Medical 1850 User manual

Smiths Medical Surgivet Advisor User manual

Smiths Medical

Smiths Medical Surgivet Advisor User manual

Smiths Medical Equator User manual

Smiths Medical

Smiths Medical Equator User manual

Smiths Medical acapella User manual

Smiths Medical

Smiths Medical acapella User manual

Smiths Medical SurgiVet V3404 Plus User manual

Smiths Medical

Smiths Medical SurgiVet V3404 Plus User manual

Smiths Medical CADD-Solis User manual

Smiths Medical

Smiths Medical CADD-Solis User manual

Smiths Medical CADD-Prizm VIP User manual

Smiths Medical

Smiths Medical CADD-Prizm VIP User manual

Smiths Medical CADD-Solis User manual

Smiths Medical

Smiths Medical CADD-Solis User manual

Smiths Medical BCI SPECTRO2 10 User manual

Smiths Medical

Smiths Medical BCI SPECTRO2 10 User manual

Smiths Medical BCI SPECTRO2 30 User manual

Smiths Medical

Smiths Medical BCI SPECTRO2 30 User manual

Smiths Medical CADD-MS 3 User manual

Smiths Medical

Smiths Medical CADD-MS 3 User manual

Smiths Medical CADD-Prizm VIP 6100 User manual

Smiths Medical

Smiths Medical CADD-Prizm VIP 6100 User manual

Smiths Medical CADD-Legacy PLUS Reference guide

Smiths Medical

Smiths Medical CADD-Legacy PLUS Reference guide

Smiths Medical CADD User manual

Smiths Medical

Smiths Medical CADD User manual

Smiths Medical CADD-Prizm VIP 6100 User manual

Smiths Medical

Smiths Medical CADD-Prizm VIP 6100 User manual

Smiths Medical CADD-Solis VIP User manual

Smiths Medical

Smiths Medical CADD-Solis VIP User manual

Smiths Medical cadd-solis VIP 2120 Technical manual
Smiths Medical

Smiths Medical cadd-solis VIP 2120 Technical manual

Popular Medical Equipment manuals by other brands

Guldmann Evocare 553000 user manual

Guldmann

Guldmann Evocare 553000 user manual

medi orthocox quick start guide

medi

medi orthocox quick start guide

KYRA MEDICAL k-tek KTEK7860 Instructions for use

KYRA MEDICAL

KYRA MEDICAL k-tek KTEK7860 Instructions for use

PANNOMED VET LIFT 7H9.6P1 instruction manual

PANNOMED

PANNOMED VET LIFT 7H9.6P1 instruction manual

MIR Minispir New quick start guide

MIR

MIR Minispir New quick start guide

Bakare Klearside user manual

Bakare

Bakare Klearside user manual

Envirotainer Releye RAP user manual

Envirotainer

Envirotainer Releye RAP user manual

BIO-MED DEVICES Crossvent-2i+ Operation & service manual

BIO-MED DEVICES

BIO-MED DEVICES Crossvent-2i+ Operation & service manual

Storz 11272 VH-TL instruction manual

Storz

Storz 11272 VH-TL instruction manual

Stryker Endoscopy X7000 Operating and maintenance manual

Stryker Endoscopy

Stryker Endoscopy X7000 Operating and maintenance manual

GS corpuls3 user manual

GS

GS corpuls3 user manual

Otto Bock 2WR95 Instructions for use

Otto Bock

Otto Bock 2WR95 Instructions for use

Microlife NEBPRO instruction manual

Microlife

Microlife NEBPRO instruction manual

Armon Ayura user manual

Armon

Armon Ayura user manual

Nosiboo pro user manual

Nosiboo

Nosiboo pro user manual

Globus Magnum XL PRO user manual

Globus

Globus Magnum XL PRO user manual

AGFA DX-D 600 user manual

AGFA

AGFA DX-D 600 user manual

Tecno-gaz ARTICA 1 Use and maintenance instructions

Tecno-gaz

Tecno-gaz ARTICA 1 Use and maintenance instructions

manuals.online logo
manuals.online logoBrands
  • About & Mission
  • Contact us
  • Privacy Policy
  • Terms and Conditions

Copyright 2025 Manuals.Online. All Rights Reserved.