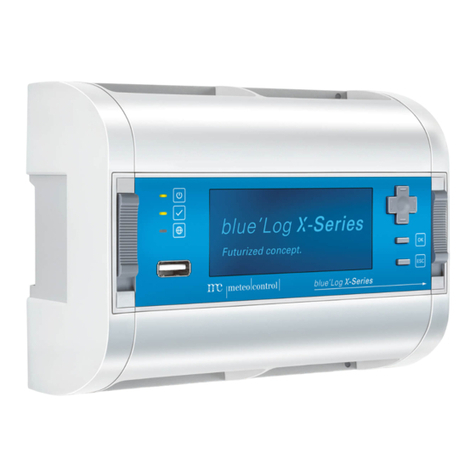
Meteo Control blue'Log X-1000 User manual

blue’Log X series
Copyright
Copyright for this manual remains with the manufacturer. No part of this manual may
be reproduced or edited, duplicated or distributed using electronic systems without
written permission from meteocontrol GmbH.
Compensation shall be payable in the event of any copyright infringements.
All brand names mentioned in this manual are the property of their respective
manufacturers and are hereby acknowledged.
Contact data
The manufacturer of the device described in this documentation is:
meteocontrol GmbH
Spicherer Str. 48
D-86157 Augsburg
Tel.: +49 (0) 821 / 3 46 66-0
Web: www.meteocontrol.com
Technical support:
Tel.: +49 (0) 821 / 3 46 66-88
Fax: +49 (0) 821 / 3 46 66-11
Details regarding the manual
The original operating manual is written in German. All other language versions are
translations of the original operating manual and are hereby identified as such.
© 2015 meteocontrol GmbH
All rights reserved.
All information in this operating manual has been compiled and checked with the
greatest care and diligence. Nevertheless, the possibility of errors cannot be entirely
excluded. meteocontrol GmbH therefore cannot accept any liability for errors or their
consequences.
Subject to technical alterations.

blue’Log X series
1 | 120
Contents
1. General notes ....................................................................................................5
1.1 Safety instructions ......................................................................................5
1.2 Warning symbols ........................................................................................5
1.3 Additional information .................................................................................6
1.4 Text display .................................................................................................6
2. Notes on this operating manual..........................................................................7
2.1 Warranty and liability...................................................................................8
3. Safety instructions for operation.........................................................................9
3.1 Intended use...............................................................................................9
3.2 Personnel....................................................................................................9
3.3 Protection concepts ..................................................................................10
3.4 Transport and storage ...............................................................................10
3.5 Internal battery..........................................................................................11
3.6 Cleaning ....................................................................................................11
4. Device overview ..............................................................................................12
4.1 Overview of product versions ...................................................................12
4.2 blue’Log front panel ..................................................................................12
4.3 blue’Log rear panel....................................................................................13
4.4 Status LEDs ..............................................................................................13
5. Installation.......................................................................................................14
5.1 Safety instructions for installation .............................................................14
5.2 Cables and wiring......................................................................................15
5.2.1 Permitted cable types for the blue’Log power supply ................15
5.2.2 Cable types for device connections ............................................15
5.2.3 Maximum recommended cable lengths......................................16
5.2.4 Shielding .....................................................................................16
5.3 Installation.................................................................................................17
5.3.1 Installing device on DIN rail.........................................................17
5.4 Expanding the blue’Log.............................................................................18
5.4.1 Connecting expansion modules ..................................................19
6. Interfaces ........................................................................................................23
6.1 Power supply ............................................................................................23
6.2 Voltage output...........................................................................................24
6.3 Ethernet ....................................................................................................24
6.4 Multi input.................................................................................................24
6.4.1 Analog input................................................................................24
6.4.2 Digital input.................................................................................24
6.5 Digital input ...............................................................................................24
6.6 Digital output.............................................................................................25

2 | 120
blue’Log X series
6.7 RS485/422 interface .................................................................................25
6.8 CAN interface ........................................................................................... 25
6.9 USB interface............................................................................................ 25
7. Commissioning, configuration.......................................................................... 26
7.1 Requirements ........................................................................................... 26
7.2 Commissioning......................................................................................... 26
7.3 Establishing / checking connections .........................................................26
7.3.1 Ethernet connection ...................................................................26
7.3.2 Connecting bus devices.............................................................. 27
7.3.3 Connections to analog and digital inputs ....................................27
7.4 Log-on via display .....................................................................................28
7.4.1 Start menu..................................................................................28
7.4.2 Setting language via quick access ..............................................28
7.4.3 User selection.............................................................................29
7.5 Network configuration on the display .......................................................30
7.5.1 DHCP setting..............................................................................30
7.5.2 Setting the static network parameters ....................................... 30
7.6 Firmware update via USB ......................................................................... 31
7.7 Showing the licenses on the display......................................................... 31
7.8 Logging on to device websites................................................................. 32
7.9 Logger master data...................................................................................35
7.10 Ethernet.................................................................................................... 36
7.11 MX modules ............................................................................................. 36
7.12 User management....................................................................................37
7.13 Licenses ................................................................................................... 37
7.14 Date / time................................................................................................ 38
7.14.1 Time synchronization with system settings................................ 38
7.14.2 User defined time synchronization ............................................. 38
7.14.3 Time synchronization disabled....................................................38
7.15 Registering on the safer’Sun Portal ..........................................................39
7.15.1 Assignment to an existing system.............................................. 39
7.15.2 Setting up a new system using master data .............................. 39
7.16 Portal communication ...............................................................................40
7.16.1 Reporting at regular intervals......................................................40
7.16.2 Reporting at set times ................................................................ 40
7.17 FTP push...................................................................................................41
8. Firmware update............................................................................................. 42
9. Licenses ......................................................................................................... 43
9.1 FTP PUSH INTRADAY ..............................................................................43
10. Recording devices........................................................................................... 43
10.1 Adding sensors......................................................................................... 43
10.1.1 Analog sensors ........................................................................... 43

blue’Log X series
3 | 120
10.1.2 Modbus sensors .........................................................................45
10.2 Adding meters ..........................................................................................47
10.2.1 S0 meter .....................................................................................47
10.2.2 Modbus meter ............................................................................49
10.3 Adding inverters........................................................................................51
10.4 Adding string measuring systems.............................................................52
10.5 Adding battery system ..............................................................................53
11. Alarms.............................................................................................................54
11.1 Latest alarms ............................................................................................54
11.2 Contact addresses ....................................................................................55
11.3 Alarm configuration...................................................................................56
12. Visualization.....................................................................................................57
12.1 Showing sensor values .............................................................................57
12.1.1 Diagrams.....................................................................................57
12.1.2 Real-time values..........................................................................57
12.2 Showing meter values ..............................................................................58
12.2.1 Diagrams.....................................................................................58
12.2.2 Real-time values..........................................................................58
12.3 Showing inverter values............................................................................59
12.3.1 Diagrams.....................................................................................59
12.3.2 Real-time values..........................................................................60
12.4 Showing string measuring system measured values................................61
12.4.1 Diagrams.....................................................................................61
12.4.2 Real-time values..........................................................................61
12.5 Showing battery system values ................................................................62
12.5.1 Diagrams.....................................................................................62
12.5.2 Real-time values..........................................................................62
12.6 Showing Power Control values .................................................................63
12.6.1 Diagrams.....................................................................................63
12.6.2 Real-time values..........................................................................63
13. Messages........................................................................................................64
13.1 Logbook ....................................................................................................64
14. meteocontrol Power Control ............................................................................65
14.1 General notes............................................................................................65
14.1.1 Functions ....................................................................................65
14.1.2 Receiving specifications from the grid operator..........................66
14.1.3 Processing the data ....................................................................67
14.1.4 Navigating to the Power Control website ...................................69
14.2 General settings........................................................................................70
14.2.1 Selecting data logger mode ........................................................70
14.2.2 Entering system data ..................................................................73
14.3 Active power procedure............................................................................74

4 | 120
blue’Log X series
14.3.1 P(DI) procedure...........................................................................76
14.3.2 P(AI) procedure........................................................................... 78
14.3.3 P(fix) procedure........................................................................... 79
14.3.4 Intelligent Power Limit (IPL) .......................................................80
14.3.5 Gradient limitation active power (P) procedure...........................82
14.3.6 Limitation to agreed connection power PAV ................................84
14.3.7 Preset for fallback value..............................................................84
14.4 Reactive power procedure........................................................................85
14.4.1 cosφ(DI) procedure .....................................................................87
14.4.2 cosφ(AI) procedure ..................................................................... 89
14.4.3 cosφ(fix) procedure ..................................................................... 90
14.4.4 cosφ(P) procedure.......................................................................91
14.4.5 cosφ(U) procedure ...................................................................... 93
14.4.6 Q(DI) procedure .......................................................................... 95
14.4.7 Q(AI) procedure ..........................................................................97
14.4.8 Q(fix) procedure..........................................................................98
14.4.9 Q(U) procedure ........................................................................... 99
14.4.10 Q(P tanφ(fix)) procedure ........................................................101
14.4.11 Q(cosφ(DI)) procedure .............................................................. 102
14.4.12 Q(cosφ(AI)) procedure .............................................................. 102
14.4.13 Q(cosφ(fix)) procedure ..............................................................103
14.4.14 Q(cosφ(P)) procedure................................................................ 103
14.4.15 Q(cosφ(U)) procedure ............................................................... 104
14.4.16 Procedure in the event of an error............................................ 105
14.4.17 Gradient limitation reactive power(Q) procedure ...................... 107
14.4.18 System control loop.................................................................. 109
14.5 Power Control checklist.......................................................................... 111
15. Technical data ............................................................................................... 112
16. Environmental protection and disposal........................................................... 115
17. CE certificate ................................................................................................ 116
18. RoHS Statement ........................................................................................... 117
19. List of figures................................................................................................ 118

blue’Log X series
5 | 120
1. General notes
1.1 Safety instructions
Safety instructions warn of dangers when using the devices and explain how they can
be avoided.
The safety instructions are classified according to the severity of the risk and are
subdivided into four groups:
DANGER
Imminent danger
Failure to comply with the warning notice will lead to an imminent risk of
death or serious physical injury!
WARNING
Possible danger
Failure to comply with the warning notice may lead to death or serious
physical injury!
CAUTION
Hazard with a risk of material damage
Failure to comply with the warning notice may lead to minor injuries!
ATTENTION
Risk of material damage
Failure to comply with the warning notice will lead to material damage!
1.2 Warning symbols
Particular dangers are highlighted using warning symbols.
ELECTRICAL HAZARD
Risk of electrocution!
Failure to comply with the warning notice will lead to an imminent risk of
serious injury or death.

6 | 120
blue’Log X series
1.3 Additional information
This symbol can be found next to notes, additional information and tips.
1.4 Text display
Emphasized points are shown in bold and indicate important information.
Lists are shown with bullet points (level 1) and dashes (level 2):
List 1
Point A
Point B
List 2
Instructions describe steps which are to be carried out in the given order.
1. Instruction 1
2. Instruction 2
Result of the operation
Button names are shown in capitals and in “QUOTATION MARKS".
In illustrations, item numbers are used to indicate components.
The legend including item numbers and descriptions of the components is shown
below the figure. Alternatively, direct references to components are made in the text.

blue’Log X series
7 | 120
2. Notes on this operating manual
This manual is a key aid when it comes to ensuring proper operation of the device. It
contains important information and safety notes to help you use the devices correctly,
economically and in the intended manner.
The manual helps to avoid dangers, to reduce repair costs and downtimes, and to
increase the reliability and operating life of the devices.
During installation, all the manuals for system modules and components must be taken
into account.
DANGER
Danger from improper handling of the device
The personnel responsible for installation, operation and maintenance of the
system must have read and understood the operating manual before the
devices can be installed and used safely!
The manual and documentation must be kept by the system and be
available at all times as required.
meteocontrol GmbH accepts no liability for personal injury, damage to property, or
system malfunctions and their consequences, insofar as these result from non-
observance of this operating manual.

8 | 120
blue’Log X series
2.1 Warranty and liability
Details of the scope and form of the warranty as well as the warranty period are given
in the meteocontrol GmbH General Terms and Conditions.
meteocontrol GmbH rejects any liability for damage arising from the non-observance of
the operating manual.
This applies, in particular, to damage resulting from:
Unintended use
Incorrect operation
Wrongly chosen materials and tools
Faulty or non-executed maintenance and repairs
With Power Control, meteocontrol GmbH accepts no liability for events and
occurrences outside of its control, such as:
the correctness of control commands given by an energy supply company or failure
to implement control commands that have been passed on
hardware and/or software faults on the part of the system operator
end-user switching processes
Any liability for damage caused by such events and occurrences, such as lost
profits, grid instability, damage to parts of the customer's system, for instance of
an inverter, shall remain expressly excluded.

blue’Log X series
9 | 120
3. Safety instructions for operation
3.1 Intended use
Only the permitted signals and signal strengths may be applied to the connections of
the data logger (blue’Log) and the expansion modules (MX modules) used here.
Installation is only permitted indoors. For installation outdoors or in a dusty
environment, the device must be installed in a standardized protective enclosure.
3.2 Personnel
Installation, commissioning and maintenance of the device may only be performed by a
qualified electrician.
Given their specialist training, knowledge, experience and familiarity with the relevant
standards and regulations, a qualified electrician is in a position not only to carry out
work on electrical systems but also to recognize and avoid possible dangers unaided.
The qualified electrician must comply with the occupational health and safety laws in
force.
Please note in particular:
all national installation and set-up regulations (e.g. VDE in Germany),
all generally accepted codes of practice,
information on transport, installation, operation, service, maintenance and disposal
given in this installation manual,
specific values, limits, and information relating to operating and ambient conditions
on type plates and in data sheets.

10 | 120
blue’Log X series
3.3 Protection concepts
The memory card (SD memory) must not be removed while the blue’Log is in
operation
The blue’Log may not be opened
The blue’Log may not be modified
Damaged devices must be taken out of operation immediately and checked by a
qualified electrician
Local regulations must be observed when using the devices
The safety of the blue’Log and the user cannot be guaranteed if the safety
precautions described are violated
3.4 Transport and storage
Every product leaves our factory in perfect electrical and mechanical condition.
Special packaging ensures safe transport.
On delivery, unpack the device and all accessories and check them for any damage.
WARNING
A damaged device must not be put into operation!
ATTENTION
To avoid possible damage, always use the original packaging when
transporting or shipping the device.
Protect the device against dust and moisture.

blue’Log X series
11 | 120
3.5 Internal battery
The blue’Log data logger contains an internal lithium battery (button cell) which
ensures that the time and date remain stored in the device in the event of a power cut.
ATTENTION
Lithium battery
The battery may only be replaced by the meteocontrol repair service, since
the blue’Log housing needs to be opened.
meteocontrol GmbH accepts no liability for material damage owing to non-
compliance with this warning notice!
3.6 Cleaning
Clean the outside of the device only using a dry, lint-free cloth.
If the device is very dirty, you can clean it using a slightly damp cloth and a
commercially available household cleaner.
ATTENTION
Unplug the device from the mains before cleaning it!
ATTENTION
When cleaning the device, ensure that no moisture penetrates the housing!

12 | 120
blue’Log X series
4. Device overview
4.1 Overview of product versions
blue’Log X-1000
blue’Log X-3000
blue’Log X-6000
Max. feed-in power in kWp
100
1000
unlimited
Storage capacity
16 GB
16 GB
32 GB
4.2 blue’Log front panel
Fig. 1: Overview of the blue’Log front panel
(1)
Digital input (DI1–DI4)
(9)
RS485/422 termination –2
(2)
CAN
(10)
RS485/422 - 2
(3)
CAN termination
(11)
Power out (24V / 500mA –DC)
(4)
Reset
(12)
Power in (20V…60V – DC)
(5)
Digital output / multi input
(DO1 –DO4, MI1 –MI4)
(13)
LEDs: Power, status, online
(14)
USB interface
(6)
Ethernet
(15)
Display
(7)
RS485/422 - 1
(16)
Directional pad
(8)
RS485/422 termination –1
(17)
Buttons: OK, ESC

blue’Log X series
13 | 120
4.3 blue’Log rear panel
Fig. 2: Overview of the blue’Log rear panel
(1)
Clamp for DIN rail
4.4 Status LEDs
The front panel features three LED displays with the following meanings.
Symbol
LED
Meaning
Green: blue‘Log is supplied with power
Off: No power supply
Green: System loaded successfully, normal operation
Orange: System booting, boot phase
Red: System error
Green: Connected to portal
Off: No connection to portal

14 | 120
blue’Log X series
5. Installation
5.1 Safety instructions for installation
DANGER
Risk of electrocution!
Fatal injuries or death from contact with cables and terminals.
Only connect or disconnect cables while the power supply is switched
off.
Provide a safeguard to prevent unintentional restart.
ATTENTION
Damage due to incorrect cabling!
Incorrectly connected cables can lead to damage or destruction of the
measuring inputs and the device.
Connect cables only to the sockets provided for this purpose.
Observe the polarity during connection.
ATTENTION
Damage due to overvoltage!
Overvoltages or surge voltages may damage or destroy the device.
Protect the power supply against overvoltages.
ATTENTION
Damage due to overvoltage!
Voltages of more than 24 V DC and currents of more than 20 mA on the
analog inputs can destroy the relevant measuring inputs.
Ensure that only voltages of up to 24 V DC are applied and only currents
of up to 20 mA flow.
Voltages of more than 24 V DC and currents of more than 20 mA on the
digital inputs can destroy the relevant measuring inputs.

blue’Log X series
15 | 120
5.2 Cables and wiring
Recommended cable types for wiring the individual system components are given
below. The restrictions resulting from the wiring are also listed.
5.2.1 Permitted cable types for the blue’Log power supply
Connecting cable
Voltage range
Cable cross
section
Type
Finely stranded
conductor
U < 24 V DC
1 mm2
H05V-K
Finely stranded
conductor
U >= 24 V DC
0.75 mm2
H05V-K
5.2.2 Cable types for device connections
Bus cabling (inverters, current sensors)
Recommended: Data cable (twisted and shielded)
Alternatively: Network cable
Li2YCYv (TP) 2×2×0.5mm2) 1)
CAT 6-SFTP
Analog signals (irradiance sensor, temperature sensor)
Sensor cable
LiYCY 2×2×0.5mm2
Digital signals (energy meter, remote control system)
Sensor cable
LiYCY 2×2×0.5mm2
Ethernet network
Network cable
CAT 5 / CAT 6

16 | 120
blue’Log X series
5.2.3 Maximum recommended cable lengths
Bus cabling (data cable RS485)
Sensors (voltage signal 0 V –10 V)
Sensors (current signal 4 mA –20 mA)
Meters
Ethernet network
1200 m2) 3)
100 m
600 m4)
30 m
100 m3)
1) We recommend using the cable type UNITRONIC®Li2YCYv (TP) manufactured by Lapp Kabel, or an equivalent cable type. This
cable is suitable for laying in soil.
2) For cables exceeding the given length, the additional use of repeaters is necessary.
3) Several separate cables of this length require a hub.
4) 24 V DC power supply required.
Data cables must be isolated from power cables in accordance with EN
50174-2 using metal cable supports.
5.2.4 Shielding
The cable shielding may only be grounded at one end of the connection.

blue’Log X series
17 | 120
5.3 Installation
5.3.1 Installing device on DIN rail
1. Hang the blue’Log on the DIN rail using the provided clamp (rear panel).
2. Push the DIN rail latch on the front side of the device from bottom (latch open)
to top (latch closed). This will fix the blue’Log to the DIN rail. The symbols
(open/closed lock) above and below the DIN rail latch indicate whether or not the
device is fixed.
3. Check the secure connection of the blue’Log to the DIN rail.
Fig. 3: Secure mounting on a DIN rail
To release the blue’Log from the DIN rail, push the DIN rail latch from top to bottom
position. The device can now be removed from the DIN rail by lifting it off.
ATTENTION
Ventilation
For installation within a control cabinet, ensure at least 3 cm free space
above and below the device for air circulation.

18 | 120
blue’Log X series
5.4 Expanding the blue’Log
The blue’Log can be expanded to provide additional interfaces using various expansion
modules (MX modules).
Fig. 4: MX modules (example: RS485/422)
ATTENTION
Risk of damage when installing expansion modules
Installing MX modules during operation of the blue’Log can damage or
destroy the blue’Log and the expansion modules.
Disconnect the blue’Log from the power supply before installing MX
modules for additional interfaces.
This manual suits for next models
3
Table of contents
Other Meteo Control Other manuals
Popular Other manuals by other brands
Fidelity Electronics
Fidelity Electronics SP-POS88IV SERIES Operation manual

Parker
Parker Chelsea 540 Series owner's manual

Spectrum
Spectrum WatchDog 110 product manual
Omron
Omron G9SX-EX401 Series user manual

Oase
Oase HighLine Classic LED daylight 70 operating instructions

SuperFish
SuperFish Koi Pro UVC 40 Watt user manual

