Metkon FORCIMAT User manual

OPERATINGandINSTRUCTIONSMANUAL
FORCIMAT
AUTOMATICSPECIMENMOVER


3
EC DECLARATION OF CONFORMITY
Manufacturer : Metkon Instruments Inc.
Address : Demirtas Dumlupinar Organize Sanayi Bolgesi
Ali Osman Sonmez Cd. No:14 Bursa / TURKEY
Herewith declares that;
Automatic Specimen Mover, Model: FORCIMAT
-is in conformity with the provisions of the Machinery Directive (directive 2006/42/EEC), as
amended, and with national implementing legislation;
-is in conformity with the provisions of the Low Voltage Directive (directive 2006/95/EEC), as
amended, and with national implementing legislation;
-is in conformity with the provisions of the EMC Directive (directive 2004/108/EEC), as
amended, and with national implementing legislation;
and furthermore declares that
-the following (parts/clauses of) standards have been applied
EN ISO 12100:2010, TS EN 60204-1, TS EN 61000-6-2, TS EN 61000-6-4
......................................................................................................................................................................
Authorized Person: Ercin Senay
Position: Manager of Research and Development Department
Year: 2014

4
INDEX
A. DESCRIPTION ................................................................................................................................................ 5
1. DESİGN ............................................................................................................................................................... 5
2. TECHNİCAL DATA .................................................................................................................................................. 6
3. WARRANTY ......................................................................................................................................................... 6
4. SAFETY PRECAUTİONS ............................................................................................................................................ 6
B. INSTALLATION & SET UP ............................................................................................................................... 7
1. UNPACKİNG &CHECKİNG CONTENTS OF PACKAGE ...................................................................................................... 7
2. INSTALLATİON AND SET-UP..................................................................................................................................... 8
2.1 Mounting of Automatic Head.................................................................................................................. 9
2.2 Connections ............................................................................................................................................. 9
2.3 Electrical Installation ............................................................................................................................. 11
2.4 Adjusting the Height of the Forcimat Head........................................................................................... 12
2.5 Mounting Sample Holder ...................................................................................................................... 13
2.6 Noise Level............................................................................................................................................. 14
C. CONTROL PANEL ..........................................................................................................................................14
1. CONTROL BUTTON FUNCTİONS.............................................................................................................................. 14
D. OPERATION..................................................................................................................................................15
1. MANUAL MODE ................................................................................................................................................. 15
2. AUTO MODE .................................................................................................................................................... 15
E. SERVICE AND MAINTENANCE.......................................................................................................................16
1. MAİNTENANCE ................................................................................................................................................... 16
2. TROUBLESHOOTİNG............................................................................................................................................. 16
F. ACCESSORIES AND CONSUMABLES ..............................................................................................................16
1. ACCESSORİES...................................................................................................................................................... 16
G. TECHNICAL DOCUMENTATION.....................................................................................................................17
1. RECOMMENDED SPARE PART LİST .......................................................................................................................... 17
2. PNEUMATİC WİRİNG DİAGRAM ............................................................................................................................. 17
3. CUSTOMER SERVİCE ............................................................................................................................................ 18
4. ELECTRİCAL WİRİNG DİAGRAMS............................................................................................................................. 18
5
A. DESCRIPTION
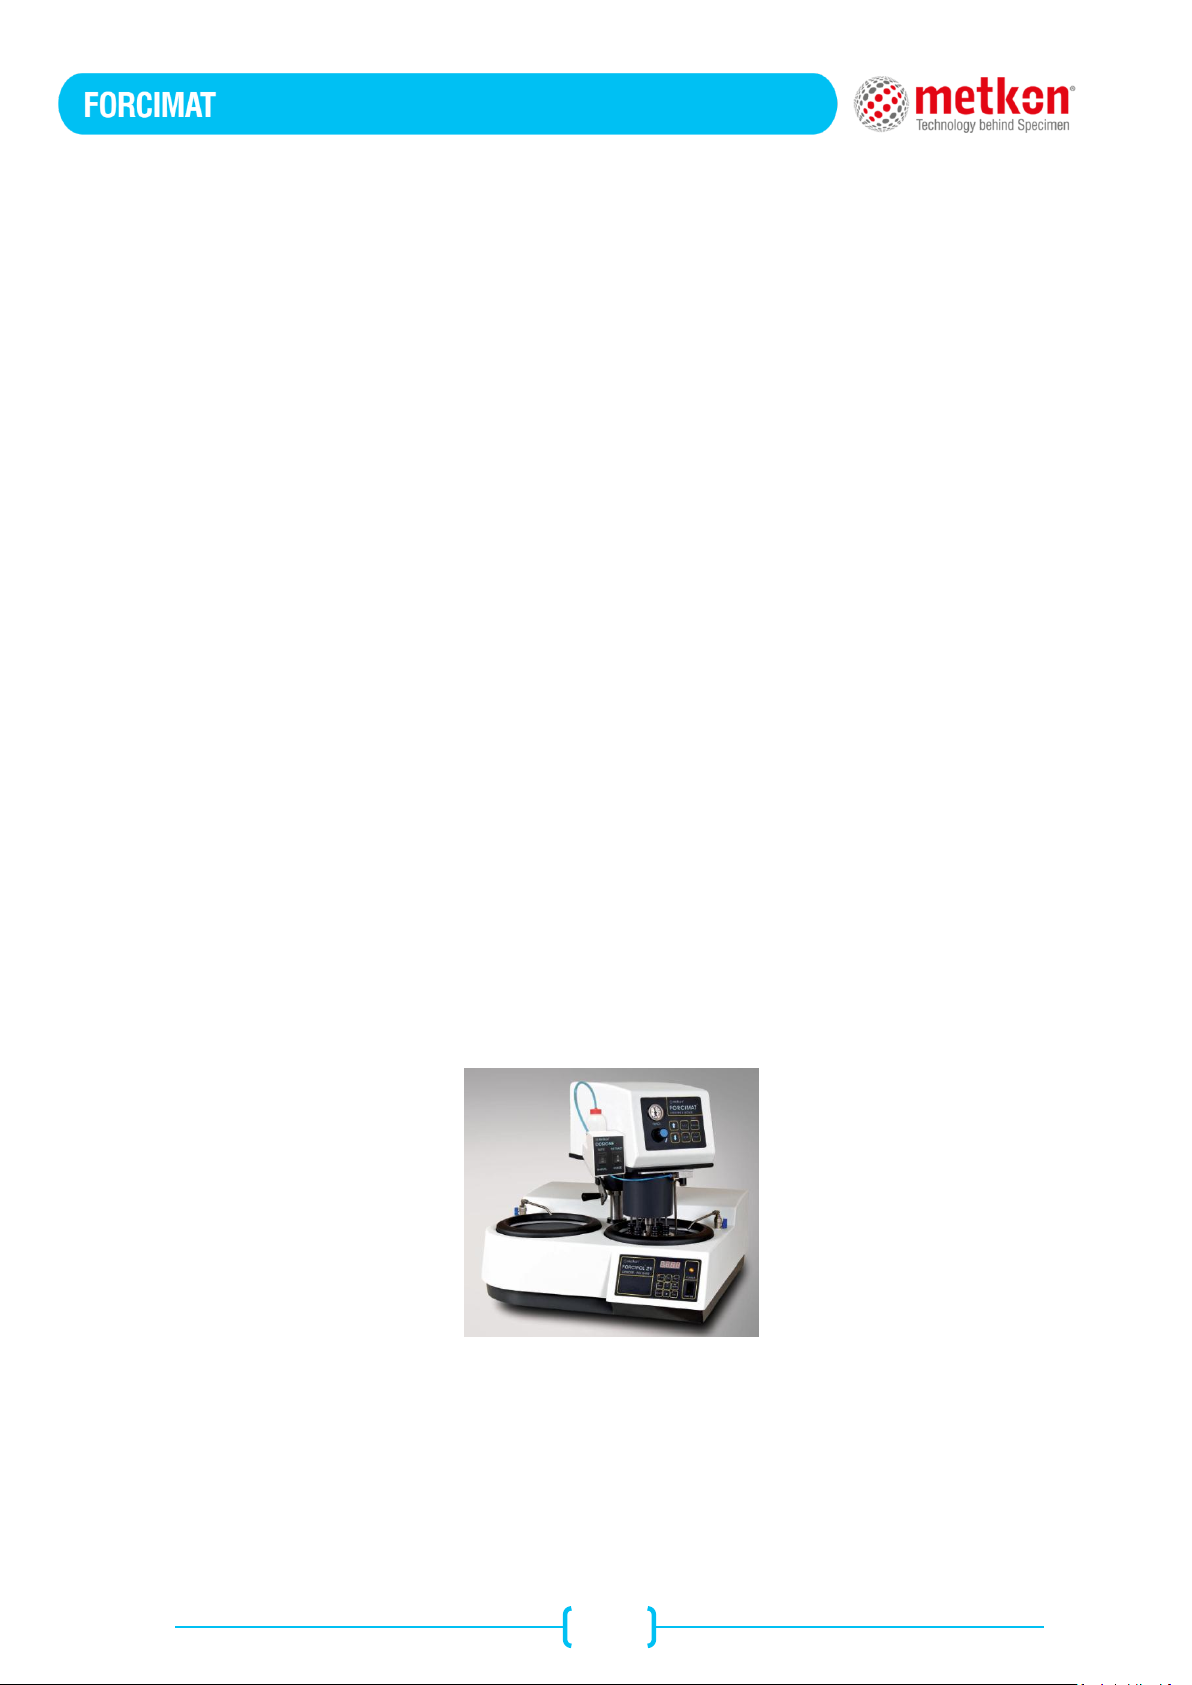
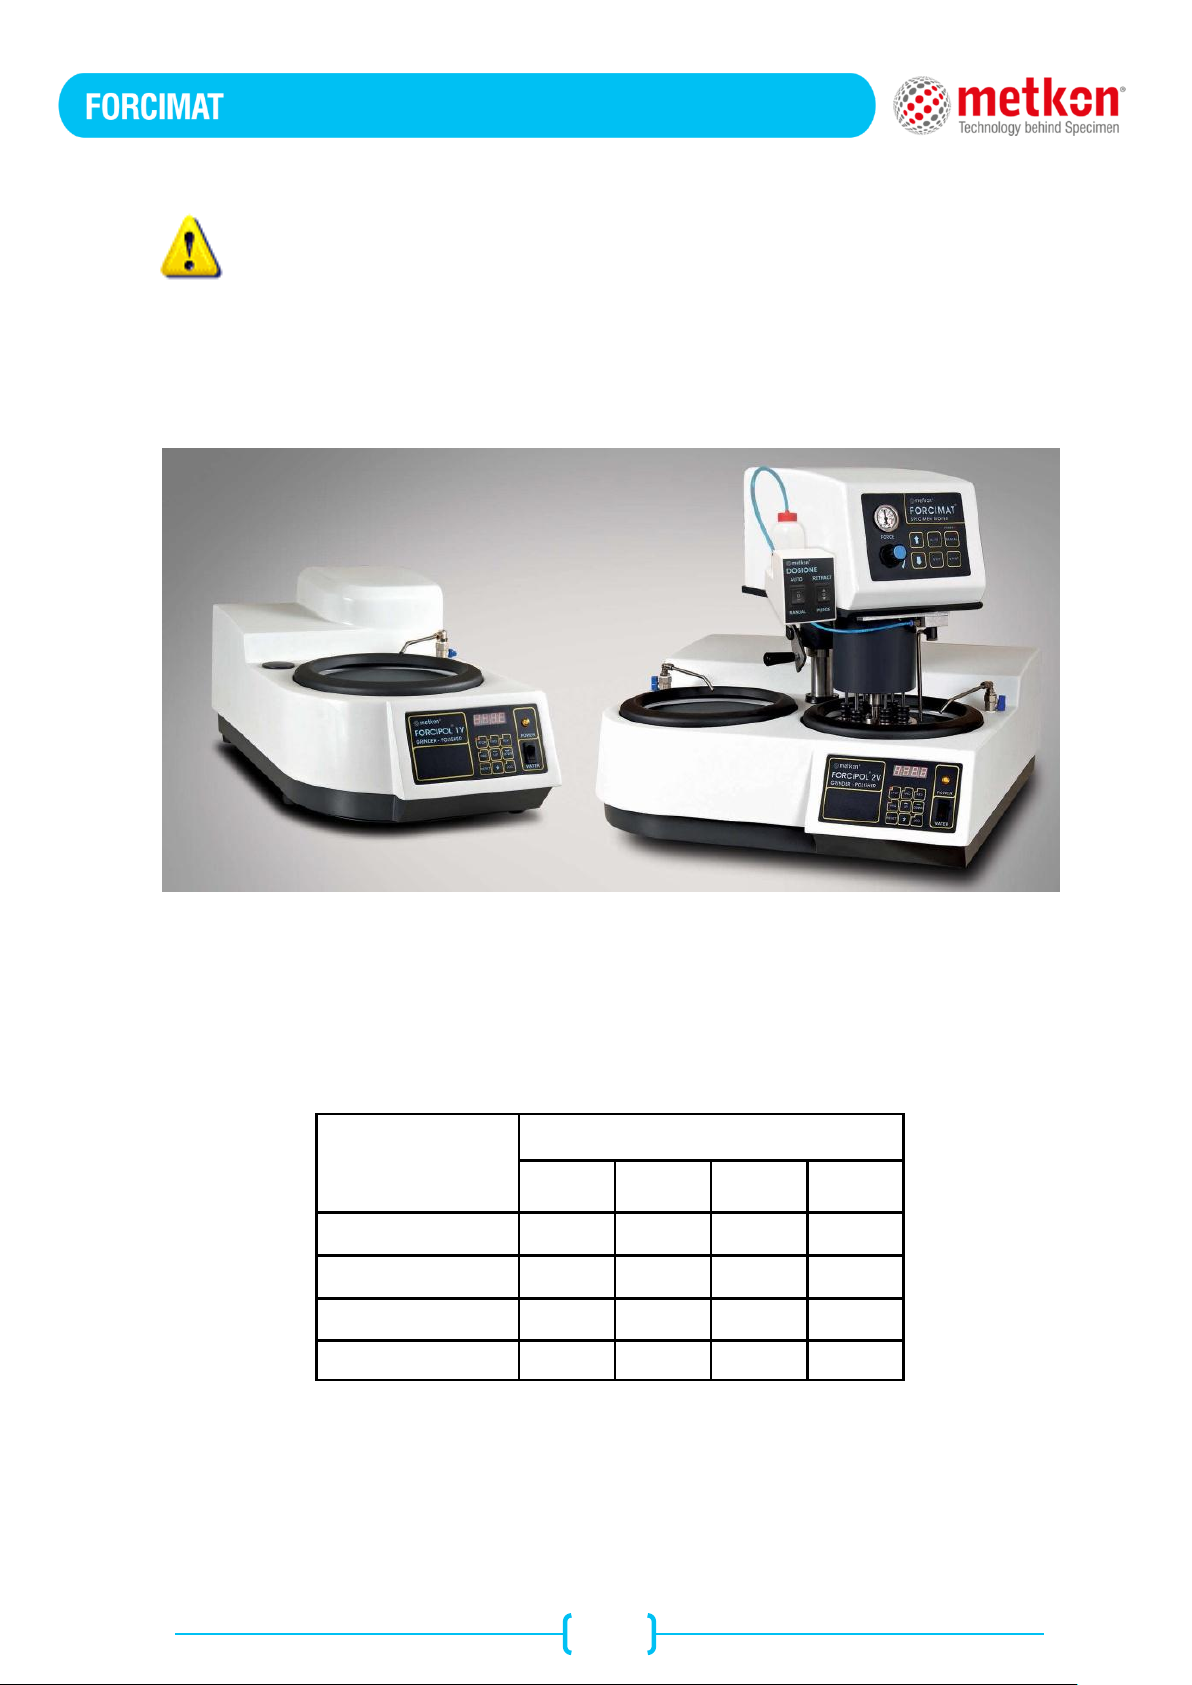
1. Design
The FORCIMAT Automatic Head is mounted on a rigid, hardened column of which the other end is fixed
to the base casting of the FORCIPOL grinder/polisher. FORCIMAT can be integrated to all FORCIPOL
model grinder/polishers and is rapidly positioned via its quick-locking clamping mechanism.
The specimen holder is driven by a 100 Watt DC motor at 50-150 rpm. The force is set individually which
is pneumatically adjustable between 5N and 60N from the front panel and can be seen on a direct
reading gage. The system is enclosed in an ABS housing with touch-pad front panel.
An adjustable and exchangable drip lubricator is a standard integrated part of FORCIMAT. The dosing
level is adjusted by a flow valve for optimal use of lubricant to obtain consistent results.
A complete series of easily exchangable specimen holders (6 specimens) from 25 to 40mm and from 1”
to 1 ½” is available to be used with FORCIMAT.
DOSIONE is an optional lubricating accessory of FORCIMAT. Please press ( I ) button on tha front pannel
of DOSIONE, when you put water and lubricant into the DOSIONE to first start. Please adjust the flow
rate of lubricant to required rate by rotating the flow rate button.
When you are replacing the bottle of DOSIONE please pay special attention to mount the bottle to its
place properly. If it does not fix properly, it can not perform the lubriacation.
The specimens are (1 to 6) easily placed in the specimen holder. The dosing level of the drip lubricator is
adjusted. The individual sample force is set from the front panel of the FORCIMAT. The cycle time, disc
speed and disc rotational direction are set from the front panel of FORCIPOL grinder/polisher and Start
button is depressed. Both instruments, FORCIMAT and FORCIPOL start operating simultaneously. Upon
completion of the cycle, both instruments stop and an audio signal informs the operator.
Fig. 1 FORCIPOL 2V with FORCIMAT

6
2. Technical Data
EQUIPMENT
Forcimat
Forcimat TS
Application of Force
Individual
Individual
Force, (N)
5 - 60
5-60
Head Speed, (rpm)
50 - 150
35
Rotation Direction
CW / CCW
CW
Display
DP
DP
Automatic Drip Lubricator
Standard
Standard
Dimensions, WxDxH, (cm)
23x43x25
23x43x25
Weight, (kgs)
16
16
Motor Power, (W)
100 W
100W
Needed air supply
6 Bar
6 Bar
3. Warranty
The FORCIMAT is guaranteed against defective material or workmanship for a period of 12 months from
the date of receipt by the customer or latest 18 months after the shipping date. Warranty is not valid if
inspection shows evidence of misuse or unauthorized repair. Warranty covers only replacement of
defective materials. In case this unit must be returned to our factory for warranty service please ask for
prior authorization and include the following details: Serial Number of the unit, Invoice number and
date. Transport costs belong to the customer.
4. Safety Precautions
Read the below instructions carefully before use.
Place the machine on a sturdy and safe table.
The equipment must be installed in compliance with local safety regulations.
Only use approved METKON accessories and consumables to achieve max. safety and
lifetime.
Follow the instructions and safety regulations when lifting and carrying the equipment.
Keep your hands away from the specimen holder and the automatic head when lowering the
Forcimat.
Do not touch the rotating parts during operation.
Use appropriate safety clothing. Long clothings, accessories and/or hair can be caught by
rotating parts.
If the Forcimat with Forcipol has to be moved to a new location, diassemble the Forcimat
from the Forcipol.
Disconnect the electrical connection before servicing the equipment.
Follow the periodically maintenance.
The equipment is designed to be used with METKON accessories and consumables. In
case of misuse of equipment, improper installation, alteration, use of different source
parts, improper repair, METKON will accept NO responsibility for any damages to the
operator or the equipment. Disassembling of any part should always be performed by
a qualified technician.

7
B. INSTALLATION & SET UP
1. Unpacking & Checking Contents of Package
Carefully unpack and check contents of the package. If any components are missing or damaged,
save the packing list and materials and advise the carrier and Metkon Instruments Inc. of the
discrepancy.
Carefully unpack and check that the following items have been received:
oPower Cable, 1.8 mt, 1 piece
oAir Hose, 1.5 mt, 1 piece
oHex Key, 1.5 mt, 1 piece
WARNING! The FORCIMAT weighs from 16 kgs. please be sure that there are enough people
(at least 2) to safely lift the unit from the shipping carton. It is recommended to wear safety
shoes during transportation.
Carefully remove outer packing material. Refer to the packing documents for a list of items supplied.
8
2. Installation and Set-Up
CAUTION! Follow approved procedures and take all necessary preventive safety measures
when lifting and installing this equipment. Improper lifting can result equipment damage.
FORCIMAT is an optional accessory of FORCIPOL series of Grinding & Polishing Machine.
FORCIMAT is mounted on FORCIPOL. Please be sure that the platform is large enough and can
stand it’s weight.
In order to work with equipment comfortably, it is recommended to leave at least 30 cm space
from all side of the equipment.
You can see the dimensions and weight of FORCIMAT and FORCIPOL as below:
Equipment
Dimensions
W
D
H
Weight
FORCIMAT
230 mm
430 mm
250 mm
16 kgs
FORCIPOL 1V
380 mm
690 mm
340 mm
30 kgs
FORCIPOL 300-1V
380 mm
690 mm
340 mm
30 kgs
FORCIPOL 2V
700 mm
690 mm
340 mm
40 kgs
Place the FORCIMAT on FORCIPOL with convenient access to a 1-phase grounded power source, water
supply and water drain. Make the connections of the air hose and the data cable between FORCIMAT
Head and the FORCIPOL.

9
2.1 Mounting of Automatic Head
FORCIMAT Automatic Specimen Mover is used in combination with FORCIPOL Grinder and Polishers.
Please follow up the following steps to combine FORCIMAT to FORCIPOL’s.
1. Pull off the plastic plug on the surface of FORCIPOL.
2. Place FORCIMAT with its column in the FORCIPOL and fix it from the bottom with the M8
screw. Be sure that the screw is tighten correctly.
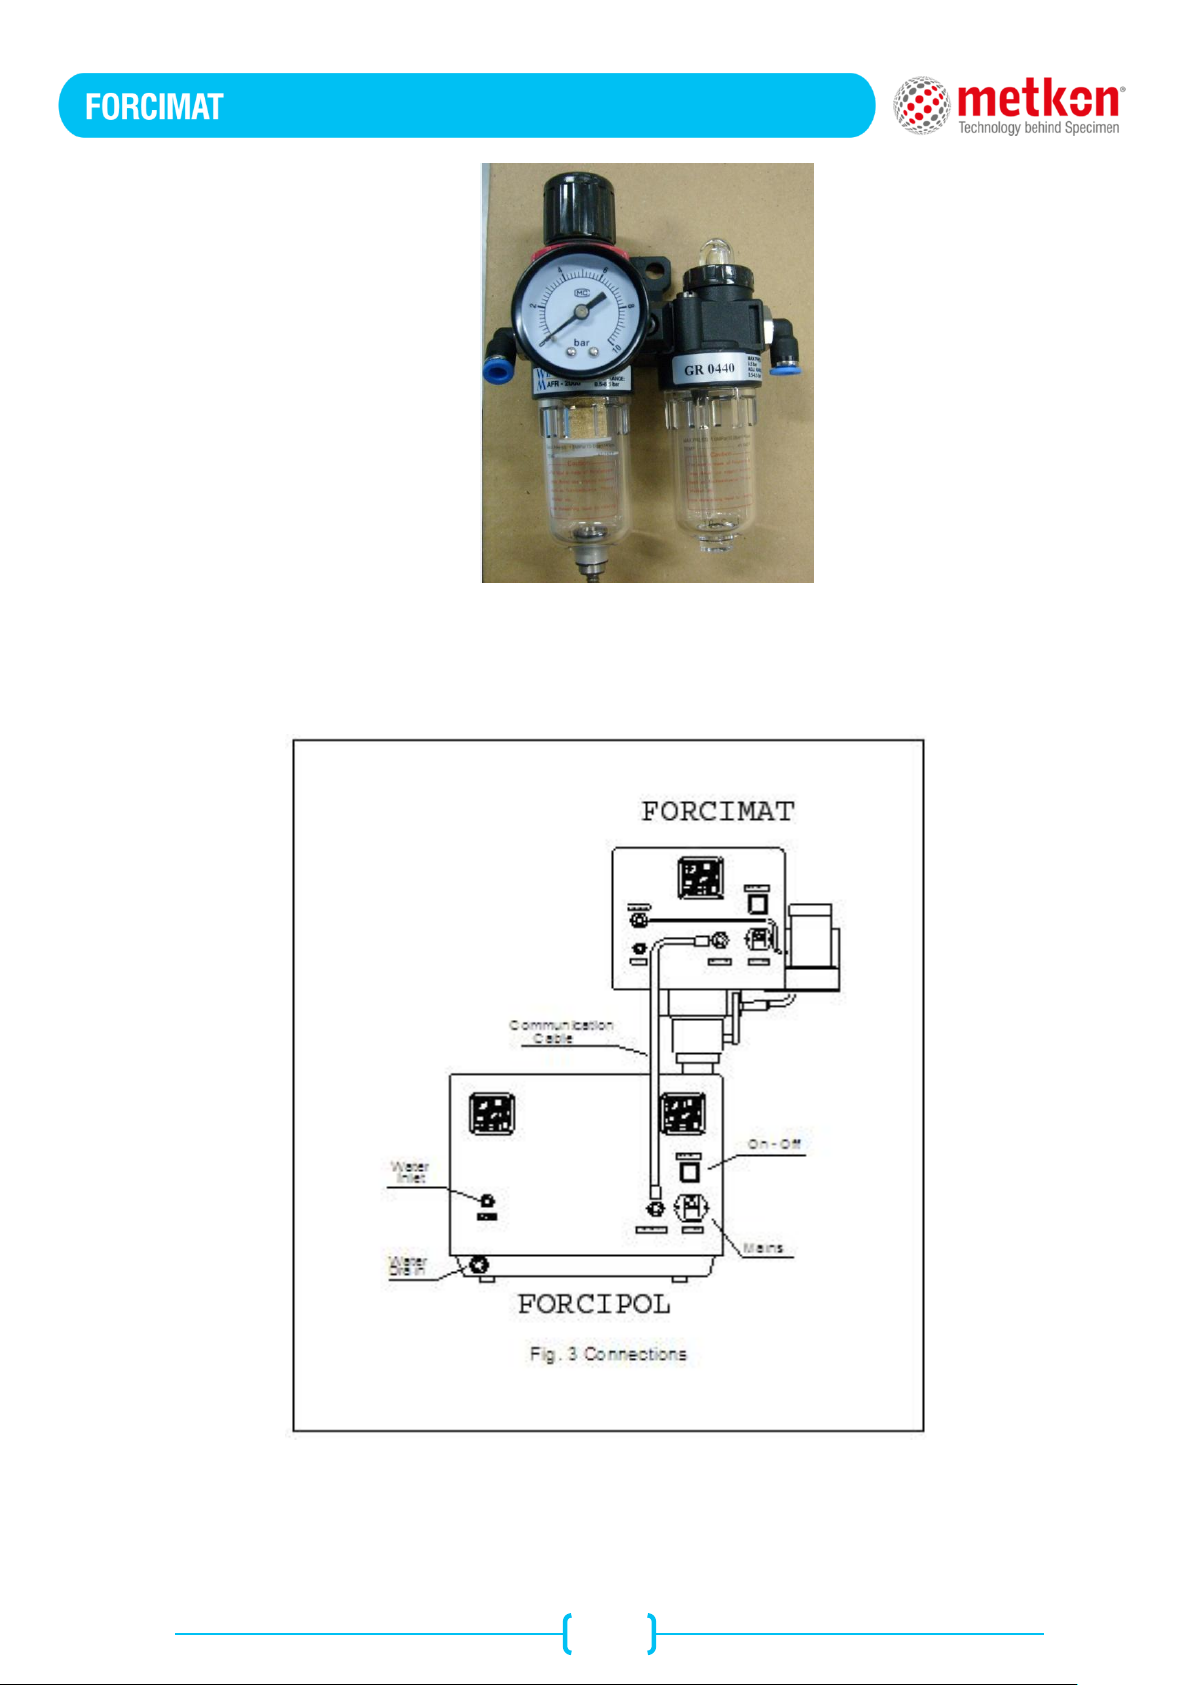
2.2 Connections
FORCIMAT requires air supply with 6 bars pressure.
A compressor which can generate more than 6 bars and has 50 liters capacity is enough for only
1 equipment. If you have more equipment that use air supply, please consult your local
compressor dealer to choose correct compressor.
If there is a doubt about the quality and pressure of the air supply, make certain that a filtering
and regulator unit for compressed air is connected to the air line before FORCIMAT.
METKON can supply GR 0440 Air Filtering and Lubricating Unit which regulates air pressure to 6
bars.
10
A pneumatic air hose with 6 mm outer diameter will be supplied with the equipment. (See:
Installation Kit)
Please be sure that you have suitable connection fittings to connect hose to the air line.
1. Connect the mains cable between FORCIMAT and mains.
2. Connect the supplied “Communication Cable” between FORCIMAT and FORCIPOL.
3. Connect the compressed air hose (supplied) to the air socket on the back of the instrument.
4. Connect the other end to the compressed air source which has to be 6 bars.
11
Note:
If there is a doubt about the quality of the air supply, make certain that a filter and
regulator unit for compressed air is connected in the air line before FORCIMAT.
5. Please do not use teflon bant to the elbow and nipel connections.
6. Please connect the Lubomat connection cable to the back side socket of FORCIMAT GRP
2.3 Electrical Installation
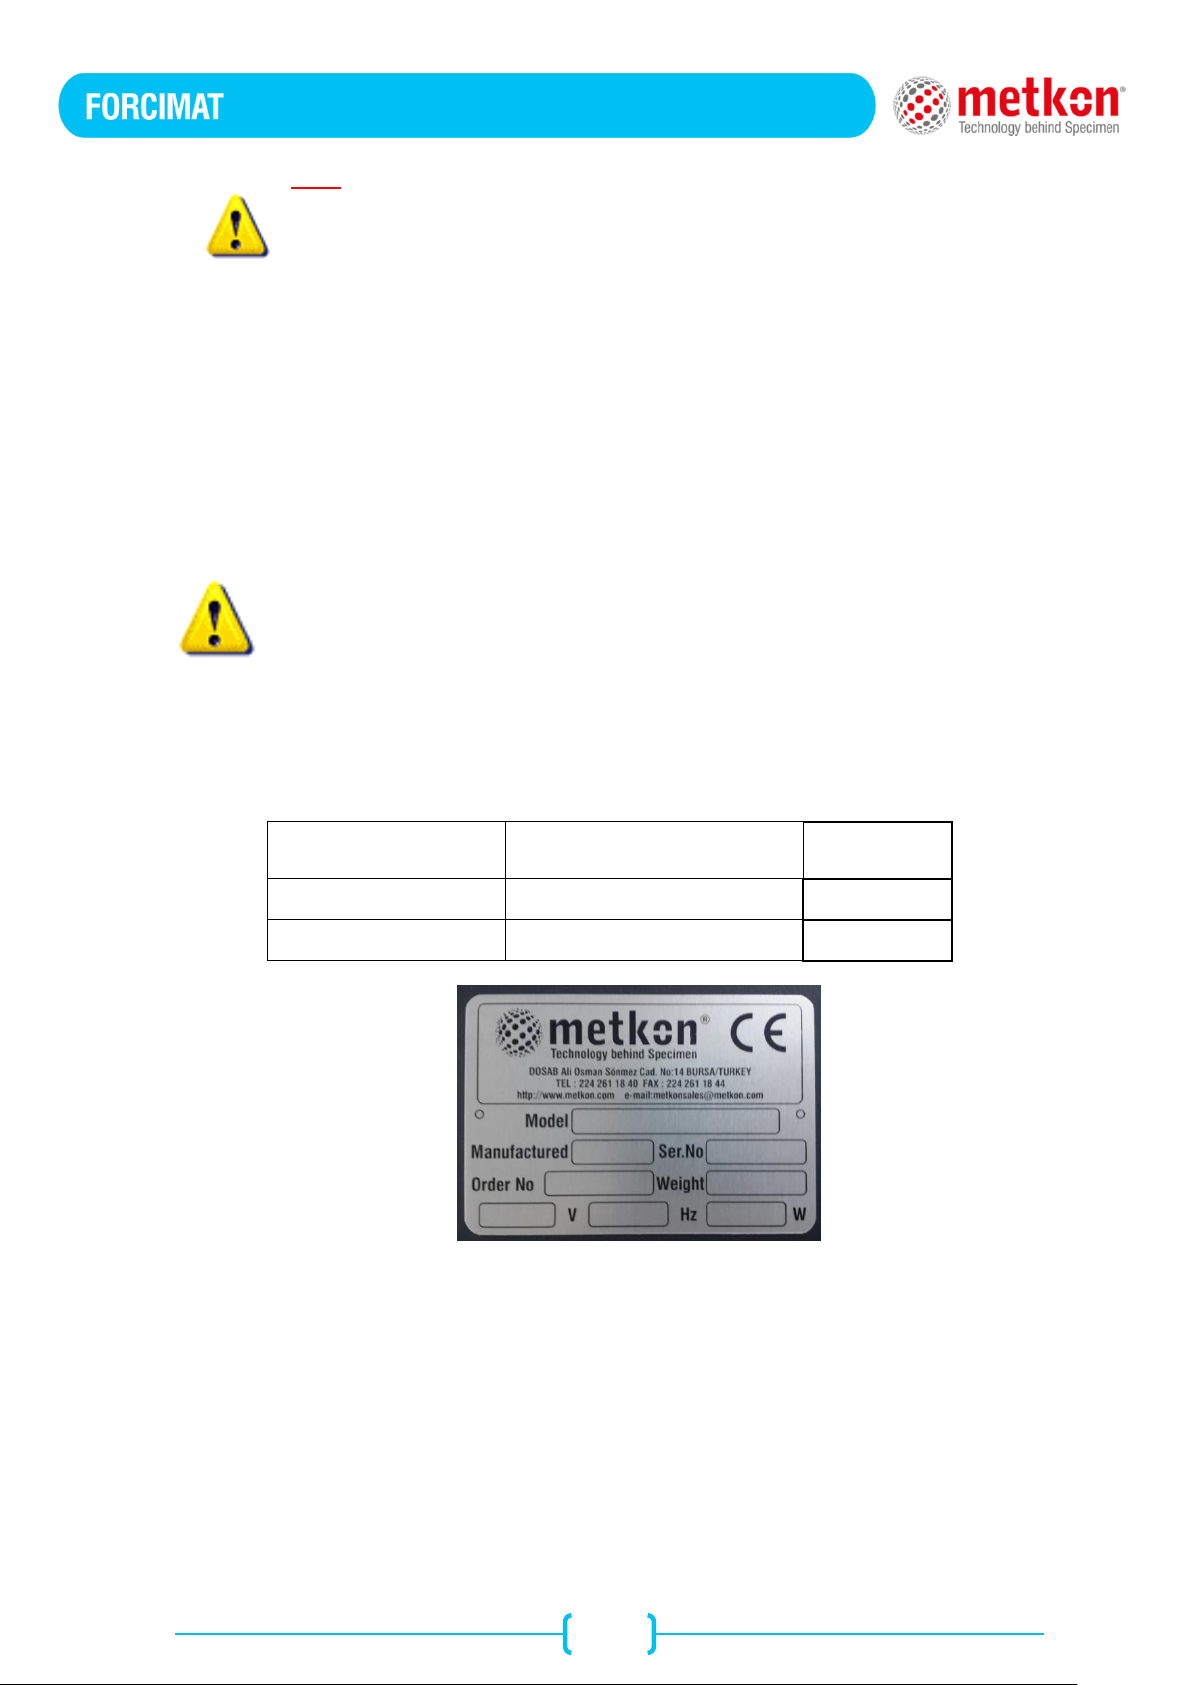
Before making electrical connections, check that the voltage and frequency stated on the specification
plate correspond to the local voltage and frequency. Check that the values for three-phase voltage, is
compatible with the intended electrical supply before installation.
ATTENTION! Connect the unit to the grounded mains voltage.
WARNING! Electrical Shock Hazard. A qualified electrical technician should perform
optional hard wiring and electrical maintenance.
Disconnect the power supply before making any electrical adjustments.
Make sure that the supply voltage and frequency is correct. Check the values from the back thin
metal plate.
Voltage / Frequency
Operational Power Range
Fuse Rating
230 V, 50/60 Hz. 1 ph.
220 - 240 V
6 A (C Type)
115 V, 50/60 Hz. 1 ph.
110 - 120 V
6 A (C Type)
Connect the equipment to the grounded mains voltage. Power cord will be supplied with the
equipment.
Lenght of power cable is 1.8 meters.

12
You can see suitable power sockets as below. If you have not suitable power socket, in this case
you should supply a suitable power cord.
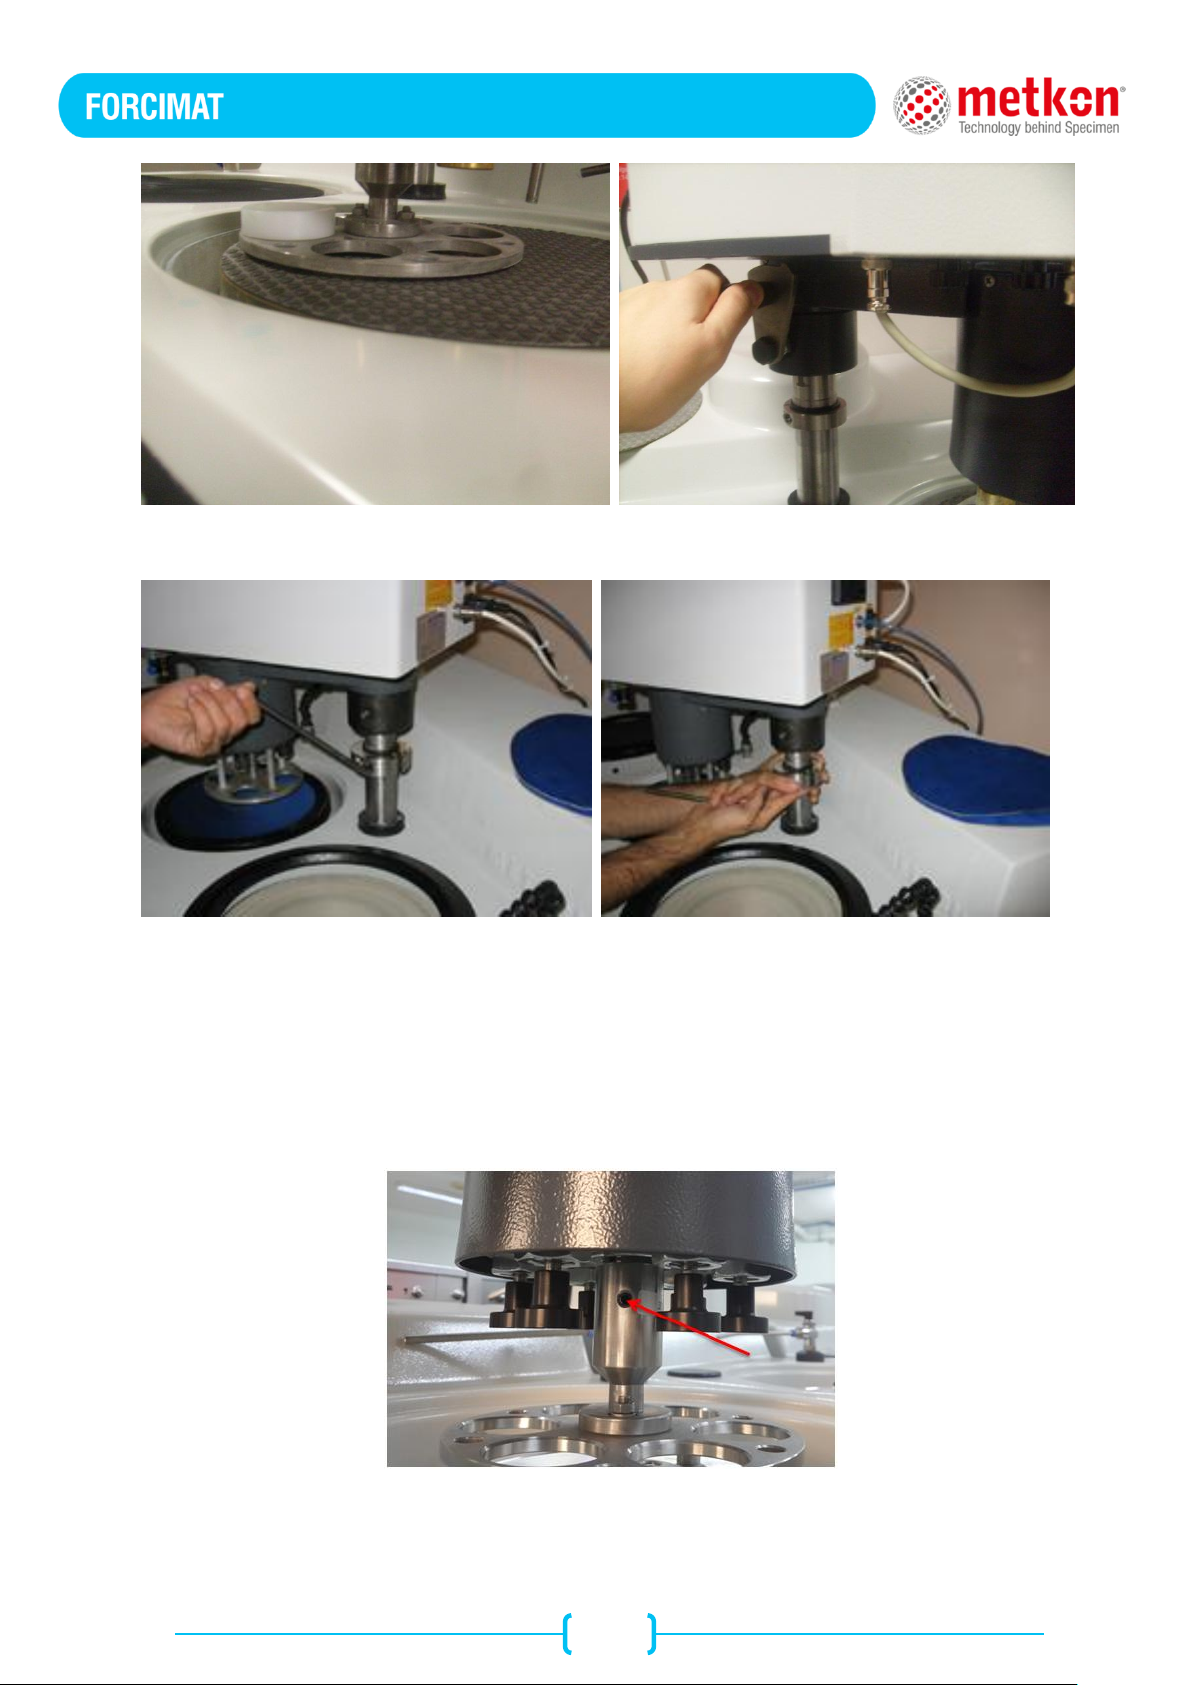
2.4 Adjusting the Height of the Forcimat Head
When you place the Forcimat on the FORCIPOL we strongly advise you to check the distance between
the sample holder and the disk when the sample holder is at the bottom position. It should be 5
mm.(Fig.4.) If it is longer or shorter you need to adjust the height. For adjusting the lenght first hold the
head up by using the handle (Fig.5.) and please loosen the set-screw of the adjusting collar. (Fig.6.)
If the lenght you measured at the beginning is shorter than 5 mm, please hold the collar upside and
tighten the set-screw again. If it was longer than 5 mm. at the beginning, than you have to move the
collar downwards and tighten the collar(Fig.7.). Than check the distance again when the sample holder
is at the bottom position. If the distance is not OK again you have to do the steps one more time.
13
Fig.4. Distance between sample holder and disk Fig.5. Head Position Handle
Fig.6 Fig.8
2.5 Mounting Sample Holder
Place your sample holder on the spindle of the Forcimat.
Tighten the 3 setscrews indicated on the below photo.
To take the sample holder out, loosen the 3 setscrews and take out the sample holder.

14
2.6 Noise Level
Approx. 60 dBa is measured at idle running at a distance of 1m. from the machine
C. CONTROL PANEL
Fig.3. FORCIMAT CONTROL PANEL and BACK VIEW
1. Control Button Functions
Direct reading force gage: shows the individual force being applied on each sample. By using the
regulator, the amount of force required is set.
RPM: Adjust the rotation speed of the Forcimat Head
STOP: Stop button is used to stop the unit when it is in operation.
START: This button is used to start the motor in clockwise direction.
UP & DOWN (↑ ↓): buttons activate the single force pistons on each sample.
“Auto” mode: FORCIMAT is activated from FORCIPOL grinder/polisher. When FORCIPOL starts, so
does the FORCIMAT.
“Manual” mode: FORCIMAT can be operated independent of FORCIPOL.
HEAD (CCW-CW): Selection of the head rotation in Clock Wise or Counter Clock Wise.
PERIOD: Total time of dispencing
FREQUENCY: Standby time for dispencing

15
D. OPERATION
Turn ON/OFF switch is at the rear side of the equipment. FORCIMAT units have quite simple
operation.
1. Manual Mode
Depress “MANUAL”
Turn the handle down to lower the unit. And turn the handle downwords to lock the head in its
position.
Place the specimens and depress
Select rotation direction from the rear side of the automatic head
Adjust the Drip Lubricator, in manual or automatic mode. In Manual mode you have to press
purge or retract button manually. In automatic mode the DOSIONE will also start automatically.
Adjust frequency & period for DOSIONE Dispencing Unit
Depress “START” from FORCIMAT Head as well as FORCIPOL.
When the preparation is finished, depress “STOP”
Depress to take the specimens.
Turn the handle up to raise the unit in case the working wheel needs to be changed.
2. AUTO Mode
Depress “AUTO”
Turn the handle down to lower the unit.
Place the specimens and depress
Select rotation direction from the rear side of the automatic head
Adjust the Drip Lubricator, in manual or automatic mode. In Manual mode you have to press
purge or retract button manually. In automatic mode the DOSIONE will also start automatically.
Adjust frequency & period for DOSIONE Dispencing Unit
Set the speed of FORCIPOL-V grinder/polisher.
Set the cycle time from FORCIPOL-V.
Adjust the Drip Lubricator.
Start the FORCIPOL-V by depressing FWD or REV. (depending on the rotational direction you
want)
At the same time FORCIMAT will also be activated.
At the end on the cycle time, FORCIPOL-V and FORCIMAT will stop automatically and the buzzer
will start beeping.
Depress to take the specimens.
Turn the handle up to raise the unit to move to the next step.
16
E. SERVICE and MAINTENANCE
1. Maintenance
FORCIMAT Automatic head does not require periodic maintenance. In case of service required, do not
disassemble or try to repair by unqualified personnel. Please contact your local representative.
2. Troubleshooting
Fault
Cause
Action
Automatic head moves during
operation
The head is not locked
Lock Forcimat from the lock unit on the
spindle.
Power lamp is not on
The main switch is OFF
Turn on the main switch.
The fuses at the back are blown
Change the blown fuses
The pistons does not activate
No air connection
Check the air hose connections
The air hose squeezed
Straighten the hose
F. ACCESSORIES and CONSUMABLES
1. Accessories
Accessories for FORCIMAT:
31 82
Special Splash Guard, 200 mm., to be used with automatic heads
31 83
Special Splash Guard, 250 mm., to be used with automatic heads
31 93
Special Splash Guard, 300 mm., to be used with automatic heads
GR 0440
Air filtering and lubricating unit
Specimen Holders for FORCIMAT:
33 01
Specimen holder, 6 x Ø40 mm specimen
33 02
Set of insert rings for 30 mm
33 03
Set of insert rings for 25 mm
33 04
Set of rings for 1 1/4"
33 05
Set of rings for 1 1/2"
33 06
Specimen holder, Blank
33 07
Specimen holder, 3 x Ø50 mm; 3 x Ø30
45 51
Specimen holder, 6 x ø 25mm
45 54
Specimen holder, ø 145mm, 6xØ 1"
45 52
Specimen holder, 6 x ø 30mm specimen.
45 55
Specimen holder, 6 x 1 1/4 inch specimen.
45 56
Specimen holder, 6 x 1 1/2 inch specimen.
45 58
Specimen holder, 3 x 2 inch specimen.
DOSIONE Peristaltic Fluid Dispenser
GR 0874
Microprocessor controlled, with peristaltic and non-misting pump for
diamond suspensions, lubricant or 2 in 1 suspensions, with interface
to be connected to FORCIMAT/DIGIPREP’s Automatic Head.
17
G. TECHNICAL DOCUMENTATION
1. Recommended Spare Part List
ORDER CODE
DESCRIPTION
YM 0440-01
Cable TTR 2X0.75, White
YM 0746-00
Ventilator 80X80X25 220V, Cooling
YM 1188-01
Motor 24VDC 90W 210RPM
YM 5480-00
Loading foot, FRC
YM 1653-00
TIHGTENING BUSHING, FORCIMAT
YM 1659-00
ROTATING CONNECTOR 1/4 WITH BEARING KSL06-02S
YM 1661-00
Mechanical valve YMV 320
YM 1665-00
Bearing 51106 URB
YM 5721-00
power supply,SP 240-24V 10A
YM 5419-00
Belt 3PJ 432
YM 1684-01
Pneumatic governor 01-R-2001/4, Shako
YM 1691-01
Control board+Display Keyboard, FRC
YM 1696-00
Connector MIC 225-2-M
YM 1697-00
Connector MIC 25-2-F
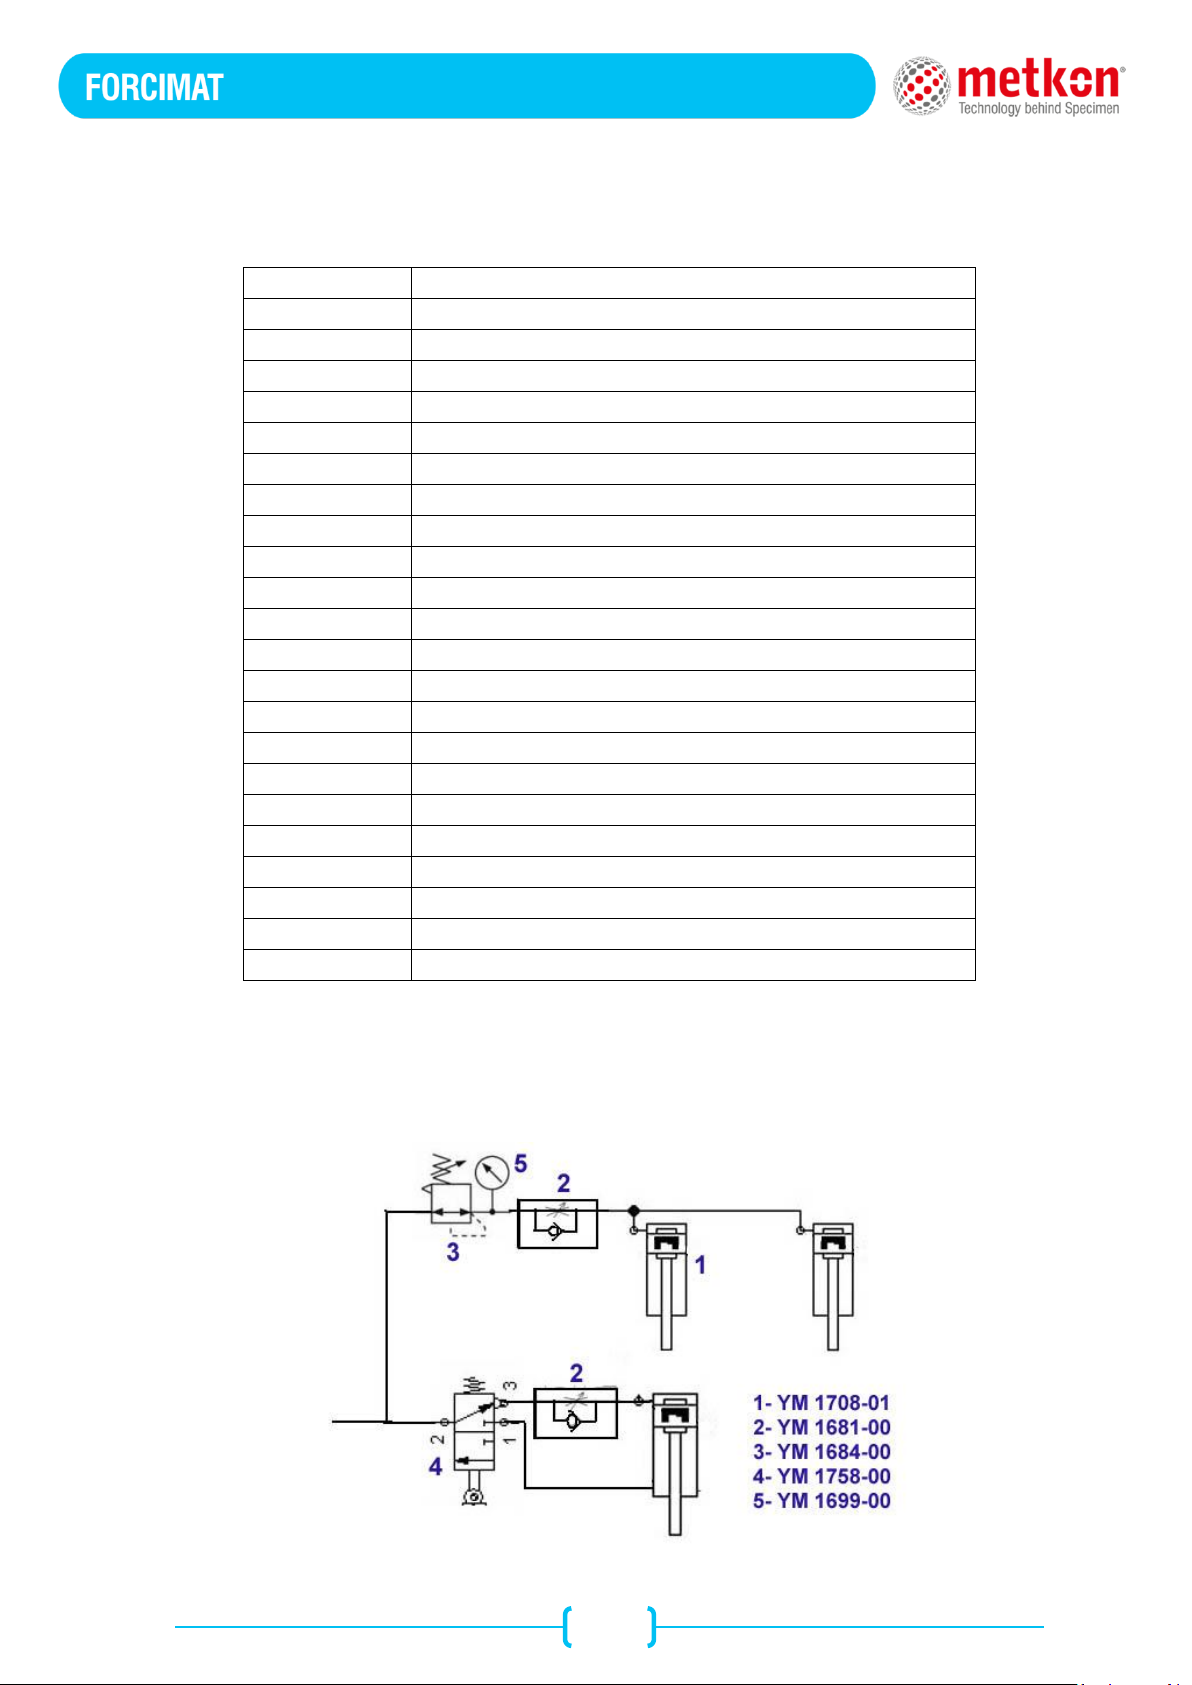
YM 1699-00
Manometer 40, 0-6 BAR
YM 1708-01
SINGLE ACTING CYLNDER, USC 12 X 40-P
YM 1721-00
Pneumatic elbow PL04-M5C
YM 1758-01
Valve NV 5321 24V DC, Single
YM 1763-00
Potentiometer, Relay, Forcimat
YM 1764-00
Potentiometer Switch, Forcimat
YM 3751-00
BEARING 6006
YM 3779-01
Pump, 24V SR 10/30 RETSCHLE, Forcimat
2. Pneumatic Wiring Diagram

18
3. Customer Service
Our factory-trained assembly personal are at your disposal for customer service.
Please contact one of the following addresses:
METKON OFFICE ADDRESSES
Head Quarter
Metkon Instruments Inc.
Demirtas Dumlupinar Organize Sanayi Sitesi
Ali Osman Sonmez Cad. No:14 Bursa/TURKEY
Tel: +90 (224) 261 1840
Fax: +90 (224) 261 1844
E-Mail: metkonsales@metkon.com
Web: www.metkon.com
Metkon Americas
100 S. Saunders Rd. Lake Forest, IL 60045
Tel: 1 (847) 574-6317
Fax: 1 (847) 572-0886
E-Mail: metkonsales@metkon.com
Web: www.metkon.com
4. Electrical Wiring Diagrams


Table of contents
Other Metkon Laboratory Equipment manuals


Popular Laboratory Equipment manuals by other brands


Daihan Scientific
Daihan Scientific MSH-20D user manual

ThermoFisher Scientific
ThermoFisher Scientific ARL EQUINOX Series Instruction Notice

Phcbi
Phcbi MCO-170MP operating instructions

NoiseKen
NoiseKen EPS-02Hv2 instruction manual

Hettich
Hettich ROTO SILENTA 630 RS operating instructions

Tencor
Tencor AlphaStep 200 manual


