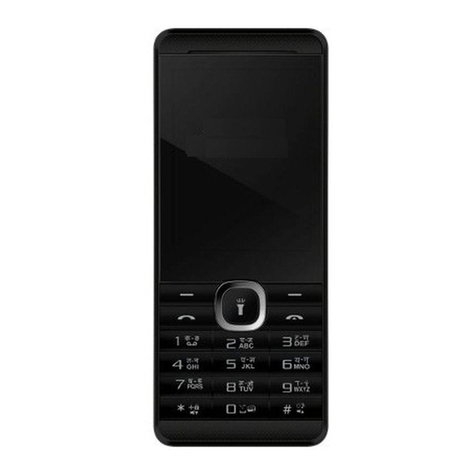
Micromax X220 User manual

X220
User Manual


Contents
1. Legal Information ................................... 1
2. Important Notice.................................... 3
3. Getting Started ...................................... 5
3.1. Packing Contents.............................. 5
3.2. Installing SIM, Battery and Attaching
other Accessories.................................... 5
SIM Card & Battery Installation (Figure 2)......................................................... 5
Connecting Hands-free Kit (Figure 3) ..... 6
Connecting the charger/Charging the
Battery (Ref Figure 4) .......................... 7
Powering ON and OFF the Phone............ 8
3.3. Phone Keypad Layout (Figure 5)......... 9
Left Soft Key....................................... 9
Right Soft Key..................................... 9
Dial Key ............................................. 9
End Key.............................................. 9
Up and Down Direction Keys ................. 9
Left and Right Direction Keys ................ 9
0-9 Keys............................................10
* & # Key..........................................10

3.4. Important Phone Icons.....................10
Signal Strength Icon ...........................10
Battery Meter Icon..............................11
Keypad Lock Icon ...............................11
3.5. Basic Functions ...............................11
Make a Call........................................11
Making a Call Using Call history............12
Answering a Call.................................12
Call Options.......................................12
4. Menu Layout.........................................14
4.1. Messages .......................................16
SMS..................................................16
MMS .................................................17
Chat..................................................18
Voicemail server.................................18
Broadcast message.............................18
4.2. Phonebook......................................18
Quick search ......................................18
Search contact ...................................20
Add new contact.................................20
Copy all...Error! Bookmark not defined.

Delete.....Error! Bookmark not defined.
Caller groups.....................................20
Extra numbers...................................21
Phonebook settings.............................21
4.3. Call logs.........................................22
Call history ........................................22
Call settings.......................................22
4.4. Multimedia......................................23
Camera .............................................24
Image viewer.....................................24
Video player.......................................25
Audio player.......................................26
Sound recorder ..................................27
FM radio............................................27
Schedule FM record.............................28
4.5. Applications....................................28
Games ..............................................28
Calculator..........................................29
Stopwatch .........................................29
4.6. File manager...................................29
4.7. Organizer .......................................30

Calendar............................................30
Tasks ................................................31
Alarm................................................31
World clock........................................31
4.8. Settings .........................................31
User profiles ......................................31
Dual SIM settings ...............................33
Phone setup.......................................33
Network setup....................................35
Security setup....................................35
Restore factory settings.......................36
4.9. Connectivity....................................36
STK ..................................................36
WAP..................................................37
Data account......................................38
Bluetooth...........................................38

1
1. Legal Information
All rights reserved. Reproduction, transfer,
distribution or storage of part or all of the contents
in this document in any form without the prior
written permission of Micromax is prohibited.
Micromax operates on a policy of continuous
development. Micromax reserves the right to make
changes and improvements to any of the products
described in this document without prior notice.
Under no circumstances shall Micromax be
responsible for any loss of data or income or any
special, incidental, consequential or indirect
damages howsoever caused.
The contents of this document are provided "as is".
Except as required by applicable law, no warranties
of any kind, either express or implied, including, but
not limited to, the implied warranties of
merchantability and fitness for a particular purpose,
are made in relation to the accuracy, reliability or
contents of this document. Micromax reserves the
right to revise this document or withdraw it at any
time without prior notice.
Disclaimer: Micromax will not bear any responsibility
for any incompliance with the above guidelines or
improper use of the mobile phone. Our company
keeps the right to make modifications to any of the
content here in this user guide without public
announcement in advance. The content of this
manual may vary from the actual content displayed

2
in the mobile phone. In such a case, the latter shall
govern.

3
2. Important Notice
Important Safety Precautions
•Do not use the device while driving. Please
see that in some countries, it is illegal to use
such devices while driving.
•Switch off when refueling. Do not use the
device at a refueling point (service station)
or near fuels or chemicals.
•Switch off in aircraft. Mobile phones and
GSM devices can cause interference. Using
them on aircraft is both illegal and
dangerous.
Follow Special Regulations
•Special Regulation. Follow any special
regulations in force in any area and always
switch off your device whenever its use is
forbidden, or when it may cause interference
to the surrounding.
•Radio Interference. All mobile phones
cause radio interference within the specified
Limits of GSM standards.
•Qualified service. Only qualified service
personnel must repair the equipment. Use
only approved accessories and batteries.
•Emergency calls. Ensure that the phone is
switched on and in service. Enter the
emergency number (112 or another official
emergency number) and press the "Dial"
key.

4
•Use only approved accessories. The use
of any other power accessory will violate
warranty conditions that apply to the phone.
Safe Operation Instructions
•Before Installing or operating this product,
read this manual carefully.
•Do not expose unit to rain or moisture.
•Do not place unit on or close to any heat
source.

5
3. Getting Started
3.1. Packing Contents
Before using Micromax X220 mobile phone, carefully
remove the contents from the shipping carton and
check for any damages or missing contents. If you
find any parts missing, contact your Authorized
Distributor or shipping agent immediately. The
standard packing contents are as follows:
•Base Trans-receiver
•Battery
•Charger
•Hands free Kit
•User Manual
•Service Guide
3.2. Installing SIM, Battery and
Attaching other Accessories
SIM Card & Battery Installation (Figure
2)
Always turn off the phone and detach the charger
when you insert or remove a SIM card or battery
from the phone.
1. Remove the battery cover by pulling it as
shown in Figure 2.
2. Slide the SIM Card into its holder. Make sure
that the gold contacts of the SIM Card are
facing down, and the cut off corner is
correctly aligned as shown in figure.

6
3. Place the battery in the back of the phone
with the label side up and the connectors
facing each other.
4. Place the battery cover as shown in the
picture and push it into place.
Figure 2
Connecting Hands-free Kit (Figure 3)
You are provided with a hands-free earpiece set with
your phone. The same can be used to listen to your
mp3 songs and listen and speak while on a call. To
connect the hands-free earpiece, simply connect the
connector into the connecting socket as shown in
figure. When properly connected, the phone will
display a message ‘Earphone plugged in’ with an
icon displayed on the screen.
NOTE:Only use Micromax specified accessories.

7
Figure-3
Connecting the charger/Charging the
Battery (Ref Figure 4)
1. Plug the charger’s transformer into a
standard AC outlet.
2. Insert the charger’s output plug into the
phone’s connecting socket as shown in
figure-4.
NOTE: It may take up-to 30 minutes before the
battery icon/charging icon appears on the screen
while charging.

8
Figure-4
Powering ON and OFF the Phone
To Power your phone ON or OFF, press and hold the
End key for at least 3 seconds or until the display
lights comes up or goes off. Enter the lock code if
necessary and select OK to Power ON.
Figure-5

9
3.3. Phone Keypad Layout (Figure 5)
Left Soft Key
Performs functions in lower left display. In standby
mode, press OK key to enter main menu.
Right Soft Key
Performs functions in lower right display.
Dial Key
•Make calls
•Answer calls
•Press when idle to see the list of calls.
End Key
End or reject calls; Press and hold this key to turn
phone on/off.
Up and Down Direction Keys
•Scroll to select options
•In standby mode press to open shortcut
applications.
•In edit message status, press to select the
required word.
•In function menu, scroll to open desired
function.
Left and Right Direction Keys
•Scroll to select options
•In standby mode press to open shortcut
applications
•In edit message status, press to select the
required word.

10
0-9 Keys
In standby mode, press number keys to input dialing
number. In standby mode, press and hold 2-9 key
to directly call the number set before, in the speed
dial list, press and hold 1 key to the voicemail
server. In edit status, press to input numbers,
characters and phonetic notation. In edit mode,
except input number, press 0 key to input space. In
functional menu, press numbers to speed select
submenu items.
* & # Key
Functions vary in different situations or function
menus: On Input Screen, press "*" for symbols. On
Input Screen, press "#" to switch among different
inputting methods. In standby and dial mode, press
and hold "*" to input +. In standby mode, input "+"
for an international call.
3.4. Important Phone Icons
Signal Strength Icon
The Signal Strength Icon is seen on the top
leftmost corner of the screen. The icon helps you to
identify the strength of the network; the phone has
latched on to, at that particular instance. It has a
maximum of 4 bars with a minimum as no bar. 4
bars signify strongest network strength and
subsequently minimizes with each diminishing bar.
No bar signifies least or no network strength.

11
Battery Meter Icon
The Battery Meter Icon is seen on the top
rightmost corner of the screen. The icon signifies the
battery strength available at that instance.
NOTE: At very low battery levels, the phone will
prompt ‘Low Battery’ message on the screen.
Keypad Lock Icon
The Keypad Lock Icon is seen on top of the screen
at various positions depending on the number of
icons displayed. A closed lock signifies that the
keypad is locked. When the slide cover is closed,
you can unlock the keypad by pressing Unlock (by
left soft key) on the phone, followed by the OK key.
Similarly for locking the keypad, press the left soft
key, to be followed by the OK key.
3.5. Basic Functions
Make a Call
To make a call, unlock the keypad, if locked, enter
the desired phone number and press the Dial key.
NOTE:Your service provider programs one or more
emergency phone numbers, such as 112, 100, that
you can call under any circumstances, even when
your phone is locked or the SIM card is not inserted.
Check with your service provider, as emergency
numbers vary by country. Your phone may not work
in all locations, and sometimes an emergency call
cannot be placed due to network, environmental or
interference issues.

12
Making a Call Using Call history
All dialed and incoming numbers are saved in call
history and categorized into Missed calls, Received
calls and Dialed calls. To check the history, please
follow these steps:
In standby mode, press the Dial key to view Call
history. Use the direction keys to select among
Missed calls, Received calls and Dialed calls.
Answering a Call
•To receive an incoming call, press the
Options key and select ‘Answer’ or receive it
directly by pressing the Dial key.
•If headset is available, user can choose
headset keys to answer the call.
Call Options
The Micromax X220 phone offers multiple functions
during a call. During a call, following functions can
be actualized if you operate according to the
instructions on the screen. Press up and down
direction keys to choose the wanted function and
press select key to enter.
•Hold single call: To hold an Active call.
•End single call: End the present active call
only.
•New call: To make a new call.
•Phonebook: To explore the Phonebook for
phone numbers.
•Messages: To explore Messages menu.

13
•Sound recorder: To record a conversation
between the active members of the
conversation
•Silence: Turn on/off the Microphone during
an active call.
•DTMF (Dual-tone Multi-frequency): You can
choose on/off; which is to send dual-tone
multi-frequency sound. This can offer dialing
the telephone numbers with extensions or
IVR systems installed for menu driven
options.
NOTE: This feature is network dependent.

14
4. Menu Layout
Messages
SMS
MMS
Chat
Voicemail server
Broadcast message
Phonebook
Quick search
Search contact
Add new contact
Mark several
Caller groups
Extra numbers
Phonebook settings
Call logs
Call history
Call settings
Multimedia
Camera
Image viewer
Video player
Audio player
Sound recorder
FM radio
Schedule FM record
Applications
Games
Calculator
Stopwatch
File manager
Table of contents
Other Micromax Cell Phone manuals

Micromax
Micromax Q22 User manual

Micromax
Micromax X353 User manual

Micromax
Micromax Q55 Bling User manual

Micromax
Micromax Q66- Eclipse User manual

Micromax
Micromax Q427+ Installation instructions

Micromax
Micromax A75 User manual

Micromax
Micromax X266 User manual

Micromax
Micromax Q463 User manual

Micromax
Micromax X225 User manual

Micromax
Micromax W121 Manual

Micromax
Micromax A069 User manual

Micromax
Micromax Q7 User manual

Micromax
Micromax A068 User manual

Micromax
Micromax GC256 User manual

Micromax
Micromax Canvas Hue 2 A316 User manual
Micromax
Micromax A69 User manual

Micromax
Micromax P580 User manual

Micromax
Micromax L2 User manual

Micromax
Micromax X725 User manual

Micromax
Micromax A80 User manual