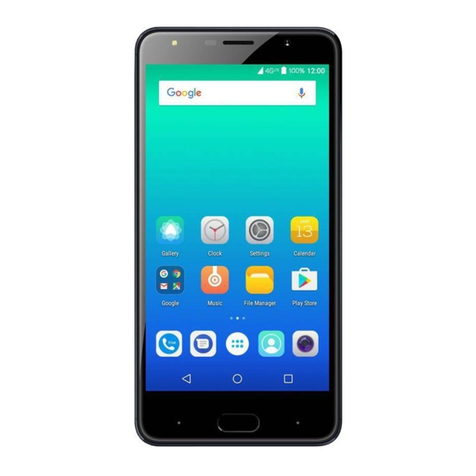
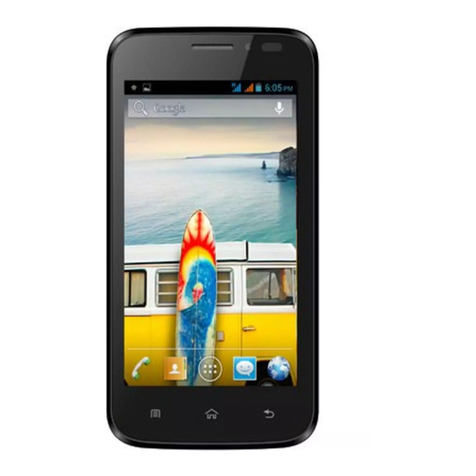
Micromax D303 User manual

D303 L3 Service Manual
1:Technical Specifications
Particular
Remarks
Key Matrix For Flashing
NA
Chipset
MT6572W
Android Version
Android4.4
Frequency
1.3GHz
Network Mode
850MHz/900MHz/1800MHz/1900MHz B1, B8
Rom
4G
RAM
512MB
Internal SD Card memory
2G
Expandable Memory
32G
Factory mode code
Press vol+/ Vol-/ power key at the same time
Good Earpiece volume
32Ω± 15%
Good Loudspeaker volume
8Ω± 5%
Good MIC volume
2.2kΩ± 5%
Good Vibrator volume
30Ω± 5%

D303 L3 Service Manual
2:CAUTIONS
I. Flashing & Servicing must be undertaken by qualified personnel only.
II. Ensure all work is carried out at an anti-static workstation and that an anti-static wrist strap is worn.
III. Use only approved Tools & components as specified in the parts list.
IV. Ensure all components, modules, screws, and insulators are correctly re-fitted after servicing and
alignment
V. Ensure all cables and wires are repositioned correctly if Handset disassembled
VI. Electrostatic discharge can easily damage the sensitive components of electronic products.
Therefore, Service Centre must Adhere the precautions which mentioned above.
3. L3 Service Manual
RF IC (U501)
TP slot (J802)
CPU
(U101)
RF PA
(U605)
TF connector
(J1201)
POWER IC
(U401)
RF antenna
Slot(E601)
Earphone jack
(J1003)
Main camera
(J902)
WCDMA
PA(U606 U601)
4 in 1 chip
(U701)
I/O
connector
(J1203)
Front camera
Connector
(J901)
Battery
connector
(J1202)
PWPKEY
(S1101)
FLASH(U301)
LCD Slot
(J801)
(MIC101)
proximity
sensor
(U1102)
Side key
connector (S1102,
S1103)

D303 L3 Service Manual
1. Unable to load Software:
Solution:
First check the computer can recognize the device or not, if not, Re-load it.
Then check the USB port to master control circuit is normal or not.:format the flash and upgrade again if fail
in the Proceed of downloading.
Use a fresh data cable
Check the I/O connector soldering quality ,if not ,Re-sold it or change it.
Check the CPU work normally or not. Re-Solder the CPU or change it
2. No power on
I/O
connector
CPU

D303 L3 Service Manual
Solution:
Flash the handset with latest SW
heck the battery have capacity or not ,if not ,Change it
Charging with transferred to 4.0 V dc power supply to the mainboard on battery Reordering ,check
The mainboard work current, the normal starting current will be from 100 ma jump to light screen
Enter boot LOGO 400 ma to completely started around 500 ma, if the current not right then check
There have short circuit or open circuit phenomenon or not.
Check the Power IC work normally or not ,Re-Solder it or change it
The output voltage normally or not
Check the crystal work normally or not ,Re-Solder it or change it
Check the CPU work normally or not, Re-Solder CPU or change it
3. Not charging:
Solution:
crystal
CPU
Power
ic

D303 L3 Service Manual
Flash the handset with latest SW
Plug in the charger to check whether the machine has a charging icon, if don’t have, then check the
5V power pin of USB port connect the mainboard or not
Check the voltage of battery when charging If it reaches 4.2V, has shown in front of the
Transmission, now maybe is the battery bad so that no charging.
Check the I/O connector work well or not ,if not , Re-Solder or change it
Check the charging switch work well or not ,if not , Re-Solder or change it
Check the Power IC work normally or not, Re-Solder CPU or change it
Check the CPU work normally or not. Re-Solder the CPU or change it
4. LCD / Display problem:
Solution:
I/O
connector
Power IC
Charge
switch

D303 L3 Service Manual
Flash the handset with latest SW
Check the connect ribbon cable saddle normally or not ,Re-assembly LCD.
Check the LCD connector work normally or not, Re-Solder LCD connector
Check the CPU work normally or not, Re-Solder CPU or change it
5. Touch panel is not working
Solution:
CPU
LCD slot

D303 L3 Service Manual
Flash the handset with latest SW
Check the connect ribbon cable saddle normally or not ,Re-assembly TP.
Check the TP slot work normally or not, Re-Solder TP slot ;
Check the CPU work normally or not, Re-Solder CPU or change it
6. LCD backlight not on or dark
Solution:
Flash the handset with latest SW
TP slot
CPU

D303 L3 Service Manual
Check the connect ribbon cable saddle normally or not ,Re-assembly LCD.
Check the LCD connector work normally or not, Re-Solder LCD connector or change it
Check the Back driver work normally or not, Re-Solder Back driver or change it;
Check the CPU work normally or not, Re-Solder CPU or change it
7. SIM not detecting:
Solution:
Flash the handset with latest SW
CPU
LCD
connector
Back
driver

D303 L3 Service Manual
Check if the SIM card is obviously damaged, if yes, Replace the SIM card socket
Check if the ground impedance of each pin of the SIM card socket(except the ground pin)is low(lower than
grade ),if yes, Replace the varistor of the corresponding pin;
Check if the series resistors on each network of the SIM card have pseudo soldering ,if yes, Carry out repair
soldering of the series resistors on each signal line;
Check the Power IC normally or not, then Re-Solder Power IC or change it.
Check the CPU normally or not, then Re-Solder CPU or change it.
8. SD card not detecting:
Solution:
Flash the handset with latest SW
Check if the SD card is obviously damaged, if yes, Replace the SD card socket
SIM
Connector
CPU
Power IC

D303 L3 Service Manual
Check if the ground impedance of each pin of the SD card socket(except the ground pin)is low(lower than
grade ),if yes, Replace the varistor of the corresponding pin;
Check if the series resistors on each network of the SD card have pseudo soldering ,if yes, Carry out repair
soldering of the series resistors on each signal line;
Check the Power IC normally or not, then Re-Solder Power IC or change it.
Check the CPU normally or not, then Re-Solder CPU or change it.
9. Front camera is not working:
Solution:
Flash the handset with latest SW
Check if the Camera is obviously damaged, if yes, Replace the Camera ;
SD
Connector
CPU
Power IC

D303 L3 Service Manual
Check if the ground impedance of each pin of the Camera connector (except the ground pin)is low(lower than
grade ),if yes, Replace the varistor of the corresponding pin;
Check if the series resistors on each network of the Camera connector have pseudo soldering ,if yes, Carry out
repair soldering of the series resistors on each signal line;
Check the CPU normally or not, then Re-Solder CPU or change it.
10. Rear camera is not working:
Solution:
Flash the handset with latest SW
Check if the Camera is obviously damaged, if yes, Replace the Camera ;
Camera
Slot
CPU

D303 L3 Service Manual
Check if the ground impedance of each pin of the Camera connector (except the ground pin)is low(lower than
grade ),if yes, Replace the varistor of the corresponding pin;
Check if the series resistors on each network of the Camera connector have pseudo soldering ,if yes, Carry out
repair soldering of the series resistors on each signal line;
Check the CPU normally or not, then Re-Solder CPU or change it.
11. MIC no sound:
Solution:
Flash the handset with latest SW
Check Earphone connector also , If Earphone connector got shorted : MIC & Receiver will not work
Check the MIC work normally or not ,Re-Solder the MIC or change it.
Camera
slot
CPU

D303 L3 Service Manual
Check the power IC work normally or not. Re-Solder the power IC or change it
Check the CPU work normally or not. Re-Solder the CPU or change it
12. Receiver not working:
Solution:
Flash the handset with latest SW
Check the receiver bad or not, then change it.
Check the receiver circuit normally or not.
CPU
MIC

D303 L3 Service Manual
Check Earphone connector also , If Earphone connector got shorted : MIC & Receiver will not work
Check the Power ic work normally or not. Re-Solder the Power IC or change it
Check the CPU normally or not, then Re-Solder CPU or change it.
13. Speaker not working:
Solution:
Flash the handset with latest SW
Check the Speaker bad or not, then change it.
Check Earphone connector also , If Earphone connector got shorted : MIC & Receiver will not work
Check the Power IC work normally or not. Re-Solder the Power IC or change it
Receiver
Slot
CPU
Power IC

D303 L3 Service Manual
Check the CPU work normally or not. Re-Solder the CPU or change it
14. Earphone not working:
Solution
Flash the handset with latest SW
Check the earphone normally or not, then change it;
Check the earphone jack normally or not. then Re-Solder earphone connector or change it
Check the Power IC normally or not, then Re-Solder Power IC or change it.
Power IC
CPU
Receiver
Slot

D303 L3 Service Manual
Check the CPU normally or not, then Re-Solder CPU or change it.
.
15. G SENSOR not working: N/A
16. FM not working:
Solution:
Flash the handset with latest SW
Check the earphone normally or not, then change it;
Earphone
CPU
Power IC
Earphone
connector

D303 L3 Service Manual
Check the first foot of earphone have good connect with earphone line or not. then Re-Solder earphone
connector or change it
Check the Power IC normally or not, then Re-Solder Power IC or change it.
Check the CPU normally or not, then Re-Solder CPU or change it.
17. WI-FI is not working properly:
Solution:
Check WIFI 11 to 30 S if these are working fine。
Flash the handset with latest SW
Check the BT/WIFI/GPS/FM Chip normally or not, then Re-Solder Power IC or change it.
Check the CPU normally or not, then Re-Solder CPU or change it.
Earphone
CPU
Power IC
CPU
Bt/WiFi /FM
Chip
Earphone
connector

D303 L3 Service Manual
18. BT is not working fine:
Solution:
Check BT 11 to 30 S if these are working fine。
Flash the handset with latest SW
Check the BT/WIFI/GPS/FM Chip normally or not, then Re-Solder Power IC or change it.
Check the CPU normally or not, then Re-Solder CPU or change it.

D303 L3 Service Manual
19. Keys are not working:
Solution:
Flash the handset with latest SW
Check if the keys normally or not, Re-Solder Side key or change it
Check the circuit from keys to CPU normally or not ,then Re-Solder CPU or change it
Side key
CPU
CPU
Bt/WiFi/FM
Chip

D303 L3 Service Manual
20. Reset is not working: N/A
21. Vibrator is not working:
Solution:
Flash the handset with latest SW
Check if the vibrator is failure then Re-Solder Vibrator or change it
Check the CPU work normally or not. Re-Solder the CPU or change it
Other Micromax Cell Phone manuals

Micromax
Micromax A066 User manual

Micromax
Micromax X501 User manual

Micromax
Micromax A310 User manual

Micromax
Micromax A111 User manual

Micromax
Micromax A092 Building instructions

Micromax
Micromax Canvas Juice 2 User manual

Micromax
Micromax Ninja A91 User manual

Micromax
Micromax A064 User manual

Micromax
Micromax X275 User manual

Micromax
Micromax Canvas A1 AQ4502 User manual

Micromax
Micromax E471 Manual

Micromax
Micromax X272 User manual

Micromax
Micromax A121 User manual

Micromax
Micromax X512 User manual

Micromax
Micromax A74 L1 User manual

Micromax
Micromax Canvas 2 User manual

Micromax
Micromax A69 User manual

Micromax
Micromax Q427+ Reference guide
Micromax
Micromax X377 User manual

Micromax
Micromax A116i User manual