MicroNX new NX-201N User manual

new NX-201N
Instructions for use
BRUSHED MICRO MOTOR

다시 한 번 당사제품을 선택해 주신 것에 감사드립니다.
Thank you for your selection of our products one more.
사용설명서의 지시사항을 지키지 않아 발생하는 사고는
당사에서 책임지지 않으며 사용자는 제품의 안전한 사용과
보관에 책임이 있습니다.
The accidents by non fulfillment of this instruction are not
our responsibility. Users should pay attention to safe use
and keeping.
제품의 품질향상을 위해 외관 및 사양에 사전예고 없이 변경될
수 있습니다.
Design and specification can be changed without notice for
quality improvement.
궁금하신 사항이 있으실 경우 언제든지 연락 주시면 최선을
다해 대응 하겠습니다.
Please contact us whenever you have a question.


1) Controller
2. 제품 설명 / Description
2.1 제품의 구성 / Description of System, Components and Functions
No. 구성품명 Part Name 수량 Quantity
컨트롤러 Controller
핸드피스 Handpiece
풋 스위치 Foot switch
홀더 Holder
척 렌치 Chuck wrench
카본 브러쉬 Carbon brush
11
2
3
4
5
6
1
1
1
1
2
①
전원램프 / Power lamp①
속도 조절 다이얼 / Speed control dial②
전압 선택 스위치 / Voltage switch③
핸드피스 연결부 /Handpiece connector④
전원버튼 / Power button
⑤
회전방향 버튼 / Direction button⑥
핸드&풋 버튼 / Hand&Foot button⑦
⑧ 페달 연결부 / Pedal connector
③
⑦
⑥
⑤
⑧
④
②

2.2 성 능 / Product Performance
1) Controller
2) Handpiece (NX-170S)
3) Foot switch (FS-30)
4) Accessary
Input 110/220 V
1.4 kg
110㎜ × 189㎜ × 77㎜ [W×D×H]
Weight
Dimension
Bur Handcap Handle Carbon housing cover
케이블 / Foot switch cable
풋 스위치 / Foot switch
Cord
Holder Chuck wrench Carbon brush

2.3 보관 조건 / Storage Conditions
2) Handpiece
경고
-지정된 환경 요인을 벗어난 장소에서 운전 시 오동작의 발생 우려가 있습니다.
CAUTION
-Operation of the device in an environment other than those specified by
manufacturer may lead to causing the device malfunction.
3. 설치 / Installation
3.1 컨트롤러와 핸드피스 연결 / Connection the motor with a cable
1) 컨트롤러의 측면과 커넥터 접속부에 나있는 홈을 확인합니다.
Identify the holes of the connector cable cap and pins of the motor terminal for
connection.
2) 케이블과 컨트롤러의 접속 단자를 홈에 맞추어 케이블을 밀어 연결합니다.
Insert the pins of the connection terminal of the motor into the holes of the connec-
tor cable cap.
Max. Speed 35,000 rpm
200 g
L 156 x Ø 28 mm
Weight
Dimension
Temperature +10℃~+40℃/ +48℉~+107℉
35%~70%
700hPa ~ 1060hPa
Humidity
Air pressure
경고
-반드시 전원을 끈 후 컨트롤러와 핸드피스를 연결 하십시오.
CAUTION
-Be sure to turn off the power before connecting the controller to the
handpiece.


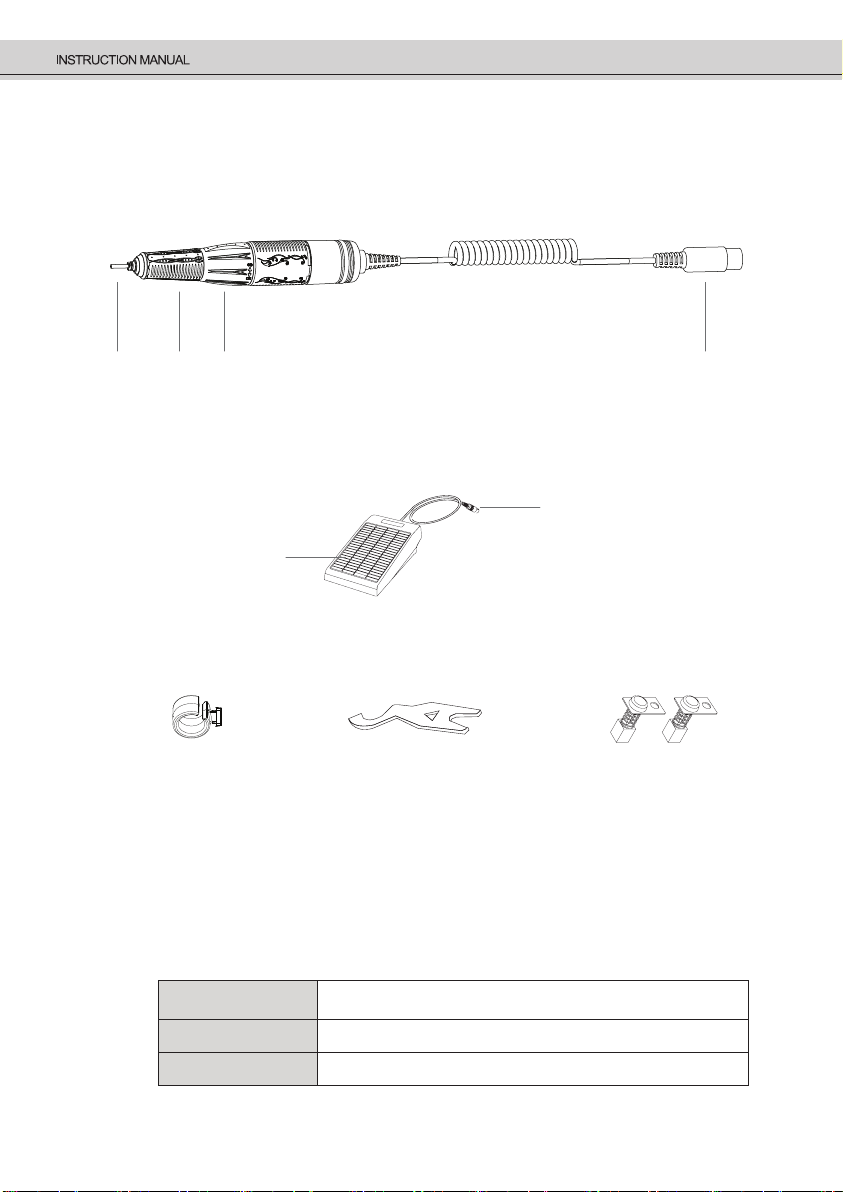
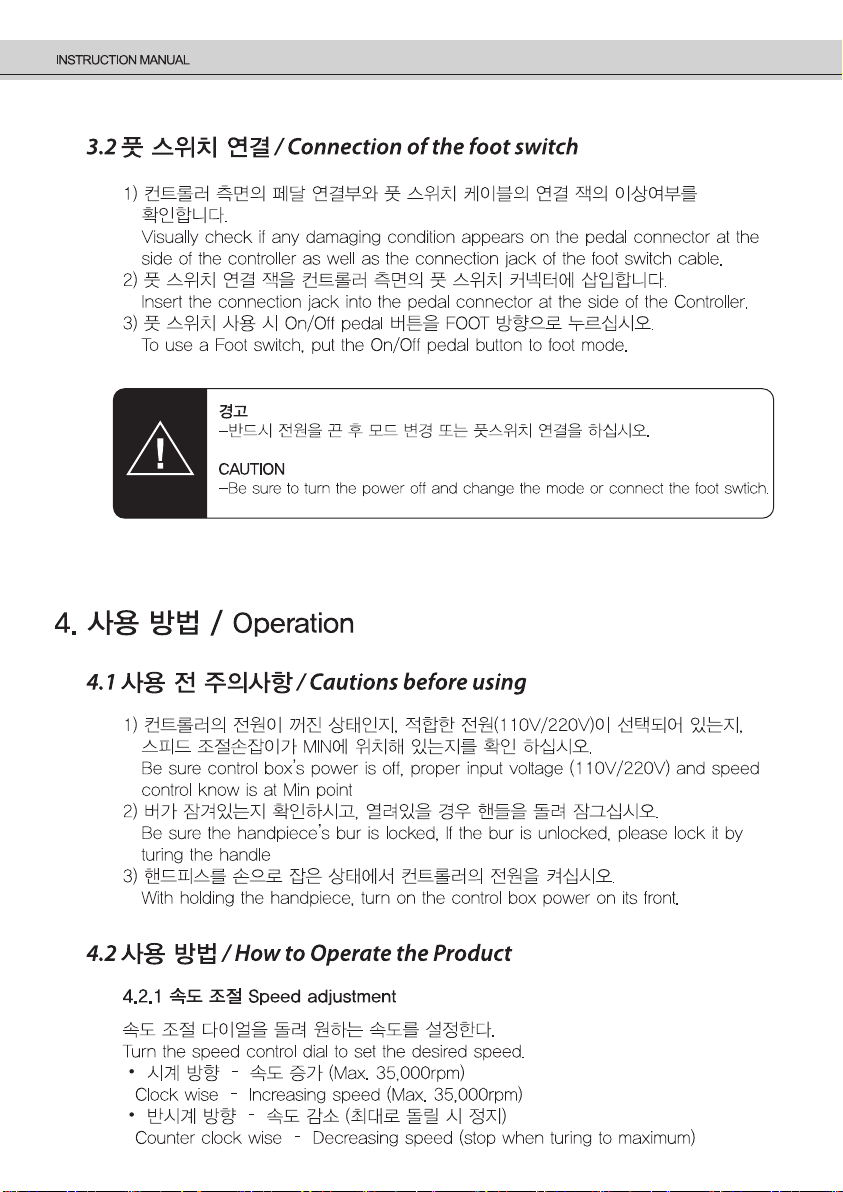
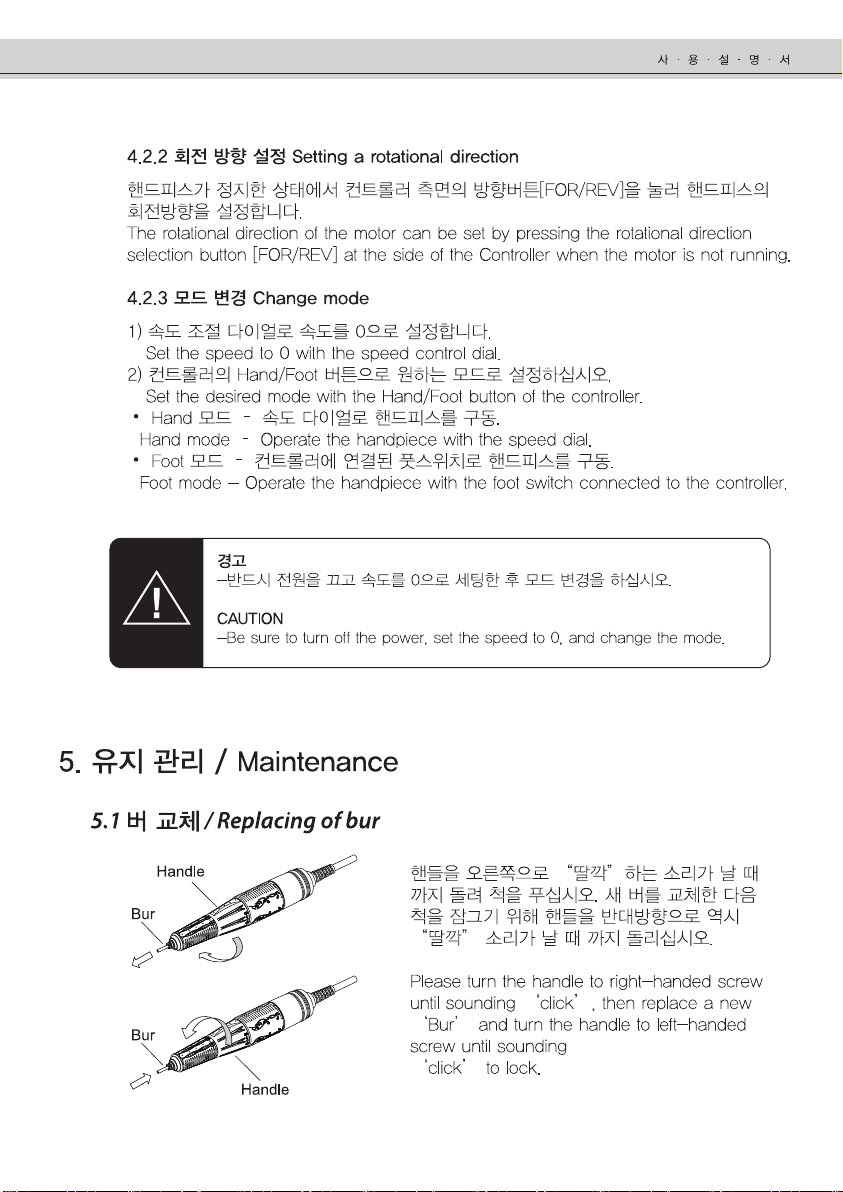
5.2 콜렛척 교체 / Replacing of collet chuck
1. 핸드캡을 오른쪽으로 돌려 분해한 후, 스핀들을
분해합니다.
Please turn the Handcap to right-handed screw
and disassemble the handcap and spindle
assembly.
2. 척 조인트 렌치와 척 렌치를 이용하여 왼쪽으로
돌려 버와 척을 분해합니다.
Please turn the chuck to left-handed screw
with chuck wrench and chuck joint wrench to
disassemble the bur and chuck.
3. 척을 교환한 후 핸드피스를 조립합니다.
Please change to new chuck and assemble
the handpiece.
4. 무 부하 상태에서 확인 후 사용합시오.
Please check it under idle after assembling and
use it.
경고
-버의 허용 회전 속도는 버의 재질과 종류에 따라 다르므로 버 생산자의 속도를 참고합시오.
CAUTION
-The permitted bur rotation speed is different according to its kind and materials. Please
refer to its manufacturer’s permitted speed.
주의
-콜렛척의 수명은 2~3년 이지만 작업량에 따라 달라질 수 있습니다.
NOTICE
-The life cycle of chuck is 2~3 years and it is flexible according to workload.
Spindle Assembly
Bur
Collet chuck
Chuck wrench
Handcap
Spindle Assembly
Handcap

5.3 카본 브러쉬 교체 / Replacing of carbon brush
1. 컨트롤러를 끈 후, 엔드캡을 풀고 코드를
분해합니다.
After tuning off the control unit, please loose the
carbon housing cover, then disassemble the
cord.
2. (+)타입 드라이버로 볼트를 푼 후 오래된 카본을
제거합니다.
After loosing the fixing bolt by (+) typed
screwdriver, please remove the old carbon
brush.
3. 카본브러쉬의 스프링이 브러쉬 홀더에 끼지
않도록 주의하면서 새 카본 브러쉬를
끼웁니다.
Being careful that brush spring is not caught in
carbon brush holder, please put a new carbon
brush.
4. 모터 코드를 끼운 후 엔드캡을 덮어
잠급니다.
Please insert the motor cord and fasten the
carbon housing cover.
주의
-카본브러쉬의 교체주기는 1년이지만 작업량에 따라 달라질 수 있습니다.
NOTICE
-The replacement period of carbon brush is about 1 year, but it is flexible
according to the workload.


6. 고 장 Troubleshooting
6.1 고장에 대한 설명 / Descriptions of Malfunctions
고장 Problem 고장 원인 Check point 해결책 Solution
전원을 켰을 때 전원램프가
켜지지 않는다.
Power Lamp is not lighten
when turning on the
power switch
모터가 작동하지 않는다.
The motor does not work.
풋 페달이 작동하지
않는다.
Foot pedal does not work.
핸드피스에서 소음이 난다.
The handpiece makes
noise.
콜렛척 안에 이물질이 끼어있진
않습니까?
Ins’t foreign substance in a collect
chuck?
허용범위 이상의 속도에서
사용했거나 휜 버를 사용
하셨습니까?
Don’t you use it at abnormal
speed or Isn’t the bur curved.
소음이 계속 난다.
Dose the motor make noise
continuously?
서비스 신청을 해주십시오.
Please ask repair.
콜렛척을 분해 후 이물질을 제거해
주십시오.
After disassembling the collect
chuck, please remove substance.
버를 교체하고 사이즈에 따라
정해진 허용속도 내에서만
사용하십시오.
Replace the curved bur and use
it under permitted RPM for bur
size.
모터선이 정확히 연결되어 있습니까?
Is the cord of motor connected
well?
핸드피스의 척이 열려있지 않습니까?
Isn’t the chuck opened?
과부하에서 작업을 오래 하셨습니까?
Have you used a handpiece for a
ling time under high-load?
페달 코드가 잘 꽂혀 있습니까?
Is the cord of foot pedal connected
well?
Foot 모드 대신 Hand모드로 되어
있지 않습니까?
Isn’t the hand mode set up
instead of Foot mode.
Hand/Foot 스위치를 눌러서 Foot
모드로 전환합니다.
Put the Hand/Foot mode button.
페달코드를 정확히 꽂습니다.
Insert the pedal plug in and outlet
correctly.
전원을 끄고 10분 정도 휴식 후
재사용 하십시오.
Turn off the control unit, please
keep it at cool place for 10
minutes and work it.
핸들을 돌려 콜렛척을 잠그십시오.
Lock the collect chuck by turning
the handle.
모터코드를 정확히 꽂습니다.
Insert the cord in outlet correctly.
전원선이 정확하게 연결되어
있습니까?
Is the power cord plug connected
well?
전원스위치에 문제가 있습니까?
Trouble of power switch?
서비스 신청해 주십시오.
Please ask repair
플러그를 정확히 꽂습니다.
Insert the plug of power cord in
outlet correctly.

7. 서비스 / Expendables and Service
7.1 소모품목 / Expendables
1) 본 제품은 정해진 전원정격사양에서만 사용되어야 합니다. 정격 사양에서 벗어난
전원을 사용할 수 없습니다.
This product shall be used only under the rated power specified. Power outside the
rated power range shall not be applied.
Spindle assembly Armature assembly Collet chuck housing
Carbon brush
Collet chuck(Ø2.53/Ø3) 3pin din cord(Gray/Black)
Ball bearing Carbon housing

7.2 A/S 정보 / Information on After-Sale Service
7.3 보증 / Warranty
7.3.1 제품에 대한 보증기한 Warranty for device
▶ 컨트롤러, 핸드피스 및 구성품 : 1년
Controller, Handpiece and Accessory : 1year
7.3.2 유료서비스 Charge service
▶ 소비자 과실로 인한 고장 :
In case of defect or damage by user’s misuse:
- 전원전압을 잘못 사용한 경우(110V/220V)
Using wrong input power (110V/220V)
- 사용 시, 이동 시 부주의로 파손된 경우
Dropping down when moving or using
- 타 업체의 부품, 악세서리 사용시
Using other parts or accessory which other manufacturer made
- 사용설명서를 따르지 않아 발생한 문제
Other problem by breaking user’s manual
▶ 제조사 : (주)마이크로엔엑스
Manufacturer : MICRO-NX Co., Ltd.
- 주소 : 대구광역시 동구 매여로1길 22(41059)
Address : 22, Maeyeo-ro 1-gil, Dong-gu, Daegu, 41059 Republic of Korea
- 연락처 : 053-650-1000
Contract : +82-53-650-1000
- Web : www.micronx.co.kr
- E-mail : micronx@micronx.co.kr
▶ EU Representative : MICRO-NX Co., Ltd. branch office
- Address : Karl-Marx-Str. 6 16540 Hohen Neuendorf Germany
- Tel: 49 (0)3303 5412323
- Fax: 49 (0)3303 5412324
- micronxeu@micronx.co.kr

NX-USM-104
EC REP
2017.08.01(0)
MICRO-NX Co., Ltd.
22, Maeyeo-ro 1-gil, Dong-gu, Daegu, 41059 Republic of Korea
Tel: 82 53 650 1001 Fax: 82 53 650 1001
Web: www.micronx.co.kr
MICRO-NX Co., Ltd. branch office
Karl-Marx-Str. 6 16540 Hohen Neuendorf Germany
Tel: 49 (0)3303 5412323 Fax: 49 (0)3303 5412324
Email: [email protected]
Other MicroNX Dental Equipment manuals
Popular Dental Equipment manuals by other brands

3M
3M Elipar DeepCure-S operating instructions

Ultradent Products
Ultradent Products GEMINIEVO 810 DIODE LASE user manual

K-LASER
K-LASER Blue Dental Operating instruction

EMS
EMS AIR-FLOW handy 3.0 Operation instructions

Miele
Miele PG 8581 operating instructions

Dentsply Sirona
Dentsply Sirona SmartLite Focus manual

NSK
NSK Ti-Max NL400 CDE installation manual

Zubler
Zubler VARIOstar Series instructions

KaVo
KaVo Status 1080 TM Instructions for use

Bien Air
Bien Air Chiropro Plus 3rd Gen Instructions for use

KaVo
KaVo EXPERTmatic LUX E15 L Instructions for use

Pelton & Crane
Pelton & Crane Spirit 3000 Series installation instructions