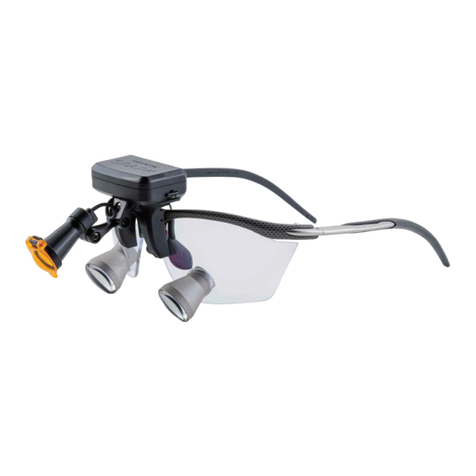
Orascoptic SPARK Assembly instructions

International
INSTRUCTIONS
for Use and Care

INTENTI
O
NALLY BLANK

INDEX
English.............................................4
Български (Bulgarian)...................15
Čeština (Czech) ...............................27
Dansk (Danish) ...............................39
Deutsch (German)..........................51
Eesti (Estonian)...............................63
Español (Spanish)...........................75
Ελληνικά (Greek).............................87
Français (French) ............................99
Hrvatski (Croatian)..........................111
Italiano (Italian)..............................123
Latvijas (Latvian)............................135
Lietuvos (Lithuanian) .....................147
Magyar (Hungarian).......................159
Nederlands (Dutch)........................171
Norsk (Norwegian).........................183
Polski (Polish) .................................195
Português (Portuguese).................207
Română (Romanian)......................219
Slovenčina (Slovak)........................231
Slovenščina (Slovenian).................243
Suomi (Finnish)..............................255
Svenska (Swedish)..........................267
⚥㕜(Chinese)............................279
傈劤铂(Japanese)....................291
묻펂 (Korean).........................303

Orascoptic™Spark™Series Headlight
INSTRUCTIONS FOR USE AND CARE
4
Indications For Use
The Spark headlight is an illumination device attached to spectacles, worn as a visual aid, intended to
illuminate oral structures and operating areas.
Intended Purpose:This device is intended to Illuminate oral structures and operating areas.
Intended Users: This device is intended to be used by qualified medical and healthcare professionals
including, but not limited to, dentists, dental hygienists, medical doctors and medical professionals.
Intended Patient Population:This device is intended for use on patients during general dental and
surgical procedures.
Clinical Benefits:When attachedto loupesorother eyewear,thisdevice illuminatesthe field ofviewof
the wearer to improve visibility during procedures.
Precautions
1. Before use, ensure all screws and removable components are secured to the device.
2. To prolong the life of the batteries, do not store in a fully charged or discharged state.
DO NOT
... disassemble or modify the device
... remove the product serial number labeling
... touch exposed electrical contacts
... begin a procedure while the low-battery indicator light is illuminated or flashing
... hang or pull on exposed cables
... spray directly onto the device
... run any part of the device under water or submerge in any liquid or an ultrasonic cleaner
... use an autoclave or chemiclave, glutaraldehyde, iodophor, or any other sterilization method
... use a cleaner with alcohol concentration greater than 70%
Contraindications
None known.
Disposal Instructions
When you plan to dispose of the device, please return to Orascoptic for recycling.The European
UnionWasteElectrical and ElectronicEquipment(WEEE)directive forbidsthedisposal ofelectrical
andelectronicequipment as unsorted municipalwaste,requiring thatitbe collected andrecycled
ordisposedof separately.Hazardous substancesarepresentinelectricalandelectronicequipment
and present potential risk to human health and environment if disposed of in municipal landfills
which are not designed to prevent migration of substances into the soil and groundwater. If you
need assistance when disposing the device, please call one of our Customer Care Specialists or
your authorized Orascoptic distributor.
This device contains lithium-ion cells. Recycle or dispose of the batteries accordingly to national,
state, and local regulations.
Transport and Storage
10%
85%
-4°F
(-20°C)
104°F
(+40°C)
1.0 atm
(1060 hPa)
0.5 atm
(500 hPa)

Orascoptic™Spark™Series Headlight
INSTRUCTIONS FOR USE AND CARE
See back cover for Customer Care or Technical support contact information | Customers outside our direct sales regions, contact your local distributor 5
Warnings
1. The device must be used exclusively for the intended purpose described.
2. Do notuse thedevice ifany componentisdamaged, loose,detached,or missing.Thisincludesbattery packs,mountingclip, headlight, andelectrical contacts/plugs.Parts thatarebroken,missing,distortedor wornshould bereplaced
immediately. Should such repair or replacement become necessary, ORASCOPTIC OR AN AUTHORIZED SERVICE DEALER SHOULD PERFORM ALL REPAIRSTOTHIS PRODUCT.
3. The use of power adapters and cables other than those provided for use with the device may result in increased emissions or decreased immunity and may cause the system to be non-compliant with the requirements of IEC 60601-1-2.
Only the power adapter and cable that ships with the device should be used during charging.
4. This product maintains compliance with blue light testing standards for safety set by the International Electrotechnical Commission (IEC). As with all lighting products, there are risks to staring directly into the light.
• IEC 62471 Risk Group 2 - CAUTION: Possibly hazardous optical radiation is emitted from this product. Do not stare at operating lamp. May be harmful to the eyes.
5. Misuse of the batteries may cause them to become hot, explode, or ignite and may cause serious injury. Be sure that the following safety warnings are expressly followed:
• Never open or modify the battery pack, mounting clip or power adapter.
• Do not use outside.
• Protect from fluids or damp environments.
• Maintain operational environment of 32˚ to 77˚F (0˚ to 25˚ C).
• Do not short circuit the electrical contacts.
• Do not bring any part of the device into contact with fire or severe heat over 158°F (70°C)
• If you determine that the battery is hot, emits an odor, or changes color or shape, disconnect power immediately.The battery must not be used again.
6. ADVERSE EVENTS: If a serious incident occurs with this medical device, report it to the legal manufacturer, Metrex Research, LLC dba Orascoptic, or the authorized representative, Kerr Italia, S.r.l., and to the competent
authority for the country in which the user/patient is established.
Lithium-Ion Battery Technology
Rechargeable lithium-ion battery technology is ideal for portable devices like the Spark headlight.
• Do not leave the batteries unused for extended periods of time, either in the device or in storage.
• Rechareable lithium-ion batteries have a limited life and will gradually lose their capacity to hold a charge, reducing the runtime of powered devices.
• If you find yourself charging the battery more often, or your device is not running as long as it should, please call our Customer Care Specialists or your authorized Orascoptic
distributor to purchase replacement batteries.

Orascoptic™Spark™Series Headlight
INSTRUCTIONS FOR USE AND CARE
6
Universal Mount
The Spark headlight (Universal Mount) can attach to a majority of loupes and other eyewear.
The Spark headlight universal system includes these main components:
Orascoptic through-the-lens (TTL) Mount
The Spark headlight (Orascoptic through-the-lens“TTL”Mount) is a lighter-weight headlight that attaches
only to Orascoptic-branded loupes.
The Spark headlight through-the-lens system includes these main components:
Accessories Included
USB-to-Micro USB Cable, Power Adapter, Optical Screwdriver
Please call one of our Customer Care Specialists or your authorized Orascoptic distributor to order additional or replacement parts.
Getting Started With Your New Spark Headlight
LED Headlight LED Headlight
Curing Filter Curing Filter
Mounting Clip
Mounting Arms
2 Lithium-ion Rechargeable
Battery Packs
2 Lithium-ion Rechargeable
Battery Packs
Mounting Clip
2 Mounting Screws

Orascoptic™Spark™Series Headlight
INSTRUCTIONS FOR USE AND CARE
See back cover for Customer Care or Technical support contact information | Customers outside our direct sales regions, contact your local distributor 7
Your Spark headlight is a precision electrical instrument manufactured from high quality components.With proper care, it will provide a long and useful life.You must adhere to the following cleaning and disinfecting instructions or
damage may result. Additionally, it is recommended to follow all instructions provided with your chosen cleaning/disinfecting solution.
Recommended Disinfectants
CaviCide™, CaviCide1™, CaviWipes™, or CaviWipes1™
NOTEThese cleaning and disinfecting instructions only apply to your Spark series headlight and Orascoptic-branded loupe. If your headlight is attached to a non-Orascoptic branded product, follow that product’s cleaning
and disinfecting instructions separately.
1. Dampen or spray a soft cloth with your chosen cleaning/disinfecting solution, or use a disinfectant wipe. Squeeze excess fluid out of the cloth or wipe before using.
2. Hold the device securely while cleaning all surfaces with the damp cloth or wipe.
3. Discard dirty cloths or wipes and repeat the steps above until the device is clean.
4. If using a disinfectant, allow all surfaces to remain saturated for the proper duration (following instructions provided with your chosen disinfecting solution).
5. Use a clean and dry soft cloth to wipe all remaining cleaning/disinfecting solution from the surface of your device.
6. If your Spark headlight is attached to an Orascoptic-branded loupe, dampen a lens cleaning cloth with lens cleaning solutionand wipe the inside and outside of the lenses, telescopes, and side shields to remove any
streaks left from the cleaning and disinfecting process. One lens cleaning cloth is provided with all Orascoptic loupe products. Please call one of our Customer Care Specialists or your authorized Orascoptic distributor
to purchase additional lens cleaning cloths.
DO NOT
... spray directly onto the device
... hang or pull on exposed cables
... use paper towel to clean lenses
... use a cleaning/disinfecting solution with alcohol concentration greater than 70%
... run any part of the device under water or submerge in any liquid or ultrasonic cleaner
... use an autoclave, chemiclave, glutaraldehyde, iodophor, or any other sterilization method
Cleaning and Disinfecting

Orascoptic™Spark™Series Headlight
INSTRUCTIONS FOR USE AND CARE
8
The Spark headlight is secured to a loupe or other eyewear frame by tightening the mounting screw to
clamp your frame between the mounting clip and mounting arms of the device. Access to the mounting
screw is located behind the headlight bezel.
1. Tilt the headlight bezel down and use an optical screwdriver to loosen the mounting screw to open
the mounting arms.
2. Push the device over the top of your loupe frame with mounting clip in front of the lenses and mounting
arms behind the lenses.
3. Center the device over the bridge of your loupe frame and tighten the mounting screw until it is secure.
4. If the light is not centered in your field of view, you may need to loosen and adjust the mounting clip
left or right as needed. Once centered to your field of view, retighten the mounting screw until the
device is secure.
DO NOT attempt to remove your Spark headlight from the frame without first
loosening the mounting screw, or damage may result.
Mounting Clip
Mounting Arms
Mounting Your Spark Headlight (Universal) to a Loupe or Other Eyewear
Turn right to tighten
Turn left to loosen

Orascoptic™Spark™Series Headlight
INSTRUCTIONS FOR USE AND CARE
See back cover for Customer Care or Technical support contact information | Customers outside our direct sales regions, contact your local distributor 9
TheSpark headlight is securedto an Orascoptic-branded loupe bytightening themountingscrews directly
into the frame bridge.
1. If your Orascoptic loupe has a badge on the frame bridge, carefully remove it to reveal two threaded
mounting holes.
2. Push two mounting screws through the mounting clip and use an optical screwdriver to slightly
tighten both screws into the frame.
3. Center the device over the bridge of your loupe frame and tighten the mounting screws until it is secure.
4. If the light isnot centered in your field ofvision, you may need to loosen and adjust the mounting clip
left or right as needed. Once centered in your field of view, retighten the mounting screws
until the device is secure.
Mounting Your Spark Headlight (through-the-lens) to an Orascoptic Loupe
Orascoptic Bridge Plate badge must
be removed to access mounting holes

Orascoptic™Spark™Series Headlight
INSTRUCTIONS FOR USE AND CARE
10
Filter FlipsHeadlightTilts
Battery Indicator Light
Bezel Black Ring
Orange Filter
Power Adapter
Charging port
USB-to-Micro USB Cable
Electrical Outlet
LockingTab
Operating Your Spark Headlight
CapacitiveTouch Control

Orascoptic™Spark™Series Headlight
INSTRUCTIONS FOR USE AND CARE
See back cover for Customer Care or Technical support contact information | Customers outside our direct sales regions, contact your local distributor 11
Charging the Battery Pack
Your Spark headlight comes with two battery packs so that one can be charging while the other is in use.
Both batterypacksare partiallycharged whenshippedand shouldbefully chargedpriortouse.Tocharge
a battery, plug the power adapter into an electrical outlet. Plug the USB-to-Micro USB cable into the
power adapter and into the charging port on the back of the battery pack.
• The battery indicator light will blink SCARLET when the battery pack is nearly depleted and needs
to be charged.
• The battery indicator light will illuminate AMBER while the battery pack is charging.
• The battery indicator light will illuminate GREEN when the battery pack is fully charged.
Installing the Battery Pack
The battery pack is secured to the mounting clip with locking tabs on each side. Depress both locking
tabs when installing or removing the battery pack.The locking tabs will click into place when the battery
pack is secure. After installing a battery pack, allow three seconds for it to activate before attempting to
turn the headlight on.
Operating the Headlight
Your Spark headlight uses capacitive touch controls, making the light simple to operate during clinical
procedures.
1. Install a battery pack onto the mounting clip.
2. Place your loupe and headlight on your head and adjust to a comfortable working position.
3. Touchanywhere onthefrontor sidebeveled areasof thebatterypackto turntheheadlightonand off.
4. Tilt the headlight to the appropriate angle to illuminate your visual field.
Do not point the headlight directly in your eyes or the eyes of others around you.
Using the Curing Filter
Thecuring filter should beused when working withlight-curedcomposites.When applying thesematerials,
unfiltered light from the headlight can cause premature curing of the composite.The curing filter is made
up of two components, the black bezel ring that is secured to the end of the headlight and the orange
filterthat canbe flippedupand downas neededduringprocedures.Thecuring filtercan beremovedfrom
the headlight bezel if you don’t require it for your practice.
• Toremovethecuring filter,graspthe headlightwithone handandtheblack bezelring withanother
and pull. It is held with a friction fit and will separate from the headlight with moderate force.
• To attach the curing filter, flip the orange filter to the UP-position and carefully press the black bezel
ring onto the headlight, making sure the hinge is at the top.
Do not directly pull or press on the orange filter.

Orascoptic™Spark™Series Headlight
INSTRUCTIONS FOR USE AND CARE
12
Symbol Glossary
Symbol SymbolTitle Explanatory Text
Medical Device Indicates the medical device manufacturer.
Catalogue Number Indicates the manufacturer’s catalogue number so that the medical device can be identified.
Serial Number Indicates the manufacturer’s serial number so that a specific medical device can be identified.
Batch Code Indicates the manufacturer’s batch code so that the batch or lot can be identified.
Unique Device Identifier Indicates a carrier that contains unique device identifier information.
European Conformity European conformity (CE) mark for Class I medical devices.
UK Conformity UK Conformity (UKCA) mark for Class I medical devices (non-sterile, no measuring function, and not resusable surgical instrument).
Canadian Standards Association Indicates the device has been tested against applicable North American standards requirements.
REPEC
Authorized Representative
in the European Community Indicates the authorized representative in the European Community.
REPCH
Swiss Authorized Representative Indicates the authorized representative based in Switzerland.
RPUK
Authorized Representative
in United Kingdom Indicates the authorized representative based in United Kingdom.
Full explanation of symbols as used on Kerr packaging located at: http://www.kerrdental.com/symbols-glossary

Orascoptic™Spark™Series Headlight
INSTRUCTIONS FOR USE AND CARE
See back cover for Customer Care or Technical support contact information | Customers outside our direct sales regions, contact your local distributor 13
Symbol Glossary
Symbol SymbolTitle Explanatory Text
Caution Indicates that caution is necessary when operating the device or control close to where the symbol is placed, or that the current situation needs operator
awareness or operator action in order to avoid undesirable consequences
Telephone Receiver Indicates the telephone contact number.
Email address Indicates the email contact address.
Waste Stream Disposal Status Do not dispose of electronic products in the general wastestream.
Consult Instructions for Use Indicates the need for the user to consult the instructions for use.
Distributor Indicates the entity distributing the medical device into the local.
Manufacturer Indicates the medical device manufacturer.
Date of Manufacture Indicates the date when the medical device was manufactured.
Country of Manufacture To identify the country of manufacture of products.
Temperature Limit Indicates the temperature limits to which the medical device can be safely exposed.
Humidity Limitation Indicates the range of humidity to which the medical device can be safely exposed.
Atmospheric Pressure Limitation Indicates the range of atmospheric pressure to which the medical device can be safely exposed.
Full explanation of symbols as used on Kerr packaging located at: http://www.kerrdental.com/symbols-glossary

Orascoptic™Spark™Series Headlight
INSTRUCTIONS FOR USE AND CARE
14
Specifications
Weight of headlight with filter Universal mount = 15.8 grams Through-the-lens mount = 12.2 grams
Weight of battery pack 17.9 grams
Diameter of headlight .6 inches / 14 mm
Dimensions of battery pack
Length = 1.7 inches / 43 mm
Width = 1.1 inches / 28 mm
Height = 0.5 inches / 13 mm
Electrical Class II
Battery type Lithium-ion / 3.7v / 425 mAh
Charge time (each battery pack) 3 Hours
Run time (each battery pack) 3 Hours
Light Output 32 Lumens
LED Color Rendering Index (CRI) Standard = 70+ TruColor = 90+
LED Correlated ColorTemperature (CCT) Standard = 6500K TruColor = 5700K
Operation Mode Continuous
EMC Standard IEC 60601-1-2, EN55011
Safety Standard IEC 60601-1, IEC 62471
Operating Environment
32˚ to 77˚F (0˚ to 25˚ C)
10% to 85% relative humidity (non-condensing)
0.5 atm to 1.0 atm (500 hPa to 1060 hPa) atmospheric pressure
Electromagnetic Compatibility Test
CISPR 11 - Emissions: Radiated RF Group 1, Class B
IEC 61000-4-2 - Immunity: Electrostatic Discharge ±8kV contact
±15kV air
IEC 61000-4-3 - Immunity: Radiated RF 3V/m, 80MHz – 2.7GHz, 80% 1kHz AM
IEC 61000-4-8 - Immunity: Power Frequency Magnetic Fields 30A/m, 50/60Hz
IEC 61000-4-3 - Immunity: Proximity Fields from RF Wireless Communications Equipment IEC 60601-1-2:2014, section 8.10
Troubleshooting
Problem Solution
Headlight does not turn on. Check that the battery pack is charged. Remove and reattach the battery pack, making sure both locking tabs are secure. Attach the other battery pack to determine if the
problem is in the headlight or battery pack.
Battery indicator light is blinking scarlet. Indicates the battery is low. Charge the battery.
Battery indicator light does not illuminate amber while charging. Checkthatthe Micro-USBplug issecuredin thechargingporton theback ofthe battery pack.Check that theUSB plugis secured in thepower adapter. Checkthat theelectrical outlet is
producingpower.

15
ИНСТРУКЦИИ
за употреба и поддръжка

Orascoptic™лампа, серия Spark™
ИНСТРУКЦИИ ЗА УПОТРЕБА И ПОДДРЪЖКА
16
Показания за употреба
Лампата от серия Spark представлява осветително устройство, което се закрепва към очилата,
носени като корекция на зрението, и е предназначено за осветяване на устната кухина и обектите
за работа в нея.
Предназначение: Устройството е предназначено за осветяване на устната кухина и обектите
за работа в нея.
Потребители по предназначение: Това устройство е предназначено за използване от
квалифицирани медицински и здравни специалисти, включително, но не само, стоматолози
и стоматологични хигиенисти, както и от лекари и медицински специалисти.
Предвидена популация на пациентите: Това устройство е предназначено за използване
върху пациенти по време на общи стоматологични и хирургични процедури.
Клинични ползи: Когато е прикрепено към лупа или други очила, това устройство осветява
зрителното поле на потребителя, за да подобри видимостта по време на процедурите.
Предпазни мерки
1. Преди употреба се уверете, че всички винтове и сменяеми компоненти са фиксирани към
устройството.
2. За да удължите експлоатационния живот на батериите, не ги съхранявайте напълно заредени
или напълно изтощени.
НЕ… разглобявайте или модифицирайте устройството
… сваляйте етикета със сериен номер на продукта
… докосвайте оголени електрически контакти
… започвайте процедура, докато индикаторът за изтощена батерия свети или мига
… закачайте или дърпайте откритите кабели
… пръскайте директно върху устройството
… мийте никоя част от устройството под течаща вода, не потапяйте в никакви течности
и не поставяйте в устройства за почистване с ултразвук
… използвайте автоклав или химически стерилизатор, глутаралдехид, йодофор или
какъвто и да е друг метод за стерилизация
… използвайте почистващ препарат с концентрация на алкохол, по-висока от 70%
Противопоказания
Няма известни.
Инструкции за изхвърляне
Когато имате намерение да изхвърлите устройството, моля, върнете го на Orascoptic за
рециклиране. Директивата относно отпадъци от електрическо и електронно оборудване
(ОЕЕО) на Европейския съюз забранява изхвърлянето на отпадъци от електрическо
и електронно оборудване като обикновени битови отпадъци и изисква те да бъдат
събирани и рециклирани или изхвърляни разделно. Електричното и електронно
оборудване съдържа опасни вещества и представлява потенциален риск за човешкото
здраве и околната среда, ако е изхвърлено на общинските сметища, които не са защитени
от миграция на вещества в почвата и подпочвените води. Ако имате нужда от помощ за
изхвърлянето на устройството, обадете се на нашите специалисти по грижа за клиентите
или упълномощен дистрибутор на Orascoptic.
В устройството има литиевойонни батерии. Рециклирането или изхвърлянето на батериите
трябва да се извършва съобразно националните, държавните и местните разпоредби.
Транспорт и съхранение

Orascoptic™лампа, серия Spark™
ИНСТРУКЦИИ ЗА УПОТРЕБА И ПОДДРЪЖКА
Вижте задната корица за информация за контакт с отдела за грижа за клиентите или техническа поддръжка | Клиентите, които се намират извън нашите региони за директни продажби, моля, свържете с Вашия местен дистрибутор 17
Предупреждения
1. Устройството трябва да се използва единствено за описаното предназначение.
2. Не използвайте устройството, ако някоя част е повредена, разхлабена, откачена или липсва. Това включва батерии, монтажна скоба, лампа и електрически контакти/щифтове. Частите, които са счупени, липсващи,
изкривени или износени, следва да бъдат сменени незабавно. В случай че се наложи ремонт или смяна, ВСИЧКИ РЕМОНТИ НА ПРОДУКТА СЛЕДВА ДА БЪДАТ ИЗВЪРШЕНИ ОТ ORASCOPTIC ИЛИ ОТ ОТОРИЗИРАН
СЕРВИЗ.
3. Използването на адаптери за захранване и кабели, различни от предоставените за употреба с устройството, може да доведе до увеличаването на емисиите или намаляване на устойчивостта, и да направи системата
несъответстваща на стандартите на IEC 60601-1-2. По време на зареждане трябва да се използват само захранващият адаптер и кабелът, които се доставят с устройството.
4. Този продукт е в съответствие със стандартите за тестване със синя светлина от принципите за безопасност на Международната електротехническа комисия (IEC). С всички осветителни продукти съществува риск
при гледане директно към светлината.
• Рискова група 2 по IEC 62471 – ВНИМАНИЕ: Излъчената светлина от този продукт може да е опасна. Не гледайте директно в запалената лампа. Тя може да увреди очите.
5. Принеправилно използванебатериитеможедасезагреятпрекомерно,даексплодиратилидасе запаляти дапричинятсериознонараняване.Уверете се,чеследнитепредупреждениязабезопасностсе спазватточно:
• Не отваряйте и не модифицирайте батериите, монтажната скоба или захранващия адаптер.
• Не използвайте на открито.
• Пазете от течности или влажна среда.
• Поддържайте работна температура от 32° до 77°F (от 0° до 25°C).
• Не давайте на късо електрическите контакти.
• Не допускайте никоя част от устройството да влиза в контакт с огън или силна топлина над 158°F (70°C).
• Ако усетите, че батерията е загряла, излъчва мирис или е променила цвета или формата си, веднага изключете захранването. Тази батерия не трябва да се използва повторно.
6. НЕЖЕЛАНИ СЪБИТИЯ: Ако възникне сериозен инцидент с това медицинско изделие, съобщете за него на законния производител, Metrex Research, LLC прави бизнес като Orascoptic, или на упълномощения
представител, Kerr Italia, S.r.l., и на компетентния орган в държавата, в която е установен потребителят/пациентът.
Технология на литиевойонната батерия
Технологията на акумулаторната литиевойонна батерия е идеална за преносими устройства като лампата Spark.
• Не оставяйте батериите неизползвани за продължителни периоди от време нито в устройството, нито при съхранение.
• Акумулаторните литиевойонни батерии имат ограничен живот и постепенно губят способността си да задържат заряд, което намалява времето за работа на
захранваните устройства.
• Ако се налага да зареждате батерията по-често или ако устройството Ви не работи толкова дълго, колкото би трябвало, моля, обадете се на нашите специалисти
по грижа за клиентите или на Вашия оторизиран дистрибутор на Orascoptic, за да закупите резервни батерии.

Orascoptic™лампа, серия Spark™
ИНСТРУКЦИИ ЗА УПОТРЕБА И ПОДДРЪЖКА
18
Универсален носач
Лампата Spark (универсален монтаж) може да се прикрепя към повечето лупи и други очила.
Универсалната система на лампата Spark се състои от следните основни компоненти:
Лампа с монтаж през лещата (TTL) Orascoptic
ЛампатаSpark(смонтажпрезлещата„TTL“Orascoptic)епо-лека лампа,коятосеприкрепясамокъм
лупи с марка Orascoptic.
Системата на лампата Spark с монтаж през лещата включва следните основни компоненти:
Включени принадлежности
Кабел от USB към micro USB, захранващ адаптер, оптическа отвертка
Обадете се на някой от нашите специалисти по грижа за клиентите или упълномощен дистрибутор на Orascoptic за поръчка на допълнителни или резервни части.
Първи стъпки с Вашата нова лампа Spark
Cветодиодна лампа Cветодиодна лампа
Защитен филтър Защитен филтър
Монтажна скоба
Монтажни рамена
2 литиевойонни
презареждаеми батерии
2 литиевойонни
презареждаеми батерии
Монтажна скоба
2 закрепващи винта

Orascoptic™лампа, серия Spark™
ИНСТРУКЦИИ ЗА УПОТРЕБА И ПОДДРЪЖКА
Вижте задната корица за информация за контакт с отдела за грижа за клиентите или техническа поддръжка | Клиентите, които се намират извън нашите региони за директни продажби, моля, свържете с Вашия местен дистрибутор 19
Вашата лампа Spark представлява прецизен електрически инструмент, произведен от висококачествени компоненти. При подходящи грижи за нея тя ще има дълъг експлоатационен живот. Трябва да се
придържате към следните инструкции за почистване и дезинфекция, в противен случай може да я повредите. Освен това се препоръчва да се спазват всички инструкции, предоставени с избрания от Вас
разтвор за почистване/дезинфекция.
Препоръчвани дезинфектанти
CaviCide™, CaviCide1™, CaviWipes™или CaviWipes1™
ЗАБЕЛЕЖКА Тези инструкции за почистване и дезинфекция се отнасят само за лампата от серия Spark и лупа с марката Orascoptic. Ако лампата е прикрепена към продукт, който не е с марката Orascoptic,
следвайте отделно инструкциите за почистване и дезинфекция на този продукт.
1. Намокрете или напръскайте мека кърпа с избрания от Вас разтвор за почистване/дезинфекция или използвайте дезинфекцираща кърпичка. Изстискайте излишната течност от кърпата, преди
да я използвате.
2. Дръжте устройството здраво, докато почиствате всички повърхности с влажна кърпа или кърпичка.
3. Изхвърлете замърсените кърпи или салфетки и повторете горните стъпки до почистване на устройството.
4. Ако използвате дезинфектант, оставете всички повърхности покрити с него в рамките на необходимата продължителност от време (като следвате инструкциите, предоставени с избрания
дезинфекционен разтвор).
5. Използвайте чиста и суха мека кърпа, за да избършете останалия разтвор за почистване/дезинфекция от повърхността на устройството.
6. Ако лампата Spark е прикрепена към лупа с марката Orascoptic, навлажнете кърпа за почистване на лещи с разтвор за почистване на лещи и избършете вътрешната и външната страна на лещите,
телескопите и страничните екрани, за да отстраните всички замъглявания, останали от процеса на почистване и дезинфекция. С всички лупи на Orascoptic се предоставя една кърпа за почистване
на лещите. Обадете се на някой от нашите специалисти по грижа за клиентите или упълномощен дистрибутор на Orascoptic за закупуване на допълнителни кърпи за почистване на лещи.
НЕ
… пръскайте директно върху устройството
… закачайте или дърпайте откритите кабели
… почиствайте лещите с хартиена кърпичка
… използвайте разтвор за почистване/дезинфекция с концентрация на алкохол, по-висока от 70%
… мийте никоя част от устройството под течаща вода, не потапяйте в никакви течности и не поставяйте в устройства за почистване с ултразвук
… използвайте автоклав, химически стерилизатор, глутаралдехид, йодофор или какъвто и да е друг метод за стерилизация
Почистване и дезинфекция

Orascoptic™лампа, серия Spark™
ИНСТРУКЦИИ ЗА УПОТРЕБА И ПОДДРЪЖКА
20
Лампата Spark се закрепва за рамката на лупата или други очила, като се затегне закрепващият
винт, за да се стегне рамката между монтажната скоба и монтажните рамена на устройството.
Достъпът до монтажния винт се осъществява отзад на рамката на лампата.
1. Наклонетерамкатана лампатанадолуиспомощтанаоптичнаотверткаразхлабетемонтажния
винт, за да отворите монтажните рамена.
2. Притиснете устройството върху рамката на лупата с монтажната скоба пред лещите,
а монтажните рамена зад лещите.
3. Центрирайте устройството върху моста на рамката на лупата и завийте закрепващия винт,
докато не се закрепи здраво.
4. Ако светлината не е центрирана в зрителното поле, може да се наложи да разхлабите и да
регулирате монтажната скоба наляво или надясно според необходимостта. След като се цен-
трира в зрителното поле, затегнете отново монтажния винт, докато устройството се закрепи.
НЕ се опитвайте да свалите лампата Spark от рамката, без да сте разхлабили
първо закрепващия винт, за да не я повредите.
Монтажна скоба
Монтажни рамена
Монтиране на лампата Spark (универсална) към лупа или други очила
Завъртете надясно,
за да затегнете
Завъртете наляво,
за да разхлабите
Other manuals for SPARK
1
This manual suits for next models
1
Table of contents
Languages:
Other Orascoptic Dental Equipment manuals

Orascoptic
Orascoptic ZEON ENDEAVOUR MD User manual

Orascoptic
Orascoptic EyeZoom User manual

Orascoptic
Orascoptic UNIVERSAL FLIP-UP LOUPE User manual

Orascoptic
Orascoptic EyeZoom User manual

Orascoptic
Orascoptic Spark Series Assembly instructions

Orascoptic
Orascoptic DRAGONFLY Assembly instructions

Orascoptic
Orascoptic EyeSpy User manual

Orascoptic
Orascoptic Zeon Discovery User manual