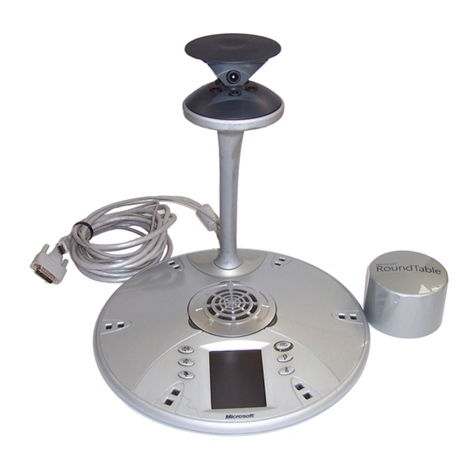
Microsoft RoundTable User manual

Microsoft®RoundTable™
Setup Guide
X14-49386-01

2 Microsoft RoundTable Setup Guide
Microsoft may have patents, patent applications, trademarks, copyrights, or other intellectual property rights covering subject
matter in this document. Except as expressly provided in any written license agreement from Microsoft, the furnishing of this
document does not give you any license to these patents, trademarks, copyrights, or other intellectual property.
© 2007 Microsoft Corporation. All rights reserved.
Microsoft, MS-DOS, Windows, Windows Server, Windows Vista, Windows XP, Office Communications Server, Office
Communicator, Office Live Meeting and Microsoft RoundTable are either registered trademarks or trademarks of Microsoft
Corporation in the United States and/or other countries.
All other trademarks are property of their respective owners.

3 Microsoft RoundTable Setup Guide
Contents
Contents ......................................................................................................................3
Warnings .....................................................................................................................4
Regulatory Information ................................................................................................6
Introduction...........................................................................................................7
How Microsoft RoundTable Works....................................................................7
Unpacking.............................................................................................................9
System Requirements...................................................................................... 10
Microsoft RoundTable device.......................................................................... 11
Power Data Box components.......................................................................... 12
Microsoft RoundTable device rear section.................................................... 13
Microsoft RoundTable device base bottom section..................................... 14
Microsoft RoundTable external dial pad and satellite microphones.......... 14
Setting up Microsoft RoundTable ......................................................................... 15
Positioning the Microsoft RoundTable device.............................................. 15
Setting up the Power Data Box and connections......................................... 16
Connecting the external dial pad and satellite microphones...................... 18
Cleaning Instructions........................................................................................ 21

4 Microsoft RoundTable Setup Guide
Warnings
This symbol identifies safety and health messages in this guide and RoundTable accessories
guides.
WARNING
Failure to properly set up, use, and care for the Microsoft RoundTable device can increase
the risk of damage to the RoundTable device, or even serious injury or death.
DO NOT ATTEMPT REPAIRS
Do not attempt to take apart, open, service, or modify the RoundTable device, power data
box, or any peripherals. Doing so increases the risk of electric shock, fire, or damage to the
device. Any evidence of an attempt to open or modify any component of the RoundTable
system, including any peeling, puncturing, or removal of any of the labels, is a violation of
your license and warranty, and renders the RoundTable device ineligible for authorized
repair.
If any part is damaged, malfunctioning, or if any internal parts become visible, contact
Microsoft Support.
WARNING
Do not attempt to open up the unit and do not attempt to replace the lithium battery. There
is a risk of explosion if the lithium battery is replaced by an incorrect type.
WARNING
To avoid damage to the power data box and components, use the following guidelines:

5 Microsoft RoundTable Setup Guide
•Protect cords from being walked on.
•Protect cords from being pinched or sharply bent, particularly where they connect to
the power outlet, the power data box, and the RoundTable device.
•Do not jerk, knot, sharply bend, or otherwise abuse the power cords.
•Do not expose the power cords to sources of heat.
•When disconnecting the power cords, pull on the plug—do not pull on the cord.
•If the power cord or power data box becomes damaged in any way, stop using the
device immediately, and contact Microsoft Support for a replacement.
•Unplug the RoundTable device during lightning storms or when unused for long
periods of time.
•Use only the power supply unit and AC power cord that came with your device or that
you received from an authorized repair center.
•Do not use non-standard power sources, such as generators or inverters, even if the
voltage and frequency appear acceptable. Only use AC power provided by a
standard wall outlet.
•Do not overload your wall outlet, extension cord, power strip, or other electrical
receptacle. Confirm that they are rated to handle the total current (in amps [A]) drawn
by the device (indicated on the power supply unit) and any other devices that are on
the same circuit.
•For devices with an AC power cord that connects to the power supply, always
connect the power cord according to the following instructions:
•Plug the AC power cord into the power supply until it stops.
•Plug the other end of the AC power cord into the wall outlet.
WARNING
Mains powered voice telephony without emergency dialing
WARNING
This equipment will be inoperable when main power fails.

6 Microsoft RoundTable Setup Guide
Regulatory Information
Microsoft® RoundTable™ is approved for use in countries listed in the table below.
Country Approval marking on product label Note 3
USA &
Canada
EU
Note 1
EFTA
Note 2
Same as above.
Japan
Australia
The table below describes the Notes for the above table.
Notes Description
Note1
EU member countries: Austria, Belgium, Bulgaria, Cypress, Czech Republic,
Denmark, Estonia, Finland, France, Germany, Greece, Hungary, Ireland, Italy,
Latvia, Lithuania, Luxembourg, Malta, Netherlands, Poland, Portugal,
Romania, Slovakia, Slovenia, Spain, Sweden and United Kingdom.
Note2
2EFTA includes: Iceland, Liechtenstein, Norway and Switzerland.
Note3
The product label is located on the bottom of the Power Data Box (PDB).

7 Microsoft RoundTable Setup Guide
Introduction
When you want to meet with people who are geographically separated, video
conferencing gives you a greater sense of immediacy than a conventional telephone
conference call. Microsoft®RoundTable™ is a next generation video conferencing
system that provides a comprehensive conferencing experience through the use of 360
degree video and active speaker detection.
This guide will help you install the Microsoft RoundTable device hardware and begin
using it for your meetings.
How Microsoft RoundTable Works
First and foremost, Microsoft RoundTable, when used with Microsoft®Office Live
Meeting 2007 and Microsoft®Office Communicator 2007, is a video conferencing
device. Video conferencing is a set of interactive telecommunication technologies that
allow two or more locations to interact using video and audio transmissions
simultaneously. It has also been called visual collaboration.
With Microsoft RoundTable, you can do any of the following:
•Place an outgoing phone call.
•Answer an incoming phone call.
•Conduct an audio-only session.
•Conduct an audio/video conference.
Microsoft RoundTable is placed in the center of your conference table and connected to
a computer, computer network, public switched telephone network (PSTN) analog
phone line, and power data box. The Microsoft RoundTable cameras capture the entire
panoramic view of your conference room, as well as the voices coming from any
location around the table, as shown in Figure 1 below.

8 Microsoft RoundTable Setup Guide
Figure 1.Microsoft RoundTable conference in session

9 Microsoft RoundTable Setup Guide
Unpacking
The Microsoft RoundTable product package contains the following items, as shown in
Figure 2 below.
Figure 2. Unpacking the box
1. Microsoft RoundTable device.
2. Power data box.
3. External dial pad.
4. Satellite microphones.
5. Microsoft RoundTable Setup Guide and Quick Reference Card.
6. Privacy cover.
7. Phone adapter for specific locale.
8. RJ45 network cable.
9. Power cord.
10. RJ11 telephone cable.
Note
For determining the correct phone line adapter for your location, see Appendix A: International Phone
Adapters, later in this document. Always plug the RJ11 telephone cable into the power data box first and
attach the phone adapter to the opposite end of the RJ11 telephone cord prior to plugging into your phone
jack.

10 Microsoft RoundTable Setup Guide
System Requirements
The following are the minimum system requirements for Microsoft RoundTable hardware
and software:
•Computer running the Windows XP™ operating system (SP2 or later, 32-bit only) or
Windows Vista™ operating system (32-bit and 64-bit).
•Computer with 2.0 gigahertz or higher processor.
•Recommended 2.0 gigabyte (GB) of RAM or higher.
•1.5 gigabytes (GB) of available hard disk space.
•Video card with 128 MB of RAM or higher.
•Super VGA (1280 × 1024) or higher-resolution video adapter and monitor.
•Keyboard and mouse, or compatible pointing device.
•Ethernet network adapter appropriate for the type of local-area or wide-area network
to which you will connect. Your computer requires an active wired Ethernet
connection for running Microsoft RoundTable.
•Graphics hardware running in full hardware acceleration mode.
•An analog PSTN phone line.
•Office Live Meeting 2007 or Office Communicator 2007 (as an active speaker
device).

11 Microsoft RoundTable Setup Guide
Microsoft RoundTable device
Inspect the Microsoft RoundTable device and become familiar with its components, as
shown below in Figure 3.
Figure 3. Microsoft RoundTable device
1. Mirrors. Five mirrors reflect the light into the cameras.
2. Cameras. Five small cameras capture the images from around the
room.
3. Light-emitting diode (LED) status lights. Three status lights
indicate phone connection, audio/video activity, mute, and incoming
calls.
4. Control buttons.Six buttons control speaker volume, mute, phone on/off
hook, flash, and information.
5. Liquid crystal display (LCD) touch screen.The LCD dial pad works just
like your phone pad for ease of dialing and quick view of call status.

12 Microsoft RoundTable Setup Guide
6. Loudspeaker. A centrally located loudspeaker provides the audio
received from the remote conference.
7. Microphones.Six microphones located every 60°around the
device pick up the audio in the room..
Power Data Box components
Inspect the power data box and cables to become familiar with its components,
as shown below in Figure 4.
Figure 4. Power data box connections
1. Power data box. Provides the data and physical interfaces for connecting
to an Ethernet network, a PSTN, and the Microsoft RoundTable device, as
well as providing the power source for the Microsoft RoundTable device.
2. RJ45 jack. The location where the RJ45 cable connects your network to
the power data box. Use the network connection when you want to
manage the Microsoft RoundTable device externally.
3. RJ11 jack. The location where the RJ11 cable connects your PSTN
phone system to the power data box. Make certain that you have the
correct phone adapter for your location. Always plug the RJ11 telephone
cable into the power data box first and attach the correct phone adapter to
the opposite end of the RJ11 telephone cord prior to connecting to your
on-site phone jack. For information on choosing the correct phone adapter
for your locale, see Appendix A: International Phone Adapters later in this
document.

13 Microsoft RoundTable Setup Guide
Microsoft RoundTable device rear section
Inspect the rear section of the Microsoft RoundTable device to determine the
components, as shown in Figure 5 below.
Figure 5. Device rear section
1. Reset button. Restarts the Microsoft RoundTable device.
2. USB Cable. The cable that connects the Microsoft RoundTable device to a
USB port on your computer.
3. System Cable. The 26-pin cable that connects the Microsoft RoundTable
device to the power data box.
4. USB Ports.Two type A USB ports for the external dial pad.
Additionally, located near the rear of the device is a security slot for securing the device
using a compatible computer security lock, as shown in Figure 6 below.
.
Figure 6. Security slot

14 Microsoft RoundTable Setup Guide
Microsoft RoundTable device base bottom section
Inspect the bottom section of the Microsoft RoundTable device to view the components,
as shown in Figure 7 below.
Figure 7. Device base bottom section
The bottom section of the device has two RJ11 jacks and a cable conduit for connecting
the satellite microphones to the Microsoft RoundTable device.
For information on connecting the external dial pad and microphones, see “Connecting
the external dial pad and satellite microphones,” later in this guide.
Microsoft RoundTable external dial pad and satellite
microphones
Microsoft RoundTable provides an external dial pad and satellite microphones for
extended accessibility and convenience. Below are the components, as shown in
Figures 8 and 9.
Figure 8. External dial pad

15 Microsoft RoundTable Setup Guide
Figure 9. Satellite microphones
Setting up Microsoft RoundTable
Setting up Microsoft RoundTable is easy. Just complete the following procedures for
getting your Microsoft RoundTable device up and running:
•Positioning the Microsoft RoundTable Device.
•Setting up the power data box and connections.
•Connecting the external dial pad and satellite microphones.
After you complete the Microsoft RoundTable setup, you can begin using Microsoft
RoundTable for phone calls, conference calls, and remote meetings.
For information on using the Microsoft RoundTable device and getting the most from
your meetings, see the Microsoft RoundTable User’s Guide located at:
http://go.microsoft.com/fwlink/?LinkID=87802.
BE CAREFUL. The camera head is fragile and can be damaged by impact. Do not
knock it over or bump it with notebooks or other objects. The Limited Warranty
does not cover camera head damage or misalignment from abuse, accident or
impact.
Positioning the Microsoft RoundTable device
Proper positioning of your Microsoft RoundTable device is essential for getting the best
results during conferences and meetings. Select a location for the Microsoft RoundTable
device using the following guidelines:
•Select a well-ventilated, flat, level, clean, and dry location to place the Microsoft
RoundTable device.
•For maximized results, choose a location near the center of a conference table
that is no longer than 15 feet in length.

16 Microsoft RoundTable Setup Guide
•Select a well-ventilated, clean, and dry location to place the power data box out
of the typical walking path.
WARNING
Failure to take the following precautions can result in serious injury or death from electric shock or fire, or
damage to the Microsoft RoundTable device and power data box.
Setting up the Power Data Box and connections
After you have positioned the Microsoft RoundTable device on the table as described
above, you can now begin to connect the cords and cables to the power data box.
Select an appropriate power source for the Microsoft RoundTable device, using the
following guidelines:
•Use only the power data box and alternating current (AC) power cord that came
with the Microsoft RoundTable device.
•Do not use nonstandard power sources, such as generators or inverters, even if
the voltage and frequency appear acceptable. Use only AC power provided by a
standard wall outlet.
•Use a properly grounded electrical outlet that accommodates the three-prong
grounding plug. Do not remove the grounding prong. If the plug does not fit into
your outlet, have an electrician replace the obsolete outlet.
•Do not use the Microsoft RoundTable device in a moist or wet environment.
•Do not spill any liquid on the Microsoft RoundTable device, power data box, or
any cords.
To set up the power data box and Microsoft RoundTable connections
Locate the power data box, the RJ45 network cable, the RJ11 telephone cable, and
power cord. The following procedure describes how to connect the cables and cord to
the power data box, the Microsoft RoundTable device, and your computer.
1. Fully insert the 26-pin system cable from the Microsoft RoundTable device into
the power data box. Ensure that the connection is tight and secured.
2. Connect one end of the RJ11 phone cable (26 AWG minimum) to the RJ11 jack
on the power data box and the other end to an active PSTN RJ11 phone jack.
For international locales, always plug the RJ11 telephone cable into the power
data box first and attach the correct phone adapter to the opposite end of the
RJ11 telephone cord prior to connecting to your on-site phone jack. The RJ11
connection is for use in the United States and Canada.
3. Connect one end of the RJ45 network cable to the RJ45 jack on the power data
box and the other end to an active Ethernet RJ45 network jack.

17 Microsoft RoundTable Setup Guide
4. Plug the AC power cord into the power data box.
The system cable, power cord, RJ11 cable, and the RJ45 cable should be
connected. Always plug the RJ11 telephone cable into the power data box first and
attach the correct phone adapter to the opposite end of the RJ11 telephone cord
prior to connecting to your on-site phone jack.
5. Connect the USB cable from to your Microsoft RoundTable device to your
computer.
6. Plug the other end of the AC power cord into an electrical wall outlet.

18 Microsoft RoundTable Setup Guide
Your setup should resemble Figure 10 below.
Figure 10. Microsoft RoundTable setup
Note
If necessary, tape the system cable to the table surface and floor so that it remains secure. Always plug the
RJ11 telephone cable into the power data box first and attach the phone adapter to the opposite end of the
RJ11 telephone cord prior to connecting to your on-site phone jack.
Your Microsoft RoundTable device is now set up and ready to use. Before you begin
using the Microsoft RoundTable device, be certain to remove the privacy cover on top of
the device, as shown below in Figure 11.
Figure 11. Privacy cover removal
To avoid any disturbance to the acoustic quality, place the cap at least six feet away
from the device.
Connecting the external dial pad and satellite
microphones
An external dial pad and satellite microphones are provided for accommodating the
needs of a larger meeting room where people may be further from the Microsoft
RoundTable device than in a conventional meeting environment.

19 Microsoft RoundTable Setup Guide
Figure 12 below shows how the external dial pad and microphones can be positioned to
enhance the Microsoft RoundTable device in a larger conference rooms.
Figure 12. External dial pad and satellite microphones
To setup the external dial pad
To setup the external dial pad, do the following.
•Plug the USB connector from the external dial pad into one of the USB ports
located at the rear of the Microsoft RoundTable device as seen in Figure 13
below.
Figure 13. Connecting external dial pad
To setup the satellite microphones
To setup the satellite microphones, do the following.
1. Carefully turn the Microsoft RoundTable device so that you can access the two
RJ11 jacks at the base bottom of the device.

20 Microsoft RoundTable Setup Guide
2. Plug both RJ11 connectors attached to the satellite microphones into the RJ11
jacks at the bottom of the device.
3. Run the RJ11 cables through the conduit so that the cords are securely lodged
and sit below the surface of the Microsoft RoundTable base bottom.
4. Place the Microsoft RoundTable device upright on the table and check to see
that the RJ11 cords do not disrupt the stability of the device. If so, return to the
previous step and make certain the RJ11 cables are lodged securely into the
conduit.
Other manuals for RoundTable
1
Table of contents
Other Microsoft Conference System manuals