manuals.online logo
Brands
  1. Home
  2. •
  3. Brands
  4. •
  5. Microtek
  6. •
  7. Scanner
  8. •
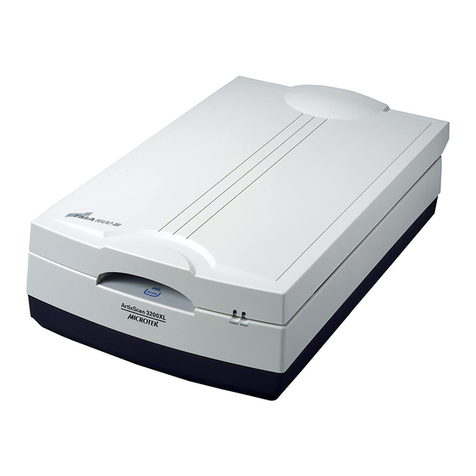
  9. Microtek ScanMaker 1000XL Instruction Manual

Microtek ScanMaker 1000XL Instruction Manual

1
Step 2: Install Software
Start Here
Installing your Microtek ScanMaker 1000XL
Important: Do not remove the yellow stickers from your scanner
until you are told to do so. You must install software before
connecting your scanner. Always close any open programs, and
turn off Anti-virus utilities before installing software.
PC:
A. Place the Adobe CD-ROM into the CD-ROM
drive, and install the software. Skip this step if
you have a newer version of Photoshop
Elements already installed on your computer.
B. Place the Microtek software CD-ROM into the
CD-ROM drive, and follow the on-screen
instructions to install the driver and software.
NOTE: If the Microtek Software Installer screen does not
come up automatically, double-click the following in
succession: “My Computer”; the CD-ROM icon; then
cdsetup.exe to start the installer program.
C. Insert the IT8 Calibration Data CD for the
Microtek Scanner ICC Profiler (MSP) program
into your CD-ROM drive, and follow the on-
screen instructions for installation.
D. Restart your computer at the end of all software
installation.
MAC:
A. Place the Adobe CD-ROM into the CD-ROM
drive, and install the software. Skip this step if
you have a newer version of Photoshop
Elements already installed on your computer.
B. Place the Microtek software CD-ROM into the
CD-ROM drive, and take note of the following:
For OS X, double-click the ScanWizard Pro
installer icon to install ScanWizard Pro first.
Next, double-click the MSP installer icon to
install the Microtek Scanner ICC Profiler (MSP)
program. Finally, insert the IT8 Calibration Data
CD, and double-click the IT8 installer icon to
complete MSP installation.
C. Install the remaining software components, then
restart your computer at the end of all software
installation.
NOTE: After rebooting your Macintosh, the Microtek software will
attempt to locate your scanner on the system. Since this is your
first install and you have not yet connected the scanner, simply
ignore the message that appears and proceed to the next step.
Step 1: Unpack Contents
Copyright © 2009 Microtek International, Inc. http://www.microtek.com
I49-004383 A, March 2009
2
1
3
4
6
5
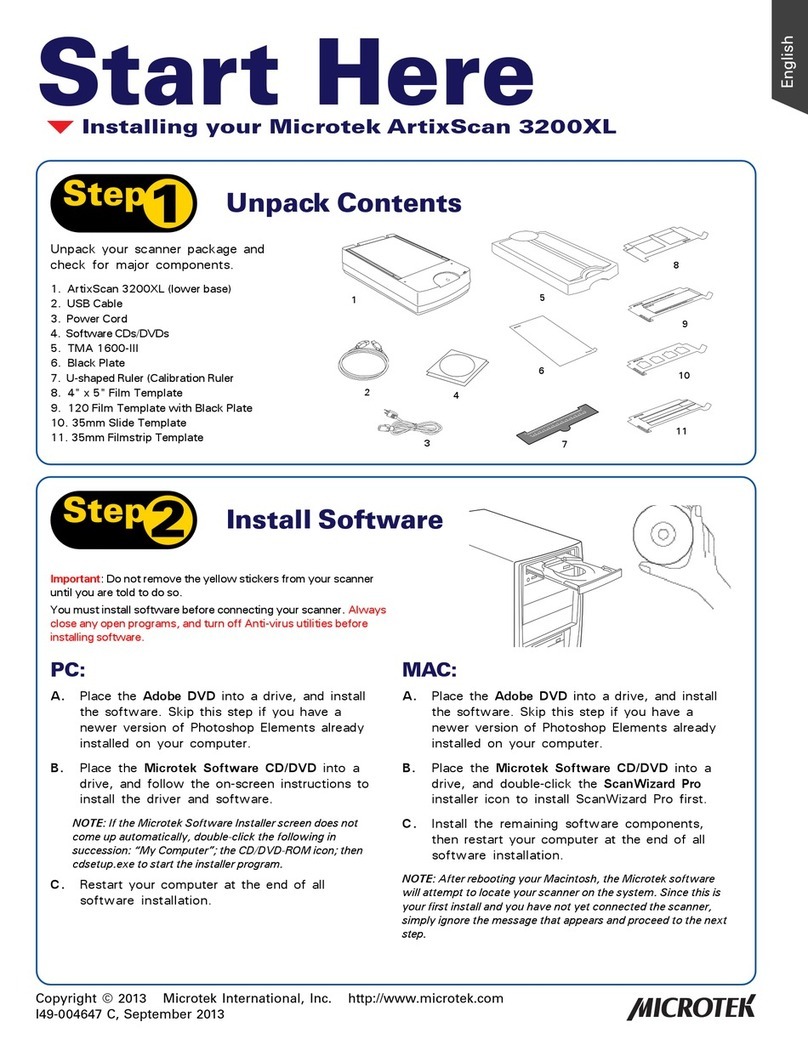
Unpack your scanner package and check
for major components.
1. ScanMaker 1000XL
2. FireWire cable
3. USB cable
4. Power cord
5. Software CDs
6. Reflective Target
7. TMA 1000XL
8. Black Plate (for scanning reflectives)
9. 35mm Slide Template (3)
10. 35mm Filmstrip Template (3)
11. 120 Film Template withBlack Plate (3)
7
8
910
11
12
13 14
12. 4”x5” Film Template (2)
13. Film Alignment Ruler
14. Transparency Target
For TMA 1000XL only
2
Step 3: Unlock Scanner
A. Remove the yellow “Step 3” sticker from your scanner.
B. With the scanner power off, tilt the front right corner of
the scanner to see the locking screw at the bottom.
C. Using a screwdriver, push and turn the locking screw
counterclockwise to the unlock position. When successfully
unlocked, the screw will push out a little, protruding
slightly from the bottom of the scanner.
NOTE: To lock the scanner (for shipping and other reasons), refer to the
ScanMaker 1000XL User Guide.
Step 4: Connect Scanner
To the power adapter
A. Remove the yellow “Step 4” sticker from your
scanner.
B. Connect the power cord to the back of the
scanner.
C. Plug the power cord into a power source.
To the Hi-Speed USB cable
D. Connect one end of the cable to your computer.
E. Connect the other end of the cable to the
scanner.
F. Press the power switch at the back of your
scanner, and wait for the indicator light on the
front panel to stop blinking and stay on steady.
The system will detect your scanner
automatically.
F
B
C
D
E
NOTE: If your computer has both Hi-Speed USB (USB 2.0) and USB
1.1 ports, connect the cable to the Hi-Speed USB port. Use the USB
1.1 port only if your computer does not have Hi-Speed USB.
For details on how to connect using the alternate
FireWire connection, refer to the ScanMaker 1000XL
User Guide.
3
Using theTMA 1000XL
NOTE: If you purchased a standard ScanMaker 1000XL without the TMA 1000XL, see only the section below on positioning reflective
materials without the TMA 1000XL.
I. Installing the TMA 1000XL
1. Make sure that the scanner power is turned off.
2. Remove the scanner lid, then attach the TMA 1000XL by sliding the posts at the rear of the TMA
1000XL into the holes.
This section is for users only with purchased TMA 1000XL
1
0
3456
654321
Scanner lid
2
1
0
34
5
321
1
0
3456
654321
TMA 1000XL
3. Plug the connector of the TMA 1000XL into the scanner’s
15-pin accessory port.
II. Unlocking the TMA 1000XL
1. Remove the yellow sticker from the TMA 1000XL.
2. Look for the locking knob at the base of the TMA 1000XL.
3. Turn the locking knob counterclockwise to the unlock
position “ ”.
NOTE: If you need to transport your TMA 1000XL, you will have to lock it
back. For more details, please see the ScanMaker 1000XL User Guide.
4
III. Positioning the Scan Material
A. PositioningTransparencies
1. To scan standard-size transparent film such as 35mm slides, 35mm filmstrips, 4”x5” film, or 120 film:
Use the individual film templates included with the TMA 1000XL package. Make sure the templates are
oriented correctly on the scanner glass surface, with the Microtek logo on the templates facing up. Keep
the calibration strip on the glass surface clear and free of obstruction at all times.
2
1
0
3456
654321
Important:
When using the templates, make sure
you use the correct side up. The correct
side up is the side showing the
“Microtek” logo facing up.
Calibration strip
(Keep clear and unobstructed)
2
1
0
3456
654321
2
1
0
3456
654321
2
1
0
3456
654321
2
1
0
3456
654321
Using the 35mm Filmstrip Template
Using the 120 Film Template Using the 4” x 5” Film Template
Using the 35mm Slide Template
5
2
1
0
3
456
54321
Film Alignment Ruler
Calibration strip
(Keep clear and unobstructed)
With TMA 1000XL & Black Plate Without TMA 1000XL
1
0
3456
654321
1
0
3456
654321
2. To scan non-standard-size transparent film, use the Film Alignment Ruler included with the TMA
1000XL package. Place the Film Alignment Ruler on the scanner glass surface. Then place the film to
be scanned face down also on the scanner glass surface, centering the film along the Film Alignment
Ruler. Make sure you keep the calibration strip on the glass surface clear and free of obstruction at all
times.
B. Positioning Reflectives
To scan reflective originals such as photos, you can use the ScanMaker 1000XL with or without the TMA
1000XL.
• If you purchased your ScanMaker 1000XL with the TMA, you will need to use the Black Plate included
with your TMA 1000XL package to shield unwanted light.
• If you purchased your ScanMaker 1000XL without the TMA, simply lift the scanner lid, and place the
reflective original to be scanned on the glass surface. Center the photo along the U-shaped ruler of the
scanner.
6
How to Scan: Scanning Photos, Using DIGITAL
ICE, and Scanning Film
Scanning Non-Damaged Photos
1. Position the photo face down on the upper glass bed, towards the front of the scanner. Center the top
along the U-shaped ruler on the scanner.
2. Launch ScanWizard Pro.
• If asked to calibrate your scanner, you can skip this section for now and come back to it later. Or,
if you wish to perform calibration, see the ScanMaker 1000XL User Guide for more details.
• If prompted to set up Color Matching, click OK for now to accept the settings. You can always
change the settings at a later time. For more details, see the ScanMaker 1000XL User Guide.
3. In the Preview window of ScanWizard Pro, choose Reflective from the Scan Material menu.
4. Click the Overview button in the Preview window to see a preliminary scan of the image.
5. Select the Scan Frame tool, and choose the area to be scanned by sizing the marquee around the
targeted area.
6. Specify your scanning requirements in the Settings window. Choose the desired image type and
resolution, and adjust the scan frame settings if necessary.
7. Adjust image quality if necessary, using the Advanced Image Correction tools.
8. Click the Scan button in the Preview window to start scanning. (The Scan button appears as the “Batch”
button when ScanWizard Pro is launched in stand-alone mode in Windows XP.)
7
Scanning Damaged Photos (using DIGITAL ICE)
1. If using the scanner without TMA: Follow steps 1 to 7 of the procedures detailed in Scanning Non-
Damaged Photos (the column to the left). If the TMA 1000XL is installed: Put the Black Plate on top of
the photo to cover it, with the side that reads “This side up” facing up”, as described in the “Using the
TMA 1000XL” section of this Guide.
2. To repair rips, tears, and other surface defects from your photo, choose the DIGITAL ICE option in the
Settings window that works best for you. Select Normal or Strong.
NOTE: DIGITAL ICE Photo Print Technology is designed to work with continuous-tone reflective originals such as photos. It is not
designed to work with slides, negatives, transparencies, and printed matter.
3. If the colors in your photo are faded and need restoring, check the Automatic Color Restoration box in
the Settings window.
4. Click the Prescan button in the Preview window to display a detailed image of the area selected by the
Scan Frame tool. A thumbnail of the prescan image appears in the Scan Job Queue window.
5. Click the Scan (or “Batch”) button in the Preview window to start scanning.
Before DIGITAL ICE After DIGITAL ICE
8
Scanning Positive or Negative Film
1. Select the film you wish to scan, then follow the procedures for positioning transparencies detailed in
the “Using the TMA 1000XL” section of this Guide.
2. Launch ScanWizard Pro.
3. If scanning positive film such as 35mm slides:
a) Go to the Preview window of ScanWizard Pro and from the Scan Material menu, choose Positive /
Positive Film.
b) Follow steps 4 to 7 of the procedures detailed in “Scanning Non-Damaged Photos” (the first column
in this section).
c) If the colors in your photo are faded and need restoring, check the Automatic Color Restoration box
in the Settings window.
d) To complete the scan, click the Scan (or “Batch”) button in the Preview window.
4. If scanning negatives:
a) Go to the Preview window of ScanWizard Pro and from the Scan Material menu, choose Negative /
Negative Film.
b) Go to the Settings window and from the Film Type menu, choose the film type that matches the
film you use. For more details, refer to a PDF document called “ScanWizard Pro Reference Manual”
in your Microtek software CD-ROM and see the Addendum to ScanWizard Pro section.
c) Follow steps 4 to 7 of the procedures detailed in “Scanning Non-Damaged Photos” (the first column
in this section).
d) If the colors in your photo are faded and need restoring, check the Automatic Color Restoration box
in the Settings window.
e) To complete the scan, click the Scan (or “Batch”) button in the Preview window.
Preview window when scanning positives Preview window when scanning negatives
9
Calibration
The Microtek Scanner ICC Profiler (MSP) program
included with your ScanMaker 1000XL is used to
calibrate your scanner to achieve consistent and
accurate color.
Two industry-standard Kodak IT8 color targets are
included for calibration:
a Reflective 5”x7” target to calibrate the scanner for
scanning photos; and a Transparency 4”x5” target to
calibrate the scanner for scanning film.
You will be asked to calibrate your scanner the first
time you run ScanWizard Pro to try to scan. You
may skip calibration to proceed directly to scanning,
and then choose to come back at a later time to
perform calibration.
For more details on calibration, refer to the
ScanMaker 1000XL User Guide, and see the Using
the Microtek Scanner ICC Profiler section.
Problems?
The green LED on the front panel indicates the status of the scanner. The amber LED beside it stands for
power and should always stay on steady when the scanner is on.
First, make sure that you have followed installation
steps 1 through 4. If your problem is listed here, try
the suggested solution.
1. No light comes on when the scanner is turned on.
Make sure your scanner is connected to your
computer and plugged into a power source.
2. Add/Remove Hardware Wizard appears on your
screen.
Click the “Cancel” button and close the Control
Panel. Disconnect the USB or FireWire cable from
the back of your computer, and refer to the
installation instructions in this guide.
3. When trying to scan, an error message appears
on your screen that reads, “Can’t Find Scanners”.
Make sure your scanner is unlocked (see Step 3).
Make sure your scanner is connected to your
computer and plugged into a power source (see Step
4).
Uninstall and reinstall the ScanWizard Pro software.
Reflective target
Transparency target
6
56
5
4
4
3
3212
1
0
6
56
5
4
4
3
3212
1
0
On - Ready to scan Flashing - Warming up or scanning Off - Call Tech Support
4. After clicking scan, a blank screen appears.
Make sure your scanner is unlocked (see Step 3).
Uninstall and reinstall the ScanWizard Pro software.
5. Having trouble scanning negatives or slides?
Make sure that you have properly inserted the
templates, as indicated in the “Using the TMA
1000XL: Positioning the Scan Material” section of
this Start Here guide. The templates should be
placed correctly on the scanner glass surface, with
the “Microtek logo” on the templates facing up.
From the Preview window of ScanWizard Pro,
choose Positive or Negative from the Scan Material
menu.
Make sure that the calibration strip is unobstructed.
For location of the calibration strip, see the “Position
the Scan Material” section.
Uninstall and reinstall the ScanWizard Pro software.
10
DoYou Need Assistance?
Manuals
If you have additional questions and need further instruction or information, we provide electronic manuals
for:
1. Using your ScanMaker 1000XL User Guide
2. Using the ScanWizard Pro scanning software
3. Using the bundled third-party software
To access the electronic manuals: Insert the scanner’s software CD-ROM into your computer’s CD-ROM
drive. Next, locate and click the “Manuals” option when the software installer window appears on your
screen. Finally, select and click the title of the manual you wish to view.
Missing Items
If your package is missing items, please call Microtek Customer Service Department.
Copyright © 2009 Microtek. Microtek, ScanMaker, ArtixScan, ScanWizard
and ColoRescue are trademarks or registered trademarks of Microtek
International, Inc. All other trademarks or registered trademarks are the
property of their respective holders. Specifications, software and hardware
bundles are subject to change without notice. Delivery of technical support
services subject to change without notice. Not responsible for
typographical errors. 031509

Other manuals for ScanMaker 1000XL

3

Other Microtek Scanner manuals

Microtek ScanMaker V6USL User manual

Microtek

Microtek ScanMaker V6USL User manual

Microtek ArtixScanDI 2125c User manual

Microtek

Microtek ArtixScanDI 2125c User manual

Microtek ArtixScanDI 8040c User manual

Microtek

Microtek ArtixScanDI 8040c User manual

Microtek LS-4600 User manual

Microtek

Microtek LS-4600 User manual

Microtek ArtixScan DI 5230 Instruction Manual

Microtek

Microtek ArtixScan DI 5230 Instruction Manual

Microtek ArtixScanDI 7200S User manual

Microtek

Microtek ArtixScanDI 7200S User manual

Microtek ArtixScan 120tf User manual

Microtek

Microtek ArtixScan 120tf User manual

Microtek ScanMaker 1000XL User manual

Microtek

Microtek ScanMaker 1000XL User manual

Microtek Bio-5000 Instruction Manual

Microtek

Microtek Bio-5000 Instruction Manual

Microtek Bio-6000 User manual

Microtek

Microtek Bio-6000 User manual

Microtek LightLid EL User manual

Microtek

Microtek LightLid EL User manual

Microtek ScanMaker i450 Instruction Manual

Microtek

Microtek ScanMaker i450 Instruction Manual

Microtek ArtixScanDI 6240S User manual

Microtek

Microtek ArtixScanDI 6240S User manual

Microtek ScanMaker s430 Instruction Manual

Microtek

Microtek ScanMaker s430 Instruction Manual

Microtek ScanMaker i800 Plus Instruction Manual

Microtek

Microtek ScanMaker i800 Plus Instruction Manual

Microtek ArtixScan DI 2015c Instruction Manual

Microtek

Microtek ArtixScan DI 2015c Instruction Manual

Microtek ScanMaker 3880 User manual

Microtek

Microtek ScanMaker 3880 User manual

Microtek ScanMaker 3700 User manual

Microtek

Microtek ScanMaker 3700 User manual

Microtek ScanMaker i300 User manual

Microtek

Microtek ScanMaker i300 User manual

Microtek ScanMaker i2400 Owner's manual

Microtek

Microtek ScanMaker i2400 Owner's manual

Microtek XT5820 HS User manual

Microtek

Microtek XT5820 HS User manual

Microtek ScanMaker 4850 User manual

Microtek

Microtek ScanMaker 4850 User manual

Microtek FileScan 3125c User manual

Microtek

Microtek FileScan 3125c User manual

Microtek LS-3700 User manual

Microtek

Microtek LS-3700 User manual

Popular Scanner manuals by other brands

THORLABS GVS012 user guide

THORLABS

THORLABS GVS012 user guide

Fujitsu fi-4750L Cleaning and maintenance

Fujitsu

Fujitsu fi-4750L Cleaning and maintenance

Unitech MR550 Specifications

Unitech

Unitech MR550 Specifications

ISC EZYiD user manual

ISC

ISC EZYiD user manual

Wetekom FS-501 instruction manual

Wetekom

Wetekom FS-501 instruction manual

Harpo Auto-Lektor user guide

Harpo

Harpo Auto-Lektor user guide

Brookstone Wi-Fi Scanner Wand user manual

Brookstone

Brookstone Wi-Fi Scanner Wand user manual

Racing Electronics RE3000 quick start guide

Racing Electronics

Racing Electronics RE3000 quick start guide

Bell and Howell 8000 parts manual

Bell and Howell

Bell and Howell 8000 parts manual

Panasonic KV-S8147 operating manual

Panasonic

Panasonic KV-S8147 operating manual

Ambir Visigo A5 Installation hardware

Ambir

Ambir Visigo A5 Installation hardware

Canon Microfilm Scanner 800II instructions

Canon

Canon Microfilm Scanner 800II instructions

Avision FL-1912H user manual

Avision

Avision FL-1912H user manual

Metron3D E Series quick start guide

Metron3D

Metron3D E Series quick start guide

MIRKA DEROS 325X operating instructions

MIRKA

MIRKA DEROS 325X operating instructions

TSS TREADREADER product manual

TSS

TSS TREADREADER product manual

GRAPHTEC SK200-09 user manual

GRAPHTEC

GRAPHTEC SK200-09 user manual

Honeywell Vuquest 3330g quick start guide

Honeywell

Honeywell Vuquest 3330g quick start guide

manuals.online logo
manuals.online logoBrands
  • About & Mission
  • Contact us
  • Privacy Policy
  • Terms and Conditions

Copyright 2025 Manuals.Online. All Rights Reserved.