Midea FP-62KCR018LETM-G1 User manual

1:1
K
A
1246
35
1246
35
B
C
D
E
F
G
H
A
B
C
D
E
F
G
H
A2017-01
145x210mm
20181203
1
2
3
4
5
6
7.
8.
-----
-----
-----
For more information, please visit our website www.ph.midea.com
The design and specifications are subject to change
without prior notice for product improvement.
Consult with your dealer or manufacturer for details.
Digital Multi-Cooker
User’s Manual
Please read this User’s Manual carefully for proper use of Midea's Digital Rice Cooker.
FP-62KCR018LETM-G1
Customer Care
(02) 863-55-22
Landline:
(0917) 863-5522
Viber/SMS:
Email:
1-800-10-863-5522
Toll free:
Monday - Sunday / 8:00am - 8:00pm
封面
封底
说明书
MIDEA-MB-FS5018D(FP-62KCR018LETM-G)-0501
16161000A08710
@ 2 更新网址 张晓 20190705

For more information, please visit our website www.ph.midea.com
The designand specifications are subject to change
without prior notice for product improvement.
Consult with your dealer or manufacturer for details.
Digital Multi-Cooker
User’s Manual
Please read this User’s Manual carefully for proper use of Midea's Digital Rice Cooker.
FP-62KCR018LETM-G1
Customer Care
(02) 863-55-22
Landline:
(0917) 863-5522
Viber/SMS:
Email:
1-800-10-863-5522
Toll free:
Monday - Sunday / 8:00am - 8:00pm

1
Product overview ediugecivreSgninaelCdnaeraCesurofsnoitcurtsnIgninrawytefaS
Safety warning
Reminder
Note
Basic safety precautions should always be followed to ensure secure use and avoid
injury and/or property loss to user and others.
Conditions unconsidered:
the appliance is used by unsupervised children or the disabled.
the appliance is played with by children.
Represents [FORBIDDEN] content
Prohibit the use of
inferior plugs
Prohibit wet hands
from touching
Prohibit children
from operating
Prohibit combustible
products
Safety
warning
Product
overview
Instructions
for use
Care and
Cleaning
Service
guide
FORBIDDEN,
MANDATORY,
04
03
01
NOITNETTA
Parts and features 05
Accessories list 05
Operation panel 06
Quick start guide 06
Functional description 07
Disassemble the lid plate
11gninaelcrof
Steam valve cleaning 11
Cleaning the cooker body 12
Technical data of the product 13
Circuit principle diagram 13
Anomaly self-checking 14
Table of Contents
Do not use outdoors.
persons (including children) with reduced
physical, sensory or mental capabilities, or
lack of experience and knowledge, unless
they have been given supervision or
instruction concerning use of the appliance
by a person responsible for their safety.
that they do not play with the appliance
household and similar applications such as:
other working environments;
- farm houses;
- by clients in hotels, motels and other
residential type environments;
- bed and breakfast type environments;
• If the supply cord is damaged, it must be
replaced by a special cord or assembly
available from the manufacture or its
service agent.

combustibles. During operation, stay away
from curtains, drapes, curtain Or in similar
articles to avoid the risk of fire.
23
Product overview ediugecivreSgninaelCdnaeraCesurofsnoitcurtsnIgninrawytefaS
gninrawytefaSgninrawytefaS
If the power line is too short, user should use an extension socket for
connection. Please do not use poor-quality socket. The power consumption of
the appliances must not exceed the maximum load of the extension socket.
Clean the dust and water on both ends of the power line and the socket of the
appliance to avoid the risk of fire, electric shock and short circuit.
Product overview ediugecivreSgninaelCdnaeraCesurofsnoitcurtsnIgninrawytefaS
Represents [MANDATORY] contents
Don't immerse the appliance in water or drench with water.
Independently use grounding socket with rated current of above 10A. When
used with Others electrical appliances, the socket will go wrong and lead to
dangers such as fire disaster.
cause vent clogging: food in sheets (e.g.
laver and Chinese cabbage), food in bands
(e.g. kelp), food in pieces (e.g. corn dregs),
to avoid accident and damage to the
appliance.
or face close to the steam vent to avoid
burns.
vent with cloth or other articles to avoid
accident and damage to the appliance.
maintenance technicians, persons are not
allowed to disassemble or repair the
appliance to avoid the risk of fire, electric
shock and injury to persons.
except for 220~240V AC to avoid the risk of
fire and electric shock. In case of power
wire damage, do not use the appliance.
following ways to avoid fire risk and electric
shock due to power line damage: Forcibly
bend the power cord, keep it close to
high-temperature objects, tie up the line or
use it to carry weights.
the appliance to avoid the risk of fire,
electric shock and short circuit.
electric shock and injury to persons.
appliance.
unsupervised children and babies to avoid
dangerous accidents such as electric shock
and burns.
places or close to other fire and heat
sources (e.g. stove). The optimum distance
is 30cm. Otherwise, damage or accident
may happen to the appliance.
into the steam vent at the bottom of the
appliance to avoid electric shock and injury
to persons.
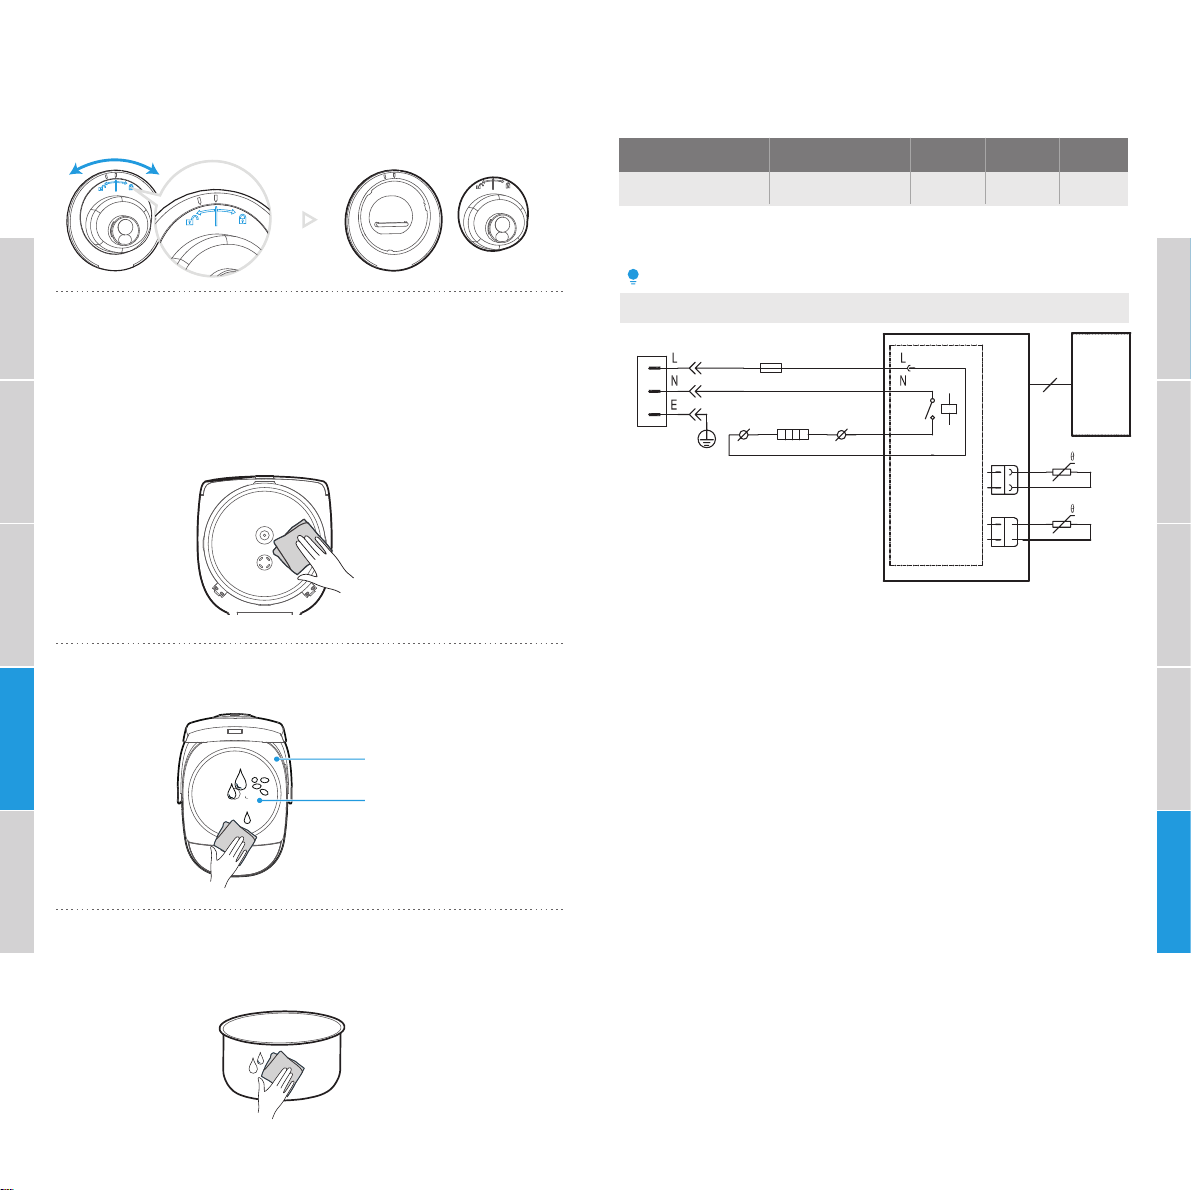
• Please turn off and unplug the appliance
before cleaning, maintenance or relocation
and whenever it is not in use
• Do not immerse any part of the appliance in
water or other liquid.
• The heating element surface is subject to
residual heat after use, do not touch.
• Warning: Avoid spillage on the connector.
• Warning: Misuse may cause potential injury.

When maintenance or parts replacement is necessary, please deliver the
product to the authorized professional service centre for maintenance of
Midea. to avoid hidden dangers caused by improper maintenance or improper
selection of accessories.
The plug should be thoroughly inserted into the socket to avoid the risk of fire,
electric shock and short circuit.
In case of supplycord damage, the cord should be replaced by professionals of the
Manufacturer, the MaintenanceDepartment or similar.
The appliance is for household use only.
Note: Improper repair or short-circuiting without permission of some important
accessories including fuse may lead to protection failure
of the appliance and cause overheating or fire.
4 5
Product overview
Parts and features
Upper lid
Detachable
cover plate
Handle
Cooker body
Power cord
Inner
cooking pot
Note
All the drawings in this manual are for functional reference only. There are differences
in the physical products due to different product types and batches.
Product overview ediugecivreSgninae
l
C
dnaeraCesurofsnoitcurtsnI
gninrawytefaS
Represents [GENTLE REMINDER] content
Any discrepancy between the picture and the product is subject to the real
object.
Before operation, check whether the cooking pot and steam valve are in place
to avoid accident.
Before the first usage or after a long time of storage, add water to the steam
water level line, select “steam” function and steam for one to two times to
clean the interior of the cooker.
During use, it is normal that the appliance slightly ticks or fizzes. Please do
not panic.
Do not use the appliance immediately after the first cooking, press the
“Cancel” button and wait above 15 minutes for the heating plate to cool down.
Do not boil rice with hot water to avoid affecting the judgement of the
temperature control and worsening the result.
Please regularly clean the steam valve.
Please regularly clean the countertop on which the appliance is placed.
The altitude scope for the appliance to properly function is 0~2000m.
When maintenance or parts replacement is necessary, please deliver the
product to the authorized service centre for maintenance of Midea to obtain
professional quality service. Please keep the manual for future reference.
Thank you.
Represents [ATTENTION] Matters that may cause minor
injuries or property loss
The appliance can only use the original cooking pot to avoid overheating and
anomaly.
Do not drop the cooking pot to avoid deformation.
Do not impact the cooking pot with hard materials to avoid deformation.
When operation is being performed or just finished, do not directly touch the
inner cooking pot to avoid burns.
Before operation, wipe dry the water outside the cooking pot to avoid
malfunction.
Before operation, clean the foreign materials including water drops and rice to
avoid overheating and short circuit.
Safety warning
Product overview ediugecivreSgninaelCdnaeraCesurofsnoitcurtsnIgninrawytefaS
Accessories list
Hanging soup
spoon X1
Measurement
cup X1
Steamer X1Standing rice
spoon X1

5
4
3
2
1
2
4
6
8
10
76
Product overview ediugecivreSgninaelCdnaeraCesurofsnoitcurts
nIgninrawytefaS
Instructions for use
Gentle Reminder:
The time displayed under pre-set timer mode is the length of time from the
start to the completion of cooking;
The pre-set the time is suggested not for more than 12 hours, otherwise
the off-flavor may occur;
To ensure “Cold Rice Heating” functions do not have pre-set
time mode;
The selected cooking function’s pre-set time should not be less than the
cooking time, such as “Congee”, the cooking time is 2 hours, the pre-set
time should be more than 2 hours, otherwise cooking will started
immediately.
Cancel cooking
Press the “Keep warm/Off” button
can cancel the selected cooking
function.
Start cooking
Press “Start” button, the cooking will be
finished at appointed time.
Gentle Reminder:
Display status refers to actual product;
Press the “Timer” button, enter the
pre-set time adjustment mode, then
press “Hour” or “Minute” button to adjust
the pre-set time. (When there are no
“Hour” and “Minute” buttons, press the
“Timer” button to adjust the pre-set time)
Set the timer for cooking completion
Menu description
“MENU” buttons user instructions:
Press the “MENU” button, the indicated light is at the selected function. After
selecting the desired function, Press the “Start” button to start the selected
function.
Sweet Cooking/Congee/Cold Rice Heating/Baby Food
Soup/Steaming
Regarding the special instructions on “Super-Quick Cooking”.
The “Super-Quick Cooking” function is based on the principle of Midea’s rice
cooker “FiveTrilogy” cooking program. When the amount of rice and other factors
are the same, the cooking time is shorter than “Sweet Cooking”.
Timer
Hour
Minute
Start
Keep warm
OFF
MENU
Close the rice cooker lid, press the
“MENU” button, select the features
you need (such as “Sweet Cooking”).
Menu selection
Sweet
Cooking
Instructions for use
Quick start guide
Control Panel
Reserve cooking
For example, pre-set 3 measurement cups of long grain rice for cooking the
essence rice, and completes after 8 hours.
Eg: Cook 3 cups of long grain rice
Place the rinsed rice into the inner
pot and choose the appropriate
water level according to rice
amount.
Prepare rice and water
Timer button
Super-Quick
Cooking button
Time adjustment buttons
Rice
MENU
Start button
Menu button
Keep Warm/ OFF button
Product overview
Product overview ediugecivreSgninaelCdnaeraCesurofsnoitcurtsnIgninrawytefaS
KEEP WARM START
MENU
TIMER HRS MIN
SUPER-QUICK
COOKING
Sweet
Cooking
Congee
Cold Rice
Heating
Baby Food
Soup
Steaming
OFF

1
3
2
1
2
3
2
4
6
8
10
2
4
6
8
10
98
Product overview ediugecivreSgninaelCdnaeraCesurofs
noitcurtsnIgninra
wytefaS
Instructions for use
Gentle Reminder:
Steaming time can be adjusted, the time range is from 1 to 60 minutes.
The default Steaming time is from the moment that boiled to the end of
the process, not the time required for entire steaming process.
Steaming For products with this function only.
Add water to the “Steaming water level” mark,
and put the food on the steamer or steaming
rack, then put into the inner pot.
Press the “Start” button and wait for cooking to
be complete.
Close the lid, press the “MENU” button to
select the “Steaming” function.
Soup For products with this function only.
Prepare soup ingredients (such as pig bone, corn,
carrots etc.), wash all ingredients and cut into small
pieces, then put them into the inner pot, and add water
no more than maximum water line.
Close the lid, press the “MENU” button to
select the “Soup”. Soup
Steaming
Rice
Rice
MENU
MENU
Product overview ediugecivreSgninaelCdnaeraCesurofsnoitcurtsnIgninrawytefaS
Press the “Start” button and wait for
cooking to be complete.
3
1
2
1
2
Instructions for use
When usingColdRice Heating function, the maximumamount of rice cannot
exceed Mark 4.
Cold Rice Heating
Loosen the rice; sprinkle 50-80 grams
of water on the surface of the rice (take
the amount of rice below the Mark 2 as
an example).
Press “MENU” button to select the
“Cold Rice Heating” function and press
the start button.
Keep warm
Press “Keep warm/OFF” button to enter
warm-keeping mode.
It is recommended that the rice should be
loosened within 30 minutes under warm-keeping
mode, the taste will be better.
Gentle Reminder:
After all functions finished cooking, it will automatically enter the
warm-keeping mode;
During the process of warm keeping, the product will be heated to
maintain the temperature above 65 degrees Celsius.
The product can achieve 24-hours water keeping function;
Cold Rice
Heating
MENU
Keep warm
OFF
Press the “Start” button and wait for cooking to
be complete.
Start
Start
Start

1110
Product overview ediugecivreSgninaelCdnaeraCesurofsnoitcurtsnIgninrawytefaS
2
4
6
8
10
Instructions for use
The water level lines of inner pot are physically different due to product
modelsandbatches.
The use of water level lines
Rice: Refer to the corresponding water level according to the type of rice when
adding water.
Congee:Refer to the congee water line when adding water.
Steaming: When steaming, please add water according to the inner
pot steaming water line, too much water will cause the
water overflowing when it is boiling, and too little will
cause it to become uncooked.
Congee
Water Level Line
rice congee porridge
Specification Maximum rice
amount
FP-62KCR018LETM-G1
10 cups 2 cups
FP-62KCR018LETM-G1
10 cups 2 cups
Minimum rice
amount
Specification Maximum rice
amount
Minimum rice
amount
max
Rice
2
3
1
1
Care and Cleaning
Disassemble the lid plate for cleaning
Note
Make sure the product is not connected to power supply when cleaning.
Rinse the whole cover with water and wipe it dry with cloth;
Align top lid slot band insert the lid, press the lid near the button ,
when hears a “click” sound then the installation is complete.
Press white button, pull outwards and remove the lid.
Steam valve cleaning
Pull it up and remove the steam valve.
Pull up
Open the top cover
and remove the
cover plate
Clean the cover
plate

1312
2
3
1
3
2
Temperature fuse Red
Black
Blue
Electric hot tray
Socket Red
Bottom sensor
Display
panel
Connecting
line
Power
panel
Top lid sensor
White
Black
Yellow and green
Circuit principle diagram
The electrical wiring is subject to change without prior notice.
Reminder
FP-62KCR018LETM-G1
230V~ 60Hz 940W 2-10 Cup
1.8L
Model Rated voltage/
Rated frequency
Rated
power
Rated
Capacity
Rice
amount
Service guide
Technical data of the product
Cleaning the cooker body
Wipe the inner lid with a damp cloth; do not wash directly with water.
Care and Cleaning
Simply press the steam valve back in place with strength while installing.
According to the disassembly mark on the steam valve, after dismantling,
clean the steam valve inside, then install it according to the disassembly
and installation mark.
Use a clean cloth to clean the water, rice grain and other debris on the water
storage tank and heating plate.
Wipe the bottom and outer surface of the inner pot with a clean cloth.
Water storage tank
Electric hot tray
Product overview ediugecivreSgninaelCdnaeraCesurofsnoitcurtsnIgninrawytefaS
Product overview gninaelCdnaeraCesurofsnoitcurtsnIgninrawytefaS Service guide

14 15
Table of contents
Other Midea Kitchen Appliance manuals

Midea
Midea MEC-1040W User manual

Midea
Midea Wine Cooler Series User manual

Midea
Midea HS-202WEN User manual

Midea
Midea MNRG17-W User manual

Midea
Midea CHEST FREEZER Series User manual

Midea
Midea CE-JC130GE-FR User manual

Midea
Midea CHEST WINE Series User manual

Midea
Midea MK-SP50Colour201 User manual

Midea
Midea FP-62KCR018LETM-G User manual

Midea
Midea COMPACT Series User manual

Midea
Midea MZTP35 User manual

Midea
Midea MMR5018 User manual

Midea
Midea MJ-KM6001W User manual

Midea
Midea MA5021D User manual

Midea
Midea MMC-EC1335-WH User manual

Midea
Midea MEC-1012W User manual

Midea
Midea YGD20D8 User manual

Midea
Midea MEC102J User manual

Midea
Midea HS-129WE(N) User manual

Midea
Midea CHEST WINE Series User manual