Quick Start
Washing Method
Rinsing Method
-6-
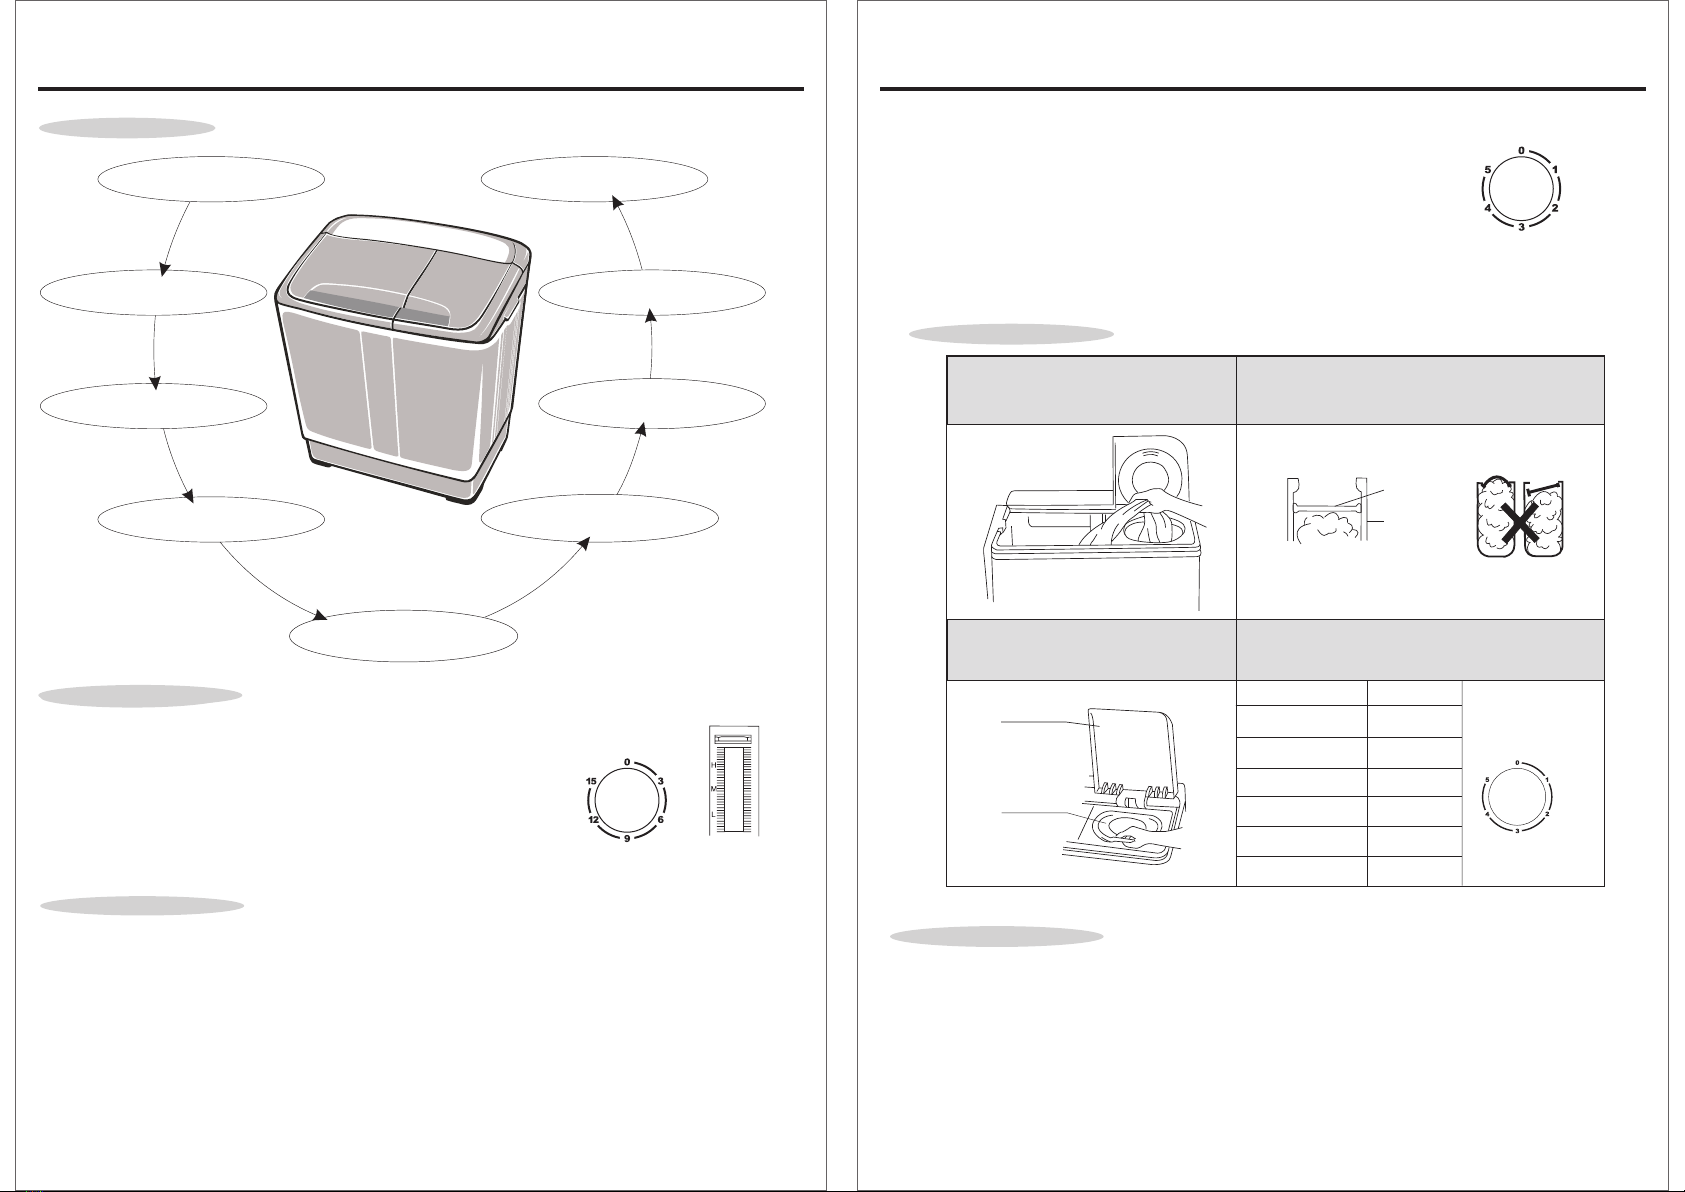
QUICK START
1. Install the Washing Machine
2. Load the Laundry
3. Add Detergent and Water
into the wash tub
4. Turn the Wash Timer Knob
to Set Wash Time
5. Set the Wash Drain Selector to
“Drain” Position after Washing
7. Move the laundry into the spin
tub and close the spin cover
8. Turn the Spin Timer Knob
to Set Spin Time
9. Take out the Laundry from
the Spin Tub
6. Repeat the Steps 3+5 for Rinsing
1. Connect the water inlet hose into the water inlet.
2. Put the laundry into the wash tub, add detergent and water into
the wash tub. When water level reaches half of the desired level, turn
off the faucet and let the laundry soak in the solution for a couple
of minutes after which, fill up to the desired water level.
3. Set the desired wash time using the wash timer knob.
4. When washing is finished, set the drain selector to “DRAIN”
position and drain the wash tub.
wash timer
1. Put the laundry into the spin tub after washing.
2. Transfer the water inlet hose to the water inlet at the spin side.
3. Turn on the water tap for 3-4 minutes.
4. Set the spin timer for 2-5 minutes for rinsing.
5. The above steps may be repeated.
Water Level Indicator
Note:
1. If there is rust in the water, do not choose spraying rinse because rust easily stains clothes.
2. Make sure not to fill water into the spin tub while it is spinning.
-7-
Spinning Method
Spin Cover
Safety Cover
1. Load the laundry evenly into
the spin tub.
2. Put the spinner cap on the laundry.
Make sure that the spinner cap is placed
horizontally
.
3. Close the safety cover and the
spin cover
Correct Incorrect
Spinner Cap
Spin tub
4. Refer to the following table to select
estimated spinning time.
Washing Materials Spin time
USAGE METHOD
Efficiency Program
B. Common Rinse (rinse in the wash tub)
1. To save time, water and energy, do pre-spinning before rinsing.
2. Put clothes that have been spun, into the wash tub.
3. When water level reaches the desired level, turn off the faucet.
4. Turn the “Wash Selector” knob to “Normal” or Heavy”.
5. Set the wash timer to the desired time for rinsing, about 3 - 5 minutes.
6. After rinsing, put clothes in the spin tub and spin for 1 - 5 minutes.
7. When finished, set the drain selector to the “DRAIN” position and drain the wash tub.
8. The above steps can be repeated.
Spin Timer
Spin Timer
50 seconds
1 minute
1-2 minutes
2-3 minutes
3-4 minutes
5 minutes
Silk
Light Clothes
(fiber,blended)
Knitwear (fiber)
Underwear (cotton)
Slipover (cotton/linen)
Towel (cotton)
(for efficiency program only)
Select Heavy in the wash selector, set wash time to 15 minutes using 40°C warm water
and spin twice, 3 minutes each time. Rinse for 5 minutes with 20°C cold water and spin twice,
3 minutes each.
A. Spraying Rinse (rinse in the spin tub)


 User manual")