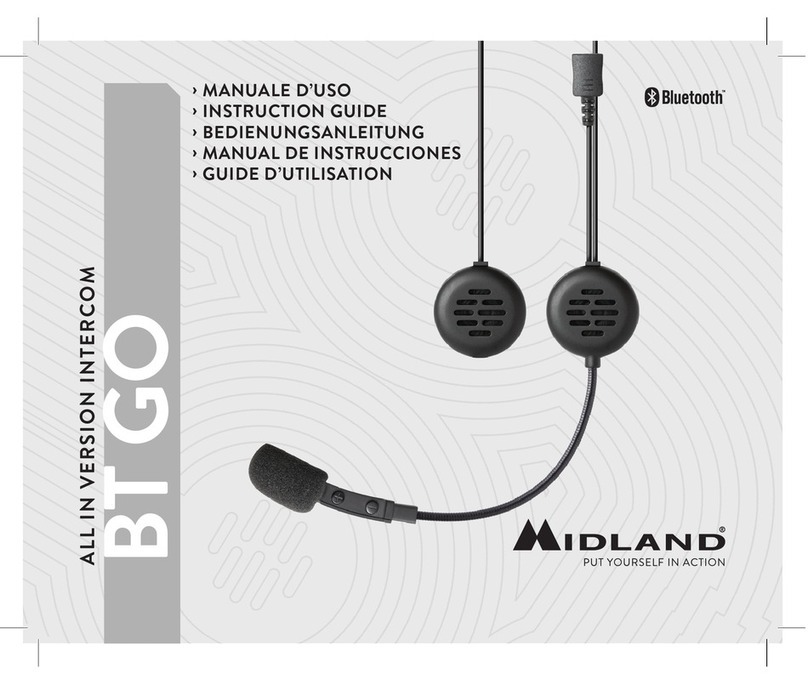
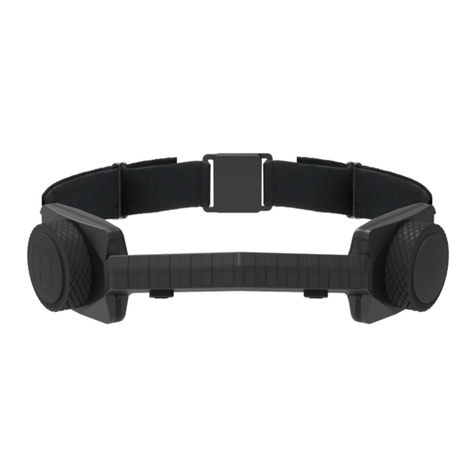
Midland BTX2 FM Manual

®
MANUALE D‘USO
INSTRUCTION GUIDE
BEDIEUNUNGSANLEITUNG
MANUAL DE INSTRUCCIONES
GUIDE D’UTILISATION
WWW.MIDLANDRADIO.EU |
Prodotto o importato da:
CTE INTERNATIONAL s.r.l.
Via. R.Sevardi 7- 42124 Reggio Emilia Italia
www.cte.it - www.midlandradio.eu
Prima dell’uso leggere attentamente le istruzioni. Se il prodotto contiene batterie: non gettare
nel fuoco, non disperdere nell’ambiente dopo l’uso, usare gli appositi contenitori per la raccolta.
Produced or imported by:
CTE INTERNATIONAL s.r.l.
Via. R.Sevardi 7 42124 Mancasale Reggio Emilia Italy
Imported by:
ALAN UK
Unit 2, Callenders, Paddington Drive, Churchward Park, Swindon, Wiltshire, SN5 7YW UK -
www.alan-uk.com
Read the instructions carefully before installation and use.
If the product contains batteries: do not throw the battery into fire.
To disperse after use, throw into the appropriate containers.
Importado por:
ALAN COMMUNICATIONS, SA
C/Cobalt, 48 - 08940 Cornellà de Llobregat Barcelona España
Tel: +34 902 384878 Fax: +34 933 779155
www.midland.es
Lea atentamente las instrucciones antes de usar el equipo. si el producto contiene pilas
o baterías no las tire al fuego ni las disperse en el ambiente después de su uso, utilice los
contenedores apropiados para su reciclaje.
Vertrieb durch:
ALAN ELECTRONICS GmbH
Daimlerstraße 1K - D-63303 Dreieich Deutschland
www.alan-electronics.de
Vor Benutzung Bedienungsanleitung beachten. Bei Verwendung von Batterien beachten Sie
bitte die Umweltbestimmungen. Batterien niemals ins offene Feuer werfen, und nur in dafür
vorgesehene Sammelbehälter entsorgen.
Importé par:
ALAN FRANCE
5, Rue de l’Industrie, Z.I d’Epluches - 95310 Saint Ouen L’Aumone France
www.alanfrance.fr
Avant l’installation et l’utilisation, lisez s.v.p. soigneusement les instructions. Si le produit
contient des batteries ou des batteries rechargeables, ne les jeter pas dans le feu. Apres l’usage,
jetez les dans les récipients appropriés.
Advanced Intercom System

I
Midland BTX2 - 1
Sommario
Principali caratteristiche......................................................................................................................................................................................... 2
Caratteristiche tecniche Midland BTX2................................................................................................................................................................... 2
Ricarica delle batterie ............................................................................................................................................................................................ 2
Descrizione dispositivo e sistema di ssaggio.........................................................................................................................................................3
Accensione e spegnimento del BTX2...................................................................................................................................................................... 4
Modalità operative................................................................................................................................................................................................. 5
Distanza................................................................................................................................................................................................................. 5
Come abbinare un altro dispositivo BTX2 ............................................................................................................................................................... 5
Utilizzo dell’Intercom con dispositivi della lina BT Midland.................................................................................................................................... 6
Abbinare tre dispositivi Intercom ........................................................................................................................................................................... 6
Talk 2 All - Abbinamento ad un dispositivo Intercom non Midland......................................................................................................................... 6
Utilizzo di altri dispositivi Bluetooth....................................................................................................................................................................... 7
Utilizzo dell’ingresso audio a lo............................................................................................................................................................................ 9
Utilizzo di un ricetrasmettitore PMR446 con cavo .................................................................................................................................................... 9
Congurazioni speciali ......................................................................................................................................................................................... 10
Congurazione e aggiornamento rmware.......................................................................................................................................................... 10
Garanzia............................................................................................................................................................................................................... 11
Certicazioni e Conformità di Sicurezza................................................................................................................................................................ 11

I
Midland BTX2 - 3
2- Midland BTX2
I
MIDLAND BTX2
Advanced Intercom System
Grazie per aver acquistato Midland BTX2 il sistema wireless Intercom pensato per il motociclista.
Midland BTX2 è un dispositivo da applicare al proprio casco per comunicare con dispositivi Bluetooth, quali Telefonino/MP3 player, Navigatore GPS e, se abbinato ad un altro
Midland BTX2, anche come sistema intercom senza li no a 3 presone ad una distanza massima 800mt.
Grazie al suo design sottile, aerodinamico ed ai suoi tre tasti centrali grandi e ben riconoscibili Midland BTX2 è la soluzione più avanzata e ideale per il motociclista.
Principali caratteristiche:
› Intercom Pilota/Passeggero e moto a moto (distanza massima di 800mt).
› connessione no a 3 persone (con funzioneTalk2All Universal Itercom)
› Connessione al telefonino/MP3 player
› Connessione a sistemi di navigazione GPS
› Connessione a Radio PMR446 con Bluetooth integrato o esterno
› Connessione AUX a lo per MP3 player e ricetrasmittenti PMR446
› Congurazione ed aggiornamento rmware da PC via USB
Midland BTX2 è disponibile in due versioni:
› BTX2 confezione singola con un solo dispositivo
› BTX2 TWIN confezione doppia con due dispositivi.
In base alla versione in vostro possesso nella confezione troverete:
BTX2
› 1 dispositivo di comunicazione BTX2
› 1 Kit audio completo di due speakers stereo, microfono a braccetto rigido e
microfono a lo
› 1 Sistema di aggancio al casco con bi-adesivo
› 1 Sistema di aggancio al casco con morsetto
› 1 cavo audio stereo per collegare un iPod/MP3 Player
› 1 Alimentatore da muro mini USB
BTX2 TWIN
› 2 dispositivi di comunicazione BTX2
› 2 Kit audio completi di due speakers stereo, microfono a braccetto rigido e
microfono a lo
› 2 Sistemi di aggancio al casco con bi-adesivo
› 2 Sistemi di aggancio al casco con morsetto
› 2 cavi audio stereo per collegare un iPod/MP3 Player
› 1 Alimentatore da muro mini USB con doppia postazione di ricarica
I dispositivi della confezione TWIN sono già abbinati tra loro per poter attivare im-
mediatamente la funzione Intercom.
Caratteristiche tecniche Midland BTX2
Generali:
›Bluetooth ver. 3.0 stereo (protocollo Headset/Handsfree/A2DP)
› Sistema AGC per il controllo automatico del volume in base al rumore di fondo
› Attivazione della comunicazione vocale (VOX) o manuale
› Comandi manuali per: attivazione telefono, interfono e connessione a lo
› Completamente resistente all’acqua
› Batteria al Litio con autonomia no a 10 ore di conversazione
› Tempo di ricarica: circa 6 ore
Connessioni Bluetooth:
› Con un dispositivo identico per la modalità Intercom Pilota-Passeggero e moto
a moto (no a 800mt)
Con dispositivo Bluetooth:
› Telefonino con MP3 player Stereo (protocollo A2DP), GPS
› Ricetrasmettitori PMR446 (con Bluetooth integrato o esterno) per comunica-
zioni di gruppo moto a moto
Connessioni a filo:
› Per sorgente audio stereo come iPod/MP3 player (con cavo opzionale)
› Per ricetrasmettitori PMR446 (con cavo opzionale)
Attenzione: Midland BTX2 è stato progettato per essere resistente alla pioggia.
Vericate sempre che i gommini di protezione delle prese siano ben chiusi in caso
di pioggia.
Ricarica delle batterie
Assicuratevi che il dispositivo di comunicazione sia completamente carico prima
di iniziare ad utilizzarlo. La prima volta sono necessarie almeno 8 ore. Successi-
vamente il tempo si riduce mediamente a 4/6 ore per una ricarica completa. Per
ragioni di comodità, il dispositivo può essere rimosso dal casco prima di essere
ricaricato. Per caricare il dispositivo di comunicazione, sollevate la protezione in
gomma della presa di ricarica e collegate ad essa lo spinotto del caricatore, quindi
innestate la spina CA del caricatore ad una presa di rete elettrica.
Il LED rosso lampeggerà per tutto il tempo della ricarica. Lasciate l’apparecchio
collegato no a che il LED rosso si spegne o il LED blu rimane acceso sso.
Quando la carica è completa, (LED rosso non più lampeggiante) scollegate il di-
spositivo dal caricatore.
Attenzione: ogni volta che viene inserito (o disinserito) il plug di ricarica, il dispo-
sitivo si spegne (per utilizzarlo mentre è in carica è necessario quindi riaccenderlo
con il plug inserito).
Descrizione dispositivo e sistema di fissaggio
Descrizione BTX2
Il dispositivo BTX2 è dotato di 5 pulsanti, tutti nella parte frontale.
I tre pulsanti principali sono pulsanti multifunzione: pulsante Avanti (a sinistra),
pulsante Centrale e pulsante Indietro (a destra).
I due pulsanti rotondi più piccoli, in alto a destra, sono invece il Volume + ed il
volume -.
Descrizione delle connessioni a filo
Presa Ricarica: Permette la ricarica del dispositivo tramite alimentatore mini USB
standard
Presa Audio Kit: Permette la connessione del kit audio (cue stereo e microfono)
Presa audio ausiliaria (AUX): Permette la connessione di una sorgente audio
come un iPod/MP3 player stereo o un ricetrasmettitore PMR446
Inne il BTX2 è dotato di un’antenna sollevabile, posizionata sulla parte alta del
dispositivo, che, se spostata in posizione verticale, permette di ottenere le mas-
sime prestazioni in distanza.
Per sollevare l’antenna è suciente fare una leggera pressione verso il casco, que-
sta si sgancerà ed immediatamente si posizionerà in verticale.
Per chiudere l’antenna basta riportarla nella posizione orizzontale e fare una
leggera pressione verso l’esterno in modo che si incastri nell’apposita chiusura.
Descrizione Kit Audio
Il sistema audio si compone di due spea-
ker stereo ultra sottili e di due microfoni
intercambiabili, uno a braccetto e l’altro
a lo. Il mini connettore del microfono vi
permette facilmente di collegare il micro-
fono più adatto al vostro casco.
Altoparlanti stereo
I due altoparlanti stereo sono dotati di velcro e adesivo per un semplice montag-
gio all’interno del casco.
Attenzione, posizionate gli altoparlanti in corrispondenza delle orecchie, lascian-
do comunque una minima distanza per poter percepire i rumori/indicazioni pro-
venienti dalla strada. Il microfono può essere ssato al casco in due modi:
Centrale
Volume -Volume +
Avanti Indietro
Presa ricarica Presa audio kit
Presa audio ausiliaria (AUX)

I
Midland BTX2 - 5
4- Midland BTX2
I
Microfono a braccetto
Posizionate il braccetto del microfono con la parte di Velcro/adesivo tra l’imbotti-
tura e la calotta rigida del casco, in modo che il microfono sia ben posizionato di
fronte alla bocca, con il simbolo bianco rivolto verso la bocca stessa. Questo tipo di
microfono è adatto per i caschi Jet e Modulari.
Microfono a filo
Posizionate il microfono, grazie al velcro/adesivo, all’interno del casco di fronte
alla bocca. Questo tipo di microfono è più indicato per i caschi integrali.
Presa Kit Audio
Il Kit Audio inne deve essere collegato, tramite il connettore ad“L”al Midland
BTX2 nella presa centrale.
Descrizione sistema di fissaggio al casco
Midland BTX2 è fornito di due sistemi dierenti di ssaggio al casco: uno con bi-
adesivo e l’altro con sistema di aggancio a morsetto.
Il sistema di ssaggio permette di“agganciare” in modo sicuro il dispositivo BTX2
al vostro casco e di slarlo in qualsiasi momento per ricaricarlo o riporlo.
Il dispositivo BTX2 va ssato sul lato sinistro del casco.
Fissaggio con bi-adesivo
La piastrina di ssaggio presenta una parte già predi-
sposta con bi-adesivo. Dopo aver pulito la supercie
del casco in corrispondenza della zona sulla quale si
intende ssare il dispositivo, rimuovete la pellicola
del bi-adesivo e posizionate la piastrina di ssaggio
al casco esercitando una leggera pressione per alcuni
secondi.
Fissaggio con morsetto
Mediante la chiave a brugola, allentate le due viti del morsetto ed inserite la pia-
strina posteriore tra l’imbottitura del casco e la calotta esterna rigida.
Dopo aver inserito il morsetto, stringete le due viti in modo che risulti stabile e
ben ssato.
Il ssaggio a morsetto comprende anche un distanziatore in plastica che può es-
sere rimosso nel caso sia necessario ridurre lo spessore.
Inserimento e sgancio del Midland BTX2
Il dispositivo BTX2 si aggancia al casco, semplicemente facendolo scorrere verso il
basso, in modo che entri nell’apposita sede del sistema di ssaggio da voi scelto
(biadesivo o a morsetto).
Il dispositivo BTX2 viene mantenuto in sede, grazie all’apposita clip di aggancio
posizionata nella parte superiore (A).
Per sganciare il BTX2 è suciente premere sulla clip di aggancio e spingere il di-
spositivo verso l’alto.
Accensione e spegnimento del BTX2
Accensione:
› Tenete premuto il pulsante “Centrale”per circa 3 secondi, no all’accensione
della luce BLU lampeggiante.
Spegnimento:
› Tenete premuti i pulsanti “Centrale” e “Indietro” insieme per circa 3 secondi,
no a che la luce ROSSA emette 3 lampeggi.
› In questo modo non è possibile spegnere il dispositivo in modo involontario
durante l’uso (cosa che potrebbe succedere, specialmente se si utilizzano i
guanti).
Modalità operative
Midland BTX2 ha due modalità di funzionamento distinte: Intercom, Telefono.
In base alla modalità attiva in un dato momento, le funzioni del BTX2 cambiano e
di conseguenza anche i tre pulsanti centrali assumono funzionalità diverse.
› La modalità “Intercom” permette la gestione della funzionalità intercom per
la comunicazione pilota-passeggero.
› La modalità “Telefono”(Phone), permette la gestione del telefono e le funzio-
ni di player musicale del telefono stesso. I tre pulsanti gestiscono le funziona-
lità del telefono e della musica (play/pausa- avanti e indietro).
E’possibile passare da una modalità all’altra semplicemente premendo per 3 se-
condi il pulsante Centrale. Un annuncio vocale vi indicherà in quale modalità state
entrando. La sequenza con cui è possibile scorrere le 2 modalità è la seguente:
› Intercom (se è stata abbinata almeno ad un altro dispositivo)
› Phone (se è stato abbinato un telefono)
E’ possibile sapere in quale modalità si trova il dispositivo semplicemente pre-
mendo insieme i pulsanti“Volume+”e “Volume-“. Un annuncio vocale vi indiche-
rà in quale modalità vi trovate.
Distanza
La distanza massima di comunicazione tra due dispositivi Midland BTX2 è di cir-
ca 800mt in campo aperto con entrambe le antenne in posizione sollevata. La
massima distanza può variare in base all’orientamento della testa o alla presenza
di ostacoli e interferenze (i motociclisti devono essere sempre in portata visiva)
Come abbinare un altro dispositivo BTX2
Per utilizzare la funzionalità Intercom è necessario avere due dispositivi BTX2 ac-
cesi ed in precedenza abbinati tra loro.
I due dispositivi presenti nella stessa confezione (Midland BTX2 TWIN) sono già
accoppiati tra loro e pronti all’uso, quindi non è necessario attivare questa pro-
cedura di abbinamento.
Se invece i dispositivi non fanno parte della stessa confezione o avete acquistato
un altro BTX2 in un secondo momento (per esempio per il passeggero), dovete
prima eseguire la procedura di abbinamento.
Abbinamento di un altro dispositivo BTX2
1. Attivate la modalità“Setup” su entrambi i dispositivi (Spegnete il BTX2. Tenere
premuto il pulsante“Centrale” no a che la luce non rimane di colore rosso
sso)
2. Tenere premuto il pulsante“Centrale”sul primo dispositivo, no a che la luce
lampeggia alternativamente Rossa e Blu.
3. Tenere premuto il pulsante “Centrale“ sull’altro dispositivo no a che la luce
Rossa e Blu lampeggia alternativamente.
4. Ora i due dispositivi si cercano per completare l’abbinamento. Se l’abbinamen-
to è avvenuto in modo corretto, su entrambi si accende, per un secondo, la luce
Blu, per poi tornare in modalità“Setup”con la luce Rossa ssa.
5. Perutilizzare i due dispositivi è necessariousciredalla modalità di abbinamen-
to (setup):
6. Fare un doppio click sul pulsante “Centrale”. La luce Rossa si spegne e al suo
posto lampeggia la luce Blu. Ora potete utilizzare il BTX2.
Se per qualsiasi ragione si vuole interrompere la ricerca (luce lampeggiante rossa
e blu) e tornare alla fase di setup (luce rossa ssa), è suciente fare due click sul
pulsante centrale.
Utilizzo della funzionalita’Intercom
Per utilizzare la funzionalità intercom, assicuratevi che entrambi i dispositivi
siano accesi e precedentemente abbinati tra loro.
Attivazione manuale:
Premendo il pulsante“Centrale”, indierentemente da uno dei due dispositivi, la
comunicazione dopo alcuni secondi si attiva e rimarrà attiva no a che non verrà
premuto nuovamente il pulsante “Centrale”. Sentirete 1 tono audio a conferma
dell’attivazione dell’Intercom e 2 toni audio a conferma della disattivazione.
Attivazione vocale (VOX):
La funzionalità VOX per l’attivazione vocale dell’Intercom è attiva di fabbrica. E’
suciente parlare per aprire la comunicazione Intercom, senza dover togliere
le mani dal manubrio. Potrebbero essere necessari alcuni secondi per l’eettiva
apertura della comunicazione intercom (un tono audio vi avvisa dell’apertura). Se
nessuno parla, dopo 40 secondi l’intercom viene automaticamente chiuso.
Per riaprire la comunicazione sarà suciente parlare nuovamente. Quando l’In-
tercom è attivato tramite VOX è possibile comunque disattivarlo senza aspettare il
tempo predeterminato, semplicemente premendo il pulsante“Centrale”.
E’possibile disattivare la funzione di attivazione vocale (Vox) seguendo la proce-
dura specicata nel capitolo“Congurazioni speciali”.
Se necessario, è comunque possibile disattivare temporaneamente la funzione
VOX, premendo per 7 secondi il pulsante “Indietro”. Un tono audio vi avviserà
dell’avvenuta disattivazione. Per riattivarlo è necessario ripetere la stessa proce-
dura (due toni audio vi avviseranno dell’attivazione) oppure spegnere e riaccen-
dere il dispositivo.
A

I
Midland BTX2 - 7
6- Midland BTX2
I
Attenzione: in questa congurazione il dispositivo non Midland non potrà utilizzare
il telefono (essendo già stato abbinato il BTX2 al posto del telefono stesso).
Utente già occupato in un’altra conversazione
Se tentate di aprire la comunicazione Intercom verso un utente che sta già par-
lando con qualcun altro o che è impegnato al telefono, avrete un segnale di“occu-
pato”(2 toni audio). Aspettate qualche minuto e riprovate, no a che non trovate
la “linea” libera! La persona che è stata chiamata verrà avvisata che qualcuno la
sta cercando con un messaggio vocale che indica il numero del pulsante da cui è
giunta la richiesta .
In questo modo appena la conversazione sarà terminata, l’utente potrà contat-
tare la persona che lo cercava, semplicemente aprendo l’intercom utilizzando il
pulsante corrispondente all’avviso ricevuto.
Utilizzo di altri dispositivi Bluetooth
Al BTX2 possono essere abbinati altri dispositivi Bluetooth , come il telefono cel-
lulare, il navigatore GPS o una Radio PMR446 con Bluetooth integrato o esterno.
Gli abbinamenti devono avvenire sul pulsante “Volume+”
Connessione Bluetooth sempre in background:
Grazie alla modalità“Background”e possibile mantenere l’intercom aperto anche
durante la comunicazione dei dispositivi abbinati al pulsante“Volume+”(molto
utile per tenere in sottofondo le comunicazioni provenienti dal GPS).
Attivazione/Distattivazione modalità background:
- Tenere premuto il pulsante “Volume -”per 3 secondi, sentirete l’annuncio
vocale che vi indicherà lo stato. La funzione Background è attiva di fabbrica.
Telefono cellulare
Il telefono cellulare può essere abbinato solo tramite il pulsante “Volume +”, in
questo modo è possibile gestire tutte le funzionalità del telefono e ascoltare la
musica tramite il telefonino stesso (supporto per il protocollo A2DP stereo). La
telefonata entrante avrà sempre la priorità più alta e interromperà le altre comu-
nicazione attive (Intercom, Musica). Quando il telefono è abbinato al pulsante
“Volume +”, la modalità“Phone”sarà attiva.
Come abbinare un telefonino
1. Attivate sul vostro telefonino la modalità di ricerca dispositivi Bluetooth. Que-
sta funzione dipende dalla marca e modello del vostro telefono (fate riferi-
mento al manuale del telefonino).
2. Attivate la modalità “Setup (Spegnete il BTX2. Tenere premuto il pulsante
“Centrale” no a che la luce non rimane di colore rosso sso). Premere il pul-
sante“Volume+”no a quando la luce lampeggia Rosso e Blu.
3. Dopo pochi secondi sul telefonino comparirà il nome“Midland BTX2”, selezio-
natelo e seguite le istruzioni del vostro telefonino per accettare l’abbinamen-
to. Quando viene richiesto, immettete il codice di abbinamento: 0000 (quattro
zeri). Il telefono confermerà se il processo di abbinamento è stato completato
con successo.
4. IlBTX2usciràdallamodalità setup (luce rossa ssa) e passerà automaticamen-
te allo stato di funzionalità normale (luce blu lampeggiante). Ora il telefono è
abbinato correttamente.
Come utilizzare il telefonino
Per utilizzare tutte le funzionalità del telefono/player musicale è necessario es-
sere in modalità “Phone”. In modalità “Intercom” è possible sfruttare solo alcu-
ne funzionalità del telefono per le chiamate entranti. Per attivare la modalità
“Phone”: tenere premuto per 3 secondi il pulsante Centrale. Un annuncio vocale
vi indicherà in quale modalità state entrando, quando sentirete“Phone”potrete
utilizzare i pulsanti del BTX2 per gestire il vostro telefono (vedi tabella B)
Rispondere ad una chiamata in qualsiasi modalità Phone/Intercom
Quando sentite il telefonino squillare, potete rispondere utilizzando due modalità:
Risposta vocale:
E’suciente pronunciare una parola qualunque e quindi iniziare a parlare.
Attenzione: la risposta alla telefonata può avvenire solo dopo il secondo squillo
Risposta manuale:
Premere brevemente il pulsante“Avanti”ed iniziare a parlare.
Rifiutare una chiamata in qualsiasi modalità Phone/Intercom
Se non intendete rispondere al telefono potete lasciarlo squillare, oppure tenere
premuto per alcuni secondi il pulsante“Avanti” (sentirete un tono audio di con-
ferma).
Regolazione del volume
Midland BTX2 è dotato della tecnologia AGC che regola automaticamente il volu-
me di ascolto in base al rumore di fondo. Potete comunque regolare manualmen-
te il volume agendo sui pulsanti“Volume+”e“Volume -“.
Attenzione: la regolazione del volume avviene solo nel momento in cui c’è un audio
attivo
Attenzione: i pulsanti di regolazione volume “Volume +” e “ Volume -” non control-
lano il volume della sorgente audio a lo.
Utilizzo dell’Intercom con dispositivi della linea BT
Midland
Il BTX2 può essere abbinato a tutti i dispositivi della linea BT, come BT Next, BT1,
BT2 e BTCity/Eva.
La massima distanza intercom possibile è stabilita dal dispositivo con minore po-
tenza. Per esempio un BTX2 abbinato ad un BTX1 potrà fare solo 10mt di distanza.
Abbinamento di un altro dispositivo della linea BT Midland
1. Attivate la modalità“Setup” su entrambi i dispositivi (Spegnete il dispositivo e
tenete premuto il pulsante “Centrale” no a che la luce non rimane di colore
rosso sso)
2. Sul BTX2, tenete premuto per 3 secondi il pulsante centrale, no a che la luce
lampeggia alternativamente Rossa e Blu.
3. Seguite la procedura di abbinamento specicata sul manuale del dispositivo
che intendete utilizzare. La luce Rossa e Blu devono lampeggiare alternativa-
mente.
4. Ora i due dispositivi si cercano per completare l’abbinamento. Se l’abbinamen-
to è avvenuto in modo corretto, su entrambi si accende, per un secondo, la luce
Blu, per poi tornare in modalità“Setup”con la luce Rossa ssa.
5. Perutilizzare i due dispositivi è necessariousciredalla modalità di abbinamen-
to (setup): sul BTX1, BT Next e BTCity/Eva fare un doppio click sul pulsante
“Centrale”. Sul BT1 e BT2 tenete premuto per 3 sec. il tasto centrale. La luce
Rossa si spegne e al suo posto lampeggia la luce Blu. Ora potete utilizzare i
dispositivi.
Per attivare l’intercom sul BTX2 è necessario premere il pulsante centrale, oppure
semplicemente parlare (VOX). Sui dispositivi della linea BT seguite le istruzioni
riportate sui rispettivi manuali (tipicamente si utilizza il tasto centrale oppure la
funzione VOX semplicemente parlando).
Abbinare tre dispositivi Intercom
Un dispositivo BTX2 può essere abbinato ad un massimo di altri due dispositivi
(per un totale di 3). E’possibile utilizzare il pulsante centrale per abbinarsi ad un
dispositivo Midland (come già spiegato nei capitoli“Come abbinare un altro di-
spositivo BTX2”e “Utilizzo dell’intercom con un dispositivo della lina Midland”) e
il tasto“Avanti”per abbinarsi ad altri dispositivi utilizzando la funzione “Talk2All-
Universal Intercom”.
Ricordate: Anche un dispositivo Midland può essere abbinato tramite il tasto
“Avanti” con la funzione “Talk2All-Universal Intercom”. L’abbinamento sull’altro
dispositivo deve essere fatto al posto del telefono. Il pulsante utilizzato per l’ab-
binamento sarà lo stesso utilizzato anche per l’apertura/chiusura dell’intercom.
Tutte le volte che si apre la comunicazione con una persona, la comunicazione
precedente viene interrotta. La comunicazione tra dispositivi non è una “catena”
quindi quando due persone stanno parlando, anche se l’altro dispositivo va fuori
portata , non potrà interrompere la comunicazione.
Solo i dispositivi abbinati sul tasto “Centrale” possono essere attivati con la mo-
dalitàVOX.
Talk 2 All - Abbinamento a dispositivo non Midland.
Grazie alla funzione “Talk2 All - Universal Intercom”è possibile abbinare al BTX2
anche un intercom di un‘altra marca.
1. Sul BTX2 entratein modalità setup,(spegneteil dispositivo e tenete premutoil
pulsante“Centrale” no a che la luce non rimane di colore rosso sso)
2. Tenete premuto il pulsante“Avanti”no a che la luce non lampeggia rossa e
blu.
3. Sull’intercom non Midland, seguite le stesse instruzione per abbinare un te-
lefono.
Ad abbinamento concluso (la luce rossa/blu smette di lampeggiare).
Per aprire la comunicazione dal BTX2 premete il tasto Avanti
Sul dispositivo non Midland potete aprire la comunicazione manualmente premen-
do il tasto per la chiamata telefonica.
Potrebbe essere necessario premere il tasto di chiamata due volte , dipende dal mo-
dello del dispositivo non Midland.
Connessione Talk2All
Universal Intercom Connessione ad un
dispositivo Midland
2
1
› Modalità
Background
On/O
› Telefono
› GPS
› GPS +Telefono
› Radio PMR446
Pilota1
Telefono
Talk2All - Universal Intercom
dispositivo non Midland
Pilota2
Passeggero1

I
Midland BTX2 - 9
8- Midland BTX2
I
Effettuare una chiamata solo in modalità Phone
Ci sono diversi modi per eettuare una chiamata.
Dalla tastiera del telefonino:
Comporre il numero sulla tastiera del telefonino
Premere il pulsante“Invio”sul telefonino
Chiamare l’ultimo numero:
Tenete premuto per alcuni secondi il pulsante“Avanti”, l’ultimo numero utilizzato
verrà richiamato (sentirete un tono audio di conferma)
Chiamata vocale:
Premete brevemente il pulsante “Avanti”, se il vostro telefonino supporta la
chiamata vocale, vi verrà chiesto di pronunciare il nome del contatto che volete
chiamare.
Priorità: La telefonata è prioritaria, quindi tutte le altre comunicazioni vengono
temporaneamente interrotte. A telefonata conclusa le comunicazioni in precedenza
interrotte vengono automaticamente riattivate.
Chiudere una telefonata in qualsiasi modalità Phone/Intercom
Ci sono diversi modi per chiudere una telefonata:
› Aspettare che l’altra parte chiuda la telefonata
› Premerebrevemente il pulsante“Avanti”(sentireteuntonoaudio di conferma)
› Premere il pulsante“Chiuso”sul telefonino
Utilizzo della funzionalità MP3 player del telefonino solo in modalità Phone
Molti telefonini possono essere utilizzati come MP3 player stereo. Il dispositivo
Midland BTX2 supporta completamente i protocolli A2DP e AVRCP, i quali consen-
tono di ascoltare musica stereo e di comandare le principali funzioni dell’MP3 pla-
yer. E’infatti possibile utilizzare i pulsanti presenti sul BTX2 per gestire le seguenti
funzioni: Play, Stop/Pause, Avanti ed Indietro.
Per attivare la musica la prima volta, normalmente è necessario farlo dal telefoni-
no, poi sarà possibile utilizzare i comandi per la gestione della musica.
Comandi disponibili in modalità“Phone”:
› Play/pausa della musica: fare click sul pulsante“Centrale”.
› Avanti di una canzone: premere il pulsante“Avanti”
› Indietro di una canzone: premere il pulsante “Indietro”
Navigatore GPS
Il GPS può essere abbinato tramite il pulsante Volume + e la modalità“Phone”
sarà quindi attiva.
Attenzione: Se intendete collegare anche il telefono, quest’ultimo va collegato di-
rettamente al GPS. In questo modo con un’unica connessione potrete utilizzare due
dispositivi e le funzionalità del telefonino saranno gestite direttamente sul Naviga-
tore GPS.
Come abbinare un Navigatore GPS
In generale è possibile abbinare qualunque navigatore GPS per moto che accetti
un auricolare Bluetooth.
1. Attivate sul vostro GPS la modalità di ricerca dispositivi auricolari Bluetooth.
Questa funzionalità dipende dalla marca e modello del vostro GPS (fate riferi-
mento al manuale del GPS).
2. Attivate la modalità “Setup (Spegnete il BTX2. Tenere premuto il pulsante
“Centrale” no a che la luce non rimane di colore rosso sso). Premere il pul-
sante“Volume +”no a quando la luce lampeggia Rosso e Blu.
3. Sul GPS comparirà il nome“Midland BTX2”, selezionatelo e seguite le istruzioni
per accettare l’abbinamento. Quando viene richiesto, immettete il codice di
abbinamento: 0000 (quattro zeri). Il GPS confermerà se il processo di abbina-
mento è stato completato con successo.
4. Il BTX2 uscirà dalla modalità setup (luce rossa ssa) e passerà automatica-
mente allo stato di funzionalità normale (luce blu lampeggiante). Ora il GPS è
abbinato correttamente.
Navigatore sempre in sottofondo (funzione background).
Se si desidera che le indicazioni vocali provenienti dal GPS siano sempre in sotto-
fondo e non interrompano la comunicazione intercom, la funzione “Background”
deve essere attiva.
Ricetrasmettitore PMR446 con Bluetooth integrato o esterno
Un ricetrasmettitore PMR446 deve essere abbinato al pulsante “Volume +“ e la
modalità“Phone”sarà quindi attiva.
Assicuratevi di avere la modalità “Background” attiva per poter tenere la comuni-
cazione radio in sottofondo mentre l’intercom è aperto.
Attenzione: se abbinate una radio PMR446 con Bluetooth non sarà possibile colle-
gare ne il Telefono ne il GPS.
Abbinamento ed utilizzo
Se possedete un ricetrasmettitore con Bluetooth integrato (come il G8BT) potete
abbinarlo al BTX2 tramite il pulsante“Volume +“.
› Attivate la modalità “Setup (Spegnete il BTX2. Tenere premuto il pulsante
“Centrale”no a che la luce non rimane di colore rosso sso).
› Premere il pulsante“Volume +” no a quando la luce lampeggia Rosso e Blu.
› Attivate la modalità di abbinamento sul ricetrasmettitore PMR446, seguendo
le istruzioni riportate sul manuale del ricetrasmettitore stesso.
Attenzione: nel caso di abbinamento ad una radio (G8BT), appena il BTX2 ha
terminato il pairing (solo luce blu lampeggiante) dovete attivare la connessione
seguendo questa procedura:
› Spegnere e riaccendere il G8BT e riattivare la connessione Bluetooth tenendo
premuto il tasto“BT”per 3 sec.
Seguite la stessa ogni volta che dovete ricollegare il G8BT al BTX2 nel caso fosse
stato spento (la procedura di pairing non deve essere ripetuta).
Attenzione: ricordatevi di avere attiva la funzione “background” se volete avere la
comunicazione radio PMR446 insieme alla comunicazione intercom.
Utilizzo dell’ingresso audio a filo
Midland BTX2 ha disponibile anche un ingresso audio a lo per collegare una
sorgente audio Stereo come ad esempio un iPod (o un qualsiasi altro MP3 Player)
oppure un ricetrasmettitore PMR446 per la comunicazione di gruppo o ad una
distanza superiore a quella concessa dalla tecnologia Bluetooth (entrambe i cavi
sono opzionali).
Ascolto della musica
Per ascoltare la musica dall’ingresso a lo è suciente collegare la sorgente audio
tramite il cavo AUX opzionale.
Ipulsanti di regolazione volume“Volume +” e“ Volume -”non controllano il volu-
me della sorgente audio a lo.
Quindi dovete solamente posizionare il volume del vostro iPod/MP3 Player ad un
livello tale che in condizioni normali (bassa velocità) la musica sia adeguata.
Attenzione: non alzate mai il volume dell’MP3 Player al massimo, normalmente un
volume al 70% può essere quello corretto.
Consiglio: fate alcune prove, regolando il volume del vostro iPod/MP3 Player in
modo che a bassa velocità il volume in cua sia ad un livello ottimale, poi anno-
tatevi il valore in modo che la prossima volta possiate immediatamente ricon-
gurarlo con il valore corretto.
Attivazione/disattivazione dell’ingresso a filo
E’possibile attivare e disattivare l’ingresso a lo semplicemente premendo 3 sec.
il pulsante“Indietro”. Un tono audio vi segnala quando la connessione è aperta,
mentre un doppio tono audio quando è chiusa.
Utilizzo di un ricetrasmettitore PMR446 con cavo
Utilizzate il cavo specico opzionale per collegare il vostro ricetrasmettitore alla
presa AUX 2.5mm del BTX2. Normalmente insieme al cavo viene anche fornito il
pulsante PTT da ssare sul manubrio della moto.
La comunicazione via radio avviene premendo il pulsante di trasmissione PTT
quando si vuole parlare e rilasciandolo quando si ascolta. Non è possibile parlare
ed ascoltare contemporaneamente. Se intendete utilizzare un ricetrasmettitore
PMR446 per la comunicazione di gruppo e allo stesso tempo volete avere attiva
la funzione di Intercom tra due dispositivi BTX2, dovete tenere presente che ogni
volta che parlate, se avete abbinato un dispositivo sul tasto Centrale, grazie alla
funzione VOX, anche la comunicazione Intercom viene aperta.
Per ovviare a questo problema, abbinare il dispositivo con cui volete parlare uti-
lizzando il pulsante “Avanti” o il pulsante “Indietro”, dove la funzione VOX non è
attiva.
In alternativa se volete utilizzare il pulsante Centrale, potete disattivare la fun-
zione VOX seguendo la procedura spiegata nel capitolo precedente, in modo che
quando parlate via radio l’Intercom non venga attivato automaticamente. Per
attivare l’Intercom sarà necessario premere il pulsante“Centrale”manualmente .
Attenzione: ricordate che disattivando la funzione di Vox anche la risposta alla te-
lefonata potrà avvenire solo in modalità manuale (premendo il pulsante “Avanti”).
Play/PausaAvanti Indietro
B - Utilizzo pulsanti in modalità Phone
Modalità Pulsante Avanti (sinistro) Pulsante Centrale Pulsante Indietro (destro)
Phone Breve: Chiamata vocale /accetta chiamata o
chiudi la telefonata
Lungo: Richiama ultimo numero/ riuta
chiamata
Lungo: Cambio modalità Lungo: on/o connessione a lo
Phone (con musica attiva) Breve: Avanti una canzone Breve: Play/pause
Lungo: Cambio modalità
Breve: Indietro una canzone

I
Midland BTX2 - 11
10 - Midland BTX2
I
Configurazioni speciali
Reset di tutti i dispositivi accoppiati
Potrebbe essere necessario eliminare tutti i riferimenti di abbinamento registrati
nel BTX2 (reset). Procedete quindi come segue:
Spegnete il BTX2. Tenere premuto il pulsante centrale (“Centrale”) no a che la
luce non rimane di colore rosso sso.
Tenete ora premuto contemporaneamente i pulsanti “Volume +” e“Volume –“
per 3 secondi, la luce Blu si accenderà ssa per un secondo e poi tornerà di colore
rosso sso.
Da questo momento il BTX2 non avrà più nessun dispositivo Bluetooth in memo-
ria e potrete procedere ad una nuova sessione di accoppiamento (pairing).
Ritorno alla configurazione di default
Potrebbe essere necessario ritornare alla congurazione “di fabbrica”, in modo
da ottenere un dispositivo“pulito” esattamente come la prima volta che è stato
tolto dalla scatola.
Spegnete il BTX2. Tenere premuto il pulsante centrale (“Centrale”) no a che la
luce non rimane di colore rosso sso.
Tenete ora premuto contemporaneamente i tre pulsanti “Avanti”,“Centrale” e“In-
dietro“ per 3 secondi, la luce Blu si accenderà ssa per un secondo e poi tornerà
di colore rosso sso.
Fate doppio click sul pulsante “Centrale”per tornare ad utilizzare il BTX2.
Attenzione: questa procedura non elimina i riferimenti ai dispositivi accoppiati.
Regolazione/disattivazione della funzione Vox (per Intercom e
telefono)
L’apertura della comunicazione Intercom, può avvenire oltre che manualmente,
anche tramite attivazione vocale (VOX). Il corretto funzionamento del VOX dipen-
de dal rumore di fondo, quindi dalla velocità.
Per ottenere il migliore risultato, è possibile decidere la soglia di attivazione,
scegliendo 4 livelli di sensibilità del microfono: alta, media bassa e molto bassa.
Di fabbrica il BTX2 è precongurato con la sensibilità“bassa”.
In aggiunta, è possibile anche disabilitare completamente la funzione VOX e
quindi attivare l’Intercom e la risposta alla telefonata solo in modalità manuale.
Regolazione della sensibilità del microfono
1. Spegnete il BTX2.
2. Tenere premuto il pulsante Centrale no a che la luce non rimane di colore
rosso sso. Ora il BTX2 è in modalità “Setup”.
3. Premete brevemente il pulsante“Indietro”no a che la luce Blu si accenderà ssa.
4. Ora premete“Volume +”o“Volume -“ per aumentare o diminuire la sensibili-
tà. La luce Rossa lampeggerà indicando che il pulsante è stato premuto (quan-
do raggiungete il limite della regolazione la luce smette di lampeggiare).
5. Premete il pulsante“Indietro”, la luce Blu lampeggerà diverse volte in base
alla congurazione della sensibilità in quel momento attiva:
1 volta= Vox disattivo
2 volte=sensibilità molto bassa
3 volte=sensibilità bassa
4 volte= sensibilità media (valore di default)
5 volte= sensibilità alta
Ora la luce rossa tornerà ad essere accesa ssa per indicare che le modiche
sono state registrate e siete tornati alla modalità di setup.
6. Se dovete modicare ulteriormente la congurazione della sensibilità ripete-
te i passi dal punto 2, altrimenti uscite dalla modalità di“Setup” facendo un
doppio click sul pulsante “Centrale” . La luce Rossa si spegne e al suo posto
lampeggia la luce Blu. Ora potete utilizzare il BTX2.
Disattivazione della funzione VOX (per Intercom e Telefono)
Seguite tutta la procedura spiegata sopra ma selezionate l’opzione 1 del punto 5
cioè un unico lampeggio (corrispondente alVox disattivo).
Connessione a filo sempre attiva
Grazie a questa funzione è possibile mantenere aperta la sorgente audio via lo
anche quando l’Intercom o il telefono sono attivi. Questa funzione può essere uti-
le quando si utilizza una ricetrasmittente collegata via lo.
Per default questa funzione è attiva.
Disattivazione:
Entrate in modalità“setup”(luce rossa sempre accesa).
Premete contemporaneamente il pulsante“Avanti”e “Centrale”per un secondo. La
luce Blu farà due lampeggi per indicare la disattivazione.
Uscite dalla modalità“setup”premendo due volte il pulsante Centrale.
Attivazione:
Fate la stessa procedura; questa volta un lampeggio della luce blu indicherà l’at-
tivazione.
Uscite dalla modalità“setup”premendo due volte il pulsante Centrale.
Configurazione e aggiornamento firmware
Midland BTX2 può essere congurato e aggiornato tramite connessione USB al
vostro PC, per migliorare la compatibilità con i dispositivi Bluetooth, quali telefoni
e GPS o per risolvere problematiche legate alla funzionalità. Il software per PC in-
sieme agli eventuali aggiornamenti del rmware sono disponibili per il download
sul sito www.midlandradio.eu nella pagina del prodotto stesso.
ATTENZIONE: NON COLLEGATE IL DISPOSITIVO AL COMPUTER PRIMA DI AVER
SCARICATO ED INSTALLATO IL SOFTWARE.
Uso e avvertimenti specifici
L’uso assiduo di questi dispositivi può diminuire la vostra capacità di udire suoni
esterni e chi vi sta intorno.
L’uso di questo dispositivo mentre si sta guidando può diventare un pericolo per
voi e per chi vi sta intorno e in alcuni paesi, l’utilizzo del dispositivo potrebbe non
essere consentito.
L’uso ad un volume troppo alto può causare la perdita permanente dell’udito.
Se si avverte un qualsiasi dolore alle orecchie, o fastidio all’udito, diminuite il vo-
lume o spegnete il dispositivo. L’uso continuativo ad alto volume, fa sì che l’udito
si abitui a tale volume, il quale a lungo andare può causare danni permanenti.
È fortemente consigliato l’utilizzo di tale apparato ad un volume adeguato.
Garanzia
Il consumatore è titolare di diritti secondo la legislazione nazionale applicabile
disciplinante la vendita dei beni di consumo e la garanzia lascia impregiudicati
tali diritti;
›La durata della garanzia è di mesi 24 a decorrere dalla data di acquisto o dal-
la data della ricevuta rilasciata dal rivenditore ; per farla valere l’utente deve
presentare lo scontrino d’acquisto assieme al box dell’apparato acquistato ;
›La garanzia copre l’apparecchio nella totalità delle sue parti e comprende sia il
materiale che la manodopera necessaria per le riparazioni ;
›La garanzia non copre i difetti causati dall’uso o collegamento del Prodotto
con accessori o/e software non prodotti o forniti dal Produttore o da un uso del
prodottodiverso da quello per cui il prodottomedesimoèstatorealizzato.Essa
non è valida in caso di apertura, modica o riparazione da parte di soggetti
diversi dai centri autorizzati o in caso di riparazioni eettuate con ricambi non
autorizzati.
›Nulla sarà dovuto all’acquirente per il tempo durante il quale l’apparecchio
sarà rimasto inattivo né egli potrà pretendere risarcimenti o indennizzi per
spese sostenute come pure per danni diretti o indiretti derivanti dall’uso
dell’apparecchio.
Certificazioni e Conformità di Sicurezza
CE/Informazioni generali
Questo prodotto è conforme alla direttiva 99/05/CE e può essere liberamente
utilizzato nei paesi dell’UE.
Agli utenti non è permesso eettuare variazioni o modiche di qualsiasi tipo
all’apparecchio. Queste ultime, se non espressamente approvate dal produttore,
annullano la possibilità di utilizzo dell’apparecchio ed invalidano la garanzia.
Per ulteriori informazioni, fate riferimento al nostro sito web: www.cte.it

UK
Midland BTX2 - 13
12 - Midland BTX2
I
Index
Main features.......................................................................................................................................................................................................14
Technical specications of Midland BTX2 .............................................................................................................................................................14
Charging batteries................................................................................................................................................................................................14
Unit and xing system description.......................................................................................................................................................................15
Switching your Midland BTX2 on and o .............................................................................................................................................................16
Operative‘mode’...................................................................................................................................................................................................17
Maximum Distance ..............................................................................................................................................................................................17
How to pair two BTX2 ..........................................................................................................................................................................................17
How to pair the BTX2 to previous Midland BT Line unit........................................................................................................................................17
How to pair three intercom unit together.............................................................................................................................................................18
Talk 2 All - Pairing to a dierent brand Intercom..................................................................................................................................................18
Pairing the BTX2 to Bluetooth devices..................................................................................................................................................................18
How to use the wired audio input........................................................................................................................................................................20
Using a PMR446 transceiver with cable connection .............................................................................................................................................21
Setup and special congurations .........................................................................................................................................................................21
Setup and rmware update .................................................................................................................................................................................22
Warranty..............................................................................................................................................................................................................23
European CE Notice Certication and Safety Approval Information......................................................................................................................23

UK
Midland BTX2 - 15
14 - Midland BTX2
UK
MIDLAND BTX2
Advanced Intercom System
BTX2 is an intercom communication system solution for motor cyclists.The design is very slim and aerodynamic, all the main functions are easy to operate thanks to the big three
buttons placed on the front of the unit.
BTX2 is xed on the helmet using the adhesive plate or the screw mounting clamp. Thanks to the audio kit with ultra slim speakers you can enjoy high quality stereo music while
riding.
Main features
›Intercom driver - passanger or bike to bike (800mt).
›Connect up to three people for intercom communication (using Talk2All-
Universal Intercom)
›Connect your phone to receive and place phone call and listen to stereo music
›Connect your GPS for voice street indication
›Connection for PMR466 radio with internal or external Bluetooth
›AUX wired connection for MP3 player and PMR446 radio
›Setup and Firmware update via USB connection to a PC
Midland BTX2 is available in two versions:
›Single BTX2 Intercom kit with one unit only
›Twin BTX2 Intercom kit with with two units
Depending on the model purchased, the package contains the following
parts:
BTX2 single
›1 BTX2 communication unit
›1 audio kit with two stereo speakers, microphone with boom and wired mi-
crophone
›1 plate with bi-adhesive strip to x the unit onto the helmet
›1 clamp to x the unit onto the helmet
›1 stereo audio cable for iPod/ or other MP3 players
›1 miniUSB wall-mounting power supply
BTX2 Twin
›2 BTX2 communication units
›2 audio kits with two stereo speakers, microphone with boom and wired mi-
crophone
›2 plates with bi-adhesive strip to x the unit onto the helmet
›2 clamps to x the unit onto the helmet
›2 stereo audio cables for iPod/ or other MP3 players
›1 miniUSB wall-mounting power supply with double plug
The units included in the TWIN kit are already paired and can therefore be immedia-
tely used in Intercom mode.
Technical specifications of Midland BTX2
General:
›Bluetooth ver. 3.0 stereo (Headset/Handsfree/A2DP protocol)
›AGC system automatically controls the volume in relation to background noise
›Voice (VOX) or manual communications activation
›Manual controls to enable: telephone, intercom and wire connection
›Fully waterproof
›Lithium battery with 10 hours talk time
›Recharge time: app. 6 hours
Bluetooth connections:
With identical device for Driver to Passanger or Bike to Bike Intercom
Bluetooth devices:
›MobilephonewithMP3playerStereo(A2DPprotocol), GPS (GarminZumo and
TomTom Rider 1 and 2)
›PMR446 transceivers (with built-in or external Bluetooth connection) for
group bike-to-bike communications
Wire connections:
›For stereo audio input like iPod/MP3 player (with optional cable)
›For PMR446 transceivers (with optional cable)
Attention: Midland BTX2 is designed to withstand rain and water. However, if it is
raining, always verify that the rubber caps protecting the sockets are fully tted.
Charging batteries
Attention: Make sure that the unit is fully charged before use. Allow at least 8 hours
for a full charge before using the unit for the rst time.
Charge the unit by inserting the wall-charger into the charging socket (lift the
rubber cover to insert the plug).
The red LED on the unit will start ashing when charging begins.
Allow the headset to charge until the unit stops ashing or the blue LED turns on.
When the charge is complete (the red LED is not ashing), release the headset
from the charger.
Normally, after the rst time, it takes 6 hours for a full charge.
Attention: every time the mini USB recharging plug is inserted (or detached), the
device is automatically turned o. To use it while it is in charge, you should turn the
device on with the plug already inserted.
Unit and fixing system description
BTX2 description
The BTX2 has ve buttons on the front; the main three big button are multi fun-
ctions buttons: the Forward (on the left), the middle button and the Rear (on the
right), the two small rounded buttons are theVolume + andVolume -.
Description of the wired connections
On the bottom of the unit you can nd three wired connection:
Charger jack: enables to recharge the unit using a standard miniUSB power
supply
Audio kit jack: enable to connect an audio kit (stereo headset and microphone)
Auxiliary audio jack (AUX) 2.5mm: can be used to connect an audio source, like
a stereo iPod/MP3 player or PMR446 transceiver
In addition the BTX2 has a ip up antenna on the top for maximum distance per-
formance.
To lift the antenna, press gently backward and the antenna will automatically
lift up.
To close the antenna just press it down and be sure to move it back into the closed
position.
Description of the audio kit
The audio system includes two ultra-at
stereo speakers and two interchangeable
microphones, which are both supplied with
a bracket and wired connection.
Fixing the stereo speakers
The two stereo speakers have a Velcro/adhesive strip that aids their xing into
your helmet.
Beware not to completely cover your ear with the speakers, you must always be
able to listen to the trac sound and your indicators.
The microphone can be xed onto the helmet in two ways:
Boom Microphone
Place the section with the Velcro/adhesive strip between the padding and the
Middle button
Volume -Volume +
Forward button Backward button
Charger jack Audio kit jack
Auxiliary audio jack (AUX)

UK
Midland BTX2 - 17
16 - Midland BTX2
UK
rigid cover of the helmet, so that the microphone is correctly positioned in front of
your mouth and that the white symbol is facing your mouth.This type of micro-
phone is suited for Open Faced and Flip Front helmets.
Wired microphone
Using the Velcro/adhesive strip, place the microphone inside the helmet in front
of your mouth. This type of microphone is more suited for Full Faced helmets. The
mini connector on the microphone allows you choose the microphone that best
suits the helmet you are using.
Audio kit jack
The audio kit must then be connected to the central jack of the Midland BTX2 unit
using the“L” shaped connector.
Description of the installation brackets
The Midland BTX2 can be xed onto the helmet in two dierent ways: By either
using the plate with bi-adhesive strip, or the clamp. These methods allow you to
safely“x”the BTX2 unit onto your helmet and to remove it at any time in order
to recharge or store it.
Plate with bi-adhesive strip
The xing plate has a bi-adhesive strip on one of
its sides. To x the plate in place, clean the appli-
cation area on the helmet surface, remove the bi-
adhesive lm and
place the xing plate on the helmet by keeping it
contact with the surface for a few seconds.
Screw Clamp
Using the Allen Key, loosen the two screws on the clamp and place the rear plate
between the helmet padding and the external rigid protection. Then, tighten the
two screws in order to rmly x the clamp in place. Inside the clamp is included a
small plastic spacer that can be removed to give a tighter t if required.
Fitting and removing your Midland BTX2
The BTX2 can be easily tted onto the helmet by sliding it downwards so that
it ts into the slot of the selected xing device (plate with bi-adhesive strip or
clamp). BTX2 is maintained in position thanks to the xing clip located on the
upper section (A).
To detach the BTX2, simply press the xing clip and push the unit upwards.
Switching your Midland BTX2 on and off
Switching the unit on:
Press and hold“Middle”button down for approximately 3 seconds until the BLUE
indicator lights.
Switching the unit off:
Press and hold both“Middle”and“Rear”buttons together for approximately 3 se-
conds until the RED indicator ashes 3 times, thus lessening the chances that you
might turn o the unit accidentally (especially whilst wearing gloves).
Operative“mode”
The BTX2 can operate in two main“mode”: Intercom and Phone.
The 3 multi function buttons can have dierent functionality depending on which
mode the unit is at that moment.
›In “Intercom mode”the middle buttons let you manage the communications
between driver and passanger
›In “Phone mode” you can manage your Bluetooth cellular phone to place/
answer a phone call or to listen to the music (in stereo mode). Please use your
phone responsibly and safely.
You can switch (toggle) from one mode to the other simply pressing the Middle
button for 3 seconds. A voice announcement will tell in which mode you are on.
The toggle sequence is the following:
›Intercom mode (if another unit has been paired)
›Phone mode (if a phone has been paired)
Every time you turn on the unit, the default mode is Intercom (if it was previously
paired to another unit), otherwise it will be Phone (If was paired to a phone).
If you need to know in which mode the unit currently is, just press the“Volume +
“ and“Volume –“ button together. A voice announcement will tell you the current
mode.
Maximum Distance
You can reach 800mt intercom distance if the ip up antenna is up and if you are
in line of site without obstructions and interferences (the riders must be always
in sight).
How to pair two BTX2 unit
The two units supplied in the same BTX2 box, are already paired and ready to use,
which mean you don’t need to perform this procedure. The unit are already paired
using the Middle button.
If the devices are not part of the same kit, or the units has been purchased sepa-
rately, you need to rst pair it in order to use it.
To pair the BTX2 to another BTX2 unit
To pair the BTX2 to another BTX2 unit, you must rst enter the setup mode:
1. Turn o the unit
2. Press and hold down the middle button about 7 sec., until the Red light is on
permanently.
3. Now press the Middle button for 3 seconds.The Blue and Red light will ash.
4. Do the same procedure on the other unit,When successfully paired, each unit
will have the Blue light on for one second and than go back to the setup mode
(Red light always on).
5. Now the pairing procedure is complete, you just need to exit the setup mode
before you can use the units:
6. Double click on the Middle button, the Red light will turn o and the Blue
light will start ashing.
You can use now your BTX2.
How to use the Intercom
To use the intercom feature, be sure the both units are turned on and correctly
paired together.
Manual activation
Press the Middle button on one of the two units. Communication is enabled and
remains active until you press again the middle button. The intercom need some
second to activate, you will hear a beep tone when the intercom is open.
Voice activation (VOX)
Simply start talking, after some seconds the communication will be opened and
will remain active for the time you are talking. If there is no conversation the
intercom will be closed after 40 seconds. If needed you can close the intercom
manually without waiting 40 seconds (just press the middle button).
If needed, you can temporarily disable the VOX feature simply by pressing the
Backward button for 7 sec. Two sound beep will advise you when the VOX is di-
sabled. To turn the VOX on again, just press the same button, one beep sound
will advise you that theVOX is now active (or just turn the unit o and on again).
Adjusting the volume
Your Midland BTX2 uses AGC technology, which automatically adjusts the liste-
ning volume in relation to background noises.
However, it is also possible to manually adjust the volume by means of the“Volu-
me +”and “Volume -“buttons.
Attention: volume can be adjust only when an audio connection is active.
Attention: the volume buttons (Vol + and Vol -) cannot be used to adjust the vo-
lume of the wired audio source. The AGC system with automatically increase the
volume on higher speed.
How to pair the BTX2 to previous Midland BT line unit
The BTX2 is compatible with all the BT line unit from Midland. You can pair the
BTX2 to a BT2, BT1 or BTX1, BT Next and BT City/Eva unit and the max distance of
the intercom is dened from the lower possible.
To pair the BTX2 to another BT line unit, you must rst enter the setup mode:
1. Turn o the unit
2. Press and hold down the Middle button about 7 sec., until the Red light is on
permanently.
3. Now press long (3 sec) the Middle button, the Blue and Red light will ash.
4. Follow the procedure on the other unit’s instruction manual

UK
Midland BTX2 - 19
18 - Midland BTX2
UK
5. When successfully paired, each unit will have the Blue light on for one second
and than go back to the setup mode (Red light always on).
Exit the setup mode from both units before you can use them: for BTX2 double
click on the Middle button, the Red light will turn o and the Blue light will start
ashing. For the other devices of BT line, please refer to their own user manual.
How to pair 3 intercom unit together
One BTX2 unit can be paired to maximum two other unit (three in total).You can
use the middle button to pair/use a Midland unit (see the paragraph“How to pair
two BTX2 unit” and “How to use the intercom”) and you can use the “Forward”
button to pair/use the“Talk2All-Universal Intercom” feature. Attention: in order
to use the the“Talk2All-Universal Intercom”feature the pairing on the other unit
mustbedoneasaphone.Thesamebutton you will use to pair the unit will be also
used to activate the intercom communication.
Remember that each device can always be paired with other 2 units at your choi-
ce; as shown in the picture here below.
Every time you open the intercom connection to one person, the previous con-
nection will be closed.
The connection is not a“chain”, when two person are talking it is not possible to
break (interrupt) the communication by one of the units riding out of the maxi-
mum distance range.
Talk 2 All - Pairing to a different brand intercom
Thanks to the“Talk2 All - Universal Intercom” feature it is now possible to pair your
BTX2 to a dierent brand intercom available on the market.
1. On the BTX2 enter the setup mode: (With the unit OFF press and hold down
the Middle button about 7 sec., until the Red light is on permanently.
2. Press the “Forward”button for 3 seconds, the Red and Blu LED light will ash.
3. On the otherintercom (notMidland brand) follow theprocedure to pair to aphone.
When successfully paired (no red/blue ashing light).
To open the intercom communication on the BTX2 press forward button.
On the other intercom just press the phone redial button.
Maybe it will be necessary to press the dial button two times, depending on the
model of the not Midland intercom.
Attention: when using this conguration, the other intercom (not Midland brand)
will not be able to be paired to a phone.
Unit already busy
If you try to open a intercom connection to another person that is already busy
talking with some one else (or is in a middle of a phone conversation), you will
hear a “busy” double beep tone. Just wait sometime and try again, maybe this
time the“line”is not busy.
The person who is called, will be advised that someone is trying to call and will
hear a voice announcement with the number of the button from which the re-
quest is coming.
Pairing the BTX2 to Bluetooth devices
The BTX2 unit can be paired to other Bluetooth devices, like Phone, GPS Navigator
or PMR446 Radio with built-in or external Bluetooth.
The pairing procedure must be done using the“Volume +” buttons.
›
›
Bluetooth connection always in Background
This feature let you keep the Bluetooth connection on the “Volume+” button
always in background also if the Intercom is open (very useful to keep the GPS
navigator announcement in background while the intercom is open).
Enabling/Disabling the Background feature:
Keep pressed for three second the“Volume -”button, a voice announcement will
tell you the status. The background feature is active by default. Pairing to a
phone
The cellular phone can be paired only to the“Volume +”, when paired the
“phone mode“ is active. In this way it is possible to manage all the phone functio-
nalities and listen to the stereo music. An incoming call the higher priority, that
means all other communications will be closed (Intercom, Music).
Pairing to a GPS navigator
The GPS can be paired on the“Volume +”button, when paired the “phone mode
“ is active.
Attention: If you need to connect both Phone and GPS, you must pair the Phone
to the GPS itself.
Pairing to a PMR446 radio with integrated or external Bluetooth
The PMR446 Radio must be paired to the“Volume +“ button.
Attention: if you pair a PMR446 with Bluetooth, it will not be possible to pair the
Phone or the GPS.
How to pair the BTX2 to a Phone
To pair the BTX2 to a Phone, you must rst enter the setup mode:
1. Turn o the unit
2. Press and hold down the middle button about 7 sec., until the Red light is on
permanently.
3. Now press for3 seconds the“Volume +”button, the Blue and Redlight will ash.
4. Enable the Bluetooth device search feature on your mobile phone
5. After some seconds,“Midland BTX2”will be displayed on your mobile phone.
Follow the pairing procedure of your Phone. If a pin code is requested you
must enter“0000”(four time zero).
When successfully paired, the Blue light of the unit will be on for one second and
than the unit will exit the setup mode and switch to the working mode (the Blue
light will start ashing).
You can use now your BTX2 together with the Phone.
How to use a Phone
After pairing your phone to the BTX2 unit you must switch to the “Phone” mode in
order to use all the phone/MP3 music player feature. If you are in“Intercom”mode
you can only manage the incoming phone call. To activate the “phone” mode,
press the middle button until you hear “Phone” from the voice announcement.
Now all the three main button are dedicated to the phone (see Table B)
Answering a call in both Phone/Intercom mode
When you hear the phone ring, you can answer in two dierent ways:
Vocally:
Simply say one word to answer the call and start talking.
Remembering that you can only do this if you answer the call after the third Ring.
Attention: be aware that some phones may not support voice answering
Manually:
Tap the “Forward”button and start speaking.
Rejecting a call in both Phone/Intercom mode
If you don’t wish to answer, you can let the mobile phone ring or press the
“Forward”button for a few seconds (you will hear one audio conrmation tone).
Making a call only Phone mode
There are several ways to make a call.
From the mobile keypad:
Dial the number on the mobile keypad:
Press“Send”on the mobile phone.
› Background
feature ON/
OFF
› Phone
› GPS
› GPS + Phone
› PMR446 Radio
Driver1
Telefono
Talk2All - Universal Intercom
different brand intercom
Driver2
Passanger1
Connessione Talk2All
Universal Intercom Connessione ad un
dispositivo Midland
2
1
B-Phone mode
Mode Forward button Middle button Rear button
Phone Short press: Voice dial /accept or close if it is
in progress
Long press: redial last number/ or reject
incoming call
Long press: Change mode Long press: toggle on/o wired
Phone (when music play) Short press: Forward the song Short press: Play/pause
Long press: Change mode
Short press: Backward the song

UK
Midland BTX2 - 21
20 - Midland BTX2
UK
To redial the last number:
Press“Forward” button for 3 seconds in order to redial the last number (you will
hear one audio conrmation tone).
To make a voice call:
Briey press“Forward”button. If your mobile phone supports voice calls, you will
be asked to speak the name of the contact you wish to call.
Priority: Calls have a high priority, which means that all other communications are
temporarily disabled when a call arrives and automatically re-enabled once the call
ends.
Ending a call in both Phone/Intercom mode
There are several ways to end a call:
›Wait for the called person to end the call.
›Press the“Forward”button (you will hear an audio conrmation tone).
›Press“End”button on the mobile phone.
Using the MP3 player feature of the mobile phone only Phone mode
Many mobile phones are now designed to be used as stereo MP3 players. The
BTX2 devicefullysupports the A2DP and AVRCPprotocolsthatenable you to listen
to stereo music and remotely control your mobile phone’s MP3 player. You can
even use the buttons on the BTX2 unit to control the following play options: Play,
Pause, Forward and Backward.
Available controls:
›To play/pause music: click on the “Middle”button.
›To skip forward to the next song: press the“Forward”button.
›To skip backwards to the previous song: press the“Rear”button..
Priority: the music listening mode has the lowest priority. Therefore, it will always
be disabled when another type of communication is enabled.
How to pair the BTX2 to a GPS
In general is possible to pair the BTX2 to all the GPS for motorbike that support
Bluetooth headset connection.
To pair the BTX2 to a GPS, you must rst enter the setup mode:
1. Turn o the unit
2. Press and hold down the“Middle”button about 7 sec., until the Red light is
on permanently.
3. Now press rmly(3 sec) the“Volume+”button, the Blue andRed light will ash.
4. Enable the Bluetooth device search feature on your GPS
5. After some seconds, “Midland BTX2” will be displayed on your GPS.
6. Follow the pairing procedure of your GPS. If a pin code is requested you must
enter“0000”(four times zero).
7. When successfully paired, the Blue light of the unit will be on for one second
and then the unit will exit the setup mode and switch to the working mode
(the Blue light will start ashing).
When you pair the GPS to theVolume + button, you loose the possibility to pair
the phone to the BTX2 unit. You can overcome this limit by pairing the phone
directly to the GPS and then the GPS to the BTX2 unit. All the phone features are
therefore managed by the GPS itself.
GPS navigator always in background
To keep the intercom open while the GPS give the street indication you must have
the“background”feature active.
How to pair PMR446 transceiver with integrated Bluetooth
If your PMR446 trasceiver has an integrated Bluetooth (like the G8BT), you must
pair the trasceiver using the“Volume +“ button:
›Turn o the unit
›Press and hold down the“Middle”button about 7 sec., until the Red light is
on permanently.
›Now press rmly (3 sec) the“Volume +”button, the Blue and Red light will
ash.
›Follow now the pairing procedure explained on the manual of the transceiver
itself
Attention: If you are pairing to a G8BT transceiver, just when the BTX2 nish the
pairing (only the Blu LED is ashing) you must follow this procedure to activate the
Bluetooth connection:
›Turn o and on the G8BT and then press for 3 sec. the“BT” button.
›Follow the same procedure every time you need to reconnect the G8BT to the
BTX2 (no need to make the pairing procedure again)
Attention: remember to have the “background” feature active if you want to keep
the two way radio communication together with the intercom.
How to use the wired audio input
Your Midland BTX2 is also supplied with a wired audio input (AUX), that can
be used to connect an audio source, like an iPod (or any other MP3 Player) or a
PMR446 transceiver for group communication or for a coverage increase.
Listening to music
To listen to music from the wired input, connect the audio source using the op-
tional AUX cable.
The volume buttons (Vol + andVol -) cannot be used to adjust the volume of the
wired audio source. The AGC system with automatically increase the volume on
higher speed.
Attention: never set the volume of the MP3 Player to the maximum possible. Nor-
mally the best level is about the 70% of the maximum.
Hint: We recommend that you perform a few tests adjusting the volume of your
iPod/MP3 player so at the normal speed the Headset volume is suited to your
needs. The AGC system will automatically increase the volume on higher speed.
Make a note to remember this setting for future trips.
Enabling/disabling the wired input
If needed the wired input can be enabled or disabled:
Enabling/Disabling: Make a Long press on the“Rear” button (you will hear one
audio beep tone for enabling conrmation and two audio beep tone for disa-
bling).
Using a PMR446 transceiver with the cable connection
In order to connect the transceiver to your Midland BTX2, you need to purchase
the specic 2.5mm plug AUX cable, sold separately. S
ome manufacturers radios use a dierent pin conguration, so we recommend
that you ask your dealer as to which cable is best suited to your needs
The cable connected to the transceiver normally has also a PTT button that can
be placed on the handlebar of your bike or held in your hand (If you are the pas-
sanger rider).
To communicate via the attached radio, press the PTT button to speak and release
it to listen. It is not possible to talk and listen simultaneously.
Adjust the volume of the transceiver to your needs, remembering that the volume
adjustment is controlled by the automatic AGC system and that it will therefore
be automatically increased in relation to background noise.
If you wish to use a PMR446 transceiver for group communications and simulta-
neously maintain the Intercom feature enabled between two or more BTX2 devi-
ces, you must remember that every time you talk to communicate with the PMR
446 transceiver (pressing the PTT button), you will also activate the intercom of
the BTX2 to the unit connected to the“Middle”button (thanks to the VOX feature).
To avoid the Intercom activation when you speak on the PMR446, you can decide
to pair the BTX2 unit on the“Rear”or“Forward”(where the VOX is not active) or
if you still want to use the“Middle”button, you must disable the VOX feature, as
explained in the previous section.
Attention! If you disable the VOX feature, you will only be able to answer incoming
phone calls by pressing the “Forward” button.
Setup and special configurations
Resetting all paired devices
Sometimes you may nd it necessary to delete all the pairing references stored in
the BTX2 unit (reset operation).
To perform this operation you must rst enter the setup mode:
›Turn o the unit
›Press and hold down the“Middle”button about 7 sec., until the Red light is
on permanently.
›Than simultaneously press and hold down the “Volume +”and “Volume –“
buttons for 3 seconds. The Blue Light will be lit on for 1 sec and than back
to steady RED.
›Double click on the“Middle”button to exitthe“Setup”mode and use the BTX2.
This procedure deletes all the paired Bluetooth devices stored in the memory and
it is therefore possible to start a new“clean”pairing session.
Back to factory setting
Sometimes you may nd it necessary to go back to the factory setting, to reset all
the changes/setup already made and have a“clean”unit.
To perform this operation you must rst enter the setup mode:
›Turn o the unit
›Press and hold down the“Middle”button about 7 sec., until the Red light is
on permanently.
›Than simultaneously press and hold down all the three buttons “Forward”-
“Middle”-“Rear”for 3 seconds. The Blue Light will be lit on for 1 sec and than
back to steady RED.
›Double click on the“Middle”button to exitthe“Setup”mode and use the BTX2.
Adjusting/ Disabling the VOX feature (Intercom and telephone)
The Intercom feature can be enabled both manually and vocally (VOX). TheVOX
activation is inuenced by the background noise and therefore by the speed.
For optimum results, it is possible to choose one of the following four microphone
sensitivity levels: high, medium, low and very low.The default setting of BTX2 is
“low”. It is also possible to disable the VOX feature in order to activate the Inter-
com and phone call answering features in manual mode only.
Adjusting the sensitivity of the microphone (VOX)
To perform this operation you must rst enter the setup mode:
1. Turn o the unit
2. Press and hold down the“Middle”button about 7 sec., until the Red light is
on permanently.
3. Your BTX2 is now in“Set up mode”.
Play/PausaForward Backward

UK
Midland BTX2 - 23
22 - Midland BTX2
UK
4. Press the “Rear”button until the red light indicator changes to a steady blue.
5. Now, press “Volume +” or “Volume -“ to increase or reduce sensitivity. Every
time you press the Volume buttons the RED light will ash for conrmation.
When you reach the end of the upper and lower limit, the RED light will not
ash.
6. Press again the “Backward” button; the Blue light will ash several times, in
order to let you know the selected sensitivity:
One ash = VOX disabled
Twice = very low sensitivity
3 times= low sensitivity
4 times= medium sensitivity (default setting)
5 times = high sensitivity
The light indicator is now back to steady RED (“Set up mode”) and the
changes are conrmed
7. If needed, you can adjust again the sensitivity repeating the steps from point
1, otherwise exit the Setting mode by double clicking the “Middle” button.
Once the red light turns o, the blue led starts blinking. Now you can use your
BTX2.
Disabling the VOX feature (Intercom and telephone)
Follow all the procedure described in the previous steps and choose the option of
only one ash (VOX disabled).
Wired connection always in background
This feature let you keep the wired connection always on, even when the phone
or the intercom is open.This feature can be useful when you connect a PMR446
transceiver.
By default this option is on.
Disabling:
›Enter the“Setup”mode:
›Turn o the unit
›Press and hold down the“Middle”button about 7 sec., until the Red light is
on permanently.
›Press the“Forward”and “Middle” button together for 3 seconds. The blue LED
will ash twice.
›Double click on the“Middle”button to exitthe“Setup”mode and use the BTX2.
Enabling:
Follow the same procedure up described; now the blue LED will ash once.
To exit the “Setup” mode, double click the “Middle” button.
Setup and Firmware update
It is possible to congure and update the rmware of your BTX2 using the USB
connection to your PC. On the Midland web site www.midlandradio.eu in the
BTX2 page you can nd the PC software and the new rmware updates if avai-
lable.
ATTENTION DO NOT CONNNECT THE UNITTO THE PC BEFORE you DOWNLOAD AND
INSTALLTHE SOFTWARE
Use at your own risk
The use of the device will impair your ability to hear other sounds and others
around you.
Listening to music or speaking on a telephone may prevent you from hearing
others around you and distract you from riding safely. The use of such device
while riding may endanger you and others, and its use, in some areas, could not
be allowed.
Using this device at a high volume may result in permanent hearing loss.
If you experience ringing in your ear or any other hearing related pain, reduce the
volume or discontinue using this device.With continued use at high volume, your
ears may become accustomed to the sound level, which may result in permanent
damage to your hearing.
Please use this device at a safe volume level.
Warranty
This product is covered by European warranty rulings and should be returned to
the place where purchased for repair or replacement if not repairable. In the event
it that it is returned to us by your supplier then we will either repair or replace
within 15 working days from receipt.
European CE Notice Certification and Safety Approval
Information
This product is CE marked according to the RTTE Directive (99/5/EC) and is free
use in all the EU countries.
Users are not permitted to make any changes or modications to the device.
Modications which are not expressly approved by the producer invalidate the
warranty card.
For further information, please go to our website: www.cte.it

D
Midland BTX2 - 25
24 - Midland BTX2
UK
Inhalt
Hauptmerkmale................................................................................................................................................................................................... 26
Technische Daten des Midland BTX2 .................................................................................................................................................................... 26
Auaden des Akku ............................................................................................................................................................................................... 27
Beschreibung des Geräts und Montagehalterung ................................................................................................................................................ 27
Ein-/Ausschalten des MIDLAND BTX2................................................................................................................................................................... 28
Betriebsarten....................................................................................................................................................................................................... 29
Max. Reichweite................................................................................................................................................................................................... 29
Koppeln (Pairen) von zwei BTX2- Geräten............................................................................................................................................................ 29
Koppeln des BTX2 mit einem älteren BT LINE Gerät............................................................................................................................................ 30
Drei Intercom Geräte verbinden ........................................................................................................................................................................... 30
Talk 2 All............................................................................................................................................................................................................... 30
Ein BTX2 mit einem anderen Bluetooth-Gerät koppeln....................................................................................................................................... 31
Verwendung des Audiokabel-Eingangs ............................................................................................................................................................... 33
Verwendung eines PMR446-Funkgeräts mit Kabelanschluss ............................................................................................................................... 33
Setup und spezielle Konguration ....................................................................................................................................................................... 34
Setup und Firmware-Aktualisierung.................................................................................................................................................................... 35
Gewährleistung.................................................................................................................................................................................................... 35
Europäische CE Erklärung und Sicherheitshinweise.............................................................................................................................................. 36

D
Midland BTX2 - 27
26 - Midland BTX2
D
MIDLAND BTX2
Advanced Intercom System
Beim BTX2 handelt es sich um eine sehr kompakte und aerodynamische Gegensprech-Kommunikationssystemlösung für Motorradfahrer. Alle wichtigen Funktionen sind dank der
drei großen Tasten auf der Vorderseite des Gerätes einfach zu bedienen.
Das BTX2 wird mit einer Befestigungsplatte und Klebeband oder einer angeschraubten Klemmhalterung am Helm xiert. Dank seines Audiokits mit ultraachen Lautsprechern
können Sie während der Fahrt hochwertige Stereo-Musik genießen.
Hauptmerkmale
›Reichweite der Gegensprechanlage (Intercom) bis zu 800 mt
›Verbinden von bis zu drei Personen für Intercomgespräche (Talk2All-Universal
Intercom)
›Anschluss eines Mobiltelefons, um Anrufe anzunehmen und zu tätigen, sowie
für die Wiedergabe von Stereo-Musik
›Anschluss eines GPS-Navigationsgeräts zur Übertragung von Navigationsan-
weisungen
›Anschluss eines PMR466 Funkgeräts mit eingebauter oder externer Blueto-
oth-Verbindung
›AUX-Kabelanschluss für MP3-Player oder PMR446 Funkgeräte
›Setup und Firmware-Update über USB-Verbindung mit einem PC
Das Midland BTX2 ist in zwei Versionen erhältlich:
›BTX2 Einzel-Intercom Set mit nur einem Gerät
›BTX2 Twin-Intercom Set mit zwei Geräten
Je nach gekauftem Modell enthält die Packung folgenden Inhalt:
›BTX2 Einzel-Intercom Set
›1 BTX2 Bluetooth Headset
›1 Audiokit mit zwei Stereo-Lautsprechern, Schwanenhalsmikrofon und Ka-
belmikrofon
›1 Befestigungsplatte mit zweiseitigem Klebeband zur Befestigung des BTX2
am Helm
›1 Stereo-Audiokabel zum Anschluss eines iPods oder MP3-Players
›1 Klemmhalterung zur Befestigung der Einheit am Helm
›1 Steckerladegerät mit Mini USB-Stecker
BTX2 Twin- Intercom Set
›2 BTX2 Geräte Sets
›2 Audiokits mit zwei Stereo-Lautsprechern, Schwanenhalsmikrofonen und
Kabelmikrofonen
›2 Befestigungsplatten mit zweiseitigem Klebeband zur Befestigung der
Einheiten am Helm
›2 Stereo-Audiokabel zum Anschluss eines iPods oder MP3-Players
›2 Klemmhalterungen zur Befestigung der Einheiten am Helm
›1 Steckerladegerät mit 2 Mini-USB Steckern
Die Gerätesets im TWIN-Kit sind bereits gekoppelt (gepairt) und können daher sofort
als Motorrad-Intercom (Gegensprech- Modus) benutzt werden.
Technische Daten des Midland BTX2
Allgemein:
›Bluetooth Vers. 3.0 Stereo (Headset/Freisprechen/A2DP-Protokoll)
›Das AGC System regelt automatisch die Lautstärke in Abhängigkeit von den
Umgebungs- und Fahrgeräuschen
›Sprachgesteuerte (VOX) oder manuelle Intercom-Aktivierung
›Manuelle Steuerung zum Aktivieren von:Telefon, Intercom (Gegensprechan-
lage) und Kabelverbindung
›Vollständig Regenwasserdicht
›Lithium-Akku mit 10 Stunden Sprechzeit
›Ladezeit: ca. 6 Stunden
Bluetooth-Verbindungen:
›Zwei BTX2 für Fahrer zu Sozius oder Bike - zu - Bike Intercom Sprechverbin-
dung mit einer maximalen Reichweite bis zu 800 mt
Bluetooth-Geräte:
›Mobiltelefon mit MP3-Player-Stereo (A2DP-Protokoll), GPS
›PMR446-Funkgerät (mit eingebauter oder externer Bluetooth-Verbindung)
für Motorrad zu Motorrad-Gruppenkommunikation
Kabelverbindungen:
›Für Stereo-Audioeingang (iPod/MP3-Player - mit optionalem Kabel)
›Für PMR446-Funkgerät (mit optionalem Kabel)
Achtung: Das Midland BTX2 ist regen- und wasserfest konzipiert. Stellen Sie aber
dennoch sicher, dass bei Regen die Gummischutzkappen die Anschlüsse vollständig
abdecken.
Aufladen des Akkus
Achtung: Vergewissern Sie sich, dass das Gerät voll aufgeladen wurde. Bitte laden
Sie das Gerät vor der ersten Benutzung für mindestens 8 Stunden auf.
Zum Laden das Steckerladegerät in die Ladebuchse stecken (nehmen Sie die
Gummischutzkappe ab, um der Stecker einzustecken).
Die rote LED am Gerät fängt an zu blinken, sobald der Ladevorgang startet.
Laden Sie das Headset, bis die rote LED aufhört zu blinken oder die blaue LED
aueuchtet.
Wenn der Ladevorgang abgeschlossen ist (die rote LED blinkt nicht mehr), ziehen
Sie den Ladestecker vom Headset ab.
Normalerweise dauert beim ersten Mal das volle Auaden 6 Stunden.
Achtung: Jedes Mal, wenn der Mini-USB-Ladestecker eingesteckt (oder abgezogen)
wurde, wird das Gerät gleichzeitig automatisch ausgeschaltet. Um das Gerät wäh-
rend des Ladevorgangs weiter zu benutzen, müssen Sie es daher nach dem Einste-
cken des Ladesteckers noch einmal einschalten.
Beschreibung des Geräts und Montagehalterung
Das BTX2 verfügt auf der Vorderseite über fünf Tasten. Die drei großen Haupt-
tasten sind Multi-Funktionstasten: „Weiter“ (links), die „mittlere“ Taste und
„Zurück“ (rechts). Die beiden kleinen runden Tasten sind die Lautstärkestärketa-
sten + und -.
Beschreibung der Kabelverbindung
›Ladebuchse: hier kann das Gerät mit einem Standard Mini-USBNetzteil ge-
laden werden
›Audioset Buchse: hier können Sie ein Audioset anschließen (Stereo-Headset
und Mikrofon)
›Zusatzbuchse für Audiogeräte (AUX) 2,5mm: hier können Sie eine Audio-
quelle, wie z. B. einen Stereo iPod/MP3-Player oder PMR446 Funkgerät an-
schließen
Zusätzlich besitzt das BTX2 oben eine ausklappbare Antenne für maximale Rei-
chweite.
Drücken Sie die Antenne zum Ausklappen sanft nach hinten. Sie klappt an-
schließend automatisch aus.
Drücken Sie zum Einklappen der Antenne diese nur nach unten und bewegen Sie
sie wieder in die verriegelte Position.
Beschreibung des Audiokits
Das Audiosystem beinhaltet zwei ul-
trafache Stereo-Lautsprecher und zwei
austauschbare Mikrofone, die jeweils mit
Halterung und Kabelverbindung geliefert
werden.
Befestigung der Stereo-Lautsprecher
Die beiden Stereo Lautsprecher besitzen
einen Klett-/Klebestreifen zur Befestigung
Mittlere Taste
Lautstärke -Lautstärke +
Weiter Zurück
Ladebuchse
Audioset Buchse
Zusatzbuchse für Audiogeräte
(AUX)

D
Midland BTX2 - 29
28 - Midland BTX2
D
an Ihrem Helm.
Achten Sie darauf, dass Sie nicht Ihr komplettes Ohr mit dem Lautsprecher ab-
decken; Sie müssen immer in der Lage sein, Verkehrsgeräusche und Signale zu
hören.
Das Mikrofon kann auf zwei Arten am Helm befestigt werden:
Schwanenhalsmikrofon
Platzieren Sie das Klett-/Klebeband zwischen dem Polster und der harten Schale
des Helmes, so dass das Mikrofon korrekt vor Ihrem Mund positioniert ist und
das weiße Symbol zu Ihrem Mund zeigt. Diese Mikrofonversion ist für oene und
klappbare Helme geeignet.
Kabelmikrofon
Platzieren Sie das Mikrofon mit dem Klett-/Klebestreifen auf der Innenseite Ihres
Helmes vor Ihrem Mund. Diese Mikrofonversion ist eher für Voll- bzw. Integralhel-
me geeignet. Der Ministecker am Mikrofon erlaubt Ihnen ein Mikrofon zu wählen,
das am besten zu Ihrem Helm passt.
Audiokit-Buchse
Der Audiokit muss anschließend mit einem Winkelstecker an die mittlere Audio-
buchse des Midland BTX2 angeschlossen werden.
Beschreibung der Montagehalterungen
Das Midland BTX2 kann auf zwei Arten am Helm befestigt werden: Entweder mit
der Montageplatte mit zweiseitigem Klebeband oder mit der Klemmhalterung.
Mit diesen Methoden können Sie das BTX2 jederzeit sicher an Ihrem Helm befesti-
gen und wieder entfernen, um das Gerät aufzuladen oder zu verstauen.
Montageplatte mit zweiseitigem Klebeband
Die Montageplatte hat auf einer Seite ein zweiseiti-
ges Klebeband. Reinigen Sie die Kontaktäche am
Helm, bevor Sie die Platte montieren. Entfernen Sie
die Schutzfolie des zweiseitigen Klebebandes, plat-
zieren die Montageplatte am Helm und drücken sie
für ein paar Sekunden fest auf die Oberäche.
Klemmhalterung
Lösen Sie die zwei Schrauben der Klammer mit einem Inbusschlüssel und plat-
zieren die Rückplatte zwischen dem Helmpolster und der äußeren harten Schale.
Danach die beiden Schrauben anziehen, um die Klemmhalterung sicher an ihrem
Platz zu xieren. Innerhalb der Klemmhalterung bendet sich ein kleiner Kunst-
sto- Abstandshalter, der ggf. entfernt werden kann, damit die Klemmhalterung
gegebenenfalls fester geschlossen werden kann.
Befestigen und Entfernen des Midland BTX2
Der BTX2 kann leicht am Helm befestigt werden, indem es so nach unten ge-
schoben wird, dass es in die Führung der Montagevorrichtung passt (Platte mit
zweiseitigem Klebeband oder Klemmhalterung). Das BTX2 wird mit Hilfe der
einrastbaren Clips im oberenTeil in Position gehalten (A).
Um das BTX2 zu entfernen, drücken Sie auf den sichtbaren Clip und schieben das
BTX2 nach oben.
Ein-/Ausschalten des MIDLAND BTX2
Einschalten des Geräts:
›Halten Sie die„mittlere“Taste für ca. 3 Sekunden gedrückt, bis die BLAUE LED
aueuchtet.
Ausschalten des Geräts:
›Halten Sie die„mittlere“ und die„Zurück“-Taste gleichzeitig für ca. 3 Sekunden
gedrückt,bis die ROTE LED 3-malaufblinkt.Dadurch wird die Gefahr desverse-
hentlichen Ausschaltens des Geräts minimiert (vor allem mit Handschuhen).
Betriebsarten
Betriebsarten
Das BTX2 besitzt 2 Hauptbetriebsarten: Gegensprechen (Intercom),Telefon.
Die 2 Multifunktions-Tasten haben unterschiedliche Funktionen und hängen von
der Betriebsart ab, in der sich das Gerät aktuell bendet.
›Im Intercom - Mode können Sie mit denTasten die Sprechverbindung mit bis
zu 3 Teilnehmern steuern, indem jeweils einer mit einem der anderen spricht.
Drücken Sie einfach auf eine der 2 Tasten, um das Intercom zu aktivieren.
›ImTelefon– Mode können Sie mit Ihrem Bluetooth-Mobiltelefoneinen Anruf
tätigen/annehmen oder Musik wiedergeben (in Stereo).
Sie können von einem Modus in einen anderen umschalten (hin- und herschal-
ten), indem Sie einfach die„mittlere“ Taste gedrückt halten (3 Sekunden). Eine
Sprachansage teilt Ihnen den aktuellen Modus mit.
Die Modes schalten in folgender Reihenfolge um:
›Gegensprech- Modus (wenn ein anderes BTX2 früher schon gekoppelt wurde)
›Telefon-Modus (wenn vorher schon ein Mobiltelefon gekoppelt wurde)
Jedes Mal, wenn Sie das BTX2 einschalten, wird der Standardmodus Intercom ein-
geschaltet (wenn es zuvor mit einem anderen Gerät gekoppelt war), andernfalls
bendet es sich im Telefon-Modus (wenn es mit einemTelefon gekoppelt war).
Wenn Sie wissen möchten, in welchem Modus sich das Gerät gerade bendet,
drücken Sie einfach gleichzeitig dieTasten„Lautstärke +“ und„Lautstärke –“. Eine
Sprachansage teilt Ihnen den aktuellen Modus mit.
Max. Reichweite
Sie können bis zu 800 mt. Intercom-Reichweite erreichen, wenn die Antenne aus-
geklappt wurde und wenn Sie sich in einem oenen Bereich ohne Hindernisse
und Funkstörungen benden (die Fahrer müssen immer in Sicht sein).
Koppeln (Pairen) von Zwei BTX2- Geräten
Die beiden Geräte im BTX2- Set sind bereits miteinander gekoppelt und be-
triebsbereit. In diesem Fall muss das Verfahren nicht durchführt werden. Das
jeweils andere Gerät wurde bereits mit der„mittleren“ Taste gekoppelt.
Wenn die Geräte nicht aus demselben Kit stammen oder eine der Geräte später
zugekauft wurde, müssen Sie die Geräte zuerst koppeln (das benutzen wir im
Folgenden anstelle des engl. Begris„ pairen“).
Um ein BTX2 mit einem anderen BTX2 zu koppeln, müssen Sie zunächst den
Setup-Modus aufrufen:
›Schalten Sie das Gerät aus.
›Halten Sie die „mittlere“ Taste ca. 7 Sek. gedrückt, bis die rote LED ständig
leuchtet.
Jetzt halten Sie die „mittlere“ Taste gedrückt (3 Sek.), bis die BLAUE und die
ROTE LED blinken. Führen Sie dasselbe Verfahren auf dem anderen Gerät durch.
Nach erfolgreichem Koppeln leuchtet die blaue LED für eine Sekunde an beiden
Geräten auf und sie gehen anschließend in den Setup-Modus zurück (die rote LED
leuchtet ständig).
Nun ist die Kopplung abgeschlossen und Sie müssen nur den Setup-Modus ver-
lassen, bevor Sie die Geräte benutzen können:
›Doppelklicken Sie auf die„mittlere“ Taste. Die rote LED erlischt und die blaue
LED blinkt.
Ihre beiden BTX2 sind jetzt betriebsbereit.
Intercom Funktion
Achten Sie darauf, dass beide Geräte eingeschaltet und richtig miteinander
gekoppelt sind.
Manuelle Aktivierung
Drücken Sie an einem der beiden Geräte die„mittlere“ Taste. Die Sprechverbin-
dung wird eingeschaltet und bleibt aktiv, bis Sie erneut die„mittlere“ Taste drü-
cken. Die Intercomanlage benötigt einige Sekunden zur Aktivierung. Sie hören
einen Signalton, wenn die Intercom-Funktion aktiviert ist.
Sprachsteuerung (VOX)
Fangen Sie einfach an zu reden. Nach einigen Sekunden wird die Sprechverbin-
dung aktiviert und bleibt eingeschaltet, solange Sie reden. Wenn nicht mehr
geredet wird, wird die Sprechverbindung nach 40 Sekunden wieder abgeschal-
tet. Bei Bedarf können Sie die Intercom- Funktion ohne eine Wartezeit von 40
Sekunden jederzeit manuell abschalten (drücken Sie einfach die„mittlere“ Taste).
Wenn nötig, können Sie die VOX-Funktion vorübergehend deaktivieren, indem
Sie einfach die„Zurück“-Taste für 7 Sek. gedrückt halten. Zwei Signaltöne weisen
darauf hin, dass die VOX-Funktion deaktiviert wurde. Um die VOX-Funktion er-
neut zu aktivieren, drücken Sie einfach die gleicheTaste. Ein Signalton macht Sie
darauf aufmerksam, dass die VOX-Funktion nun aktiviert wurde (oder schalten
Sie nur das Gerät aus und wieder ein).
Anpassen der Lautstärke
Ihr Midland BTX2 benutzt AGC-Technologie, welche automatisch die Hörer-
lautstärke den Hintergrundgeräuschen anpasst.
Sie können aber auch die Lautstärke manuell mit den Tasten „Lautstärke+“ und
„Lautstärke-“ anpassen.
Achtung: Die Lautstärke kann nur während einer gerade bestehenden Audioverbin-
dung angepasst werden.
Achtung: Die Lautstärkeeinstellung (Tasten “Lautstärke+” und “Lautstärke-”)
können nicht für die Einstellung der verkabelten Audioquelle (z.B. MP3-Player)
verwendet werden.

D
Midland BTX2 - 31
30 - Midland BTX2
D
Koppeln des BTX2 mit einem älteren BT LINE Gerät
Das BTX2 ist mit allen BT Line-Modellen von Midland kompatibel. Sie können das
BTX2 mit einem BTX1, BT2, BT1, BT City/Eva oder BT Next-Gerät koppeln. Aller-
dings ist die maximale Reichweite der Gegensprechanlage durch das Gerät mit
der geringsten möglichen Reichweite vorgegeben.
Um ein BTX2 mit einem anderen BT Line-Gerät zu koppeln, müssen Sie zunächst
den Setup-Modus aufrufen:
›Schalten Sie das Gerät aus.
›Halten Sie die „mittlere“ Taste ca. 7 Sek. gedrückt, bis die rote LED ständig
leuchtet.
›Halten Sie jetzt die mittlere Taste länger gedrückt (3 Sek.), mit der Sie die
Sprechverbindung mit dem anderen Gerät aktivieren möchten. Die blaue und
die rote LED blinken.
›Folgen Sie den Anweisungen im Handbuch des anderen Geräts (in der Regel
können Sie bei allen älteren BT Line-Geräten die„Lautstärke +“ Taste verwen-
den).
›Nach erfolgreichem Koppeln leuchtet die blaue LED für eine Sekunde an je-
dem Gerät auf und es geht anschließend in den Setup-Modus zurück (die rote
LED leuchtet ständig).
Nun ist die Kopplung abgeschlossen und Sie müssen nur den Setup-Modus ver-
lassen, bevor Sie die Geräte benutzen können:
›Für BTX2, BTX1, BT City/Eva: doppelklicken Sie auf die„mittlere“Taste. Die rote
LED erlischt und die blaue LED blinkt.
›Für das andere BT Line Gerät: folgen Sie den Anweisungen im Handbuch des
anderen Geräts
Ihre beiden BTX2 sind jetzt betriebsbereit.
Drei Intercom Geräte verbinden
Ein BTX2 kann maximal mit 2 anderen Geräten verbunden werden (3 Stück insge-
samt). Mit dem mittleren Knopf können Sie ein Midland Gerät verbinden oder
benutzen (siehe Abschnitt„Koppeln (Pairen) von Zwei BTX2- Geräten“ und „In-
tercom Funktion“). Mit dem„Forward“ Knopf können Sie das Midland Gerät mit
der „Talk2All-Universal Intercom“ Funktion benutzen oder verbinden. Achtung:
um die„Talk2All-Universal Intercom“ Funktion zu nutzen, müssen Sie das andere
Gerät als Telefon verbinden.
Die Taste, die Sie zum Koppeln des Geräts verwenden, wird auch zum Aktivieren
der Sprechverbindung benutzt.
Jedes Mal, wenn Sie eine Intercom-Verbindung mit einer Person starten, wird die
vorherige Verbindung deaktiviert.
Die Verbindung ist keine„Kette“ über evtl. unbeteiligte Geräte. Wenn zwei Perso-
nen miteinander sprechen, ist es daher auch nicht möglich, dass die Kommunika-
tion durch eines der anderen Geräte ungewollt unterbrochen wird, falls dieses die
maximale Reichweite überschritten haben sollte.
Talk 2 All – Kopplung (Pairing) mit einem Intercom
Gerät anderer Marken.
Dank der neuen„ Talk 2 All-Universal Intercom“ Funktion ist es jetzt möglich, Ihr
BTX 1 Headset auch mit einem beliebigen anderen Bluetooth kompatiblem In-
tercom zu verbinden.
Verfahren Sie bei Ihrem BTX 1 genauso, als würden Sie ein anderes BTX 1 verbin-
den: Starten Sie den„Setup Mode“, drücken Sie die„weiter“ taste für 3 Sekunden.
Die rote und blaue LED blinken jetzt.
Bei dem Intercom der anderen Marke verfahren Sie nach dessen Anleitung so, als
würden Sie ein Telefon (Handy) koppeln wollen.
Um die Intercom Sprechverbindung zu starten folgen Sie den Anweisungen aus
dem Kapitel„Manuelle Aktivierung“. Bei dem anderen Gerät verwenden Sie den
Knopf für „Phone Redial – Wahlwiederholung“.
Wenn Sie ein Nicht-Midland Produkt verwenden, könnte es sein, dass Sie die
Wähltaste 2x drücken müssen.
Hinweis: Bei dieser Konguration kann das andere Intercom Gerät nicht mehr mit
einem weiteren Telefon (Handy) gekoppelt werden.
Gerät bereits belegt
Wenn Sie eine Gegensprech-Verbindung mit einer anderen Person herstellen
möchten, die sich bereits in einem Gespräch bendet (oder telefoniert), hören
Sie zwei„Besetzt“- Signaltöne. Warten Sie einfach einen Moment und versuchen
Sie es erneut.
Die angerufene Person wird über den versuchten Anruf informiert und hört
eine Ansage mit der Nummer der Taste, von der die Anfrage kommt. Sobald das
erste Gespräch beendet ist, kann die Person auf dieseWeise einfach den Anrufer
kontaktieren, indem Sie das Intercom mit der entsprechenden Nummer (per
Sprachansage mitgeteilt) aktiviert.
Ein BTX2 mit einem anderen Bluetooth-Gerät koppeln
Das BTX2-Gerät kann mit anderen Bluetooth-Geräten gekoppelt werden, wie ei-
nem Mobiltelefon, GPS-Navigator oder PMR446-Funkgerät mit eingebauter oder
externer Bluetooth-Verbindung.
Die Kopplung beim BTX2 muss mit den Tasten„Lautstärke +“ erfolgen.
Bluetooth-Verbindung im Hintergrund
Mit dieser Funktion können Sie die über die “Volume + “ Taste eingerichtete Verbin-
dung im Hintergrund aktiviert lassen, auch wenn die Intercom-Verbindung steht.
Dies ist sehr praktisch, um z.B. die Ansagen des Navigationsgerätes im Hintergrund
hören zu können.
›Einschalten: Drücken Sie die „Volume-“ Taste für 3 Sekunden. Eine Stimme be-
stätigt „Background active“
›Ausschalten: Drücken Sie erneut die „Volume-“ Taste für 3 Sekunden. Eine Stim-
me bestätigt „Background o“
Mit einem Telefon koppeln:
Ein Mobiltelefon kann nur mit dem Lautstärke + Knopf gekoppelt werden. Nur
auf diese Weise können alle Telefon-Funktionen gesteuert und Stereo-Musik
wiedergegeben werden. Ein ankommender Telefonanruf hat die höhere Priorität,
wodurch jede weitere Kommunikation deaktiviert wird (Intercomgespräche, Mu-
sikwiedergabe).
Das BTX2 mit einem Mobiltelefon koppeln
Um das BTX2 mit einem Mobiltelefon zu koppeln, müssen Sie zunächst den
Setup-Modus aufrufen:
›Schalten Sie das Gerät aus.
›Halten Sie die „mittlere“ Taste ca. 7 Sek. gedrückt, bis die rote LED ständig
leuchtet.
›Halten Sie jetzt die„Lautstärke +“ Taste länger gedrückt (3 Sek.), die blaue
und die rote LED blinken. Nach einigen Sekunden sehen Sie im Display des
Telefons„Midland BTX2“. Befolgen Sie den Kopplungsvorgang Ihres Telefons.
Wenn ein PIN-Code erforderlich ist, geben„0000“ (vier mal Null) ein.
Wenn der Kopplungsvorgang erfolgreich war, leuchtet die blaue LED des Geräts
für eine Sekunde auf.
Anschließend verlässt das Gerät den Setup-Modus automatisch wieder und we-
chselt in den Betriebsmodus (die blaue LED blinkt).
Sie können nun Ihr BTX2 zusammen mit dem Telefon benutzen.
Mobiltelefon über das BTX2 bedienen
Mit einem Telefon koppeln: Ein Mobiltelefon kann nur mit dem Lautstärke +
Knopf gekoppelt werden. Nur auf diese Weise können alle Telefon-Funktionen
gesteuert und Stereo-Musik wiedergegeben werden.Wenn Sie im“Intercommo-
dus”sind, können Sie nur eingehendeTelefongespräche annehmen.
Nachdem Sie Ihr Mobiltelefon mit dem BTX2 gekoppelt haben, müssen Sie in den
„Telefon“ Modus wechseln, um es zu verwenden. Drücken Sie die„mittlere“ Taste,
bis Sie die Ansage„Telefon“ hören.
Nun bedienen alle drei Tasten dasTelefon (siehe dieTabelle B).
Ein ankommender Telefonanruf hat die höhere Priorität, wodurch jede weitere
Kommunikation deaktiviert wird (Intercomgespräche, Musikwiedergabe).
Telefongespräche annehmen im Telefon-/Intercommodus
Wenn Sie dasTelefon klingeln hören, können Sie auf zwei Arten antworten:
Sprachgesteuert:
Einfach ein Wort sagen, um den Anruf anzunehmen und Sie können das Gespräch
starten.
Denken Sie daran, dass dies nur möglich ist, wenn Sie den Anruf erst nach dem
dritten Klingelton annehmen. (Beachten Sie, dass einigeTelefone eventuell keine
Sprachsteuerung unterstützen)
Manuell:
Tippen Sie auf die„Weiter“-Taste und fangen Sie zu reden.
Anruf ablehnen im Telefon-/Intercommodus
Falls Sie den Anruf nicht annehmen wollen, können Sie das Mobiltelefon klingeln
lassen oder halten Sie die„Weiter“-Taste für ein paar Sekunden gedrückt (Sie wer-
den einen Bestätigungston hören).
Fahrer1
Telefono
Talk2All - Universal Intercom
anderer Marken
Fahrer2
Sozius 1
Talk2All Universal Intercom
Verbindung Verbindung zu einem
Midland Gerät
2
1
Bluetooth-Verbindung im
Hintergrund ein/aus
› Telephone
› GPS
› GPS+ Telephone
› PMR446 Bluetooth
Radio

D
Midland BTX2 - 33
32 - Midland BTX2
D
Anruf tätigen im Telefonmodus
Es gibt verschiedene Wege einen Anruf zu tätigen.
Mit der Tastatur des Mobiltelefons:
Wählen Sie die Nummer auf derTastatur des Mobiltelefons:
Drücken Sie„Senden“ auf dem Mobiltelefon.
Wahlwiederholung:
Halten Sie die „Weiter“-Taste für 3 Sekunden gedrückt, um die letzte Nummer
erneut zu wählen (Sie hören einen Bestätigungston).
Mit Sprachsteuerung:
Kurz auf die„Weiter“-Taste drücken. Falls Ihr Mobiltelefon sprachgesteuerte An-
rufe unterstützt, werden Sie aufgefordert, den Namen der Kontaktperson deut-
lich auszusprechen.
Priorität: Anrufe haben eine hohe Priorität, was bedeutet: Wenn ein Anruf ankom-
mt, wird jede andere Verbindung vorübergehend deaktiviert. Eine vorher bestehen-
de Verbindung wird nach Gesprächsende automatisch wieder hergestellt.
Anruf beenden im Telefon-/Intercommodus
Es gibt verschiedene Wege, einen Anruf zu beenden:
›Warten Sie, bis die angerufene Person den Anruf beendet.
›Halten Sie die „Weiter“-Taste für 3 Sekunden gedrückt (Sie hören einen Be-
stätigungston).
›Drücken Sie auf dem Mobiltelefon auf dieTaste„Beenden“.
Die MP3-Player-Funktion des Mobiltelefons benutzen im Telefonmodus
Viele Mobiltelefone können heute auch als Stereo MP3-Player genutzt werden.
Das BTX2 unterstützt die A2DP- und AVRCP-Protokolle, die es Ihnen ermöglichen,
Stereo-Musik zu hören und Ihren MP3 Player im Mobiltelefon fernzusteuern. Sie
können auch dieTasten am BTX2- Gerät nutzen, um die Abspielfunktionen (Wie-
dergabe, Pause, Vorspulen und Zurückspulen) zu steuern:
Verfügbare Bedienelemente:
›Musik-Wiedergabe/Pause: Klicken Sie auf die„mittlere“Taste.
›Zum nächstenTitel springen: Drücken Sie die„Weiter“-Taste.
›Zum vorherigenTitel gehen: Drücken Sie die„Zurück“-Taste.
Priorität: Die Musikwiedergabe hat die niedrigste Priorität. Deshalb wird die Musik
immer deaktiviert, wenn ein anderer Kommunikationstyp aktiviert ist.
Das BTX2 mit einem GPS-Navigationsgerät koppeln
Allgemein ist es möglich, das BTX2 mit jedem GPS-Navigationsgerät für Mo-
torräder zu koppeln, das Bluetooth Headsets unterstützt.
Hinweis: Die meisten für PKW angebotenen Bluetooth-Navigationsgeräte sind auf
dem Motorrad nicht brauchbar, da deren Bluetoothmodul nicht headsetfähig ist!
Um das BTX2 mit einem GPS-Navigationsgerät zu koppeln, müssen Sie zunächst
den Setup-Modus aufrufen:
›Schalten Sie das Gerät aus.
›Halten Sie die mittlere Taste ca. 7 Sek. gedrückt, bis die rote LED ständig
leuchtet.
›Halten Sie jetzt die Taste„Lautstärke +“ gedrückt (3 Sek.), bis die blaue und
die rote LED anfangen zu blinken. Befolgen Sie den Kopplungsvorgang für Ihr
GPS-Navigationsgerät. Wenn ein PIN-Code erforderlich ist, geben Sie„0000“
(vier mal Null) ein.
Wenn der Kopplungsvorgang erfolgreich war, leuchtet die blaue LED des BTX2
für eine Sekunde auf. Anschließend verlässt das Gerät den Setup-Modus und ist
betriebsbereit (die blaue LED blinkt).
Hinweis: Um die GPS-Navigationsanweisungen im Hintergrund zu hören, stellen
Sie sicher, dass die„Bluetooth-Verbindung im Hintergrund“ Funktion aktiviert ist.
Wenn Sie das BTX2 mit einem GPS-Navigationsgerät über die Taste„Lautstärke
+“ koppeln, können Sie das BTX2 nicht mit einem Mobiltelefon koppeln. Das Pro-
blem können Sie umgehen, indem Sie Ihr Mobiltelefon direkt mit dem GPS-Na-
vigationsgerät koppeln und anschließend das GPS-Gerät mit dem BTX2 koppeln.
In diesem Fall wird die Bedienung des Mobiltelefons vom GPS-Navibildschirm
(Touch Screen) übernommen.
Verwenden eines PMR 446 Funkgeräts mit integriertem Bluetooth
Wenn Sie über ein Funkgerät mit integriertem Bluetooth (wie z.B. Midland G8BT)
verfügen. Dann koppeln Sie das Funkgerät über die„Lautstärke +“ Taste
›Schalten Sie das Gerät aus.
›Halten Sie die „mittlere“ Taste ca. 7 Sek. gedrückt, bis die rote LED ständig
leuchtet.
›Drücken Sie jetzt (3 sec lang) die„Lautstärke +“ Taste. Die blaue und rote LED
blinken.
›Folgen Sie jetzt der Kopplungs- (Pairing) Prozedur, wie Sie im Handbuch des
Funkgeräts beschrieben ist.
Achtung: Beim Koppeln eines G8E-BT Funkgeräts müssen Sie nach Abschluss des
Koppelns von der BTX2 Seite her auch noch die Bluetooth Sprechverbindung auf der
G8E-BT Seite starten.
›Schalten Sie das G8E-BT aus und wieder ein
›Drücken Sie für etwa 3 sec lang den BT Knopf am G8BT
Diese Prozedur müssen Sie jedes Mal ausführen, wenn Sie die Sprechverbindung
zwischen G8BT und BTX2 wieder einmal starten möchten. (Die Pairing Prozedur
selbst ist nicht erforderlich)
Hinweis: Um das PMR446-Funkgerät immer im Hintergrund hörbar zu haben,
stellen Sie sicher dass die‘Bluetooth- Verbindung im Hintergrund’ Funktion akti-
viert ist.
Verwendung des Audiokabel-Eingangs
Ihr Midland BTX2 hat auch einen Kabel-Audioeingang (AUX) zur Verbindung
mit einer verdrahteten Audioquelle, wie z.B. ein iPod (oder ein beliebiger MP3-
Player) oder ein PMR446-Funkgerät für die Gruppenkommunikation oder zum
Erhöhen der Reichweite.
Musik wiedergeben
Um Musik über den Kabeleingang anzuhören, verbinden Sie die Audioquelle über
das optional Kabel mit dem BTX2. Der Lautstärkepegel wird automatisch über
das AGC-System eingestellt, was bedeutet, dass Sie die Lautstärke am iPod/MP3-
Player nur so laut einstellen müssen, wie Sie bei normaler Geschwindigkeit Musik
hören können.
Achtung: Stellen Sie niemals die Lautstärke von Ihrem MP3-Player auf Maximum.
Normalerweise liegt der beste Lautstärkepegel bei ca. 70% des Maximums.
Tipp: Wir empfehlen Ihnen, ein paar Tests durchzuführen, um die Lautstärke Ihres
iPod/MP3-Players so einzustellen, dass sie Ihren Wünschen entspricht. Das AGC-
System regelt bei höheren Geschwindigkeiten automatisch die Lautstärke nach.
Merken Sie sich diese Einstellung für künftige Fahrten.
Aktivieren/Deaktivieren des Kabeleingangs
Der Kabeleingang kann bei Bedarf aktiviert oder deaktiviert werden:
Aktivieren/Deaktivieren: Halten Sie etwas länger (ca. 3 s) die „Zurück”-Taste
gedrückt (Sie hören bei Aktivierung einen Signalton und bei Deaktivierung zwei
Signaltöne zur Bestätigung).
Verwendung eines PMR446-Funkgeräts mit Kabelan-
schluss
Um das Funkgerät nutzen zu können, benötigen Sie ein spezielles Kabel (wird
separat verkauft), um das Gerät an Ihr Midland BTX2 anzuschließen
(Funkgeräte anderer Hersteller verwenden u.U. eine andere Pin-Belegung). Fra-
gen Sie Ihren Lieferanten, welches Kabel am besten für Ihr Gerät geeignet ist.
Das Kabel zum Funkgerät hat normalerweise eine PTT Taste, die am Lenker be-
festigt werden kann. Es ist aber auch möglich, die PTT Taste z.B. als Beifahrer in
der Hand zu halten.
Drücken Sie die Sprechtaste (PTT), um über das Funkgerät zu reden und lassen
Sie die Taste los, um zu hören. Stellen Sie die Lautstärke des Funkgerätes nach
Ihren Bedürfnissen ein und denken Sie daran, dass die Lautstärkeeinstellung au-
tomatisch über das AGC-System angepasst wird und automatisch entsprechend
der Hintergrund- und Fahrtgeräusche erhöht wird.
Falls Sie ein PMR446-Funkgerät für den Funk zu andere Motorradfahrern be-
nutzen und gleichzeitig die Gegensprechfunktion zwischen zwei oder mehr
BTX2-Geräten benutzen möchten, müssen Sie daran denken, dass jedes Mal
die Gegensprechfunktion des BTX2 aktiviert wird, wenn Sie mit dem PMR
446-Funkgerät (Drücken der PTT-Taste) sprechen, das über die „mittlere“ Taste
mit dem Gerät gekoppelt ist (dank derVOX-Funktion).
Um eine Aktivierung der Gegensprechanlage zu verhindern, wenn Sie über das
PMR446 sprechen, können Sie das BTX2-Gerät mit der„Zurück“- oder „Weiter“-
Taste koppeln (wobei VOX nicht aktiv ist). Wenn Sie immer noch die „mittlere“
Taste verwenden möchten, müssen Sie die VOX-Funktion deaktivieren, wie im
vorherigen Abschnitt beschrieben.
Falls Sie dieVOX Funktion deaktivieren, können Sie eingehende Anrufe nur durch
Drücken der„Weiter”-Taste beantworten.
B – TELEFON MODE
Modus Weiter-Taste MittlereTaste Zurück-Taste
Telefon Kurzer Tastendruck: Sprachanwahl/Akzep-
tieren oder beenden, solange die Anwahl
oder das Gespräch noch stattndet
LangerTastendruck:Wahlwiederholung/
oder eingehenden Anruf ablehnen
Langer Tastendruck: Modus wechseln Langer Tastendruck: Kabelverbindung ein-
oder ausschalten
Telefon
(während der Musikwiedergabe)
KurzerTastendruck: EinenTitel weiter Kurzer Tastendruck:Wiedergabe/Pause
Langer Tastendruck: Modus wechseln
KurzerTastendruck: EinenTitel zurück
Play / PauseVorspulen Zurückspulen

D
Midland BTX2 - 35
34 - Midland BTX2
D
Setup und spezielle Konfiguration
Alle Pairing- (Kopplungs-) Informationen zurücksetzen
Wurde Ihr BTX2 bereits öfter mit anderen Geräten gekoppelt, dann kann die Zahl
der gekoppeltenVerbindungen irgendwann unübersichtlich werden und es kann
angebracht sein, alle im BTX2 gespeicherten Kopplungsdaten zu löschen (Reset).
Für diese Prozedur rufen Sie zunächst den Setup-Modus auf:
›Schalten Sie das Gerät aus.
›Halten Sie die„mittlere“Taste ca. 7 Sek. gedrückt, bis die rote LED ständig leuchtet.
›Halten Sie anschließend die „Lautstärke +“ und „Lautstärke –“ Tasten für
3 Sekunden gedrückt. Die blaue LED leuchtet für 1 Sekunde auf und an-
schließend leuchtet ständig die rote LED.
›Doppelklicken Sie auf die„mittlere“ Taste, um den Setup-Modus zu verlassen
und das BTX2 wieder zu verwenden.
Dieses Vorgehen löscht alle gespeicherten und gekoppelten Bluetooth-Geräte
und ermöglicht einen neuen„sauberen“ Kopplungsablauf.
Auf die Werkseinstellungen zurücksetzen
Manchmal kann es notwendig sein, zu den Werkseinstellungen zurückzukehren,
um alle Änderungen oder Setupeinstellungen zurückzusetzen und ein„sauberes“
Gerät zu erhalten.
Zuerst schalten Sie wieder in den Setup-Modus:
›Schalten Sie das Gerät aus.
›Halten Sie die „mittlere“ Taste ca. 7 Sek. gedrückt, bis die rote LED ständig
leuchtet.
›Anschließend halten Sie gleichzeitig alle 3 Tasten„Weiter“ – „mittlere Taste“
–„Zurück“ für 3 Sekunden gedrückt. Die blaue LED leuchtet für 1 Sekunde auf
und anschließend leuchtet ständig die ROTE LED.
›Doppelklicken Sie auf die„mittlere“ Taste, um den Setup-Modus zu verlassen
und das BTX2 zu verwenden.
Einstellen/Deaktivieren der VOX-Funktion
(Gegensprechanlage und Telefon)
Die Gegensprechfunktion kann manuell oder durch Sprache (VOX) aktiviert wer-
den. Diese Funktion wird durch Hintergrundgeräusche beeinusst und deshalb
auch durch die Geschwindigkeit.
Für optimale Resultate kann einer der folgenden vier Mikrofon-Empndli-
chkeitspegel gewählt werden: hoch, mittel, niedrig und sehr niedrig. Die Wer-
kseinstellung des BTX2 ist„niedrig“. Sie können dieVOX Funktion auch deaktivie-
ren, um die Gegensprech- undTelefon-Antwortfunktion nur im manuellen Modus
zu aktivieren.
Einstellen der Mikrofonempfindlichkeit (VOX)
Um diese Prozedur auszuführen, müssen Sie zuerst den Setup-Modus aufrufen:
›Schalten Sie das Gerät aus.
›Halten Sie die „mittlere“ Taste ca. 7 Sek. gedrückt, bis die rote LED ständig
leuchtet.
Ihr BTX2 bendet sich jetzt im„Setup-Modus“.
1. Drücken Sie die„Zurück“-Taste, bis die rote LED ständig blau leuchtet.
2. Erhöhen oder verringern Sie jetzt die Empndlichkeit mit den Tasten
„Lautstärke +“ oder„Lautstärke –“. Jedes Mal, wenn Sie die Lautstärketasten
drücken, blinkt die rote LED zur Bestätigung auf. Wenn Sie den oberen oder
unteren Grenzwert erreicht haben, blinkt die rote LED nicht mehr.
3. Drücken Sie erneut die„Zurück“-Taste. Die blaue LED blinkt mehrmals auf,
um Ihnen die ausgewählte Empndlichkeit anzuzeigen:
Einmal Aufblinken =VOX deaktiviert
Zweimal Aufblinken = sehr geringe Empndlichkeit
Dreimal Aufblinken= geringe Empndlichkeit
Viermal Aufblinken= mittlere Empndlichkeit , (Werkseinstellung)
Fünfmal Aufblinken = hohe Empndlichkeit
4. Nun leuchtet rote LED erneut ständig auf („Setup-Modus“) und die Änderun-
gen werden bestätigt.
5. Bei Bedarf kann die Empndlichkeit durch Wiederholen der Schritte ab Punkt
1 erneut angepasst werden. Ansonsten können Sie den Einstellmodus durch
Doppelklicken der„mittleren“ Taste verlassen. Sobald die rote LED erlischt, be-
ginnt die blaue LED zu blinken. Jetzt ist Ihr BTX2 betriebsbereit.
Deaktivieren der VOX-Funktion
(Gegensprechanlage und Telefon)
Wiederholen Sie die Prozedur für die Empndlichkeitseinstellung des Mikrofons
(siehe oben) und wählen Sie die Option, bei der LED nur einmal aufblinkt (VOX
deaktiviert).
Kabelverbindung stets im Hintergrund
Mit dieser Funktion können Sie die Kabelverbindung stets eingeschaltet lassen,
auch wenn das Telefon oder die Gegensprechanlage aktiviert sind. Diese Funktion
kann nützlich sein, wenn Sie ein PMR446-Funkgerät angeschlossen haben.
Werksmäßig ist diese Option eingeschaltet.
Deaktivieren:
Rufen Sie den„Setup“-Modus auf:
›Schalten Sie das Gerät aus.
›Halten Sie die „mittlere“ Taste ca. 7 Sek. gedrückt, bis die rote LED ständig
leuchtet.
›Halten Sie gleichzeitig die „Weiter“-Taste und die „mittlere“ Taste für ca. 3
Sekunden gedrückt. Die blaue LED blinkt zweimal auf.
›Doppelklicken Sie auf die„mittlere“ Taste, um den„Setup“-Modus zu verlassen
und das BTX2 zu verwenden.
Aktivieren:
›Wiederholen Sie das oben beschriebeneVerfahren. Jetzt blinkt die blaue LED
einmal auf.
›Doppelklicken Sie zum Verlassen des„Setup“-Modus auf die„mittlere“-Taste.
Setup und Firmware-Aktualisierung
Die Firmware Ihres BTX2 kann mittels einer USB-Verbindung mit Ihrem PC kon-
guriert und aktualisiert werden. Auf der Website von Midland www.midlandra-
dio.eu nden Sie auf der BTX2-Seite die PC-Software und die neuen Firmware-
Aktualisierungen, falls verfügbar.
ACHTUNG DAS GERÄT NUR AN DEN PC ANSCHLIESSEN, WENN DIE SOFTWARE
HERUNTERGELADEN UND INSTALLIERT WURDE
Benutzung auf eigene Gefahr
Das Benutzen von beidseitigen Audiosets in Helmen kann kann Ihre Fähigkeit,
Geräusche und das Verkehrsgeschehen in Ihrer Umgebung wahrzunehmen,
beeinträchtigen. Benutzen Sie daher das Bluetooth Set nur, wenn die
Verkehrssituation es erlaubt.
Beim Motorradfahren kann das Hören von Musik oder das Führen von Telefonaten
oder das Benutzen des Intercoms Sie von anderen Ereignissen und vom sicheren
Fahren ablenken.
Das Benutzen des Bluetooth Sets beim Führen eines Fahrzeugs oder beim
Fahrradfahren kann ein ernsthaftes Risiko für Sie oder Ihre Mitmenschen
bedeuten und kann, von Land zu Land unterschiedlich, verboten sein.
Das Benutzen eines Headsets mit extremer Lautstärkeeinstellung kann bleibende
Gehörschäden hervorrufen.
Sollten Sie Klingeln in Ihren Ohren oder andere Hörprobleme feststellen, so ver-
ringern Sie sofort die Lautstärke oder schalten Sie das Gerät aus. Bei ständigem
Gebrauch mit hohen Lautstärken kann sich Ihr Gehör and den erhöhten Lautstär-
kepegel so gewöhnen, dass die Folge eine permanente Hörschädigung sein kann.
Bitte benutzen Sie dieses Gerät nur mit einer sicheren Lautstärke.
Gewährleistung
Durch die Gewährleistung (von 2 Jahren nach EU Gewährleistungsrecht) werden
andere Verbraucherrechte unter der nationalen Gesetzgebung nicht berührt.
Innerhalb der Gewährleistungsfrist ist ausschließlich Ihr Fachhändler, bei dem Sie
das Produkt erworben haben, dafür verantwortlich, dass ein defektes Produkt
entweder instandgesetzt oder ausgetauscht wird. Der Fachhändler kann dazu
ggf. den Hersteller bzw. einen autorisierten Servicepartner einbeziehen. In Fäl-
len, wo ausdrücklich eine zusätzliche Herstellergarantie gewährt wird, kann der
Kunde sich auch direkt an den Hersteller oder seinem autorisierten Servicepart-
ner wenden. Zusätzliche Garantieleistungen sind freiwillige zeitlich beschränkte
Zusatzleistungen von Alan Electronics GmbH für in Deutschland verkaufte Geräte
und gelten nur, wenn die zusätzliche Herstellergarantie in der Bedienungsanlei-
tung, zusätzlichen Gerätepapieren oder im Kaufbeleg ausdrücklich erwähnt ist.
Gewährleistungsfristen
Die Gewährleistungsfrist beginnt mit dem Zeitpunkt des Verkaufs an den ersten
Endverbraucher. Unsere Produkte können aus verschiedenenTeilen bestehen, für
die unterschiedliche Fristen gelten können:
›24 Monate für das elektronische Gerät mit Ausnahme der im folgenden ge-
nanntenTeile
›6 Monate für Teile mit beschränkter Lebensdauer wie: auadbare Batterien
(Akkus), Ladegeräte, Headsets, Antennen.
Wie mache ich Gewährleistungsansprüche geltend ?
ImFalleeinesDefektswendenSie sich an IhrenFachhändler,bei dem Sie das Gerät
erworben haben, bzw. an die mit dem Händler vereinbarte Serviceanschrift. Im
Falle einer zusätzlichen Herstellergarantie können Sie Ihr Gerät auch direkt an den
autorisierten Servicepartner senden. Senden Sie bitte folgendes ein::
›das beanstandete Gerät (möglichst mit Zubehör) und Fehlerangaben
›einen gültigen Kaufbeleg (z.B. der Kassenzettel, aus dem das Kauf-datum,
sowie Name + Anschrift der Verkaufsstelle hervorgehen muss).
Was deckt die Gewährleistung nicht ab ?
Die Gewährleistung gilt nicht für:
›Normale Abnutzungserscheinungen durch den Gebrauch des Geräts
›Defekte oder Beschädigungen, die durch grobe Behandlung entstanden sind
(z.B. durch scharfe Gegenstände, durch Fallenlassen oder übermäßige Kraf-
teinwirkung)
›Defekte oder Beschädigungen durch nicht bestimmungsgemäße Verwen-
dung des Geräts, einschließlich Schäden oder bei Haftungsfällen, die durch
Benutzung entgegen den Angaben in der Bedienungsanleitung entstanden
sind.
›Defekte, die durch andere Faktoren oderTätigkeiten außerhalb des Einussbe-
reichs des Herstellers hervorgerufen wurden.
Die Gewährleistung deckt auch keine Defekte oder Folgeschäden ab, die durch
missbräuchliche Nutzung des Produktes, zusätzliche Software oder Zubehörteile
von Fremdherstellern, die nicht vom Hersteller geliefert oder als geeignet dekla-
riert wurden, oder durch die Benutzung des Gerätes für andere als den vorbe-
stimmten Verwendungszwecke hervorgerufen wurden.
Die Gewährleistung kann abgelehnt werden, wenn das Produkt geönet, mo-
diziert oder durch andere als vom Hersteller autorisierte Personen repariert
wurde, nach einem Reparaturversuch unter Verwendung von ungeeigneten
Ersatzteilen. Keine Gewährleistung erfolgt grundsätzlich, wenn Seriennummer
und/oder Typenschild geändert oder entfernt wurden und die Herkunft des
Gerätes dadurch nicht zu klären ist., oder wenn das Gerät extremen thermischen
oder Umweltbedingungen ausgesetzt wurde , wie Korrosion, Oxidation, Versch-

E
Midland BTX2 - 37
36 - Midland BTX2
D
mutzung mit Speiseresten, Einsatz von Flüssigkeiten oder chemischen Stoen.
Dieses Produkt unterliegt den europäischen Garantiebestimmungen und muss
zwecks Reparatur oder Austausch, wenn nicht reparaturfähig, an den Verkäufer
zurückgegeben werden. Bei Rücksendung durch Ihren Fachhändler reparieren wir
das Gerät oder wir tauschen es nach Eingang aus.
Europäische CE Erklärung und Sicherheitshinweise
Dieses Produkt trägt das CE Zeichen nach der R&TTE Direktive (99/5/EC). Es ist
gültig für alle EU Staaten.
Es ist nicht zulässig, nicht mit uns abgesprocheneVeränderungen an den Geräten
vorzunehmen. Sie gefährden mit Änderungen nicht nur die Gewährleistung, son-
dern auch das Einhalten der gesetzlichen Grenzwerte.
Näheres an technischen Informationen nden Kunden aus dem deutschsprachi-
gen Raum auch unter http://hobbyradio.de, in der Rubrik “Biker Sets”, wo Sie die
jeweilsneueste Ausgabe der GeräteunterlagenzumDownloadndenInformatio-
nen für Kunden in Deutschland gibt es unter www.alan-electronics.de
Índice
Características principales.................................................................................................................................................................................... 38
Especicaciones técnicas del Midland BTX2 ......................................................................................................................................................... 38
Carga de baterías ................................................................................................................................................................................................. 38
Descripción del dispositivo y del sistema de montaje........................................................................................................................................... 39
Encender y apagar el BTX2................................................................................................................................................................................... 40
Modos de operación............................................................................................................................................................................................. 40
Distancia.............................................................................................................................................................................................................. 41
Cómo sincronizar otro BTX2.................................................................................................................................................................................. 41
Sincronización de òtro dispositivo de la línea BT .................................................................................................................................................. 41
Como enlazar tres unidades Intercom entre ellas................................................................................................................................................. 42
Talk 2 All – Sincronización con un Intercomunicador de otra marca..................................................................................................................... 42
Uso de otros dispositivos Bluetooth...................................................................................................................................................................... 43
Cómo usar la conexión audio por cable ................................................................................................................................................................ 44
Walkie talkie con conexión vía cable .................................................................................................................................................................... 44
Conguraciones especiales................................................................................................................................................................................... 45
Setup y actualización de Firmware....................................................................................................................................................................... 46
Garantía............................................................................................................................................................................................................... 47
Certicaciones Europeas CE.................................................................................................................................................................................. 47
Other manuals for BTX2 FM
3
Table of contents
Languages:
Other Midland Headset manuals

Midland
Midland MA46 User manual

Midland
Midland BT GO Manual

Midland
Midland BT-Intercom User manual

Midland
Midland BT GO Manual

Midland
Midland BT City User manual

Midland
Midland Cardo BT Rider FM Manual

Midland
Midland BT Sport User manual

Midland
Midland BTNEXT PRO User manual

Midland
Midland BT Remote User manual

Midland
Midland DUAL HEADSET User manual