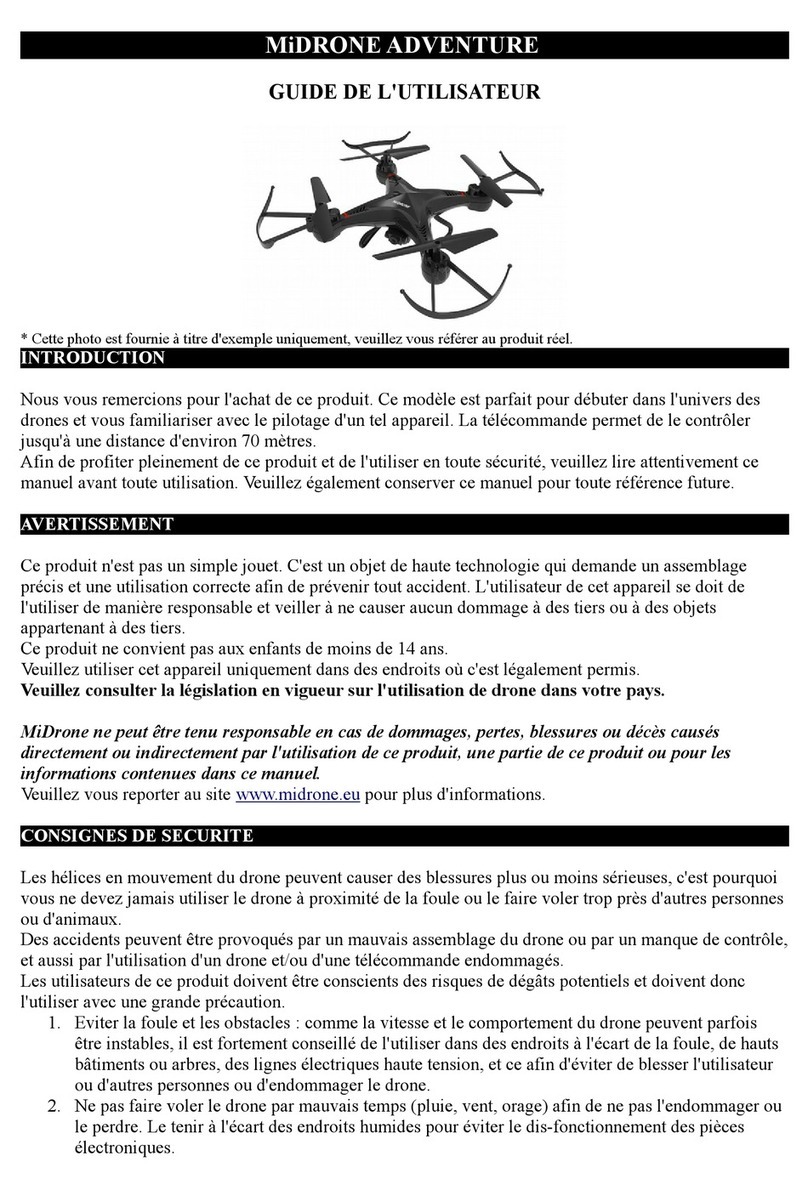
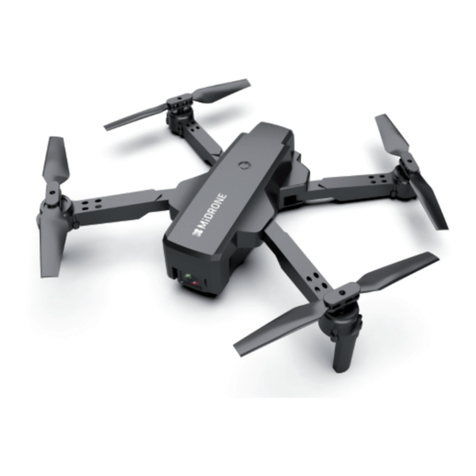
MiDRONE BEE 520 User manual

Warning
Age:14+
Thank you for your purchase. BEE 520 Drone is an innovatively designed portable foldable drone.
With the high-end technology built-in flight control system and visual orientation system, it could fly steadily
when flying indoors. The GPS systems also assure a very stable flight outdoors, with the possibility of
following way points route or follow the pilot for perfect photo and video footage.
When the transmission signal is lost or when battery level is too low, the drone will return to starting point
automatically. The drone is equipped with 1080p HD wide angle camera, with real time video transmission
on the smartphone with Midrone 520 APP for iOS or Android. The longest flying time is about 15 minutes in
the best flying conditions. Please read this manual carefully before using the drone and keep it in safe place
for further reference.
BEE 520
INSTRUCTIONS MANUAL
-1-
Introduction
This product is not a toy. It is a high-tech device that requires accurate assembly and proper use to prevent
any accidents. The user of this device must use it responsibly and ensure not cause any damage to third
parties or to objects belonging to third parties.
This product is not suitable for children under 14 years.
Please use this product only in places where it is legally permitted.
Important - Read this first!
1. It is very important to perform the Compass, R/C calibration and Board level calibrations
before your first flight, see the different calibration procedures later in this manual.
2. It is recommended to perform a new compass calibration if the new departing point of the
new flight is far from over 20KM from the previous flight.
3. It is strongly recommanded to do the horizontal calibration if the drone have bad performances
or falled or had a serious shock.
4. Do not press the emergency stop button if there is no emergency case, otherwise the drone
will fall down and may have serious damages or may cause serious injuries to people.
5. We strongly suggest to update the Bee520 APP regulary for better performances.
6. Do not take-off on a metal surface, the sensors of the drone can’t work properly on metal.
WiFi password: 77777777

Charging
Please charge the battery fully before using the drone. The battery must be charged only with the
original Midrone Bee 520 charger provided with the product.
1. Insert the battery in the charger and connect it to a power supply outlet (100-240V,50/60Hz)
2. The battery is fully charged when when all red led indicators are ON and the green led switched OFF .
You can now remove the battery from the charging dock and install it in the drone.
4. Overcharge Protection: Charging automatically stops when the battery is fully charged.
5. Short Circuit Protection: the charger automatically cuts the power supply when a short circuit is
detected.
3. The charging time is about 80 minutes.
-2-
Please refer to the legislation on the use of drones in your country.
Midrone can not be held responsible for any damage, loss, injury or death caused directly or
indirectly by the use of this product, part of the product or the information contained in this
manual.
Safety instructions
The propellers in movement can cause more or less serious injuries, which is why you should never
use the drone near the crowd or flying too close to other people or animals. Accidents can be caused
by improper assembly of the drone or a lack of control, and also by the use of a drone and / or damaged
remote.
Users of this product should be aware of the risks of potential damage and should therefore use it with
great caution.
1. Avoid the crowds and obstacles : the speed and behavior of the drone can sometimes be unstable,
it is strongly advised to use it in places away from the crowds, tall buildings or trees, high voltage cables,
to prevent injury to the user or other persons or damages to the drone.
2. Do not fly the drone in bad weather (rain, wind, storm) to prevent damages or lost. Keep away from wet
places to avoid dis-functioning of electronic parts.
3. Do not use the drone if you're tired because the control requires maximum concentration. Be very
careful during learning until your control of the drone is acquired.
4. Keep the drone and the battery away from heat: this product is made of metal and plastic parts,
and electrical parts. Therefore it should not be exposed to high temperatures such as near fire, near
a heating radiator or exposed too long to direct sunlight.
5. Never leave small parts of drone to reach of children to avoid the risk of suffocation.
6. Please respect the “no flying zone”in your area and never fly the drone in such zone.
7. Please respect the privacy of the people around you. It is totally forbidden to record or take pictures of
people without their prior approval.
This product is using Li-po battery, it can lead to explosion if improperly operation
•Do not charge the battery when putting it inside the drone, it might cause fire and damage.
•Please keep the drone battery with at least with 50% power if you do not play it for a long time, to extend
the battery life. Remove the battery from the drone when you don’t use it.
•Please use the original charger.
•Do not charge the battery on the carpet to avoid fire.
•Please recharge the Li-po battery if store it more than 3 months.

Preparing the drone and battery
Description of the drone
The drone is folded when packed in the box. Please prepare it following the below steps.
1) Unfold the rear arms followed by the front arms as shown below.
2) Plug the battery on the top of the drone as shown on the image below. Make sure that it is well fixed.
3) On the remote control, unfold the antenna
and the phone holder if needed.
4) Pairing: Switch ON the drone (press and hold the
ON/OFF switch or several seconds until you hear 3 short
beeps), then place the drone on a flat surface. After you
hear two long beep coming from the drone, turn ON the
remote controller, you will
hear 2 shorts beeps
followed by a long beep.
5) Connect WIFI: enter into phone Wifi settings, select wifi named Bee520-xxxx
in the list of available networks. Then exit wifi settings and launch the Bee520
APP on your smartphone.
1
23
4
5
6
-3-
Unlock / Auto take-off / Auto landing
After pairing sucessfully, push the 2 levers down and to the center with angle
of 45 degrees to unlock the drone. The blades start to rotate.
Then press Auto take-off button on the remote controller, the drone will rise
automatically to the preset height of approximatively 1,2 meter. Keep the throttle
stick at the neutral position, then the drone hovers.
Press the Auto take-off/landing key again if you want the drone to land at its current position.

Description of the remote control
Code CodeDescription Description
Propeller
Motor
Arm
Landing gear
Camera
High-performance battery
Power switch
Vision orientation system
Rear arms led indicator
SD card slot
Settings / Data Interface
Front arms led indicator
17
8
9
10
11
12
2
3
4
5
6
7
8
910
11
12
Before taking photos or videos you need to insert a micro SD card in the memory slot at the side of
the drone. The cards must be recent SDHC with suffisant writing speed to record HD videos.
Throttle TRIM
LED indicator
Throttle/ Rotation
joystick
Emergency stop
Rotation TRIM
Positioning mode/
Sports mode
Auto take off /landing Return To Home (RTH)
Video button
Left / Right TRIM
Photo button
Direction Joystick
Front / Rear TRIM
Power
ON/OFF
Antenna
-4-

Flight modes
Flight status indicators
P mode (positioning): the GPS module and optical flow system will help the drone to conduct
precise hovering, flying to pointed waypoints and take off on hands function precisely.
S mode (sports): In this mode the direction lever is more sensitive than usual to achieve maximum
flying speed. The GPS system is helping for the flight stability but the vision positioning system shuts
off automatically, and App function is not available in this mode.
There are two kinds of LED indicators: front arms LED indicator (white color) and rear arms LED indicator (red
color).
The front led indicator shows the direction of the drone. Red led indicator glow solid after take off.
The rear led indictor shows different flying status of the drone.
The led indicator status description
The front led indicator flashes quickly
The front led indicator flashes slowly
The front led indicator glows solid
The front led indicator flashes alternatively
The left rear led indicator flashes quickly
The left rear led indicator flashes slowly
The left rear led indicator glows solid
The rear led lights flash alternatively
The rear right led indicator flashes rapidly
Two rear led indicators flash rapidly
Both rear and front led indicators flash rapidly
The front and rear led indicators flash alternatively
The front led indicator flashes two times and stop
for one second
The front led indicator and rear led indicator flash
two times and stop for one second
Drone is in pairing mode
Drone is in standby mode
Drone is unlocked (ready for take-off)
System failure
Gps signal is not sufficient for
positioning. Rapidly flash (4hz frequency)
GPS positioning is available ,but not
accurate enough, led flashes in 2HZ
frequency (2 times per second)
GPS workable
Remote control signal lost
NO visual orientation system
Battery low voltage warning
Severely battery low voltage warning
RTH mode (Return to Home)
Preset route flying mode (Waypoints)
Follow me flying mode
Red rear arm led indicator
Red rear arm led indicator
White front arm led indicator
White front arm led indicator
-5-
You select one of the two flying mode depending of the use you want to make with the drone.
The rear led lights flash quickly
The rear led lights keep flashing
When photo button is pressed
During video recording

Different calibration procedures
1) Electronic compass calibration
This is very important to operate this calibration before your first flight with the drone. Explantion videos are
available on Midrone website or on Midrone Youtube channel.
Switch ON the drone and wait for the stand by mode (2 long beeps). Switch ON the R/C and wait for the
pairing with the drone (see pairing section above in this manual). Push the direction lever and throttle lever
upwards to the right with an angle of 45 degrees. Now the drone starts to calibrate, the front led lights glow
solid and the rear led lights flash slowly, then put the drone horizontally and make it rotate few times at 360
degrees with your hand, until the red led indicators flash quickly. After that, put the drone in vertical position
and make it rotate few times at 360 degrees. And finally perfom some movements with “8 shaped” circles
untilall LED lights of the drone switch OFF. At this point the calibaration succeeded. You can now switch it
ON again the drone and start to use it.
If the calibration failed, you need to switch off the drone and restart it, and try this procedure again.
2) Remote control calibration
In standby mode, push the direction lever and throttle lever upwards and to the center with an angle of 45
degrees. Now the remote control starts to calibrate, the front led indicators start to flash slowly and the rear
led lights glow solid. Now rotate the 2 levers several times at 360 degrees all the way around until front led
indicators start to flash rapidly, then release the two levers back to the middle position. All led indicators
come back to previous status after R/C calibration succeeded.
3) Horizontal (Board level) calibration of the drone
First place the drone on a flat level surface before operating the horizontal calibration.
In standby mode, push the throttle lever and the direction lever upwards to the left with an angle of 45
degrees. When the front led indicators glow solid and and rear led indicators starts breathing (variation of
color instensity) you can release the 2 levers and the led indicators come back to previous status when the
calibration is finished. If the calibaration failed, you need to turn off and restart the drone, and try this
procedure again.
-6-
Rear LED
flashes slowly Rear LED
flashes quickly
Vertical
360°
Front LED
flashes slowly
Front LED
flashes rapidly
360°maximum
rotate all around
360°maximum
rotate all around
Release two levers
Red rear led
start breathing
LED lights back to previous
status if successed
Horizontal
360°
All LED lights switch off
when calibration is finished
White front led
glow solid

RTH mode safety precautions
Photo / Video
Return to home (RTH)
The auto-return function protects the drone from damages or other injuries when it is loosing the connection
with the R/C or with the smartphone. Midrone 520 provide three different Auto-return functions.
Failsafe Return: The drone will enter failsafe mode when the connection from the R/C is lost over 5
seconds or if WIFI control is lost over 10 seconds. When GPS signal is available, and the compass is
functioning normally, the drone will return to the lastest take-off point. During the return, if the drone retrieve
signal, you can keep return and control the drone through R/C, or press Auto Return key to exit failure safe
return mode.
Intelligent Return: you can activate this mode with RTH button on the remote control, press and hold this
button until your hear a beep sound. The drone will start flying back to the lastest
take-off point. You can use the remote controller to control the drone's direction.
Press again the intelligent return button RTH to exit this mode and come back to
previous flying mode.
Low Battery Return: To avoid damages and injuries to people, animals or objects, the drone will auto
return to the take-off point after self checking the power of the battery. If the power is too low to support
RTH, the drone might land near its current position, in this case, damages and injuries or other danger may
occur.
During RTH flying, you can control the
direction by R/C to avoid obstacles.
You can pre-set the height
via APP before RTH.
When the GPS signal is not sufficient,
The auto return is not available.
When the drone rises to 10 meters, but not
reach the pre-set height, press the
RTH button again, the drone will exit
the RTH mode.
You can control the camera of the drone by the remote controller or with the APP on smartphone.
REMARK: the quality of photos and videos recorded in the APP have lower qualiy than when it is
recorded on micro SD card because it is compressed in 720p for the wifi transmission.
If you have a micro SD card inserted in the drone, the photos and videos taken by the APP will be
also saved on the micro SD card in better quality.
To take photo during the flight press the photo button on the remote controller or in APP. The front led lights
are fixed, the rear led lights flash 3 times when the photo button is pressed. More functions are available via
Bee520 APP control.
To take video during the flight press the video button on the remote controller or in APP. The rear led lights
keep flashing when recording. Press the video button again to end recording video. More functions for video
recording are also available in the APP on smartphone.
When taking photos and videos by the remote controller please make sure that a compatible micro
SD card is inserted in the memory slot of the drone. The card must be high speed SHDC with a max.
capacity of 64GB.
H
Return altitude
10 meters 5 meters
-6-
-7-
Note: you must check if the drone is receiving a sufficient number
of satellites for the RTH mode to operate properly. The left rear red
LED remains fixed when the GPS signal is sufficient. If it flashes
the RTH mode will not work.

Operation of the drone
Vision positioning system (Optical flow)
The vision positioning system function also called optical flow is useful
for stable indoor flight under 8m, when the GPS signal is not available.
The sensors located under the drone will mesure the distance
between the drone and the ground and will allow a stable hovering of
the drone.
Note that the accuracy of this technology is limited by the texture of
the ground.
See below the functions description of the 2 levers (joystick) of the remote controller.
R/C Drone Function description
The throttle stick controls drone altitude /
elevation. Push the stick up and the drone
will rise. Pull the stick down and the drone
will descend. The aircraft will automutically
hover and hold its altitude if the throttle
stick is in central position. Push the stick
above the central position to make the
drone take off.
The rotation stick controls the drone rotation.
Push it to the left and the drone will rotate
counterclockwise. Push it to the right and
the drone will rotate clockwise. If the stick
is in the center, the drone will remain facing
the same direction. The stick controls the
rotating speed of the drone. Pushing the
stick further away from center results in a
faster drone rotation speed.
The direction stick controls the drone's front
and back tilt. Push the stick up and the
drone will tilt and fly forward. Pull the stick
down and the drone will tilt and fly
backward. The drone will keep its position
when the stick is in central position. Pushing
or pulling the stick further away from center
will result in a higher tilt angle (maximum is
25 degrees) and faster flight velocity.
The direction stick controls also the drone's
left and right tilt. Push it to the right and the
drone will tilt and fly to the right. The drone
will keep its position when the stick is in
central position. Pushing or pulling the stick
further away from center will result in a
higher tilt angle and faster flight velocity.
-8-
Emergency stop
If the drone is blocked in an obstacle and you want to stop the propellers in emergency, press the
Emergency stop button on the remote controller. See the location of this button in the description of the
remote controller earlier in this manual.
Important: Do not press the emergency stop button if there is no emergency case, otherwise the
drone will fall down and may have serious damages or may cause serious injuries to people.

-9-
Installation of Bee520 APP on your smartphone
You need to install the Bee520 APP on your smartphone to take full advantage of the features of this
drone. The APP is available for Android and iOS systems. You can find it in the PlayStore or AppStore
by searching on Midrone Bee520. You can also scan the QR codes below to access directly the
downloading page of the APP.
Android iOS
Connecting Bee520 with your smartphone
Before being able to control Bee520 drone with your smartphone, you need to establish the Wifi connection
between both devices.
Enter the Wifi settings on your smartphone, then switch ON the drone. After a few seconds you will see a
new Wifi network name starting by “Bee520”in the list of the available networks, select it and confirm the
connection. The WiFi password for the drone is 77777777.
Now you can start the Bee520 APP on your smartphone and the drone should appear as
detected device on the welcome screen. You are now ready to control the drone by the APP.
Remark: If you want to use the remote controller to pilot the drone and use the screen of your
smartphone only for real time video transmission of the camera of the drone, you need to pair first
the drone with the remote control and then establish the Wifi connection between the drone and the
smartphone in a second step.
Bee520 APP description
APP welcome screen

-10-
Enter photo/video album Enter photo/video menu
Take photos and videos
Access photo/video settings
Enter control interface
screen to pilot the drone Enter the help menu
Album interface
Select photo or video menu then select the desired photo or video.
Tap on this icon to share directly your pictures and videos on your social medias.
Photos and videos sharing

-11-
Controlling the drone by the APP
The following screen will appear when you click on the control icon on the welcome screen.
The virtual joysticks are working the same way as the physical joysticks of the remote controller.
1. Gravity sensor (Avatar mode)
2. Record video
3. Take photo
4. Lock / Unlock (prepatation for take-off)
5. Auto take-off
6. Auto landing
7. Drone status bar
8. Camera preview
9. Circle mode
10. Follow Me mode
11.RTH (return to home)
12. Show / Hide joysticks
13. Throttle: the drone rises
14. Throttle: the drone descends
15. The drone rotates to the left
16. The drone rotates to the right
17. The drone flies forward
18. The drone flies backwards
19. The drone flies to the left
20. The drone flies to the right
21. Drone flying mode
22. Calibration settings
23. Return to welcome screen
24. Enter waypoint menu
Gravity mode switch: tap this icon, then tilt your smartphone slightly to any direction.
The drone will fly to the same direction accordingly.
Video button: tap this button to start recording video. Tap it again to end the video recording.
The videos are visible in the Album of the APP.
Photo button: tap this button to take pictures.
The photos are visible in the Album of the APP.
Lock/Unlock: when the drone is connected to Wifi, tap this button to unlock the drone and
make it ready for take-off. The propellers start to rotate when you unlock the drone.
Auto take-off: when the drone is unlocked, tap this button and the drone will take-off
automatically to about 1.2 meters.
Auto landing: when the drone is flying or hovering, tap this button and the drone will land
automatically near its actual position.
12345 6
7
8
9
10
11
12
13
14
15 16 19 20
17
18
21 22 23
24
Tap this button to exit the control screen and come back to the welcome screen.

-12-
Tap this button on the main screen to enter the Follow Me mode and access the options.
You will have to confirm by pressing OK button on the next screen (see below).
Follow Me mode
In this mode the drone will follow the position of your smartphone. It can thus record your activities while
you are in movement. Please read carefully the recommandations below before operating this function.
1.We strongly advise you to use this function in a clear place, away from obstacles such as
trees, buildings, and away from the crowd. Improper handling may result in loss of the
drone or may result in injuries to persons or damages to nearby objects.
2. The position of the drone is represented on the map by a orange plane on wite background, the
position of the smartphone is represented on the map by a blue point. It is very important that the
drone and the mobile phone are very close to each other on the map, because if the mobile phone
appears to a different location on the map, the drone will fly to this direction.
The accuracy of the mobile phone position on the map can vary following the region where you
are located.
3. This function is available only if the drone is locating at list 10 sattelites. You can see the number
of sattelites in the status bar on top of the screen. The sattelite reception will be much faster in clear
places such as field, away from buidings.
On the below screen you can define the altitude of the drone and the distance between the drone and
smartphone. Once you have selected both parameters the drone will start to follow you. The status of the
drone changes from POSHOLD to GUIDE during the Follow Me mode session.
Follow Me mode operation
Proceed to drone take-off and wait until it flies stably. Make sure that the drone flying status is in POSHOLD
mode, you can check it in the status bar on top of the APP screen.
Tap again the Follow Me mode button to exit this mode. The status of the drone comes back to
POSHOLD mode in the status bar.

-13-
Tap this button on the main screen to enter the Circle mode and access the options.
You will have to confirm by pressing OK button on the next screen (see below).
Circle mode
In this mode the drone will fly around a defined point at 360 degrees. It can thus record a person or object
in 360 degrees. Please read carefully the recommandations below before operating this function.
1.We strongly advise you to use this function in a clear place, away from obstacles such as
trees, buildings, and away from the crowd. Improper handling may result in loss of the
drone or may result in injuries to persons or damages to nearby objects.
2. The position of the drone is represented on the map by a orange plane on wite background, the
position of the smartphone is represented on the map by a blue point. It is very important that the
drone and the mobile phone are very close to each other on the map, because if the mobile phone
appears to a different location on the map, the drone will fly to this direction.
The accuracy of the mobile phone position on the map can vary following the region where you
are located.
3. This function is available only if the drone is locating at list 10 sattelites. You can see the number
of sattelites in the status bar on top of the screen. The sattelite reception will be much faster in clear
places such as field, away from buidings.
Circle mode operation
Proceed to drone take-off and wait until it flies stably. Make sure that the drone flying status is in POSHOLD
mode, you can check it in the status bar on top of the APP screen.
On the below screen you can define the radius of the circle. Once you have selected this parameter the
drone will start to fly in circle in the selected radius, starting from its initial position. The status of the
drone changes from POSHOLD to CIRCLE during the Circle mode session.
Tap again the Circle mode button to exit this mode. The status of the drone comes back to
POSHOLD mode in the status bar.

Tap this icon to show the waypoints tools.
Method 1: Add waypoints manually. Tap this icon, then click on the map for the desired waypoint
locations. Tip: The last point you choose should be close to the starting point.
Tap this icon again to exit the adding waypoint mode and be able to select the options for each
waypoint.
Method 2: Route drawing. Tap this icon, then draw a line on the map to define the route the drone
has to follow. Several waypoints will be added automatically on the line you have drawn.
Delete a waypoint. Tap this icon, then click on the waypoint you want to delete.
-14-
Tap this icon to show or hide the virtual joysticks on the main screen.
Flying plan (waypoints) mode
In this mode you can draw a route on a map and ask the drone to follow this itinary. Please make sure that
there are no obstacles between the different way points of your route.
Please read carefully the recommandations below before operating this function.
1.We strongly advise you to use this function in a clear place, away from obstacles such as
trees, buildings, and away from the crowd. Improper handling may result in loss of the
drone or may result in injuries to persons or damages to nearby objects.
2. The position of the drone is represented on the map by a orange plane on wite background, the
position of the smartphone is represented on the map by a blue point. It is important that the
drone and the mobile phone are very close to each other on the map.
The accuracy of the mobile phone position on the map can vary following the region where you
are located.
3. This function is available only if the drone is locating at list 10 sattelites. You can see the number
of sattelites in the status bar on top of the screen. The sattelite reception will be much faster in clear
places such as field, away from buidings.
Waypoints operation
Before connecting your smartphone to the wifi of the drone, please launch the Bee520 APP with an active
internet connection (Wifi or 3G/4G) so the map of the area where you are located will be loaded in the APP.
You can zoom in and out on the map to load more or less area.
Now you can connect your smartphone to the wifi of te drone and come back in the APP.
Note:

Tap this icon to see your location on the map.
Tap this icone to see the drone’s location on the map.
When you finished to select the options for each waypoint, tap on the icon to show another menu.
Choose a waypoint and select the altitude and delay time. Delay time is the time the drone will stay
at this waypoint before flying to the next one.
Then tap on the icon and the drone starts to follow the route that you have drawn on the map.
The status of the drone changes from POSHOLD to AUTO during the Waypoint session.
Tap again on the icon to exit the waypoint mode when the drone finished its route. The status of the
drone comes back to POSHOLD mode in the status bar.
-15-
Tap the icon to load the mission in the drone. When you see the below screen, clickon YES to
confirm.
Now proceed to drone take-off and wait until it flies stably. Make sure that the drone flying status is in
POSHOLD mode, you can check it in the status bar on top of the APP screen.
NOTE: if one of the waypoint is out of the range of the wifi connection with the smartphone (usually
more than 50M), the drone will fly back to home point after reaching this waypoint as it will enter in
safe return mode.

Return to home (RTH): when the drone is flying or hovering, tap this button and the drone
will fly back to home point. The home point is represented by a home icon in orange circle
on the map, see exemple on the map below. Make sure that this home icon is present on the map
and that this is the location where you want the drone to fly back to before pressing the RTH
button.
Tap this button to enter the Board level calibration and ECS calibration.
More information about these calibrations are available on www.midrone.eu.
Return to home
Other functions
-16-
Troubleshooting
1. I can’t establish the connection between the drone and the remote controller.
If the drone has been connctected with the smartphone in Wifi, you need to switch off the drone and close
the wifi connection before you can pair it again with the remote controller.
2. I can’t unlock the drone in the APP so I can’t take-off.
If the drone has been connctected with the remote controller, you need to switch off the drone and switch
off the remote controller before you can control the drone with the APP again.
3. The drone has difficulties to connect with 10 satellites.
It is not easy to get a good satellite reception if you are located near buildings. Please choose a clear location
away from buildings such as field or park. The weather conditions can also affect the satellite reception.
4. The flying time of the drone is less than expected.
The flying time can be affected by different parameters such as windy conditions, the way you pilot, if the
drone is recording videos or taking photos, ect. The max flying time should be around 15 minutes in the best
conditions.
The Board level calibration is the same as the horizontal calibration explianed above in the manual. When
you select this option, the front led indicators glow solid and and rear led indicators starts breathing (variation
of color instensity), then the led indicators come back to previous status when the calibration is finished.
The ECS calibration has to be done only after a motor replacement or a remote controller replacement, or if
the drone is flying abnormally. Note that the R/C calibration has to be done prior to the ECS calibration (see
above in this manual for R/C calibration details).
Select this option and press OK to confirm on the next screen. Now switch off the drone, remove the
battery, then insert the battery again and switch on the drone. You must hear different beep sounds coming
from the drone. If you don’t hear these sounds, repeet the operation. The calibration is finished when the
drone finished to emit the beep sounds.

Warranty conditions
1. Warranty period
The Midrone products and accessories are guaranteed against manufacturing defects for a total period of
24 months ** (consisting of an initial period of six months and a second period of 18 months) from the date
of original purchase. Midrone sole obligation in the event of such defects during this period is to repair or
replace the defective product or part with a comparable product or part at the sole discretion of Midrone.
The following components or parts are not within the scope of this warranty.
• Propellers & propeller protections : no warranty on this component
• The lithium battery receive a limited warranty for 6 months or 50 recharges
Existence of a lack of conformity on the day of purchase
To benefit from the conformity warranty of the defect in the product must exist at the acquisition date.
The defect in the product appears within 6 months after purchase
The defect in the product appears within 6 months after the purchase, it is presumed to exist at the date of
acquisition.
The fault occurs more than 6 months after purchase
The fault appears more than six months after purchase, you can benefit from the guarantee of conformity
only if you can prove that the defect existed at the time of purchase.
** LAW 2014-344 of 17 March 2014 on the consumption, publication NOR: EFIX1307316L
2. Warranty conditions
These conditions must be fulfilled for the warranty service.
You must include the purchase invoice or receipt as proof of purchase date.
• The product must not have been altered, modified, or repaired by unauthorized person.
• The product must have been used in a normal way as described in the manufacturer's manual.
• The serial number or lot number, labels and stickers sabotage must be intact, with no signs of tampering.
The guarantee is not applicable for
• Damage resulting from misuse, accident, shock, ...
• Damage resulting from the inability to use the product
• Damage resulting from a fault of the user
• Damage resulting from a job, use or installation not in accordance with the manufacturer's specifications
• Damage resulting from a bad use for the good preservation of the unit
• Damage resulting from use of inappropriate accessories or consumables
• Damages that result from use of unauthorized spare parts
• Damage resulting from modification or alteration of the product
• Damage resulting from pilot error
• The damage that result from misconfiguration
• Damage resulting from the use of the unit in a hazardous environment
• Damage resulting from the use of the unit in bad weather
• Damage resulting from the use of a defective or non-charged battery.
• Damage to components: Camera, Accu resulting from inadequate mounting of these components
• The damage resulting from the operation of the unit in an electro magnetic interference environment
(radio transmission tower, high voltage son, high voltage transformer, etc.).
• Damage resulting from operating the unit in a known environment for interference from other wireless
devices (Wi-Fi signals, data transmission, etc ...)
• The damage resulting from the operation of the unit with a higher weight than normal take off weight.
3. Return Product
The product can be returned to your dealer or directly at Midrone after asking in advance a return number
on the site www.MiDrone.eu. If the returned unit is out of warranty, no refund or exchange will be allowed.
4. Spare parts available
The main spare parts such as propellers, battery, propeller protection are available for sale on the site
www.MiDrone.eu
Respect of the environment
This product or its battery can not be disposed of with household waste, it must be returned
to a collection point to be recycled. Please check with your local authorities for details.
-17-

Technical specifications
Drone size open: 250x230x55mm - Drone size folded : 120x75x55mm
Drone weight with battery and camera: 199g
Stability and flight precision outdoors by GPS / Glonass
Stability and flight precision indoors by optical flow
Camera HD 1080P 30ips view angle 120° – Real time video transmission on smartphone
Photo resolution 1920*1280 pixels
LiPo Rechargeable Battery Pack 1200mAh 7.4V
Flight time: up to 15 mins in good conditions - Charge time: about 70min
Precise return to starting point by GPS - Programmable flying on map by waypoints
Accurate « Follow Me » function - Auto take-off – Auto landing – Altitude hold
Range with 2.4Ghz remote control: about 200m - Wifi range with Smartphone : about 50m
MiDrone APP for iOS and Android for control via smartphone
Box content :
MiDrone BEE 520HD
Remote control 2.4Ghz with holder for smartphone
Battery pack LiPo 1200mAh 7.4V + Charging dock
*4 batteries AA 1.5V needed for remote controller
(not included in the pack)
About this manual
CE declaration of conformity
We strive to ensure that the information contained in this manual are as accurate as possible. Changes
may be made to the manual or the product without prior notification. The latest updates will be
available on our website www.midrone.eu. Our company shall under no circumstances be held liable
for injury or damage caused by errors or omissions in this manual.
©Midrone 2017. All rights reserved. All brands and trademarks mentioned in this manual are the
property of their respective owners. Google Play and Android are trademarks of Google Inc. iPhone and
App Store are trademarks of Apple Inc., registered in the US and other countries. WiFi is a trademark of
Wi-Fi Alliance.
We, manufacturer / importer,
Company : A6 Europe s.a. - Address : 127-129 rue Colonel Bourg, 1140 Brussels, Belgium.
Declare under our own responsability that the following equipment :
Brand : MiDRONE - Item code: MIDR_520HD
Product description: R/C Drone MiDRONE Bee520 HD Wifi GPS
is in compliance with the essential requirements and other relevant provisions of the European
Directive RED 2014/53/EU. This product has been tested with the listed standards and found in
compliance with the following European Directives :
ETSI EN300440 V2.1.1 : 2017-03
ETSI EN301489-1 V2.1.1 : 2017-02
ETSI EN301489-3 V1.6.1 : 2013
ETSI EN300328 V2.1.1 : 2016-11
ETSI EN301489-17 V3.1.1 : 2017-02
EN60950-1:2006+A11:2009+A1:2010+A12:2011+A2:2013
EN62479 :2010
IEC62133 : 2012
2006/66/EU (2013/56/EU)
2011/65/EU (EN 62321-3-1:2014)
Date : July 2017
David Peroo, Product Manager
-18-
Table of contents
Other MiDRONE Drone manuals
