Contents
01 Introduction
02 Daily maintenance
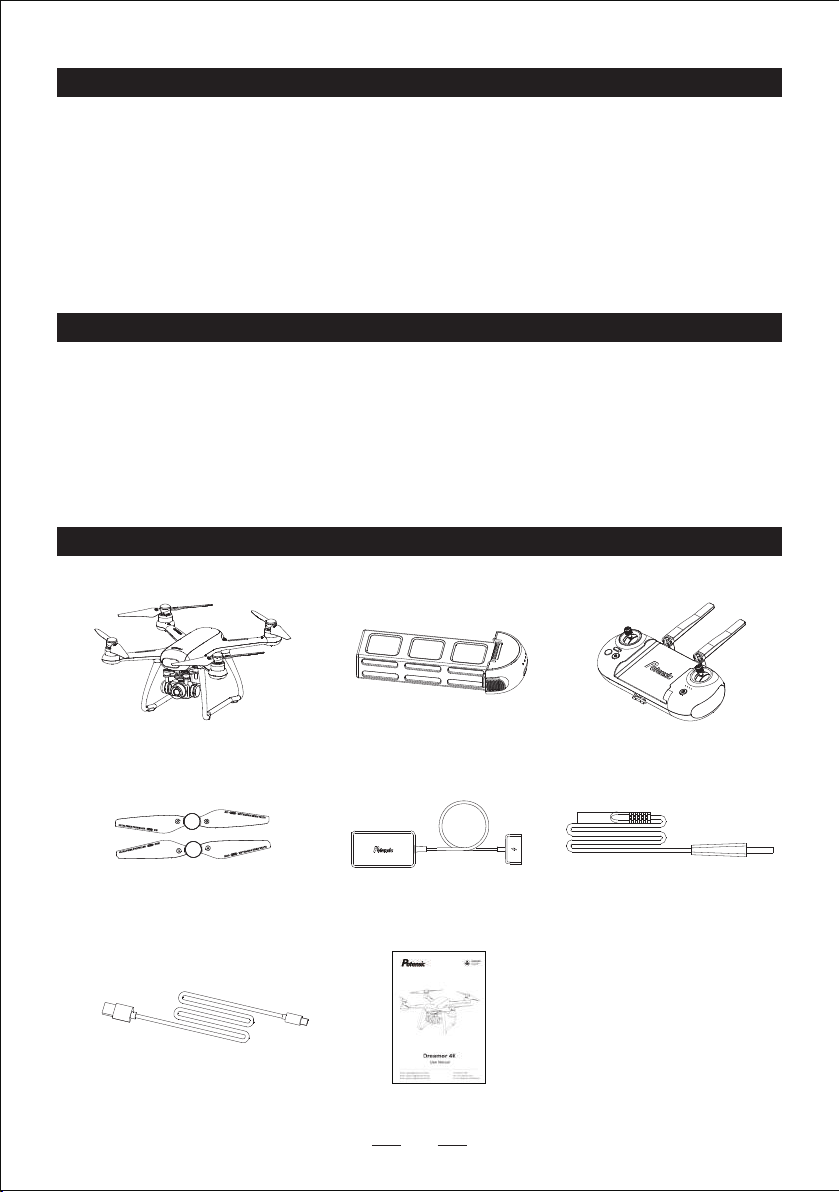
03 Packing list
04 Product diagram
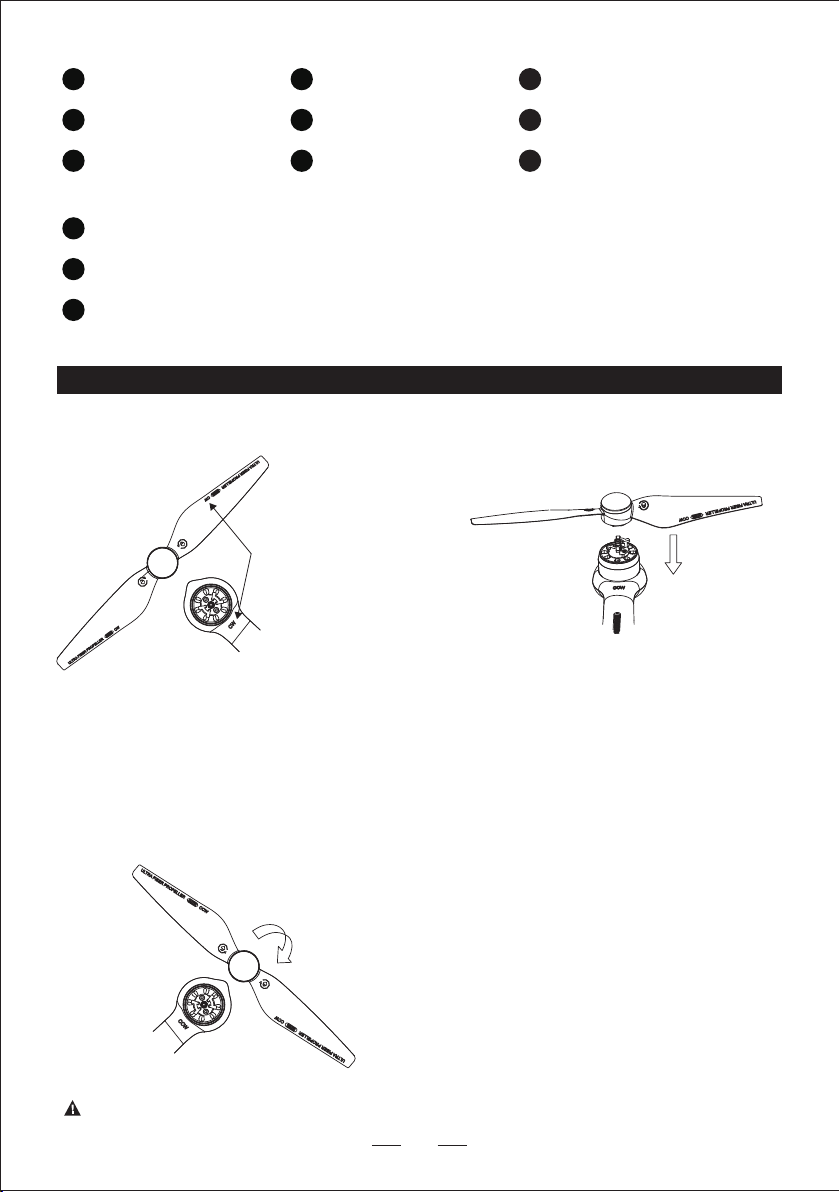
05 Installation
Propeller
Camera
Micro SD card
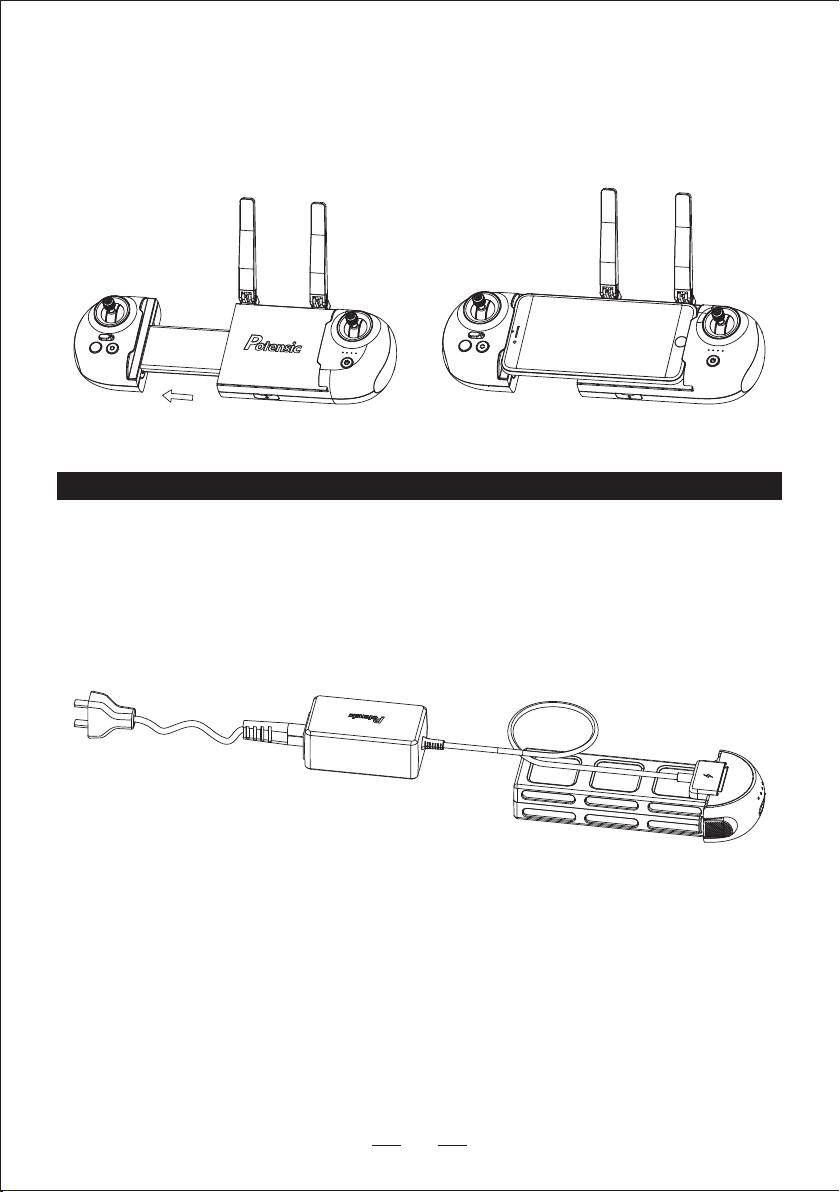
Mobile phone clip
06 Charging
Drone smart battery
Remote control charging
07 Remote control
Remote control details
Remote control mode
08 Drone app "PotensicPro"
09 Connection and calibration
Connect drone with remote control
Connect drone with phone app
Geomagnetic calibration
10 Function details
Take-off and landing
Return to home (RTH)
Headless mode
Circle flight mode
Follow me mode
Waypoint flight mode
11 Specification
12 Drone indicator introduction
13 Notice and disclaimer
14 Warnings and tips
.................................................................................................................
......................................................................................................
.................................................................................................................
........................................................................................................
......................................................................................................................
......................................................................................................................
..............................................................................................................
.........................................................................................................
......................................................................................................
..............................................................................................
..................................................................................................
...................................................................................................
..........................................................................................
...............................................................................
.....................................................................................
..............................................................................................
....................................................................................................
................................................................................................
............................................................................................................
..........................................................................................................
...........................................................................................................
...................................................................................................
...............................................................................................................
......................................................................................
.................................................................................................
.......................................................................................................
01
01
01
02
03
04
04
05
05
06
07
08
10
13
14
14
15
16
17
18
18
19
19
22
22
24


 user manual")