Midtronics Inc. 7000 Monroe Street Willowbrook, IL 60527 www.midtronics.com
DCA-8000P
Page 2
Quick Reference Guide
Oct. 2020
167-000985EN-B
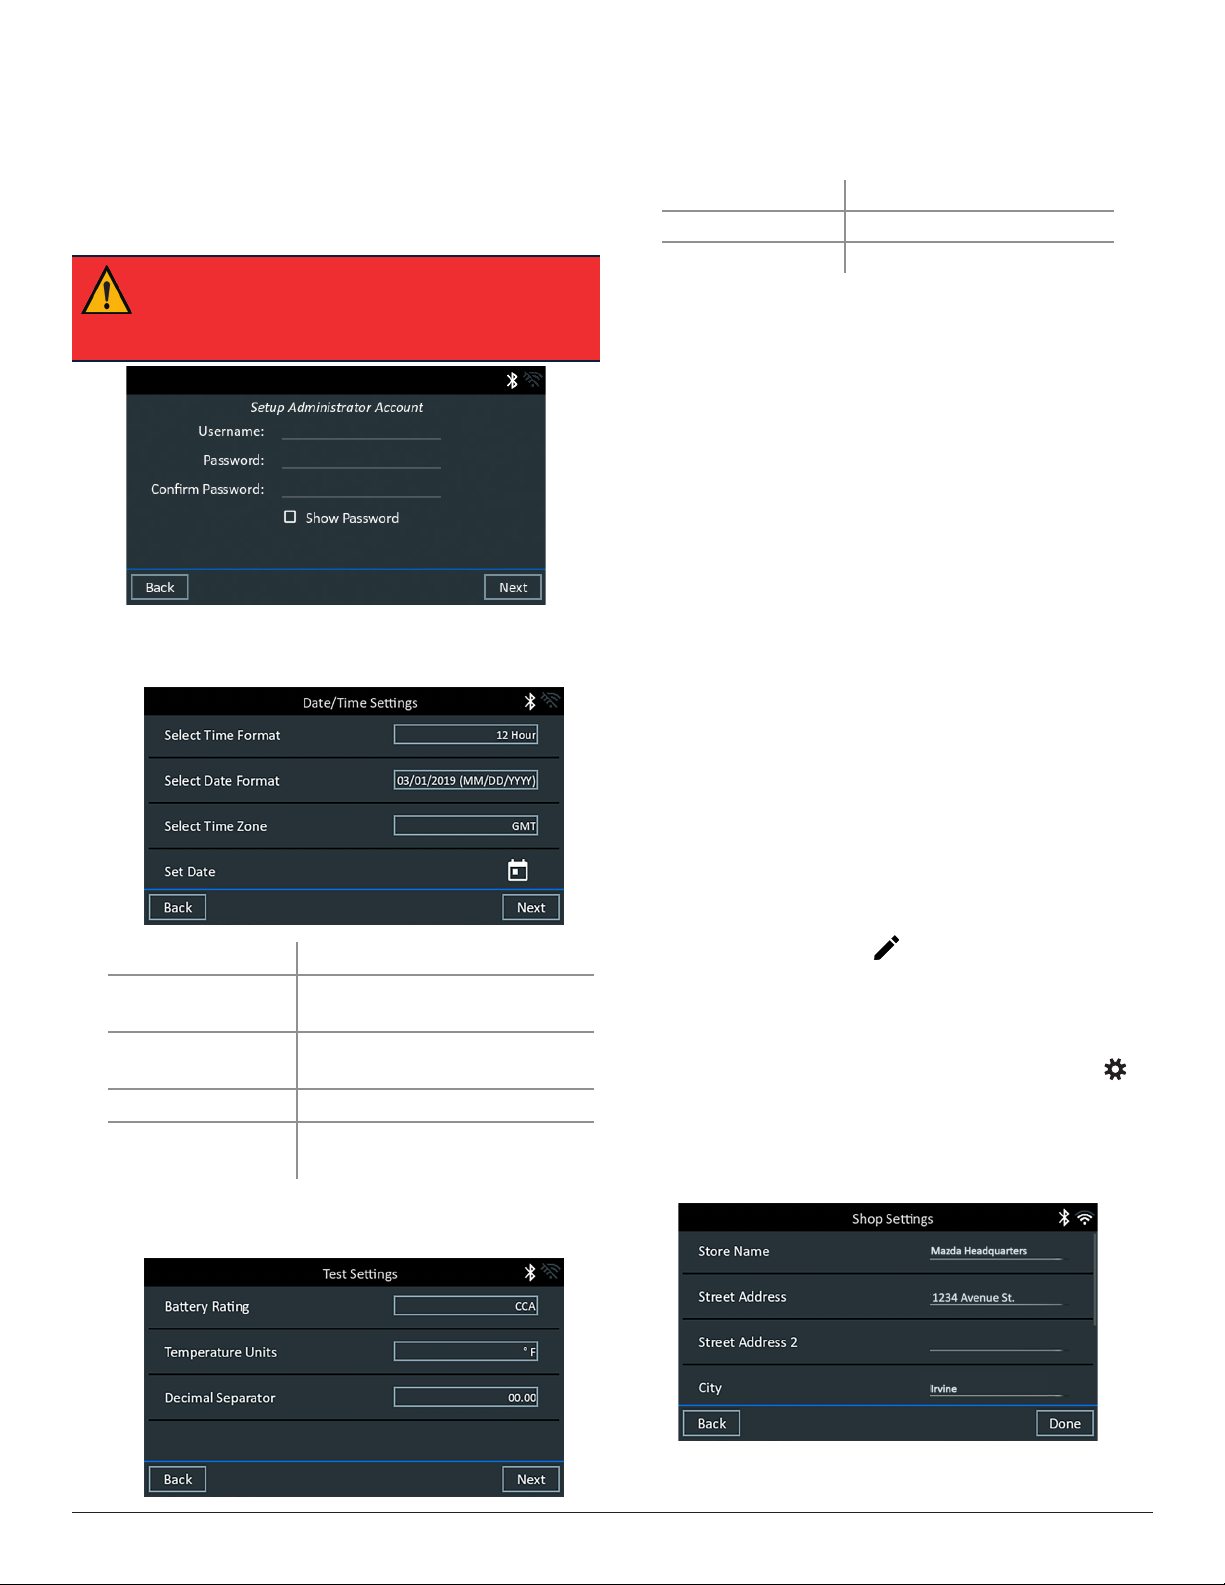
3. Next you must create an admin account; begin by enter-
ing your dealership’s name as the Username. Tap Next to
continue.
ATTENTION SERVICE MANAGERS: The password is
optional and can be left blank if all users should have
access to all features including language settings and
WiFi congurations
.
5. The Date/Time Settings are displayed. Tap Next to continue
after making any adjustments.
Select Time Format: 12-hour or 24-hour format
Select Date Format: DD/MM/YYYY, MM/DD/YYYY, or
YYYY/MM/DD
Select Time Zone: Time zone oset from Greenwich
Mean Time
Set Date: Set the current date
Set Time:
Set the current time in the selected
time zone
The Test Settings are displayed. Tap Next to continue after
making any adjustments.
Battery Rating
CCA (Cold Cranking Amps)
Temperature Units Select Fahrenheit or Celsius
Decimal Separator Select decimal point or comma
6. A list of detected Congured WiFi networks is displayed.
Adding a network allows for the use of additional features
such as emailing test results to customers, however, net-
work setup is optional. If no network is currently available
or you wish to skip this step, tap Next to continue. If no
network has been added, skip to step 8.
To add a network: Select from one of the displayed
detected networks. If necessary, enter the WiFi network
password. Tap Next when nished.
To manually add a network, tap the plus (+) sign.
Use the onscreen keypad to manually enter the Network
SSID, security type, and IP settings. If necessary, enter the
WiFi network password. Tap Next when nished.
A conrmation screen is displayed when the analyzer has
successfully connected to the WiFi network.
To delete a network: Tap a displayed network to select it.
Tap trash can icon (3) to delete it.
7. The Email Address Book screen is displayed. After a bat-
tery test, the user has the option of sending test results
via email. Adding commonly used email addresses during
setup allows for quick selection of saved recipients later. If
you wish to skip this step, tap Next to continue.
To add an email address: Tap the plus (+) sign, then use the
displayed keyboard to add the address.
To edit an email address: Tap a displayed email address
to select it. Tap the pencil icon, then use the displayed
keyboard to edit the address.
To delete an email address: Tap a displayed email address
to select it. Tap trash can icon (3) to delete it.
To use the Default Email Server Settings: Tap the gear
icon to use the default.
8. The Shop Information screen is displayed. Use the on-
screen keypad to enter the store name, address, and phone
number. Tap Next to continue.


