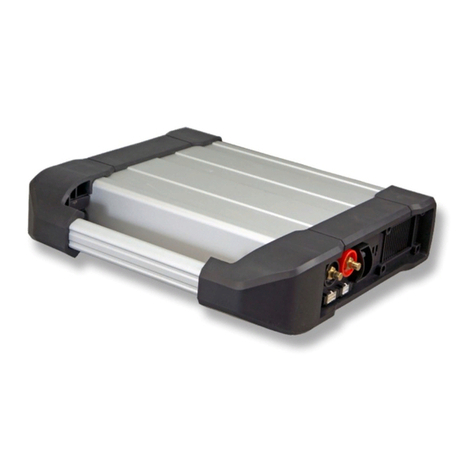
Midtronics xRC-3363 User manual

A u g u s t 2 0 2 0
167-000916EN-A
xRC-3363
Hybrid Rescue Charger
Users Guide

Midtronics Inc. 7000 Monroe Street Willowbrook, IL 60527
2
xRC-3363
General Safety Guidelines 3
Maintenance 3
Personal Precautions 5
Grounding & Power Cord Connections 5
xRC-3363 Location 6
Product Specications 7
1 – Introduction & Overview 8
Safety Precautions 8
Connecting To AC Power 8
Front View 9
Rear View 9
Connections 10
Charging Cables 10
Locking Power Cord 10
Main Menu 11
Additional Screens 11
Main Menu Icons 13
2 – Rescue Charge 14
3 – History 16
Tool History 16
Vehicle History 16
Date History 17
USB Data Upload 17
4 – Messages 18
Accessing Messages 18
Message Types 18
5 – Settings 19
WiFi 19
Adding A Network 19
Deleting A Network 19
Printer Settings 20
Email 20
Add Address 20
Edit Address 21
Deleting An Address 21
Server Settings 21
Users 21
User Management (Admin Only) 21
Language Settings 22
System Language 22
Test Result Language 22
Display Settings 22
Brightness 22
BMIS 22
Shop Information 22
Shop Information 22
Test Settings 23
Version Information 24
Factory Reset 24
Check for Updates 24
6 – Error Codes 25
Contents

www.midtronics.com
General Safety Guidelines
xRC-3363
3
General Safety Guidelines
IMPORTANT SAFETY INSTRUCTIONS - SAVE THESE INSTRUCTIONS
IT IS OF UTMOST IMPORTANCE THAT BEFORE USING YOUR xRC-3363, YOU READ THIS
MANUAL AND FOLLOW THE SAFETY AND OPERATING INSTRUCTIONS EXACTLY.
Hazardous voltage.
Do not remove protective covers.
Failure to follow this instruction may result
in electric shock, personal injury, or death.
Circuit boards, test points, and output voltages also
may be oating above or below chassis ground.
This xRC-3363 is designed for
indoor use only.
Do not operate the xRC-3363
outdoors.
Operation of the xRC-3363 in
an outdoor environment can
result in equipment damage.
Manual Conventions
Symbol Description
The safety symbol indicates instructions for avoiding
hazardous conditions and personal injury.
The safety symbol with the words CAUTION, WARNING,
or DANGER indicates instructions for avoiding hazardous
conditions and personal injury.
The wrench symbol indicates procedural notes and helpful
information.
These symbols indicate which arrow keys on the keypad to
press for a given function.
Bold Letters The text for screen options are in Bold letters.
1. Maintenance
•SAVE THESE INSTRUCTIONS - This manual contains important instructions that shall be fol-
lowed during installation, operation and maintenance of the unit.
Risk of explosion.
This device contains internal arcing and sparking parts which should not be
exposed to ammable vapors. This device should be located at least 18 inches
(457mm) above grade. Failure to follow this instruction may result in personal
injury or death.
•Periodic inspection and care are highly recommended, especially if the xRC-3363 is operating
in a harsh environment.
•Inspect for signs of overheating, rust, paint deterioration and general condition of the unit. If
corrective measures should be taken, contact Midtronics. Contact information on back cover.
Removal of dust, dirt and debris from the external enclosure surfaces is encouraged and may
be performed while the unit is in operation.
IMPORTANT: No user-serviceable parts are inside the xRC-3363. No unauthorized
personnel should ever remove the cover.

Midtronics Inc. 7000 Monroe Street Willowbrook, IL 60527
4
General Safety Guidelines xRC-3363
•Ensure that the AC power line ground is connected properly to the xRC-3363 input connector
or chassis. Similarly, other power ground lines including those to application and maintenance
equipment must be grounded properly for both personnel and equipment safety.
•In normal operation, the operator does not have access to hazardous voltages within the chas-
sis. However, depending on the user’s application conguration, HIGH VOLTAGES HAZARDOUS
TO HUMAN SAFETY may be normally generated on the output terminals. The customer/user
must ensure that the output power lines are labeled properly as to the safety hazards and that
any inadvertent contact with hazardous voltages is eliminated.
•This xRC-3363 is not intended for use by persons (including children) with reduced physical, sensory
or mental capabilities, or lack of experience and knowledge, unless they have been given supervision
or instruction concerning use of the xRC-3363 by a person responsible for their safety.
Risk of explosive gases.
Batteries may generate explosive gases. To reduce risk, follow these
safety instructions and those published by the battery manufacturer
and OEM. Failure to follow these instructions may result in personal
injury or death.
1.1 To reduce risk of battery explosion, follow these safety instructions and those published by the
battery manufacturer and the manufacturer of any equipment you intend to use in the vicin-
ity of a battery. Review cautionary marking on these products and on the engine, and on the
vehicle or equipment containing the battery.
Charging a non-rechargeable battery may
cause the battery to burst.
Only charge batteries for which xRC-3363 has been
designed and is intended for use. Failure to follow these
instructions may result in personal injury or death
If you are uncertain as to the type of battery you are attempting to charge, or the
correct procedure for checking the battery’s state of charge, contact the seller or battery
manufacturer.
1.2 Use of an attachment not recommended or sold by the xRC-3363 manufacturer may result in a
risk of re, electric shock, or injury to persons.
1.3 To reduce risk of damage to the electric plug and cord, pull by the plug rather than by the cord
when disconnecting the xRC-3363.
1.4 Do not operate the xRC-3363 if it has received a sharp blow, been dropped or otherwise dam-
aged in any way; contact Midtronics (see contact information on back cover).
1.5
Do not disassemble the xRC-3363; when repair is required contact
nearest Midtronics regional
oce
(see back cover of this manual for locations and contact information). Incorrect reassem-
bly may result in a risk of electric shock or re.
1.6 To reduce risk of electric shock, unplug the xRC-3363 from the AC outlet before attempting any
maintenance or cleaning. Turning o the controls will not reduce this risk.
1.7
Connect and disconnect the battery leads only when directed to do so by the xRC-3363.
1.8
Do not overcharge the battery (See Section 3).
1.9
Charge the battery in a dry, well-ventilated area.
1.10
Never place articles on or around the xRC-3363, or locate the xRC-3363 in a way that will restrict
the ow of cooling air through the cabinet.
1.11
An extension cord should not be used with xRC-3363.
1.12
Have a damaged cord or plug replaced immediately.

www.midtronics.com
General Safety Guidelines
xRC-3363
5
The xRC-3363 has not been designed for exposure to rain or snow.
Operate the xRC-3363 only indoors in a clean environment. Failure
to follow these instructions may resulit in equipment damage.
2. Personal Precautions
Only qualied technicians may use this equipment.
The required qualications vary by region. Always
observe local laws and legislative directives.
Failure to follow this instruction may result in serious
personal injury or death.
2.1 Have plenty of fresh water and soap nearby in case battery electrolyte contacts skin, clothing
or eyes.
2.2 Always wear all personal protective equipment (PPE) dened by OEM when working with bat-
teries seviced by xRC-3363.
2.3 If battery electrolyte contacts skin or clothing, wash immediately with soap and water. If elec-
trolyte enters the eye, immediately ush with cold running water for at least 10 minutes, and
seek medical attention.
2.4 NEVER smoke or allow a spark or ame in vicinity of a battery or engine.
2.5 Before working with a battery, remove personal metal items such as rings, bracelets, necklaces,
watches, etc. A battery can produce a short circuit current high enough to weld such items
causing a severe burns.
2.6 The xRC-3363 is not intended to supply power to a low-voltage electrical system other than
applications using rechargeable batteries.
2.7 NEVER charge a battery outside of recommended operating temperature range as dened by
OEM. Allow battery to come within operating temperature range xRC-3363 (Pg.7) and battery
operating range prior to charging.
3. Grounding & Power Cord Connections
3.1
The xRC-3363 must be grounded to reduce risk of electric shock. The xRC-3363 is equipped with
an electric cord having an equipment grounding conductor and a grounding plug. The plug
must be plugged into an outlet that is properly installed and grounded in accordance with all
local codes and ordinances.
Hazardous voltage.
An improper connection can result in electric shock
To avoid electrical shock or burn, never alter the xRC-3363’s original AC
cord and plug. Disconnect plug from outlet when xRC-3363 is idle. Failure
to follow these instructions may result in personal injury or death.
IF THE PLUG DOES NOT FIT THE OUTLET, HAVE A PROPER OUTLET INSTALLED BY A
QUALIFIED ELECTRICIAN.

Midtronics Inc. 7000 Monroe Street Willowbrook, IL 60527
6
General Safety Guidelines xRC-3363
3.2
This xRC-3363 is for use on a nominal 120 volts or 240 volts circuit.
The 120V grounding plug looks like the plug illustrated in Figure A.
3.3 Use of an extension cord could result in a risk of re and electric shock.
3.4 The plugs and receptacles have dedicated grounding terminals and must be mated with plugs
and receptacles having matching grounding terminals.
4. xRC-3363 Location
IMPORTANT: The xRC-3363 is designed for indoor use only!
It is the responsibility of the operator to provide a controlled environment for the equipment. Work
tents are a common method of protecting equipment in adverse conditions.
The xRC-3363 depends upon the surrounding air for cooling. The free ow of air is important as is the
air temperature. The xRC-3363 must be mounted so that air can freely circulate all around it.
4.1 Do not place combustible materials on or near the xRC-3363 or mount the xRC-3363 closer
than 3 inches from any adjacent wall. The xRC-3363 must never be mounted next to or above
heat generating equipment.
4.2 Locate the xRC-3363 as far away from the battery as the cables permit.
4.3 Never place the xRC-3363 directly above the battery being charged; gases from the battery will
corrode and damage the xRC-3363.
4.4 Only operate the xRC-3363 in a well-ventilated area that is free of dangerous vapors.
4.5 Store the xRC-3363 in safe, dry location.
4.6 Do not operate the xRC-3363 in high relative humidity conditions (85% non-condensing maxi-
mum).
4.7 When using the xRC-3363, follow all regulations for the locality in which the equipment is used.

www.midtronics.com
Product Specications
xRC-3363
7
Power
Input: 100 – 240 , 50/60 Hz; 12A max.
Output: 336 V , 3A
Charge Cables
•2m
Power Cord
Accepts C19 locking connector for region-specic
power cables:
•United States: EMA 5-15 termination, rated
at 15A/125V UL CSA
•EU: EMA 5-15 termination, rated at
16A/250V UL CSA
•UK: EMA 5-15 termination, rated at
13A/250V UL CSA
Applications
•Automotive •Heavy-Duty
Battery Chemistry Compatability
•Lithium ion
•Nickel Metal Hydride
Humidity
•15% to 85% R.H., non-condensing
Dimensions
(without cables)
•WEIGHT:16,78 KG (37 LBS)
•44 CM (L) X 43,5 CM (W) X 23 CM (H)
Temperature
•Operating temperature range: 0°C to +50°C
(32°F to +140°F)
•Storage temperature range: -10°C to + 85°C
(14°F to 185°F)
Certications
•CE
•RoHS
•FCC
•UL
Connectivity
•Bluetooth 2.0
•WiFi
•USB 2.0 connection
•CAN bus interface
User Interface
•Advanced navigation and charge
applications
•5”Touch Screen
•5 button directional input pad
Product Specications

Midtronics Inc. 7000 Monroe Street Willowbrook, IL 60527
8
1 – Introduction & Overview xRC-3363
1 – Introduction & Overview
Safety Precautions
For safe, ecient, and accurate charging, review the safety and operating instructions in this manual
before using the xRC-3363. In addition, follow all manufacturers’ instructions and SAE instructions.
Always use the necessary safety precautions when working with batteries to prevent severe injury
or death. Follow all OEM instructions and SAE safety recommendations, as well as the following
precautions:
Risk of explosive gases.
Never smoke or allow a spark or
ame in the vicinity of a battery.
Batteries can produce a highly explosive
mix of gases, even when the battery is
not in operation. Always work in a well-
ventilated area. Failure to follow these
instuctions may result in personal injury
or death.
Wash hands after handling.
REQUIRED BY CALIFORNIA PROP. 65: Battery
posts, terminals, and related accessories contain
lead and lead compounds, chemicals known to
the state of California to cause cancer and birth
defects or other reproductive harm.
•Battery electrolyte can be hazardous. Refer to Material Safety Data Sheet for precautions and
safety procedure for the type of battery being serviced
•Keep hair, hands, and clothing as well as the xRC-3363 cords and cables away from moving
engine parts.
•Before working with a battery, remove personal metal items such as rings, bracelets, necklaces,
watches, etc. A battery can produce a short circuit current high enough to weld such items-
causing a severe burn.
•Use caution when working with metallic tools to prevent sparks or short circuits.
•Never lean over a battery when charging.
•Never operate xRC-3363 outside of dened operating temperature range (pg. 7).
•Never charge a battery outside of OEM specied temperature range.
Connecting To AC Power
Plug the xRC-3363 into a dedicated, grounded nominal 15-amp or higher AC outlet.

www.midtronics.com
1 – Introduction & Overview
xRC-3363
9
Front View
Touchscreen Display Screen Power Button
USB Port 5 Button Directional Input Pad
Note: It is normal for the xRC-3363 fans to continue running after turning screen off
Rear View
LV Common Cable Connection Fuse Door Cover
HV Common Cable Connection Power Cord Socket

Midtronics Inc. 7000 Monroe Street Willowbrook, IL 60527
10
1 – Introduction & Overview xRC-3363
Connections
Charging Cables
1. Insert the LV Common Cable.
2. Insert the HV Common Cable.
Locking Power Cord
Pull back on the red tab on the side of the connector to release/remove the power cord from the
unit’s power socket.
Pull Back To
Release

www.midtronics.com
1 – Introduction & Overview
xRC-3363
11
Main Menu
Additional Screens
The dots at the bottom or side of a menu or results screen indicate additional screens are available.
Use your nger to swipe horizontally left, right, up or down across the Controller screen to view all
of the results.
Screen 1
Screen 2
Screen 3
Screen 1
Screen 2
Swipe
Horizontally
Swipe
Vertically
Initial Setup
1. Upon initial power-up, the Language Settings screen is displayed. Tap Next to continue.
System Language Select the Controller default language displayed on the screen.
Test Result Language Select the Controller default language for all displayed tests and
test results.
2. The Create User screen is displayed. Enter a WSLX ID: and tap Next.
IMPORTANT:
B y d e f a u lt, t h e r s t u s e r c r e a t e d is a s s ig n e d A d m i n is t r a t o r r ig h t s .
T a p A d d U s e r t o a d d a d d it io n a l u s e r s . S e e C h a p t e r 6 : S e t ti n g s t o c h a n g e t h e s e d e f a u lt s.
Select Time Format: 12-hour or 24-hour format
Select Date Format: DD/MM/YYYY, MM/DD/YYYY, or YYYY/MM/DD
Select Time Zone: Time zone oset from Greenwich Mean Time
Set Date: Set the current date
Set Time: Set the current time in the selected time zone
3. The Test Settings are displayed. Tap Next to continue after making any adjustments.
Temperature Units Celsius or Fahrenheit
Decimal Separator 00.00 (dot) or 00,00 (comma)
4. The Congured WiFi Networks screen is displayed. Tap Next to continue after making any
adjustments.

Midtronics Inc. 7000 Monroe Street Willowbrook, IL 60527
12
1 – Introduction & Overview xRC-3363
Tap on the WiFi icon to display a list of detected and congured WiFi networks.
Add Network Delete Selected Network
Connect Selected Network Refresh Network List
Adding A Network
• Tap
to add a WiFi network.
A list of detected wireless networks is displayed with next to the selected network.
5. • Tap
>to access the network Security and IP Settings.
Security None
WEP
WPA/WPA2 PSK
IP Address DHCP
Static
• Tap to congure the selected network.
• Once the network has been successfully congured, tap to return to the list of avail-
able congured networks. A indicates the selected network.
D e l e t in g A N e t w o rk
• Tap a displayed network.
• Tap
to delete the network and tap Yes to conrm.
6. For Ford Dealers, enter dealership P&A Code. If not a Ford dealer, the BMIS Login screen is
displayed. If you have a Midtronics 7BMIS account, enter your Username and Password. Tap
Xto skip. Contact Midtronics for inquiries regarding Midtronics BMIS accounts.
7. The Shop Settings screen is displayed. Tap Next to continue after making any adjustments.

www.midtronics.com
1 – Introduction & Overview
xRC-3363
13
8. The login screen is displayed.
9. Select your User ID to access the Main Menu
Menu Bar
Main Menu Selection Area
Main Menu Icons
Icon Description Icon Description
Rescue Charge
Charges battery to sufcient
State of Charge (SOC) to turn
over engine
History
Access archived test histories
or search test history by VIN
or by technician.
Messages
Access messages, alerts and
notications on tool
Sengs
Setup/adjust: WiFi, printer
setup,
email settings, user
information, default language,
display/sound settings,
BMIS, shop info, connected
devices, tool software version
information.

Midtronics Inc. 7000 Monroe Street Willowbrook, IL 60527
14
2 – Rescue Charge xRC-3363
2 – Rescue Charge
Rescue
Charge
Use this function to perform a rescue charge on the battery pack.
Hazardous voltage.
An improper connection can result in electric
shock
To avoid electrical shock or burn, never alter the xRC-
3363’s original AC cord and plug. Disconnect plug from
outlet when the xRC is idle. Failure to follow these instruc-
tions may result in personal injury or death.
High Voltage Present.
Make sure to properly prepare the battery pack
by following all required OEM procedures. Failure
to follow these instructions may result in personal
injury or death.
High Voltage Present.
Before charging, inspect all cables to be used for
damage to insure that all are in good working order.
Damage may include but is not limited to: break-
age, swelling, discoloration, corrosion or softening.
Do not operate xRC-3363 with damaged cables.
Failure to follow these instructions may result in
personal injury or death.
Procedure
1. At the Main Menu, select Rescue Charge.
2. Select the Vehicle Input method.
V IN S c a n : Scan the VIN using a handheld barcode scanner.
V IN E n t r y : Manually enter the VIN using the on-screen keyboard.
Y M M S e le c t io n : Select the vehicle year, make, and model.
3. Conrm the Vehicle information displayed and tap Next.
4. Follow the on screen instructions to connect to battery and complete rescue charge.
xRC-3363 will direct you to correct cable set based on vehicle input. The xRC begins the
rescue charge process once the initialization process has been successfully completed.

www.midtronics.com
2 – Rescue Charge
xRC-3363
15
Field Description
Initial Pack Voltage The voltage of the pack when the rescue charge was started
Target Pack Voltage Preprogrammed nishing pack voltage based on pack type
Final Pack Voltage The voltage of the pack when the rescue charge was
completed
Amp Hours The total number of Amp Hours accepted by the pack
Charge Duration The amount of time that the rescue charge was operational.
The format is HH:MM:SS
The results are displayed on the xRC screen.
T a r g e t V o lt a g e A c h ie v e d : The rescue charge ran to completion without any errors.
S t o p p e d E a r ly : The rescue charge was stopped by the user before running to completion.
E r r o r D e te c t e d : There was a fault encountered during the rescue charge. Tap ? for additional
error code details.
Tap Send Results to email or print the Rescue Charge Results.
5. Follow the on-screen directions to disconnect the cables.

Midtronics Inc. 7000 Monroe Street Willowbrook, IL 60527
16
3 – History xRC-3363
3 – History
History
History shows tests that have been performed on the tool. Records are listed in
order of occurance with the most-recent record on the top of the list.
At the Main Menu, tap History. By default the Tool History screen is displayed.
Tool History
Use Tool History to view test history. Selecting a record will show the full test results.
Tap >to view individual test details.
Tap ∑to view Total By Test Decision, Total By Test Type, and Total By Date And Location.
Tap Done to return to the Tool History screen.
Vehicle History
Vehicle History shows tests associated with a given vehicle. When rst selected, all
records for the most recent vehicle will be shown. The user will have the ability to
search for vehicles by VIN to show records for another vehicle.
Tap >to view individual test details.
Tap to search Vehicle History.
M a n u a l V IN L o o k u p : Manually enter the VIN using the on-screen keyboard.
V I N S c a n : Scan the VIN using a handheld barcode scanner.
Y M M S e le c t io n : Select the vehicle year, make, and model. The list returned will include all
VINs that have been tested for that Year, Make, Model. There is also the option to show tests
for all vehicles with that Year, Make, Model.

www.midtronics.com
3 – History
xRC-3363
17
Date History
Date History shows results by date tested.
Tap to select a date.
USB Data Upload
Export history
1. Connect a USB drive to the front panel of the xRC.
2. Select the type of data to export.
3. Tap Conrm once the data has been exported.
4. Remove the USB drive.

Midtronics Inc. 7000 Monroe Street Willowbrook, IL 60527
18
4 – Messages xRC-3363
4 – Messages
Messages
The Messages function displays alerts and notications for upcoming tests and
activities. This includes scheduled testing as well as tool software updates and
maintenance opportunities.
Mark Read Or Unread Delete Notication
Perform Message Action
Tap to return to the previous screen or to return to the Main Menu.
Accessing Messages
A number is displayed next to the Messages icon when the analyzer has received
any critical messages. The number does not include non-critical Notications.
Unread Critical Messages Read Critical Messages
1. Tap Messages on the Main Menu screen.
2. Tap to read a message.
Tap to perform the message action item.
Tap to delete a message.
3. Tap ∧to collapse a list of messages or ∨to expand the list.
Message Types
Critical: An important action cannot be performed and may require user input in order to
complete action.
Notications: Indicates an action has been performed or data has been sent.

www.midtronics.com
5 – Settings
xRC-3363
19
5 – Settings
Sengs
Use the Setup options to setup and adjust WiFi, user information, default
language, display settings, shop information, user management, connected
accessories, and device information.
Tap to return to the previous screen or to return to the Main Menu.
WiFi
Use WiFi to view, add, and delete wireless networks.
Tap on the WiFi icon to display a list of detected and congured WiFi networks.
Add Network Delete Selected Network
Connect Selected Network Refresh Network List
Adding A Network
1. Tap to add a WiFi network.
A list of detected wireless networks is displayed with next to the selected network.
2. Tap >to access the network Security and IP Settings.
Security None
WEP
WPA/WPA2 PSK
IP Address DHCP
Static
3. Tap to congure the selected network.
4. Once the network has been successfully congured, tap to return to the list of available
congured networks. A indicates the selected network.
Deleting A Network
1. Tap a displayed network.
2. Tap to delete the network and tap Yes to conrm.

Midtronics Inc. 7000 Monroe Street Willowbrook, IL 60527
20
5 – Settings xRC-3363
Printer Settings
Use Printer to view, add, and delete WiFi printers.
NOTE: WiFi network communication must be successfully established
before a printer or printers can be detected and setup.
Tap on the Printer icon to display a list of available printers on the congured WiFi and
Bluetooth networks.
Edit Printer Settings Printer Setup
Delete Selected Network Congured Printers
Print Test Page
Adding A WiFi Printer
1. Tap to add a printer. Printer must be turned on and connected to WiFi..
2. Tap to add a WiFi printer.
Make sure the printer is on and connected to the same wireless network as the analyzer.
3. Tap once readty to connect.
Email
Displays all entered email addresses. Addresses can be added,
edited, and deleted. Entered email accounts are added to the
email address book. Frequently used email addresses can be
selected from the displayed address list rather than being re-
typed each time.
Add Address Server Settings
Edit Address Address Book
Delete Selected Address Send Test Email
Add Address
1. Tap to add an email address.
2. Use the displayed keypad to enter the contact name and email address.
3. Tap Add to add the address to the email list or Cancel to exit and return to the email list.
Table of contents
Other Midtronics Batteries Charger manuals
Midtronics
Midtronics DCA-8000P User manual
Midtronics
Midtronics MCC-070 User manual

Midtronics
Midtronics PowerSensor Micro500 User manual
Midtronics
Midtronics GR1 240 User manual
Midtronics
Midtronics psc-700 User manual
Midtronics
Midtronics ChargeXpress PRO 50-2 User manual
Midtronics
Midtronics GR1-120 User manual

Midtronics
Midtronics inCHARGE 940 User manual
Midtronics
Midtronics DCA-8000 User manual

Midtronics
Midtronics GR8 1100 User manual
