Midtronics GR1-120 User manual

For testing and charging 12-volt
automotive batteries
INSTRUCTION MANUAL
Battery Management Innovation
DIAGNOSTIC
CONDUCTANCE CHARGER


•1•
Contents
Safety instructions.............................................................................................................................3
Installing the handle ...........................................................................................................................9
Operation ........................................................................................................................................10
Front panel ................................................................................................................................10
Back panel ................................................................................................................................10
Charging modes........................................................................................................................ 11
Diagnostic fast charge.........................................................................................................11
Connect the charger to the battery.................................................................................. 11
Connect to AC power ......................................................................................................11
Select charging mode ..................................................................................................... 12
Select charge type ..........................................................................................................12
Select battery location..................................................................................................... 12
Select battery type ..........................................................................................................12
Enter battery rating.......................................................................................................... 12
Diagnostic testing ......................................................................................................12
Diagnostic charging ................................................................................................... 13
Automatic charging .................................................................................................... 13
Charge completion.....................................................................................................14
Top-off charging.........................................................................................................14
Top-off charge completion ......................................................................................... 15
Test code generation .................................................................................................15
Recovery mode.......................................................................................................... 16
Recovery mode charge completion ........................................................................... 16
Manual charge......................................................................................................................17
Connect the charger to the battery.................................................................................. 17
Connect to AC power ......................................................................................................17
Select charging mode ..................................................................................................... 17
Select battery type ..........................................................................................................17
Select charge current...................................................................................................... 17
Enter battery rating.......................................................................................................... 18
Enter charging time......................................................................................................... 18
Timed charging .......................................................................................................... 18
Timed charge completion .......................................................................................... 18
Continuous charging.................................................................................................. 19
Continuous charge completion .................................................................................. 19

•2•
Contents
Jump start vehicle .....................................................................................................................20
Connect the charger to the battery.................................................................................. 20
Connect to AC power ......................................................................................................20
Select charging mode ..................................................................................................... 20
Options menu ..................................................................................................................................21
View test codes............................................................................................................... 21
View last test data........................................................................................................... 21
Print last test data ...........................................................................................................22
Select language...............................................................................................................22
Troubleshooting...............................................................................................................................23
Error messages ........................................................................................................................ 23
Charger operation .....................................................................................................................23
Maintenance ....................................................................................................................................24
Patents, Service.............................................................................................................................. 25
IMPORTANT: READAND SAVE THIS SAFETYAND INSTRUCTION MANUAL. KEEP IT
WITH OR NEAR THE CHARGERATALL TIMES.
1. IMPORTANT SAFETY INSTRUCTIONS
WARNING: RISK OF EXPLOSIVE GASES
1.1 WORKING IN THE VICINITY OFALEAD-ACID BATTERY IS DANGEROUS. BATTERIES
GENERATEEXPLOSIVE GASES DURING NORMALBATTERY OPERATIONAND WHEN
DISCHARGED OR CHARGED. FOR THIS REASON IT IS OF UTMOST IMPORTANCE
THAT EACH TIME BEFORE USING YOUR CHARGER,YOU RE-READ THIS MANUALAND
MAKE CERTAIN YOU FULLY UNDERSTAND ITAND FOLLOW THE SAFETYAND
OPERATINGINSTRUCTIONS EXACTLY.
1.2 Toreducetherisk ofabattery explosion,followthesesafety instructionsandthose publishedby
thebatterymanufacturerandthe manufacturerofanyequipment youintendtouse inthevicinity
ofabattery.Review cautionarymarkingsonthese productsandonthevehicleengine andonthe
vehicleorequipmentcontainingthebattery.
1.3 CAUTION:Toreducethe riskofinjury,chargeonly rechargeableLEAD-ACIDTYPE batteries
whichmayincludeMAINTENANCE-FREE, LOW-MAINTENANCE OR DEEP CYCLE batteries.
Othertypesof batteries mayburstcausing personalinjuryand damage.
Ifyouare uncertainasto thetypeof batteryyouare attemptingtocharge orthecorrect procedure
forcheckingthe battery’sstate ofcharge,contacttheseller orbattery manufacturer.
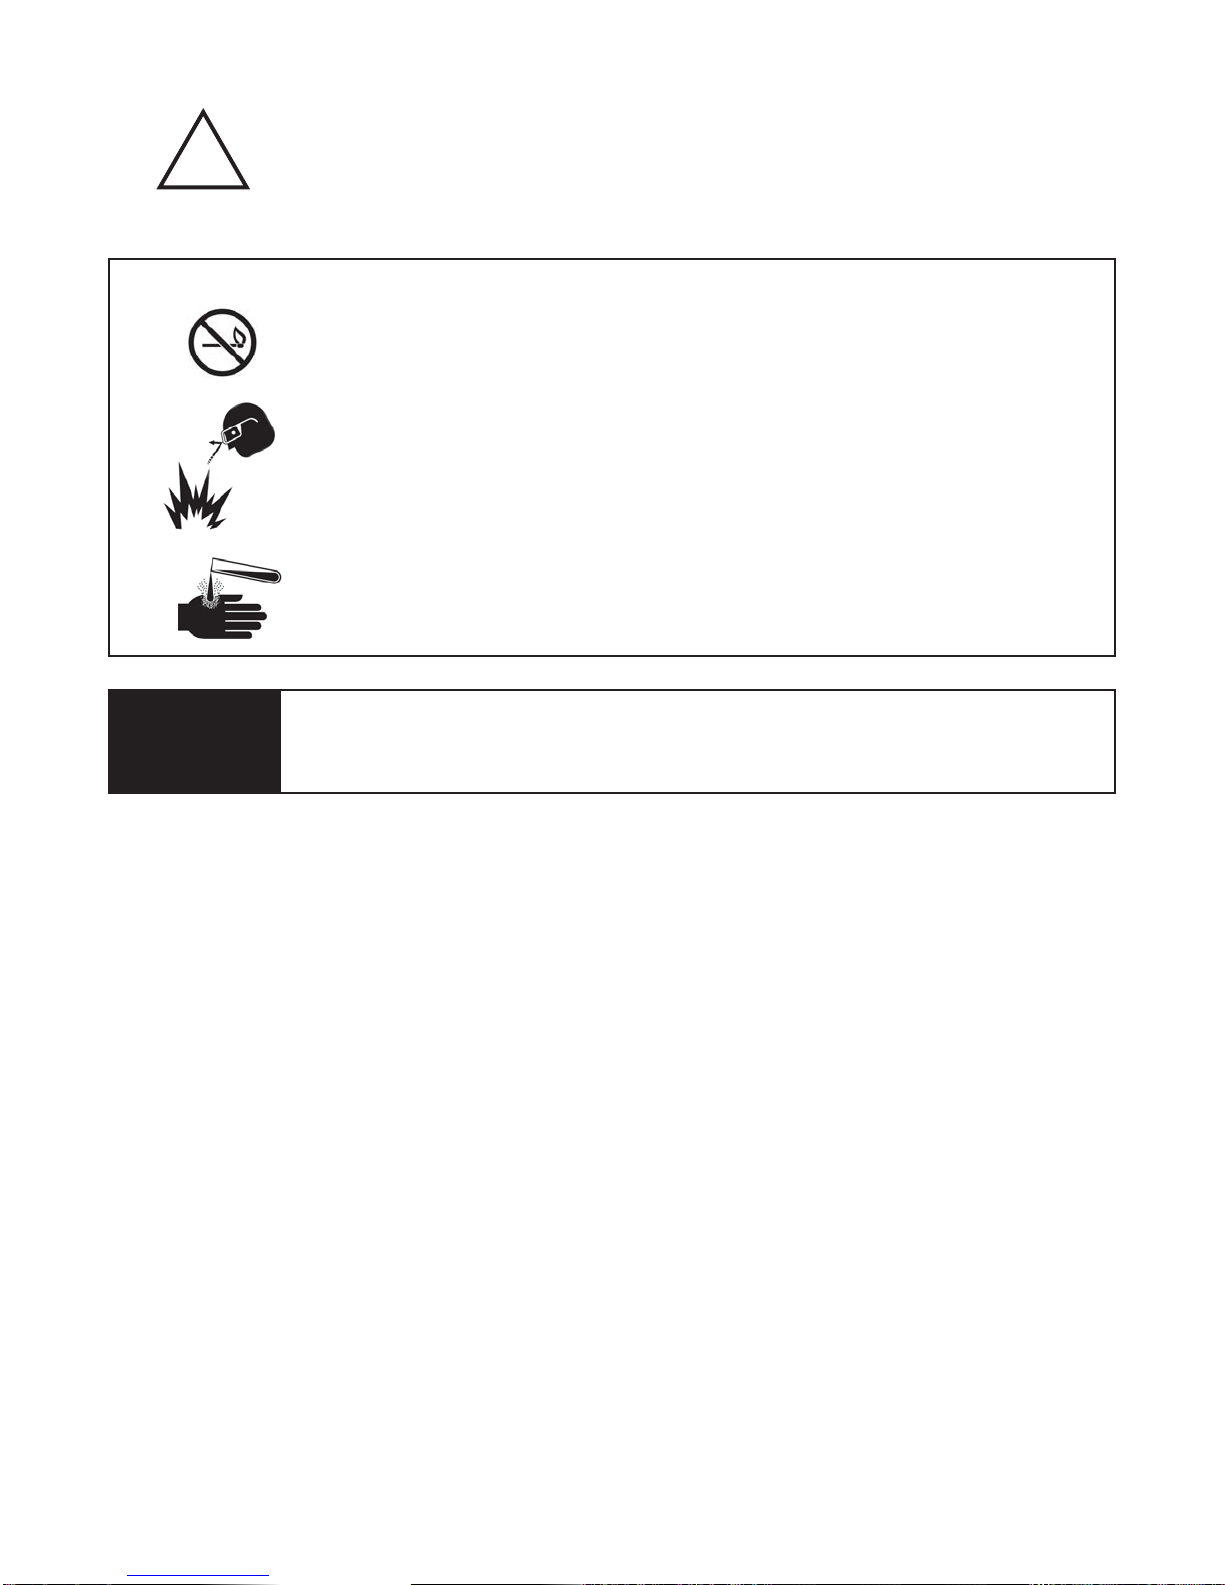
DANGER
Always wear complete eye protection: Explosive gases can
cause blindness or injury
Lead-acid batteries contain sulfuric acid that can cause
blindness or severe burns
Never smoke or cause a spark or flame in the vicinity of the
battery or engine.
SAFETY INSTRUCTIONS
• 3•
Requiredby
California
Proposition65
WARNING: Battery posts, terminals, and related accessories containleadand
leadcompounds,chemicalsknowntothestateofCaliforniatocausecancer
and birth defects or other reproductive harm. Wash hands after handling.
GR1-120 SafetyInstructions
CAUTION:Because of the possibility of personal injury, always use the
followingprecautions when working around batteries.
!

1.4 Theuse ofanattachment notrecommendedor soldby thebatterycharger manufacturermay
resultin arisk offire, electricshock, orinjury topersons.
1.5 To reducerisk ofdamageto theelectric plugandcord, pullby the plugrather thanthecord when
disconnectingthecharger.Haveadamagedcordorplug replacedimmediately.
1.6 PositiontheACandDCleadsto avoid trippingoverthem andtopreventdamage bythevehicle
hood,doors,or movingengineparts; protecttheleads fromheat,oil, andsharpedges.
1.7 Donot operatethecharger ifithas received asharpblow,beendropped orotherwisedamaged
inanyway; takeittoaqualified servicecenter.
1.8 Donot disassemblethecharger; takeitto aqualified servicecenterwhen repairisrequired.
Incorrectreassembly mayresult ina riskof electricshock orfire.
1.9 Ifthe chargerisinneedof service,callMidtronicsat1-800-776-1995 or1-630-323-2800.
1.10 To reducetheriskofelectric shock,unplugthe chargerfromtheACoutletbefore attemptingany
maintenanceorcleaning.Turningoffthecontrolswillnot reducethis risk.
1.11 BOATBATTERIESMUSTBEREMOVEDANDCHARGEDONSHORE.TOSAFELYCHARGE
THEMONBOARDREQUIRESEQUIPMENTSPECIALLYDESIGNEDANDULLISTEDFOR
MARINEUSE.
1.12 Do notoverchargethebattery.See 3.PreparingtoCharge theBattery.
1.13 Whenchargingabattery,place itinadry,well-ventilated area.
1.13 Neverplacearticles onor aroundthe chargerorposition thecharger ina waythatwill restrictthe
flowofcoolingair throughthecabinet.
1.15 An extensioncordshouldnot beusedunlessabsolutely necessary.SeeSafety Instructions(4.3).
1.16 Do notexpose thecharger torain orsnow.
2. PERSONALPRECAUTIONS
2.1 Alwayshave someonewithinrange ofyourvoice orcloseenough tocometo youraidwhen
workingaroundlead-acidbatteries.
2.2 Haveplenty offreshwater andsoapnearby incasebattery acidcontactsskin, clothing,oreyes.
2.3 Wearcomplete eyeprotection,clothing protection,andwearrubber soledshoes.When the
groundisverywet orcoveredwith snow,wear rubberboots.Avoidtouchingeyeswhileworking
nearthebattery.
2.4 Ifbattery acidcontactsskinorclothing,wash immediatelywith soapandwater.Ifacid entersthe
eyes,immediatelyflush themwith runningcold waterforat least10 minutesand getadoctor’s
attention.
• 4•
GR1-120 SafetyInstructions

2.5 NEVERsmoke orallowa sparkorflame inthevicinity ofthebattery orengine.
2.6 Beextra cautioustoreduce therisk of droppinga metaltoolontothe battery.Itmight sparkor
shortcircuitthe batteryorother electricalpart thatmaycause anexplosion.
2.7 Beforeworking withalead acidbattery,remove personalmetalitems such asrings, bracelets,
necklaces,watches,etc. Aleadacidbattery canproducea short-circuitcurrent highenoughto
weldsuch itemscausing asevere burn.
2.8 Usethe chargerforchargingLEAD-ACID batteriesonly.Thecharger isnotintendedtosupply
powertoalow-voltageelectrical systemotherthanapplicationsusing rechargeable,lead-acid
typebatteries.Do notusethe chargerforcharging dry-cellbatteries commonlyusedwith home
appliances. Thesebatteriesmayburst andcausepersonalinjury andpropertydamage.
2.9 NEVERcharge afrozenbattery; thawitout first.
3. PREPARING TO CHARGE THE BATTERY
3.1 Ifnecessary toremovethe batteryfromthe vehicletocharge,always firstremovethe grounded
terminalfromthe battery.Makesure allaccessoriesin thevehicle areofftopreventan arc.
3.2 Besure theareaaround battery iswellventilated whilethebattery isbeingcharged.Gas canbe
forcefullyblownaway byusinga pieceofcardboard orothernonmetallic materialasa fan.
3.3 Cleanthe batteryterminals.Be carefulto keep corrosionfrom comingintocontact withyour
eyes.
3.4 Adddistilled waterineachcell untilthebattery acidreachesthe levelspecifiedbythe
manufacturer.Thishelpspurgeexcessivegas fromthe cells.Donot overfill.Fora batterywithout
caps,carefullyfollowthemanufacturer’srecharging instructions.
3.5 Studyallthe batterymanufacturer’sspecificprecautions suchasremoving ornotremoving cell
capswhilecharging andtherecommended ratesof charge.
3.6 Determinethe voltageofbatterybyreferring tothevehicle owner’smanual andmakesure that
theoutputvoltage menuselectionis set atthecorrect voltage.Thecharger hasadjustable
chargerates,socharge thebatteryinitially atlowestrate.If thechargerhas onlyonevoltage,
verifythatthebatteryvoltagematchesthe voltageof charger.
4. AC POWER CORD CONNECTION INSTRUCTIONS
4.1 Thecharger mustbegrounded toreduce theriskof electricshock. Thechargeris equippedwith
anelectriccordhavingan equipmentgroundingconductorand agroundingplug.Theplug must
bepluggedintoan outletthatisproperly installedandgroundedin accordancewithalllocal codes
andordinances.
DANGER: NEVERALTER THEAC CORD OR PLUG PROVIDED. IF IT WILL NOT FIT
OUTLET, HAVEAPROPEROUTLETINSTALLEDBYAQUALIFIED ELECTRICIAN.AN
IMPROPER CONNECTION CAN RESULT IN THE RISK OFAN ELECTRIC SHOCK.
• 5•
GR1-120 SafetyInstructions
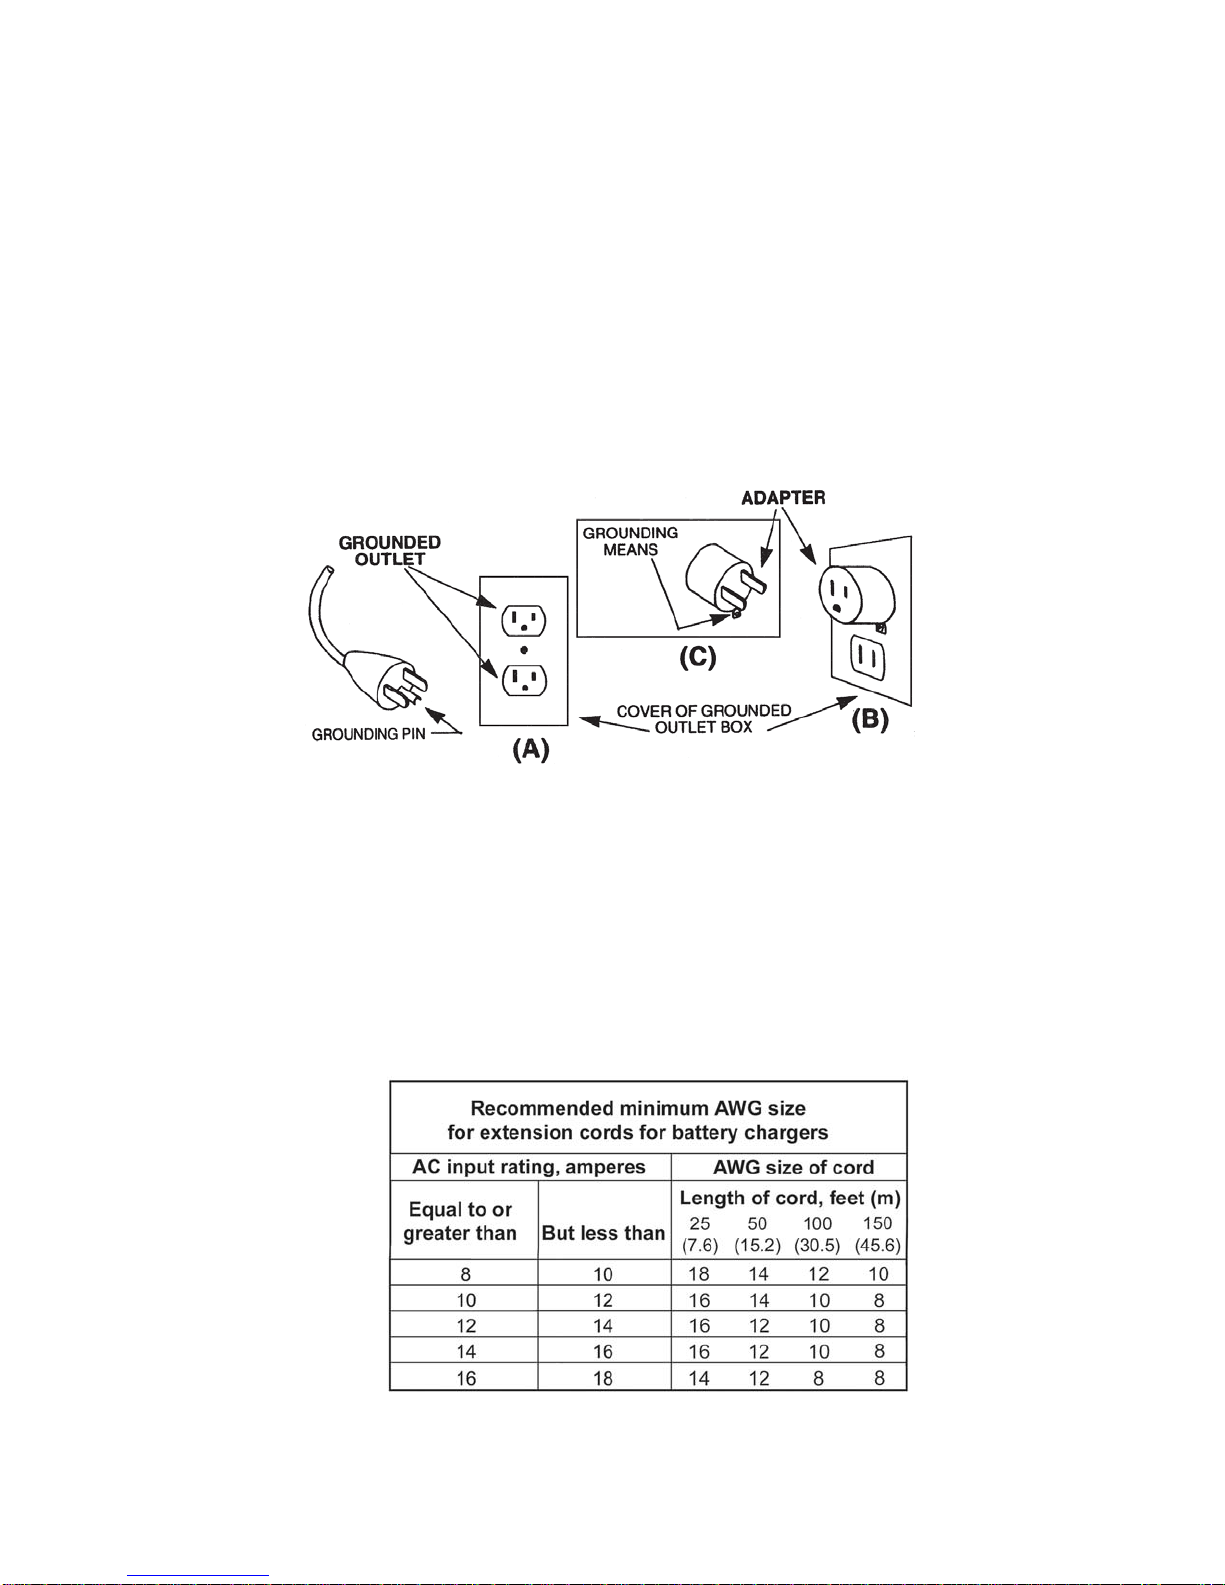
4.2 Thisbattery chargerisfor useona nominal120-voltcircuit andhasa groundingplug thatlooks
liketheplugillustratedin FigureA. Atemporaryadapter,whichlooks liketheadapterillustratedin
FiguresB andC, maybe usedto connectthis plugto atwo-pole receptacleas shownin FigureB
ifaproperlygroundedoutletis notavailable.Thetemporaryadapter shouldbeusedonlyuntila
properlygroundedoutletcanbeinstalledbya qualifiedelectrician.
DANGER: BEFOREUSINGANADAPTERAS ILLUSTRATED, BECERTAINTHAT THE
CENTER SCREW OF THE OUTLET PLATE IS GROUNDED. THE GREEN-COLORED
RIGID EAR OR LUG EXTENDING FROM THEADAPTER MUST BE CONNECTED TOA
PROPERLY GROUNDED OUTLET— MAKE CERTAIN IT IS GROUNDED. IF NECESSARY,
REPLACE THE ORIGINAL OUTLET COVER PLATE SCREW WITHALONGER SCREW
THAT WILLSECURE THEADAPTER EAR OR LUG TO THE COVER PLATEAND MAKE
THE GROUND CONNECTION TO THE GROUNDED OUTLET.
4.3 Anextensioncordshouldnotbeusedunlessabsolutelynecessary.Useofanimproperextension
cordcouldresultinariskoffireandelectricshock.Ifanextensioncordmustbeused,makesure
that:
a) The pins on plugs of the extension cord are the same number, size, and shape as those
of the plug on the charger;
b) The extension cord is properly wired and in good electrical condition; and
c) The wire size is large enough for theAC ampere rating of the charger as specified in the
followingtable:
• 6•
GR1-120 SafetyInstructions

5. CHARGERLOCATION
5.1 Locatethe chargeras farawayfrom thebattery asthe chargercables permit.
5.2 Neverplace thechargerdirectlyabove thebatterybeingcharged;gases fromthebatterywill
corrodeanddamagethecharger.
5.3 Neverallow batteryacidtodripon thechargerwhentakinggravityreadingsor fillingabattery.
5.4 Operatethe chargeronlyina well ventilatedarea,freeof dangerousvapors.
5.5 Storethecharger inasafe, drylocation.
5.6 Donot setthe batteryontop ofthe chargeror whereitsacid mightdrip ontocharger.
6. DC CONNECTION PRECAUTIONS
6.1 Turnthe powerswitchto theOFF position anddisconnect theACcordfromthe electricaloutlet
beforeyouconnect anddisconnectcharger clamps.Neverallowthe clampstotouch each other.
6.2 Whenattaching thecharger clamps,be certain tomake thebest possiblemechanical aswell as
electricalconnection.This willtendto preventtheclamps fromslippingoff theconnections,avoid
dangeroussparking,andassure saferandmore efficientcharging.Clamps shouldbekeptclean.
CAUTION:Settingthe powerswitchto OFF doesnot alwayseliminatean electricalchargein the
charger’scircuitryor clamps.
7. CHARGER CONNECTION FORABATTERY IN THE VEHICLE
7.1 Beforeworking onthevehicle,firmlyapply theemergencybrakeandplace themanual
transmissiongearshiftto NEUTRAL orshifttheautomatic transmissionto PARK.
7.2 Locatethe chargeras far awayfrom thebattery asthe chargercordspermit andposition theAC
andDCcordsto avoidsteppingon ortrippingover themandto prevent damagebythe hood,
doors,ormovingengineparts.
7.3 Stayclear offan blades,belts,pulleys,and anyotherpartsthecancause physicalinjury.
7.4 TurnOFF allvehicle loads,includingthedoor lights.
7.5 Checkthe polarityof thebattery posts.ThePOSITIVE (POS., P, +) postusually hasalarger
diameterthanthe NEGATIVE (NEG., N, –) post.
7.6 Determinewhich postofbattery isgrounded (connected)tochassis. Ifthenegative postis
grounded(asin mostvehicles),see paragraph7.7.If thepositivepost isgrounded, see
paragraph7.8orcallMidtronicsat1-800-776-1995or1-630-323-2800.
• 7•
GR1-120 SafetyInstructions

7.7 Fora negative-groundedvehicle,first connectthePOSITIVE (RED) chargerclamp tothe
POSITIVE (POS., P, +) ungroundedpost ofthebattery.Thenconnectthe NEGATIVE(black)
clampfrom thecharger tothe NEGATIVE (NEG., N, –) post.Do notconnect theclamp tothe
carburetor,fuellines, orsheet-metalbodyparts.When disconnectingthecharger,turnall
switchestoOFF,disconnectAC cord,andremove theNEGATIVE clampand thenthe
POSITIVE clamp.
7.8 Fora positive-groundedvehicle,connectthe NEGATIVE(BLACK)chargerclampto the
NEGATIVE (NEG., N, –) ungrounded postof battery.Thenconnect thePOSITIVE (RED) clamp
fromthe chargerto thePOSITIVE (POS., P, +) post. Donot connectthe clamp tothe carburetor,
fuellines,or sheet-metalbodyparts.When disconnectingthecharger,turnallswitches toOFF,
disconnectAC cord,andremove thePOSITIVE clamp andthenthe NEGATIVE clamp.
CAUTION: WHEN THE POSITIVE (+) POST OF THE VEHICLE BATTERYIS GROUNDED,
DOUBLE CHECK THE POLARITY.
8. CHARGER CONNECTION FORA BATTERY NOT IN THE VEHICLE
Ifnecessaryto removethebattery fromthevehicle orequipment,always firstremovethe
groundedterminalfromthebattery.
WARNING:To preventapossible arc,makesure allvehicleloadsare OFF.
FOLLOW THESE STEPS WHEN THE BATTERY IS OUTSIDE OF THE VEHICLE. ASPARK
NEAR THE BATTERY MAY CAUSEAN EXPLOSION. TO REDUCE RISK:
8.1 Checkthe polarityof thebattery posts.ThePOSITIVE (POS., P, +) postusually hasalarger
diameterthanthe NEGATIVE (NEG., N, –) post.
8.2 Connectthe POSITIVE (RED)charger clampto thePOSITIVE (POS., P, +) post ofthe battery.
Thenconnectthe NEGATIVE (BLACK) chargerclampto theNEGATIVE (NEG., N, –) postof the
battery.
• 8•
GR1-120 SafetyInstructions

INSTALLING THE HANDLE
CAUTION:Thechargermustbe fullyassembledbeforeoperating.
1. Locatethehandleandhardwareprovided.
2. Positionthehandle so thatthe anglefacesaway fromthe backofthe chargerand allmounting
holeslineup. Refertothedrawing.
3. Useall4 screwsto attachthehandle tothe backof thecharger.
• 9•
Screws (4) for attaching
the handle
Clamp holder bar
GR1-120 Installingthe Handle
OPERATION
Before using the GR1-120 Diagnostic Conductance Charger, visually inspect the battery. If there
are any signs of a leaking or cracked case, discard the battery. Do not attempt to charge a battery
that is in this condition.
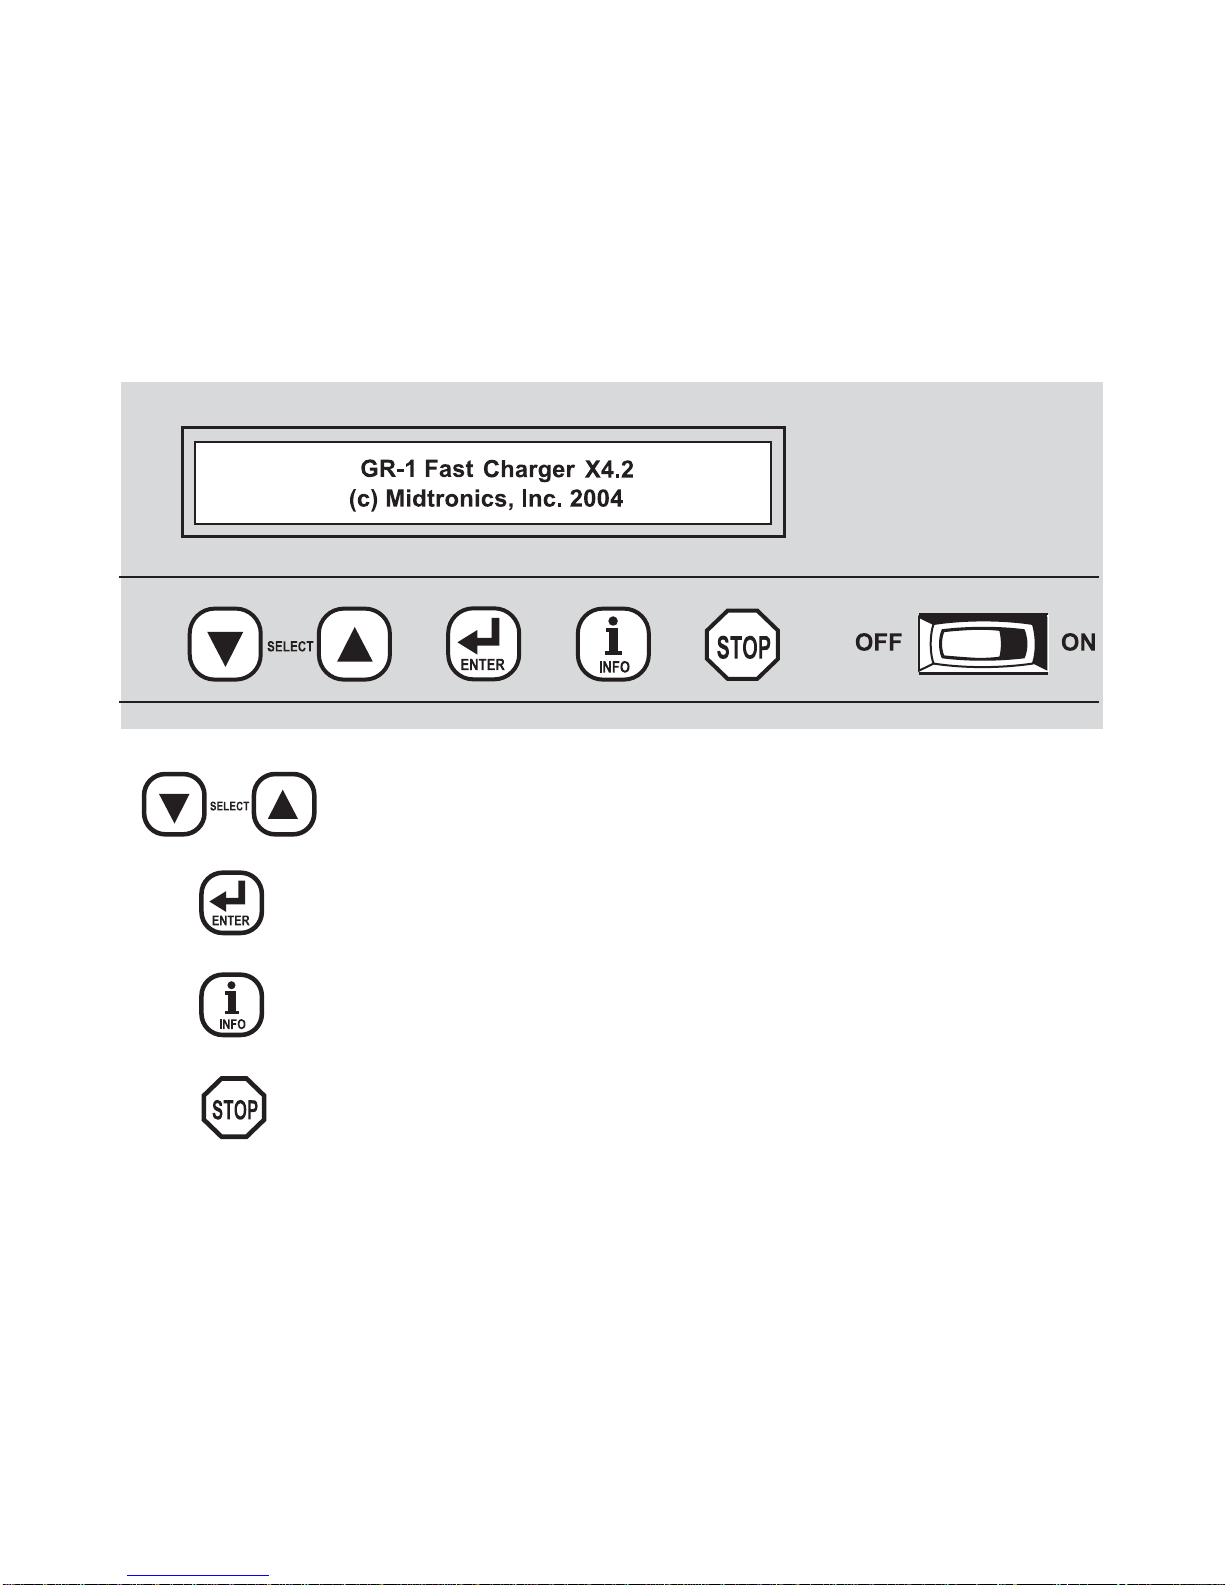
Front panel
Under the GR1-120 display there are 5 push-buttons and an ON/OFF switch.
The DOWN/UPARROW buttons are used for scrolling to selections on
the display and to increase/decrease displayed values.
The INFO button is used to display the options menu, which accesses
the Test Codes, Last Test Data, Language setup (English, French, or
Spanish), and theprinter (optional).
The ENTER button is used to accept the displayed selection and to
continue to the next step.
Back panel
The back panel houses the outlets for the positive and negative charging cables, theAC power
cord, and a 9-pin connector.
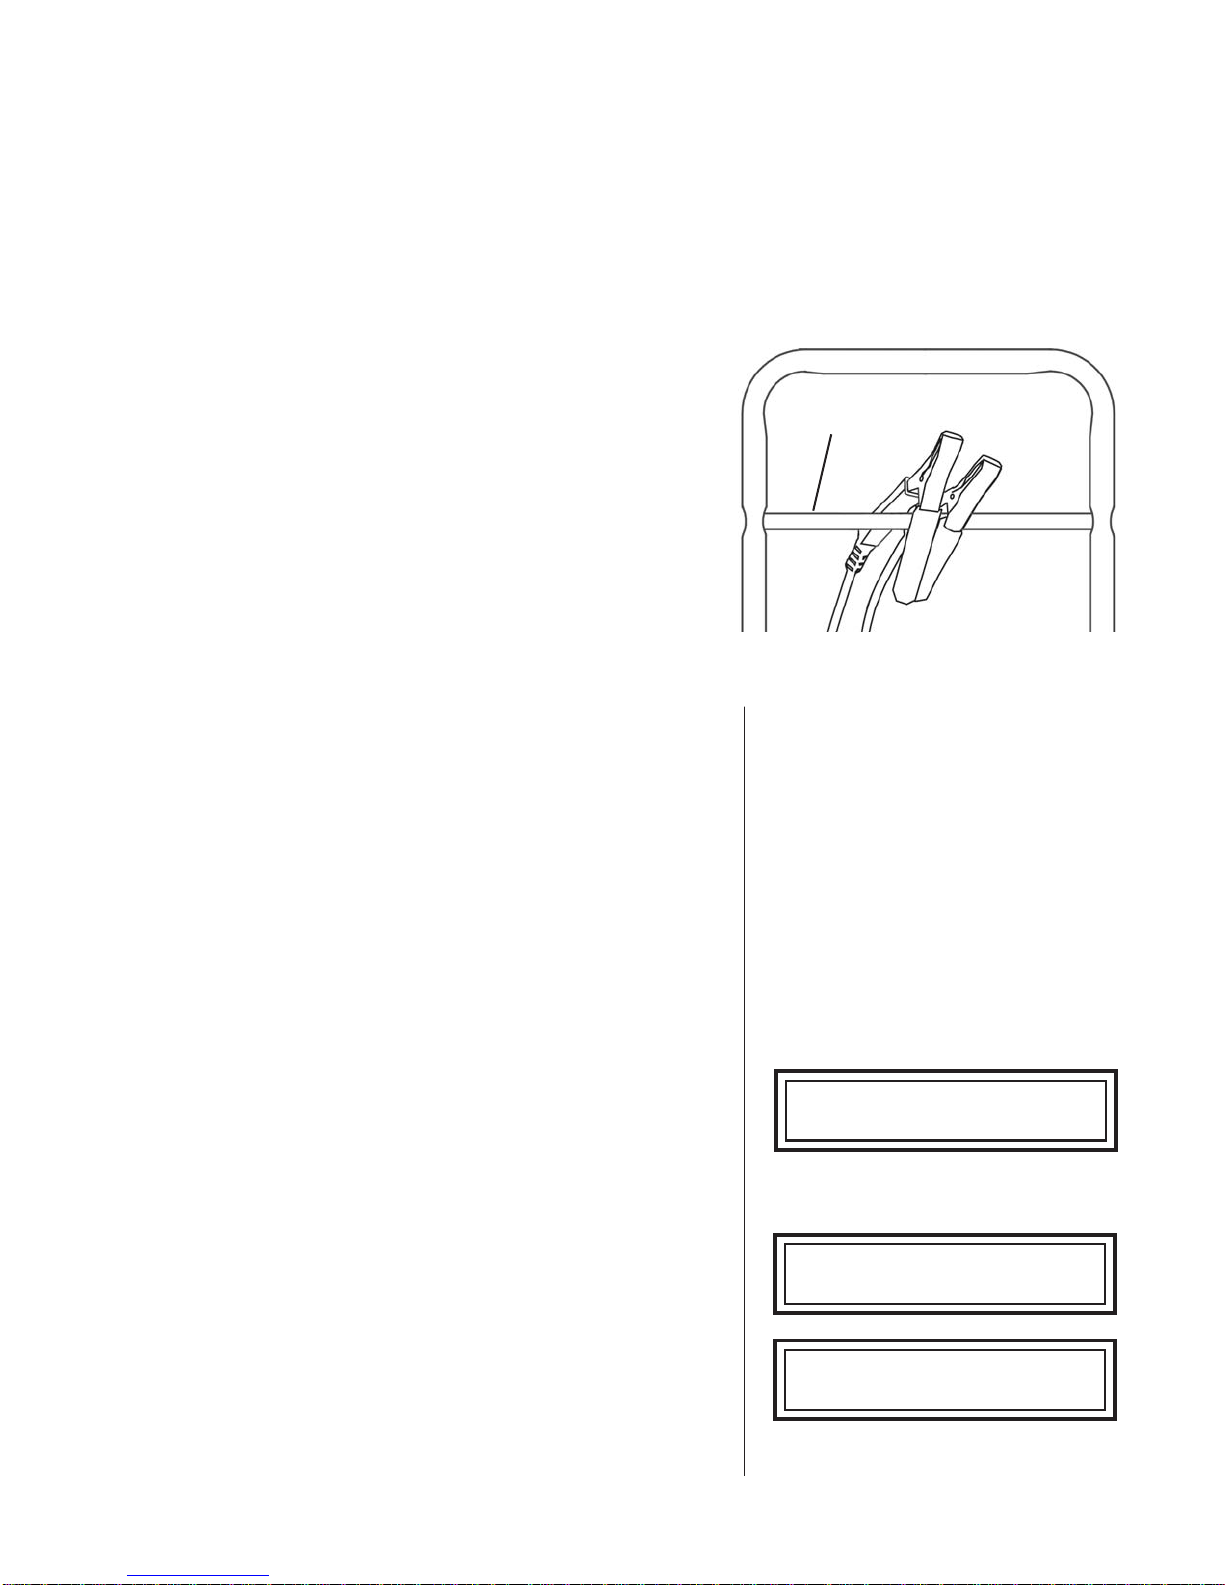
The handle, which attaches to the back panel, includes a clamp-holder bar. When used
consistently, this feature adds safety, convenience and longer operating life to the clamps, cables,
andcharger.
The STOP button is used to abort any charging cycle. During menu
selections, it can be used to go back to the previous step.
•10•
GR1-120 ChargingModes: Diagnostic FastCharge
•11 •
•Donotleave theclampslaying in batteryacid.
•Hangtheclamps totheclamp-holder barwhenthe
chargeris notin use.
•Cleanupanyacid spillsimmediatelywithbaking soda
andwater.
•Theclampsshouldbe keptclean.
•Improperuseof the9-pin connectormaycause
permanentdamagetothecharger.
Charging Modes
Important:
•Cleanthebattery terminals.Ifstud adaptersarerequired, fastenthemwith theproper tool. Donot
usethebattery clampstotighten adapters.
•Neverremovethe clampsfroma batterytoabort anactive chargingsession. Always pressthered
STOP buttonbeforeremoving theclamps.
Clamp-holder bar
Charger handle
GR1-120 ChargingModes: Diagnostic FastCharge
1. DIAGNOSTICFAST CHARGE
1.1 CONNECT THE CHARGER TO THE BATTERY
Important: Beforeconnecting theclampstothebattery,
turnthepower switchto theOFF positionand disconnect
theAC power cordfrom theelectricaloutlet
Connectthecharging clampstothe batteryin accordance
withallprecautions andsafetyinstructions Donot connect
eitherclamp tothe vehicle chassis.
1.2 CONNECT TOAC POWER
Plugthechargerintoa dedicated,grounded15-ampAC
outlet.Press thepower switchto theON position.
Iftheclamps arenotmaking goodcontact tothebattery
posts,thecharger willask youto checkthe connection.
Makesurethat bothjaws ofthecharging clampcome in
goodcontactwiththe connectionpoint.Check Clamp
Connectionswillremain onthe displayaslong ashalf of
oneclampis notmaking goodcontact.
Ifyouaccidentallyreverse theclampconnections,the
chargerwillsound analarmand displayCharger Clamps
Reversed.Press thepower switch tothe OFF position
andreconnectthe clamps.
Charger Clamps Reversed
Check Clamp Connections
GR-1 Fast Charger X4.2
(c) Midtronics, Inc. 2004
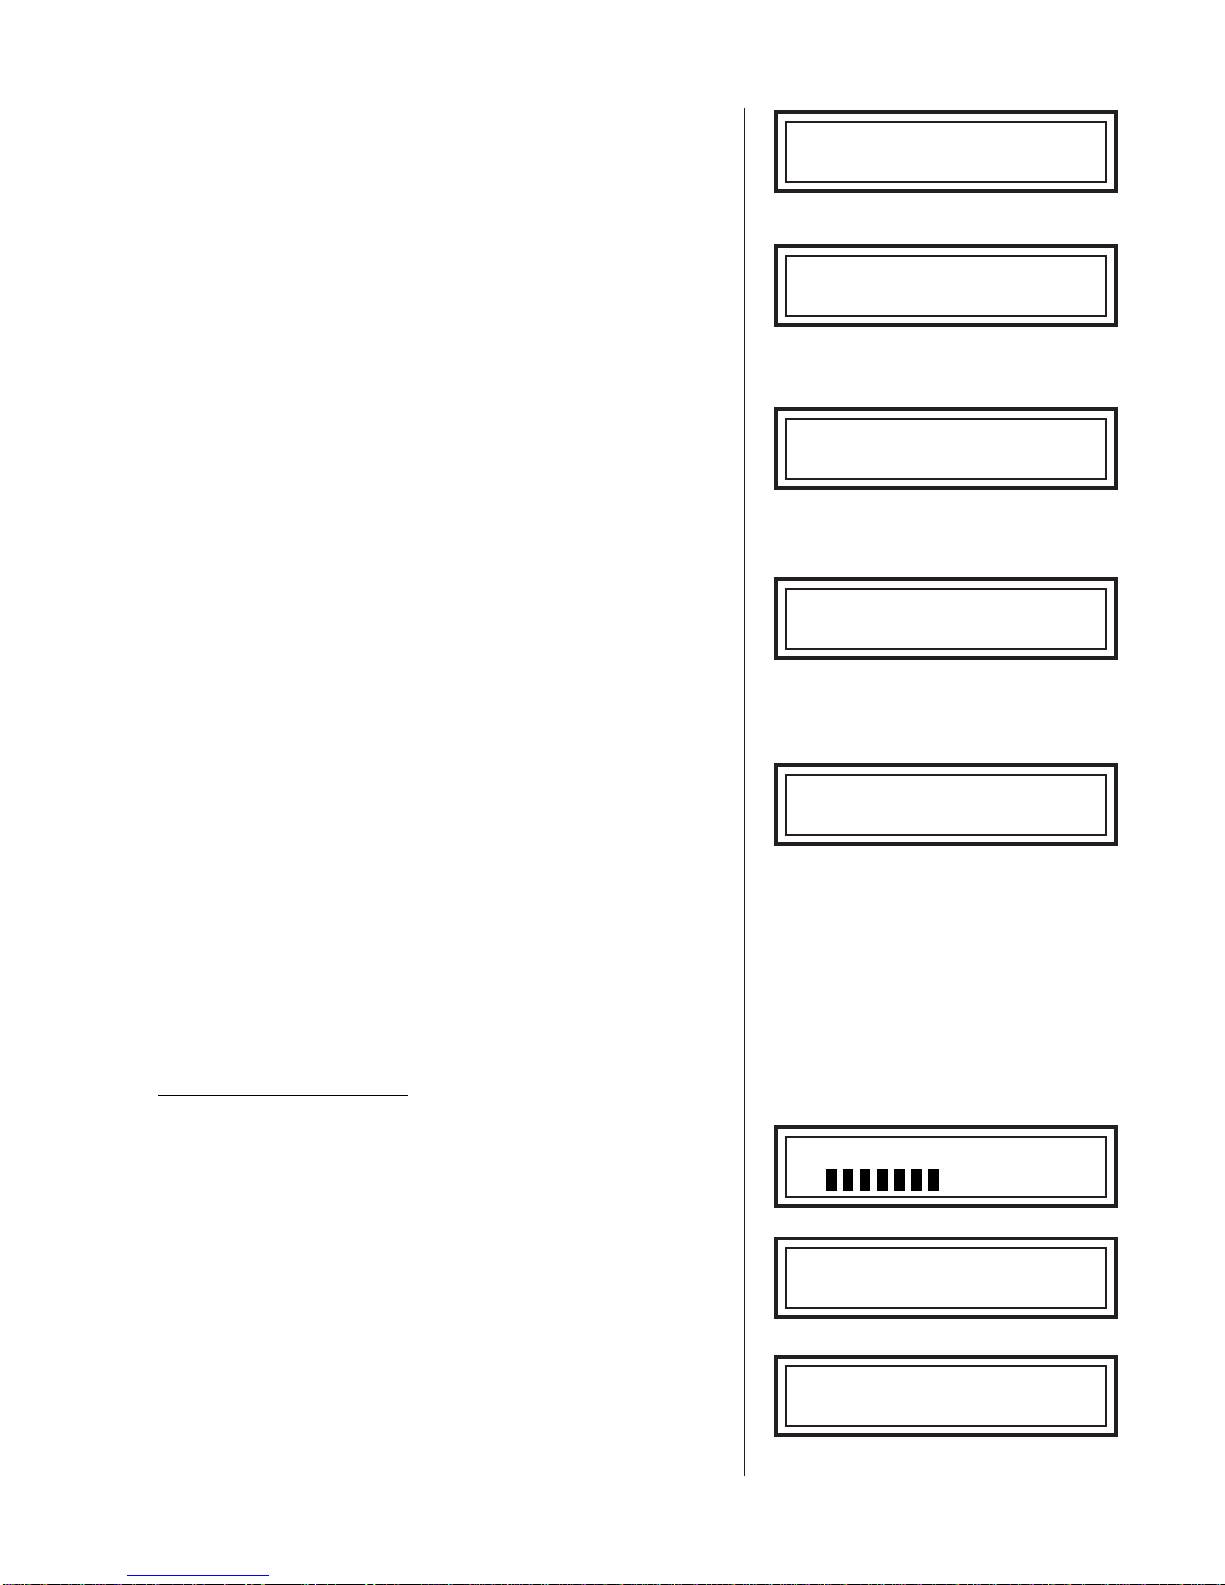
1.3 SELECT CHARGING MODE
UsetheDOWN/UP buttonsto selectDiagnostic
Fast Charge.Press the ENTER ↵↵
↵↵
↵ buttonto continue.
1.4 SELECT CHARGE TYPE
UsetheDOWN/UP buttonsto selectthe battery
chargetype: Dealer Inventory or In Service.Press the
ENTER ↵↵
↵↵
↵ buttonto continue.
1.5 SELECTBATTERYLOCATION
UsetheDOWN/UP buttons toselect thelocation of
thebattery:In Vehicle orOut of Vehicle.Press the
ENTER ↵↵
↵↵
↵buttonto continue.
1.6 SELECT BATTERYTYPE
Usethe DOWN/UP buttonsto select thebattery
type:LeadAcid orAGM/Spiral.Pressthe ENTER ↵↵
↵↵
↵
buttontocontinue.
1.7 ENTER BATTERY RATING
UsetheDOWN/UP buttonstoenter thebattery
ratingfrom 100 to1500 CCA. Pressthe ENTER ↵↵
↵↵
↵button
tocontinue.The DiagnosticFastCharge cyclewillbegin
automatically.
Thechargerwill controltheentire chargingsession
includingtheinitialdiagnostictestingandcharging, data
analysis,chargingduration,charginglevel,chargingrate,
top-offcharging(whenappropriate),andfinaldiagnostic
testing.
DIAGNOSTIC TESTING
Thechargerwill quicklyperform anumber oftests to
analyzethebattery.During some initialdiagnostic testsit
willdisplayamoving statusbar.
Iftheanalysis findsa batterytobe bad,the charger stops
anddisplaysReplace Battery or Replace-Bad Cell.
Iftheanalysis findsagood batterywitha sufficientstate
ofcharge,the chargerstops anddisplays theresults.
•12•
Mode ↑↓↑↓
↑↓↑↓
↑↓
Diagnostic Fast Charge ↵↵
↵↵
↵
Battery Location ↑↓↑↓
↑↓↑↓
↑↓
In Vehicle ↵↵
↵↵
↵
Select Charge Type ↑↓↑↓
↑↓↑↓
↑↓
Dealer Inventory ↵↵
↵↵
↵
Select Battery Type ↑↓↑↓
↑↓↑↓
↑↓
Lead Acid ↵↵
↵↵
↵
GR1-120 ChargingModes: Diagnostic FastCharge
Enter Rating ↑↓↑↓
↑↓↑↓
↑↓
500 CCA ↵↵
↵↵
↵
Analyzing Battery ........
........
....
9.83V 345CCA 0:00:00
Replace Battery AH: 0.0
12.72V 0:00:00
Good Battery AH: 0.0

Thedisplaywillalternatebetween theresultanda
message to press ENTER ↵↵
↵↵
↵ for the test code (see “Test
CodeGeneration.”
DIAGNOSTICCHARGING
Iftheanalysis findsabattery withinsufficientstate of
charge,thechargerbegins thediagnosticchargingmode.
Thismodegreatlyenhances thecharger’sability tojudge
hard-to-diagnosebatteries.
Thelengthoftime requiredfordiagnosticcharging varies
dependingonthebatterytype.Duringthis diagnostic
mode,whichdoes notexceed 5minutes,the charger
keepsyouinformedbydisplayingthechargingvoltage,
chargingcurrent,remainingtime tocharge,charging
mode,andthe amount ofchargeput backintothe battery
inamp-hours.Asindiagnostictesting, duringsome parts
ofdiagnosticcharging thedisplaywillshow amoving
statusbar.
Ifadecisionis notmadeduring DiagnosticMode,the
chargerwillproceedtoAutomatic Charging Mode.The
chargeralertsyou ofthis transitionwith amessage and
analarm.
AUTOMATIC CHARGING
Thechargercontrolsthecharging voltageandcharging
currentbasedon itsanalysisof thediagnostic testingand
chargingdata,andthebatteryinformationthat you
selected.Thechargercontinuously monitors thebattery
andanalyzesthecharging progress duringtheentire
automaticcharging session. Insome casesthe charger
mayfinda batterytobe badbeforethe endofthe
estimatedtimeto charge.In othercases thecharger may
detectthatthebattery haschargedmore quicklythan
estimated.Ineither casethecharger willalertyou withan
alarmandtheappropriate message.Forbatteries thatare
weakor hardtocharge thedisplay mayshow Recovery
Mode.Inthis modethe chargingalgorithm is optimizedto
trytorecoverthebattery.
•13•
15.5V 42.5A 0:02:34
Diagnostic Mode AH: 1.7
GR1-120 ChargingModes: Diagnostic FastCharge

Duringcharging,thechargerdisplaysthe chargingvoltage,
chargingcurrent,remainingtime tocharge,the charging
mode,andthe amount ofchargeput backintothe battery
inamp-hours.
Note: Ifyouneed tostop(abort) thecharging session,
presstheSTOP button.However,you willnotbe ableto
obtainatest codeafteran abortedcharge.
CHARGE COMPLETION
Theautomaticcharge sessionis completewhen the
properamountof chargeisput backinto thebatteryor the
remainingtimeto chargegoes tozero. Thechargerwill
thenperformitsfinaldiagnostic testsonthebattery.
Whentheanalysis iscomplete, thechargerwill alertyou
withanalarmanddisplaythebatteryvoltage,available
startingcurrentinCCA, totalchargingtime, battery
condition,andthefinal amountofchargeput backintothe
batteryinamp-hours.Thedisplaywill alternatebetweenthe
resultsand a message to pressENTER ↵↵
↵↵
↵forthe test
code.(See“TestCodeGeneration.”)
Thealarmwill soundevery 30secondsuntil youpress the
STOP buttonor disconnectthe chargerclamps from the
battery.
TOP-OFF CHARGING
Whentheresult isGood Battery,the chargerwill gointo
Top-Off Mode.You havethe optionof stoppingTop-Off
Modebypressing theSTOP buttonorthe chargerwill stop
automaticallywhenthechargingcurrent dropsbelow
2amps.The chargeralerts youof thetransition witha
messageandan alarm.
DuringTop-OffMode, thechargersoundsan alarmevery
minuteanddisplaysthecharging voltage, chargingcurrent,
Top-OffModemessage,andthe amountofchargeput
backintothebattery inamp-hours.
•14•
14.5V 35.5A Tmax=0:32:27
Automatic Charge AH: 4.6
14.53V 246CCA 0:00:20
Charging Aborted AH: 0.0
Analyzing Battery ........
........
....
12.82V 645CCA 0:40:36
Good Battery AH: 27.1
Press Enter For Code
GR1-120 ChargingModes: Diagnostic FastCharge

Cycledmessagesinform youthat thebatteryis readyto
beput backinto service:Good Battery / Top-Off
Charging / Hit STOP To End.
TOP-OFFCHARGECOMPLETION
WhenTop-OffModeiscomplete, thechargerwill alertyou
withanalarmanddisplaythe batteryvoltage,battery
condition,andtheamount ofchargeput backintothe
batteryinamp-hours.Thedisplaywill alternatebetween
thefinal results and amessage to press ENTER ↵↵
↵↵
↵for
thetestcode.(See “Test CodeGeneration.”)
Thealarmwill soundevery30 seconds,untilthe you
pressthe STOP buttonor disconnectthe charger clamps
fromthebattery.
TESTCODEGENERATION
Beforethecharge sessionis finished thedisplay will
alternatebetweenthe finalresultsand apromptto press
theENTER ↵↵
↵↵
↵buttonto generatethe test code.
Pressthe INFO ( i)button toprint the testcodes and the
finalresults.Toreturnto theModeselection screenand
starta newcharge session, pressthe STOP button.
•15•
13.3V 9.4A Top-Off
Good Battery AH: 23.1
13.3V 9.4A Top-Off
Top-Off Charging AH: 23.1
13.3V 9.4A Top-Off
Hit STOP To End AH: 23.1
12.74V 0:45:16
Good Battery AH: 28.2
GR1-120 ChargingModes: Diagnostic FastCharge
Test Code ↑↓↑↓
↑↓↑↓
↑↓
A1B2C 3D4E5 F6

RECOVERY MODE
Undercertainconditions thecharger will switchfrom
AutomaticChargeto Recovery Mode tofullycharge the
battery.Themaximum chargetimein RecoveryModeis
5hours;however,mostbatterieswill finishcharging
sooner.DuringRecovery Mode thechargerwill
continuouslyanalyzethebattery tomakea decisionas
quicklyaspossible
RECOVERY MODE CHARGE COMPLETION
WhenRecoveryModeends, the chargerwilldisplaythe
batteryvoltage,availablestartingcurrentinCCA,battery
conditionandthefinal amountofcharge put backintothe
batteryinamp-hours.Thisdisplay willalternatebetween
thefinal results and amessage to press ENTER ↵↵
↵↵
↵for
thetestcode.(See “Test CodeGeneration.”)Ifthe
decisionwasGood Battery,thecharger willproceedto
Top-OffMode.
Thealarmwill soundevery 30secondsuntil youpress
theSTOP buttonagain ordisconnect thecharger clamps
fromthebattery.
•16•
12.14V 365CCA 1:45:16
Replace Battery AH: 10.2
13.3V 9.4A Top-Off
Good Battery AH: 23.1
GR1-120 ChargingModes: Diagnostic FastCharge

2. MANUALCHARGE
Note:ManualChargedoesnot generatetestcodes.
2.1 CONNECT THE CHARGER TO THE BATTERY
Important: Beforeconnecting theclampstothebattery,
turnthepower switchto theOFF positionand disconnect
theAC power cordfrom theelectricaloutlet
Connectthecharging clampstothe batteryin
accordancewithall precautionsandsafety instructions
Donot connecteither clampto thevehicle chassis.
2.2 CONNECT TOAC POWER
Plugthechargerintoa dedicated,grounded15-ampAC
outlet.Press thepower switchto theON position.
Iftheclamps arenotmaking goodcontact tothebattery
posts,thecharger willask youto checkthe connection.
Makesurethat bothjaws ofthecharging clampcome in
goodcontactwith thebatterypost. CheckClamp
Connections willremainon thedisplay aslong ashalfof
oneclampis notmaking goodcontact.
Ifyouaccidentallyreverse theclampconnections,the
chargerwillsound analarmand displayCharger Clamps
Reversed.Press thepower switch tothe OFF position
andreconnectthe clamps.
2.3. SELECT CHARGING MODE
Usethe DOWN/UP buttonsto selectManual
Charge.Press the ENTER ↵↵
↵↵
↵ buttonto continue.
2.4 SELECT BATTERY TYPE
Usethe DOWN/UP buttonsto selectthe battery
type:LeadAcid or AGM/Spiral.Press theENTER ↵↵
↵↵
↵
buttontocontinue.
2.5. SELECT CHARGE CURRENT
Usethe DOWN/UP buttonsto selectthe output
current:10AmpMode,30AmpMode, or60AmpMode.
Pressthe ENTER ↵↵
↵↵
↵buttonto continue.
Notes: Whenindoubt, startwith thelowestcharging rate.
Ifyouselect60AmpMode,thechargerwillautomatically
switchto30Amp Mode afteronehourof timedor
continuouscharging.
GR1-120 Charging Modes: Manual Charge
•17•
Mode ↑↓↑↓
↑↓↑↓
↑↓
Manual Charge ↵↵
↵↵
↵
Select Battery Type ↑↓↑↓
↑↓↑↓
↑↓
Lead Acid ↵↵
↵↵
↵
Select Charge Current ↑↓↑↓
↑↓↑↓
↑↓
10 Amp Mode ↵↵
↵↵
↵
Charger Clamps Reversed
Check Clamp Connections
GR-1 Fast Charger X4.2
(c) Midtronics, Inc. 2004

2.6 ENTER BATTERY RATING
Usethe DOWN/UP toenter abattery ratingfrom
100 to1500 CCA. Pressthe ENTER ↵↵
↵↵
↵buttonto
continue.
2.7 ENTER CHARGING TIME
UsetheDOWN/UP buttons toselect thecharging
timefrom5to 120 minutes.
Pressthe ENTER ↵↵
↵↵
↵buttonto beginthe timedcharge.
Usingthe UP buttonto scroll past120 minuteswill
selecttheContinuous Charge mode.
PresstheENTER ↵↵
↵↵
↵buttonto beginthe continuous
charge.(The STOP buttonis usedto turnoff continuous
charging.)
Important:DuringManualMode,theGR1-120charges
thebatterybasedonthe voltage,current,andcharge
durationthatyou select.Becausethe chargerdoesnot
monitorthecharging progress tooptimizecharging levels
orreducecharging,you shouldmonitorthe battery’sstate
ofchargeandtemperature.Anychargingafterthe battery
isfullycharged willresultin excessivebattery
temperatureandgassing,which canshortenbattery life.
TIMEDCHARGING
Ifyouhaveselected achargingtime(between 5and120
minutes),thechargerwill analyzethebattery,briefly
displaythemeasuredvoltageandavailablestarting
currentinCCA,and beginchargingat theselectedlevels.
Duringchargingthechargerkeeps youinformedby
displayingthechargingvoltage,chargingcurrent,
remainingtimetocharge, chargingmode,and the
amountofcharge putbackinto the batteryinamp-hours.
TIMED CHARGE COMPLETION
Themanualcharge sessionis completewhen the
selectedtime tocharge goesto zero.
Thechargerwill alertyouwith analarmand displaythe
endingchargevoltage,totalchargingtime,charging
mode,andthe finalamountof chargeputback intothe
batteryinamp-hours.
Thealarmwill soundevery 30secondsuntil youpress
theSTOP button ordisconnect thecharger clamps from
thebattery.
GR1-120 Charging Modes: Manual Charge
•18•
14.5V 35.5A 1:02:34
Manual Charge AH: 0.7
13.72V 1:20:00
Manual Charge AH: 57.2
Analyzing Battery ........
........
....
8.2V 12CCA
Battery Test Information
Enter Rating ↑↓↑↓
↑↓↑↓
↑↓
500 CCA ↵↵
↵↵
↵
Enter Charging Time ↑↓↑↓
↑↓↑↓
↑↓
120 Minutes ↵↵
↵↵
↵
Enter Charging Time ↑↓↑↓
↑↓↑↓
↑↓
Continuous Charge ↵↵
↵↵
↵
Table of contents
Other Midtronics Batteries Charger manuals

Midtronics
Midtronics psc-700 User manual

Midtronics
Midtronics DCA-8000 User manual

Midtronics
Midtronics DCA-8000 User manual

Midtronics
Midtronics PowerSensor Micro500 User manual

Midtronics
Midtronics ChargeXpress PRO 50-2 User manual

Midtronics
Midtronics GR8 1100 User manual

Midtronics
Midtronics MSP-070C User manual

Midtronics
Midtronics ChargeXpress PRO 15 User manual

Midtronics
Midtronics xRC-3363 User manual

Midtronics
Midtronics DCA-8000P User manual


