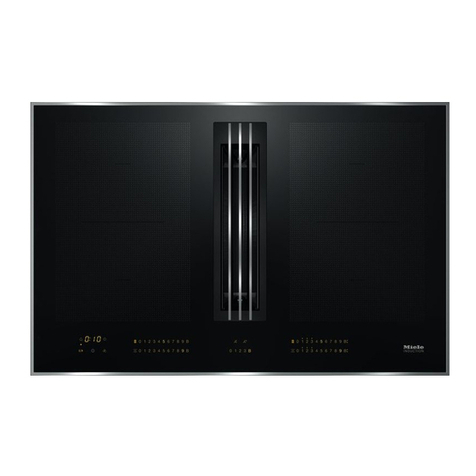
Miele KM 5840 User manual

Installation Instructions
KM 5840 HQ&$
KM 5860
KM 5880
,QVWDOODWLRQUHSDLUDQGPDLQWHQDQFHZRUNVKRXOGEHSHUIRUPHGE\
D0LHOHDXWKRUL]HGVHUYLFHWHFKQLFLDQLQDFFRUGDQFHZLWKQDWLRQDO
DQGORFDOVDIHW\UHJXODWLRQVDQGWKHSURYLGHGLQVWDOODWLRQLQVWUXFWLRQV

Note to the installer:
Please leave this instruction book
with the consumer for the local
electrical inspector’s use.
The minimum distances given in
these Installation Instructions must
be observed in order to ensure safe
operation. Failure to do so increases
the risk of fire.
The cabinetry and venting hood
should be installed first to prevent
damage to the cooktop.
~The countertop must be bonded
with heat resistant (212°F/100°C)
adhesive to prevent distortion or
dissolving.
Any back splashes should also be
heat-resistant.
~The cooktop must not be installed
over a dishwasher, washer, dryer,
refrigerator or freezer. Heat radiated by
the cooktop may damage them.
~To eliminate the risk of burns or fire
by reaching over heated surfaces
cabinet storage space above the
appliance should be avoided. If cabinet
storage is necessary, the risk can be
reduced by installing a venting hood to
project horizontally a minimum of 5"
(127 mm) beyond the bottom of the
cabinets.
~This appliance has not been
designed for maritime (e.g. ships) use
or for use in mobile installations such as
recreational vehicles or aircraft.
However, under certain conditions it
may be possible for installation in these
applications. Please contact the Miele
Technical Service Department with
specific requirements.
~You must ensure the power cable
for the appliance will not come into
contact with the floor panel after
installation, nor be subject to any
mechanical strain.
~The cooktop must not be
permanently sealed into the countertop
when installed. The sealing strip under
the edge of the cooktop provides a
sufficient seal for the countertop. See
"Sealing".
~The safety distances specified in
these instructions must be followed
carefully.
Keep this instruction book in a safe
place for reference and pass it on to
any future user.
IMPORTANT INSTALLATION SAFETY INSTRUCTIONS
40

Safety distance from divider
Installation of a divider under the
cooktop is not required.
If a divider is fitted under the cooktop,
the distance between the upper edge
of the work surface and the upper edge
of the divider must be at least4½"
(110 mm).
A gap of at least 1 3/8"" (35 mm) must
be provided between the rear edge of
the divider and the rear wall of the
cabinet so that the power cord can be
passed through.
Safety distances above the
appliance
The minimum safety distance given by
the hood manufacturer must be
maintained between the cooktop and
the hood above it. See the installation
instructions of the hood for these safety
measurements.
If the hood manufacturer's instructions
are not available or if flammable objects
are installed over the cooktop
(e.g. cabinets, utensil rail, etc.), a
minimum safety distance of 30"
(760 mm) must be maintained.
If there is more than one appliance
beneath a hood (e.g. wok burner
and electric cooktop), and they have
different minimum safety distances,
always observe the greater
distance.
IMPORTANT INSTALLATION SAFETY INSTRUCTIONS
41

Safety distances to the sides
of the appliance
The appliance should only be installed
as shown in the illustrations, while
maintaining the required safety
distances shown. Do not install the
appliance between two tall cabinets,
this is a fire hazard.
a1 5/8" (40 mm) minimum distance
from the countertop cut-out to the
rear edge of countertop or wall.
bMinimum distance from the right of
the countertop cut-out to the closest
adjacent piece of furniture (for
instance, a high cabinet) or a room
wall.
KM 5840 = 2" (50 mm)
KM 5860 / KM 5880 = 4" (100 mm)
c2" (50 mm) minimum distance from
the left of the countertop cut-out to
the closest adjacent piece of
furniture (for instance, a high
cabinet) or a room wall.
not allowed
recommended
not recommended
not recommended
IMPORTANT INSTALLATION SAFETY INSTRUCTIONS
42

Safety distance from the wall covering
If a wall covering is installed, a minimum safety distance must be maintained
between the countertop cut-out and the covering, since high temperatures can
damage these materials.
If the covering is made of a combustible material (such as wood), the distance
between the countertop cut-out and the wall covering must be a minimum of
2" (50 mm).
For coverings made of non-combustible materials (such as metal, marble, granite
or ceramic tiles) the minimum safety distance ebetween the countertop cut-out
and the wall covering must be 2" (50 mm) minus the thickness of the covering.
For example: thickness of wall covering 9/16" (15 mm)
2" (50 mm) - 9/16" (15 mm) = minimum safety distance 1 3/8" (35 mm).
Cooktops flush with the countertop Frame/Facet cooktops
aWall frame
bWall covering
x= thickness of the wall covering
cCountertop
dCountertop cut-out
eMinimum safety distance
with flammable materials 2" (50 mm)
with non-flammable materials 2" (50 mm) minus x
Installation
43

Frame/Facet Cooktops
Sealing
The appliance must not be permanently
sealed into the countertop when
installed. The sealing strip under the
edge of the appliance provides a
sufficient seal for the countertop.
If the appliance is sealed into
position, the countertop or appliance
could be damaged if it needs to be
removed for maintenance or service.
Tiled surfaces
The grouting aand shaded area under
the appliance frame must be flat and
even so that the frame will lie evenly
and the sealing strip under the edge of
the upper part of the appliance can
provide an adequate seal against the
countertop.
Installation
44

KM 5840
aSpring clips
bFront
cInstallation height
dConnecting cable, Length = 56 11/16" (1440 mm)
eRating label
Installation dimensions
45

KM 5860
aSpring clips
bFront
cInstallation height
dConnecting cable, Length = 56 11/16" (1440 mm)
eRating label
Installation dimensions
46

KM 5880
aSpring clips
bFront
cInstallation height
dConnecting cable, Length = 56 11/16" (1440 mm)
eRating label
Installation dimensions
47

The exact positions of the spring
clamps and the support bars (for
beveled cooktops only) are shown in
the "Installation dimensions" of each
unit.
Facet cooktops:
A special sealing strip ensures the
slip-proof seating of the cooktop in
the cutout. The gap between the
frame and the countertop will narrow
after a little time has passed.
^Create the countertop cutout as
shown in the "Installation
dimensions". Observe the safety
distances (see "Installation Safety
Instructions").
Wood or solid surface countertop
^Seal the cut surfaces with a suitable
sealant to avoid swelling caused by
moisture.
The materials used must be heat
resistant.
Ensure that these materials do not
get on the top surface of the
countertop panels.
^Position the spring clips and the
securing strips (supplied with the
appliance; only for facet cooktops)
on the top edge of the cut-out
^Attach the spring clips aand the
securing strips bwith the
3.5 x 25 mm wood screws (supplied).
Installation
48

Granite countertop
Strong double-sided adhesive tape
and silicon are required for
installation (not included).
^Using adhesive tape cattach the
spring clips and the securing strips
(for facet cooktops only)
The spring clips and the securing
strips must be on or flush with the
top edge of the cooktop.
^Coat the lateral edges and the lower
edge of the spring clips and securing
strips with silicon.
Installation
49

Insert the cooktop
^Feed the power cord down through
the cut-out.
^Place the cooktop lightly on the
spring clips.
^With a hand on each side of the
appliance press down evenly on the
edges until it clicks into position.
When doing so make sure that the
appliance seal sits tightly on the
countertop to ensure it is sealed
correctly. This is important to ensure
an effective seal. Do not permanently
seal into the countertop.
If during installation the seal around
the frame does not sit flush with the
countertop in the corners, the corner
radius, maximum 3/16" (4 mm), can be
carefully filed down to fit.
^Connect the appliance to the main
power supply (see "Electrical
connection").
^Turn the appliance on and check the
function.
The appliance may be lifted out
using a special tool.
The appliance can also be pushed
up and out from underneath.
Installation
50

,CAUTION: Before installation or
servicing, disconnect the power
supply by either removing the fuse,
shutting off the main power or
manually "tripping" the circuit
breaker.
Installation work and repairs should
only be performed by a qualified
technician in accordance with all
applicable codes and standards.
Repairs and service by unqualified
persons could be dangerous and
the manufacturer will not be held
responsible.
Before connecting the appliance to
the power supply, make sure that
the voltage and frequency listed on
the rating label correspond with the
household electrical supply. This
data must correspond to prevent
appliance damage. Consult an
electrician if in doubt.
Only operate the appliance after it
has been installed into the
countertop.
Installer:
Please leave these instructions with
the consumer.
Power supply
^Be sure your electrical supply
matches the data plate.
The rating label is located on the
underside of the appliance.
The appliance is equipped with a
flexible metal conduit encasing 3 wires
ready for connection to a grounded
power supply.
It must be connected to a dedicated
line through the use of an approved
junction box.
A disconnection incorporated in the
fixed wiring must be provided. There
must be an all-pole contact gap of at
least 3 mm in the isolator switch
(including switch, fuses and relays).
Black wire: connect to L1 (hot)
Red wire: connect to L2 (hot)
Green wire: connect to GND (ground)
KM 5840
208/240 V, 60 Hz, 40 A fuse rating
KM 5860
208/240 V, 60 Hz, 50 A fuse rating
KM 5880
208 V, 60 Hz, 60 A fuse rating
240 V, 60 Hz, 50 A fuse rating
Be sure the power outlet is accessible
after installation.
For further information, see the wiring
diagram provided with the appliance.
,WARNING:
THIS APPLIANCE MUST BE
GROUNDED!
Electrical connection
51

Disposal of packing materials
The cardboard box and packing
materials are biodegradable and
recyclable. Please recycle.
Ensure that any plastic wrappings,
bags, etc. are disposed of safely and
kept out of the reach of children.
Danger of suffocation!
Disposal of an old appliance
Old appliances contain materials that
can be recycled. Please contact your
local recycling authority about the
possibility of recycling these materials.
Before discarding an old appliance
disconnect it from the electrical supply
and cut off the power cord to prevent it
from becoming a hazard.
Help protect our environment
52

53

54

55

Alteration rights reserved / 2413
INFORMATION IS SUBJECT TO CHANGE. PLEASE REFER TO OUR WEBSITE TO OBTAIN THE MOST
CURRENT PRODUCT SPECIFICATIONS, TECHNICAL & WARRANTY INFORMATION.
M.-Nr. 07 844 710 / 02
Other manuals for KM 5840
3
This manual suits for next models
2
Table of contents
Other Miele Cooktop manuals

Miele
Miele GAS COMBISET CS 1012 User manual

Miele
Miele CS 1212 User manual

Miele
Miele KM 451 User manual
Miele
Miele KMR 1124 G User manual

Miele
Miele KM 5676 User manual

Miele
Miele KM 404 User manual

Miele
Miele KM 5840 User manual

Miele
Miele TX2070 User manual

Miele
Miele KM 6324-1 User manual

Miele
Miele KM 6344 User manual

Miele
Miele KM 93-2 User manual

Miele
Miele KM 404 User manual

Miele
Miele INDUCTION WOK CS 1223 User manual

Miele
Miele KM 6360 User manual

Miele
Miele KM 5676 User manual

Miele
Miele KM 3484 User manual

Miele
Miele KM 451 User manual

Miele
Miele MasterChef KM452 User manual

Miele
Miele KM 5773 Manual

Miele
Miele KM 5773 User manual