Miele W 3514 WPS User manual

Operating instructions
for Washing machine
W 3514 WPS
To avoid the risk of accidents or
damage to the machine it is
essential to read these instructions
before it is installed and used for the
first time.
G
M.-Nr. 06 622 900

Disposal of the packing
material
The transport and protective packing
has been selected from materials which
are environmentally friendly for disposal
and can normally be recycled.
Ensure that any plastic wrappings,
bags etc. are disposed of safely and
kept out of the reach of babies and
young children. Danger of suffocation!
Rather than just throwing these
materials away, please ensure they are
offered for recycling.
Disposal of your old appliance
or machine
Electrical and electronic appliances /
machines often contain materials
which, if handled or disposed of
incorrectly, could be potentially
hazardous to human health and to the
environment. They are, however,
essential for the correct functioning of
your appliance or machine. Please do
not therefore dispose of your old
machine or appliance with your
household waste.
Please dispose of it at your local
community waste collection / recycling
centre and ensure that it presents no
danger to children while being stored
for disposal.
It should be unplugged or disconnected
from the mains electricity supply by a
competent person. The plug must be
rendered useless and the cable cut off
directly behind it to prevent misuse.
See the "Warning and Safety" section of
this booklet for further details.
Caring for our environment
2

Caring for our environment. . . . . . . . . . . . . . . . . . . . . . . . . . . . . . . . . . . . . . . . . . 2
Disposal of the packing material . . . . . . . . . . . . . . . . . . . . . . . . . . . . . . . . . . . . . . . 2
Disposal of your old appliance or machine . . . . . . . . . . . . . . . . . . . . . . . . . . . . . . . 2
Warning and safety instructions . . . . . . . . . . . . . . . . . . . . . . . . . . . . . . . . . . . . . 6
Description of the machine. . . . . . . . . . . . . . . . . . . . . . . . . . . . . . . . . . . . . . . . . . 9
Control panel . . . . . . . . . . . . . . . . . . . . . . . . . . . . . . . . . . . . . . . . . . . . . . . . . . . . . . 9
Before using for the first time. . . . . . . . . . . . . . . . . . . . . . . . . . . . . . . . . . . . . . . 11
Washing environmentally and economically. . . . . . . . . . . . . . . . . . . . . . . . . . . 12
Energy and water consumption . . . . . . . . . . . . . . . . . . . . . . . . . . . . . . . . . . . . 12
Detergent . . . . . . . . . . . . . . . . . . . . . . . . . . . . . . . . . . . . . . . . . . . . . . . . . . . . . 12
Degree of soiling. . . . . . . . . . . . . . . . . . . . . . . . . . . . . . . . . . . . . . . . . . . . . . . . 12
When drying with a tumble dryer . . . . . . . . . . . . . . . . . . . . . . . . . . . . . . . . . . . 12
How to wash correctly. . . . . . . . . . . . . . . . . . . . . . . . . . . . . . . . . . . . . . . . . . . . . 13
Brief instructions . . . . . . . . . . . . . . . . . . . . . . . . . . . . . . . . . . . . . . . . . . . . . . . . . . 13
Degree of soiling, Water plus, Buzzer . . . . . . . . . . . . . . . . . . . . . . . . . . . . . . . . 18
Light . . . . . . . . . . . . . . . . . . . . . . . . . . . . . . . . . . . . . . . . . . . . . . . . . . . . . . . . . . . . 18
Normal . . . . . . . . . . . . . . . . . . . . . . . . . . . . . . . . . . . . . . . . . . . . . . . . . . . . . . . . . . 18
Heavy. . . . . . . . . . . . . . . . . . . . . . . . . . . . . . . . . . . . . . . . . . . . . . . . . . . . . . . . . . . 18
Water plus . . . . . . . . . . . . . . . . . . . . . . . . . . . . . . . . . . . . . . . . . . . . . . . . . . . . . . . 18
Buzzer . . . . . . . . . . . . . . . . . . . . . . . . . . . . . . . . . . . . . . . . . . . . . . . . . . . . . . . . . . 18
Spinning . . . . . . . . . . . . . . . . . . . . . . . . . . . . . . . . . . . . . . . . . . . . . . . . . . . . . . . . 19
Final spin speed . . . . . . . . . . . . . . . . . . . . . . . . . . . . . . . . . . . . . . . . . . . . . . . . . . 19
Rinse and interim spin . . . . . . . . . . . . . . . . . . . . . . . . . . . . . . . . . . . . . . . . . . . 19
To omit the final spin (Rinse hold). . . . . . . . . . . . . . . . . . . . . . . . . . . . . . . . . . . 19
To omit rinse and interim spin and the final spin . . . . . . . . . . . . . . . . . . . . . . . 19
Programme chart . . . . . . . . . . . . . . . . . . . . . . . . . . . . . . . . . . . . . . . . . . . . . . . . . 20
Programme sequence . . . . . . . . . . . . . . . . . . . . . . . . . . . . . . . . . . . . . . . . . . . . . 22
Contents
3

Garment care label symbols . . . . . . . . . . . . . . . . . . . . . . . . . . . . . . . . . . . . . . . . 24
Changing the programme sequence . . . . . . . . . . . . . . . . . . . . . . . . . . . . . . . . . 25
Cancelling a programme . . . . . . . . . . . . . . . . . . . . . . . . . . . . . . . . . . . . . . . . . . . . 25
Interrupting a programme . . . . . . . . . . . . . . . . . . . . . . . . . . . . . . . . . . . . . . . . . . . 25
Altering a programme . . . . . . . . . . . . . . . . . . . . . . . . . . . . . . . . . . . . . . . . . . . . . . 25
Adding or removing laundry after a programme has started . . . . . . . . . . . . . . . . 26
Safety lock . . . . . . . . . . . . . . . . . . . . . . . . . . . . . . . . . . . . . . . . . . . . . . . . . . . . . . . 26
System lock . . . . . . . . . . . . . . . . . . . . . . . . . . . . . . . . . . . . . . . . . . . . . . . . . . . . . . 27
Detergent . . . . . . . . . . . . . . . . . . . . . . . . . . . . . . . . . . . . . . . . . . . . . . . . . . . . . . . 28
Water softeners . . . . . . . . . . . . . . . . . . . . . . . . . . . . . . . . . . . . . . . . . . . . . . . . . . . 28
Washing with several components . . . . . . . . . . . . . . . . . . . . . . . . . . . . . . . . . . . . 28
Fabric conditioners and liquid starch . . . . . . . . . . . . . . . . . . . . . . . . . . . . . . . . . . 29
Automatic dispensing of fabric conditioner or liquid starch to laundry
at the end of a programme. . . . . . . . . . . . . . . . . . . . . . . . . . . . . . . . . . . . . . . . 29
Colour run and dye removers / dyes . . . . . . . . . . . . . . . . . . . . . . . . . . . . . . . . . . . 29
Cleaning and care . . . . . . . . . . . . . . . . . . . . . . . . . . . . . . . . . . . . . . . . . . . . . . . . 30
E-Cloth . . . . . . . . . . . . . . . . . . . . . . . . . . . . . . . . . . . . . . . . . . . . . . . . . . . . . . . 30
Extra cleaning. . . . . . . . . . . . . . . . . . . . . . . . . . . . . . . . . . . . . . . . . . . . . . . . . . 30
Cleaning the detergent dispenser drawer . . . . . . . . . . . . . . . . . . . . . . . . . . . . 31
Cleaning the filter in the water inlet . . . . . . . . . . . . . . . . . . . . . . . . . . . . . . . . . . . . 32
What to do, if . . . . . . . . . . . . . . . . . . . . . . . . . . . . . . . . . . . . . . . . . . . . . . . . . . . . . 33
The programme does not start . . . . . . . . . . . . . . . . . . . . . . . . . . . . . . . . . . . . . . . 33
The wash programme stops and a fault indicator light comes on. . . . . . . . . . . . . 34
General problems . . . . . . . . . . . . . . . . . . . . . . . . . . . . . . . . . . . . . . . . . . . . . . . . . 35
An unsatisfactory wash result . . . . . . . . . . . . . . . . . . . . . . . . . . . . . . . . . . . . . . . . 36
The drum door does not open when you press the Door button. . . . . . . . . . . . . . 37
Opening the drum door in the event of a blocked drain outlet and/
or power failure . . . . . . . . . . . . . . . . . . . . . . . . . . . . . . . . . . . . . . . . . . . . . . . . . . . 38
Blocked drain outlet . . . . . . . . . . . . . . . . . . . . . . . . . . . . . . . . . . . . . . . . . . . . . 38
Opening the drum door . . . . . . . . . . . . . . . . . . . . . . . . . . . . . . . . . . . . . . . . . . 39
Contents
4

After sales service . . . . . . . . . . . . . . . . . . . . . . . . . . . . . . . . . . . . . . . . . . . . . . . . 40
Future updates (PC) . . . . . . . . . . . . . . . . . . . . . . . . . . . . . . . . . . . . . . . . . . . . . 40
Appliance guarantee . . . . . . . . . . . . . . . . . . . . . . . . . . . . . . . . . . . . . . . . . . . . 40
Optional accessories . . . . . . . . . . . . . . . . . . . . . . . . . . . . . . . . . . . . . . . . . . . . 40
Installation and connection . . . . . . . . . . . . . . . . . . . . . . . . . . . . . . . . . . . . . . . . 41
Front view. . . . . . . . . . . . . . . . . . . . . . . . . . . . . . . . . . . . . . . . . . . . . . . . . . . . . . . . 41
Rear view . . . . . . . . . . . . . . . . . . . . . . . . . . . . . . . . . . . . . . . . . . . . . . . . . . . . . . . . 42
Installation surface. . . . . . . . . . . . . . . . . . . . . . . . . . . . . . . . . . . . . . . . . . . . . . . . . 43
Installing the washing machine . . . . . . . . . . . . . . . . . . . . . . . . . . . . . . . . . . . . . . . 43
Removing the transit fittings . . . . . . . . . . . . . . . . . . . . . . . . . . . . . . . . . . . . . . . . . 43
Re-fitting the transit bars . . . . . . . . . . . . . . . . . . . . . . . . . . . . . . . . . . . . . . . . . . . . 45
Levelling the machine . . . . . . . . . . . . . . . . . . . . . . . . . . . . . . . . . . . . . . . . . . . . . . 46
Screwing out and adjusting the feet. . . . . . . . . . . . . . . . . . . . . . . . . . . . . . . . . 46
Building under a continuous worktop/in a kitchen run . . . . . . . . . . . . . . . . . . . 47
Washer and Dryer stack . . . . . . . . . . . . . . . . . . . . . . . . . . . . . . . . . . . . . . . . . . 47
The Miele Waterproof system . . . . . . . . . . . . . . . . . . . . . . . . . . . . . . . . . . . . . . . . 48
Connection to the water supply . . . . . . . . . . . . . . . . . . . . . . . . . . . . . . . . . . . . . . . 49
Connection to the drainage system. . . . . . . . . . . . . . . . . . . . . . . . . . . . . . . . . . . . 51
Electrical connection U.K. . . . . . . . . . . . . . . . . . . . . . . . . . . . . . . . . . . . . . . . . . . . 52
Consumption data . . . . . . . . . . . . . . . . . . . . . . . . . . . . . . . . . . . . . . . . . . . . . . . . 53
Technical data . . . . . . . . . . . . . . . . . . . . . . . . . . . . . . . . . . . . . . . . . . . . . . . . . . . 54
Programmable functions. . . . . . . . . . . . . . . . . . . . . . . . . . . . . . . . . . . . . . . . . . . 56
Water plus system . . . . . . . . . . . . . . . . . . . . . . . . . . . . . . . . . . . . . . . . . . . . . . . . . 56
Gentle action . . . . . . . . . . . . . . . . . . . . . . . . . . . . . . . . . . . . . . . . . . . . . . . . . . . . . 57
Suds cooling in the Cottons programme . . . . . . . . . . . . . . . . . . . . . . . . . . . . . . . . 58
Increase the duration of the main wash. . . . . . . . . . . . . . . . . . . . . . . . . . . . . . . . . 59
Buzzer . . . . . . . . . . . . . . . . . . . . . . . . . . . . . . . . . . . . . . . . . . . . . . . . . . . . . . . . . . 60
Keypad tones. . . . . . . . . . . . . . . . . . . . . . . . . . . . . . . . . . . . . . . . . . . . . . . . . . . . . 61
Memory function . . . . . . . . . . . . . . . . . . . . . . . . . . . . . . . . . . . . . . . . . . . . . . . . . . 62
Pre-wash with the Heavy Degree of soiling option . . . . . . . . . . . . . . . . . . . . . . . . 63
Contents
5

To avoid the risk of accidents and
damage to the machine please read
these instructions carefully before
using it for the first time. They
contain important information on its
safety, use and maintenance.
Keep these operating instructions in
a safe place and ensure that new
users are familiar with the content.
Pass them on to any future owner of
the machine.
Correct usage
Only use the washing machine to
wash items which are specified by
the manufacturer to be machine-wash-
able on the wash-care label, and tex-
tiles composed of hand-washable wool
or wool blend fabrics as well as satin,
lace, silk and other hand-washable
garments.
Any other applications may be danger-
ous. The manufacturer is not liable for
damage resulting from improper use or
operation.
Technical safety
Before setting up the machine,
check it for any externally visible
damage. Do not install and use a
damaged machine.
Before connecting the machine,
ensure that the connection data on
the data plate (voltage and connected
load) match the mains electricity
supply. If in any doubt, consult a
qualified electrician.
The electrical safety of this
machine can only be guaranteed
when continuity is complete between
the machine and an effective earthing
system which complies with local and
national regulations. It is most important
that this basic safety requirement is
present and regularly tested and where
there is any doubt the household wiring
system should be inspected by a
qualified electrician.
The manufacturer cannot be held liable
for the consequences of an inadequate
earthing system (e.g. electric shock).
Do not connect the machine to the
mains electricity supply by an
extension lead. Extension leads do not
guarantee the required safety of the
machine (e.g. danger of overheating).
The machine is built in accordance
with current safety requirements.
Unauthorised repairs could result in
unforeseen dangers for the user, for
which the manufacturer cannot accept
liability. Repairs should only be
undertaken by a Miele approved
technician.
Ensure current is not supplied to the
machine until after maintenance or
repair work has been carried out.
The machine is only completely
isolated from the electricity supply
when:
– it is switched off at the wall socket
and the plug is withdrawn, or
– it is switched off at the mains, or
– the mains fuse is withdrawn.
Warning and safety instructions
6

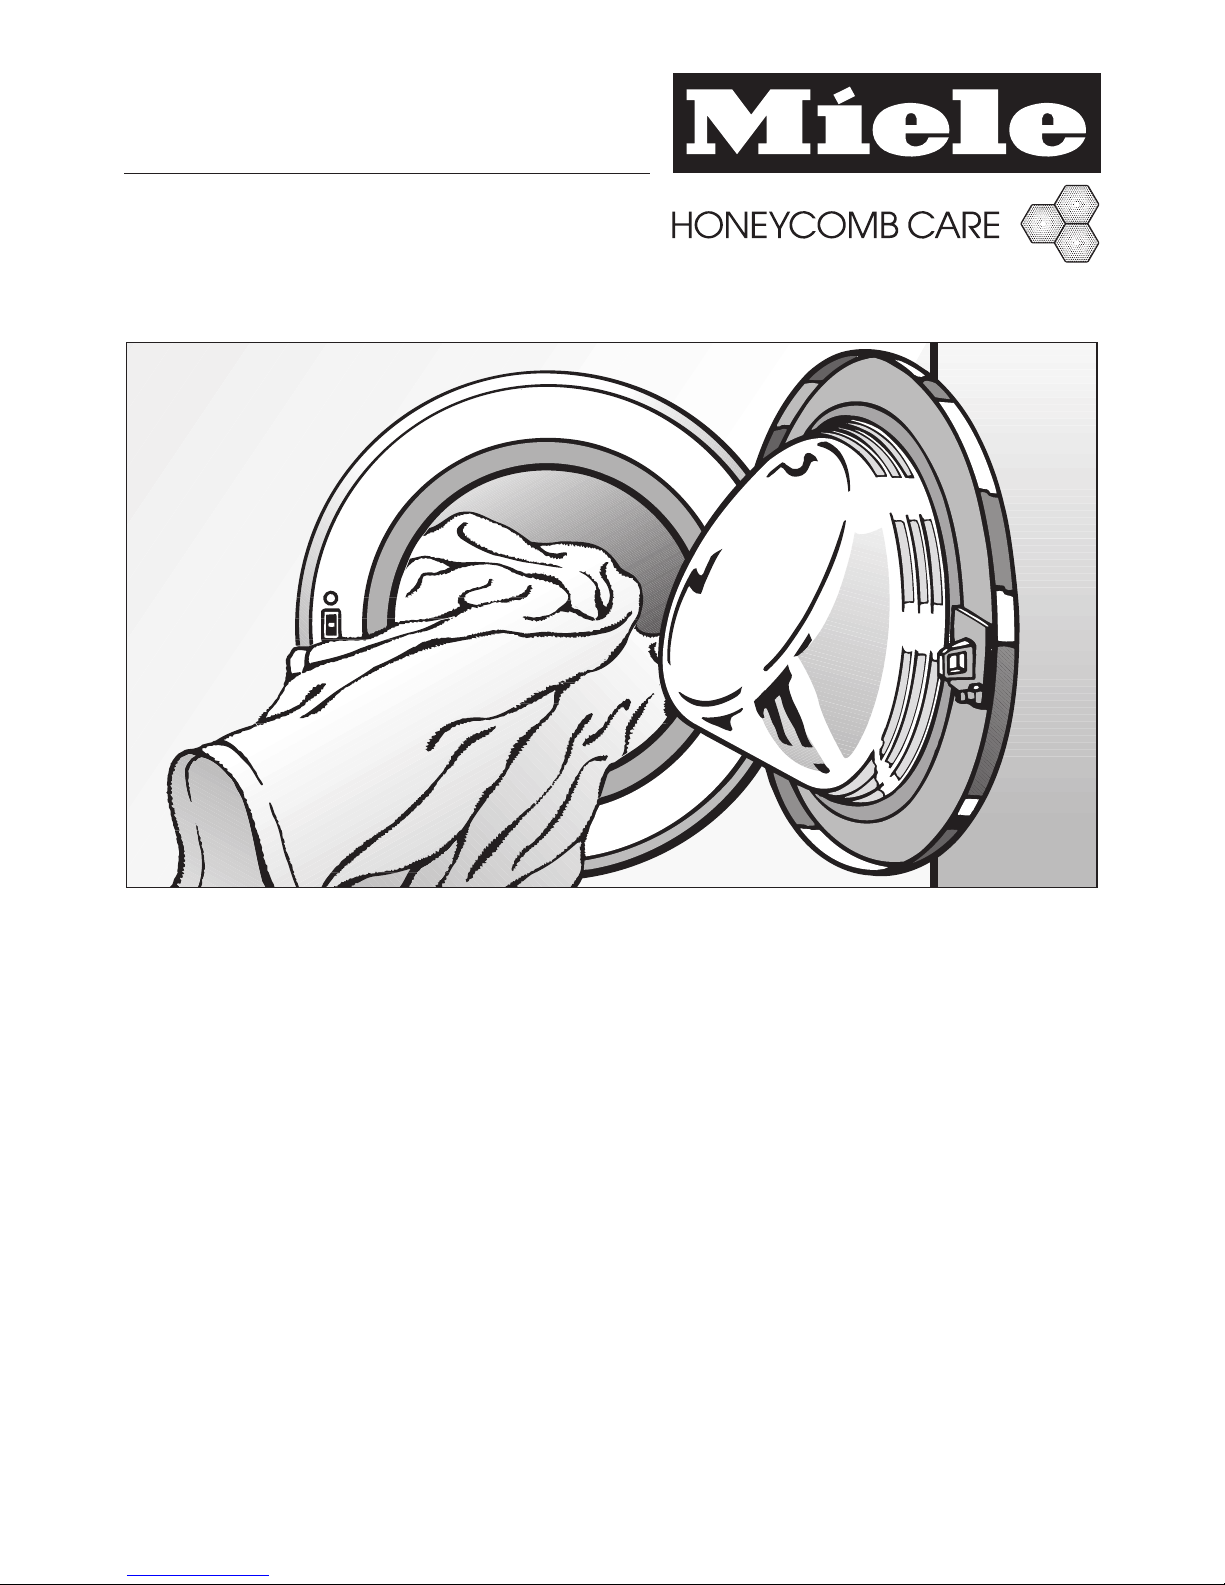
The Miele "Water protection
system" protects from water
damage provided the following
conditions have been met:
–the machine is correctly plumbed in
and connected to the electricity
supply.
–if a fault has been identified, the
machine must be examined by a
competent person before further use,
and repaired if necessary.
Faulty components must only be
replaced by genuine Miele original
spare parts. Only when these parts are
fitted can the safety standards of the
machine be guaranteed.
If the connection cable is faulty it
must only be replaced by a Miele
approved service technician to protect
the user from danger.
In countries where there are areas
which may be subject to infestation
by cockroaches or other vermin, pay
particular attention to keeping the
machine and its surroundings in a
clean condition at all times. Any
damage which may be caused by
cockroaches or other vermin will not be
covered by the machine guarantee.
Use
This equipment may only be used
in mobile installations such as
ships, caravans, aircraft etc. if a risk
assessment of the installation has been
carried out by a suitably qualified
engineer.
Do not install your washing
machine in rooms where
temperatures below freezing may
occur. Frozen hoses may burst under
pressure. The reliability of the electronic
control unit may be impaired at
temperatures below freezing point.
Before using the machine for the
first time, check that the transit
fitting at the rear of the machine has
been removed (see section on
"Installation"). During spinning, a transit
fitting which is still in place may result in
damage to both the machine and
adjacent furniture or appliances.
Turn off the stopcock if the
machine is to be left for any length
of time (e.g. holiday), especially if there
is no floor drain (gully) in the immediate
vicinity.
Flooding danger
If hooking the drain hose into a
wash basin, check that the water can
drain off quickly enough to prevent the
sink from overflowing.
Make sure the drain hose is secure, so
that the force of the water flowing out of
the hose does not dislodge it.
Take care to ensure that foreign
objects (e.g. nails, pins, coins,
paper clips) do not find their way into
the machine with the laundry. These
may damage components of the
machine (e.g. suds container, drum),
which in turn can result in damage to
the laundry.
Warning and safety instructions
7

If the correct amount of detergent
is dispensed, the machine should
not need to be descaled. If, however,
you do wish to descale the machine
only use proprietary non-corrosive
descaling agents and strictly observe
the instructions on the packaging. If in
doubt, contact the Miele Customer Ser-
vice Dept. or your Miele Dealer.
Textiles which have been
pre-treated in solvent based
cleaning agents must be thoroughly
rinsed in clean water before being
washed in the machine.
Never use solvent based cleaning
agents in this machine, as this may
result in damage to component parts
and create toxic fumes. Such
detergents also pose a fire and
explosion hazard.
Only use dyes specified by the
manufacturer as being suitable for
use in a domestic washing machine.
Always observe the manufacturer's
instructions carefully.
Colour run and dye removers
contain sulphur compounds which
can cause damage such as corrosion.
Do not use these products in this
machine.
Always make sure the drum is
stationary before reaching in to
remove washing. Reaching into a
moving drum is extremely dangerous.
Safety with children
This machine is not a toy! To avoid
the risk of injury do not allow
children to play on or near it or to play
with the controls. Supervise its use by
the elderly or infirm, and supervise
children whilst you are operating the
machine.
For machines with a ‘porthole’
door, remember that the porthole
glass will be hot when washing at very
high temperatures. Do not let children
touch it.
Accessories
Accessory parts may only be fitted
when expressly approved by Miele.
If other parts are used, guarantee,
performance and product liability
claims will be invalidated.
Disposal of your old machine
Before discarding an old machine,
switch it off at the wall socket and
unplug it. Render the plug useless. Cut
off the cable directly behind the
appliance to prevent misuse. This
should be done by a competent
person.
The manufacturer cannot be held
liable for damage caused by
non-compliance with these Warning
and Safety instructions.
Warning and safety instructions
8

Control panel
aProgramme buttons e-
For selecting a washing programme.
bSoiling button
For specifying the degree of soiling
of the laundry.
Water plus button
For increasing the water level.
cTemperature button
For selecting a temperature.
dSpin speed button
For selecting a final spin speed.
ePC / Optical interface
This is used by service technicians
to run diagnostic checks on your
machine and can also be used to
update programming data in the
future.
fSequence indicator lights
Show which section of the wash
programme has been reached.
gBuzzer button
hCheck lights
iDelay start button
For delaying the start of a
programme.
jStart/Stop button
For starting the programme selected
and cancelling a programme once it
has started.
kI-On/0-Off button
For switching the machine on or off.
lDoor button
Opens the machine door.
mDisplay (h min)
The display fulfills several functions.
See next page for details.
Description of the machine
9

Display
The display shows:
–the programme duration (Time left
display)
–delay start
–the programmable functions
Programme duration
After the start of a programme, the
estimated programme duration will
appear in the display in hours and
minutes.
When delay start is being used, the
programme duration will appear after
the delay start time has elapsed.
During the first 10 minutes the washing
machine measures how much water is
being absorbed by the laundry and
uses this to calculate the load. The
programme duration may be longer or
shorter depending on this absorbency
rate.
Delay start
The delay start time selected will
appear in the display.
After the machine has started, the
delay start time counts down. If the
delay start time is more than 10 hours, it
will count down by the hour. If it is less
than 9 hours and 59 minutes it will
count down minute by minute.
Once the delay start time has finished,
the programme begins and the
estimated programme duration shows
in the display.
Programmable functions
The programmable functions can be
used to tailor washing programmes to
suit your individual requirements. In
programming mode, the display will
show the function selected.
Description of the machine
10

Before using the machine for the first
time ensure that it is correctly
installed and connected. See
"Installation and connection". Also
check that the drain filter is securely
tightened to prevent the risk of water
leaks during use.
For safety reasons, spinning is not
possible until the machine has been
prepared for using for the first time. To
activate the spinning function you must
run a wash programme without laundry
and without detergent.
Using detergent could result in an
excessive build-up of foam.
This also activates the ball valve. The
ball valve prevents detergent escaping
from the suds container into the sump
during a wash programme, thus making
maximum use of the detergent.
^Open the stopcock.
^Press the
I-On/0-Off
button in.
The indicator light for the
Automatic
programme will come on.
^Press the Hprogramme button to
select the
Cottons
programme.
^Press the
Start/Stop
button.
The programme will begin. When it has
finished, your machine is ready for
using for the first time.
Before using for the first time
11

Energy and water consumption
–Water consumption and energy
usage are determined by the size of
the load.
To make the most out of your
machine, load the maximum dry load
for the programme you are using.
–Use the
Automatic
and
Express
programmes for small loads.
–When smaller amounts of laundry are
washed using the
Cottons
programme, the automatic load
recognition system will reduce the
amount of water, time and energy
used. This may mean that the time
left shown in the display is adjusted
during the course of the wash
programme.
– Using the
Cottons 60°C
programme
instead of the
Cottons 95°C
programme will give energy savings
of between 35% and 45%.
Detergent
–Do not exceed the amounts of
detergent recommended by the
manufacturer on the packaging.
–Reduce the amount of detergent with
smaller loads (approx. 1/3less than
the amount recommended can be
used when washing a half load).
Degree of soiling
With most of the programmes you can
specify the degree of soiling of the
laundry. The washing machine will then
adjust the programme to suit the
degree of soiling.
–Light
No visible dirt or stains.
–Normal
Visibly dirty and/or just a few slight
stains.
–Heavy
Visible dirt and stains as well as
soiling that has dried on or been left
unwashed for a while.
When drying with a tumble dryer
– Selecting the highest possible spin
speed for the wash programme will
save energy when drying in a tumble
dryer afterwards.
Washing environmentally and economically
12

Brief instructions
The headings numbered A,B,C, . . .
show the operating sequence and can
be used as brief instructions.
ASort the laundry
^Empty all pockets.
,Foreign objects (e.g. nails,
coins, paper clips, etc.) can cause
damage to garments and
components in the machine.
^Badly soiled areas, stains etc. should
be cleaned as soon as possible,
preferably whilst still fresh. Spillages
should be carefully dabbed off using
a soft colourfast cloth. Do not rub!
Badly soiled areas can be pre-treated
with liquid detergent, stain removers
etc. first, following the manufacturer's
instructions. With particularly stubborn
stains ask your dry cleaner for advice.
,Do not use solvent-based
cleaning agents in this machine.
^Sort the laundry by colour and by
care label. Most garments have a
textile care label in the collar or side
seam.
Dark textiles often contain excess dye
and should be washed separately
several times before being included in
a mixed load. Always wash whites and
coloureds separately.
–Curtains: Remove lead weights first
or place in a laundry bag.
–Underwiring and collar stiffeners:
Any loose wiring in bras, shirt collar
stiffeners, etc. should be removed or
sewn in.
– Knitted garments, trousers and
jeans, T-shirts and sweat shirts: Turn
inside out, if recommended by the
manufacturer.
– Close any zips, fasten hooks and
eyes etc before washing.
– Fasten duvet covers etc. to prevent
small items from being rolled up
inside them.
Do not wash any items in this machine
which are specified by the
manufacturer as not washable on the
care label. (hsymbol)
How to wash correctly
13

BSwitch on the washing machine
CLoad the drum
^Press the
Door
button to open the
drum door.
^Unfold the laundry and load loosely
in the drum. Mixing both large and
small items gives better wash results
and also helps distribute the load
evenly during spinning.
The most efficient use of energy and
water is achieved when a full load is
washed. However, do not overload as
this causes creases and reduces
cleaning efficiency.
Make sure that no garments are
caught between the drum door and
seal.
^Shut the door with a gentle swing.
DSelect a programme
^Press the eor -button repeatedly
until the indicator light for the
programme you want lights up.
How to wash correctly
14

Specify the degree of soiling of the
laundry
Press the top button to select the
degree of soiling.
Normal
is the default
setting.
Use the lower button to select the
Water
plus
option.
^Press the top button repeatedly until
the degree of soiling you want lights
up.
^Press the
Water plus
button if you
want to activate this function.
You cannot select the degree of soiling
or
Water plus
for every programme.
You can change the pre-set
temperature or spin speed by pressing
the Temperature or Spin button.
In some programmes the maximum
temperature and spin speed is limited.
The machine will not allow a higher
value to be selected.
^Press the Temperature or Spin
button repeatedly until the indicator
light for the value you want comes
on.
^Press the
Buzzer
button if you want to
be reminded when the programme is
finished.
How to wash correctly
15

EAdd detergent
It is important to dispense the correct
amount, because . . .
. . . too little detergent results in:
–Laundry not getting properly clean
and with time it may become grey
and hard to the touch.
–Greasy particles clinging to the
laundry.
–Limescale deposits on the heater
elements.
. . . too much detergent results in:
– Excessive foam which causes a low
level of agitation and poor wash,
rinse and spin results.
– Higher water consumption (an
additional rinse cycle will
automatically switch in).
– A burden to the environment.
^Pull out the detergent drawer and
place detergent in the compartments
as follows:
i
Detergent for the pre-wash (if the
Degree of soiling
has been set as
Heavy
, add 1/4of the total amount
recommended).
j
Detergent for the main wash
§
Fabric conditioner or liquid starch.
^Close the detergent drawer.
See "Detergent" for further information.
How to wash correctly
16

FSelect Delay Start, if wished
Delay start allows you to delay the start
of a programme from 30 minutes up to
a maximum of 24 hours, allowing you to
make use of night-time economy
electricity rates, for example.
^Press the
Delay start
button. Each
press on the button increases the
delay start time:
–by 30 minutes up to 10 hours,
–by 1 hour from 10 hours upwards.
To cancel Delay start
^Press the
Delay start
button once
when 24 ^ is showing in the display.
To cancel Delay start after you have
pressed the
Start
button:
^You will have to cancel the
programme. See relevant section
later in this booklet.
GStart the programme
^Press the flashing
Start/Stop
button.
The estimated programme duration will
then show in the display. This will count
down in one minute steps. During the
first 10 minutes the machine measures
how much water is being absorbed by
the laundry. The programme duration
may be longer or shorter depending on
this absorbency rate.
HRemove the laundry when the
programme as finished
The
Finish
and
Anti-crease
Sequence
indicator lights will come on when the
programme is finished.
^Press the
Door
button to open the
drum door.
^Remove the laundry.
Only remove laundry from the
machine once the drum has
stopped turning. Reaching into a
moving drum is extremely
dangerous and could result in injury.
Check that all items have been
removed from the drum. Items left in
the drum could discolour other items
in the next wash or become
discoloured themselves.
^Check the folds in the door seal for
any small articles, e.g. buttons which
might be lodged there.
^Switch the washing machine off with
I-On/0-Off
button.
^Close the drum door. Otherwise there
is the danger of objects being placed
inadvertently in the drum. If these
remained unnoticed and were
washed in the next load, they could
damage the laundry.
How to wash correctly
17

The washing machine will adjust the
programme to suit the degree of soiling
selected.
Light
No visible dirt or stains.
The duration of the main wash is
reduced.
Normal
Visibly dirty and/or just a few slight
stains.
The standard wash programme will be
carried out.
Heavy
Visible dirt and stains and/or dried on
soiling.
A fifteen minute pre-wash will be
carried out and the duration of the main
wash will be increased by 15 minutes.
The
Pre-wash
Sequence indicator light
will flash. Add the appropriate amount
of powder detergent to compartment
i.
You can also deactivate the Pre-wash
and increase the duration of the main
wash by 30 or 60 minutes instead of the
standard default increase of 15
minutes. See "Programmable functions".
Water plus
If the
Water plus
button is pressed, the
water level in the main wash and rinses
is increased.
You can also alter the setting allocated
to the
Water plus
button. See
"Programmable functions".
Buzzer
The buzzer will sound at the end of the
programme or when Rinse hold has
been reached.
The buzzer will sound repeatedly until
the machine is switched off.
Once switched on, the buzzer is active
in all programmes until it is switched off
again.
You can also change the volume of the
buzzer or deactivate the buzzer button.
See "Programmable functions".
The buzzer will always sound when
there is a fault, even if it has been
deactivated.
Degree of soiling, Water plus, Buzzer
18

Final spin speed
Programme rpm
Automatic 1200
Cottons 1400
Minimum iron/Delicates 1200
Woollens 1200
Silks 400
Express 1400
Dark garments 1200
Shirts 600
Denim 900
Drain/Spin 1400
You can reduce the final spin speed.
However, you cannot select a final spin
speed higher than that shown in the
chart above.
Rinse and interim spin
There is a spin after the main wash and
between the rinses. A reduction in the
final spin speed will also reduce the
interim spin speed. If a spin speed of
less than 700 rpm is selected for a
Cottons
programme, an additional rinse
is introduced.
To omit the final spin (Rinse hold)
^Select the
Rinse hold
setting. The
laundry will not be spun and will
remain suspended in the final rinse
water. This reduces creasing if the
laundry is not going to be removed
from the drum immediately after the
end of the programme.
–To start the final spin:
The Rinse hold indicator light will
illuminate. Select the spin speed you
want by pressing the spin speed
button until the indicator light next to
the spin speed you want illuminates.
The washing machine will then start
the final spin.
– To end the programme:
Press the
Door
button. The water will
drain away. Press the
Door
button
again to open the door.
To omit rinse and interim spin and
the final spin
Select the
Without spin
setting. The
laundry is not spun after the final rinse.
The water will drain away and the
machine will go straight into the
anti-crease stage. An additional rinse is
introduced if this settnig is selected
with the
Automatic
,
Cottons
,
Minimum
iron/Delicates
and
Express
programmes.
Spinning
19

Automatic cold to 40°C 76e21f Max. load 3.5 kg
Fabric Mixed loads of garments suitable for the
Cottons
and
Minimum
iron/Delicates
programmes. Sort according to colour.
Cottons 30°C to 95°C 9ö8E76 Max. load 6.0 kg
Fabric Cotton and linen fabrics, e.g. bed linen, table linen, towelling,
jeans, underwear, T-shirts, nappies.
Notes –Only use the
Cottons 95°C
programme for heavily soiled
laundry.
–Use the
Dark garments
programme for dark coloured items.
Note for test institutes:
Programme setting for testing according to EN 60456 standard: Cottons 60°C
Short programme: 3.0 kg load and
Light
Degree of soiling setting
Minimum iron/Delicates cold to 60°C
8E764321
Max. load 3.0 kg
Fabric Synthetic fibres, mixed fibres, rayon and easy care cottons.
Curtains, including net curtains, specified as machine-washable
by the manufacturer.
Notes –Due to the large amount of fine dust in curtains, we
recommend selecting the
Heavy
Degree of soiling setting and
also the
Water plus
option. Only wash a maximum load of 2
kg.
–For curtains which crease easily, reduce the spin speed or
select Without spin.
Note for test institutes:
Programme setting for testing according to EN 60456 standard: Minimum iron/
Delicates 40°C and spin speed of 1200 rpm
Programme chart
20
Table of contents
Other Miele Washer manuals

Miele
Miele W 2839I WPM User manual

Miele
Miele WWV 980 WPS Passion User manual

Miele
Miele WSD023 WCS User manual

Miele
Miele W 3364 WPS User manual

Miele
Miele W 211 User manual

Miele
Miele W 3037WH User manual

Miele
Miele WEK 365 User manual

Miele
Miele W 5872 Edition 111 User manual

Miele
Miele PWM511 User manual

Miele
Miele PW 5105 Vario User manual

Miele
Miele W 5873 WPS User manual

Miele
Miele PG 8591 User manual

Miele
Miele W 1514 User manual

Miele
Miele PW 5065 User manual

Miele
Miele W 3652 WPS User manual

Miele
Miele PW 6207 User manual

Miele
Miele W 304 Plus User manual

Miele
Miele PWM 507 Hygiene User manual

Miele
Miele WEG 365 Excellence User manual

Miele
Miele PG 8527 User manual