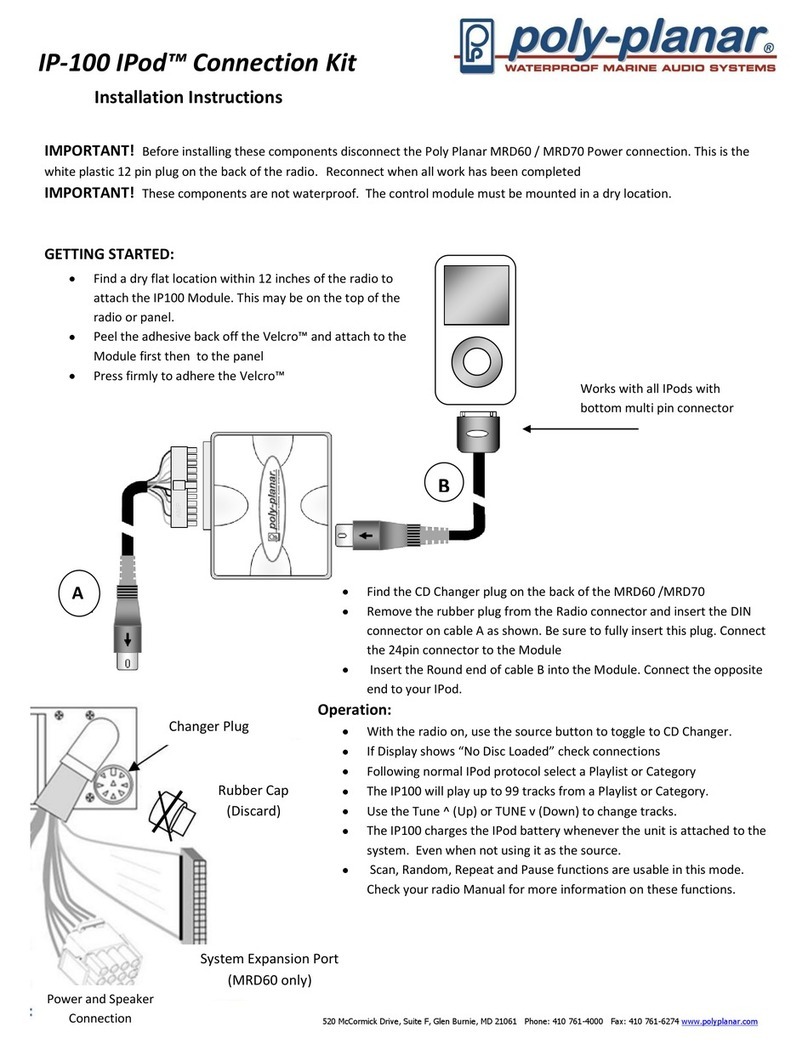
Miktek ProCast SST User manual

by
USB Microphone Audio Interface
Microphone USB Interface Audio
SST


Miktek, LLC
Nashville, TN USA
tel: 615.250.2434 • fax: 615.346.9298
© 2009 - 2014 All Rights Reserved, Miktek, LLC. Printed April, 2014 v1.1
www. miktekaudio.com
PRINTED IN CHINA

Table of Contents
Introduction . . . . . . . . . . . . . . . . . . . . . . . . . . . . . . . . . . . . . . . . . . . . . . . . . . 1
ProCast SST Features. . . . . . . . . . . . . . . . . . . . . . . . . . . . . . . . . . . . . . . . . . . . . 2
ProCast SST Layout . . . . . . . . . . . . . . . . . . . . . . . . . . . . . . . . . . . . . . . . . . . . 3 - 4
Installing the ProCast SST . . . . . . . . . . . . . . . . . . . . . . . . . . . . . . . . . . . . . . . 5 - 8
Getting Started with MAC OS X. . . . . . . . . . . . . . . . . . . . . . . . . . . . . . . . . . . . . . 5
Getting Started with Windows . . . . . . . . . . . . . . . . . . . . . . . . . . . . . . . . . . . . . . 6
ProCast SST Quick Start . . . . . . . . . . . . . . . . . . . . . . . . . . . . . . . . . . . . . . . . . 9 - 10
Operating the ProCast SST . . . . . . . . . . . . . . . . . . . . . . . . . . . . . . . . . . . . . . 11 - 16
Connecting LINE/Instrument level signals . . . . . . . . . . . . . . . . . . . . . . . . . . . . . . .11
Selecting the Inputs . . . . . . . . . . . . . . . . . . . . . . . . . . . . . . . . . . . . . . . . .12
Setting a Good Signal Level . . . . . . . . . . . . . . . . . . . . . . . . . . . . . . . . . . . . .12
Using the Direct Monitor. . . . . . . . . . . . . . . . . . . . . . . . . . . . . . . . . . . . . . . . . .13
Using the Monitor Blend control. . . . . . . . . . . . . . . . . . . . . . . . . . . . . . . . . . . . . . . . . . .14
Using the High-Pass Filter . . . . . . . . . . . . . . . . . . . . . . . . . . . . . . . . . . . . . . . . .15
Applications . . . . . . . . . . . . . . . . . . . . . . . . . . . . . . . . . . . . . . . . . . . . . . . . . .17
Specifications . . . . . . . . . . . . . . . . . . . . . . . . . . . . . . . . . . . . . . . . . . . . . . . . .18

1
Congratulations on your purchase of the ProCast SST studio condenser by Miktek. The ProCast SST is a high quality 24 BIT USB
studio condenser microphone with integrated radio style boom, weighted base and on-board mixer. The heart of the ProCast SST
is its broadcast quality, studio condenser microphone featuring a large, 19mm, capsule with an ultra thin diaphragm, an on-board
high-pass filter, multi stage windscreen and heavy-duty die-cast metal body construction. The ProCast SST’s mixer section offers
two inputs, which can be used to connect mic or line sources. Channel 1 allows you to use the on-board condenser microphone or
select the rear panel ¼-inch Instrument/Line level input. Channel 2 provides a rear panel mini XLR to connect a second microphone,
or selectable rear panel ¼-inch Instrument/Line level input. Each input features a mic/line switch, Clip LED, a 60 mm studio quality
fader, plus Mute switch. Plus there’s a phantom power switch to power an external condenser microphone. The ProCast SST provides
no latency direct monitoring, which can be mixed in with the computer playback. In addition, the SST has a second headphone/
monitor output for producers or additional talent. The ProCast SST’s professional features makes it an ideal choice for home recordist,
singer songwriters, and of course, podcasters. If you’re serious about home recording or podcasting, you need the ProCast SST.
The ProCast SST is perfect for recording your music or any acoustic audio source on your favorite DAW (Digital Audio Workstation).
Just plug in the supplied USB cable, launch your DAW and start recording. The ProCast SST faithfully reproduces a variety of sound
sources including vocals, acoustic string and wind instruments and percussion to name a few. The extended frequency and fast
transient response ensures an accurate reproduction with linear characteristics from bottom to top. Whether you’re recording your
latest song idea, a podcast, or your band’s next big hit, the ProCast SST is one of the most simplest and comprehensive solution for
high quality recording on a Mac or PC. Just plug it in and start recording great audio!
In these pages, you’ll find a detailed description of the features of the ProCast SST USB Studio Condenser Microphone, as well as
step-by-step instructions for its setup and use, and full specifications. With proper care your ProCast SST will operate trouble free for
many years. We recommend you record your serial number in the space provided below for future reference.
Serial number: __________________________ Date of purchase: __________________
Please visit www.miktekaudio.com for additional information on this and other Miktek products.
Introduction

2
ProCast SST Features
• Internalshockmounted,19mm,fixedchargeStudioCondenserUSBmicrophonewithhigh-passanddie-castmetal
construction
• IntegralHeavy-dutydesktopstandwithnon-skidrubberfeetandadjustableradiostylescissorboom
• 24Bit2x2AudioInterfacewithhighqualityconverters
• Plugandplay-noadditionaldriversneededforMacorPC.
• TwoinputswithMicorLineconnectionsforrecordingelectricguitarandbass,keyboards,drummachines,MP3
playersandjustaboutanyotherlinelevelorinstrumentsignal.
• 60mmInputfadercontrolswithbacklitMuteswitchesandPeakLEDsmakeiteasytosetthepropercleansignalwhen
recording with the mic or line inputs.
• +48VphantompowerforMicInput2.
• OutputsignallevelLEDmonitoring.
• Twoon-boardheadphoneampswithlevelcontrols.
• ADirectMonitorMixcontrol,withmonoorstereomodes,isprovidedforzerolatencymonitoringandadjustable
input and playback blending.
• 3meterMiniXLRtoXLRand3meterUSBcablesincluded.
• Recordstwovocalinputs,avocalandinstrument,orstereoinstruments.
• CompatiblewithmostanyMacandPCbasedDigitalAudioWorkstation.
ProCast SST Features

3
MONO
CPU
Direct
+48V
INPUT 2INPUT 1 MIX
MU TE
MI C/L INE
MU TE
CL IP C LIP
MI C/L INE
L
R
MIX
MON 2
by
1
56 7 8
9
10
11
13
12
14
15
2
3
4
ProCast SST Layout
1. Channel 1 Input – Selector switch
to select the internal Microphone or
rear panel LINE input.
2. Channel 1 Input MUTE - Push
switch used to turn off the Channel
1 input
3. Channel 2 Level – 60mm Fader
levelcontroltoadjusttheinputlevel
of the channel 2 Mic or line inputs.
4. Channel 1 Level – 60mm Fader
levelcontroltoadjustthesensitivity
of the internal microphone or line
input.
5. Channel 1 CLIP LED – The Power/
Clip LED lights red when the input
signal is clipping.
6. Channel 2 Input – Selector switch
to select the external microphone or
rear panel line input.
7. Channel 2 Input MUTE -Push
switch used to turn off the Channel
1 input
8. Channel 1 CLIP LED – The Power/
Clip LED lights red when the input
signal is clipping.
9. OUTPUT METER - 2 x 5 segment LED
meter displays the left and right MIX
output level.
10. Direct Monitor – Control knob allows
you to mix the Channel 1 and 2 direct
input signal with the CPU playback.
11. MONO Switch - Push switch used
to send the direct input signal from
Channel 1 and Channel 2 to both the
left and right headphone outputs.
12. MIX–Faderlevelcontroltoadjustthe
overall volume of the Mix headphone
output.
13. 48V Switch – used to activate
phantom power for the Channel 2
microphone input
14. Monitor/Headphone 2 - Control
knob used to set the level of the Phones
2 output.
15. MIX OUTPUT - 1/8-inch (.35mm)
stereojackforconnectingheadphones.

4
MIC 2 2 1
MON 2
LINE INPUT
A B C D E
ProCast SST Layout
A. Monitor 2 / Phones-1/8-inch(.35mm)stereojack
for connecting headphones.
B. USB –BsizeUSBconnectorforinterfacingwithyour
PC or Mac.
C. Channel 2 MIC Input - Mini XLR connector for
connecting a microphone to the Channel 2 input.
D. Channel 2 LINE Input - Instrument Input on
1/4-inch(6.35mm)inputjackforconnectinginstru-
ments in mono like electric guitar and bass guitar,
or the left side of a stereo line level signal like those
from keyboards, drum machines and MP3 players.
E. Channel 1 LINE Input - Instrument Input on 1/4-
inch(6.35mm)inputjackforconnectinginstruments
in mono like electric guitar and bass guitar, or the
right side of a stereo line level signal like those from
keyboards, drum machines and MP3 players.

5
InstallingtheProCastSSTisasimpleprocedurethattakesjustafewminutes.SincetheProCastSSTisUSBcompliant,
you can use either a MAC or PC, connect the included USB cable and plug and play. You will be able to control your
ProCast SST using the standard audio interface controls in the MAC or Windows operating system. You will find detailed
instructions on setting up with MAC OS and Windows in the following sections of this manual.
Getting Started with MAC OS X
The following example is for setting up the ProCast SST in MAC OS X .
1. PlugintheProCastSST.TheLEDwilllighttoindicateitisreceivingUSBpower.TheMACwillrecognizetheUSB
audio device and automatically install a universal driver.
2. To select the ProCast SST as the computer’s audio input, open the System Preferences from the dock or the main
Apple Menu.
3. Next open the Sound preference.
4. Now,clickintheInputtabandselectMiktekProCast.YoumaynoticethattheVolumeslidersetsitselftothefull
level. This will allow you to have full range using ProCast SST ‘s hardware input level controls.
5. Next,clickintheOutputtabandselectMiktekProCast.YoumaynoticethattheVolumeslidersetsitselftothefull
level.ThiswillallowyoutohavefullrangeusingProCastSST‘shardwareVolumecontrol.
At this point you can begin using your microphone with most any audio recording software, but you need to select it as
aninputandoutputdevicewithintheDAW.WhenselectingtheinputsandoutputsjustlookforandselecttheMiktek
ProCast.
Plug and Play - Most MAC OS DAW’s, like Apple’s Garage band, will let you plug and play without going to the Sound
preference set up. When you plug the ProCast SST into the USB port you’ll see a dialog box that will ask you if you want
to select Miktek ProCast SST . Select yes and you’re ready to go.
Installing the ProCast SST

6
Installing the ProCast SST
Getting Started with Windows
1. The first time you plug the ProCast SST into a USB port, Windows will install the universal drivers for that port. A bal-
loon tip will pop up, telling you it has found the USB Audio codec.
2. When it is finished installing the drivers, it will say “Your new hardware is installed and ready to use” .
Note: This balloon will not pop up again for the same USB port.
3. Most of the time, you’ll want the output volume from the computer at the maximum position, but sometimes it
defaults to the middle of the slider, making the output very quiet. The volume can be increased in several ways. The
simplest is to click the loudspeaker icon in the system tray and drag the slider to the top.
4.Iftheiconisnotthere,thevolumecanbechangedbygoingtoControlPanelandopeningSoundandadjustsystem
volume.
5. To use the ProCast SST as your default input/output device (for system sounds and programs like Sound Recorder),
ensure that it is set for playback and recording in the Audio tab.
6.ThevolumecanthenbesetbypressingtheVolumebutton.
7. To prevent system sounds from coming through the ProCast SST, select a different sound card for the system default,
and then choose the ProCast SST manually within your DAW software.
A Word on Sample Rates and Bit Depth
The ProCast SST is capable of recording and playing back various sample rates and Bit depths. The sample rate
is the resolution the converters use to capture the analog audio and convert it into digital information. The
higher the resolution, the better the audio quality. While you can choose a higher sample rate, keep in mind
thatCDqualityaudioisatasamplerateof44.1kHzwhichisthechoiceofmanyprofessionalrecordingengi-
neers since that’s the sample rate that will be used in the final mastered CD. In general, the larger the

7
Installing the ProCast SST
Bit depth the more dynamic range (another way to say signal to noise ratio), which helps keep recordings qui-
eter.Acommonsettingformostprofessionalrecordingprojectsiswithasamplerateat44.1kHzanddepth
of 24 bit. Most MAC and PC based DAWs allow you to select the Bit depth and sample rate within the pro-
gram. However, you can also select them at a system level with in the Mac “Audio MIDI Setup” utility or in the
“Sound” control panel on the Windows based computers.
Selecting Sample Rates and Bit Depth on Apple-Macintosh
You can select the sample rate and Bit depth in the “Audio MIDI Setup” utility located in the “Utilities” folder.
1. From the desktop select menu “GO” then, “Utilities” then, “Audio MIDI Setup” to launch the Audio MIDI
set up utility.
2. Since it’s possible to record and playback at different sample rates, the Mac OS separates the ProCast into
input and output drivers. So, first set the Input sampling rate by selecting the ProCast 2/00 and choose
the desired sample rate.
3. Next set the Output sampling rates by clicking on the ProCast 00/2 to select the sample rate.
4. At this point you can select the Bit depth using the pull down menu.
5. Now, click Apply and the new settings will be in place.

8
Selecting the Sampling Rate and Bit Depth in Windows Systems
1. Connect your ProCast SST to an available USB port on your computer.
2. Next, navigate to your computer’s Control panel.
3. From the Control panel, click on the “Hardware & Sound” option.
4. Now, from the “Hardware & Sound” menu, choose the “Sound” icon.
5. Next, select the “Recording” tab.
6. Choose the “Miktek ProCast” from the available input devices.
7. Click on “Properties” and select the “Advanced” tab.
8. Set the sample rate from the “Default Format” pull down menu.
9. Now set the Output by going to your computer’s control panel, and from there, select the “Hardware &
Sound” option.
10. From the “Hardware & Sound” menu, choose the “Sound” icon.
11. Once you’re in the “Sound” set up, select the “Playback” tab. and select the “Miktek ProCast” as the output
device.
12. Next click on “Properties” and choose the “Advanced” tab from the “Properties” window.
13. Now, set the sample rate and Bit depth from the “Default Format” pull down menu.
Installing the ProCast SST

9
ProCast SST Quick Start
ProCast SST Quick Start
Before you get going it’s recommended that you follow the instructions on installing the ProCast SST with either Mac or
Windows OS in the previous sections of this manual. Once you confirm the ProCast SST is connected to your computer
properly, it will be easy to start recording. The more you learn about ProCast SST, the more you’ll discover its versatility
and powerful features. There are many ways to use the microphone, and our quick start example is for a typical set-up for
recording electric guitar and vocals. Just follow the simple steps below to start recording.
1. First, plug the USB cable into the ProCast SST and into an available USB port on your computer. Note: Be sure to
checktheinstallationguideforWindowsandMacOStoconfirmyourcomputerwillrecognizetheProCastSST.Also,
make sure your computer’s output level is set to maximum for full volume in the ProCast SST monitor.
2. Set all the level controls off by pushing the faders all the way down.
3. Position the ProCast SST’s microphone towards the vocalist about 4 to 6 inches away. Since the SST’s microphone is
an end address, unidirectional type, be sure to face the front grille side towards the sound source.
4. Set the Channel 1 Input MIC/LINE switch to MIC, which will enable you to use the internal microphone.
5. Use a standard 1/4-inch instrument cable and connect your guitar to the ProCast SST ’s Channel 2 LINE input which
is located on the rear of the base.
6 Set the Channel 2 Input MIC/LINE switch to LINE, which will enable you to use your instrument in the LINE input.
7. Connect your headphones to the MIX output located on the front of the ProCast SST.
8. Next, set the Direct Monitor control to the fully counter clockwise position and press the MONO switch in, so you
will hear the guitar and mic in both sides of the headphones. Note: The direct monitor allows you to hear your
instrumentandvoicedirectlyfromthemicrophone,withzerolatencyandwithouthavingtomonitortheoutputof
DAW software. You'll want to make sure your DAW's input monitoring is turned off to avoid any unwanted echos or
feedback.

10
ProCast SST Quick Start - continued
9. Now set level of the microphone by raising the MIC level control to about half way up. If you see the Power/Peak LED
light red, then turn the MIC level control down until it does not flash red.
10 .Now set the level of your guitar by raising the Channel 2 fader level control to about half way up. If you see the Peak
LED light red while playing, turn the INSTRUMENT level control down until it does not flash red. Don’t forget to
check the input meter on your DAW to make sure it’s not clipping.
10. Now, put on your headphones, speak or sing into the mic and then raise the MIX control fader until you reach a
comfortable listening level.
11 .Next, launch your DAW and select the Miktek ProCast for the input and outputs.
12. Set up two mono tracks in your DAW for the vocal and guitar track. Then, select Miktek ProCast mono left for the
vocal track and select Miktek ProCast mono right for the guitar track.
Now follow the instructions of your DAW software to enable the two tracks for recording and you're ready to record
A Note on Powering the ProCast SST
The ProCast SST is a condenser microphone, and like all condenser microphones, it has internal electronics that require
an active power supply. Traditional studio condensers are almost always powered by a Phantom Power supply which
is usually derived from the mixing console. The ProCast SST receives its power from the USB bus. Simply connect the
microphone to the computer’s USB port and the microphone is ready to operate. The ProCast SST features a power on
LED, which will illuminate when USB power is present.
ProCast SST Quick Start

11
Connecting LINE/Instrument level signals
Line signals like those from keyboards drum machines and DJ mixers and instrument level signals
like those from electric guitars can be easily connected using the ProCast SST’s Channel 1 and 2
LINE inputs. The connections are made using standard ¼”-phone cables. Be sure to select the LINE
input using the MIC/LINE switch as explained in a section later in this manual.
Connecting an External Mic
You can connect an external microphone to the Channel 2 MIC 2 input using the supplied mini
XLR to XLR adapter cable. Most any dynamic like the Miktek PM9 or condenser microphone such
as the Miktek C1 or PM5 can be used to mik a separate vocalist or instrument. Be sure to select the
Mic input using the MIC/LINE switch as explained in a section later in this manual. Also, if you’re
using a condenser microphone, be sure to see the following section on Phantom power.
Using Phantom Power
It is possible to use an external condenser microphone like the Miktek C1, C5 or PM5 on Channel
2 thanks to the on-board 48 volt Phantom power source. Be sure to connect the microphone first,
thenturnonthePhantompowerbypressingthe+48switchdown.You’llseetheLEDilluminate.
Once the Phantom power switch is turned on, the external condenser receives the phantom power
directly from a mic cable.
IMPORTANT NOTE: Do not plug and unplug any microphone with phantom power on since it will
createanannoyingpop.Youshouldturnoffthephantompowerbysettingthe+48Vswitchtothe
up position so that the LED is off. You should also turn the Channel 2 MUTE on, remove your head-
phones and/or lower your monitor speakers before disconnecting and reconnecting.
Operating the ProCast SST
MONO
CPU
Direct
+48V
INPUT 2INPUT 1 MIX
MUTE
MIC/ LINE
MUTE
MIC/ LINE
L
R
MIX
MON 2
by
+48V
INPUT2INPUT1 MIX
MUTE
MIC/L INE
MUTE
MIC/L INE
L
R
MIX
MON2
+48V

12
Selecting the Inputs
The ProCast SST has two input modes; MIC and LINE for each channel, allowing you to connect and record a variety of
different input signals and configurations.
MIC/LINE
Each of the ProCast SST’s inputs can be set to select either Mic or line level signals. On Channel 1
you can select between the SST’s internal microphone and an external line signal connected to the
rearpanel¼-inchLINEIN1jack.OnChannel2youcanselectbetweenanexternalmicrophone
connected to the rear panel MIC 2 mini XLR and an external line signal connected to the rear panel
¼-inchLINEIN2jack.ToselectthemicrophoneinputoneitherchannelpresstheMIC/LINE
switch up, or press the MIC/LINE switch down to select line input signals.
Setting a Good Signal Level
YoucanadjusttheProCastSST’sinternalanaloginputgainstagebyusingtheProCastSST’sLINE
andMIClevelfaders.Thepurposeofthelevel,orgain,controlsaretooptimizetheamountofgood
signal relative to any associated noise. A good mic or instrument pre-amplifier, like those inside
the ProCast SST, will also have a PEAK indicator to show when the input signal is clipping. To set a
good level on the mic, set the ProCast SST up in front of the desired sound source and slowly raise
the input trim control until you see the red CLIP or Peak indicator light up. Then, turn the input
trim fader down until the indicator does not light red any more. Repeat the same process for the
second microphone or instrument. Once you set the input level controls you shouldn’t need to
change them during recording. Use the level controls on the DAW to set the balance between the
instrument mic and stereo mix from the DAW.
Operating the ProCast SST
MUTE
MIC/LINE
MUTE
CLIP

13
USING the MUTE switches
Each of the ProCast SST’s input channels includes a MUTE switch, which allows you to turn off the
signal on the channel. When the Mute switch is on the red LED will illuminate indicating that the
signal is cut in both of the headphones/monitors outputs, as well as, the send to the CPU.
Using the Direct Monitor
TheProCastSSThasasimple,yetsophisticateddirectmonitorsystem,whichprovideszerolatency
monitoring.
What’s Zero Latency, and why do I need it?
Latency is the delay time between record and playback that all computer DAW’s, including yours, have when recording
andmonitoringsimultaneously.Simplystated,whenrecording,theDAWneedstorecognizetheinputsignal,then
crunch a bunch of numbers and then send the signal through to the output. Depending on several factors like the speed
of your computer, the amount of tracks you’ve recorded, and whether or not you’re using the DAW’s effects, this can
take a few to several milliseconds. A delay of several milliseconds can sometimes make it hard for a musician to play on
time. To solve this problem, the ProCast SST lets you monitor the internal microphone and line inputs directly on the
headphones without making the round-trip in and out of the DAW. As a result you hear the inputs with no latency.
The ProCast SST’s Monitor Blend control allows you to mix between the Direct signal from the inputs channels and CPU
playback signal.
Direct Signal
The Direct signals are those signals that feed directly off the Channel 1 and Channel 2 inputs. Since this signal path is
sent straight to the MIX or MONITOR 2 headphone outputs there is no delay caused by the computer DAW.
CPU Signal
The CPU signals are those coming from your computer like the playback of your DAW. The CPU signal can also be your
computer’s MP3 player, or it can be any sound the computer generates depending on how you configure the SST in the
system’s audio set up.
Operating the ProCast SST
MUTE

14
Using the Monitor Blend control.
Now that you know where the direct and CPU signals originate from you can decide how you want
to set the Monitor Blend. Here are three common set ups.
Monitor Blend all the way towards CPU.
With this set up you will only hear the playback of the computer. You can check this by playing
a previous recording from your DAW or a recording from your computer’s MP3 payer (This is
assuming that the Procast SST is set as the computer’s main audio device).
Monitor Blend all the way towards DIRECT
When the Monitor Blend knob is positioned all the way towards DIRECT you will hear the mic
or line inputs. It is normal to hear the CPU playback at a very low volume.
IMPORTANT NOTE: If you have studio monitors connected to the MONITOR 2 outputs be careful
to lower the MON 2 level control, or turn it all the way off, to avoid feedback while recording the live
microphones.
Monitor Blend knob set at the half position point.
In this mode you will hear both the Direct Signal off the inputs along with the CPU playback. This
is how you set up the monitor if you are recording an overdub and you want to hear the playback
track together with the direct input from the mic or line.
Another way of thinking about the MONITOR BLEND control knob is as follows:
RECORDING - Monitor Blend all the way towards DIRECT
OVERDUBBING - Monitor Blend knob set at the half position point
MIXING - Monitor Blend all the way towards CPU
CPU
Direct
CPU
Direct
CPU
Direct
Operating the ProCast SST

15
Polar Pattern
The most important characteristic of any microphone is its directionality or “pick-up pattern”. There are three basic
categories of pick up patterns; omni, bi, and unidirectional. Omni mics pick up sound from all directions, bidirectional
micspickupthesounddirectlyinfrontandbackofthemicrophonewhilerejectingthesoundontheleftandrightsides,
and unidirectional (cardioid) mics pick up the sound in front of the microphone.
Whileomniandbidirectionalmicrophonesareveryusefulforavarietyofapplications,amajorityof“miking”situations
in recording and live sound require unidirectional or cardioid microphones. The unidirectional pick-up pattern allows for
better separation of instruments in the studio and more control over feedback in live sound reinforcement. The ProCast
SST’spick-uppatternissuper-cardioid,whichoffersevenmoreside-to-siderejection.Whenpositionedcorrectly,the
super-cardioid pick-up pattern allows you to pick up more of the sound you want and less of the sound you don’t want.
Microphone Placement
Inordertomaximizethesoundquality,youmustpaycarefulattentiontotheplacementofyourProCastSSTandhowitis
positioned for the instrument or vocalist that you are miking. Most microphones, not omni, but especially unidirectional
orcardioidmicrophones,exhibitaphenomenonknownas“proximityeffect.”Verysimplyput,the proximity effect is the
increaseinlowfrequencyresponseamicrophoneexhibitsasitismovedclosertothesoundsource.Vocalisttendtolove
this effect since when they get really close to the mic they get the “FM radio”, big bass sound. A good vocalist with good
mictechniquewillusetheproximityeffecttoadjusttheirtonalresponseinrealtime.Thekeytodevelopingthebest
mic technique is experimentation along with awareness of the general principle that the closer your SST’s microphone
is to a signal source, the greater the bass response. For most vocal applications you’ll want to position the microphone
directlyinfrontoftheartist.Thesamemaybetrueformikinginstruments,however,youcanmakesomeprettyamazing
equalizationadjustmentsbyslightlychangingtheangleofthecapsuletothesoundsource.Thiscanbeaveryuseful
technique in capturing the optimum sound of drum set, acoustic guitar, piano or other instruments in a live room or
sound stage. Experimentation and experience are the best teachers in getting good sounds, so plug in!
Operating the ProCast SST

16
P-Popping
P-popping is that annoying pop that you can get when the microphone diaphragm gets a blast of air from a vocalist
pronouncing words with the letter “P” included. There are a few ways to deal with the problem including using an
external pop filter. Some famous engineers have relied on an old nylon stocking over a bent clothes hanger, which
actually works very well. You can also try placing the microphone slightly off axis (on a slight angle) from the vocalist.
This can often solve the problem without using an external pop filter. However, the simplest, most reliable way to reduce
P-popping is to use the included foam pop filter placed on the microphone. Using a pop filter also makes it easy to
maintain a good level by keeping the vocalist at a constant distance from the microphone.
Using the High-Pass Filter
The ProCast SST microphone has an on-board High-Pass, or low-cut filter, which when engaged,
will reduce the response of the bass frequencies. The knee (the frequency where the roll off starts) of
theHi-Passissetat100Hzandtherolloffoccursat12dBperoctave.Toengagethefilter,slide
the High-Pass switch so the picture of the roll off is showing. The High-Pass filter can be a valuable
tool to help eliminate unwanted low-end content to reduce bleed in the studio and stage rumble in
alivesituation.Plus,ifyou’rerecordinganinstrumentthatdoesn’tmakeanysoundunder100Hz,don’trecordunder
100Hz.It’softenbettertosettheHigh-Passfilterontoreduceanyunwantedlowfrequencypickup.
Connecting Studio Monitors
You can connect the ProCast SST to studio monitors using the MON 2 output. Use a standard 1/8-inch to dual RCA,
or an 1/8-inch to dual quarter inch cable available at your local audio dealer to connect the monitors. Set the monitor
amplifier(s) to the normal operating level. Then, use the MON2 control know to set the desired listening level.
Operating the ProCast SST
Table of contents

