Kopp Radio motion sensor User manual
Bedienungsanleitung (2-5)
Instruction Manual (6-9)
Bedieningshandleiding (10-13)
Mode d‘emploi (14-17)
Istruzioni sull‘uso (18-21)
Radio dialer alarm
Artikel-Nr. 2933.1302.5
Stand Juni 2008 - ID-Nr.: 058 608 010
Heinrich Kopp GmbH
Alzenauer Str. 68
63796 Kahl
www.heinrich-kopp.de
www.free-control.com
(22-23)
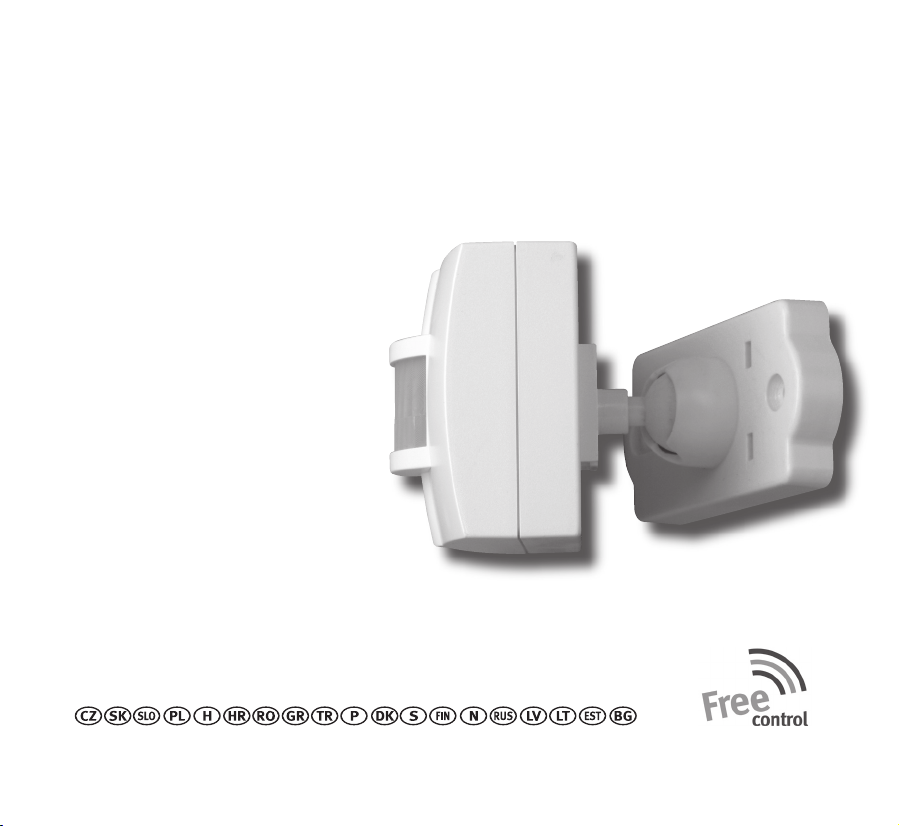
Funk Bewegungsmelder (mobil)
Radio motion sensor (mobile)
Radio-bewegingsmelder (mobiel)
Détecteur de mouvement radio (mobile)
Radiorilevatore di movimento (mobile)
�

3
2
14
5
3 mm3 mm


3
Betriebsfall 2:
• Signalauswertung durch die Funk Einbruch-
alarmzentrale
• Signalauswertung durch die PC-Software für
Einbruchalarmzentrale
Einstellung Betriebsfall 2:
Dazu Codierschalter im Batteriefach wie folgt
einstellen:
Schieber 1 = ON
Schieber 2 = OFF
Bei Batterietausch ist das Gerät sofort betriebsbereit.
LED blinkt 1X
Funktionsweise Betriebsfall 2
Nach jeder erkannten Bewegung wird ein Funksignal
gesendet.
Sobald keine Bewegung mehr erfasst wird, ist das
Gerät für 2 Minuten inaktiv.
Wird vor Ablauf der Sperrzeit erneut eine Bewegung
erkannt, läuft die Sperrzeit erneut.
Geh-Test:
Dient zum Ausrichten des Funk Bewegungsmelders
(mobil).
Dazu Codierschalter im Batteriefach wie folgt
einstellen:
Schieber 1 = ON
Schieber 2 = ON
• Jede erkannte Bewegung führt zum Aufleuchten
der gelben LED.
• Anschließend ist die Bewegungserkennung für 6
Sekunden inaktiv.
• Bewegungsmelder (mobil) solange ausrichten,
bis der gewünschte Bereich erfasst wird.
• Anschließend Schieber auf OFF stellen
(Normalbetrieb).
Anlernen an Funk-Empfänger, Funk-Alarmstation
Funk Bewegungsmelder (mobil) auf Betriebsfall 1
einstellen.
Lernmodus der Funk Empfänger, Funk Alarmstation
aktivieren (hierzu separate Bedienungsanleitung
beachten).
PROG Taste im Batteriefach (bei eingelegten Bat-
terien!) mit beiliegendem Stift < 1 Sekunde drücken:
Ein Funktelegramm mit EIN- und AUS Befehl im
Abstand von 2 Sekunden wird gesendet.
Gelbe LED leuchtet für ca. 3 Sekunden.
LED am Empfänger muss 2x blinken.
Anlernvorgang beenden, wie in Bedienungsanlei-
tung des Empfängers beschrieben.
Anlernen an Funk Einbruchalarmzentrale, PC-Soft-
ware für Einbruchalarmzentrale
Funk Bewegungsmelder (mobil) auf Betriebsfall 2
einstellen.
Lernmodus der Funk Einbruchalarmzentrale, PC-Soft-
ware für Einbruchalarmzentrale aktivieren (hierzu
separate Bedienungsanleitung beachten)
PROG Taste im Batteriefach (bei eingelegten Bat-
terien!) mit beiliegendem Stift < 1 Sekunde drücken:
Gelbe LED am Funk Bewegungsmelder (mobil)
leuchtet für ca. 1,5 Sekunden auf.
Anlernvorgang wird automatisch durchgeführt und
beendet.

4
Spannungsversorgung
4 Kreuzschlitzschrauben am Batteriefach lösen.
4x 1,5V AAA Alkaline Batterien einlegen - gelbe LED
blinkt.
Keine Akkus verwenden.
Auf richtige Batteriepolung achten.
Beigelegte Batterien sind nur zur Inbetriebnahme
und nicht für Langzeitanwendung vorgesehen.
Spannungsüberwachung - Statusmeldung
Ca. alle 4 Stunden wird aktueller Batteriestatus an
die Funk Einbruchalarmzentrale gemeldet.
Empfehlung: Vorsorglich 1x jährlich die Batterie
tauschen
Betriebsanzeige gelbe LED
• LED aus:
Gerät in Betrieb oder Batterien entfernt
• LED blitzt 3x ca. alle 60 Sekunden:
Batterie schwach. Alarmerkennung und Signal-
aussendung noch möglich
• LED blinkt schnell:
Batterie leer: Alarmerkennung und Signal-
aussendung nicht mehr möglich
Falls die Programmierung nicht erfolgreich war:
Hinweise in Rubrik Fehlersuche (FAQ) unter
www.free-control.com beachten
Hinweise
Mit Free-control schalten Sie einfach, komfortabel
und bequem Ihre Elektrogeräte. Ein funktionsfähi-
ges Funksystem besteht in der Minimalausführung
immer aus einem Funk-Sender und einem Funk-
Empfänger. Bei Free-control (mit Logo: ) können
alle Sender mit allen Empfängern verknüpft werden,
Ausnahme für Geräte mit folgenden Artikelnummern
xxxx.xxx1.x (mit Logo: ).
Haftungen oder weitergehende andere Ansprüche,
insbesondere solche auf Ersatz außerhalb des
Gerätes entstehender Personen- oder Sachschä-
den, durch keine oder fehlerhafte Funktionen sind
ausgeschlossen.
Alle Sendecodes sind werkseitig eingestellt und
können nicht verändert werden.
Die Funkübertragung erfolgt auf einem nicht exklusiv
verfügbaren Frequenzkanal mit 868 MHz. Störungen
sind daher nicht auszuschließen.
Die Funkreichweite ist abhängig von Sendeleistung,
Störeinflüssen und baulichen Gegebenheiten.
Die Empfangssicherheit nimmt mit zunehmendem
Abstand zwischen Sendern und Empfängern ab. In
Gebäuden ist die Reichweite abhängig von den dort
eingesetzten Baumaterialien.
Material Typische Reichweite
Mauerwerk 20m - max. durch 3 Wände
Stahlbeton 10m - max. durch 1 Wand/Decke
Gipskarton/Holz 30m - max. durch 5 Wände

5
Free-control Funktechnik ist nicht geeignet für Si-
cherheitsanwendungen, z.B. NOT-AUS, NOT-RUF.
Beachten Sie die Regeln der Elektrotechnik und die
technischen Daten!
Führen Sie keine Änderungen an den Geräten durch.
Änderungen aufgrund technischen Fortschritts, Nor-
menänderungen, veränderter Fertigungsverfahren
oder Konstruktionsänderungen bleiben ausdrücklich
vorbehalten.
Für den Betrieb in EU, EFTA-Mitgliedsstaaten zuge-
lassen.
Die Konformitätserklärung kann unter folgender
Adresse gefunden werden: Heinrich Kopp GmbH •
Alzenauer Straße 68 • 63796 Kahl am Main oder
www.free-control.com
Weitere Informationen, Anwendungsbeispiele,
Sortimentsübersicht, Bedienungsanleitungen in je-
weiliger Landessprache unter www.free-control.com

6
Please read the operating instructions carefully!
Dependable early warning and protection against
burglary is only ensured if this radio motion sensor
(mobile) is used in accordance with the following
instructions.
The radio motion sensor (mobile) can be combined
with all Free-control radio receivers, radio alarm
stations, and radio burglary alarm centers.
Mounting - setup
Select a suitable mounting or setup location
Do not point the lens toward heat sources, such as
radiators, ovens, etc.
This may lead to false alarms.
The orientation of the device should not be able to
be changed by vibrations or unintentional contact.
If possible, mount the radio motion sensor (mobile)
so that it is not immediately recognizable.
Before final mounting, please check to ensure that
the intended receiver reliably receives the radio
signal of the motion sensor.
If necessary, change the position of the receiver or
the motion sensor.
Use wall bracket for wall mounting.
Drilling guide on fold-out side.
Set operating scenario
The radio motion sensor (mobile) can be used for
two different applications.
Operating scenario 1:
• Signal evaluation by the radio alarm station
• Switching of radio receivers
- Flush-mounted receiver 1-channel 2-wire and
3-wire
- Flush-mounted receiver 2-channel or blinds
- Flush-mounted receiver buttons or time function
- Flush-mounted receiver dimmer function for
electronic transformers (switch on/off function)
- Flush-mounted receiver dimmer function for
- conventional transformers (switch on/off function)
- Lamp socket
- Adapter switch function
- Adapter dimmer function (switch on/off function)
- Grounding-type multiple socket outlet
Set operating scenario 1:
For this, set the encoding switch in the battery
compartment as follows:
Slide 1 = OFF
Slide 2 = OFF
Twilight threshold:
Device is always active regardless of the ambient
brightness!
An ON-switching command is transmitted if move-
ment is detected.
An OFF-switching command is transmitted one minu-
te later (fixed setting).
The device is ready for operation approx. 60 sec
after a battery replacement.
The yellow LED illuminates during this settling
phase.

7
Operating scenario 2:
• Signal evaluation by the burglary alarm center
• Signal evaluation by the PC-Software for the
burglary alarm center
Set operating scenario 2:
For this, set the encoding switch in the battery
compartment as follows:
Slide 1 = ON
Slide 2 = OFF
The device is ready for operation approx. 60 sec
after a battery replacement.
LED blinks 1 x.
Function of operating scenario 2
A radio signal is transmitted after each detected
movement.
If no more movement is detected, the device is
inactive for 2 minutes.
If new movement is detected before the end of the
blocking period, the blocking period begins again.
Walking test:
Serves to align the radio motion sensor (mobile).
For this, set the encoding switch in the battery
compartment as follows:
Slide 1 = ON
Slide 2 = ON
• Each detected movement leads to the illuminati-
on of the yellow LED.
• After this, the motion detection is inactive for 6
seconds.
• Align the motion sensor (mobile) until the desired
area is covered.
• Then, set slide to OFF (normal mode).
Programming to radio receiver and/or radio alarm
station
Set radio motion sensor (mobile) to operating
scenario 1.
Activate the programming mode of the radio recei-
vers, radio alarm station (see separate operating
instructions).
Press PROG button in the battery compartment
(with batteries installed!) with the included pin < 1
second.
A radio telegram with ON and OFF command is trans-
mitted at an interval of 2 seconds.
Yellow LED illuminates for 3 approx. seconds.
Receiver LED must blink 2x.
Terminate programming process as described in
receiver operating instructions.
Programming to radio burglary alarm center, PC-
software for burglary alarm center
Set radio motion sensor (mobile) to operating
scenario 2.
Activate the programming mode of the radio bur-
glary alarm center, PC-software for burglary alarm
center (see separate operating instructions).
Press PROG button in the battery compartment
(with batteries installed!) with the included pin < 1
second:
Yellow LED on the radio motion sensor (mobile) illu-
minates approximately 1.5 seconds. Programming
process is performed and terminated automatically.

8
Power supply
Loosen 4 Phillips screws on the battery compart-
ment.
Insert 4x 1.5V AAA alkaline batteries - yellow LED
blinks.
Do not use rechargeable batteries.
Ensure correct battery polarity.
The included batteries are only for commissioning
and are not intended for long-term use.
Power monitoring - status report
The current battery status is reported to the radio
burglary alarm center approx. every 4 hours.
Recommendation: Replace battery once a year as a
precaution.
Status display yellow LED
• LED off:
Device in operation or batteries removed.
• LED flashes 3x approx. every 60 seconds:
Battery weak: Alarm recognition and signal
broadcast still possible
• LED blinks quickly:
Battery empty: Alarm recognition and signal
broadcast no longer possible.
If programming was not successful:
Note instructions in the troubleshooting section
(FAQ) at www.free-control.com.
Notes
With Free-control, you can easily, comfortably,
and conveniently switch your electrical devices. A
minimum functional radio system always consists of
a radio-transmitter and a radio-receiver. With Free-
control (with logo: ), all transmitters can be linked
with all receivers, except for devices with the follo-
wing article numbers xxxx.xxx1.x (with logo: ).
Liability or any other claims, especially for the reim-
bursement of personal or property damages outside
of the device caused by lack of function or malfunc-
tion are excluded.
All transmitting codes are set at the factory and
cannot be changed.
The radio transmission takes place over a non-ex-
clusive frequency channel of 868 MHz. Malfunctions
are therefore not impossible.
The radio range depends upon transmitting power,
disruptions, and structural conditions.
The reliability of reception decreases with increa-
sing distance between transmitters and receivers.
In buildings, the range depends upon the building
materials used.
Typical range based on material
Masonry 20m - through a maximum of 3 walls
Reinforced concrete 10m - through a maximum of 1 wall/floor
Plasterboard/wood 30m - through a maximum of 5 walls
Free-control radio technology is not suitable for
safety applications, such as EMERGENCY STOP,
EMERGENCY CALL.
Follow the rules of electrical engineering and the
technical data!
Do not make any changes to the devices.
We expressly reserve the right to make changes
due to technical progress, changes in standards,
changes to production procedures, or construction

9
changes.
Certified for operation in EU, EFTA-member states.
For additional information, application examples,
assortment overview, and operating instructions in
the respective language of a country, see
www.free-control.com
The declaration of conformity can be found under
the following address: Heinrich Kopp GmbH • Alze-
nauer Straße 68 • 63796 Kahl am Main or
www.free-control.com
Table of contents
Languages:
Other Kopp Accessories manuals


