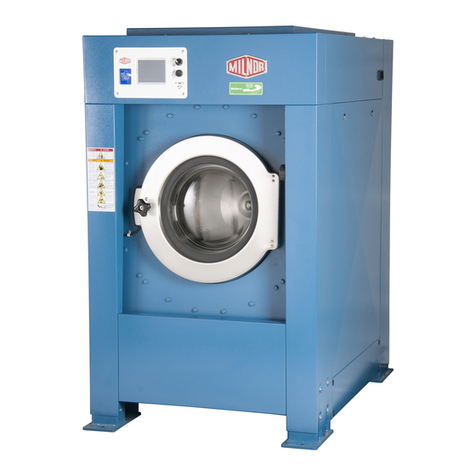
Milnor MilTouch MWF27Z8 Series Manual

Published Manual Number/ECN: MQCLJO01UU/2020215A
• Publishing System: TPAS2
• Access date: 05/21/2020
• Document ECNs: Latest
MilTouch™
PELLERIN MILNOR CORPORATION POST OFFICE BOX 400, KENNER, LOUISIANA 70063-0400, U.S.A.


MQCLJO01UU/20215A
1English
3Operator Guide— MilTouch™ Controller MQCLJO01EN/20170804
57 Deutsch
59 Betriebshandbuch—MilTouch™ Steuerung MQCLJO01DE/20170804
115 Français
117 Guide de l’opérateur—MilTouch™ Contrôleur MQCLJO01FR/20170804
177 Nederlands
179 Gebruikershandleiding— MilTouch™-controller MQCLJO01NL/20170804
231 Ελληνική
233 Οδηγός χειριστή—Σύστημα ελέγχου MilTouch™ MQCLJO01EL/20170804
287 Español
289 Guía del operario—Controlador MilTouch™ MQCLJO01ES/20170804


English 1
1


Published Manual Number: MQCLJO01EN
• Specified Date: 20170804
• As-of Date: 20170804
• Access Date: 20170804
• Depth: Detail
• Custom: n/a
• Applicability: CLJ
• Language Code: ENG01, Purpose: publication, Format: 1colA
Operator Guide—
MilTouch™ Controller
PELLERIN MILNOR CORPORATION POST OFFICE BOX 400, KENNER, LOUISIANA 70063 - 0400, U.S.A.
3

Applicable Milnor® products by model number:
30015V8Z 30022V8Z 36021V5Z 36021V7Z 36026V5Z 36026V7Z 42026V6Z
42030V6Z 48040F7D 48040F7Z MWF27Z8- MWF45Z8- MWF63Z7- MWF77Z7-
4

Table of Contents
PELLERIN MILNOR CORPORATION
Table of Contents
Sections Figures, Tables, and Supplements
Chapter 1. How to Use the MilTouch™ Control
1.1. Using the MilTouch® Control (Document BICLUO01) Supplement 1: MilTouch Simulator for
Windows PCs
1.1.1. The Home Display Figure 1: The Home Display
1.1.1.1. The Wash Formula Maintenance Display Figure 2: The Wash Formula Maintenance
Display
1.1.1.1.1. To Change an Existing Wash Formula Figure 3: The Steps in a Wash Formula
Figure 4: The Step Choices Display
Supplement 2: About the Steam Codes
1.1.1.1.2. To Add a New Wash Formula
1.1.1.1.3. To Erase a Wash Formula
1.1.1.2. The Configuration Display Figure 5: The Configuration Display
1.1.1.2.1. The Machine Configure Decisions
Figure 6: The Password and System Clock
Display
1.1.1.2.2. The Default Formulas by Laundry Type
1.1.1.3. The Data Transfer Display Figure 7: The Data Transfer Display on the
Controller
Figure 8: The Data Transfer Display on the
Programmer Software
1.1.1.4. Data Transfer with the MilTouch Programmer
Software
1.1.1.4.1. How to Mount a USB Flash Drive to the Machine
Controller
1.1.1.4.2. How to Save Machine Configuration Files
1.1.1.4.3. How to Transfer Machine Configuration Files to a
MilTouch Machine
1.1.1.4.4. How to Save and Transfer Wash Formulas
1.1.1.5. The Data Log Displays
1.1.1.5.1. The Date Selection Display Figure 9: Date Selection Display
1.1.1.5.2. The Production Display Figure 10: Production Display
1.1.1.5.3. The Configuration and Programming Display Figure 11: Configuration and
Programming Display
1.1.1.5.4. The Errors Display Figure 12: Errors Display
1.1.1.6. The Inputs and Outputs Displays Figure 13: The Outputs Display
Figure 14: The Inputs Display
Figure 15: The Analog-Digital Values
Display
1.1.2. The Run Display (Document BICLJO01) Figure 16: The Zones of the Run Display
1.1.2.1. The Names and Timers on the Run Display Figure 17: The Names and the Timers
5

Table of Contents
PELLERIN MILNOR CORPORATION
Sections Figures, Tables, and Supplements
1.1.2.2. The Machine Status Data Figure 18: The Machine Status Data
1.1.2.3. The Machine Operations Figure 19: The Machine Operations
1.1.2.4. The Standard and Pop-up Controls on the Run Display Figure 20: Standard Controls
Figure 21: Manual Control Areas
Figure 22: Pop-up Controls for Water
Valves
Figure 23: Pop-up Controls for Step Timer
Figure 24: Pop-up Controls for Steam and
Cooldown Valves
Figure 25: Pop-up Controls for Drain
Valves
Chapter 2. How to Update the Machine Software
2.1. MilTouch Update: WUMTGUI/2.1.xxx (Document BICLUR02)
2.1.1. Does my machine need this update? Figure 26: Home Display
2.1.2. How do I save my formulas and machine configuration? Figure 27: Parts Used in This Procedure
Figure 28: Confirmation Window
Figure 29: File Transfer Display
2.1.3. How do I update the machine software?
2.1.4. How do I restore my formulas and configuration data?
Chapter 3. MilTouch ™Wash Formulas
3.1. MilTouch Formula Decisions (Document BICLJP02)
3.1.1. Type = Type of Step
3.1.2. Time = Step Duration
3.1.3. Temp = Commanded Bath Temperature (Optional)
3.1.4. Hot = Hot Water Valve
3.1.5. Cold = Cold Water Valve
3.1.6. 3 = Third Water Valve (Optional)
3.1.7. Level = Bath Level
3.1.8. Steam (Optional)
3.1.9. C = Chemicals
3.1.10. W = When to Inject Chemicals
3.1.11. Chemical Dose = Chemical Injection Duration
3.1.12. Signal with Chemical Injection
3.1.13. Wash Speed
3.1.14. Drain Type
3.1.15. Re-Use Drain (Optional)
3.1.16. How to End Formula
6

Table of Contents
PELLERIN MILNOR CORPORATION
Sections Figures, Tables, and Supplements
3.2. RinSave™ Commercial Laundry Formulas (Document
BICLJP01)
Table 1: Commercial Laundry Formula 01:
Standard Wash
Table 2: Commercial Laundry Formula 02:
Light Soil—White
Table 3: Commercial Laundry Formula 03:
Light Soil—Colored
Table 4: Commercial Laundry Formula 04:
Medium Soil—White
Table 5: Commercial Laundry Formula 05:
Medium Soil—Colored
Table 6: Commercial Laundry Formula 06:
Heavy Soil—White
Table 7: Commercial Laundry Formula 07:
Heavy Soil—Colored
Table 8: Commercial Laundry Formula 08:
Multi-Flush
Table 9: Commercial Laundry Formula 09:
Stain Soak
Table 10: Commercial Laundry Formula
10: Quick Wash
Chapter 4. Troubleshooting
4.1. MilTouch™ and MilTouch-EX™ Error Messages (Document
BICLUT03)
4.1.1. Messages that Can Occur on All Models
4.1.1.1. Door Opened (1)
4.1.1.2. Vibration Switch Tripped
4.1.1.3. Too Much Water
4.1.1.4. Too Long to Fill (3)
4.1.1.5. Too Long to Drain (4) Figure 30: Transducer Tube at Processor
Board
Figure 31: Schematic of Typical Drain
Circuit
4.1.1.6. 3-Wire Circuit Disabled (5)
4.1.1.7. Too Long to Steam (6)
4.1.1.8. Too Long to Cool (7)
4.1.1.9. Check Temperature Probe (8)
4.1.1.10. Level Still Made (9)
4.1.1.11. Serial Communication Failure (10)
4.1.1.12. Failed Speed Sensor (11)
4.1.1.13. Inverter Tripped (12)
4.1.1.14. External Fault Error (13)
4.1.1.15. Brake Pressure Fault (14)
4.1.1.16. Bearing Pressure Fault (15)
7

Table of Contents
PELLERIN MILNOR CORPORATION
Sections Figures, Tables, and Supplements
4.1.2. Messages that Can Occur on MilTouch-EX™ Models Only
4.1.2.1. Brake Pads Worn (20)
4.1.2.2. Control on Clean Side (21)
4.1.2.3. Check Balance System/Excursion Switch (23)
4.1.3. Messages that Can Occur on Automatic Load/Discharge
MilTouch-EX™ Models Only
4.1.3.1. Brake Pads Worn (16)
4.1.3.2. Loading Aborted (19)
4.1.3.3. Discharge Aborted (20)
4.2. Inputs and Outputs for the MilTouch™ Controller (Document
BICLUT01)
Figure 32: Board Identification
4.2.1. Outputs
4.2.1.1. MilTouch 3 (WUMTGUIA 3.x) Table 11: Output V3 Function and V3
Connection
4.2.1.2. MilTouch 2 (WUMTGUIA 2.x) Table 12: Output Function and Connection
Table 13: Speed Signals from Outputs
Figure 33: Output Indicator Position and
Label
4.2.2. Inputs Table 14: Input Function and Connection
Figure 34: Input Indicator Position and
Label
4.3. Components of the MilTouch™ Controller Circuit Boards
(Document BICLJT01)
4.3.1. Processor board (P/N: 08BHPAR91_) Figure 35: 08BHPAR91_, Revision C
4.3.2. Input/output board (P/N: 08BHF120A_) Figure 36: 08BHF120_, Revision B
4.4. Out-of-balance Detection and Balancing for Washer-
extractors (Document BICLUF02)
4.4.1. MilTouch® Models
4.4.2. MilTouch-EX® Models Other than 72046M5K
4.4.2.1. If the Next Operation is an Intermediate Extract
4.4.2.2. If the Next Operation is a Final Extract
4.4.2.2.1. If the Excursion Switch Trips
4.4.2.2.2. If the Excursion Switch Does not Trip
4.4.3. MilTouch-EX® Model 72046M5K
4.4.3.1. If the Next Operation is an Intermediate Extract
4.4.3.2. If the Next Operation is a Final Extract
4.4.3.2.1. If the Excursion Switch Trips
4.4.3.2.2. If the Excursion Switch Does not Trip
4.5. Out-of-Balance Detection System (Document BICLUT04)
4.5.1. Requirements Figure 37: MilTouch Home Screen
Figure 38: MilTouch SD Card
8

Chapter 1. How to Use the MilTouch™ Control
PELLERIN MILNOR CORPORATION
Chapter 1
How to Use the MilTouch™ Control
BICLUO01 (Published) Book specs- Dates: 20170804 / 20170804 / 20170804 Lang: ENG01 Applic: CLJ
1.1. Using the MilTouch® Control
The Milnor® MilTouch washer-extractor control system uses a touch-sensitive display screen. All
the functions and information you need to configure, program, and run the machine appear on this
screen.
CAUTION 1 : Avoid Machine Damage—The touch screen works best if you use your finger
to touch it with light or moderate pressure.
• Do not push hard on the glass.
• Use only a finger to touch the glass. Do not touch the screen with a tool.
Supplement 1
MilTouch Simulator for Windows PCs
The MilTouch Simulator software lets you prepare wash formulas and perform other MilTouch
controller tasks without using the MilTouch control system. The software uses the same
interface as the one on the machine to help you program formulas and manage their
deployment.
The contents of this document apply to both the MilTouch washer-extractor control and the
MilTouch Simulator software, with the following exceptions:
• In the PC software, the displays described in Section 1.1.1.6 “The Inputs and Outputs
Displays” do not reflect the state of any real hardware. The PC software does not simulate
inputs and outputs.
• The PC software will not simulate the actions of a formula.
• The PC software allows you to export formulas to any suitable storage device attached to
your computer. The machine control exports to either a USB flash drive or to memory
internal to the controller. See Section 1.1.1.3 “The Data Transfer Display” for details.
1.1.1. The Home Display
You can run any available wash formula from the display in Figure 1.
1. Use the scroll buttons to bring the wash formula onto the screen.
2. Touch the Wash Formula Name button. The button changes color to show that the formula is
selected.
3. Touch the blue Start button.
See Section 1.1.2 for information about the Run display.
10

Chapter 1. How to Use the MilTouch™ Control
PELLERIN MILNOR CORPORATION
Figure 1: The Home Display
Typical View Legend
.
A. Wash Formula number
B. Wash Formula Name
button
C. Start button
D. Version data
E. Scroll buttons
F. Wash Formula page
indicator
G. Dealer Contact button
H. Data Exchange button
I. Wash Formula
Maintenance button
J. Configuration button
K. View Logs button
L. Inputs, Outputs, and
Digital-to-Analog button
M. Power OFF button
N. Version Details button
O. Search button
P. Mildata button
1.1.1.1. The Wash Formula Maintenance Display—Touch the Wash Formula Maintenance
button. You can change, add, and delete wash formulas from this display.
1. Use the scroll buttons if necessary to bring the wash formula you want onto the display.
2. Touch the Wash Formula Name button.
3. Use the instructions below.
Figure 2: The Wash Formula Maintenance Display
Typical View Legend
.
A. Back button
B. Wash Formula Name
buttons
C. Add buttons
D. Copy button
E. Rename button
F. Scroll Page buttons
G. Home button
H. Erase button
I. Steps button
J. Search button
11

Chapter 1. How to Use the MilTouch™ Control
PELLERIN MILNOR CORPORATION
1.1.1.1.1. To Change an Existing Wash Formula
1. Touch the Steps button to the right of the wash formula you want to change. The control will
display the steps.
Figure 3: The Steps in a Wash Formula
Typical View Legend
.
A. Back button
B. Name button
C. Step Type button
D. Add button
E. Copy button
F. Rename button
G. Erase button
H. Home button
2. Touch the Step Type button next to the step you want to change. The control will display the
choices.
3. Touch the step parameter you want to change.
•For selection lists, touch the value you want to use.
•For fields that require a typed value, touch the value in the box at the top. When the box
changes color to orange, delete the current value. Touch the desired numbers or letters to
enter the new value. Finally, touch the checkmark button to save the new value and go
back one level. To abandon the most recent change, touch the Exit button.
Figure 4: The Step Choices Display
Typical View Legend
.
A. Step Choices buttons
B. Save Changes button
C. Abandon Changes button
12

Chapter 1. How to Use the MilTouch™ Control
PELLERIN MILNOR CORPORATION
4. Touch the Save Changes button (Figure 4) to save the changes. The control displays the steps
in the formula (Figure 3).
5. Touch the Home button to go to the Home display (Figure 1).
Supplement 2
About the Steam Codes
Use the No Steam option unless your machine is configured for steam and connected to a
steam supply line.
No Steam—No steam is allowed in this bath step.
After, Runs—Steam starts only after the commanded bath level is achieved. If necessary,
steam is allowed to maintain temperature. The timer runs when the steam valve is open.
Stops—Steam begins only after the commanded bath level is achieved. After temperature is
first achieved, no more steam is allowed in the step. The timer stops running when the steam
valve is open.
After, Stops—Steam begins only after the commanded bath level is achieved. If necessary,
steam is allowed to maintain temperature. The timer stops running when the steam valve is
open.
Early, After, Runs—Steam starts when the lowest safe bath level is achieved. If necessary,
steam is allowed to maintain temperature. The timer runs when the steam valve is open.
Early, Stops—Steam starts when the lowest safe bath level is achieved. After temperature is
first achieved, no more steam is allowed in the step. The timer stops running when the steam
valve is open.
Early, After, Stops—Steam starts when the lowest safe bath level is achieved. If necessary,
steam is allowed to maintain temperature. The timer stops running when the steam valve is
open.
1.1.1.1.2. To Add a New Wash Formula
1. From the Wash Formula Maintenance display, touch the Add button.
2. The control names the new wash formula similar to [N] Formula - xx, where xx is a number.
3. Touch the Rename button to change the wash formula name.
a. In the Formula Name window, touch the formula name.
b. Touch the [Clear All] button to erase the formula name that the controller provided.
c. Use the keypad to enter a formula name.
d. Touch the Accept button to write the new formula name to memory. The Wash Formula
Maintenance display appears.
4. Touch the Steps button beside a formula to add steps.
a. Touch the Add button. A new step appears with a step type of End Formula (00:00).
b. Touch the Step Type button to program the step. The Step Decisions display appears.
• For selection lists, touch the value you want to use.
• For fields that require a typed value, touch the value in the box at the top. When the
box changes color to orange, delete the current value. Touch the desired numbers or
letters to enter the new value. Finally, touch the checkmark button to save the new
value and go back one level. To abandon the most recent change, touch the Exit
button.
13

Chapter 1. How to Use the MilTouch™ Control
PELLERIN MILNOR CORPORATION
c. Touch the Type button on the Step Choices display, then select the type of step you want.
d. Touch the Time button. Touch each desired units box and erase the value, then enter a
new value.
e. Touch the Confirm button to save the step time.
f. Set the remaining choices for the step.
g. Touch the Save Changes button to save the step.
h. The Steps display appears.
5. Repeat the steps above to add and modify steps.
1.1.1.1.3. To Erase a Wash Formula
1. Touch the Name button for the formula you want to erase.
2. Touch the Erase button.
3. Confirm that you want to erase the formula.
1.1.1.2. The Configuration Display
Figure 5: The Configuration Display
Typical View Legend
.
A. Machine Type button
B. Machine Name button
C. Laundry Type button
D. Language
E. Water Unit (inches or
centimeters) button
F. Water Offset button
G. Water Level buttons for
universal levels
H. Temperature Probe button
I. Temperature Unit
J. Time before Steam Error
button
K. Time before Cooldown
Error button
L. Third Water Valve button
M. Second Drain Valve
button
N. RinSave Option button
O. Time before Fill Error
button
P. Counts per 10 RPMs
button
Q. Scroll buttons
R. Password Menu button
S. Save Configuration and
Exit button
T. Exit (Abandon Changes)
button
1.1.1.2.1. The Machine Configure Decisions—Use the information below to configure the machine
14

Chapter 1. How to Use the MilTouch™ Control
PELLERIN MILNOR CORPORATION
for how you will use it, temperature and water units, etc.
1.1.1.2.1.1. Type—Select the type of machine shown on the machine name plate. The name plate is on the
back side of the machine.
1.1.1.2.1.2. Name—Set a machine name to describe the machine on printed reports.
1.1.1.2.1.3. Laundry Type—Set the type of goods this machine will process most often. This selection sets
the 10 default formulas available without programming. This version of the machine software
provides default formulas for the commercial configuration.
1.1.1.2.1.4. Language—Set a language for the machine prompts. The only current choice is English.
1.1.1.2.1.5. Water Unit—Set whether bath height will be displayed and programmed in inches or
centimeters.
1.1.1.2.1.6. Water Offset—Set a digital counts value here so the displayed bath level on the Run screen is
the same as the actual bath level in the machine.
1.1.1.2.1.7. Water Levels—Set a value for each water level. Water Level 1 must be the lowest level, and
Water Level 6 must be the highest.
1.1.1.2.1.8. Temperature Probe—Set whether this machine has a temperature sensor. A temperature
sensor allows programming a specific temperature for each bath step.
1.1.1.2.1.9. Temperature Unit—Set whether bath temperature will be displayed and programmed in
degrees Fahrenheit or degrees Celsius.
1.1.1.2.1.10. Steam Error—Set the time allowed for the machine to use steam to achieve the programmed
bath temperature.
1.1.1.2.1.11. Cooldown Error—Set the time allowed for the machine to complete a cooldown to a
programmed bath temperature.
1.1.1.2.1.12. Extra Water—Set whether this machine is attached to a third water source.
1.1.1.2.1.13. Reuse Drain—Set whether this machine has a reuse tank and a second drain valve.
1.1.1.2.1.14. RinSave—Set whether to allow RinSave steps in wash formulas.
1.1.1.2.1.15. Fill Error—Set the maximum time allowed for the machine to fill to the desired level.
1.1.1.2.1.16. Counts per 10 RPMs—Set the number of counts from the digital-to-analog board required to
change the basket speed by 10 RPMs. Do not make a change to this value before you consult with
the Milnor factory.
1.1.1.2.1.17. Password Menu button—Set a password to restrict access to programming, configuration,
and manual functions. Also, set the date and time for the machine.
15

Chapter 1. How to Use the MilTouch™ Control
PELLERIN MILNOR CORPORATION
Figure 6: The Password and System Clock Display
Typical View Legend
.
A. System Date button
B. System Time button
C. Recalibrate Touchscreen
button
D. Configuration Password
Enabled button
E. Set Configuration
Password button
F. Formulas Password
Enabled button
G. Set Formulas Password
button
H. Manual Functions
Password Enabled button
I. Set Manual Functions
Password button
J. Scroll buttons
K. Exit button
1.1.1.2.1.17.1
.
Set a Lockout Password—When the lockout password is turned ON, you must enter the
password to see the programming, configuration, or manual function displays.
Notice 2 : For this version of the machine software, the only way to recover a lost password is
to send an email to [email protected]. Provide the machine serial number and the 10-digit
phone number of the facility where the machine is installed. You will receive a temporary
password in email during normal business hours.
1. Set the Enabled button to YES. This means the lockout password will be necessary to access
certain functions.
2. Touch the button for the functions you want to protect. The User Password display appears.
3. Touch the New Password box.
4. Enter the same password in both the New Password box and the Verify Password box. The
lockout passwords are not case-sensitive.
5. Touch the Exit button. The Configuration Display (Figure 6) appears.
1.1.1.2.1.17.2
.
Set the System Date and System Time—The date and time fields are used on the Home
display and when data is collected. Enter the time in 24-hour format.
1. Touch the System Date button or the System Time button.
2. Touch the field to change.
3. Enter the correct value in the box.
4. Touch the Save Changes button. The Configuration Display (Figure 5) appears.
1.1.1.2.2. The Default Formulas by Laundry Type—This machine software includes typical
formulas for the commercial configuration. You can change these formulas or copies of them for
other types of goods.
1.1.1.3. The Data Transfer Display—You can save wash formulas from a MilTouch machine to an
external USB device or to an internal memory area in the controller.
16
Other manuals for MilTouch MWF27Z8 Series
1
This manual suits for next models
13
Table of contents
Languages:
Other Milnor Controllers manuals

Milnor
Milnor Milnor Phase 7.2.2 User manual

Milnor
Milnor Miltrac Use and care manual

Milnor
Milnor MilTouch-EX Manual

Milnor
Milnor MilTouch User manual

Milnor
Milnor E-P Express User manual

Milnor
Milnor 30010CGE User manual

Milnor
Milnor MilTouch Manual

Milnor
Milnor MilTouch User manual

Milnor
Milnor MilTouch MWF27Z8 Series Manual

Milnor
Milnor E-P Plus Service manual