manuals.online logo
Brands
  1. Home
  2. •
  3. Brands
  4. •
  5. Milwaukee
  6. •
  7. Controllers
  8. •
  9. Milwaukee BLACK BOX DL510 Manual instruction

Milwaukee BLACK BOX DL510 Manual instruction

1
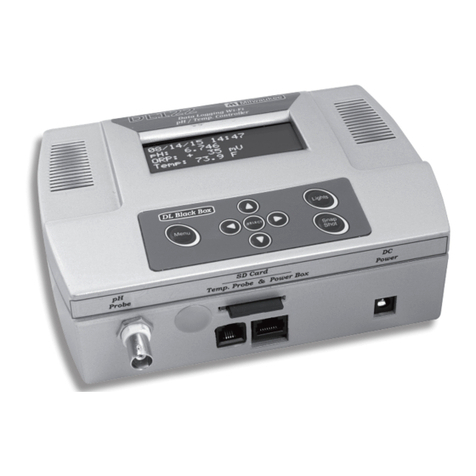
DL510 BLACK BOX
DATA LOGGING CONTROLLER
ORP/Temperature
Set Up / Operation Manual
Test Equipment Depot - 800.517.8431 - 99 Washington Street Melrose, MA 02176 - TestEquipmentDepot.com
2
DL510 MENU MAP
**Menu**
> Basic Setup
ORP
DataLog Setup
Last Logged
Wi-Fi Settings
IDC Setup
Exit
**Basic Setup**
>Date & Time
Temperature
Exit
Date and Time
>05/09/15 Date
9:25 Time
Exit
**Basic Setup**
Date & Time
>Temperature
Exit
Temperature
>Fahrenheit
Celsius
Exit
**ORP Menu**
>ORP Controller
ORP Below Alert
ORP Above Alert
ORP Hysteresis
Exit
*ORP Control Setup*
>ORP Setpoint: +0300
Activate: Below
Exit
ORP Control Setup
> ORP Setpoint **.**
ORP Control Setup
ORP Setpoint: +0300
>Activate: Below
Exit
ORP Control Setup
>Activate: Below
**Menu**
Basic Setup
>ORP
DataLog Setup
Last Logged
Wi-Fi Settings
IDC Setup
Exit
**ORP Menu**
ORP Controller
>ORP Below Alert
ORP Above Alert
ORP Hysteresis
Exit
*ORP Below Alert*
>ORP Caution +**.**
ORP Critical +**.**
Exit
**ORP Menu**
ORP Controller
ORP Below Alert
>ORP Above Alert
ORP Hysteresis
Exit
*ORP Above Alert*
>ORP Caution **.**
ORP Critical **.**
Exit
*ORP Below Alert*
ORP Caution +**.**
>ORP Critical +**.**
Exit
*ORP Above Alert*
ORP Caution +**.**
>ORP Critical +**.**
Exit
**ORP Menu**
ORP Controller
ORP Below Alert
ORP Above Alert
>ORP Hysteresis
Exit
**Menu**
BasicSetup
ORP
>Data LogSetup
Last Logged
Wi-Fi Settings
IDCSetup
Exit
*DataLogger*
>Set TimeInterval
Start Time
Exit
Set Time Interval
xx:xx:xx
*DataLogger*
Set TimeInterval
>Start Time
Exit
Set Start Time
xx:xx:xx
**Menu**
Basic Setup
ORP
DataLog Setup
>Last Logged
Wi-Fi Settings
IDC Setup
Exit
**Last Logged**
01/05/16 08:06:07
ORP: +344
Temperature: 22.56º C
ORP Probe Diag. ORP Probe Diag. ORP Probe Diag. ORP Probe Diag.
**ORP Menu**
>
ORP Controller
ORP Below Alert
ORP Above Alert
ORP Hysteresis
Exit
ORP Probe Diag.
*Probe Diagnostic*
Follow instructions
given here.
*ORP Hysteresis*
>
20mV
15mV
10mV
5mV
Exit
**Wi-Fi
Settings**
>Wi-Fi Enable
Security Type
Network Name/SSID
Pre-shared Key
View Device IP
U
pload Inte
rval
Portal Sync
Portal Service
Exit
**Wi-Fi Enable*
*
> Enabl
e
Disable
**Wi-Fi Settings**
Wi-Fi Enable
>Security Type
Network Name/SSID
Pre-shared Key
View Device IP
Upload Interval
Portal Sync
Portal Service
Exit
**Wi-Fi Security**
Open
WEP
>WPA
Exit
**Wi-Fi Settings**
Wi-Fi Enable
Security Type
>Network Name/SSID
Pre-shared Key
View DeviceIP
Upload Interval
Portal Sync
Portal Service
Exit
Network Name
XXXXXXXXXXXXX
**Wi-Fi Settings**
Wi-Fi Enable
Security Type
Network Name/SSID
>Pre-shared Key
View DeviceIP
Upload Interval
Portal Sync
Portal Service
Exit
Network Password
XXXXXXXXXXXXX
**Wi-Fi Settings**
Wi-Fi Enable
Security Type
Network Name/SSID
Pre-shared Key
>View DeviceIP
Upload Interval
Portal Sync
Portal Service
Exit
Device IP Address
IP: 196.162.3.***
MAC: 18fe351e79cd
Exit
**Wi-Fi Settings**
Wi-Fi Enable
Security Type
Network Name/SSID
Pre-shared Key
View DeviceIP
>Upload Interval
Portal Sync
Portal Service
Exit
**Wi-Fi Settings**
Wi-Fi Enable
Security Type
Network Name/SSID
Pre-shared Key
View DeviceIP
Upload Interval
>Portal Sync
Portal Service
Exit
Set Upload Interval
05 minutes
Portal Sync
**Wi-Fi Settings**
Wi-Fi Enable
Security Type
Network Name/SSID
Pre-shared Key
View DeviceIP
Upload Interval
>
Portal Sync
Portal Service
Exit
Do Not Enter
Any Data
**Menu**
Basic Setup
ORP
DataLog Setup
>
Last Logged
Wi-Fi Settings
IDC Setup
Exit
**IDC Setup**
>Days to Dose
Sessions/Day
Session Time
Start Time
End Time
Exit
Days to Dose:
MT W T F SS
**Menu**
Basic Setup
ORP
DataLog Setup
Last Logged
Wi-Fi Settings
>IDCSetup
Exit
**IDC Setup**
Days to Dose
>Sessions/Day
Session Time
Start Time
End Time
Exit
**IDC Setup**
Days to Dose
Sessions/Day
>Session Time
Start Time
End Time
Exit
**IDC Setup**
Days to Dose
Sessions/Day
Session Time
>Start Time
End Time
Exit
Sessions/Day:
XXX
Session Time:
00:00:00
Start Time:
00:00
**IDC Setup**
Days to Dose
Sessions/Day
Session Time
>
Start Time
End Time
Exit
EndTime:
00:00
**IDC Setup Menu****IDC Setup Menu****IDC Setup Menu****IDC Setup Menu****IDC Setup Menu**
Incremental Dosing Control, IDC,
is totally independent of ORP control functions
1
Please make sure you have all the components
listed below. If not, call your dealer.
• DL510 Data Logging Controller
• Controller Power Box with ORP and IDC outlets
• #MA921B/2 ORP probe with 2m cable
• #RJ11 temperature probe with 3m cable
• 9VDC power supply
• 4GB SD card
• RJ45 power cable
• International power supply kit
DL510 Quick-Start Hardware Setup
1) Plug the ORP probe into the BNC connector on the controller.
2) Insert the 4GB SD card (included), printed side down, making
certain that it snaps into place.
3) Connect RJ11 temperature probe.
4) Connect one end of RJ45 power cable to the DL510 unit; the
other end to the Controller power box. To avoid“accidental”
dosing, you will not be plugging the Controller power box into a
power supply until the settings for ORP have been entered and
saved.
5) Connect 9VDC power supply into unit rst, then plug into
120VAC wall outlet.
Note: To enable Wi-Fi, you will need to know your Wi-Fi network
Security Type, Name, and Password.
Milwaukee Instruments, designer and manufacturer of the
DL510, recommends you read this manual from start-to-
nish, without skipping sections. Many of the instructions in
later sections are based on knowledge you will acquire in the
earlier sections of this manual.
Getting to know the DL510
Once you have connected all the cords, inserted the SD card, and
plugged the DL510 into a wall socket, please read this section,
taking a few moments to learn about the screen and keypad.
Note there is no ON/OFF switch; the unit is ON as soon as it is
plugged in. The only way to deactivate the unit is to unplug it.
Recorded data on the SD card will remain intact when the unit is
unplugged.
THE SCREEN When the unit is rst powered up, you will see a
WELCOME message. In a few seconds, the unit will automatically
switch to the primary display screen. This screen gives the
date, time, and real-time readings of ORP and Temperature.
If activated, the word Wi-Fi will also appear in the upper right
corner. Unless you are changing settings, this is the screen that
should always be displaying.
Primary Display Screen
On the menu screens, only four lines will be visible at a time.
To see more options, scroll the list by using up/down arrows
on the keypad. When the cursor (>) appears beside the
appropriate function or setting, press SELECT.
THE KEYPAD Pressing the Menu button brings up a screen
featuring the full menu. At the bottom of all menu screens,
there will be an“Exit”option. The“Exit” option, when selected,
takes you back to the previous screen you were viewing. For
informational screens, there is no “Exit” option. Press SELECT to
return to previous screen.
Pressing the Menu button takes you all the way back to the
primary display screen, bypassing other screens you may have
used. Pressing the Menu button also allows you to toggle
between the primary display screen and the full menu screen.
The left/right arrows ( )allow you to move the blinking cursor
horizontally through a line of settings to the numbers you want
to reset, while the up/down arrows ( )allow you to move
through the function listings and numbers, and toggle between
yes/no options. When new settings are entered, press SELECT,
there will be a short pause and the screen will read SAVED! In just
a moment, the unit will revert to the previous screen.
The Lights button allows you to turn o the screen and status
lights (lights to the left and right of screen, behind grills). The
unit is still functional when lights are o. Pressing Lights again
will reactivate all lights.
IMPORTANT: When in the Lights OFF mode, the status lights
(caution and critical) will not activate on the unit; however,
since the unit is still operational, it will continue to log data
and, if web portal is activated, send text or email alerts, or
both. The only way to turn o data logging and the alerts
system is to unplug the unit.
The Snap Shot button allows you to instantly log a real-time
reading on both the SD card and the portal. A snap shot will
not interfere with scheduled data logging. When you press the
Snap Shot button on the keypad,“Snap Shot”will appear for a
few seconds in the lower right corner of the screen, indicating
the real-time data has been logged.
11/30/15 11:45 Wi-Fi
ORP: +344mV
Temp: 22.56ºC
Incremental Dosing Control, IDC,
is totally independent of ORP control functions
Wi-Fi will
display here
if enabled.
2
Getting Started with Basic Setup
This is a very important step, allowing you to enter the
correct Date and Time, and select Fahrenheit or Celsius
Temperature readings. Please note that ORP comes factory
calibrated and needs no further calibration.
This unit comes with factory presets, but before using you must
reset to meet your specic requirements. If you ever wish to
revert to factory settings (a factory reset), simply unplug unit,
then plug back in while holding the LIGHTS button down for 3
seconds.
Breadcrumbs, or the navigation path, shown at the beginning
of each section of this manual, will take you from the Menu
screen to the screen where you will be entering changes.
Setting Date and Time
Menu Button>Basic Setup>Date and Time
1) Press the Menu button on the keypad and the full menu will
appear on screen.
2) The cursor appears beside the rst option on each new
screen, and since“Basic Setup” is the rst option listed, you can
press the SELECT button on the keypad.
Please note that the Full Menu lists seven options, but only three
will be visible on the rst screen. To see other options, scroll with
the down arrow to bring other options into view.
3) The **Basic Setup** screen will appear and the cursor will be
beside the rst option, which is “Date and Time.”Press SELECT.
4) The“Date and Time”screen will now appear. Both the date
and the time will be shown, but they may not be correct.
5) To change the date, make sure cursor is beside the Date line
and press SELECT.
6) To set the “Date,” use the left/right arrows on the keypad to
move the blinking cursor through the line. Be sure to skip over
slashes. Use the up/down arrows to nd the correct numbers
for the month, day, and year. Once you have set all numbers to
match today’s date, press the SELECT button and the SAVED!
screen should appear for a few moments. It will then go back to
the “Date and Time” screen.
7) Now you are ready to set the time. Scroll down to the next
option, which is “Time.”Press SELECT.
8) Again, work across the Hours:Minutes (00:00) using left/right
arrows, picking the number you want to change, then using
up/down arrows to select the appropriate number.
Note that this unit displays in military time (24-hour); there is
no am/pm option, that is, 9AM is 09:00 and 2:05PM is 14:05.
10:30PM is 22:30.
9) Once complete, press SELECT to enter the new time. A
screen will appear indicating that your change has been SAVED!
10) Scroll to“Exit”and press SELECT to return to **Basic
Setup** screen, or press the Menu button to return to the
primary display screen.
Important: When utilizing portal, date on controller and portal
dashboard must be the same, and times should be set as close
as possible (within ten minutes).
Setting Temperature – Fahrenheit or
Celsius
Menu Button>Basic Setup>Temperature
Work your way to the“Temperature” screen and, using
up/down arrows, select Fahrenheit or Celsius, then press
SELECT. The SAVED! screen will appear then go back to the
“Temperature” screen. Scroll to“Exit” and press SELECT to
return to **Basic Setup** screen, or press the Menu button to
return to the primary display screen.
This completes the Basic Setup of your DL510.
******************************************
Setting up for ORP Readings
The DL510 allows you to establish an ORP setpoint along with
caution and critical alerts for“out of parameter” readings. ORP
has been factory calibrated and no user calibration is required.
ORP Probe Diagnostic
Menu Button>ORP>ORP Probe Diagnostic
ORP probes have a limited lifetime and must be replaced
periodically to maintain accurate readings. If you suspect
incorrect readings, work your way to the ORP Probe Diagnostic
screen. You will be instructed to:“Place probe in 240 or 470mV
Calib. Sol’n. Press SELECT.”
The unit will run a diagnostic test, then a message will appear
on the screen, such as“Probe or solution is bad!”Replace
your solution, run diagnostic again, and if you get the same
message, replace the probe.
** Menu **
> Basic Setup
ORP
Data Log Setup
Last Logged
Wi-Fi Settings
IDC Setup
Exit
Please be sure to read Getting to Know the DL510, previous page, before beginning Basic Setup.
** ORP Menu **
> ORP Probe Diag.
ORP Controller
ORP Below Alert
ORP Above Alert
ORP Hysteresis
Exit
3
Setting ORP Setpoint and Activation
Menu Button>ORP>ORP Controller
1) Work your way to the *ORP Control Setup* screen. If the ORP
setpoint shown on this screen is correct, “Exit”the menu.
2) If you want to change the ORP setpoint, make sure the cursor
is beside “ORP Setpoint” and press SELECT.
3) On this screen, use the keypad arrows to create the new ORP
setpoint, expressed in mV (millivolts). While most ORP values
are positive, you can set a negative value by moving the cursor
to the“-” sign. Both the up and down arrows on the keypad will
allow you to toggle between positive(+) and negative (-).
ORP values on the DL510 are calculated with an Ag/AgCl w/3.5 M
KCl reference electrode.
4) Once you have entered the correct setpoint, press SELECT
and the SAVED! screen will appear.
5) This will bring you back to the *ORP Control Setup* screen.
Scroll to the“Activate”line and press SELECT. If the Above or
Below is correct, you may exit the screen.
6) If not, simply use the up/down arrows on the keypad to
toggle between Above and Below, then press SELECT. There is
no blinking cursor on this screen.
Understanding ORP Alerts (Caution
and Critical)
The DL510 is designed to eciently monitor ORP and maintain
the setpoint you have entered; however, problems may occur
over which this unit has no control.
When this happens, lights on the unit will signal Caution and
Critical alerts and, if you have enabled Wi-Fi and subscribe to
the interface portal, the unit will send out your choice of emails
or text messages, or both, to notify you. See “Setting up Wi-Fi”
section for details on connecting to the interface portal.
A Caution is intended to alert you when the unit registers
an ORP value that has deviated too far from your setpoint.
A Critical alert is to let you know that the ORP value has
deviated even further and you have a serious problem needing
immediate attention.
It is your responsibility to set the ORP alert parameters for your
specic requirements. This is a balancing act and may require
some experimentation on your part. You do not want an ORP
value to drift too far from your setpoint without an alert, but
you also don’t want the DL510 to be sending you alerts too
frequently.
For most applications, Milwaukee Instruments recommends a
30mV dierence between the setpoint and the Caution alert
value; and a 70mV dierence between the setpoint and the
Critical alert value. See the diagram below.
+630 +660 +690 +720 +750
Critical Caution Setpoint Caution Critical
Red | Lime | Blue | Lime | Red
Below Alert Above Alert
If the value for ORP is within the parameters you have set, the
status lights on both sides of the screen will remain blue. If
the blue changes to lime, this signals that the ORP value has
reached the Caution level. If the value continues to drift further
from the setpoint and reaches the Critical level, the lime lights
will turn red, indicating a critical condition.
Setting ORP Below Alerts (Caution & Critical)
Menu Button>ORP>ORP Below Alert
1) Work your way to the *ORP Below Alert* screen. You will see
two options: “ORP Caution” and “ORP Critical.” If the settings
shown beside each are the desired settings, you may“Exit”the
screen.
2) If you want to change the Caution setting, place the cursor
beside “ORP Caution” and press SELECT.
3) On the *ORP Below Alert* screen, use the keypad arrows to
create the new setting, and press SELECT. The SAVED! screen
will appear and then you will go back to the * ORP Below Alert*
screen.
4) Now move the cursor to the “ORP Critical”option; press
SELECT, then enter the new setting.
5) Press SELECT and you have completed setup for the ORP
Below Alerts. “Exit” to return to the **ORP Menu** or press the
Menu button to go back to the primary display screen.
Setting ORP Above Alerts (Caution & Critical)
Menu Button>ORP>ORP Above Alert
1) Work your way to the *ORP Above Alert* screen. You will see
two options: “ORP Caution” and “ORP Critical.” If the settings
shown beside each are the desired settings, you may“Exit”the
screen.
2) If you want to change the Caution setting, place the cursor
beside “ORP Caution” and press SELECT.
3) On the *ORP Above Alert* screen, use the keypad arrows to
create the new setting, and press SELECT. The SAVED! screen
will appear and then you will go back to the * ORP Above Alert*
screen.
4) Now move the cursor to the “ORP Critical”option; press
SELECT, then enter the new setting.
5) Press SELECT and you have completed setup for the ORP
Above Alerts.“Exit”to return to the **ORP Menu** or press the
Menu button to go back to the primary display screen.
IMPORTANT: When all ORP settings have been entered and
saved, plug the controller power box into a 120VAC wall
socket or power supply. ORP devices must be plugged
into the bottom socket. IDC devices are plugged into the
top socket. The red indicator lights beside the ORP and IDC
sockets, labeled“Activated,”let you know when the sockets
are providing power to the devices.
Setting ORP Hysteresis
Menu Button>ORP>ORP Hysteresis
To prevent excessive on/o cycling of dosing devices, the“ORP
Hysteresis” feature allows you to customize the lag (delay) in
4
device activation. Without hysteresis, your controller would
attempt to correct even the slightest variation in ORP value and
would be cycling on and o almost continuously.
On the **ORP Hysteresis** screen, you may select from four
ORP options: 5mV, 10mV, 15mV, and 20mV. Place the cursor
beside your selection, press SELECT and the SAVED! screen will
appear. The default setting for this unit is 15mV.
As an example, if your setpoint is +690mV (Set for ABOVE) and
you set ORP hysteresis at 20mV, then the controller will activate
your dosing device when the ORP value reaches 710mV and will
continue until the solution returns to 670mV.
Setting up the Data Logger
(Time Interval & Start Time)
Please note that if you remove the SD card when the unit is ON,
the unit will remain operational. However, before re-inserting
the SD card, disconnect the unit from its power source. Once
you have the SD card snapped back in place, restore power
to the unit. If you re-insert the SD card while the unit is
operational, you must still momentarily disconnect from power,
then reconnect, allowing the unit to properly communicate
with the SD Card.
Also note that the internal SD card is xed at two-minute
logging intervals. The following instructions refer to the portal
only.
Example of Logged Data on SD Card
Menu Button>Data Log Setup>Data Logger
1) Work your way to the **Data Logger** screen. The cursor will
appear beside “Set Time Interval.” Press SELECT.
2) On the “Set time interval” screen, using the keypad
arrows, enter the amount of time between logs, in Hours:
Minutes:Seconds (00:00:00). Logging is restricted to a 5-minute
minimum upload interval (except for Snap Shots); however,
Milwaukee Instruments recommends a wider interval,
typically 00:10:00 to 00:15:00. For most applications, this 10- to
15-minute interval is frequent enough to gather meaningful
data without collecting too much data, which can often make
evaluation cumbersome.
3) Press SELECT to save this interval. Screen will read SAVED!
and go back to the **Data Logger** screen with the cursor
beside “Start Time.”
4) Press SELECT to advance to the Start Time screen. Using the
keypad arrows, enter the start time and press SELECT to save.
5) Press the Menu button to return to the primary display screen.
Note: To capture a real-time reading, press the Snap Shot button.
A snap shot will not interfere with scheduled data logging. When
you press the Snap Shot button on the keypad, “Snap Shot” will
appear for a few seconds in the lower right corner of the screen,
indicating the real-time data has been logged.
Checking Last Logged Screen
Place cursor beside“Last Logged”and press SELECT. The **Last
Logged** screen will appear. Press Menu button to return to
primary display screen.
Setting up Wi-Fi
In addition to displaying real-time data, the Wi-Fi and portal
provide email and text alerts, store redundant data, and oer
remote control of unit.
Use of Wi-Fi and portal is optional; it is not required. Not utilizing
the portal will not aect operation of the unit.
Your DL Controller is set up to transmit in the 2.4GHz frequency
range only. If you are using a wireless router with two or more
channels, please be sure to enter the “Network Name / SSID”that
will access the 2.4GHz frequency channel only. The unit will not
communicate at 5.0GHz.
Before beginning Wi-Fi setup, make sure you have the following:
• Wi-Fi Network Security Type (Open, WEP, or WPA)
• Wi-Fi Name, and
• Wi-Fi Password
IMPORTANT: Although“Wi-Fi Enable” is the rst option listed,
you should enter all Wi-Fi information with the unit in Wi-Fi
Disabled mode. Enable Wi-Fi as the last step, otherwise the unit
may begin uploading information before you nish entering it.
Menu Button>Wi-Fi Settings>Wi-Fi Enable
1) Work your way to the **Wi-Fi Enable** screen.
2) On the **Wi-Fi Enable** screen, place cursor beside“Enable”
and press SELECT.
3) Use the same procedure to Disable Wi-Fi.
Menu Button>Wi-Fi Settings>Security Type
1) Work your way to the **Wi-Fi Security** screen and press
SELECT.
**Last Logged**
01/05/16 08:06:07
ORP: + 344
Temperature: 22.56ºC
**Wi-Fi Settings**
> Wi-Fi Enable
Security Type
Network Name/SSID
Pre-shared Key
View Device IP
Upload Interval
Portal Sync
Portal Service
Exit
Date Time ORP Temperature
5
2) On the **Wi-Fi Security** screen, you will have the following
options: Open, WEP, and WPA. WPA is the most common. Place the
cursor beside the appropriate security type and press SELECT.
Menu Button>Wi-Fi Settings>Network Name/SSID
(Remember to use 2.4GHz only)
1) Work your way to the“Network Name/SSID”screen and press
SELECT.
2) When the“Network Name/SSID” screen opens, ll in your Wi-
Fi name using the keypad arrows, and press SELECT.
Menu Button>Wi-Fi Settings>Pre-shared Key (Password)
1) Work your way to the **Pre-shared Key** screen and press
SELECT.
2) When the screen opens, the heading will read “Network
Password.”
3) Fill in your Wi-Fi password using the keypad arrows, and
press SELECT.
Menu Button>Wi-Fi Settings>View Device IP
When Wi-Fi is set up and you have logged in, you will be able to
view the Device IP and MAC Addresses.
Menu Button>Wi-Fi Settings>Upload Interval
This screen will show upload interval, that is, how often the
DL510 sends new information to the portal.
Menu Button>Wi-Fi Settings>Portal Sync
Menu Button>Wi-Fi Settings>Portal Service
IMPORTANT: Do not open the Portal Service screen unless
you are instructed to do so by Milwaukee Instruments. If you
accidentally open this screen, press MENU to back out. Do NOT
enter any data! Doing so will permanently disconnect you
from the portal.
Setting up the Incremental
Dosing Control (IDC)
The Incremental Dosing Control oers precision on/o switching
of pumps, lights, and other devices. (It’s a little sophisticated for
your coee maker, but it’ll work.) It can be programmed for 1 to
7 days of the week with Start/End times each day and up to 999
timed-duration sessions per day. The controller function and IDC
are completely independent of each other.
Menu Button>IDC Setup>Days to Dose
1) Press Menu button, scroll down to **IDC Setup**, and press
SELECT.
2) The **IDC Setup** screen allows you to accurately schedule
precision dosing and includes a ow calibration feature.
Begin by placing the cursor beside“Days to Dose,” press SELECT.
3) Use the left/right arrows (<>) to move the blinking cursor
across the days of the week. On each day, use the up/down
arrows to toggle the day ON or OFF. The presence of an“X”
indicates that power will be supplied to a dosing device (or any
other device) on that day.
4) Once you have completed selection of days, press SELECT
and this information will be SAVED!
Menu Button>IDC Setup>Sessions/Day
The DL510 will space sessions evenly over the available time
(Start Time to End Time) on each day.
1) Press Menu button, scroll down to **IDC Setup**, and press
SELECT.
2) Place cursor beside Sessions/Day and press SELECT.
3) Use the left/right arrows (<>) to move the blinking cursor
across the three digits. In each place, use the up/down arrows
to select a number. Once you have entered the appropriate
number of sessions per day (up to 999), press SELECT and this
information will be SAVED!
4) Based on Start/End times and Session Time you have
programmed, if you attempt to enter a number of sessions that
will not t into the time that is available, the message on your
screen will read:“Please enter a valid number of sessions per
day.”You will need to enter a lower number of Sessions Per Day
or make adjustments in Start/End times and/or Session Time.
Menu Button>IDC Setup>Session Time
Session Time is the length of time (duration) that your device
will be turned on. All session times must be the same length.
1) Press Menu button, scroll down to **IDC Setup**, and press
SELECT.
2) Place cursor beside Session Time and press SELECT.
3) Use the left/right arrows to move the blinking cursor across
the time, shown in Hours:Minutes:Seconds (00:00:00). Use the
up/down arrows to select numbers. Once you have entered the
appropriate duration of EACH dosing session, press SELECT
and the SAVED! screen will appear. All session times must be
the same.
4) Based on Start/End times and Sessions/Day you have
programmed, if you attempt to enter a session time that will
not t into the time that is available, the message on your
screen with read:“Please enter a valid session time.”You will
need to enter a shorter session time or make adjustments in
Start/End times and/or Sessions/Day
Menu Button>IDC Setup>Start Time
1) Press Menu button, scroll down to **IDC Setup**, and press
SELECT.
2) Place cursor beside“Start Time”and press SELECT.
3) Use the left/right arrows to move the blinking cursor across
the start time and up/down arrows to select appropriate
numbers. When complete, press SELECT and the SAVED! screen
will appear. Note that the DL510 uses military (24-hour) time.
A start time of 2:30PM would be entered as 14:30. Default Start
Time is 00:00.
4) If you attempt to enter Start/End times that do not allow
** IDC Setup **
> Days to Dose
Sessions/Day
Session Time
Start Time
End Time
Flow Calibration
Exit
6
sucient time for Sessions/Day and Session Time you have
programmed, the message on your screen will read:“Please
enter valid Start and End Times.”You will need to add more time
between Start and End Times, if possible, or make adjustments
in Session Time and/or Sessions/Day.
Menu Button>IDC Setup>End Time
1) Press Menu button, scroll down to **IDC Setup**, and press
SELECT.
2) Place cursor beside“End Time” and press SELECT.
3) Use the left/right arrows to move the blinking cursor across
the end time and up/down arrows to select appropriate
numbers. When complete, press SELECT and the Saved! screen
will appear. Default End Time is 23:59.
The unit will not accept an End Time that precedes a Start Time,
and Start/End Times must fall within a single day.
4) If you attempt to enter Start/End times that do not allow
sucient time for Sessions/Day and Session Time you have
programmed, the message on your screen will read:“Please
enter valid Start and End Times.”You will need to add more time
between Start and End Times, if possible, or make adjustments
in Session Time and/or Sessions/Day.
Menu Button>IDC Setup>Flow Calibration
When utilizing the IDC to dispense a solution, you must
determine how long your pump needs to be on to provide
a given volume of solution. Since pump eciency, solution
strength and viscosity, tubing diameter, and many other factors
play a role in how long your pump should run, the DL510 is
equipped with a ow calibration feature.
1) Press Menu button, scroll down to **IDC Setup**, and press
SELECT.
2) Place cursor beside“Flow Calibration”and press SELECT.
3) Be sure the cursor is beside START. Using a container of
appropriate size (or one marked with an appropriate ll level),
place the tube from the pump into the container and begin
lling the container by pressing SELECT. The display will serve
as a stopwatch, recording minutes and seconds (00:00).
4) Scroll the cursor down to STOP and when the solution
reaches the ll mark, press SELECT.
5) Write down this number and plug it into the IDC Session
Time screen.
7
8
9
Manufactured/Assembled
in the USA
Range Full ORP scale: -1000 mV to +1000 mV
Resolution - Fixed 1 mV
Accuracy @ 77°F 5 mV
Setpoint Range Full ORP scale: -1000 mV to +1000 mV
Activation Parameter User Select above or below activation setpoint
Visual Alerts LED backlight blue = normal; lime = caution; red = critical
Probe Protection On Master Board GLP chipset ( Ground Loop Preventer )
Circuit Board Protection On Master Board RJ45 Backfeed Prevention Chipset
Operational Environment 15°F to 180°F (-10°C to 85°C)
Temperature Accuracy 0.5°F
Power Supply International Plug Set - No converter needed
ORP Electrode MA921B/2
RJ45 Cable 7-foot RJ45 provided -- Optional up to 50 feet
Controller Power Box 1 socket for ORP dosing or Ozone; 1 socket for IDC Device
Main Board Atmel SAM3X8E ARM Cortex-M3 CPU
Operating Voltage 3.3 volts
Clock Speed 84 MHz clock
S Ram 96 KBytes of SRAM (two banks: 64KB and 32KB)
Flash Memory 512 KB
Data Retention 100 years at 25° C
Station and Access Point, Wi-Fi 802.11 b/g/n Roles with Integrated Radio, Baseband, and MAC
TCP/IP Embedded TCP/IP stack
Circuit Board Protection RJ45 Back Feed Protection with Short Circuit Protection
GLP (Ground Loop Prevention) Dual Ground Loop Prevention Circuit and Chipset
Input Power Supply 7V to 12VDC Recommended --- International Plug Set - No Converter needed
Input Min. & Max. 6V to 20VDC
Logic Load Shifter Provides Higher LCD Screen Resolution and Fast Response Time
Controller Power Max Capacity @ 110VAC or 220VAC, 10 amps / 1000 watts
Relay Response Time is 20ms
Free-wheeling Diode Protection
Universal Plug -- No Converter Necessary
Red LED Light Indicates Socket is Active and Power is On
One Socket Powers ORP Device; the Other Powers IDC Device
Communication to Master Controller Through RJ45 up to Maximum Distance of 50 Feet
DL510 BLACK BOX SPECIFICATIONS
CONTROLLER POWER BOX
Test Equipment Depot - 800.517.8431 - 99 Washington Street Melrose, MA 02176 - TestEquipmentDepot.com

Other Milwaukee Controllers manuals

Milwaukee MC740 User manual

Milwaukee

Milwaukee MC740 User manual

Milwaukee MC110 User manual

Milwaukee

Milwaukee MC110 User manual

Milwaukee MC720 User manual

Milwaukee

Milwaukee MC720 User manual

Milwaukee 0950-20 User manual

Milwaukee

Milwaukee 0950-20 User manual

Milwaukee MC720 User manual

Milwaukee

Milwaukee MC720 User manual

Milwaukee MC311 User manual

Milwaukee

Milwaukee MC311 User manual

Milwaukee DL122 Manual instruction

Milwaukee

Milwaukee DL122 Manual instruction

Milwaukee MC745 User manual

Milwaukee

Milwaukee MC745 User manual

Milwaukee MC510 User manual

Milwaukee

Milwaukee MC510 User manual

Milwaukee M12 551B-21 User manual

Milwaukee

Milwaukee M12 551B-21 User manual

Popular Controllers manuals by other brands

DMX4ALL ArtNet Player 4 user manual

DMX4ALL

DMX4ALL ArtNet Player 4 user manual

Emerson TESCOM Safety, Installation, Operations & Service Manual

Emerson

Emerson TESCOM Safety, Installation, Operations & Service Manual

LOVATO ELECTRIC SM1X3150R Assembly instructions

LOVATO ELECTRIC

LOVATO ELECTRIC SM1X3150R Assembly instructions

Velleman HQ-Power VDLC6000 manual

Velleman

Velleman HQ-Power VDLC6000 manual

Superior Electric WHR32 S Series instructions

Superior Electric

Superior Electric WHR32 S Series instructions

Maschine mikro user manual

Maschine

Maschine mikro user manual

CaterSense CaterSense -01 Installation and commissioning instructions

CaterSense

CaterSense CaterSense -01 Installation and commissioning instructions

Siemens SIRIUS 3SX3217 manual

Siemens

Siemens SIRIUS 3SX3217 manual

ActronAir MGW-BACCS Operation manual

ActronAir

ActronAir MGW-BACCS Operation manual

Oh!FX TC-105 Quick user guide

Oh!FX

Oh!FX TC-105 Quick user guide

Dialight L865 Medium Intensity Quick start manual

Dialight

Dialight L865 Medium Intensity Quick start manual

KEYA CON3 instruction manual

KEYA

KEYA CON3 instruction manual

ATiB 2 Series user manual

ATiB

ATiB 2 Series user manual

Toshiba PROSEC T1-16S user manual

Toshiba

Toshiba PROSEC T1-16S user manual

Graco GLC 2200 instructions

Graco

Graco GLC 2200 instructions

STA-RITE SR6000S Installation & operation guide

STA-RITE

STA-RITE SR6000S Installation & operation guide

TECOMAT FOXTROT CP-1005 Basic documentation

TECOMAT FOXTROT

TECOMAT FOXTROT CP-1005 Basic documentation

EVAPCO PulsePure Integrated Controller-2 Instruction, Operation and Installation Manual Addendum

EVAPCO

EVAPCO PulsePure Integrated Controller-2 Instruction, Operation and Installation Manual Addendum

manuals.online logo
manuals.online logoBrands
  • About & Mission
  • Contact us
  • Privacy Policy
  • Terms and Conditions

Copyright 2025 Manuals.Online. All Rights Reserved.