manuals.online logo
Brands
  1. Home
  2. •
  3. Brands
  4. •
  5. Milwaukee
  6. •
  7. Measuring Instrument
  8. •
  9. Milwaukee MI806 User manual

Milwaukee MI806 User manual

Other Milwaukee Measuring Instrument manuals

Milwaukee MC310 User manual

Milwaukee

Milwaukee MC310 User manual

Milwaukee MW13 User manual

Milwaukee

Milwaukee MW13 User manual

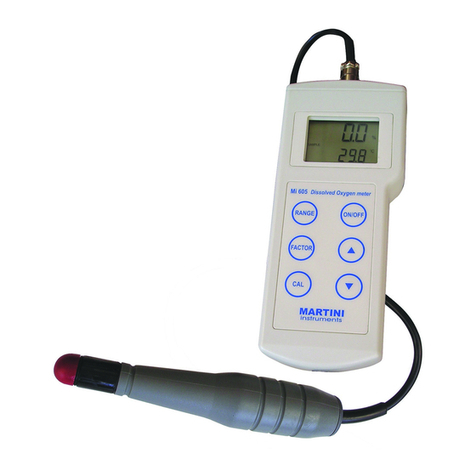
Milwaukee MI605 User manual

Milwaukee

Milwaukee MI605 User manual

Milwaukee MI408 User manual

Milwaukee

Milwaukee MI408 User manual

Milwaukee 2309-60 User manual

Milwaukee

Milwaukee 2309-60 User manual

Milwaukee MI407 User manual

Milwaukee

Milwaukee MI407 User manual

Milwaukee MW13 User manual

Milwaukee

Milwaukee MW13 User manual

Milwaukee SM101 User manual

Milwaukee

Milwaukee SM101 User manual

Milwaukee SM700 User manual

Milwaukee

Milwaukee SM700 User manual

Milwaukee MI404 User manual

Milwaukee

Milwaukee MI404 User manual

Milwaukee 48-22-5112 User manual

Milwaukee

Milwaukee 48-22-5112 User manual

Milwaukee C65 User manual

Milwaukee

Milwaukee C65 User manual

Milwaukee 3421 User manual

Milwaukee

Milwaukee 3421 User manual

Milwaukee MA887 User manual

Milwaukee

Milwaukee MA887 User manual

Milwaukee MW14 User manual

Milwaukee

Milwaukee MW14 User manual

Milwaukee MW100 User manual

Milwaukee

Milwaukee MW100 User manual

Milwaukee MW150 User manual

Milwaukee

Milwaukee MW150 User manual

Milwaukee REDLITHIUM User manual

Milwaukee

Milwaukee REDLITHIUM User manual

Milwaukee pH 58 User manual

Milwaukee

Milwaukee pH 58 User manual

Milwaukee MI405 User manual

Milwaukee

Milwaukee MI405 User manual

Milwaukee T75 User manual

Milwaukee

Milwaukee T75 User manual

Milwaukee MW170 MAX User manual

Milwaukee

Milwaukee MW170 MAX User manual

Milwaukee M12 3622-20 User manual

Milwaukee

Milwaukee M12 3622-20 User manual

Milwaukee MC510 User manual

Milwaukee

Milwaukee MC510 User manual

Popular Measuring Instrument manuals by other brands

Powerfix Profi 278296 Operation and safety notes

Powerfix Profi

Powerfix Profi 278296 Operation and safety notes

Test Equipment Depot GVT-427B user manual

Test Equipment Depot

Test Equipment Depot GVT-427B user manual

Fieldpiece ACH Operator's manual

Fieldpiece

Fieldpiece ACH Operator's manual

FLYSURFER VIRON3 user manual

FLYSURFER

FLYSURFER VIRON3 user manual

GMW TG uni 1 operating manual

GMW

GMW TG uni 1 operating manual

Downeaster Wind & Weather Medallion Series instruction manual

Downeaster

Downeaster Wind & Weather Medallion Series instruction manual

Hanna Instruments HI96725C instruction manual

Hanna Instruments

Hanna Instruments HI96725C instruction manual

Nokeval KMR260 quick guide

Nokeval

Nokeval KMR260 quick guide

HOKUYO AUTOMATIC UBG-05LN instruction manual

HOKUYO AUTOMATIC

HOKUYO AUTOMATIC UBG-05LN instruction manual

Fluke 96000 Series Operator's manual

Fluke

Fluke 96000 Series Operator's manual

Test Products International SP565 user manual

Test Products International

Test Products International SP565 user manual

General Sleep Zmachine Insight+ DT-200 Service manual

General Sleep

General Sleep Zmachine Insight+ DT-200 Service manual

Sensa Core Lacto Spark user manual

Sensa Core

Sensa Core Lacto Spark user manual

VOLTCRAFT UTS-1980 operating instructions

VOLTCRAFT

VOLTCRAFT UTS-1980 operating instructions

EBCHQ 94915 Operation manual

EBCHQ

EBCHQ 94915 Operation manual

Balluff BIP LD2-T017-01-EP-S4 Series user guide

Balluff

Balluff BIP LD2-T017-01-EP-S4 Series user guide

Pulsar IMP Lite Series instruction manual

Pulsar

Pulsar IMP Lite Series instruction manual

ETCR 6800 user manual

ETCR

ETCR 6800 user manual

manuals.online logo
manuals.online logoBrands
  • About & Mission
  • Contact us
  • Privacy Policy
  • Terms and Conditions

Copyright 2025 Manuals.Online. All Rights Reserved.

USER MANUAL
MI806
pH/EC/TDS/Temperature
Portable Meter
milwaukeeinstruments.com (USA & CAN)
milwaukeeinst.com
ACCESSORIES
MA851D/1 Amplified pH/EC/TDS/Temperature probe
with DIN connector and 1 m (3.3’) cable.
MA9004 pH 4.01 buer, 230 ml bottle
MA9006 pH 6.86 buer, 230 ml bottle
MA9007 pH 7.01 buer, 230 ml bottle
MA9009 pH 9.18 buer, 230 ml bottle
MA9010 pH 10.01 buer, 230 ml
MA9030 12.88 mS/cm solution, 230 ml
MA9015 Probe storage solution, 230 ml bottle
MA9016 General cleaning solution, 230 ml
M10000B Rinse solution, 20 ml (25 pcs.)
SPECIFICATIONS
Range
0.00 to 14.00 pH
0.00 to 20.00 mS/cm
0.00 to 10.00 ppt
0.0 to 60.0ºC or 32.0 to 140.0°F
Resolution
0.01 pH
0.1 mS/cm
0.01 ppt
0.1°C or 0.1°F
ACCURACY (@25°C)
±0.01pH
±2% FS (EC/TDS)
±0.5°C or ±1°F
TYPICAL
EMC DEV.
±0.02 pH
±2% FS (EC/TDS)
±0.5°C or ±1°F
TEMPERATURE
COMPENSATION
Automatic from 0 to 60ºC;
ß adj. from 0.0 to 2.4%/°C
pH CALIBRATION 1 or 2-point
with automatic buer recognition
EC CALIBRATION Automatic, 1 point
EC/TDS FACTOR (CONV)
Adj. from 0.45 to 1.00
PROBE|
(included)
MA851D/1 amplified pH/EC/TDS/
Temperature probe with DIN
connector and 1 m (3.3’) cable.
ENVIRONMENT 0 to 50°C (32 to 122°F);
100% RH max.
BATTERY TYPE 1 x 9V alkaline (included)
BATTERY LIFE approx. 300 hours
AUTO-OFF after 8 minutes
DIMENSIONS 200 x 85 x 50 mm
WEIGHT 260 g (with battery)
CERTIFICATION
Milwaukee Instruments conform to the CE
European Directives.
Disposal of Electrical & Electronic
Equipment. Do not treat this product as
household waste. Hand it over to the
appropriate collection point for the recycling of electrical
and electronic equipment.
Disposal of waste batteries. This product
contains batteries. Do not dispose of them with
other household waste. Hand them over to the
appropriate collection point for recycling.
Please note: proper product and battery disposal
prevents potential negative consequences for human
health and the environment. For detailed information,
contact your local household waste disposal service or
go to www.milwaukeeinstruments.com (USA & CAN) or
www.milwaukeeinst.com.
RECOMMENDATION
Before using this product, make sure it is entirely suitable
for your specific application and for the environment in
which it is used. Any modification introduced by the user
to the supplied equipment may compromise the meter’s
performance. For your and the meter’s safety do not use or
store the meter in hazardous environment. To avoid damage
or burn, do not perform any measurement in microwave
ovens.
WARRANTY
This instrument is warranted against defects in materials
and manufacturing for a period of 2years from the date of
purchase. Probe is warranted for 6 months. This warranty
is limited to repair or free of charge replacement if the
instrument cannot be repaired. Damage due to accidents,
misuse, tampering or lack of prescribed maintenance is
not covered by warranty. If service is required, contact your
local Milwaukee Instruments Technical Service. If the repair
is not covered by the warranty, you will be notified of the
charges incurred. When shipping any meter, make sure it is
properly packaged for complete protection.
Milwaukee Instruments reserves the right to make
improvements in design, construction and appearance of its
products without advance notice.
SATISFACTION
GUARANTEED
ISTMI806 07/20-1
GENERAL OPERATION
yThe meter is supplied complete with
a 9V battery. Remove the battery
cover on the back of the meter and
install the battery while paying
attention to its polarity.
yConnect the MA851D/1 probe to the
meter and turn it on by pressing the
ON/OFF.
yAt start-up, the LCD shows the
percentage of the remaining battery
life for a few seconds, and then the
current measurement.
yTo select the temperature measurement unit (°C or °F),
press and hold the “ON/OFF” key until “TEMP” and the cur-
rent temperature unit are displayed on the secondary LCD.
Use “SET” to select the unit, then press “ON/OFF” a couple
of times to return to normal mode.
yTo activate the HOLD function,
keep pressed the “HOLD” key. The
measured value will be frozen on
the display and the “HOLD” message
appears on the secondary LCD.
yTo set the measurement range (pH, µS, ppm), press the
“RANGE” key. The chosen mode will be stored until next
change.
yBefore taking any measurement, make sure that the
meter has been calibrated (the “CAL” tag is displayed on
the left lower corner of the LCD).
yAfter measurements, switch the meter o by pressing the
“ON/OFF” key. The “OFF” message appears on the LCD;
release the button.
yStore the electrode with a few drops of storage solution
in the protective cap.
TAKING pH MEASUREMENTS
yAlways remove the electrode protective cap before
taking any measurement. If the electrode has been left
dry, soak the tip (bottom 2.5 cm) in M10000 rinse solution
for a few minutes to reactivate it.
ySelect the pH range with the “RANGE” key.
yImmerse the tip (2.5 cm) of the probe into the sample and
stir gently.
yRead the pH value when the clock symbol stops blinking.
pH CALIBRATION PROCEDURE
A) Preparation, Buer solutions:
1. pH 7.01 / 6.86 (MA9007
/
MA9006)
2. pH 4.01 (MA9004) for acidic calibration (pH<7) or
pH 10.01/9.18 (MA9010/MA9009) for alkaline range (pH>7).
Use two beakers for each buer solution: one beaker for
rinsing the probe, the other for calibration. In this way the
cross contamination between solutions is minimized.
B) Procedure:
yEnter the pH mode with the “RANGE” key.
ySelect calibration buer set: press and hold the “ON/OFF”
key until the LCD shows “TEMP”. Press again this key and
the “BUFF” message will appear; then select the desired
buer set with the “SET” key: “7.01 pH BUFF” (for standard
solutions: pH 4.01, 7.01, 10.01) or “6.86 pH BUFF” (for NIST
solutions: pH 4.01, 6.86, 9.18). Press “ON/OFF” again to exit.
yRemove the protective cap, then
immerse the probe in the first buer
solution.
yPress and hold the “ON/OFF” key until
“CAL” is displayed on the lower LCD.
Release the button and the message
“7.01 pH USE” (or “6.86pH USE” for NIST
buer set) will be displayed.
yFor a single point pH calibration, place the probe in any
buer from the selected set (e.g. pH 4.01 or 7.01/6.86 or
10.01/9.18). The meter will automatically recognize the buer
value, store the calibration point and return to normal mode.
yIf using pH 7.01 (or pH 6.86), after recognition of the buer
press the “ON/OFF” button to return to normal mode.
yFor a two point pH calibration, place
the probe in pH 7.01 buer (or pH 6.86,
if the NIST buer set was selected). The
meter will recognize the buer value
and then display pH 4.01 USE.
yPlace the probe in the second buer (pH 4.01 or 10.01, or, if
using NIST, pH 4.01 or 9.18). When the second buer is recog-
nized, the LCD will display “OK” for 1second and the meter
will return to normal mode.
yThe “CAL” tag is displayed on the LCD to indicate that the
meter is calibrated.
EC/TDS OPERATIONS
yThe user can select the EC/TDS conversion factor
(CONV), as well as the ß coeicient (BETA) for automatic
temperature compensation.
yEnter the EC or TDS mode with the
“RANGE” key, then press and hold the
“ON/OFF” key until “TEMP” is displayed
on the secondary LCD. Press this key
again to show the current conversion
factor (CONV).
yPress the “SET” button to change
the value, then press again this key
to show the current temperature
coeicient (BETA).
yPress “SET” to change the value, then press “ON/OFF” key
to return to normal operation.
yFor taking EC or TDS measurements, immerse the probe
in the solution to be tested.
ySelect either EC or TDS mode with “RANGE”.
yStir gently and wait for the reading to stabilize (the clock
symbol stops blinking).
EC/TDS CALIBRATION PROCEDURE
yClean the probe with M10000 solution.
yEnter the EC mode with the “RANGE” key.
yImmerse the probe in MA9030 (12.88 mS/cm) calibration
solution.
yPress and hold the “ON/OFF” key until
“CAL” is displayed on the LCD. Release
the button and the message “12.88 mS
USE” appears.
yThe meter will perform automatic calibration, and then
display “OK” for 1 second before returning to normal mode.
yThe calibration is now complete and the “CAL” tag is
displayed on the LCD to indicate that the meter is calibrated.
BATTERY REPLACEMENT
The meter shows the remaining battery percentage every
time it is switched on. When the battery level is below 5%,
the battery symbol on the bottom left of the LCD lights up to
alert the user.
The meter is also provided with BEPS
(Battery Error Prevention System), which
automatically switches the meter o if the
battery level is so low to cause erroneous
readings. It is recommended to replace
immediately the battery. Turn the meter o,
remove the battery compartment cover
from the rear of the meter and replace
the rundown 9V battery with a new one.
Install the battery while paying attention
to its polarity and reattach the cover.
NOTES: If reading is over-range, the display will flash the
closest full scale value.
To clear a previous calibration, press “ON/OFF” after entering
the calibration mode. The lower LCD will display ESC for 1
second and the meter will return to normal measurement
mode. The “CAL” symbol on the LCD will disappear and the
meter is reset to the default calibration.