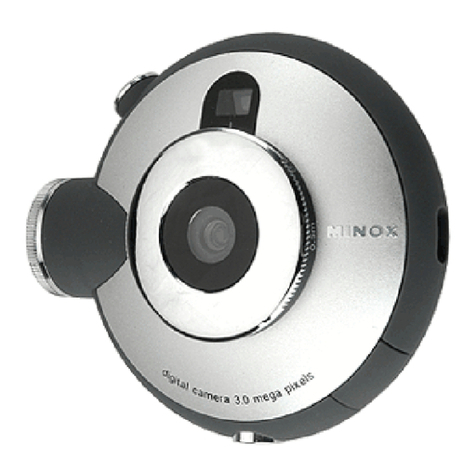
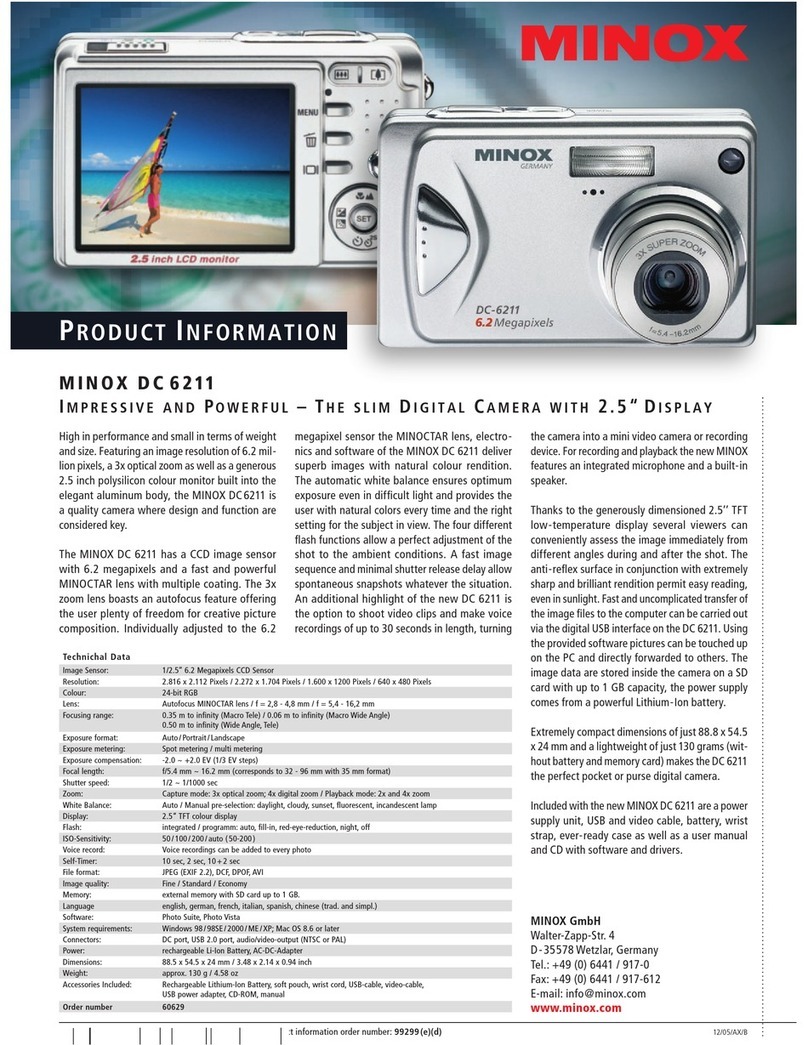
Minox DCM User manual

DCM
Manual
Content
Introduction . . . . . . . . . . . . . . . . . . . . . . . . . . . . . ........ . . . . . . . . . . . . . . . . . . . . . . . . . . . . . . . . . . . 2
Inserting the battery . . . . . .. . . . . . . . . . . . . . . . . . . . . . . . . . . . . . . . . . . . . . . . . . . . . . . . . . . . . . . . .2
Charging the battery . . . . . . .. . . . . . . . . . . . . . . . . . . . . . . . . . . . . . . . . . . . . . . . . . . . . . . . . .. . . . . . 2
Switching the camera on . . . . . . . . . . . . . . . . . . . . . . . . . . . . . . . . . . . . . . . . . . . . . . . . . . . . . . . . . . 3
Taking your first picture .. . . . . . . . . . . . . . . . . . . . . . . . . . . . . . . . . . . . . . . . . . . . . . . . . . . . . . . . . . 3
Taking videos . . . . . . . . .. . . . . . . . . . . . . . . . . . . . . . . . . . . . . . . . . . . . . . . . . . . . . . . . . . . . . . . . . . 3
Playback mode . . . . . . . . . . . . . . . .. . . . . . . . . . . . . . . . . . . . . . . . . . . . . . . . . . . . . . . . . . . . . . . . . .
Image quality . . .. . . . . . . . . . .. . . . . . . . . . . . . . . . . . . . . . . . . . . . . . . . . . . . . . . . . . . . . . . . . . . . . .
Increase the camera memory with an SD card .. . . . .. . . . . . . . . . . . . . . . . . . . . . . . . . . . . . . . . . . . . 5
Inserting an SD card . . . . . . . .. . . . . . . ................. . . . . . . . . . . . . . . . . . . . . . . . . . . . . . . . . . . . . . . 5
Deleting unwanted images . . . . . . . . . . . . . . . . . . .... .. . . . . . . . . . . . . . . . . . . . . . . . . . . . . . . . . . . . 5
Downloading your images to your computer . . . . . ..... . . . . . . . . . . . . . . . . . . . . . . . . . . . . . . . . . . . 5
Using the Self Timer . . . . . . . . . . . . . . . . . . . . . . . . . . ... . . . . . . . . . . . . . . . . . . . . . . . . . . . . . . . . . . 6
Adjusting the white balance (WB) . . . . . . . . . . . . . . . . . ... . . . . . . . . . . . . . . . . . . . . . . . . . . . . . . . . 6
Adjusting the Exposure Values (EV) . . . . .. . . . . . . . . . . . .. . . . . . . . . . . . . . . . . . . . . . . . . . . . . . . . 6
Adjusting your camera settings . . . . . .. . . . . . . . . . . . . . . . . . . . . . . . . . . . . . . . . . . . . . . . . . . . . . . . 7
Camera maintenance . . .. . . . . . . . . . . . . . . . . . . . . . . . . . . . . . . . . . . . . . . . . . . . . . . . . . . . . . . . . . . 8
Technical Data . . . . . . . . . . . . . . . . . . . . . . . . . . . . . . . . . . . . . . . . . . . . . . . . . . . . . . . . . . . . . . . . . . 8
Conditions of warranty . . . . . . . . .. . . . . . . . . . . . . . . . . . . ... . . . . . . . . . . . . . . . . . . . . . . . . . . . . . 9
1

Introduction
Congratulations on the purchase of your new MINOX DCM. Like all other MINOX products this
digital Camera Module boasts the traditional values fostered by MINOX. It combines functionality
in the smallest possible space with excellent optical quality.
Fast and easy operation make the MINOX DCM an excellent tool for digital observation and digital
photography in combination with a spotting scope.
The MINOX DCM is ready to become your permanent companion and capture wonderful
memories in the modern way.
These instructions are to help you benefit from the full performance spectrum of your MINOX
DCM.
Enjoy photography with your digital Camera Module!
Introducing your DCM
Please take a few moments to read these Instructions and the Safety and Maintenance notes in the
last section of this manual.
Inserting the battery
Your camera uses a lithium-ion rechargeable battery.
You can recharge the battery using the provided accessory equipment.
We do not warranty for battery or camera damage caused by using any other method to charge the
battery.
To insert the battery hold the Camera Module with your right hand, with the monitor shield flipped
open and the back facing upward. Now open the battery compartment cover by opening the latch
with the thumb of your left hand and moving it to the side.
Slide the battery into the battery compartment with the metal contacts head first and close the
battery latch. Close the battery compartment.
Your photos will remain safely stored in the camera memory or on the SD card even if the batteries
are removed or replaced.
Charging the battery
Connect the switched off Camera Module using the provided USB cable to the USB connection of
your computer. This starts the charging process automatically. While the battery is being charged
a green lamp lights up in the proximity of the USB connection.
Charging is completed when the lamp extinguishes.
2

Switching your Camera Module On / Off
To switch the camera on press and hold the Mode button ON/MODE.
To switch your camera off, press the Mode button until the Setup menu appears. Press the Down
button until Power Off is selected and then press the shutter button to switch the camera off. Your
camera will automatically switch itself off if it is not used within 60 seconds, thus saving battery
power.
Taking your first picture
Frame your subject
When the DCM is switched on it is in Camera Mode and the symbol appears on the display. If
this symbol does not show, press the Mode button until it appears.
Digital zoom function
Frame your subject in the display on the back of the Camera Module.
To change the size of the desired image detail (zoom function) press the Up button (to zoom in) or
Down button (to zoom out).
Shoot the picture
Press the shutter button (RELEASE) to shoot the picture.
Taking videos
Select Video Mode
In the Photo mode, press the Select button (SEL/OK); the Camera Menu appears. Use the Down
button to select the option Video and then press the Select button (SEL/OK) again to get into the
Video Setup Menu. The Camera option is selected. Use the Down button to select the option Video
and then press the Select button (SEL/OK) to confirm the setting. The camera is now in Video
Mode, the symbol will show on the display.
Frame the scene
Frame the scene you want to take using the display on the back of the camera. To change the size of
the desired image detail (zoom function) press the Up button (to zoom in) or the Down button (to
zoom out).
Shoot the video
Press the shutter button (RELEASE) to start
the recording. Press it again to stop the video.
During the shooting you will see a red dot in
the display.
3

layback mode
Review your pictures and videos on the display
Press the Mode button (ON/MODE) as many times as needed to get into the Playback mode ( ).
Use the Up or Down button to scroll through the stored images.
Press the shutter button to start the replay of a video clip. Press the shutter button again to stop
the replay before the end of the clip.
Loo at details
You can take a closer look at details of your images using the zoom function.
Press the Select button (SEL/OK) while viewing an image. Select Zoom and press the Select button
(SEL/OK) again. Press the Up or Down button to zoom in or zoom out. Press the Select button
twice to leave Zoom Mode.
Review several images at once
Press the Select button when in Playback Mode ( ) to reach the Playback Menu, select either
or 9 images, and press the Select button. The display will now show or 9 miniature images of
your pictures. Select one of the images using the Up or Down button and press the Select button to
enlarge this image.
View your pictures in a slide show
Your Camera Module can automatically display your images one after the other in a slide show.
Press the Select button when in Playback Mode ( ) to reach the Playback Menu, select Slide
Show and press the shutter button. The slide show then starts.
Press the Select button again to stop the slide show.
Image quality
The higher the selected quality, the larger the size of the individual image fi le. You can choose
between three different quality settings for your images. This has an impact on the number of
images that will fit on the internal memory of the DCM:
Low (*) - 20 8 x 1536 pixels
– up to 50 images
Normal (**) - 20 8 x 1536 pixels
– up to 30 images
High (***) - 2560 x 1920 pixels (by
interpolation)
– up to 20 images
When in Camera Mode press the Select button (SEL/OK) to enter the Camera Menu. Select Quality
and press the Select button (SEL/OK) again. This brings you into the Quality Menu where you can
select the different quality settings using the Up or Down button.
Press the Select button (SEL/OK) again to confirm your selection.

Increase memory capacity with an SD Card
SD Cards (Secure Digital) increase the amount of memory available for storing images and videos.
SD cards can be purchased from photo dealers and from electronic goods retailers. Your camera
supports up to GB SD Card memory.
Inserting an SD Card
Open the battery compartment and insert the SD card in the SD Card slot with the gold contacts
pointing to the lens.
Important: If the SD Card is write-protected, a lock symbol appears on the display and you cannot
shoot pictures or videos.
Deleting unwanted images
Delete an individual image
In Playback Mode ( ) use the Up or Down button to select the image you want to delete.
Press the Select button (SEL/OK), to enter the Playback Menu, select Delete image and press
the Select button. Select Yes and press the Select button (SEL/OK) again.
The selected image is then deleted from the camera memory.
Delete all images
In Playback mode ( ) press the Select button to enter the Playback Menu, select Delete All and
press the Select button (SEL/OK). Select Yes and press the Select button (SEL/OK) again. All
images are then deleted from the camera memory.
Downloading pictures onto your computer
Note: You do not need to install camera drivers for Windows versions 2000/ME/XP or Mac OS 9+
or OS X. Your MINOX DCM does not support older versions of the named operating systems.
Note: When your DCM is connected your computer supplies the power via the USB cable to save
the batteries.
Connect your Camera Module to the computer
Always turn your Camera Module on before connecting it to the computer. Then connect the
DCM to the computer using the provided USB cable (the smaller sized head connects to the Camera
Module and the larger one to the computer). When you connect your Camera Module to your
computer for the first time, your computer will recognize it as new hardware. Your computer then
installs the drivers automatically. Wait until your computer informs you that the installation is
complete before trying to access the pictures or movies stored in the camera or on the SD card.
Download images to a Windows PC
Open the My Computer icon on your computer. You will see a new icon named Removable Disk.
Double click on the icon and open the folder DCIM and then the folder 100_CAM in which all of
your images are stored.
Download images to an Apple Mac
After connecting the Camera Module and switching it on, a new hard disk icon appears on your
Desktop called Untitled. In this hard disk you will find a folder named DCIM and this contains a
folder named 100_CAM in which all of your images are stored.
You can rename Untitled to any name you prefer.
Note: You can also use your Camera Module for saving or transferring other files. Simply open the
above named folder and copy in the file you want to save in the camera memory.
5

Using the Self Timer
Put yourself in the picture using the Self Timer function. The timer has a 10 second delay.
In Camera Mode press the Select button (SEL/OK); This provides access to the Camera Menu.
Select Self Timer and press the Select button (SEL/OK) again. This provides access to the Self
Timer Menu. Select On and press the Select button (SEL/OK) to confirm your selection.
The Camera Module is now in Self Timer Mode, the symbol appears on the display.
Frame your picture as required. To do this, you can still use the zoom function as normal.
After pressing the shutter button you have ten seconds to put yourself in the picture before the
shutter is released.
Camera
Adjusting the White Balance (WB)
The white balance ensures natural color rendition of your pictures. The Camera Module is set to
automatic white balance in the factory. In critical light conditions you can selectively adjust the
white balance.
In Camera Mode press the Select button (SEL/OK); this provides access to the Camera Menu.
Select WB and press the Select button (SEL/OK) again. In the WB Menu you can choose between 6
settings: Auto (automatic), Daylight, Cloudy, Lamp, Tungsten, Night Press the Select button
(SEL/OK) to confirm your selection.
Adjusting the Exposure Values (EV)
In critical light conditions you can manually adjust the brightness of your images.
In Camera Mode press the Select button (SEL/OK); this provides access to the Camera Menu.
Select EV and press the Select button (SEL/OK) again. Now reduce or increase the exposure time
using the Up or Down button. Press the Select button (SEL/OK) to confirm your adjustment.
Camera
6

Adjusting your camera settings
Open the Setup Menu
Press the ON/MODE button until the Setup Menu appears on the display.
Use the Up or Down button to select one of the following options:
Switch off
Select the option Switch Off and press the Select button (SEL/OK) to switch off the Camera
Module.
Formatting
It is possible to format your camera memory. In the Setup Menu select Format and press the Select
button. Select Yes in the Formatting Menu and press the Select button (SEL/OK) again. This deletes
all images and settings.
Set AutoOff time
Select AutoOff and press the Select button (SEL/OK). Select the time after which you would like
the camera to switch off automatically if left unattended.
Adjust frequency
You can manually adjust the frequency to reduce image flicker under tungsten light when in the
Video Mode. Select Frequency and press the Select button (SEL/OK).
Select between 50 Hz and 60 Hz and confirm your setting with the Select button.
Reset settings
If you want to reset the camera settings to the default settings select Settings and press the Select
button (SEL/OK). Select Default and press the Select button to reset the settings.
Language setting
You can set the language used in the menus. Select Language and press the Select button
(SEL/OK). Select the preferred language and confirm the setting with the Select button (SEL/OK).
7

Maintenance of the Camera Module
Please read the following information to make sure you are using your DCM correctly.
Places to avoid Do not store or use your camera in any of the following environments:
• very damp, dirty or dusty places,
• places exposed to direct sunlight or extreme temperatures, such as the inside of a closed car
in the summer,
• extremely cold places,
• places exposed to severe vibrations,
• places exposed to smoke or steam,
• places exposed to strong magnetic fields (e.g. In close proximity of electric motors, transformers
or magnets,
• places where aggressive chemicals are stored on a long-term basis, such as pesticides, rubber or
vinyl products.
Note: Always keep the DCM away from sand and dust. Like any other electronic/digital camera,
the DCM is particularly sensitive to sand and dust. Always make sure that the camera is not exposed
to sand in sandy places, especially on the beach or in the desert where fine sand is blown about.
Storing the Camera Module
If your DCM is not being used for a longer period, it is best to remove the battery and store the
Camera Module in a dry place.
Cleaning your DCM
Use a small brush to carefully remove the dust from the lens and the LCD surface. Gently wipe the
surface with a dry, soft, fl uff-free cloth. If there are any spots on the lens, apply a few drops of
liquid lens cleaner to an optical cloth and carefully wipe the lens surface.
Never scratch any part of the Camera Module using a hard object. Do not use volatile substances
like solvents, benzole or insecticide as these could react with the camera body and lead to
deformation or destroy the coating.
Traveling by air
Do not pack the Camera Module in baggage to be handed in at the airport. The baggage handling
could cause damage on the inside of the Camera Module, even if there are no signs of this showing
on the outside.
Setup
Technical Data
Image sensor: 5.0 MP, CMOS Sensor (3.2 MP Hardware-resolution)
Image resolution Still: 2,560 x 1,920 pixels (interpolated),
2,0 8 x 1,536 Pixel (3.2 MP); Videoclip: 320 x 2 0 pixels
Memory Internal: 128 MB Flash memory
External: optional SD card up to GB
Display: 2.0’’ TFT LCD display
White balance: Automatic, Daylight, Cloudy, Lamp, Tungsten, Night
Shutter: 2 sec / Remote Control
Zoom 6x digital zoom
File-format Picture: JPEG / Video: AVI
Power supply: Rechargeable Lithium-Ion-Battery/USB-cable
Support Windows: ME / 2000 / XP; Mac OS X compatible
Dimensions: 7 mm (L) x 7 mm (W) x mm (H)
Weight approx.: 220 g / 7.76 oz
8
Conditions of warranty
With the purchase of this MINOX product you have acquired a product which has been
manufactured and checked to special quality standards.
For this product the MINOX GmbH provides warranty of 2 years. The period commences on the
date of purchase from an authorized dealer and the warranty is subject to the following conditions:
1) During the warranty period we shall deal with complaints based on faulty manufacture (free of
charge) by repair, replacement of defective parts or replacement by an identical flawless product
at our own discretion. Consequential claims, no matter what kind of what legal argument in
connection with this warranty, cannot be accepted.
2) Claims under warranty are null and void, if the defect has been caused by improper handling
– which also can include the use of non-MINOX accessories – if the MINOX product is serviced
by unauthorized persons or workshops, or if the serial number has been obliterated.
3) Warranty claims can only be made by submission of the typewritten sales slip of an authorized
dealer.
) When submitting claims under warranty please return the MINOX product together with the
typewritten sales slip and a description of the claim to the MINOX GmbH or MINOX agency.
5) Tourists may, if required, make use of the Agency of the country in which they are traveling
(within the terms of the Warranty of the MINOX GmbH) by presenting the typewritten sales slip.
MINOX GmbH
Walter-Zapp-Str.
D-35578 Wetzlar
Tel.: + 9 (0) 6 1 / 917-0
Fax: + 9 (0) 6 1 / 917-612
eMail: [email protected]
Internet: www.minox.com
9

10
FCC Statement
This device complies with Part 15 of the FCC Rules. Operation is subject to the
following two conditions: (1) this device may not cause harmful interference, and (2)
this device must accept any interference received, including interference that may
cause undesired operation.
CAUTION: Changes or modifications not expressly approved by the party
responsible for compliance could void the user’s authority to operate the device.
NOTE; This equipment has been tested and found to comply with the limits for a
Class B digital device, pursuant to Part 15 of the FCC Rules. These limits are
designed to provide reasonable protection against harmful interference in a residential
Installation. This equipment generates, uses and can radiate radio frequency energy
and, if not installed and used in accordance with the instructions, may cause harmful
interference to radio communications. However, there is no guarantee that
interference will not occur in a particular installation. If this equipment does cause
harmful interference to radio or television reception, which can be determined by
turning the equipment off and on, the user is encouraged to try to correct the
interference by one or more of the following measures:
-- Reorient or relocate the receiving antenna
-- Increase the separation between the equipment and receiver
-- Connect the equipment into an outlet on a circuit different from that to which the
receiver is connected.
-- consult the dealer or an experience radio/TV technician for help.
Table of contents
Other Minox Digital Camera manuals