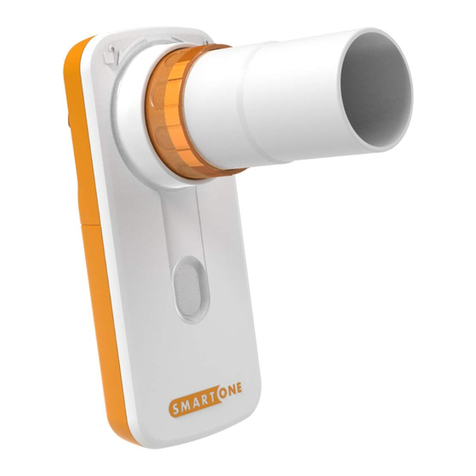
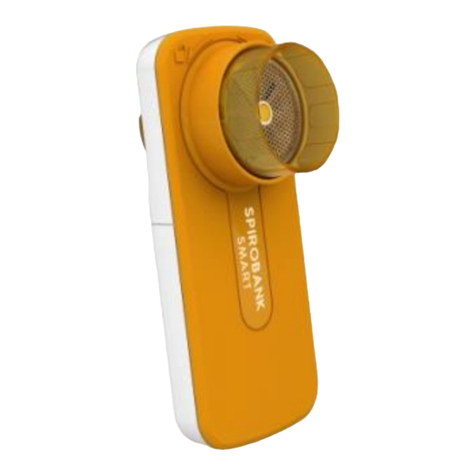
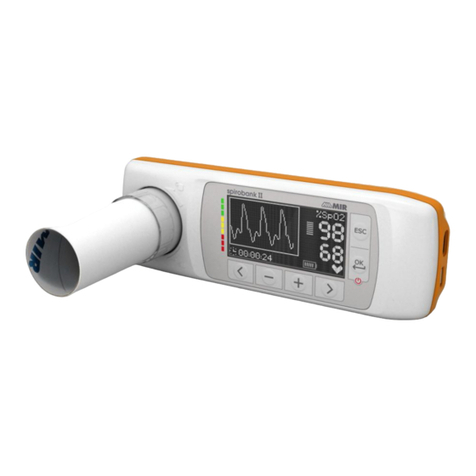
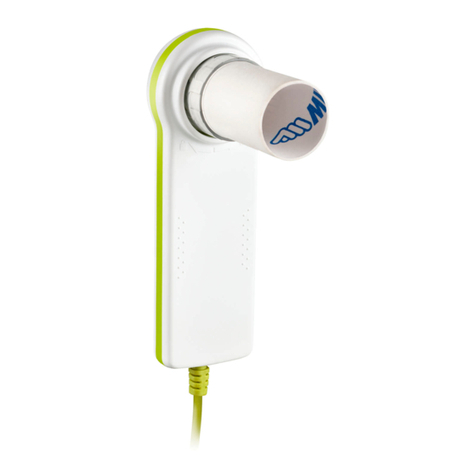
MIR Spirodoc User manual

spirodoc user manual code 980165 Rev 4.5 page 1 of 27
spirodoc
User Manual
User Manual Rev. 4.5
Issued on: 03/09/2008
Approved on: 03/09/2008

spirodoc user manual code 980165 Rev 4.5 page 2 of 27
Thank you for choosing a MIR MEDICAL INTERNATIONAL RESEARCH product.
The original packaging contains:
PRODUCT
without oximetry option
CODE PRODUCT
with oximetry option
CODE
spirodoc bag 672675 spirodoc bag 672675
spirodoc device 910520 spirodoc device with oxy 910524
spirodoc User Manual 980105 spirodoc User Manual 980105
1 3V CR123A battery 970320 1 3V CR123A battery 970320
1 Nose clip 910320 1 Nose clip 910320
1 plastic mouthpiece 910302 1 plastic mouthpiece 910302
1 Oximeter sensor 919001
OPTION CODE
Infant sensor 919003
Finger sensor 919004
Wrap sensor 919005
Neonate sensor 919006
Adult sensor 919007
Before using your spirodoc…
•Read the User Manual carefully and read all of the labels supplied with the unit.
•Install the operating battery (if not already installed), taking care to connect correctly as shown inside the battery
housing.
•Select the required display language.
Please keep the original packaging!
In the event that your unit has a problem use the original packaging to return the unit to your distributor or to the
manufacturer.
MIR has a policy of constant product improvement, and the technology within our products is also in constant
evolution, thus we reserve the right to update these instructions as necessary. We appreciate all suggestions
from our users, please send emails to the following address:
[email protected]. Thank you.
MIR cannot be held responsible for any damage caused by users failing to follow the instructions and warnings
within this manual.
Note that due to printing limitations the screenshots shown in this manual may differ from the display of the
machine and/or from the keyboard graphics. Copying this manual in whole or in part is forbidden.

spirodoc user manual code 980165 Rev 4.5 page 3 of 27
INDEX Page
1. INTRODUCTION......................................................................................................................................................... 4
1.1 Intended use ...................................................................................................................................................... 4
1.1.1 User category............................................................................................................................... 4
1.1.2 Qualification and experience required ......................................................................................... 4
1.1.3 Operating environment ................................................................................................................ 4
1.1.4 Who must/can make the installation............................................................................................ 4
1.1.5 Patient effect on the use of the instrument .................................................................................. 4
1.1.6 Limitations of use – Contraindications ......................................................................................... 4
1.2 Important safety warnings................................................................................................................................ 4
1.2.1 Danger of cross-contamination.................................................................................................... 5
1.2.2 The turbine................................................................................................................................... 5
1.2.3 The mouthpiece ........................................................................................................................... 5
1.2.4 The Pulse oxymetry sensor ......................................................................................................... 5
1.2.5 The instrument ............................................................................................................................. 6
1.3 Unforeseen errors ............................................................................................................................................. 6
1.4 Labels and symbols .......................................................................................................................................... 6
1.4.1 Identification label ........................................................................................................................ 6
1.4.2 CE mark for medical devices ....................................................................................................... 7
1.4.3 Electrical safety symbol ............................................................................................................... 7
1.4.4 Warning symbol for the RS232 serial port................................................................................... 7
1.5 Product description .......................................................................................................................................... 7
1.6 Method of test interpretation............................................................................................................................ 7
1.7 Technical specifications................................................................................................................................... 8
1.7.1 Spirometer specifications............................................................................................................. 8
1.7.2 Pulse oximeter specifications....................................................................................................... 8
1.7.3 Other specifications ..................................................................................................................... 8
1.8 Spirometric normal values ............................................................................................................................... 9
2. OPERATION OF THE SPIRODOC............................................................................................................................. 9
2.1 Keyboard............................................................................................................................................................ 9
2.2 Battery level ..................................................................................................................................................... 10
2.3 To make a test ................................................................................................................................................. 10
2.4 Entering subject data...................................................................................................................................... 11
2.4.1 New subject data ....................................................................................................................... 11
2.5 Making a spirometry test ................................................................................................................................ 12
2.6 Making a spot oxymetry test .......................................................................................................................... 13
2.7 Making long term oximetry testing ................................................................................................................ 14
2.7.1 Adult Single Patient Sensor – Instructions for Use.................................................................... 14
2.7.2 Making a test.............................................................................................................................. 15
3. TEST RESULTS ....................................................................................................................................................... 15
3.1 Interpretation of the spirometry test.............................................................................................................. 15
3.2 Viewing the results.......................................................................................................................................... 16
3.3 Print out of the results .................................................................................................................................... 16
3.3.1 Print out...................................................................................................................................... 18
4. MAINTENANCE........................................................................................................................................................ 19
4.1 Cleaning and general control of the turbine ................................................................................................. 19
4.2 Replacement tape instructions ...................................................................................................................... 19
4.3 Changing the battery ...................................................................................................................................... 19
5. POSSIBLE PROBLEMS........................................................................................................................................... 20
5.1 Causes and solutions ..................................................................................................................................... 20
6. CONFIGURATION MANUAL FOR THE SPIRODOC............................................................................................... 21
6.1 Configuration menu ........................................................................................................................................ 21
6.1.1 Select Language........................................................................................................................ 21
6.1.2 Delete Test Data........................................................................................................................ 21
6.1.3 Oximetry: threshold values ........................................................................................................ 21
6.1.4 Oximetry: sampling rate............................................................................................................. 21
6.1.5 Date Format ............................................................................................................................... 22
6.1.6 Change Date/Time..................................................................................................................... 22
6.1.7 Predicted Values........................................................................................................................ 22
6.1.8 Unit Format ................................................................................................................................ 22
6.1.9 Select Printer.............................................................................................................................. 23
6.1.10 Store All Test (for future developments).................................................................................... 23
Declaration of EC Conformity ........................................................................................................................................ 24
Limited Warranty Conditions ......................................................................................................................................... 25
ANNEX 1 INFORMATION FOR CORRECT USE IN AN ELECTROMAGNETIC ENVIRONMENT .......................... 26

spirodoc user manual code 980165 Rev 4.5 page 4 of 27
1. INTRODUCTION
1.1 Intended use
The spirodoc spirometer and pulse oximeter is intended to be used by a physician or by a patient under the instruction of
a physician or paramedic to test lung function in people of all ages. It is also intended to be used as a single patient
device and can be used in any setting- home, factory, pharmacy, hospital or physician office.
1.1.1 User category
The spirodoc spirometer + oxymeter measures a series of parameters relating to human respiratory function.
The product is therefore intended for use by a doctor or by a paramedic under the supervision of a doctor.
1.1.2 Qualification and experience required
The correct use of the instrument, the interpretation of the test results plus the maintenance of the instrument, in
particular the disinfection (to avoid the risk of cross-infection), all require qualified personnel.
1.1.3 Operating environment
The operation of the instrument is foreseen within a doctor’s office or within a hospital ward.
The instrument is not intended for use in an operating theatre or in the presence of inflammable liquids or detergents, nor
in the presence of inflammable anaesthetic gases or oxygen or nitrogen gases.
The instrument is not designed to be used in direct air currents (eg wind), sources of heat or cold, direct sun light or other
sources or light or energy, dust, sand or any other chemical substances.
The user is responsible to check the suitability of the environmental conditions both for the storage and for the use of the
instrument.
WARNING
If spirodoc is exposed to unsuitable environmental conditions, this could cause the device to malfunction and to
give incorrect results
1.1.4 Who must/can make the installation
The spirodoc requires installation by qualified personnel. It is the responsibility of the user of the instrument to make the
required operations.
1.1.5 Patient effect on the use of the instrument
A spirometry test should only be carried out when the patient is at rest and is in good health, and thus in a suitable
condition for the test. A spirometry test requires the collaboration of the patient, the patient must make a complete
forced expiration in order to have a meaningful test result.
1.1.6 Limitations of use – Contraindications
An analysis of the results of a spirometry test is not in itself sufficient to make a correct diagnosis of the patient’s clinical
condition. A detailed clinical history of the patient is also required together with any other tests suggested by a doctor.
Test comments, a test interpretation and suggested courses of treatment must be given by a doctor.
Any symptoms that the patient has at the time of the test must be carefully considered before a spirometry test is made.
The user is responsible to assess both the mental and the physical capacity of the patient to make a correct test and the
user must also assess the degree of collaboration for each test carried out.
A correct spirometry test always requires full collaboration from the patient. The results obtained always depend upon the
patient making a complete inspiration and then a complete expiration of air at the maximum possible velocity. If these
conditions are not respected then the results obtained will not be reliable and therefore the results are "not medically
acceptable".
The acceptability of a test is the responsibility of the user. Special attention should be given to testing elderly patients,
children plus handicapped people.
The instrument should never be used when it is possible or probable that the validity of the results may be compromised
due to any such external factors.
1.2 Important safety warnings
spirodoc has been examined by an independent laboratory which has certified the conformity of the device to the
European Safety Standards IEC 60601-1 and guarantees the EMC Requirements within the limits laid down in the
European Standard IEC 60601-1-2
The spirodoc is continually controlled during its production and therefore the product confirms to the established
security levels and quality standards laid down by the Council Directive 93/42/CEE for MEDICAL DEVICES.
After removing the device from its package, control that there is no visibile damage present, pay particular attention to
any flaws or cracks in the plastic casing that may lead to exposure of electrical components.
WARNING
The safety and the correct performance of the unit can only be assured if the user of the instrument respects all
of the current safety rules and regulations.
The manufacturer accepts no responsibility for problems or damage caused by the failure of the user to follow
these instructions correctly. The instrument must be used as described in the User’s Manual with particular

spirodoc user manual code 980165 Rev 4.5 page 5 of 27
attention to § Intended Use and only original spares and accessories as specified by the manufacturer may be
used. The use of a non-original turbine sensor of other parts could cause measurement errors and/or
compromise the correct functioning of the instrument, and is therefore not permitted. In the event of any kind of
accident arising from the use of the device, the patient must inform his doctor and the doctor must
communicate the full details (adverse event reporting), as instructed in article.9 of the European Directive CE
n.93/42 law, D.Lgs. n. 46/1997.
1.2.1 Danger of cross-contamination
The instrument uses a turbine sensor. A mouthpiece is required to connect a patient to the spirometer.
WARNING
In order to avoid exposing the patient to the critical danger of cross contamination, the turbine sensor must
always be disinfected before each spirometry test, and a new single use mouthpiece must be used for each new
patient.
1.2.2 The turbine
An incorrect or insufficient disinfection of the turbine could be a cause of infection for the patient.
A regular cleaning is strongly recommended. See the relevant paragraph within this manual for details of the correct
operation for disinfection.
Do not expose the turbine sensor to a direct jet of water or air nor allow it to come into contact with liquid at high
temperature.
Do not allow dust or foreign bodies to enter the turbine sensor, to avoid incorrect functioning and possible damage.
The presence of any impurities such as hairs, sputum, threads etc within the body of the turbine sensor may “brake” the
propellor and thus seriously compromise the accuracy of the measurements.
1.2.3 The mouthpiece
Any single-use mouthpieces included with the instrument are supplied only as a guide to the correct type and dimensions
of the mouthpiece required for this instrument, they are clean but not sterile. To purchase appropriate mouthpieces
(generally either paper or plastic, in any case single-use/disposable) we suggest that you contact your local distributor
who supplied the spirometer.
WARNING
The use of a mouthpiece made from an inappropriate material could modify the bio-compatibility and could
cause a malfunction of the instrument and thus incorrect test results.
The user is responsible to obtain the correct type of mouthpieces for the instrument. Those required are a standard type
with an outside diameter of 30mm, they are commonly used and in general easily procured.
1.2.4 The Pulse oxymetry sensor
Prolonged use and/or the patient’s condition may require changing the sensor site periodically. Change sensor site and
check skin integrity, circulatory status, and correct alignment at least every 4 hours. Prolonged use may cause blisters,
skin deterioration and discomfort.
WARNING
Incorrectly applied sensors may cause inaccurate readings.
Using a damaged sensor may cause inaccurate readings, possibly resulting in patient injury or death. Inspect
each sensor before use.
If a sensor appears damaged, do not use it. Use another sensor or contact your authorized repair centre for help.
Using a damaged patient cable may cause inaccurate readings, possibly resulting in patient injury or death. Inspect the
patient cable. If the patient cable appears damaged, do not use it. Contact your authorized repair centre for help.
Use only MIR SpO2 sensors supplied with, or specifically intended for use with the spirodoc. Use of sensors not
intended for use with the spirodoc may cause inaccurate readings.
Oximetry measurements may be inaccurate in the presence of high ambient light. Shield the sensor area (with a surgical
towel, for example) if necessary.
WARNING
Dyes introduced into the bloodstream, such as methylene blue, indocyanine green, indigo carmine, patent blue
V (PBV), and fluorescein may adversely affect the accuracy of the oximetry reading.
Any condition that restricts blood flow, such as the use of a blood pressure cuff or a device for systemic
vascular resistance, may cause an inability to determine accurate pulse rate and SpO2 readings.
Remove fingernail polish or false fingernails before applying oximetry sensors.
Fingernail polish or false fingernails may cause inaccurate SpO2 readings.

spirodoc user manual code 980165 Rev 4.5 page 6 of 27
Significant levels of dysfunctional hemoglobins, such as carboxyhemoglobin or methemoglobin, will affect the accuracy
of the oximetry measurements.
Optical cross-talk can occur when two or more sensors are placed in close proximity. This can be eliminated by covering
each site with opaque material. Optical cross-talk may adversely affect the accuracy of the SpO2 readings.
Obstructions or dirt on the sensor’s red light or detector may cause a sensor failure or inaccurate readings. Make sure
there are no obstructions and the sensor is clean.
Autoclaving, ethylene oxide sterilizing, or immersing the sensors in liquid may cause sensor damage which may result in
inaccurate readings.
Unplug the sensor from the monitor before cleaning or disinfecting to prevent damaging sensor or monitor, and to
prevent user safety hazards.
1.2.5 The instrument
WARNING
The maintenance operations detailed in this manual must be carried out precisely. If these instructions are not
followed this can cause measurement errors and/or an incorrect test interpretation.
Any modifications, adjustments, repairs or reconfiguration must be made by the manufacturer or by personnel
authorised by the manufacturer. Never attempt to make a repair oneself.
The set-up of configurable parameters should only be made by qualified personnel. However, an incorrect set
up of the parameters does not put the patient at risk.
High-frequency emissions may interfere with the correct operation of the instrument. For this reason, certain
minimum clearances (a few metres) should be observed when high-frequency appliances such as a TV, radio,
portable phone etc and other electronic units are operated at the same time in the same room.
The instrument may give inaccurate readings in the presence of strong electromagnetic sources, such as
electrosurgery equipment.
The instrument may give inaccurate readings in the presence of computed tomography (CT) eqipment.
Do not use the instrument in the presence of magnetic resonance imaging (MRI) equipment. MRI equipment may
cause induced current to the SpO2 sensor resulting in patient injury.
If the instrument is connected to any other instrument then, in order to maintain the essential safety
characteristics laid down by IEC 60601-1-1 only equipment which complies to the current safety regulations may
be used.
For the recycling of the spirodoc, accessories, plastic consumable materials (mouthpieces) plus the battery, use only
the appropriate containers or return all such parts to the seller of the instrument or to a recycling centre. All appropriate
local regulations must be followed.
Use only a battery of the type indicated in the § Technical specifications. Remove the battery from the device if the
machine is not used for a long period (several months).
Keep the device out of reach of children and of any person with mental handicap.
1.3 Unforeseen errors
In the case of a problem, one of a series of messages to indicate the nature of the problem will appear on the screen
together with a warning “beep”.
Operation of this device beyond its declared life (see the relevant paragraph in the Technical Characteristics) could
provoke a loss of data in the memory of the device (SRAM memory) .
Errors in measurement or in interpretation can also be caused by:
•use by non-qualified or non-trained personnel, lacking ability or experience
•user error
•use of the instrument outside the guidelines described in this User's Manual
•use of the instrument even when some operational anomalies are encountered
•non-authorised servicing of the instrument
1.4 Labels and symbols
1.4.1 Identification label
0476
0476
This label contains:
•Product name
•Serial number of the device

spirodoc user manual code 980165 Rev 4.5 page 7 of 27
•Battery type and power
•Name and address of the manufacturer
•Mark of conformity with the directive 93/42 CEE
1.4.2 CE mark for medical devices
0476
This product is certified to conform to the
requirements of the 93/42/CEE medical devices
directive.
1.4.3 Electrical safety symbol
In accordance with IEC 60601-1, this product and
its component parts are of type BF and therefore
protected against the dangers of direct and indirect
contact with electricity.
1.4.4 Warning symbol for the RS232 serial port
For connection to other devices such as PC or
printer. Use only the serial cable supplied by
the manufacturer and observe the safety
regulations of IEC 60601-1-1.
1.5 Product description
spirodoc is a simple to operate precise pocket spirometer and pulse oxymeter (weight only 100g). It is able to measure
the most important functional respiratory parameters and to monitor the oxygen saturation and pulse rate. It makes a
quality control check on the test carried out.
spirodoc is intended for any doctor, from a family doctor to a specialist, requiring a small and compact instrument able to
make full spirometry and oximetry tests.
To make a meaningful interpretation of the measured spirometry parameters, the measured parameters must be
compared to the so-called "normal" or "predicted" values which are calculated from the anthropometric data of the
subject. The predicted values represent an average taken from a healthy population.
spirodoc gives a simple traffic light summary of the spirometric test interpretation. This test interpretation is based on the
ATS (American Thoracic Society) standards of 5 levels of obstruction, 5 levels of restriction and one of normal
spirometry. The instrument thus gives a valid support to the doctor to make a functional diagnosis.
The sensor for flow and volume measurement is a turbine sensor based on the infrared interruption principle. This
measurement principle guarantees accuracy and reproducibility of the measurement without the requirement of constant
calibration. disinfection is simple as the only requirement is to withdraw the turbine tube and to immerse it in a cold
detergent solution.
The sensor for pulse oxymetry is placed on the finger of the patient. The sensor contains two light emitting diodes
(LEDs), one in the visible red spectrum and the other in the infrared spectrum. The beams of light pass through the
tissues to a photodetector. During passage through the tissues some light is absorbed by the blood and by soft tissues,
depending on the concentration of haemoglobin. The amount of light absorbed at each light frequency depends on the
degree of oxygenation of haemoglobin within the tissues
This measurement principle guarantees accuracy and reproducibility of the measurement without the requirement of
constant calibration.
The sensor can be disinfected with isopropyl alcohol.
The power supply is a 3V battery and the battery life is in the region of two years, depending on the use.
1.6 Method of test interpretation
Following every FVC test (forced expiration) the instrument makes a quality control check to verify the validity of the test
made and to compare the principal measured parameters FEV1, FEV1% and FVC with the respective normal (predicted)
value.
It also calculates a series of indices as per the following criteria:
index % = measured value / normal (or best) value x 100
The colours code of the functional interpretation is as follows:

spirodoc user manual code 980165 Rev 4.5 page 8 of 27
FEV1 or PEF > 80% Green: No problem
FEV1 or PEF > 50% < 80% Yellow: Caution
FEV1 of PEF < 50% Red: Alert, contact doctor
These default values can be modified by the doctor during the configuration process.
1.7 Technical specifications
The following is a complete description of the technical characteristics of the instrument and of the flow/volume and
Pulse Oxymeter sensors.
1.7.1 Spirometer specifications
Measured parameters:
FVC Forced Vital Capacity L
FEV1 Volume expired in the 1st second of test L
FEV1% FEV1/FVC x100 %
PEF Peak Expiratory Flow L/s
FEF2575 Average flow between 25% and 75% of the
FVC L/s
FET Forced expiratory time s
Flow/Volume sensor: Bi-directional turbine
Measuring method: Infrared interruption
Max volume: 10 L
Flow range: 16 L/s
Volume accuracy: 3% or 50 mL
Flow accuracy: 5 % or 200 mL/s
Dynamic resistance at 12 L/s: <1 cmH2O/L/s
1.7.2 Pulse oximeter specifications
Measured parameters:
%SpO2 Oxygen Saturation %
♥Pulse Rate Beats Per Minutes (BPM)
Pulse oximeter sensor:
The sensors intended to use with Spirodoc are:
•BCI 1300 Adult Disposable Sensor
•BCI 3026 Neonatal Wrap Sensor
•BCI 3043 Universal Y Sensor
•BCI 3078 Ear Sensor
•BCI 3178 Pediatric Reusable Finger Sensor
•BCI 3444 Adult Reusable Sensor – Comfort Clip
•BCI 3044 Adult Reusable Finger Sensor
These sensors require the use of an extension cable cod. 919100_INV to be correctly connected to the
device.
The same sensors are also available with microconnector for the direct connection.
Measuring method: Red and Infrared absorption
%SpO2 range: 0-99% Functional SpO2 (1% increments)
%SpO2 accuracy: Adult: ±2 @70-100% SpO2, less than 70% is undefined
%SpO2 averaging: 8 beats
Pulse Rate range: 30-254 BPM (1 BPM increments)
Pulse Rate accuracy: ±2 BPM or ±2% whichever is greater
Pulse rate averaging: 8 seconds
Signal strength: 0 - 8
Audible warnings:
•Pulse Beep, at the frequency of the cardiac pulse
•Continuous beep, if the %SpO2 limit values or the pulse rate go outside of the set limits
•Continuous beep during the oximetry test, if the battery is low
Displayed warnings:
•Insert the finger
•Connect sensor
1.7.3 Other specifications

spirodoc user manual code 980165 Rev 4.5 page 9 of 27
Display: LCD, 2 lines, 16 characters
Keyboard: 5 keys
Interface: RS 232 bi-directional
Power supply: Lithium battery 3 V, type CR123A
Dimensions: 70x80x30 mm
Weight: 100 g (including operating battery)
Type of electrical Class II device
protection:
Safety level for Apparatus type BF
shock hazard:
Protection level against IPX0
water penetration:
Safety levels in Apparatus not suitable
presence of inflammable
anaesthetic gas, oxygen
or nitrogen:
Conditions of use: Apparatus for continuous use
Conditions of storage: Temperature: MIN -20 °C, MAX + 60 °C
Humidity :MIN 10% RH; MAX 95%RH
Operating Conditions: Temperature: MIN 10 °C, MAX + 40 °C;
Humidity: MIN 10% RH; MAX 95%RH
Applied norms: Electrical Safety Standard IEC 60601-1
EMC Compatibility IEC 60601-1-2
Expected working life: A life expectancy of 10 years is declared
WARNING
This device is a Class IIa medical device according to the European Directive 93/42/CEE.
1.8 Spirometric normal values
spirodoc is a precise measurement instrument which measures the main spirometric parmeters during a test of “forced
expiration”. At the end of each test the machine gives also a suggested automatic interpretation for the respiratory
function of that subject.
In order to make a correct evaluation of a spirometry test the measured values must be compared with the “normal (or
predicted) values”. These values are taken from a healthy population and are calculated from tables or formulas in
function of the age, height and sex of the subject in question.
spirodoc automatically calculates the relevant “normal values”and compares them as a percentage with the “measured
values”.
An example of such a calculation is shown below:
parameter FVC: % = FVC measured / FVC normal x 100
2. OPERATION OF THE SPIRODOC
2.1 Keyboard
All spirodocs have a keyboard
consisting of 5 keys:
The "↵
↵↵
↵" key ( ) has several
functions:
SWITCH ON to switch on the spirodoc press and release
SWITCH OFF to switch off the spirodoc press the key for at least 2 seconds
ENTER to confirm and to proceed to the next phase
The "∇
∇∇
∇"
is generally used:
•to answer the questions shown on the display
•to reduce/modify a value highlighted with an arrow
The "
"key is generally used:
•to answer the questions shown on the display
•used to change the anthropometric data of the patient or to correct recently-input data
The "∆
∆∆
∆"key
is generally used:
•to answer the questions shown on the display
•to increase/modify the value highlighted with an arrow

spirodoc user manual code 980165 Rev 4.5 page 10 of 27
The "i"key is used to return to view some info messages.
2.2 Battery level
The symbol indicates the level of the battery is charge. The maximum charge of the batteries is indicated when four
symbols appear. As the battery charge level reduces the symbol .is shown.
If the battery is completely discharged the following message is shown on the display:
LOW BATTERY
WARNING
If the "battery discharged" condition occurs during an oximetry test then spirodoc emits a constant beep
(providing this function is switched on!)
2.3 To make a test
Switch on the spirodoc by pressing the "↵
↵↵
↵" key
The following message is shown, the charge of the battery and the percentage of memory remaining are displayed:
BATTERY
Free memory 95%
If no tests or information have been stored the following message is shown:
BATTERY
Memory empty
After circa one second the main menu is shown:
Select function
SUB FVC SpO2
SUB to insert the new subject’s data
FVC to make a spirometry test
SpO2to make an oximetry test
to view or to print the test results
If "i" key is pressed the following info messages are shown:
spirodoc
Ver x.y
The product name is indicated on the first line and the current software version on the second line.
After circa one second, the charge of the battery and the percentage of memory remaining are displayed:
BATTERY
Free memory 95%
After circa two seconds the current date and time are shown:
DATE 20 / 01 / 04
TIME 16 : 48 : 55
When the date and time are shown, press the "" key to modify the date and time:
DATE 20 01 / 04
dd / mm / yy
The arrow shown to the right of the field indicates the value to be modified.
WARNING

spirodoc user manual code 980165 Rev 4.5 page 11 of 27
The current date format (dd/mm/yy or mm/dd/yy) is shown on the second line. To modify the date format see the
section describing the configuration menu.
•Use "∆
∆∆
∆"and "∇
∇∇
∇"to increase or to decrease the value of the selected field.
•Press "" to return to the previous field, to correct an error.
•Press "↵
↵↵
↵" to confirm each value.
When the date is set the screen shows (for example):
DATE 22 / 01 / 04
TIME 16 33 : 15
Use the same procedure to set the time.
If the device was purchased with the oximetry option, the following screens are shown:
•the upper and lower limit values of the %SpO2and of the pulse rate (in bpm)The max and min threshold values, both
for the %SpO2and for the pulse (in bpm), are then shown:
%SpO280/100
BPM 40/180
•the current setting (on or off) of the acoustic signal
BEEP ON/OFF
On Off
WARNING
During the oximetry measurement, if the value of the %SpO2 or of the pulse rate go outside of the threshold
values, then spirodoc emits an audible warning which continues as long as the conditions remain.
The default threshold values are shown.
If the optional oximetry module has not been purchased with the spirodoc then only spirometry testing can be carried
out.
If the following message is shown:
Oximetry
disabled
this means that your device has the oximetry option fitted but this function has not been activated. In this case contact the
manufacturer or an authorised service agent.
The device can be switched off at any time by pressing and holding down the "↵
↵↵
↵" for a few seconds.
After 3 minutes the device will automatically switch off.
2.4 Entering subject data
From the main menu select SUB:
Subject data
New Esc
To insert details of a new subject press the New key.
To keep these subject details (ie to retest that subject) press Esc:
Age cm kg S #
35 172 74 001
To keep these subject details (ie to retest that subject) press "↵
↵↵
↵". To insert details of a new subject press the "" key
2.4.1 New subject data
The cursor is shown "" against the first parameter (age). Use the keys "∆
∆∆
∆ " and " ∇
∇∇
∇ " to select the correct age.
Age cm kg S #
35172 74 001

spirodoc user manual code 980165 Rev 4.5 page 12 of 27
Press "↵
↵↵
↵" to confirm and to move onto the next value, and the cursor "" moves to the next parameter. Select the
correct value with the "∆
∆∆
∆ " and " ∇
∇∇
∇ " keys.
•Age
On the left of the display beneath the value Age the arrow appears
to show that the age can be increased or reduced by pressing the keys " ∇
∇∇
∇ ", " ∆
∆∆
∆ ".
Press "↵
↵↵
↵" to confirm the selected value.
•cm
The arrow then appears after the height, again the value can be increased or reduced using the " ∇
∇∇
∇ ", " ∆
∆∆
∆ " keys. Press
"↵
↵↵
↵" to confirm the value
•Kg
The arrow then appears on the weight, the value can be increased or reduced using the " ∇
∇∇
∇ ", " ∆
∆∆
∆ " keys. Press "↵
↵↵
↵" to
confirm the value
•S (Sex)
The arrow then appears on the sex, the sex can then be indicated using the " ∇
∇∇
∇ ", " ∆
∆∆
∆ " keys. indicates male and
female. Press "↵" to confirm the selection
•#
Shows the progressive ID number of the patient.
If an error is made, press the "" key to go back to the previous value.
2.5 Making a spirometry test
When spirometry test is selected, the display then shows
EXPIRE fast
STOP
Press the STOP key to return to the main menu.
The (optional) inspiratory phase can be carried out before connecting to the mouthpiece.
To perform a good spirometry test the following instructions must be closely followed:
•Fit the nose clip to the nose in order to ensure that no air can escape from the nostrils.
•Insert the mouthpiece well into the mouth, so that at least 2 cm of the mouthpiece is inside the mouth and
close the sides of the mouth tightly around the mouthpiece in order that air cannot escape.
WARNING
It is absolutely necessary to keep the mouthpiece between the teeth in order to avoid that the opening of the
mouthpiece is obstructed by the lips. If the mouthpiece is obstructed this can have a negative effect on the test
results.
After a slow and deep inspiration, the forced expiration must be made by making a complete forced expiration lasting as
long as possible.
After six seconds of forced expiration the device emits a long beep, thus helping the user to understand when
the minimum expiratory time has been reached.
To made a correct spirometric test all air must be expired from the lungs.
The measurement finishes automatically several seconds after the last volume variation (at zero flow), or by pressing
STOP.
The display then shows the automatic test interpretation, which follow the ATS recommendations, with one normal level
plus 5 levels of restriction and 5 levels of obstruction.
Severe Restrict.
In addition, a colour code is also shown (GREEN, YELLOW, RED) plus a symbol "" .
In the event of a “mixed” interpretation (obstruction plus restriction), then the colour code always refers to the
more severe of the two pathologies.
spirodoc may show one of the following messages, showing the “test quality” of the test made:
Next test

spirodoc user manual code 980165 Rev 4.5 page 13 of 27
start faster
If the start of the forced vital capacity is not made with sufficient force and velocity.
Next test
avoid coughing
If the test contains a fall (50%) and then a successive increase in the expired velocity
Blow out air for
a longer time
If the expiratory time is insufficient (FET< 6sec or the volume variation > 100mL in the last 0,5sec).
Blow out ALL air
in the lungs
If the last expiratory flow measured is too high (> 0,2 L/s).
After these test quality control messages have been shown (if generated) then the spirodoc shows the values of FVC,
FEV1, FEV1%, PEF, 2575 and FET of the current test
FVC 4.82 89%
FEV1 4.12 91%
On each line, the parameter name is shown on the left, the result ie the value in the centre, and the percentage of the
predicted value on the right.
The other parameters are then shown after 8 seconds, or by pressing the key "∆
∆∆
∆":
FEV1% 85.8 99%
PEF 9.42 91%
2575 4.02 82%
FET 5.72
The measurement units of these parameters are the following:
FVC: litres
FEV1: litres
FEV1%: %
PEF: litres/second
2575: litres/second
FET: seconds
If the symbol "x" is shown next to a result this means that the result is below the lower limits of the normal
values. This can be considered significant when the doctor makes the interpretation of the spirometry tests.
Press the "∆
∆∆
∆ " and "∇
∇∇
∇ " keys to view the messages and the results of the current test another time. Press "↵
↵↵
↵" to return to
the main menu. To make another spirometry test, repeat the procedure already described.
2.6 Making a spot oxymetry test
WARNING
If spirodoc was purchased without the oximetry option, then only spirometry testing can be made. If the
oximetry module is purchased at a later date, contact either the manufacturer or an authorised service centre to
activate the oximetry function.
The reusable finger sensor can be used to measure both the oxygen saturation (SpO2) plus the
frequency of the arterial pulse, using a non invasive method. This sensor is suitable for patients
with body weight over 20kg, measuring at rest.
In the default setting, spirodoc stores the two oximetry parameters every 12 seconds.
To make a test:
•Connect the sensor to the device: insert the connecter with the arrow head (printed on the connecter) towards you.
•Select a finger which fits correctly into the sensor.
•Insert the finger into the sensor until the finger touches the stop. Ensure that the bottom of the finger completely covers
the detector. If the sensor cannot be positioned correctly then use another finger.

spirodoc user manual code 980165 Rev 4.5 page 14 of 27
•Position the sensor so that the cable rests along the palm of the hand. This ensures that the
light source is on the fingernail side and the detector on the underside of the finger.
•From the main menu, select SpO2. If the following message is shown:
Oximetry
disabled
this means that your device has the oximetry option fitted but this function has not been activated. Contact the
manufacturer or an authorised service agent.
Otherwise, the following message is shown:
Wait please...
STOP
Then after a few seconds:
At this stage the first set of values of the %SpO2 and pulse have been stored, and the test continues.
Press '1'to enable (
on) or to disable (
off) the acoustic signal , which indicates that the oximetry limits have been
exceeded.
The number of square blocks ( the symbol '') is directly proportional to the strength of the oximetry signal (maximum 8
squares). Position the finger carefully inside the sensor to maximise the signal strength.
WARNING
If the value of the %SpO2 or of the pulse rate go outside of the threshold values, then spirodoc emits an audible
warning which continues as long as the conditions remain.
The oximetry measurement can be stopped by pressing STOP.
If SpO2 is selected spirodoc checks if the sensor is connected and if a finger is inserted into the sensor, and one of the
following messages may be displayed:
Insert finger
STOP
on
Connect sensor
STOP
on
If the symbol "
on" is shown then spirodoc will emit a beep in each of these two cases.
In order to avoid damage to the sensor and/or incorrect results, do not place excessive strain nor use excessive
force on the sensor cable when using, connecting or disconnecting the sensor to the device or to the hand.
2.7 Making long term oximetry testing
The reusable “wrap” sensor is suitable for making continuous, non-invasive oximetry monitoring of the arterial oxygen
saturation in patients weighing more than 30 kg. Use of this sensor is NOT advised for patients with allergic reactions to
adhesive tape.
WARNING
The raw materials used in the manufacture of the sensor are FREE FROM NATURAL LACTIC protein. The
materials used in the sensor have been subjected to rigerous tests of biocompatibility
2.7.1 Adult Single Patient Sensor – Instructions for Use
WARNING
This sensor is contraindicated for use on patients who exhibit allergic reactions to the adhesive tape. Do not
reuse. One use on one patient.
Quality of the SpO2
signal. The range is
from 0 to 8.
SpO2 98 72♥
♥♥
♥
STOP
off

spirodoc user manual code 980165 Rev 4.5 page 15 of 27
•Choose an application site on the patient’s finger or toe where the light source will be directly
over and in-line with the detector. The preferred sites are the forefinger or smaller thumb.
•Remove nail polish or artificial fingernails
•Place the patient’s digit in the sensor nail-side up, lining up the digit’s pad over the detector.
The sensor’s positioning line runs across the mid axis of the fingertip
•Wrap the bottom adhesive around the digit, being careful not to cover the nail.
•Fold the sensor’s top over the digit, making sure the light source is directly over and in-line
with the detector. Wrap the adhesive around the finger or toe to secure the sensor. Route the
cable along the palm or the bottom of the foot, and secure with adhesive tape if necessary.
Connect the sensor to the instrument: insert the connector with the arrow on the connector face-up and control the correct
functioning according to the previous instructions.
WARNING
Do not twist unnecessarily or use excessive force when using, connecting, disconnecting, or storing the sensor.
An over-tight sensor can produce inaccurate saturation measurements. Therefore avoid over tightening the
adhesive tape.
It is recommended to fasten the cable to the wrist with a bandage.
2.7.2 Making a test
If the spot oximetry test lasts for more than 5 minutes then the device goes into long term measurement mode, and the
display shows:
SpO298 72♥
♥♥
♥
Esc
off
The acoustic signal is switched off and the automatic switch-off time becomes 30 minutes.
The sequence of the symbols indicates the time intervals.
WARNING
If the value of the %SpO2 or pulse rate go outside of the threshold values, then spirodoc:
•returns from the long term measurement mode to the spot measurement mode, and
•emits a continuous beep
The oximetry measurement can be stopped by select ESC (press "i" key), is shown the message
SpO298 72♥
♥♥
♥
STOP
Press STOP within 2 seconds to return to the main menu, otherwise spirodoc will continue the long term measurement.
3. TEST RESULTS
spirodoc will memorise the details of the best spirometry test, selecting the test with the highest sum of FVC+FEV1, plus
the most recent oximetry test made on the current subject.
The best spirometry test is the one made by that subject which contains the highest sum of FVC+FEV1.
3.1 Interpretation of the spirometry test
spirodoc gives an automatic functional interpretation of the spirometry test following the latest guidelines of the ATS
(American Thoracic Society) which has one level of normal spirometry, 5 levels of obstruction and 5 levels of restriction.
This test interpretation is shown directly on the display of the instrument. In addition, a colour code is shown indicated by
the symbol ""
This table illustrates the possible test interpretations:
Elapsing time.
, ,

spirodoc user manual code 980165 Rev 4.5 page 16 of 27
LEVEL
COLOUR FUNCTIONAL INTERPRETATION
0 Green Normal spirometry
1 Yellow Mild Obstruction Mild Restriction
2 Yellow-Orange Moderate Obstruc Moderate Restric
3 Orange Mod.Severe Obst Mod.Severe Rest
4 Light Red Severe Obstruction
Severe Restriction
5 Dark Red Very Severe Obst Very Severe Rest
In the case of a “mixed” interpretation (obstruction plus restriction) then the colour code will always refer to the more
severe of the two pathologies.
3.2 Viewing the results
When the subject details have been inserted and at least one spirometry test made, then the symbol "" is shown next to
the FVC to indicate that the results are held in memory:
Select fuction
SUB FVC SpO2
In the event that the same patient makes also an oxymetry test then the same symbol "" is shown next to the SpO2
and indicates that an oxymetry test is held in memory:
Select fuction
SUB FVC SpO2
Press
and on the display the following are shown, in order:
•the spirometry parameters of the best test
FVC 4.82 89%
FEV1 4.12 91%
FEV1% 85.8 99%
PEF 9.42 91%
2575 4.02 82%
FET 5.72
•the minimum, maximum and average values of SpO2 and of the pulse rate from the last test made
Min Max Ave SpO2
96 99 98,3 %
Min Max Med BPM
62 105 88
If the message:
No test data
in memory
Is shown, this means that no tests have been made since the new subject data were entered.
3.3 Print out of the results
To print the results held in memory, connect the spirodoc to a parallel printer and press the "
" key from the main menu.
The results are then sent automatically to the printer.
WARNING
To make a print out of the results then the optional hardware (Optoisolated RS232 interface plus serial to
parallel converter).
To connect to the printer see the following illustration.

spirodoc user manual code 980165 Rev 4.5 page 17 of 27

spirodoc user manual code 980165 Rev 4.5 page 18 of 27
3.3.1 Print out
EXAMPLE OF RESULT PRINTOUT

spirodoc user manual code 980165 Rev 4.5 page 19 of 27
4. MAINTENANCE
spirodoc requires very little maintenance. The only periodic requirements are:
•Cleaning and general control of the turbine flow and volume measuring system.
•Periodic changing of the operating battery.
4.1 Cleaning and general control of the turbine
The turbine flow and volume measurement system used by the spirodoc guarantees accurate measurement and also
has the major advantage of not requiring any periodic calibration. In order to ensure the correct operation of the turbine it
is necessary to carry out a simple cleaning. This operation also assures a level of hygiene for the subjects who will
breath through the machine.
WARNING
It is a good rule to make a visual check from time to time that dirt or foreign bodies are not deposited inside the
turbine, like hair for instance. Any such deposit could slow or block the free movement of the turbine blade and
thus compromise the measurement accuracy.
To clean the turbine first remove it from the machine by rotating it and then pulling it gently, holding it by the mouthpiece.
It can help to push it gently with a finger from underneath.
Immerse the turbine in a detergent solution (not hot), and move it in the liquid in order to remove any impurities
deposited. Then rinse the turbine immersing it in clean water (not hot).
WARNING
To avoid permanent damage do not put the turbine under a direct jet of water or other liquid. If no detergent
solution is available it is necessary to clean the turbine in clean water.
Leave it to soak for at least one hour. Shake off the excess water from the turbine and leave it to dry standing it vertically
on a drying surface.
To check the perfect functioning of the turbine, before reinserting it inside the machine it is good practise to make a
visual check that the mobile part moves freely. Place the turbine horizontally and move it slowly from side to side, the
mobile part (blade) must move without any obstruction. If this is not the case, the accuracy of measurement is no longer
guaranteed and the turbine must be replaced.
When the turbine is clean replace it in the spirodoc note the correct direction as indicated by the “arrow” (
) printed on
the spirodoc case. Twist to lock the turbine into the case.
WARNING
To insert the turbine correctly into the machine, push it inside and turn it anticlockwise until you hear a “click”
which confirms that the turbine is locked inside the plastic case.
4.2 Replacement tape instructions
The adhesive tape is made from latex-free materials. It is recommended to use a new sensor tape for each new patient
or as needed.
•Genly remove used sensor tape and discard appropriately.
•It is recommended to use a new sensor tape for each new patient or as needed
•Sensor back is equipped with alignment pegs. Place sensor with alignment pegs down against adhesive side of tape,
aligning the pegs with the tape holes properly
•Press firmly on sensor to push pegs through tape holes. Pick up both sensor and tape and verify sensor pegs are
aligned properly.
4.3 Changing the battery
When ''BATTERY LOW''appears on the display of the spirodoc at switch on, or if the machine does not switch on at all,
then change the operating battery.
WARNING
Only use 3V Lithium battery CR123A or equivalent.
When you insert the battery pay close attention to the
polarity +/- shown inside the battery cover (see design
below)

spirodoc user manual code 980165 Rev 4.5 page 20 of 27
5. POSSIBLE PROBLEMS
A list of possible problem follows plus a list of messages which may appear on the display to indicate the type of
problem:
5.1 Causes and solutions
spirodoc does not switch on
Check that the battery is inserted correctly inside the battery cover on the back of the machine. If it is then, change the
battery.
When switched on the display shows 16 dark blocks
Change the battery. If this does not resolve the problem, contact a qualified technical service company.
During operation the machine switches itself off and then on again.
Change the battery. If this does not resolve the problem, contact a qualified technical service company.
At the end of a test the measured data is not correct
Clean the turbine and then control the free movement of the turbine blade.
Memory lost caused by unexpected event
The data in the archive has been cancelled. Contact a qualified technical service company.
Other manuals for Spirodoc
2
Table of contents
Other MIR Measuring Instrument manuals
Popular Measuring Instrument manuals by other brands

IDEAL Networks
IDEAL Networks LanXPLORER Pro manual

Teswell
Teswell 4CH 960H user manual

KROHNE
KROHNE Optisonic 6300 P Handbook

RADAC
RADAC WaveGuide 5 Direction user manual

AMI
AMI 1700 Installation, operation and maintenance instructions

IFM Electronic
IFM Electronic efector300 SD6050 operating instructions

TDE Instruments
TDE Instruments Digalox DPM72-MPP instruction manual

BMT
BMT Blast Movement Monitor System manual

EUTECH INSTRUMENTS
EUTECH INSTRUMENTS WATERPROOF CYBERSCAN DO 300 DISSOLVED OXYGEN... instruction manual

PCB Piezotronics
PCB Piezotronics P357A07 Installation and operating manual

SOUNDTEK
SOUNDTEK ST-106 user manual

Sharp
Sharp VC-A230NZ/X Service manual