Mistral MKA24KY21 User manual

Model: MKA24KY21
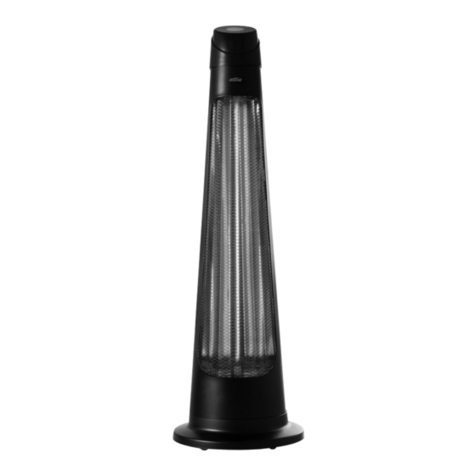
Ceramic Tower Heater
Instruction Manual

2
Important Safeguards
When using electrical appliances, in
order to reduce the risk of re, electric
shock, and/or injury to persons, basic
safety precautions should always be
followed, including:
Safety Precautions
When using this appliance, below safety
precautions should always be followed.
• Topreventreorshockhazard,DONOT
expose this appliance to rain or moisture.
• Dangeroushighvoltagesarepresentinside
thisenclosure.Toavoidelectricshock,DO
NOTopentheenclosure,referservicingto
qualiedpersonnelonly.
• Toprotectagainstre,electricalshockand
injury to persons, do not immerse the unit,
plug or cord in water or spray with liquids.
• The heater shall not be exposed to dripping
orsplashingandnoobjectslledwithliquids,
such as vases, shall be placed near the
product.Drylocationuseonly.
• Nonakedamessources,suchascandles,
should be placed on the product.
• Any ventilation holes should not be impeded
by covering with items, such as newspaper,
table paper, tablecloths, curtains etc. Slots
and opening are provided for ventilation to
ensure reliable operation of the product and
toprotectitfromoverheating.Neverobstruct
theairinletandoutlet.Donotuseanyobject
to cover this appliance.
• OnlyconnecttoasuitableAC240V~50Hz
mainswalloutlet.Donotoverloadthewall
outlet.
• This appliance is not intended to be operated
by means of an external timer or separate
remote-controlsystem.Otherusenot
recommendedmaycausere,electricshock
or injury.
• This appliance is not intended for use by
persons(including children) with reduced
physical, sensory or mental capabilities,
orlackofexperienceandknowledge,
unless they have been given supervision or
instruction concerning use of the appliance
by a person responsible for their safety.
• Keepoutofreachofchildren.Children
should be supervised to ensure that they do
not play with the appliance.
• To disconnect, grip the plug and pull it from
thewalloutlet.Neverpullbythecord.Donot
use with wet hands or in damp environments.
• Donotattempttorepair,disassembleor
modify the appliance. There are no user-
serviceable parts inside. Repairs should only
beperformedbyqualiedpersonnel.
• If the supply cord is damaged, it must be
replaced by the manufacturer, its service
agentorsimilarlyqualiedpersonsinorderto
avoidahazard.
• Donotusethisapplianceoutdoors.This
appliance is for household use only and not
for commercial or industrial use.
• Donotuseiftherearevisiblesignsofdamage
to the heater.
• Usethisheateronahorizontalandstable
surface.
• Donotusethisheaterwithaprogrammer,
timer, separate remote-control system or
any other device that switches the heater
onautomatically,sinceareriskexistsifthe
heater is covered or positioned incorrectly.
• Donotusethisheaterifithasbeendropped.
WARNING: Do not use this heater in small
rooms when they are occupied by persons
not capable of leaving the room on
their own, unless constant supervision is
provided.
Warning: In order to avoid overheating, DO
NOT COVER the appliance.
Warning: Do not place the heater on LONG
PILE CARPET OR FLOKATI RUGS. Use a heat
board if necessary.
WARNING: To reduce the risk of re, keep
textiles, curtains, or any other ammable
material a minimum distance of 1 m from
the air outlet.
WARNING: FIRE RISK EXISTS IF THE HEATER
IS COVERED BY OR POSITIONED CLOSE
TO CURTAINS OR OTHER COMBUSTIBLE
MATERIALS.

3
Always
1. Always position the heater in accordance
with the instructions.
2. Alwaysmakesuretheelectricalsocketis
accessible and located adjacent to, but not
above the heater.
3. Alwaysuseareguardaroundtheheaterin
thepresenceofChildren,AnimalsorElderly/
Personswithreduced/impairedphysical,
sensory or metal capabilities in the absence if
adequate supervision.
4. AlwaysturntheapplianceOFFandunplug
it from the mains wall outlet when it is not in
use, when moving the appliance from one
location to another and before cleaning.
Never
1. Neverleavetheapplianceunattendedwhen
itisinuse.Neverleavechildrenunsupervised
inaroomwheretheheaterisONand
unguarded.
2. Neverobstructorcovertheairoutletorforce
items into the heater openings, this could
causeoverheatingandconsequentriskof
re.Neverinsertorallowforeignobjects
to enter the air outlet as this may cause
damage to the appliance.
3. Neverpositionorusetheheaterinthe
immediate vicinity of water, such as bathtub,
shower, washbowls, swimming pool etc.
4. Neveruseaerosolsorsteamcleanersonor
around the heater.
5. Neverusethefanheaterinroomswith
explosivegasorwhileusingammable
solvents, varnish or glue.
6. Neverroutethepowersupplycordunder
carpet etc.
7. Neverusetheheatertodryclothes,etc.
8. Neveroperatetheappliancewitha
damaged cord or plug, after a malfunction
orifitisnotworkingnormally,droppedor
damaged in any way.
9. Neverletthepowercordhangovertheedge
of a table or counter or let it touch any hot
surfaces.
10.Nevermovetheappliancebypullingthe
cord.
11.Neverimmersetheproductinwaterorany
other liquid for any reasons.
12.Neveruseaccessoriesthatarenot
recommended or supplied by the
manufacturer.
Position Instructions
This heater must be placed on a hard, level, heat
resistantsurface.Whenpositioning,pleasekeep
the following points in mind:
• The heater requires no installation. It should
be used solely as a portable appliance. The
heater must always be used and stored in an
upright position.
• This heater must not be located immediately
below an electrical outlet.
• The heater MUST only directly be plugged in
toaxedDomesticPoweroutlet,DONOT
useinconjunctionwithExtensioncords,
PowerBoardsorDoubleAdaptors,asthese
can overheat when overloaded.
• Donotusetheapplianceinroomslessthan
4m2 areas.
• Keep the air inlet and outlet free from objects
atleast100cminfrontand50cmbehindthe
heater.Donothanganythingonorinfrontof
the fan heater.
• Neverpositiontheheaterclosetocurtains
or combustible materials such as furniture,
cushions, bedding, paper, clothes, curtains
etc.Keeptheapplianceatleast100cm
(1m) from walls and any other combustible
materials.
• Neverpositionorusetheheaterinthe
immediate vicinity of water, such as bathtub,
washbowls, swimming pool etc. where the
likelihoodofimmersionorsplashingcould
occur.
• Keep hearthrugs and other soft furnishings
away from the front of the heater. They could
obstructthefreeowofhotairanddamage
both soft furnishings and heater.

4
Cautions:
Donotoperatetheapplianceonaninclined
place.Donotmovetheappliancewhilethe
appliance is switched on.
Inordertoavoidahazardduetoinadvertent
resetting of the thermal cutout, this appliance
must not be supplied through an external
switching device, such as a timer, or connected
to a circuit that is regularly switched on and off
by the utility.
This heater is hot when in use or directly after use.
Toavoidburns,donotletbareskintouchhot
surfaces. Keep combustible materials such as
furniture, pillows, bedding, papers, clothes and
curtainswellawayfromtheheater.Donotdrape
laundry or any other items over the heater.
At the end of the product’s serviceable life it
should be disposed of carefully and safely in
accordance with local authority regulations.

5
FeaturesofYour
CeramicTowerHeater
Handle
Filter
AirIntake
Grille
PowerON/
OFFSwitch
YourCeramicTower
Heater
Congratulationsonthepurchaseofyournew
Heater.
BeforerstusingyourHeater,itismostimportant
that you read and follow the instructions in this
useandcarebooklet,evenifyoufeelyouare
quite familiar with this type of appliance.
Your attention is drawn particularly to the section
dealingwithIMPORTANTSAFEGUARDS.Finda
placeandkeepthisbooklethandyforfuture
reference.
Your designed to function quietly and safely
under normal circumstances.
ThisqualityHeaterisfullyportable,withsturdy
base and a modern design.
Operation
1. ON/Stand-Bytouchbutton
2. MODEselectiontouchbutton(antifrost/fan/
heat1/Heat2/Heat3selection)
3. TIMERtouchbutton
4. ECOmodetouchbutton
5. SWINGON/OFFtouchbutton
6. MINUStouchbutton
7. PLUS touch button
Icon Description
1. Digits
2. Power indicator
3. ECOfunctionicon
4. Antifrost icon
5. Fanicon
6. ºC:celsius
8. H:hour
9. Timer indicator
LEDDisplay
ControlPanel
AirOutlet
Base

6
Whenoperatedforthersttime,theunitmay
emit an unpleasant burning type smell. This is
normal, and will disappear after a short period
of use.
1. Carefullyremovetheheaterfromtheplastic
bag and carton.Place the heater on a level
surfaceinastableuprightposition.Make
certainthepowerswitchisinthe“OFF”
position.
2. UnwindthepowercordandplugyourFan
Heaterintoasocketoutlet.Ensurethatthe
voltageonthespecicationsplateisthe
same as in your home.
3. Turnthepowerswitch(locatedattheback
oftheheater)‘On’.Theheaterisinstandby
Mode.Theapplianceemitsabeep(if“beep”
soundisON).TheblinkingStandByindicator
comes on and remains visible while the
appliance is powered.
4. TurntheheateronbypressingtheON/OFF“
”buttononTheheaterwillbeginheatingthe
room according to the last used settings.
5. Pressthe“ ”buttontoselectoneofthe
following operating modes:
• Antifrost (Theappliancekeeptheroomat
7°Cavoidfreezing)
• FAN (in this mode the appliance doesn’t
emits heat; only the fan operates)
• Heating1
• Heating2
• Heating3
6. Todistributetheairowoverawidersurface,
press the swing touch button . The
appliance starts swinging to the right and left.
To stop the appliance in the desired position,
simply press the swing touch button again.
7. Toturntheheater‘Off’presstheON/OFF
button. Please note: the unit display will show
acountdownforabout30secondsandtake
approx30secondstostopblowingoutair.
After30secondstheappliancewillbein
stand-by mode.
8. Turntheswitchoffatthebackoftheunit
mustbein“0”position(off).
WARNING: Allow the heater to cool down
for 30-60 seconds before switching on
again and before turning off at the power
outlet. This will protect the inner parts.
NOTE: It is normal when the heater is turned
on for the rst time or when they are turned
on after having not been used for a long
period of time to emit some smell and
fumes. This will disappear when the heater
has been on for a short while.
Heating 1, 2 and Heating 3
In this mode, the desired temperature can be
selected by pressing the adjustment touch
buttons+and–.Theblinkingtargettemperature
is shown for a few seconds:
Heating1: The appliance operates
at low power, reducing noise levels
and energy consumption to a minimum.
Heating2: The appliance operates
at medium power.
Heating3: The appliance operates
at high power to heat the room rapidly.
ECO function
ThisfunctionisavailableinHeating1,Heating2
andHeating3modesonly.
ToactivatethisfunctionpresstheECO push
button.TheECOicon will be displayed.
TheECOfunctionwillcomparethetarget
temperature, with the current ambient
temperature, and it will automatically select the
most appropriate heating level to guarantee
an optimum comfort level while reducing the
energy consumption.
WhiletheECOfunctionisON,theappliancemay
switch automatically to a lower or higher heating
level several times. The corresponding heating
level is always shown on the display.
Digital 24h timer
This function can be activated from any
operating mode (normal operating mode or
stand-by mode).
Auto-start:withtheapplianceinSTAND-BY,
press the Timer touch button. The timer icon
is displayed together with the time remaining
beforetheappliancewillbeturnedON.Toadjust
the timer, use the adjustment touch buttons
and , then wait a few seconds for the setting
tobememorised(timervaluestopstoashfor
2secbeforeitgetsmemorized).Thestand-by
icon is displayed together with the timer icon
(ashingicons),indicatingthatthetimerhas
been set. When the programmed time is
reached,theapplianceisturnedONwiththe
settings used during the previous period of
operation.

7
Auto-off:whentheapplianceisON,pressthe
Timer push button. The timer icon is displayed
together with the time remaining before the
appliance goes off. To set the timer, use the
adjustment buttons and , then wait a
fewsecondsforthesettingtobememorized
(timervaluestopstoashfor2secbeforeit
getsmemorized).Oncedonethetimericon
is shown during the normal operating mode,
indicating that the timer has been set. When the
programmed time is reached, the appliance is
turned off automatically.
Togobacktooperationwithoutthetimer,
press the timer button twice. The timer symbol
disappears from the display.
TimerSteps:0.5Hr(30minutes),1Hr,2Hr,3Hr,
4Hr...23Hr,24Hr,0.
Everytimethebuttonispushedtheappliance
emit“beep”sound.Thisfunctioncanbe
activated/deactivated:whenproductisworking
byrepeatedlypressing“-”pushbuttonuntilthe
displaywillshow“b0”or“b1”ashing.Press“-”
pushbuttontoselect“b0”(beepoff)or“b1”
(beep on); waiting a few seconds for the setting
to be memorised.
Thermal Cut-Out
AThermalCut-Outisbuiltintothisheaterto
minimisetheriskofoverheatingandmaximise
safety to users. A heat sensing device monitors
internal temperatures in the appliance. If heat
levels rise beyond a preset safety threshold
theCut-Outwillswitchoffpowertotheheat
elements, eliminating further danger. Let the
heatercoolforapproximately10minutes,thenit
will function normally again.
IntheeventofaThermalCut-Outcheckfor
visible obstructions to air inlets. Try moving
the appliance to a new position. Sometimes
placement close to walls and furniture can restrict
air movement enough to cause the heater to
shut down.
Safety Tip-Over Switch
Thisapplianceisttedwithasafetytip-over
switch which automatically turns the unit off when
it is tilted or tipped over. Always ensure that the
unitisplacedonatsolidgroundbefore
operating.
Technical
Specications
PowerSupply:AC240V~50Hz
PowerConsumption:2400W
NOTE: As a result of continual
improvements, the design and
specications of the product within may
differ slightly to the unit illustrated on the
packaging.
CareandCleaning
• Before cleaning, ensure that the heater is
switched in the off position and is unplugged
fromthesocket.
• Cleantheexteriorsurfacesoftheheaterwith
a dry, soft cloth.
• Neveruseanyformofdetergentsorsolvents
to clean the heater.
• Neverspraywithliquidsorsubmergeinliquids
or water.
• DONOTattempttocleantheinteriorofthe
heater.
• DONOTATTEMPTTOOPENTHECASEOFTHIS
HEATERatanytime.Therearenoconsumer
serviceable parts inside this unit.
• When the heater is stored during the off
season, neatly wind the power cord around
the base of the heater to prevent any
damage to the power cord.
Note: If the power cord of the appliance
becomes damaged discontinue use.
Disposal
Donotdisposeofpackagingortheproduct
through your household waste!
Theproductandpackagingaremadefrom
recyclable materials (plastics, metals, paper).
If the product is no longer suitable for use
dispose of it in an environmentally friendly
manner in accordance with your local council
regulations.

8
Cat.No.MKA24KY21
November2020
WarrantyConditionsforpurchaseinAustralia&
NewZealand
Any claim under this warranty must be made within 2 years of the date of purchase of the product.
TomakeaclaimunderthewarrantyinAustralia,taketheproduct(withproofofpurchase)toany
Bunningsstore(seewww.bunnings.com.auinAustraliaorwww.bunnings.co.nzinNewZealandforstore
locations).
GSM Retail Group bears reasonable, direct, expenses of claiming under the warranty in Australia. You
may submit details and proof to a Bunnings store for consideration or contact our service agent below.
This warranty is provided in addition to other rights and remedies you may have under law: our goods
comewithguaranteeswhichcannotbeexcludedundertheAustralianConsumerLaw(ifpurchased
inAustralia)ortheConsumerGuaranteesAct1993(ifpurchasedinNewZealand).Youareentitledto
replacement or refund for a major failure and to compensation for other reasonably foreseeable loss
or damage. You are also entitled to have the goods repaired or replaced if the goods fail to be of
acceptable quality and the failure does not amount to a major failure.
The warranty excludes damage resulting from product misuse or product neglect. The warranty covers
domestic use only and does not apply to commercial applications.
This warranty is given by GSM Retail Group
ABN:53007682475
ForWarrantyandtechnicalqueries:1300373199AusOr0800200037NZ
WarrantyExclusions
Damagetothebaseordiffuseroranypartthroughaccident,misuseornegligence.
Table of contents
Other Mistral Heater manuals
Popular Heater manuals by other brands

Sonnenkonig
Sonnenkonig VENTUS 200 manual

emerio
emerio CH-111018.3 instruction manual

Ivation
Ivation IVACFH60 user guide

Johnson Controls
Johnson Controls SABROE HXSG 1614 Series Installation, operation and maintenance manual

Riello
Riello RCM NX Series Instructions for the installer and the technical service centre

Roberts Gorden
Roberts Gorden Vantage TF Series Installation, operation & service manual