Mistral FBF 2.0 User manual

-page -
v.15012020
Versions disponibles :
froide /tempérée
froide /chaude
Avecréfrigérant
R
600A ou
R
134A
Version:
cold/cook
cold/ hot
With
R
600A or
R
134A
refrigerants
ZI Bois de l’Epine – 2, avenue Ambroise Croizat
91130 Ris Orangis - FRANCE
tel. +33 (0)1 60 79 37 61 | fax. +33 (0)1 60 79 18 26
www.mistralcoolers.com
FBF / FBM 2.0

- page 2 -
ATTENTION : ne pas endommager le circuit réfrigérant.
Les réfrigérants utilisées sont le R600A ou le R134A. Vérifiez quel gaz est utilisé en vous référant à l’éti-
quette du compresseur à l’intérieur de la machine ou sur l’étiquette signalétique.
Le R600A est un gaz hautement inflammable.
Pendant le transport et l’installation de la machine, n’endommagez aucune partie du circuit de réfrigération.
Si le réfrigérant gicle, il peut prendre feu ou endommager vos yeux.
En cas de fuite, n’approchez aucune flamme ou autres sources inflammables près de la fontaine et aérez la pièce
quelques minutes.
AVERTISSEMENT : pour éviter tout danger d’instabilité de l’appareil, il doit être fixé conformément aux
instructions.
ATTENTION : lorsque l’appareil est positionné, assurez-vous que le cordon d’alimentation n’est pas coin-
cé ou endommagé.
ATTENTION : ne pas placer de prises de courant ou d’alimentation électrique trop proche de l’appareil.
ATTENTION : installer l’appareil dans un lieu aéré, protégé des projections diverses et régulièrement entretenu.
Laisser un espace libre entre l’appareil et le mur pour un refroidissement parfait du matériel.
WARNING: do not damage the refrigerant circuit.
The refrigerants used are R600A or R134A. Verify which one is used referring to the compressor label
indise the machine or on the sign label.
The R600A is highly inflammable.
During the transport and installation, be careful not to damage any part of the refrigerant circuit.
If the refrigerant squirted, it may catch fire or cause injuries to the eyes.
In case of leak, do not take any flames or potential ignition sources near the machine and air the room.
WARNING : to avoid a hazard due to instability of the applicance, it must be fixed in accordance with the
instructions.
WARNING : when positioning the appliance, ensure the supply cord is not trapped or damaged.
WARNING : do not locate multiple portable socket outlets or portable power supplies at the rear of the
appliance.
WARNING: choose a well-ventilated location away from direct sunloght and any spatters and regularly maintai-
ned. Keep a free space between the water cooler and the wall for a perfect cooling of the appliance.

- page 3 -
Pour votre sécurité, débranchez la fontaine de son alimentation électrique afin d’éviter les risques de
blessures ou de choc électrique lors d’une intervention sur celle-ci. Ne pas introduire d’objets métalliques,
ni vos doigts dans l’appareil pour ne pas l’endommager et éviter tout risque de choc électrique.
TRANSPORT
Il est impératif de transporter, d’entreposer et de déplacer la fontaine en position verticale afin d’éviter que l’huile
présente dans le compresseur ne s’écoule dans le circuit réfrigérant.
Si tel devait être le cas, maintenir l’appareil en position verticale pendant 24h avant sa mise en service.
STOCKAGE
Ne pas exposer la fontaine aux rayonnements solaires, ne pas la placer près d’un radiateur. Eviter tout emplace-
ment exposé à des projections diverses provenant d’atelier industriel, etc...
Il est nécessaire d’installer votre fontaine dans les meilleures conditions d’hygiène et d’utilisation. Pour ce faire,
choisir un emplacement à l’abri du soleil, installer l’appareil dans un lieu aéré, protégé des projections diverses et
régulièrement entretenu. Laisser un espace libre entre l’appareil et le mur pour un refroidissement parfait du maté-
riel. Ne pas utiliser la fontaine à l’extérieur ou dans un lieu humide. Ne pas stocker des substances explosives
comme les aérosols avec un propulseur inflammables dans cet appareil. Ne jamais déplacer ou débrancher l’appa-
reil en tirant sur le cordon d’alimentation.
INSTALLATION
Les opérations d’installation et de maintenance doivent être réalisées uniquement par un personnel qualifié.
Contactez le service ou l’entreprise en charge de la maintenance pour toutes interventions. Avant de commen-
cer l’installation de la fontaine, prévoir à gauche ou à droite, près de la fontaine, une prise de 220 Volts avec un
disjoncteur 10A. Lors de la procédure d’installation, la fontaine doit être débranchée électriquement.
AVERTISSEMENT: Pour éviter tout danger d'instabilité de l'appareil, il doit être fixé conformément aux instructions.
UTILISATION
Cet appareil peut être utilisé par des enfants âgés de 8 ans et plus et par des personnes aux capacités réduites
que si elles sont sous surveillance ou qu’elles ont reçu les instructions nécessaires quant à l'utilisation en toute
sécurité de l'appareil. Les enfants ne doivent pas jouer avec l'appareil. Le nettoyage et l’entretien de la fontaine ne
sont pas à pratiquer par des enfants. Si le cordon d'alimentation est endommagé, il doit être immédiatement rem-
placé par un cordon approprié disponible auprès du fabricant ou de son prestataire de service.
Cet appareil est destiné à être utilisé dans tout environnement de type ménager ou similaire, tels que les magasins,
bureaux, cuisines, hôtel, restaurant, service de santé.
PRECAUTION RELATIVE A L’EAU CHAUDE
Pour les versions eau chaude, nous vous recommandons de toujours bien utiliser un gobelet adapté à recevoir de
l’eau chaude. Placez le gobelet au centre de la distribution sans le tenir lors de l’écoulement, maintenir le bouton
enfoncé en continu jusqu’à ce que le gobelet soit plein et ne remplir qu’un gobelet à la fois.
MAINTENANCE
Pour garantir le bon fonctionnement et la longévité de la fontaine à eau Mistral, nous préconisons 2 entretiens
sanitaires minimum par an. Ces opérations de maintenance doivent être réalisées par un personnel qualifié qui
procède au nettoyage externe et interne de la machine afin de la débactériser et la détartrer. Merci de vous rappro-
cher de votre service technique ou de votre prestataire afin de fixer les dates de passage pour réaliser les entre-
tiens sanitaires.
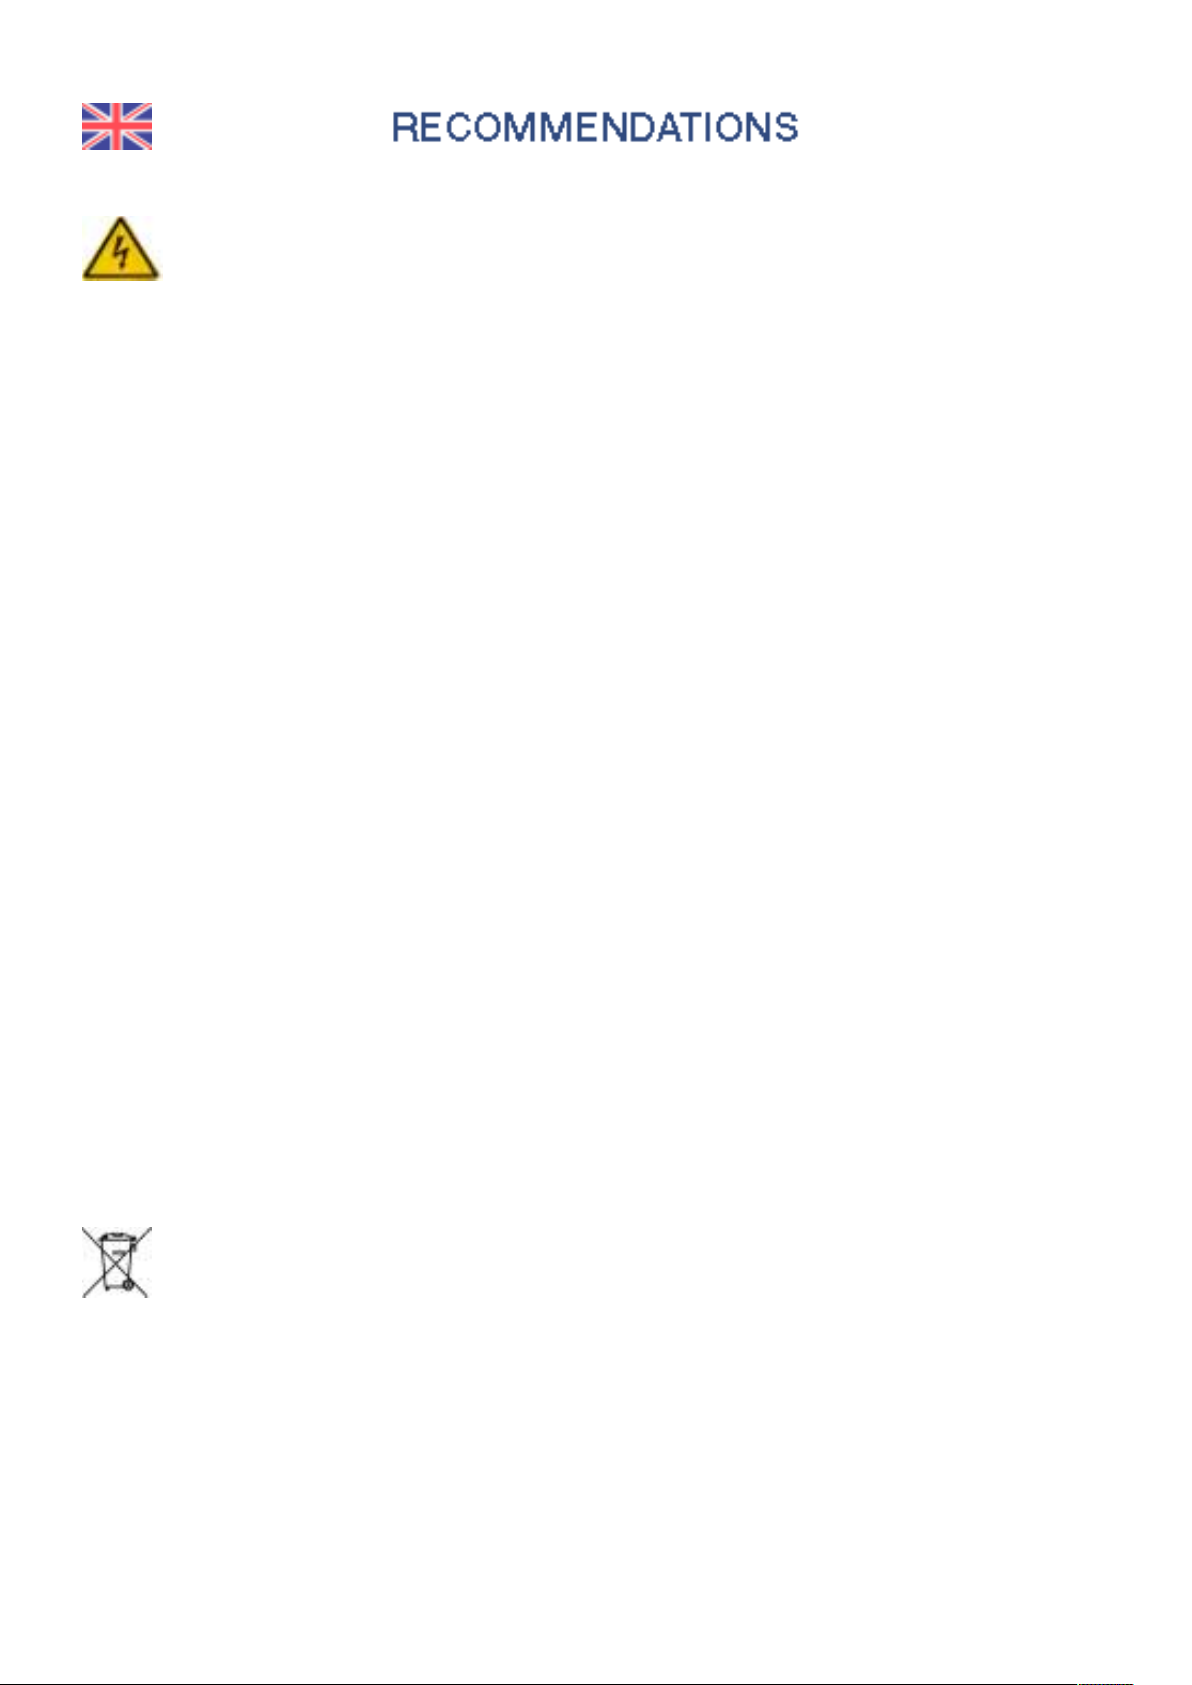
INFORMATION SUR LA PROTECTION DE L’ENVIRONNEMENT
En fin de vie, ce produit devra être déposé dans un point de collecte pour le recyclage des équipements électriques
et électroniques.
Ce symbole présent sur le produit, le manuel d'instructions ou l'emballage, le rappelle. Les matériaux sont
recyclés, en fonction de leur identification. Le recyclage, ou toutes autres formes de valorisation des dé-
chets, permet de contribuer à la protection de notre environnement. Merci de vous rapprocher de l'autorité
compétente. Le symbole signifie que le produit ne doit pas être mis au rebut avec les déchets généraux/
ménagers. En fin de cycle de vie du produit, veuillez vous assurer qu’il soit démantelé et écoulé selon les normes
environnementales, conformément aux directives de votre pays, ou contacter le revendeur à qui le matériel a été
acheté. DEEE : il faut savoir que nos produits sont couverts par la directive sur les déchets d’équipements électri-
ques et électroniques (DEEE) (2002/96/CE).
NORMES SANITAIRES RoHS
Tous les appareils fabriqués par Mistral Constructeur sont conformes à la Directive CE (2002/95/CE) relative à la
restriction de l’utilisation de certaines substances dangereuses dans les équipements électriques et électroniques
(RoHS).
GARANTIE CONSTRUCTEUR
Mistral Constructeur garantit le groupe de réfrigération pendant 2 ans et les pièces pendant 1 an.
LE FABRICANT NE PEUT ETRE TENU RESPONSABLE DE LA MAUVAISE UTILISATION DE L’APPAREIL.

- page 4 -
In case of servicing, for your security, always unplug the water cooler to avoid any risk of injuries or elec-
tric shocks. Never place your fingers or any metal objects inside the water cooler. Doing so may damage
the cooler and also increase the risk of electric shocks.
TRANSPORT
The water cooler must be transported, stocked and carried in a vertical position to avoid any oil leak from the
compressor into the cooling system. If this does happen, keep the water cooler in a vertical position during at least
24h before setting it up.
STORAGE
Keep the water cooler away from direct sunlight, from radiators and avoid any location exposed to spatters from
industrial shop, etc… The water cooler must be installed in the best hygiene and use conditions: choose a well-
ventilated location away from direct sunlight and any spatters and regularly maintained. Keep a free space bet-
ween the water cooler and the wall for a perfect cooling of the appliance.
Keep the water cooler indoors and away from damp environments. Do not store explosive substances such as
aerosol cans with a flammable propellant in this appliance.
Never attempt to move or unplug the appliance by pulling on the power cable.
INSTALLATION
The installation and maintenance operations have to be only realized by qualified persons. Please, contact your
department or the company which is in charge of the servicing.
Before setting up the water cooler, a 220 Volt plug with a 10 A circuit breaker has to be located at the left or at the
right near the water cooler.
WARNING: To avoid a hazard due to instability of the appliance, it must be fixed in accordance with the instruc-
tions.
USE
This appliance can used by children aged from 8 years and above and persons with reduced physical, sensory or
mental capabilities or lack of experience and knowledge if they have been given supervision or instruction concer-
ning use of the appliance in a safe way and understand the hazards involved. Children shall not play with the
appliance. Cleaning and user maintenance shall not be made by children without supervision .
If the power cable is damaged, it must be replaced by a special cable available from the manufacturer or its servi-
ce agent. This appliance is intended to be used in household and similar applications such as staff kitchen areas
in shops, offices and other working environments, farm houses and by clients in hotels, motels and other residen-
tial type environments, bed and breakfast type environments, catering and similar non-retail applications.
HOT WATER SAFETY
For hot water versions, we recommend you to use a cup adapted to receive hot water, place the cup in the center
of the distribution without holding it during the flow. Press the button continuously until the cup is full, only one cup
at a time
SERVICING
To ensure the longevity of the Mistral’s cooler, we recommend a minimum of 2 servicings per year. Those mainte-
nance operations have to be made by a qualified technician who realizes the outside and inside cleaning of the
machine in order to sanitize and discale it. Please, contact your department or the company which is in charge of
the servicing.
NOTES ON ENVIRONMENTAL PROTECTION
This product may be at the end of his life rather than the normal household waste will be sonderm at a collection
point for the recycling of electrical and electronic equipment will be delivered.
The symbol on the product, the instruction manual or packaging recalls. The materials are recycled, ac-
cording to their identification. With the reuse of recycling or other forms of recovery of waste afford an
important contribution to protect our environment. Please ask at the municipal disposal of the competent
authority. This making indicates that this product should not be disposed with other household wastes
troughout the EU. To prevent possible harm to the environment or human health from uncontrolled waste disposal,
recycle it responsibly to promote the sustainable reuse of material resources. To return your used device, please
use the return and collection system or contact the retailer where the product was purchased. They can take this
product for environmental safe recycling.
WEEE: our materials are covert by the Reglementation of WEEE (2002/96/EC).
HEALTH STANDARDS ROHS
All machines manufactured by Mistral Constructeur comply with EC Regulation (2002/95/EC) on the restriction of
use of certain hazardous substances in electrical and electronic equipment (RoHS).
MANUFACTURER WARRANTY
Mistral Constructeur guarantees the cooling unit during 2 years and spare parts during 1 year.
THE MANUFACTURER IS NOT RESPONSIBLE FOR ANY DAMAGE RESULTING FROM MISUSE OF THE WATER COOLER.

- page 5 -
1. Pousser le verrou situé sur le haut de la fontaine pour l’ouvrir (figure 1).
2. Retirer le kit d’hygiène de son emballage et mettre les gants pour garantir l’hygiène (figure 2).
3. Insérer le kit d’hygiène dans le sas de réfrigération (figure 3).
4. Avant d’introduire le réceptacle, positionner les 2 tuyaux d’eau vers les distributions. Introduire
l’encoche du réceptacle dans l’encoche de droite du support du kit (figure 4).
Version eau froide / eau tempérée
5. Presser le robinet « eau froide » tout en introduisant le tuyau « eau froide » (embout bleu) dans
la sortie de distribution (figure 5).
6. Puis pincer le tuyau afin de l’insérer sous les encoches. IMPORTANT : positionner bien les
encoches sur la partie lisse du tube et non sur la partie ondulée. Répéter l’opération pour le
tuyau « eau tempérée » (embout blanc transparent) (figure 6).
7. Refermer le capot.
8. Enlever l’opercule du bouchon de la bonbonne d’eau (figure 7).
9. Mettre en place la bonbonne le plus verticalement possible pour ne pas endommager le récep-
tacle (figure 8).
10. Presser sur chaque robinet pour amorcer l’eau dans les tuyaux jusqu’à écoulement (figure 9).
11. Brancher la prise électrique de la fontaine.
figure 1 figure 2 figure 3 figure 4
figure 5 figure 6 figure 7 figure 8 figure 9

- page 6 -
1. Push the lock located on the top of the water cooler to open it (figure 1).
2. Remove the hygiene kit from its packing and put on the gloves to ensure hygiene (figure 2).
3. Insert the hygiene kit into the cooling room (figure 3).
4. Before inserting the receptable, place the 2 tubes towards the distributions. Insert the recepta-
ble’s notch in the right kit support’s notch (figure 4).
5. Press the cold water tap, while inserting the « cold water » tube (blue nozzle) inside the water
distribution (figure 5).
6. Then, pinch the tube in order to insert it below the notches. CAUTION: Place the notches on
the smooth part of the tube and not on the undulating part. Make sure that the tube is not
pinched. Repeat the operation for the « cook water » tube (white nozzle) (figure 6).
7. Close the top of the water cooler.
8. Remove the protecting cap of the bottle (figure 7).
9. Place the bottle as straight as possible not to avoid damaging the receptacle (figure 8).
10. Press on each tap to initiate the water inside the tubes until flowing (figure 9).
11. Switch on the water cooler.
figure 1 figure 2 figure 3 figure 4
figure 5 figure 6 figure 7 figure 8 figure 9
Cold / cook water version

- page 7 -
1. Pousser le verrou situé sur le haut de la fontaine pour l’ouvrir (figure 1).
2. Retirer le kit d’hygiène de son emballage et mettre les gants pour garantir l’hygiène du réservoir
(figure 2).
3. Prendre l’adaptateur eau chaude et détacher le bouchon (figure 3).
4. Enlever le tuyau avec l’embout blanc et mettre le bouchon à la place sur le kit pour boucher
l’orifice (figure 4).
5. Retirer le réceptacle du kit et emboiter l’adaptateur « eau chaude » sur le réceptacle en veillant
bien à l’orientation (figure 5).
6. Remettre le réceptacle + l’adaptateur « eau chaude » sur le kit. Enfoncer le bien jusqu’à ressen-
tir le « clic ». Le tuyau embout bleu doit se trouver sur la droite, filtre à air positionné vers l’arriè-
re (figure 6).
7. Avant d’introduire le réceptacle, positionner le tuyau avec l’embout bleu à droite et le filtre à air
orienté vers l’arrière. Introduire les encoches du réceptacle dans les celles du support du kit, et
l’adaptateur eau chaude dans le manchon en silicone prévu à cet effet (figure 7 et 8).
8. Presser le robinet « eau froide » tout en introduisant le tuyau « eau froide » (embout bleu) dans
la sortie de distribution de droite.
9. Puis pincer le tuyau afin de l’insérer sous les encoches. IMPORTANT : positionner bien les
encoches sur la partie lisse du tube et non sur la partie ondulée.
10. Refermer le capot.
11. Enlever l’opercule du bouchon de la bonbonne d’eau.
12. Mettre en place la bonbonne le plus verticalement possible pour ne pas endommager le récep-
tacle.
13. Presser sur chaque robinet pour amorcer l’eau dans les tuyaux jusqu’à écoulement.
14. Brancher la prise électrique de la fontaine.
15. Appuyer sur l’interrupteur (I) du chauffe-eau situé sur le coté gauche de la fontaine.
Version eau froide / eau chaude
Adaptateur eau chaude
figure 1 figure 2 figure 3 figure 4
figure 5 figure 6 figure 7 figure 8

- page 8 -
Cold / hot water version
1. Push the lock located on the top of the water cooler to open it (figure 1).
2. Remove the hygiene kit from its packing and put on the gloves to ensure hygiene (figure 2).
3. Take the hot water adaptor and disconnect the cap.
4. Remove the white nozzle tube and place the cap on the pipe hole (figure 4).
5. Remove the receptacle from the kit and insert it on the hot water adaptor respecting the right
direction (figure 5).
6. Replace the receptacle + hot water adaptor in the kit. Push it until you feel the "click". The blue
nozzle tube must be place on the right when the air filter is positionning towards rear(figure 6).
7. Before insert the receptacle, place the blue nozzle tube towards right and the air filter towards
rear. Insert the receptacle’s notches inside those of the kit’s bracket, and the hot water adaptor
inside the silicone adaptor (figure 7 and 8).
8. Press the cold water tap, while inserting the « cold water » tube (blue nozzle) inside the right
distribution (figure 5).
9. Then, pinch the tube in order to insert it below the notches. CAUTION: Place the notches on the
smooth part of the tube and not on the undulating part. Make sure that the tube is not pinched.
10. Close the top of the water cooler.
11. Remove the protecting cap of the bottle (figure 7).
12. Place the bottle as straight as possible not to avoid damaging the receptacle.
13. Press on each tap to initiate the water inside the tubes until flowing.
14. Switch on the water cooler.
15. Press on the ON-OFF button of the heater, located at the left of the cooler.
figure 1 figure 2 figure 3 figure 4
figure 5 figure 6 figure 7 figure 8
Hot water adaptor

- page 9 -
En tant que fabricant nous préconisons un changement de l’ensemble des pièces en contact
avec l’eau, tous les 3 mois, pour garantir une hygiène optimale de la fontaine.
1. Débrancher la prise électrique de la fontaine.
2. Retirer la bonbonne d’eau.
3. Appuyer sur les robinets pour vider l’eau présente dans le réservoir.
4. Pousser le verrou situé sur le haut de la fontaine pour l’ouvrir.
5. Presser sur les robinets pour sortir les tuyaux de leur logement.
6. Retirer le kit d’hygiène de la fontaine.
7. Procéder au changement du kit d’hygiène.
Changement du kit d’hygiène
En tant que fabricant nous préconisons un détartrage du chauffe-eau une fois par an pour
garantir la longévité de votre matériel.
1. Appuyer sur l’interrupteur du chauffe-eau situé à l’arrière de la fontaine et débrancher la prise
électrique (figure 1).
2. Retirer la bonbonne (figure 2).
3. Prendre 1 récipient d’une contenance minimum de 2L (figure 4) et placer-le sous le bouchon de
vidange situé au dos de la fontaine. Dévisser le bouchon de vidange (+ capuchon rouge) et
vider environ 20cl. ATTENTION : l’eau est très chaude, risque de brûlure.
4. Remettre le bouchon de vidange sans oublier le capuchon rouge.
5. Ouvrir le capot (figure 3) et retirer l’adaptateur eau-chaude de son logement en tirant sur le
réceptacle (figure 5). Disposer un entonnoir à la place (figure 6).
6. Préparer 20 cl de solution détartrante diluée et verser la préparation dans le chauffe-eau
via l’entonnoir. Laisser agir environ 5 minutes.
7. Dévisser le bouchon de vidange (+ capuchon rouge) et laisser l’eau du chauffe-eau s’évacuer
complètement. Une fois l’opération terminée, remettre le bouchon et le capuchon rouge en pla-
ce.
8. Changer le kit d’hygiène, refermer le capot et remettre la bonbonne d’eau sur la fontaine.
9. Via les robinets de distribution, soutirer 2 litres d’eau pour rincer.
10. Brancher la prise électrique de la fontaine et appuyer sur l’interrupteur du chauffe-eau pour le
mettre en fonctionnement.
Détartrage du chauffe-eau
figure 1 figure 2 figure 3 figure 4 figure 5 figure 6

- page 10 -
HYGIENE KIT REPLACEMENT (operation to be made every 3 months)
1. Disconnect the power cable of the water cooler.
2. Remove the bottle.
3. Press on the cold tap to empty the water inside the reservoir.
4. Push the lock located on the cooler’s top to open the water cooler.
5. Press on the distribution taps to remove the tubes from their location.
6. Remove the hygiene kit.
7. Replace the hygiene kit.
Hygiene kit replacement
As manufacturer we recommend a discaling of water-heater once a year to ensure the mate-
riel’s life.
1. Press on the ON-OFF button to switch off the water-heater and disconnect the power cable of
the machine (figure 1).
2. Remove the bottle (figure 2).
3. Take a 2L bucket (figure 4) & place it under the draining cap of the water heater located behind
the cooler. Unscrew the draining cap (+ remove the red cap) and empty a cup of 20cl.
CAUTION : Burn Hazard - The water is extremely hot.
4. Replace de draining cap without forget the red cap.
5. Open the top panel (figure 3) & remove the hot adaptor of the hygiene kit by pulling on the re-
ceptacle(figure 5). Put a funnel on adaptor’s place (figure 6).
6. Prepare 20cl of descaling solution diluted with water and pour the preparation in the water
heater via the funnel. Wait around 5 minutes.
7. Unscrew the draining cap (+ remove the red cap) and empty the water heater. Then replace the
two draining caps.
8. Install a new hygiene kit, close the top panel & replace the bottle.
9. Via the distribution, flush around 2 liters by pressing on the hot water tap.
10. Reconnect the water cooler and switch on the water heater’s button.
Water-heater discaling
figure 1 figure 2 figure 3 figure 4 figure 5 figure 6

- page 11 -
INSTALLATION DES SUPPORTS MURAUX DE STABILISATION
STABILIZING WALL BRACKET INSTRUCTIONS
1. Retirer les 2 vis fixées à l’arrière de la fontaine, sur la carrosserie extérieure.
2. En positionnant les supports en forme de « S » contre la fontaine (figure 1), remettre les vis afin
de fixer les supports à la fontaine.
3. Placer la fontaine contre un mur et utiliser les supports en forme de « S » pour définir l’emplace-
ment exact des trous à faire dans le mur (si nécessaire).
1. Remove the 2 mounting screws that secure the upper support to the external part of the body.
2. While holding the « S » shaped bracket against the cooler (figure 1), put back the screws to fix
the supports on the cooler.
3. Place the cooler against the wall and use the « S » shape supports to mark the exact location of
the wall insert holes (if required).
If not required, secure the cooler to the wall using the 2 screws provided.

- page 12 -
MistralConstructeur-Toutereproductionestinterdite-
D
ocu
m
entnoncontractuel

- page 13 -
NOTES
————————————————————————————————————————————
————————————————————————————————————————————
————————————————————————————————————————————
————————————————————————————————————————————
————————————————————————————————————————————
————————————————————————————————————————————
————————————————————————————————————————————
————————————————————————————————————————————
————————————————————————————————————————————
————————————————————————————————————————————
————————————————————————————————————————————
————————————————————————————————————————————
————————————————————————————————————————————
————————————————————————————————————————————
————————————————————————————————————————————
————————————————————————————————————————————
————————————————————————————————————————————
————————————————————————————————————————————
————————————————————————————————————————————
————————————————————————————————————————————
————————————————————————————————————————————
————————————————————————————————————————————
————————————————————————————————————————————
————————————————————————————————————————————
————————————————————————————————————————————
————————————————————————————————————————————
————————————————————————————————————————————
————————————————————————————————————————————
————————————————————————————————————————————
————————————————————————————————————————————
————————————————————————————————————————————
————————————————————————————————————————————
————————————————————————————————————————————
————————————————————————————————————————————
————————————————————————————————————————————
————————————————————————————————————————————
————————————————————————————————————————————
————————————————————————————————————————————
————————————————————————————————————————————
————————————————————————————————————————————
————————————————————————————————————————————
————————————————————————————————————————————
————————————————————————————————————————————
————————————————————————————————————————————
————————————————————————————————————————————
————————————————————————————————————————————
————————————————————————————————————————————
————————————————————————————————————————————
————————————————————————————————————————————
————————————————————————————————————————————
————————————————————————————————————————————

- page 14 -
NOTES
————————————————————————————————————————————
————————————————————————————————————————————
————————————————————————————————————————————
————————————————————————————————————————————
————————————————————————————————————————————
————————————————————————————————————————————
————————————————————————————————————————————
————————————————————————————————————————————
————————————————————————————————————————————
————————————————————————————————————————————
————————————————————————————————————————————
————————————————————————————————————————————
————————————————————————————————————————————
————————————————————————————————————————————
————————————————————————————————————————————
————————————————————————————————————————————
————————————————————————————————————————————
————————————————————————————————————————————
————————————————————————————————————————————
————————————————————————————————————————————
————————————————————————————————————————————
————————————————————————————————————————————
————————————————————————————————————————————
————————————————————————————————————————————
————————————————————————————————————————————
————————————————————————————————————————————
————————————————————————————————————————————
————————————————————————————————————————————
————————————————————————————————————————————
————————————————————————————————————————————
————————————————————————————————————————————
————————————————————————————————————————————
————————————————————————————————————————————
————————————————————————————————————————————
————————————————————————————————————————————
————————————————————————————————————————————
————————————————————————————————————————————
————————————————————————————————————————————
————————————————————————————————————————————
————————————————————————————————————————————
————————————————————————————————————————————
————————————————————————————————————————————
————————————————————————————————————————————
————————————————————————————————————————————
————————————————————————————————————————————
————————————————————————————————————————————
————————————————————————————————————————————
————————————————————————————————————————————
————————————————————————————————————————————
————————————————————————————————————————————
————————————————————————————————————————————

- page 15 -
Production d’eau froide
Coldwaterproduction
10 litres/h
2U
S
gallons/h
Production d’eau chaude
Hot waterproduction
60 verres/h
60 glasses/h
Température d’entrée d’eau
Waterinlettemperature
25/30 C°
77/86 F°
Température sortie d’eau froide
Coldoutlettemperature
4/10 C°
39/50 F°
Température sortie d’eau chaude
Hot outlettemperature
75/80° C°
167/176 F°
Température ambiante
R
oom temperature
25 C°
77 F°
Capacité réservoir
R
eservoircapacity
1,6litres
0,4U
S
gallons/h
Compresseur hermétique
Hermetic compressor
1/8 CH
Chauffe-eauinox
S
tainless steelwaterheater
1,1
L
Absorption nominaleaufroide
Coldwaterratedinput
80 W
Absorption nominaleauchaude
Hot waterratedinput
450 W
Alimentation
Powersupply
220V /50Hz-60Hz
Dimensionsemballage
Packing dimensions
340x340x1060 mm
Dimensionsmachine
Machinedimensions
Diam.240 mm xH.1017 mm
Diam.Base320 mm
Poidsnet
Netweight
FBF2.0:13 kg
FBM2.0:14 kg
Poidsbrut
Gross weight
FBF2.0:15 kg
FBM2.0:16 kg
ChargeHFC-
R
134A /
R
600A 30 g/18 g
Bruit
Noise
45dB
Bonbonnes d’eau compatibles
Acceptedwaterbottles
18,9litres/12 litres/10 litres

- page 16 -
Connectez-voussurvotreextranet
R
evendeuretretrouveztouteslesinfor
m
ationstechniquesde
l’ensemble des fontaines :
Connectyouto Mistralresellerarea and find all technicalinfor
m
ationsaboutcoolers
http://www.mistralcoolers.com/fr/portail-distributeur/
Retrouvez toute l’actualité de Mistral sur :
All newsaboutMistral
Suivez-nous / Follow us
Distributeur agréé Mistral / Mistral’s Reseller
This manual suits for next models
1
Table of contents
Languages:
Other Mistral Water Dispenser manuals
Popular Water Dispenser manuals by other brands

Orbegozo
Orbegozo DA 5650 instruction manual

Omnifilter
Omnifilter R800 installation instructions

vitapur
vitapur Classic VWD5276BLK Specification sheet

Hamilton Beach
Hamilton Beach HBWC114-SSWH instruction manual

Aquaport
Aquaport AQP-3TAP-SS Installation & operating instructions

Quooker
Quooker Scale Control Plus installation guide

Mojo
Mojo Frost M1-22 Operation manual

Kenmore
Kenmore 625.34842 owner's manual

Modena
Modena Sottile Series User manual book

resideo
resideo Braukmann KaltecSoft KS10S installation instructions

Everpure
Everpure Water Filter and Cartridge QL2-OW200L Installation and operation guide

Omnifilter
Omnifilter BF9C installation instructions