Mitek VAPR II User manual

User Manual
English
GYRUS P/N:
126063-HC
P/N: 103097
Rev: N Revised 11/2014
© 2004-2014 DePuy Mitek

User Manual
English
This user’s guide will familiarize you with the controls and output functions available from your
DePuy Mitek VAPR System and instruct you on the proper use of the equipment. Review
this manual thoroughly before installation and use of the VAPR System. Please also read,
understand and follow all cautions and warnings in this manual and those included in the
Instructions for Use included with the VAPR System accessories. Additional information,
training and product servicing are available from DePuy Mitek.
The information contained in this manual is based upon the most current information available
at the time of printing. DePuy Mitek reserves the right to update the equipment and its
operation without notice.
The entire content of this manual is the property of DePuy Mitek and is protected by all
relevant copyright laws. Do not reproduce any portion of this manual, in any form, without
express written approval of DePuy Mitek.
Worldwide Patents pending.
GYRUS P/N:
126063-HC
P/N: 103097
Rev: N Revised 11/2014
© 2004-2014 DePuy Mitek

This manual covers both the VAPR II and VAPR 3
System. Except where otherwise indicated, the
instructions for use apply to both systems.

1 INtRodUCtIoN
Background....................................................................................................................1-1
Comparison to Conventional Electrosurgery .................................................................1-1
System Description........................................................................................................1-2
Principle of Operation ....................................................................................................1-3
2 INdICatIoNS foR USe, CoNtRaINdICatIoNS
Indications for Use .........................................................................................................2-1
Contraindications ...........................................................................................................2-1
3 SafetY
Operating Personnel......................................................................................................3-1
Fire/Explosion Warnings ................................................................................................3-1
Electrical Safety Considerations ....................................................................................3-1
EMC Precautions...........................................................................................................3-2
Electrosurgical Smoke Caution......................................................................................3-2
Prior to Surgery..............................................................................................................3-2
During Surgery...............................................................................................................3-3
After Surgery..................................................................................................................3-4
4 SYStem deSCRIPtIoN
VAPR Generator ............................................................................................................4-1
Output Modes ................................................................................................................4-1
Generator Controls and Displays...................................................................................4-3
Front Panel Display Symbols.........................................................................................4-4
Footswitch......................................................................................................................4-5
VAPR Electrodes ...........................................................................................................4-8
VAPR Handpiece and Cable........................................................................................4-10
5 INStRUCtIoNS foR USe
System Installation.........................................................................................................5-1
System Setup and Use During Surgery.........................................................................5-2
Using VAPR TC Electrodes ...........................................................................................5-4
Adjusting the Tone Volume ............................................................................................5-4
Adjusting the Footswitch/Handpiece Option (VAPR II ONLY)........................................5-4
Changing Electrodes During Surgery ............................................................................5-5
Use of suction Electrodes ..............................................................................................5-6
After Surgery..................................................................................................................5-6
6 CleaNING aNd SteRIlIzatIoN PRoCedUReS
Cleaning the Generator..................................................................................................6-1
Cleaning the Footswitch.................................................................................................6-1
Cleaning and Sterilizing the VAPR Handpiece and Cable.............................................6-1
Steam Sterilization Procedure .......................................................................................6-1
7 PeRIodIC maINteNaNCe INSPeCtIoN
...........................................................................7-1
8 eRRoR aNd faUlt SYmbolS, tRoUbleSHootING GUIde
Error and Fault Symbol Interpretation ...........................................................................8-1
Error Symbols ................................................................................................................8-1
Fault Symbols ................................................................................................................8-1
Troubleshooting Guide...................................................................................................8-4
aPPeNdIx a, teCHNICal SPeCIfICatIoNS
...........................................................................A-1
aPPeNdIx b, emC table
...................................................................................................B-1
WaRRaNtY
TABLE OF CONTENTS

INtRodUCtIoN
1-1
Section 1
IntroductIon
BACKGROUND
Arthroscopy relates to the use of an arthroscope to visualize the joint space. A variety of
instruments specifically designed for arthroscopic use may be introduced through separate
puncture sites, employing the technique of triangulation, in order to perform various surgical
procedures within the joint space.
Arthroscopic instruments have been developed to provide specific functions such as tissue
removal, cutting, shaping and coagulation. Until recently, these instruments have broadly taken
one of three forms; manual instruments, powered instruments, and electrosurgical instruments,
each with respective merits and limitations. As a result, it is common practice to employ a
combination of instruments during an arthroscopic procedure.
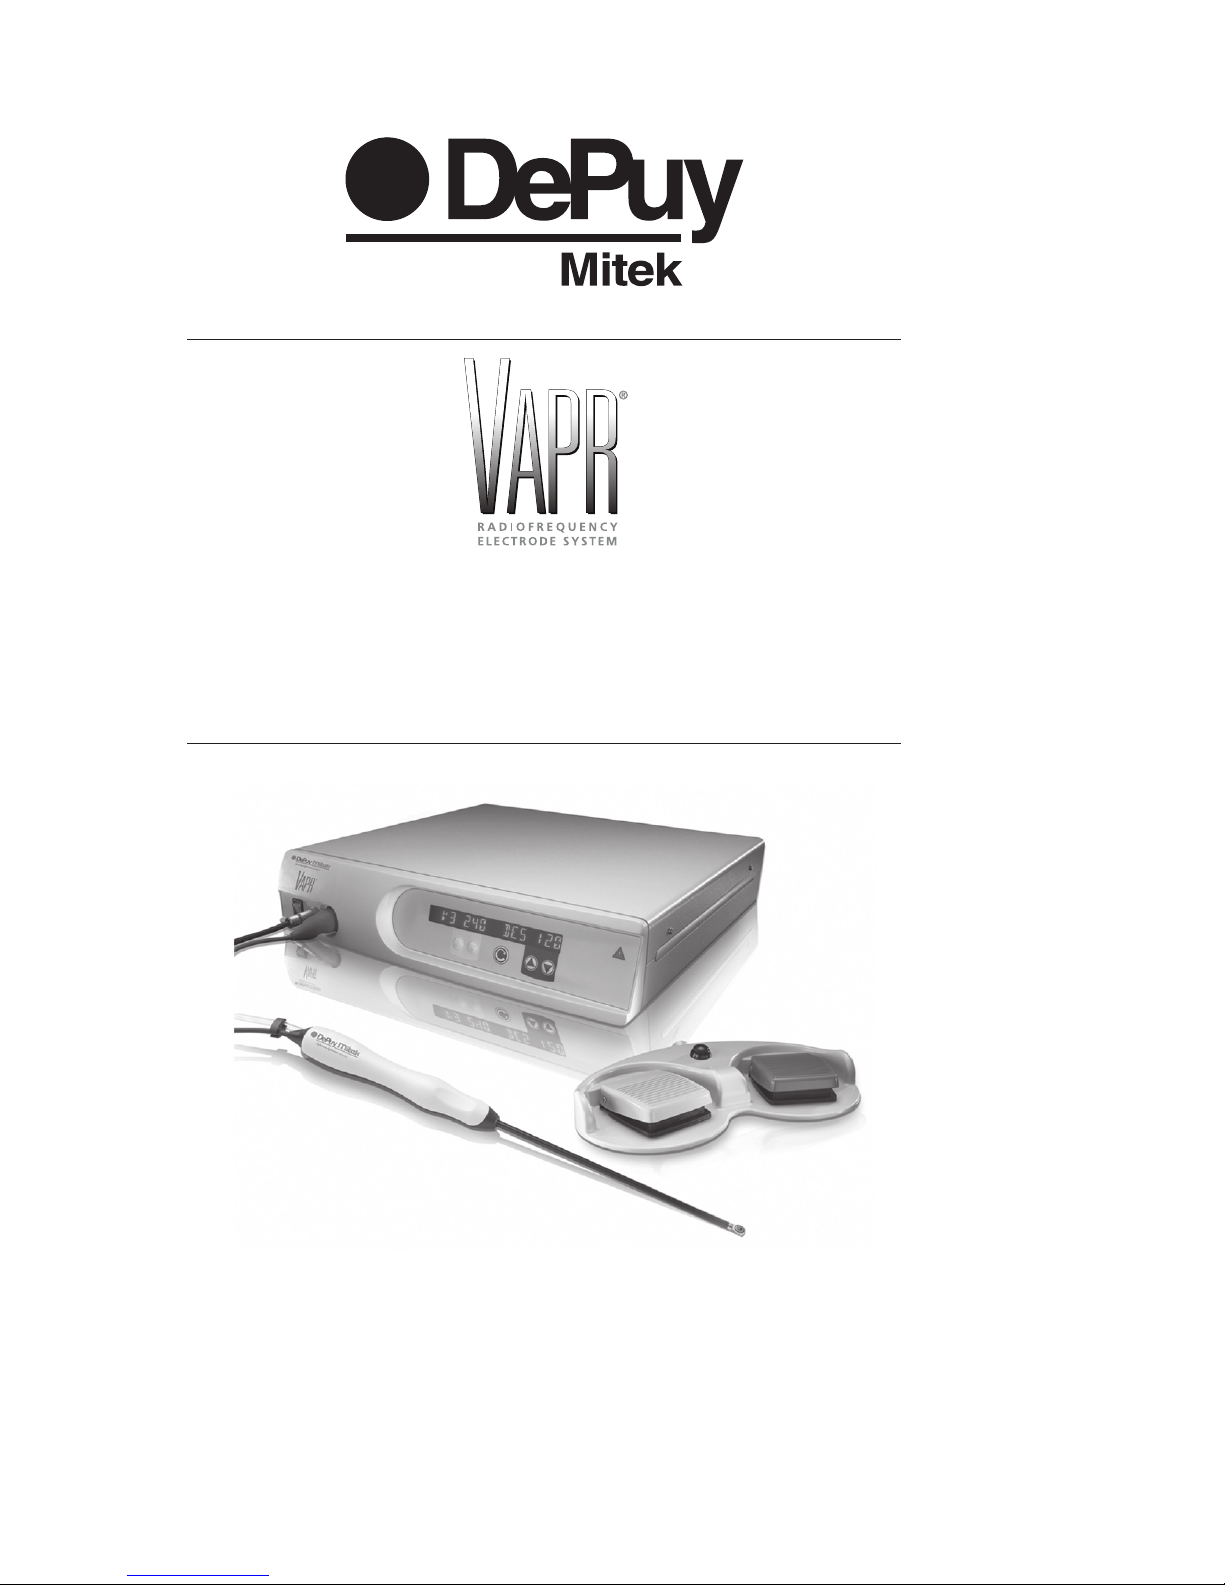
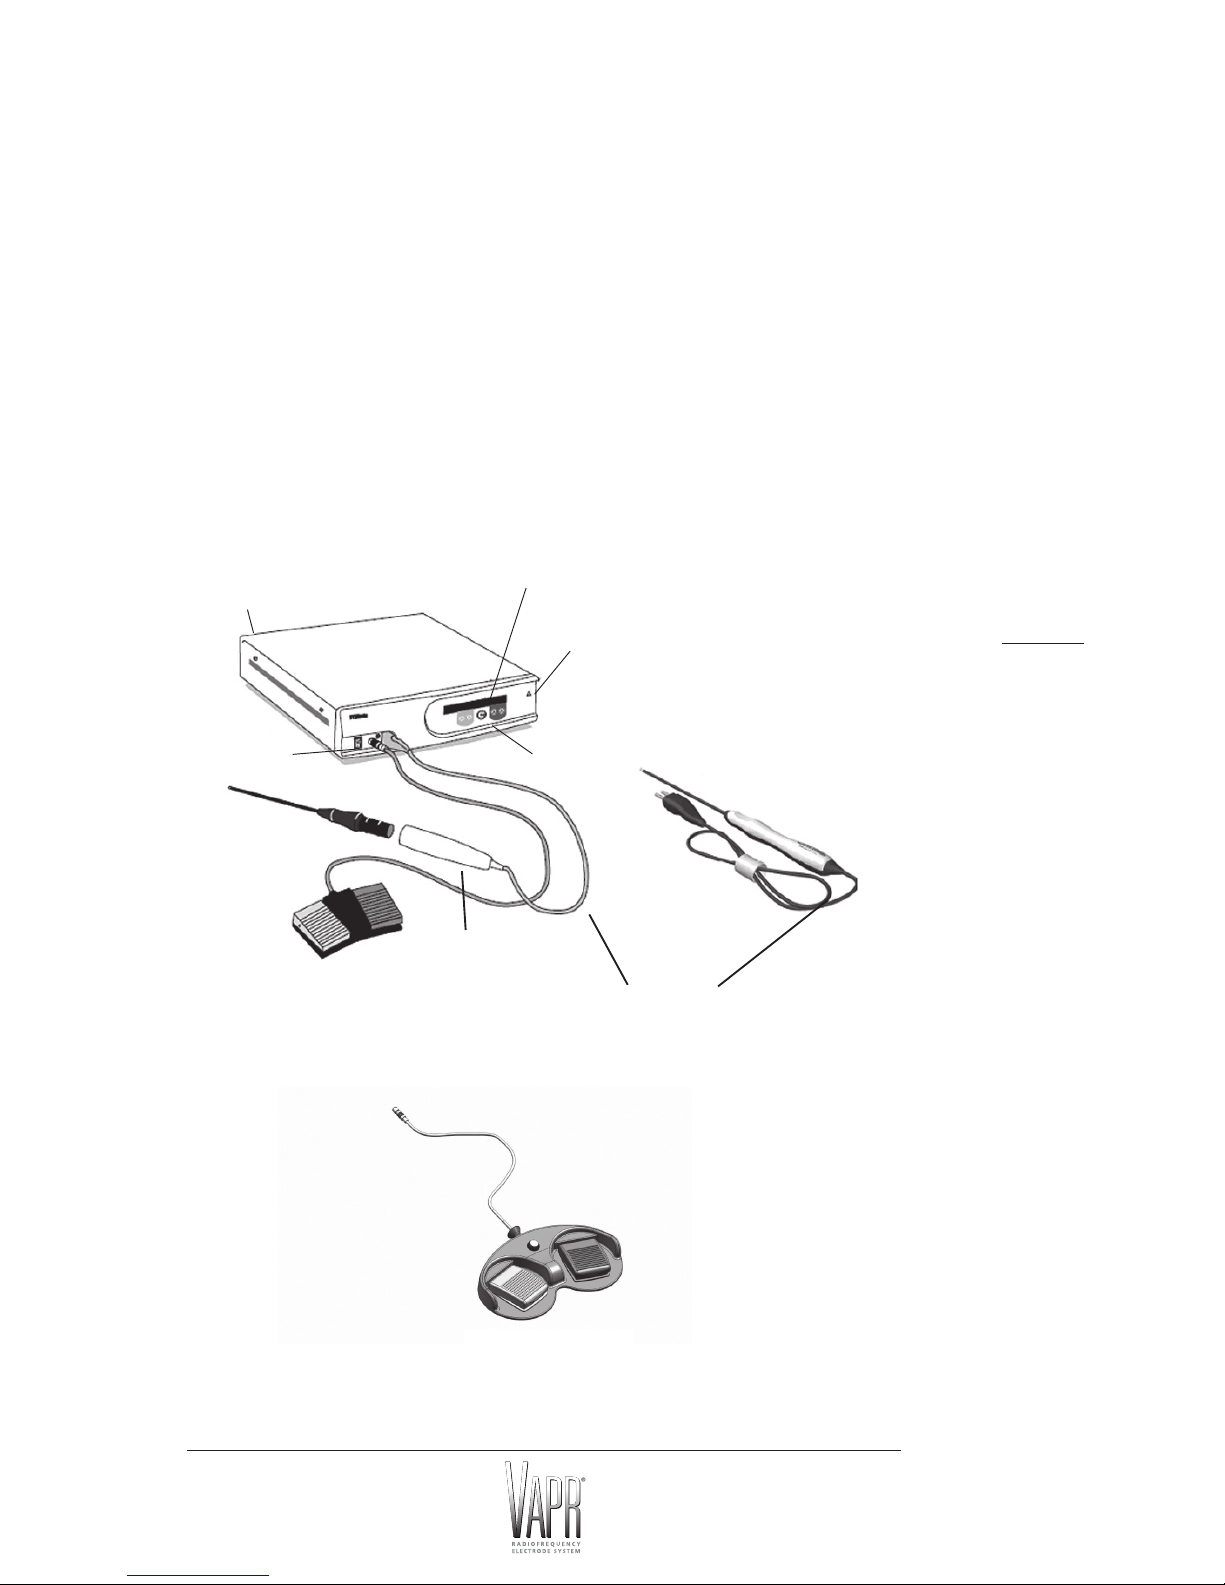
The DePuy Mitek VAPR System represents a new and versatile approach to arthroscopy.
Based on an innovative form of bipolar electrosurgery, the VAPR System has been specifically
designed to provide a range of arthroscopic surgical modalities including soft tissue ablation
(electro-vaporization), contouring, cutting and coagulation and temperature indication.
COMPARISON TO CONVENTIONAL ELECTROSURGERY
Conventional electrosurgical systems deliver high frequency electrical current through tissue
for the purposes of tissue cutting or hemostasis of blood vessels. Monopolar electrosurgery
utilizes an “active” electrode located on the surgical instrument and a separate “return”
electrode applied to the patient. Current flow is from the active electrode, through the patient to
the return electrode. Bipolar electrosurgery differs in that both the active and return electrodes
are located on the surgical instrument, thus minimizing the amount of tissue involved in the
electrical circuit.
Problems potentially encountered when using conventional bipolar electrosurgery include
limited power delivery and visualization of the working tip, tissue sticking, and dependence
upon proper electrode-to-tissue orientation. Additionally, conventional bipolar electrodes do not
operate effectively while immersed in conductive irrigating solutions used in arthroscopy, such
as normal saline or Ringer’s lactate.
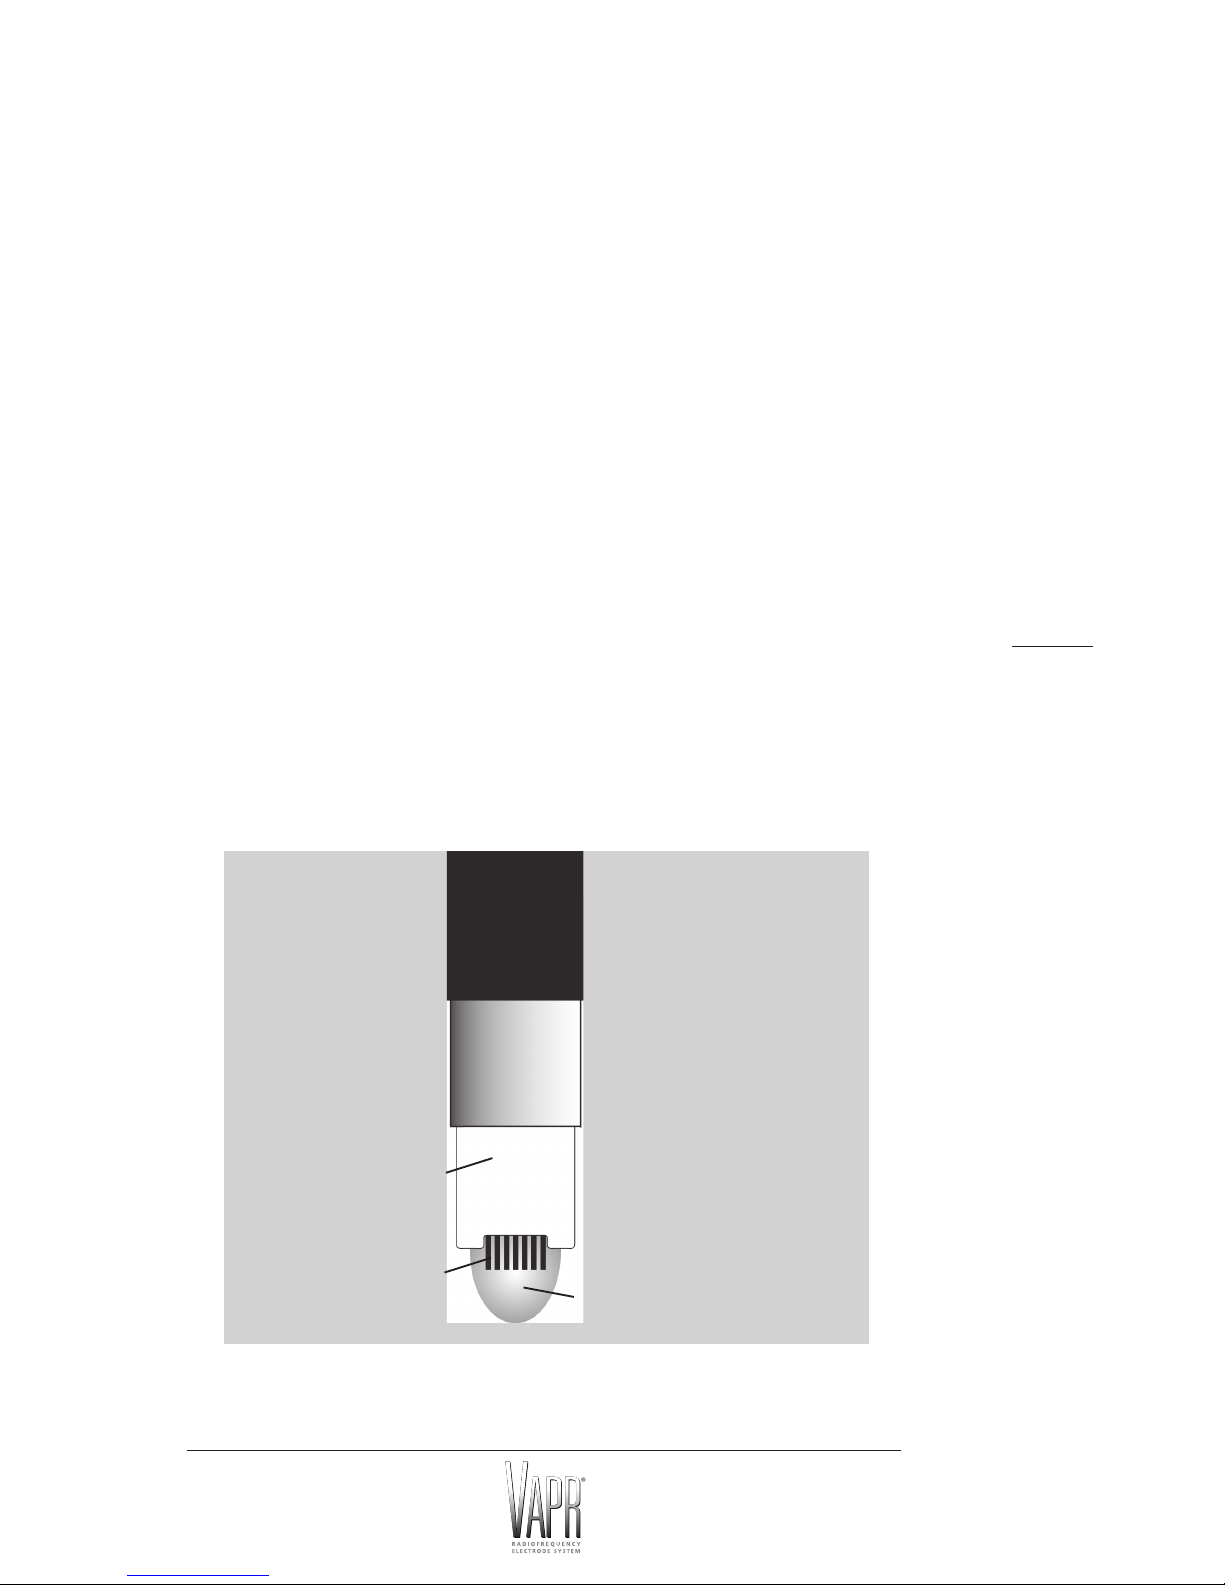
In contrast, VAPR bipolar electrosurgery Electrodes are specifically designed to function in
conductive irrigating solutions. The VAPR “return” electrode is mounted on the shaft of the
instrument and does not have to be oriented to be in contact with tissue during use. This
eliminates the need for a separate patient ground electrode. Additionally, since only the tissue
that is in contact with the active electrode is involved in the electrical circuit, the recognized
safety features of bipolar electrosurgery are preserved.

SYSTEM DESCRIPTION
The VAPR System is designed to provide soft tissue ablation (vaporization), contouring, cutting
and hemostasis of blood vessels during arthroscopic surgical procedures.
The components of the DePuy Mitek VAPR System (FIGURE 1) are individually described in
Section 4 of this manual:
• VAPR Generator
• VAPR Handpiece and Cable
• VAPR Electrodes
• VAPR, VAPR 3 Footswitch
• Power Cord (not provided)
Use only the DePuy Mitek Handpiece and Electrodes with this System.
fIGURe 1
INtRodUCtIoN
1-2
AC POWER INPUT
16 Character User
Display
Fault
Indicator
Control Panel
Connector Cable
Handpiece
Assembly
Electrode
VAPR Footswitch
On/Off
Switch
Generator
VAPR 3 FOOTSWITCH
Electrode with
Integrated Cable

PRINCIPLE OF OPERATION
The VAPR System offers four bipolar modes of operation: Vaporization, Desiccation, Blended
Vaporization and desiccation with temperature indication.
• In the Vaporization mode of operation, high frequency power is delivered from the
VAPR Generator to the Electrode tip. At specific threshold power levels, a vapor
pocket, characterized by an orange glow, is created around the active electrode. Arcs
within the vapor pocket produce vaporization of tissue entering the vapor pocket.
• The Vaporization power threshold for a particular VAPR Electrode is automatically set
as a default by connecting the Electrode, via the Handpiece, to the Generator. The
default setting for each Electrode type is the optimal power required to produce the
desired tissue effect. As an inherent safety feature, the VAPR System is designed to
minimize the power required to sustain the vapor pocket around the active electrode.
• In the Desiccation mode of operation, the VAPR Generator delivers high frequency
power to the active electrode to cause tissue desiccation and coagulation without
sparking or cutting. The Desiccation power level is also automatically set as a default
for each style of Electrode.
• The Blended Vaporization mode of operation provides tissue vaporization combined
with hemostasis. Certain Electrode styles will automatically default to a Blended
Vaporization mode.
• In the Desiccation Mode with temperature indication (only available with the
VAPR Temperature Control (TC) electrodes), the tip temperature is set as a default,
along with a power level. The VAPR System will monitor the actual tip temperature
while activating, automatically adjusting the power to maintain the tip temperature at
the set temperature.
NOTE
The Temperature Control system will only automatically adjust the power up to the limit of the
current displayed desiccate power level.
fIGURe 2
INtRodUCtIoN
1-3
electrode shaft
return
electrode
insulator
active tip
electrode
vapor pocket

INdICatIoNS
foR USe,
CoNtRaINdICatIoNS
2-1
Section 2
IndIcAtIons
For use,
contrAIndIcAtIons
INDICATIONS FOR USE
The DePuy Mitek VAPR System is intended for resection, ablation and excision of soft tissue,
and hemostasis of blood vessels in patients requiring arthroscopic surgery of the knee, shoulder,
ankle, elbow and wrist. Arthroscopic surgery could include, for example, the following:
CONTRAINDICATIONS
The DePuy Mitek VAPR System is contraindicated in any non-arthroscopic surgical procedure
and in procedures where saline or Ringer’s lactate is not used as an irrigant. The System is
also not appropriate for patients for whom an arthroscopic procedure is contraindicated for any
reason. Use of the System is also contraindicated in patients with heart pacemakers or other
electronic device implants.
Knee
Meniscectomy
Lateral Release
Chondroplasty
Synovectomy
ACL Debridement
Plica Removal
Meniscal Cystectomy
Ankle
Fracture Debridement
Excision of Scar Tissue
Synovectomy
Chondroplasty
Wrist
Synovectomy
Cartilage Debridement
Fracture Debridement
Shoulder
Labral Tear Resection
Synovectomy
Excision of Scar Tissue
Acromioplasty
Bursectomy
Subacromial Decompression
Chondroplasty
Elbow
Synovectomy
Tendon Debridement
Chondroplasty

SafetY
3-1
Section 3
sAFety
OPERATING PERSONNEL
The surgeon using this device should:
• be trained in arthroscopic surgical procedures
• be aware of the risks associated with those procedures
• have current knowledge of technological advances in surgical products and techniques.
WARNING
Hazardous Electrical Output: This equipment is capable of producing a physiological effect and
is for use only by licensed physicians, trained in the use of this device.
WARNING
No modification to the equipment is allowed.
FIRE/EXPLOSION WARNINGS
• As with all electrosurgical devices, do not use in the presence of flammable anesthetics
or oxidizing gases, such as nitrous oxide, oxygen or endogenous gases which have
accumulated in body cavities. An electrosurgical device has the potential for providing
a source for ignition.
• Nonflammable substances should be used for cleaning and disinfecting. Use of
flammable substances, such as alcohol-based skin prepping agents and tinctures
should also be avoided.
• All oxygen connections must be leak free for the duration of the surgical procedure.
Pathways, such as endotracheal tubes, must be leak free and properly sealed to
prevent oxygen leaks.
• Electrosurgical accessories which are activated or hot from use can be a potential fire
hazard if placed near or in contact with flammable materials. Some materials, such as
gauze, cotton or wool, when saturated with flammable liquids, can be ignited by sparks
produced during the normal use of electrosurgical devices.
ELECTRICAL SAFETY CONSIDERATIONS
• Examine all accessories and connections to the VAPR Generator before use. Ensure
that the accessories function as intended. Improper connection may result in arcing,
sparking, or malfunction of the Electrode or Handpiece, any of which can result in an
unintended surgical effect, injury, or product damage.
• Unless specified in the instructions for use accompanying an approved VAPR
accessory, the VAPR System should only be activated with the working tip of the
electrode accessory completely immersed in 0.9% w/v; 150 mmol/l sodium chloride
or Ringer’s lactate solutions. For convenience, these will be referred to within the
remainder of this manual as normal saline or Ringer’s, respectively. Performance will
be suppressed by use of other irrigating solutions such as Glycine, Sorbitol, Dextrose,
Mannitol or other solutions containing a non-physiological concentration of electrolytes.

SafetY
3-2
EMC PRECAUTIONS
Medical electrical equipment needs special precautions regarding EMC and
needs to be installed and put into service according to the EMC information in the
accompanying documents.
WARNING
Portable and mobile RF communications equipment can affect medical electrical equipment.
WARNING
The use of accessories and cables other than those for which the system was designed can
significantly degrade emissions and immunity performance.
WARNING
Keep the accessory cables away from cables from other electrical equipment. Electrical currents
may be induced in the other equipment causing unintended effects.
WARNING
Do not use a monopolar generator/accessories simultaneously with the VAPR 3 generator.
Activation of a monopolar generator/accessories may cause interference with the VAPR 3
generator resulting in user message changes on the display. Before proceeding with surgery,
confirm proper power settings are displayed on the generator. Ensure the appropriate output
setting is enabled for the desired surgical outcome.
ELECTROSURGICAL SMOKE CAUTION
• Studies have shown that smoke generated during electrosurgical procedures can be
potentially harmful to surgical personnel. Use appropriate surgical masks or other
means of protection.
• It is recommended that a suitable extraction method is employed.
PRIOR TO SURGERY
Operator Safety Warnings
• Electric Shock Hazard: Do not connect wet accessories to the handpiece or generator.
Ensure that all accessories are securely and properly connected.
• Electric Shock Hazard: Do not remove or tamper with the Generator housing. Contact
DePuy Mitek technical service for assistance.
• The power cord must meet all requirements for safe grounding. Do not use extension
cords, multiple point plugs or 2 to 3 pronged adapters.
• Do not reuse or resterilize accessories labeled “SINGLE USE,” as malfunction, injury or
cross-infection may result.
• Non-function of the Workstation may cause interruption of surgery. Ensure that all
installation procedures are followed and all connectors are correctly inserted before
use. A backup system / method should be made available for use.
Operator Safety Cautions
• Inspect the insulation of all cords for cracks, nicks and breaks. Inspect all connectors
for damaged or missing parts.
• Use default power levels to test Electrode performance. Confirm proper default power
settings with package insert information before proceeding with surgery.
• Accessories labeled “REUSABLE” must only be processed according to the
recommended procedures provided in this manual.
• Provide as much distance as possible between the electrosurgical generator and other
electronic equipment (such as monitors) because an activated electrosurgical generator
may cause interference with them.

SafetY
3-3
DURING SURGERY
NOTE
For the purposes of safety procedures, and despite the absence of a conventional return pad, the
VAPR System should still be treated as a high power electrosurgical device.
WARNING
Failure of the HF surgical equipment could result in an unintended increase or decrease in output
power, change in output waveform characteristics or absence of electrosurgical output.
Operator Safety Warnings
• Observe extreme caution when using electrosurgery in close proximity to or in
direct contact with any metal objects. The majority of arthroscopes and arthroscopic
instruments are metal. Do not activate the electrode while any portion of the electrode
tip is in contact with another metal object; localized heating of the electrode and the
adjacent metal object may result in product damage.
• Do not wrap Handpiece, Footswitch or Generator power cord around metal objects.
Wrapping cables around metal objects may induce currents that could lead to shock,
fire or injury to patient or surgical personnel.
• During an electrosurgical procedure, the patient should not be allowed to come into direct
contact with grounded metal objects such as surgical table frame, instrument table, etc.
• Confirm proper default generator power settings before proceeding with surgery.
Always check that the automatic default settings shown on the display match those
indicated on the package insert of the Electrode being used.
• Caution should be used when overriding the default power settings. Use the lowest
power setting and the minimum tissue contact time necessary to achieve the
appropriate surgical effect.
• Visually inspect the Handpiece and Electrode to ensure that they are clean and dry
and free of damage prior to inserting the Electrode. Damage to the connectors or the
presence of fluid may cause a hazardous electrical short.
• Ensure that the Electrode is fully seated in the handpiece prior to use. Improper
connection could result in non-activation of the Electrode and fluid leakage which may
produce an electrical short.
• Ensure that electrodes with integrated cables are properly connected to the generator,
and that the correct default settings are displayed.
• Introducing the Electrode without an instrument cannula may result in tissue injury and/
or product damage.
• Do not insert, withdraw or touch the active tip of the Electrode when power is
being applied.
• When not in use, place the active Electrode in a clean, dry, nonconductive, and highly
visible area not in contact with the patient. Inadvertent activation while in contact with
the patient may result in burns.
• All high frequency electrosurgical devices can potentially cause muscle stimulation
during use. System design minimizes this effect, however, muscle stimulation may
cause unexpected movement of the patient within the surgical field.
• Skin-to-skin contact (for example between the arms and body of the patient) should be
avoided by, for example, insertion of dry gauze.
Operator Safety Cautions
The VAPR 3 system contains an over-current alarm. If this is heard during activation, the
electrode and handpiece must be withdrawn and inspected for damage. An accessory
that causes repeated over current alarms (when not in contact with a metal surface/
object) should be discarded.

SafetY
3-4
• Maintain the generator volume control to a level that will be audible in a normal
operating room environment. The activation tone is heard while the foot pedal is
depressed, indicating the electrode is activated.
• If possible, avoid the use of needle style electrodes for any physiological monitoring
equipment that may be connected to the patient during electro-surgery.
• Where practical, only use monitoring equipment that incorporates high frequency
current limiting devices during electrosurgical procedures.
• The Handpiece, or electrode cable should be positioned so that it avoids contact with
the patient and any other leads.
•Should a power supply interruption occur, the generator power settings will revert to the
minimum values when power is re-established should the accessory combination still
be connected.
•Attempts to bend electrodes can result in electrode fracture or degradation of electrode
performance.
•Fluids pooled in the body depressions and cavities should be removed before the use
of HF surgical equipment.
Potential Hazards for Arthroscopic Procedures
As visualization may be impaired during arthroscopy, be particularly alert to these potential
hazards:
• An activated Electrode tip may remain hot enough to cause burns after the
electrosurgical current is deactivated.
• Maintain the active Electrode in the field of view at all times. Injuries to the patient may
result from inadvertent activation or movement of an activated Electrode outside the
field of view.
• Use care when inserting and withdrawing the Electrode from a cannula to avoid the
possibility of damage to the devices and/or injury to the patient.
• Continuous flow of irrigant is recommended. Fluid flow assists in removing
vaporization by-products as well as reducing the temperature of the electrode tip
between activations.
• Ensure that the Electrode tip is completely surrounded by irrigant solution during use.
• Outflow is important, especially in small joint spaces.
• Prolonged or unnecessary activation when not in contact with tissue may result in
unintentional damage to surrounding tissue.
AFTER SURGERY
WARNING
Electric shock hazard: Turn off the Generator and unplug the power cord from the AC source
prior to cleaning Generator.
Equipment Disposal
• The VAPR System Generator contains electronic printed circuit assemblies. At
the end of the useful life of the equipment it should be disposed of in accordance
with any applicable national or institutional related policy relating to obsolete
electronic equipment.
• Dispose of any system accessories according to normal institution practice relating to
potentially contaminated items.

SYStem
deSCRIPtIoN
4-1
Section 4
system
descrIptIon
VAPR GENERATOR
The VAPR Generator (FIGure 3) is an isolated output radiofrequency generator that provides
power for soft tissue vaporization, cutting and coagulation during arthroscopic surgical
procedures. Technical specifications are detailed in Appendix A.
OUTPUT MODES
The VAPR Generator allows the user to select one of the following functional modes: a
tissue Vaporization mode, or a Blended Vaporization mode that combines Vaporization and
Desiccation using generator set-up options, with the selected output mode activated using
the Yellow footswitch pedal. The Desiccation (hemostasis) mode is activated using the Blue
footswitch pedal. A brief description of each mode is provided below:
Vaporization (V) Modes
There are three standard V mode levels V1, V2 and V3. The least aggressive tissue
vaporization is created in the V1 mode while the most aggressive tissue vaporization is
created in the V3 mode.
Desiccate (DES) Mode
The Desiccate mode provides hemostasis of blood vessels without tissue vaporization.
Available with all Electrode configurations, the hemostatic effect will be dependent on the
active electrode contact area and power setting. The depth of effect for a given Electrode
configuration and power setting is dependent upon the application time.
DES with Temp Indication
When in desiccation mode, this allows the display of electrode tip temperature, and
control against a set temperature.
Blended Vaporization (BV) Modes
There are two Blended Vaporization modes: BV1 and BV2. The Blended Vaporization
output modes combine tissue vaporization with hemostasis and are useful when cutting or
de-bulking more vascular tissue structures.
• BV1 mode automatically switches between a V2 vaporization mode and desiccate
(hemostasis) mode.
• BV2 mode switches between the V3 vaporization mode and desiccate
(hemostasis) mode.

SYStem
deSCRIPtIoN
4-2
fIGURe 3
on/off switch
footswitch
connector
receptacle 3 or
4 pin
connector cable
receptacle
v/bv power
up/down adjustment, SET
TEMPERATURE UP/
DOWN ADJUSTMENT
EQUALIZATION TERMINAL
heat sink
AC POWER INPUT
fuse holder
desiccate power
up/down adjustment and
mode selector
MODE FUNCTION/FOOTSWITCH
ENABLE
FAULT indicator
output
mode
display
output mode power
display, SET/TIP
TEMPERATURE
DISPLAY
desiccate mode
display
desiccate power
display
3 pin
VAPR II only
4 pin
VAPR 3 only

SYStem
deSCRIPtIoN
4-3
GENERATOR CONTROLS AND DISPLAYS
Power Switch
The power switch turns AC power on and off. When the
Generator is on, the green light within the power switch
is illuminated. It is advisable to switch off the Generator
whenever it is not in use to avoid any possibility of
inadvertent activation.
Fault Indication Light
This light will illuminate to indicate a Generator critical failure
or a VAPR accessory malfunction.
NOTE
The light will illuminate briefly during the self-test routine. This is
normal and does not indicate a failure.
Mode Button
Depressing the mode button once will enable selection of the
mode using the Power Up and Down buttons in the Desiccate
(blue) section. Once the display shows the desired V or BV
output mode, holding the Mode Button down will return the
Generator to a Ready condition.
Power Up/Down
The Power Up and Down buttons adjust the default power
setting; the Yellow Arrow button controls the Vaporization
(V) and Blended Vaporization (BV) outputs in standard
electrodes and set tip temperature with TC electrodes and
the Blue Arrow buttons control the Desiccate (DES) output.
Press the appropriate button once for a power increment
or decrement. Holding down the button accelerates the
incrementation or decrementation.
NOTE
Power can only be adjusted with the Generator in “Ready” mode
after an Electrode is properly connected to the Generator. The
VAPR Electrode will determine its own default output power and
set temperature.
Power/Temperature Setting Display
The display is divided into separate yellow and blue sections.
The yellow section (left side) displays the nominal output
power in watts for the selected Vaporization or Blended
Vaporization modes or set temperature in TC electrodes. The
blue section, (right side) displays the nominal output power in
watts for the Desiccate output. When an output is activated,
the power display for the selected output flashes and an
audible tone sounds. For a VAPR TC electrode the actual
measured ‘TIP’ temperature is displayed.

FRONT PANEL DISPLAY SYMBOLS
Indicates that the output mode for yellow pedal activation can be selected.
Indicates that the footswitch is the activation source for the system.
Indicates that the audio alarm output level may be selected. “MIN” is the lowest volume
available, “MAX” is the loudest.
Indicates that the Generator is waiting for the Electrode/Handpiece Cable to be attached to the
front panel receptacle.
Indicates that the Generator is waiting for an Electrode to be inserted into the Handpiece. Not
displayed when using the electrode with integrated cable.
NOTE
Mode selection can only be performed after an Electrode and Handpiece are connected
to the Generator. If the Mode button is quickly pressed and released the next user set-up
option appears.
May appear if the active tip shorts against nearby metal objects. A warning tone will also be
issued. Press the mode button on the front panel or the third footswitch button to resume
operation, for TC electrodes only.
For all other electrode types operation will resume automatically when the short is removed
(provided foot-pedal remains depressed).
Indicates that the Footswitch menu option is in the default off position.
SYStem
deSCRIPtIoN
4-4
VAPR II ONLY
VAPR 3 ONLY
VAPR 3 ONLY
ALARM VOLUME
FOOTSWITCH
CONNECT CABLE
INSERT ELECTRODE
OUTPUT SHORTED
FOOT MENU OFF
OUTPUT (YEL)

FOOTSWITCH (VAPR II ONLY)
The 2 pedal Footswitch (FIGURE 4
A
) connects to the VAPR Generator and has
two activation pedals:
• Depressing the yellow pedal activates the selected Vaporization (V) or Blended
Vaporization (BV) outputs.
• Depressing the blue pedal activates the Desiccate (DES) output to produce hemostasis
or thermal modification of tissue.
• Depressing both footswitches simultaneously can reset the Generator for
fault conditions.
SYStem
deSCRIPtIoN
4-5
v/bv pedal
(yellow)
desiccate pedal (blue)
FOOTSWITCH
CONNECTOR
FOOTSWITCH
CABLE
fIGURe 4a

FOOTSWITCH (VAPR 3 ONLY)
The VAPR 3 Footswitch (FIGURE 4
B
) connects to the VAPR Generator. The yellow and blue
pedals are used for output activation with the menu/reset button for fault clearance or remote
adjustment of the output settings (if enabled as shown below).
• Depressing the yellow pedal activates the selected Vaporization (V) or Blended
Vaporization (BV) outputs.
• Depressing the blue pedal activates the Desiccate (DES) output to produce hemostasis
or thermal modification of tissue.
• Depressing the menu/reset button can reset the Generator from a fault condition.
Enabling of Footswitch Setting Feature (software version V1.02 onwards)
• In the “ready” state, press the mode function button (as shown on FIGURE 3) three
times, the display will show “FOOT MENU OFF” (the VAPR 3 system is supplied with
“OFF” as default).
• Press either of the blue arrow buttons to toggle the state until the display indicates
“FOOT MENU ON”.
• Press the mode function button until the generator returns to the “ready” state.
• When enabled as described above the output settings may be controlled as follows:
• Depressing and releasing the menu/reset button when the VAPR Generator is waiting
for user interaction (“ready” state) will initiate a setting adjustment procedure.
• After pressing the menu/reset button the first time the VAPR Generator will emit two
short beeps and start flashing, the vaporize mode power settings on the left of display
as shown in FIGURE 5
A
.
• While the power setting is flashing, holding down the blue pedal will reduce the value
and holding down the yellow pedal will increase it.
• Pressing the menu/reset button once more will advance the setting to the vaporize
waveform which will start to flash rapidly on the display. Pressing and releasing the
yellow or blue pedals will cycle through the availability modifiers (FIGURE 5
B
).
• Pressing the menu/reset button again will cause the DES power setting to flash as per
FIGURE 5
c
so that it may be adjusted in the same way as the V/BV power.
• Pressing the menu/reset button once more resumes the “ready” state with a
static display.
NOTE
In some versions of the 3 input footswitch the menu/reset button will be replaced by a gray
pedal. For VAPR 3 systems with software V1.01 the footswitch setting feature is always enabled.
SYStem
deSCRIPtIoN
4-6
fIGURe 4b

SYStem
deSCRIPtIoN
4-7
fIGURe 5b
fIGURe 5C
fIGURe 5a
Menu Button Modify Yellow Pedal Blue Pedal
Press menu button once, hold for 2 beeps
(same tone-high), release.
Ablation Power
Press menu button second time, hold for
2 beeps (high-low), release.
Ablation Mode
(V3, V2, V1, BV2,
BV1)
Press menu button third time, hold for
2 beeps (same tone-low), release.
Desiccation Power
Press menu button fourth time, hold for 2
beeps (low-high), release.
Operative Mode Ablation Desiccation
To reset to Operative mode from anywhere within the menu process, press and
hold menu button for 2 seconds (screen will go blank), release button.

SYStem
deSCRIPtIoN
4-8
VAPR ELECTRODES
The family of VAPR Electrodes has been designed to facilitate access and control the
delivery of energy to the joint space. Each Electrode contains an internal classification code
which automatically adjusts the VAPR Generator to the optimal output power setting. The
VAPR Electrode has an integrated “return” electrode on its shaft, eliminating the need for a
conventional patient ground pad. Angled Electrode styles are also available to facilitate tissue
access and positioning during use.
WARNING
This product is for single-use only. It has not been designed to be re-used/re-sterilized. Reprocessing
may lead to changes in material characteristics such as metallic corrosion and dulled edges, ceramic
and plastic deformation or splitting which may impact the strength of the device and compromise device
performance. Reprocessing of single use devices can also cause cross-contamination leading to patient
infection. These risks may potentially affect patient safety.
The working tips of the Electrodes can be divided into the following main functional types
according to the geometry of the active electrode and insulation support:
Premiere50 Electrode - VAPR3 Default Power 160 W
VAPR S50 Electrode - VAPR3 Default Power 60 W
The forward facing active tip is designed to facilitate controlled, precise
tissue effects. The RF probe, with angled shaft is intended to be used
for removal of soft tissue during Arthroscopic procedures in smaller,
more difficult areas of the anatomy to access such as the knee (i.e.,
posterior horn of meniscus). The integral Suction Port allows bubbles
and vaporization products to be removed. The design provides a large
area suction path which attracts difficult to access frond tissue to the tip
and helps minimize clogging.
LDS, LPS, and VAPR S90 Electrodes
The side facing electrode is designed to maximize the tip tissue contact
area and provide rapid tissue debulking. The electrode has a large tip-
shaft offset which maximizes tactile feedback and facilitates removal of
difficult to reach tissue. The integral Suction Port allows bubbles and
vaporization products to be removed. The design provides a large area
suction path which attracts difficult to access frond tissue to the tip and
helps minimize clogging.
Additionally, the forward facing end of the manifold may be useful in
protecting adjacent structures from inadvertent injury during activation.
Premiere90 Electrode
The side facing electrode is designed to maximize the tip tissue contact
area and provide rapid tissue debulking. The electrode has a large
tipshaft offset which maximizes tactile feedback and facilitates removal
of difficult to reach tissue. The integral Suction Port allows bubbles and
vaporization products to be removed. The design provides a large area
suction path which attracts difficult to access frond tissue to the tip and
helps minimize clogging.
Additionally, the forward facing end of the manifold may be useful in
protecting adjacent structures from inadvertent injury during activation.
3.5 Side Effect Electrode
The side-facing electrode is designed to maximize tissue contact area
and produce rapid tissue debulking. The active, tissue contact electrode
is mounted on the side of the working tip with the return electrode
extending over the insulator on the opposite side of the active electrode.
This configuration is particularly useful in engaging tissue which is
approached at an acute angle. Additionally, the insulator and return
electrode assist in protecting adjacent structures from inadvertent injury
during activation. The larger contact area of the electrode means that
these electrodes also produce effective hemostasis of blood vessels.
This manual suits for next models
2
Table of contents
Other Mitek Medical Equipment manuals
Popular Medical Equipment manuals by other brands

Sunrise Medical
Sunrise Medical Jay J2 Back XT2505S User instruction manual & warranty

Curlin Medical
Curlin Medical PainSmart IOD Addendum to user's manual

Fluke Biomedical
Fluke Biomedical IMPULSE 6000D Demo Instructions

Magic Care
Magic Care Aliseo Plus Instructions for use manual

ThermaZone
ThermaZone 003-47 user manual

Enthermics
Enthermics ivNow owner's manual