manuals.online logo
Brands
  1. Home
  2. •
  3. Brands
  4. •
  5. Mocka
  6. •
  7. High Chair
  8. •
  9. Mocka Jenson User manual

Mocka Jenson User manual

Jenson High Chair
1
Assembly Instructions
mocka.co.nz | mocka.com.au | PO BOX 6171, Maroochydore BC, QLD, 4558
Thank you for your purchase.
Please follow the instructions below for correct assembly.
FOLLOW THE MANUFACTURERS INSTRUCTIONS
DO NOT LEAVE CHILDREN UNATTENDED
THE HARNESS MUST ALWAYS BE USED AND CORRECTLY
FITTED – MOST INJURIES FROM HIGH CHAIRS ARE CAUSED
BY FALLS
POSITION THE HIGH CHAIR AWAY FROM SOLID STRUCTURES
AND BENCHES TO AVOID INJURIES CAUSED BY FALLS AND
BY ACCESS TO DANGEROUS ITEMS
 Falling hazard: Prevent your child from climbing on the product.
 Do not use the product unless all components are correctly fitted and
adjusted.
 Be aware of the risk of open fires and other sources of strong heat in the
vicinity of the product.
 Be aware of the risk of tilting when your child can push its feet against a table
or any other structure.
 Do not carry backrest or adjust height when baby is inside of chair.
 Do not use the product until the child can sit up unaided.
 Do not to use the product if any part is broken, torn or missing.
 Any additional harness other than the one provided by the manufacturer, shall
comply with EN 13210.
 Product is intended for children able to sit up unaided and up to 3 years or a
maximum weight of 15kg/ 35lbs
 Always store the highchair so it cannot be pulled or fall on children.
 Only use the high chair on a flat, even and horizontal floor and do not elevate
the high chair on any structure or table.
 Position the high chair away from furniture, walls, hot surfaces and liquids,
window covering cords, and electrical cords and position the high chair away
from furniture when the chair is not being used at a table with the tray
removed.
Jenson High Chair
2
Assembly Instructions
mocka.co.nz | mocka.com.au | PO BOX 6171, Maroochydore BC, QLD, 4558
CLEANING AND CARE:
 SEAT - Clean with a soft cloth using warm
water and mild soap. DO NOT place the
seat cover or tray in the dishwasher or
washing machine.
 RESTRAINT SYSTEM STRAPS AND
BUCKLES - Clean restraint system straps
and buckles using a soft cloth with warm
water and mild soap.
 TRAY - Clean with a soft cloth using warm
water and mild soap.
 FRAME - Clean with a soft cloth. Avoid
using water near hardware parts which
could lead to corrosion.
Do not use bleach or strong acid/base
liquid for cleaning the high chair
(including the frame). Avoid using water
near hardware parts which could lead to
corrosion, affecting the service life of the
product. Allow to dry fully, preferably away
from direct sunlight
 To prolong the life of your high chair keep
it clean and do not leave it in direct sunlight
for extended periods of time.
 In some climates the fabric cover may be
affected by mould and mildew. To help
prevent this occurring, store the high chair
in a well-ventilated area.
 To maintain the safety of your high chair,
seek prompt repairs for bent, torn, worn or
broken parts. Use only those parts
approved by the manufacturer.
 Always check parts regularly for tightness
of screws, nuts and other fasteners –
tighten if required.
 If the high chair is not working correctly
stop using the high chair and seek repair.
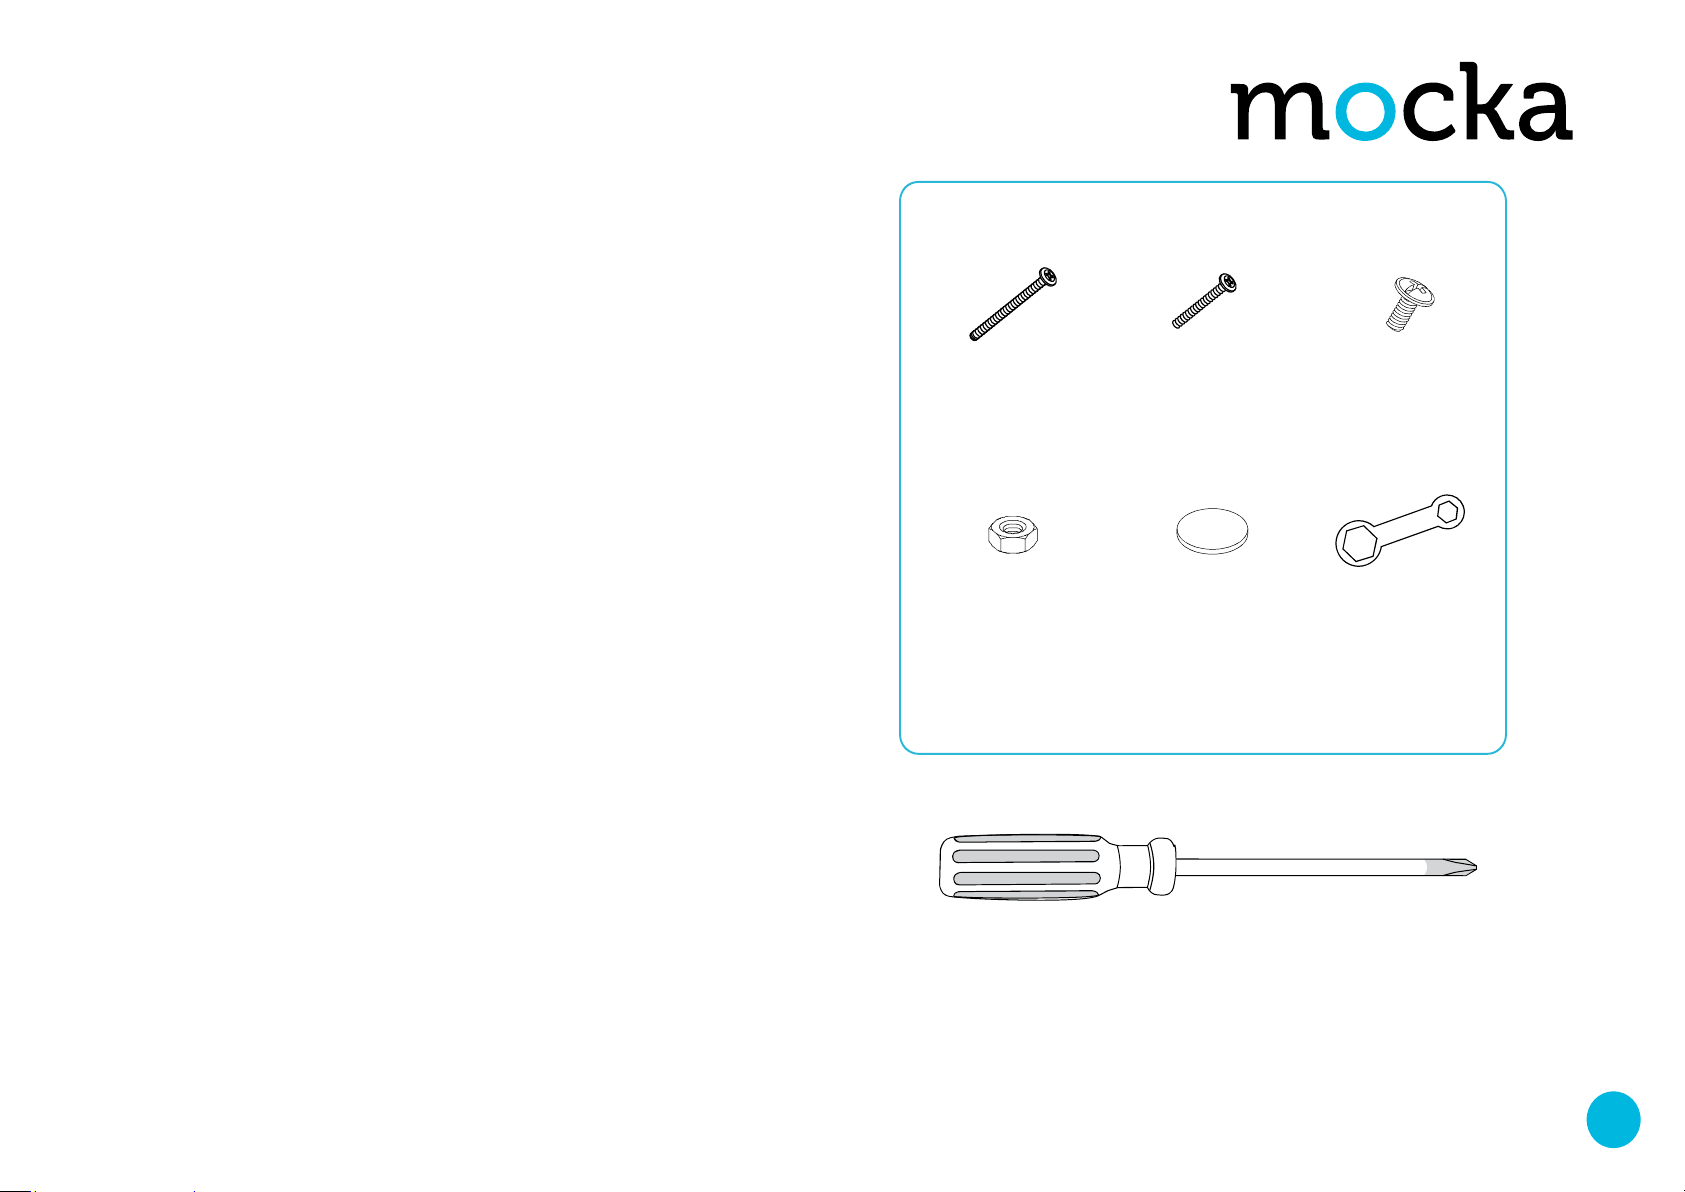
Hardware Supplied
A
Long Screws
x2
B
Medium Screws
x2
C
Small Screw
x1
E
Anti-slip pads
x4
F
Spanner
Phillips screwdriver required
For quicker assembly, we recommend the
use of a power drill on a low-speed setting.
D
Nuts
x5
1
3
Assembly Instructions
mocka.co.nz | mocka.com.au | PO BOX 6171, Maroochydore BC, QLD, 4558
Attach 4 x lower legs [1] with 4 x upper legs [2] and screw together.
Ensure parts are joined and the surface is smooth. Attach 4 x anti-slip
pads (E) to the bottom of the lower legs [1].
Attach 4 x assembled legs to seat bottom and screw together.
Jenson High Chair
2
E
1
2
3
4
Assembly Instructions
mocka.co.nz | mocka.com.au | PO BOX 6171, Maroochydore BC, QLD, 4558
Jenson High Chair
4
Turn the assembled chair upside down. To attach the footrest [4] onto
the front side of the chair, pass 2x long screws [A] through the holes on
the footrest [4], then the chair leg [2] and lastly the holes on the leg
support [3] before securing with 2x nuts (D). Attach the other side of the
leg support [3] to the back legs [2] and secure with 2x medium screws
(B) and 2x nuts (D). Secure the middle of the leg support bars [3]
together with 1x small screw (C) and 1x nut (D). Tighten all screws and
nuts with a screwdriver and spanner [F].
4
C
D
3
3
Click the tray onto the handrail and press the tray down to ensure it is
secured well. You’re done, enjoy!
Click
B
B
A
A
D
D
D
D
Unscrew 4 x lower legs [1] from 4 x upper legs [2]. Attach 4 x anti-slip
pads [3] to the bottom of the upper legs [2].
To change the high chair to a small chair
Jenson High Chair
5
Assembly Instructions
mocka.co.nz | mocka.com.au | PO BOX 6171, Maroochydore BC, QLD, 4558
1
3
2
A five-point safety harness is provided to restrain your child.
To secure your child in the harness:
Push buckles (A) and (B) into the buckle housing (C) until the buckle
prongs click into position.
Carefully adjust the harness by pulling the sliders (D) until the
desired fit is achieved in the lap, shoulders and crotch strap.
To remove your child from the harness:
Release the buckles (A) and (B) by squeezing the top and bottom
prongs either side of the buckle housing (C).
Remove the shoulder straps and lift the child out of the high chair.
Safety Harness Use
A
D
DD
C
B

Other Mocka High Chair manuals

Mocka Original Highchair User manual

Mocka

Mocka Original Highchair User manual

Mocka Aiden User manual

Mocka

Mocka Aiden User manual

Mocka Jenson User manual

Mocka

Mocka Jenson User manual

Mocka Designer Highchair User manual

Mocka

Mocka Designer Highchair User manual

Mocka Aiden Highchair User manual

Mocka

Mocka Aiden Highchair User manual

Mocka Aiden User manual

Mocka

Mocka Aiden User manual

Mocka Rayne User manual

Mocka

Mocka Rayne User manual

Popular High Chair manuals by other brands

Lionelo Eli user manual

Lionelo

Lionelo Eli user manual

Graco DuoDiner 1762131 owner's manual

Graco

Graco DuoDiner 1762131 owner's manual

William Kent 1733 WONDER K Instructions for use

William Kent 1733

William Kent 1733 WONDER K Instructions for use

Fisher-Price P4259 user manual

Fisher-Price

Fisher-Price P4259 user manual

Chicco Polly Easy Instructions for use

Chicco

Chicco Polly Easy Instructions for use

Jikel Bibz user manual

Jikel

Jikel Bibz user manual

Costway AD10039 manual

Costway

Costway AD10039 manual

Graco Highchair owner's manual

Graco

Graco Highchair owner's manual

CHILDHOME EVOLU 2 Assembly instructions

CHILDHOME

CHILDHOME EVOLU 2 Assembly instructions

Melissa & Doug Wooden Doll High Chair 9382 Assembly instructions

Melissa & Doug

Melissa & Doug Wooden Doll High Chair 9382 Assembly instructions

Baby Relax Safety 1st DINNER STAR Instructions for use

Baby Relax

Baby Relax Safety 1st DINNER STAR Instructions for use

Graco 35610 owner's manual

Graco

Graco 35610 owner's manual

QU-AX ULTIMO 3 manual

QU-AX

QU-AX ULTIMO 3 manual

KIKKA BOO EAT'N PLAY Instructions for use

KIKKA BOO

KIKKA BOO EAT'N PLAY Instructions for use

MaxiCosi Bebe Confort Minla manual

MaxiCosi

MaxiCosi Bebe Confort Minla manual

BabyBjorn 067021US owner's manual

BabyBjorn

BabyBjorn 067021US owner's manual

Graco Meal Time 1762138 owner's manual

Graco

Graco Meal Time 1762138 owner's manual

Geuther Mucki 2306 Instructions for assembly and use

Geuther

Geuther Mucki 2306 Instructions for assembly and use

manuals.online logo
manuals.online logoBrands
  • About & Mission
  • Contact us
  • Privacy Policy
  • Terms and Conditions

Copyright 2025 Manuals.Online. All Rights Reserved.