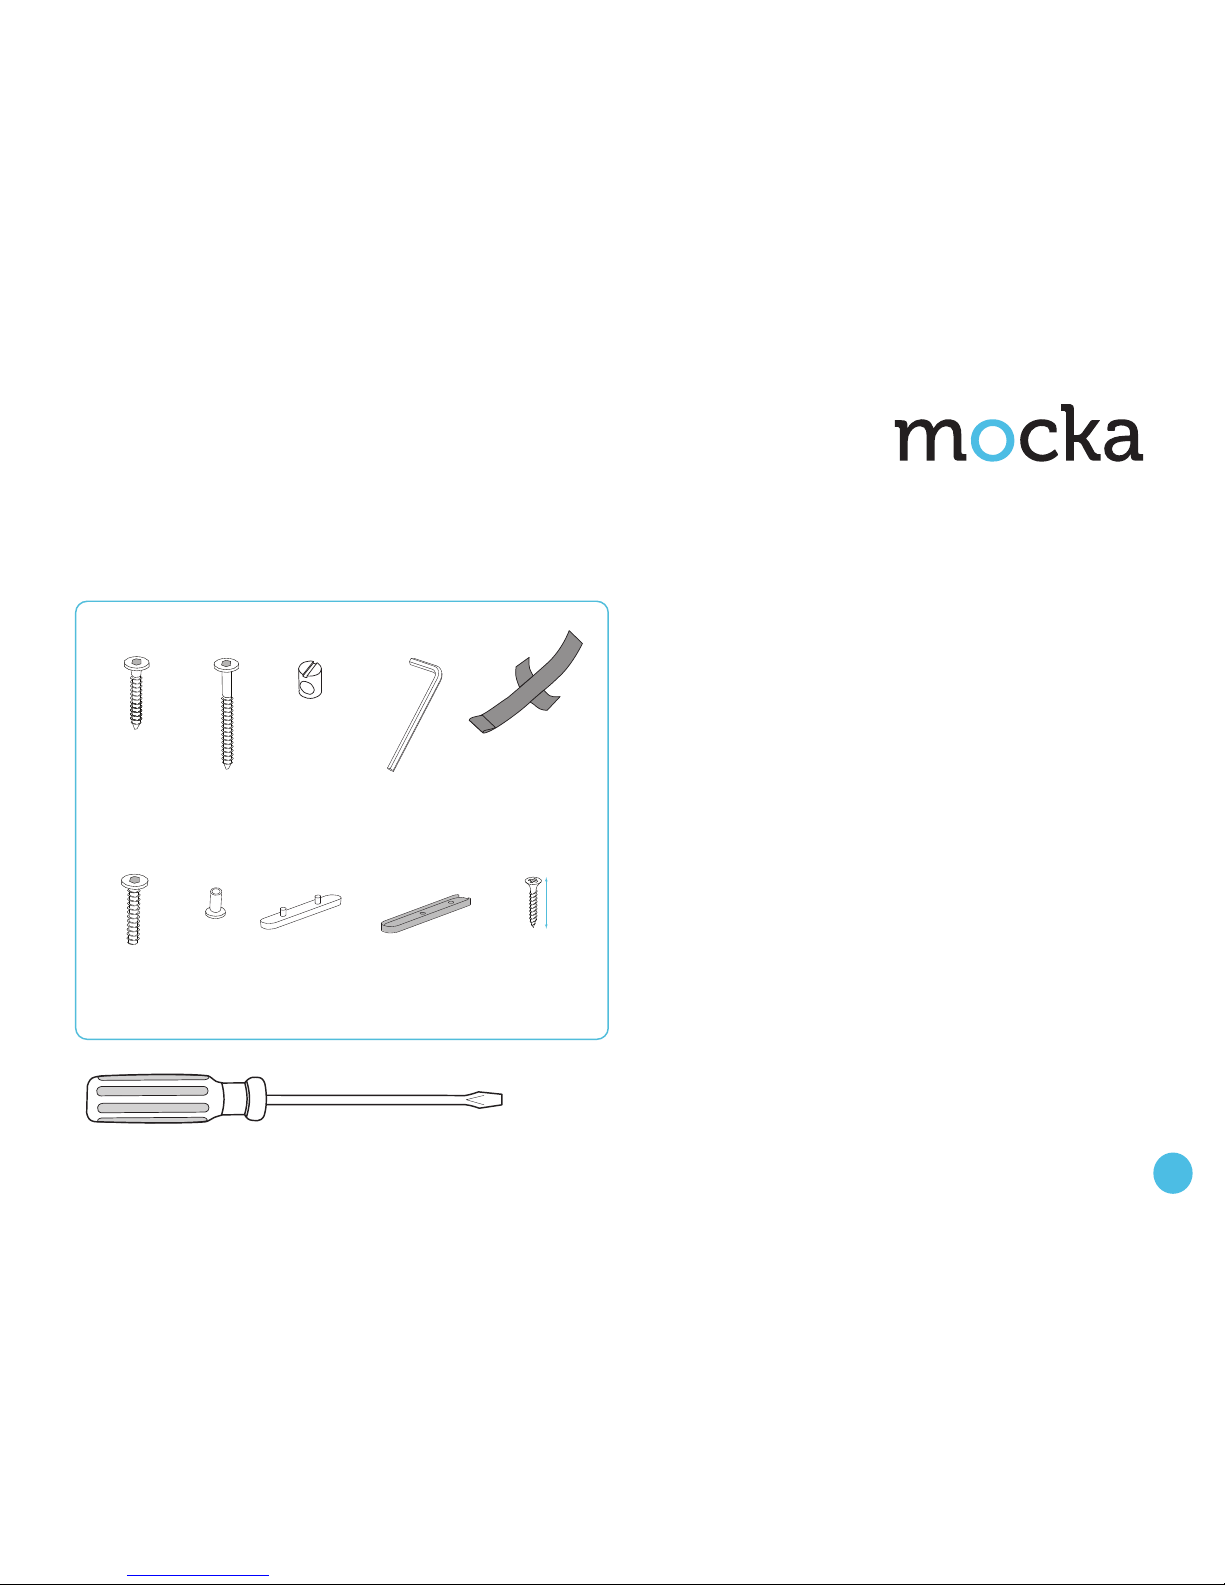
Backboard Upper
Metal rod
Highchair Leg
Footboard
Seat board
Tray
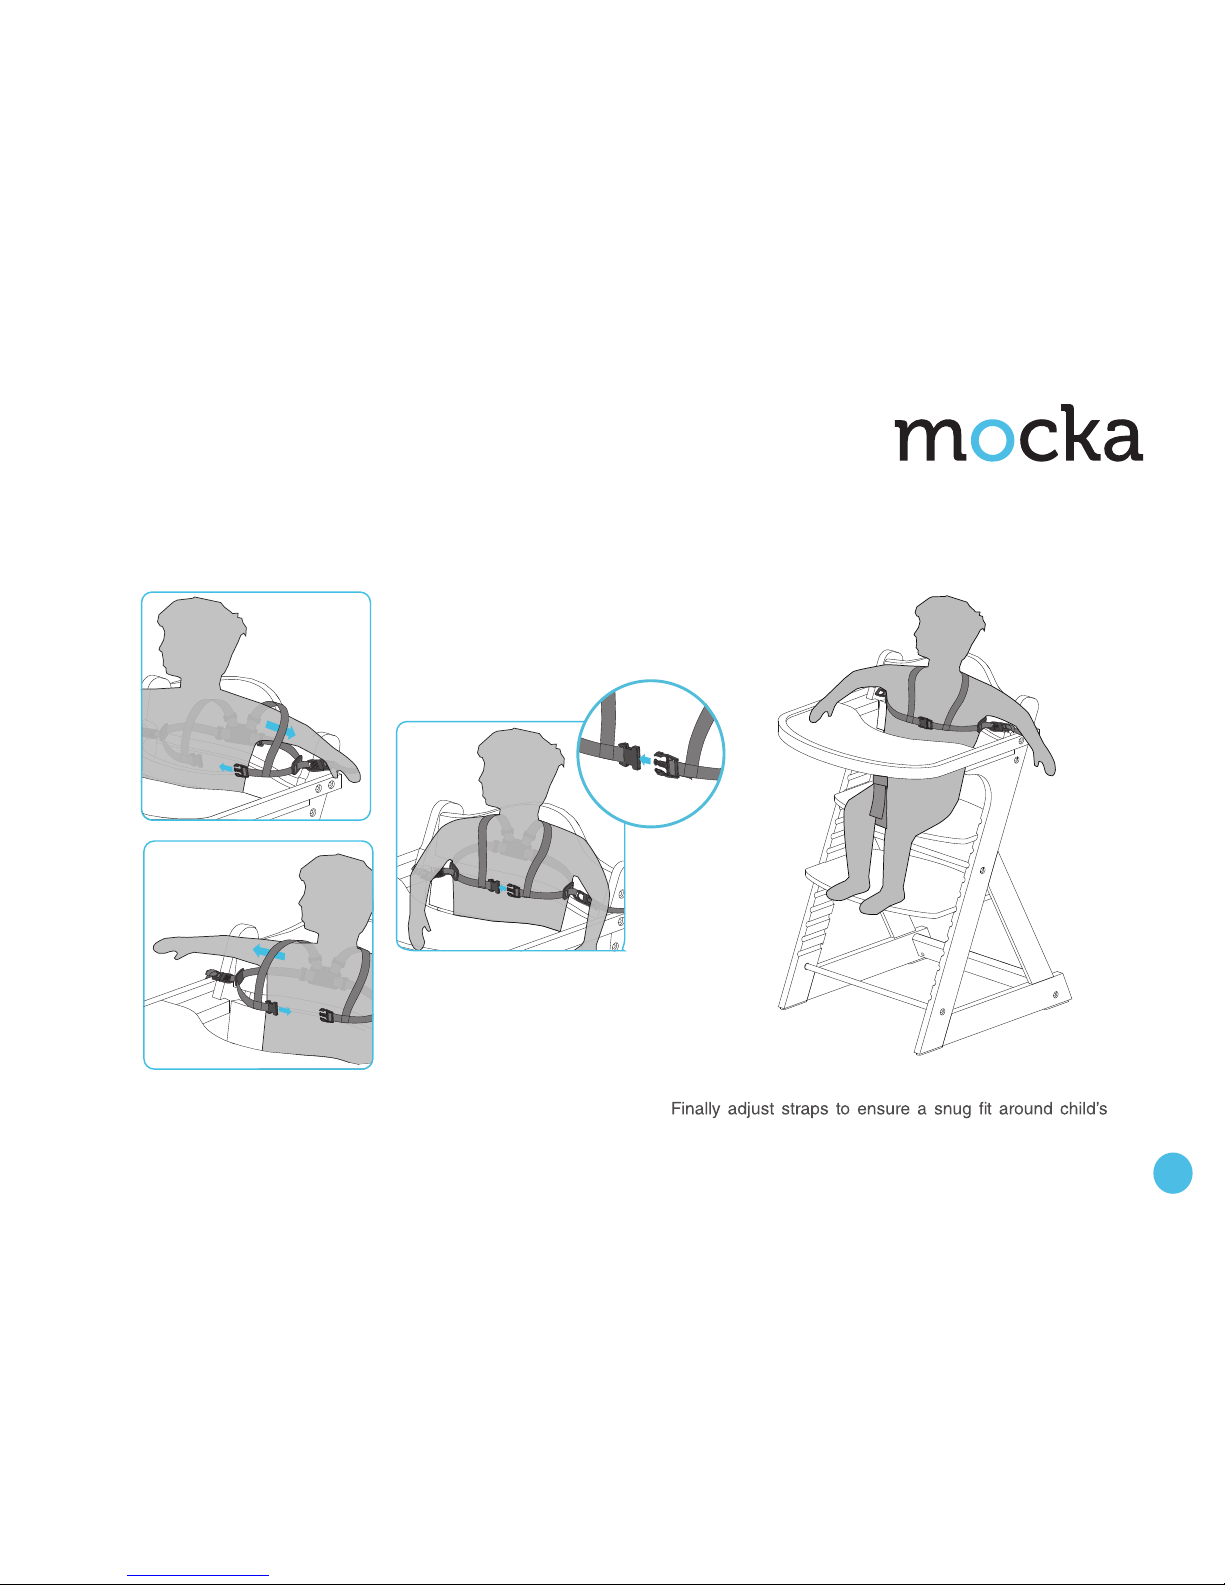
Safety strap
Support brace
IMPORTANT!
KEEP FOR FUTURE REFERENCE:
WARNING: Never leave your child unattended in the highchair. Strict
adult supervision is required at all times.
WARNING: Ensure the safety strap is in use at all times to avoid the child
slipping downwards and causing injury. We recommend the use of the
shoulder and waist harness at all times to avoid injury caused by falls.
WARNING: Do not use the highchair unless components are correctly
fitted and adjusted.
WARNING: Ensure the highchair is positioned away from objects or
structures that can cause injury. Be aware of the risk of open fire and
other sources of strong heat, such as electric bar fires, gas fires etc, in
the vicinity of the highchair.
WARNING: Ensure both the seat and footrest are locked into positon
and cannot be moved by hand, before placing the child in the highchair.
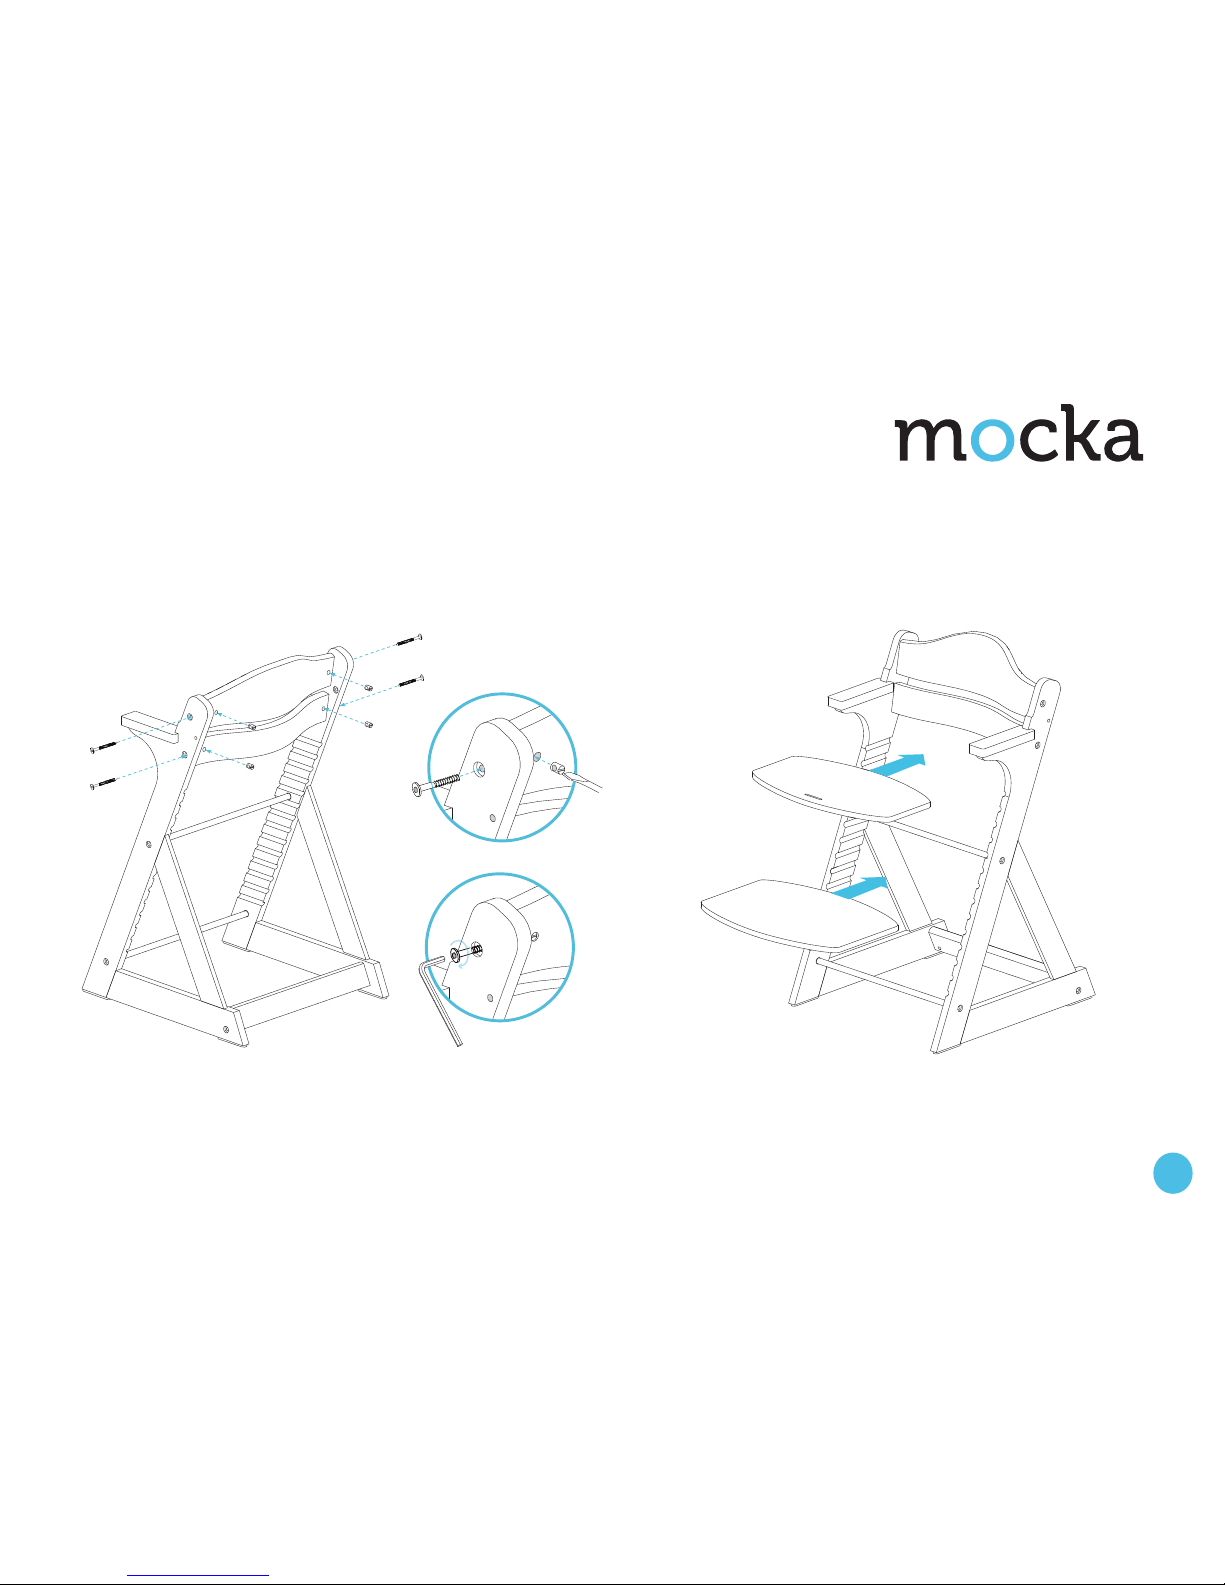
Do not tighten all screws until all components have been assembled.
The highchair should not be used until the child can sit up unaided.
Do not use the highchair if any part is broken, torn or missing.
Only use the highchair on a flat, even and horizontal floor.
Do not elevate the highchair on any structure or table.
WARNING: For babies/toddlers under 2 years old, please ensure the
seat is positioned on the 1st or 2nd level from the top ONLY.
Original Highchair