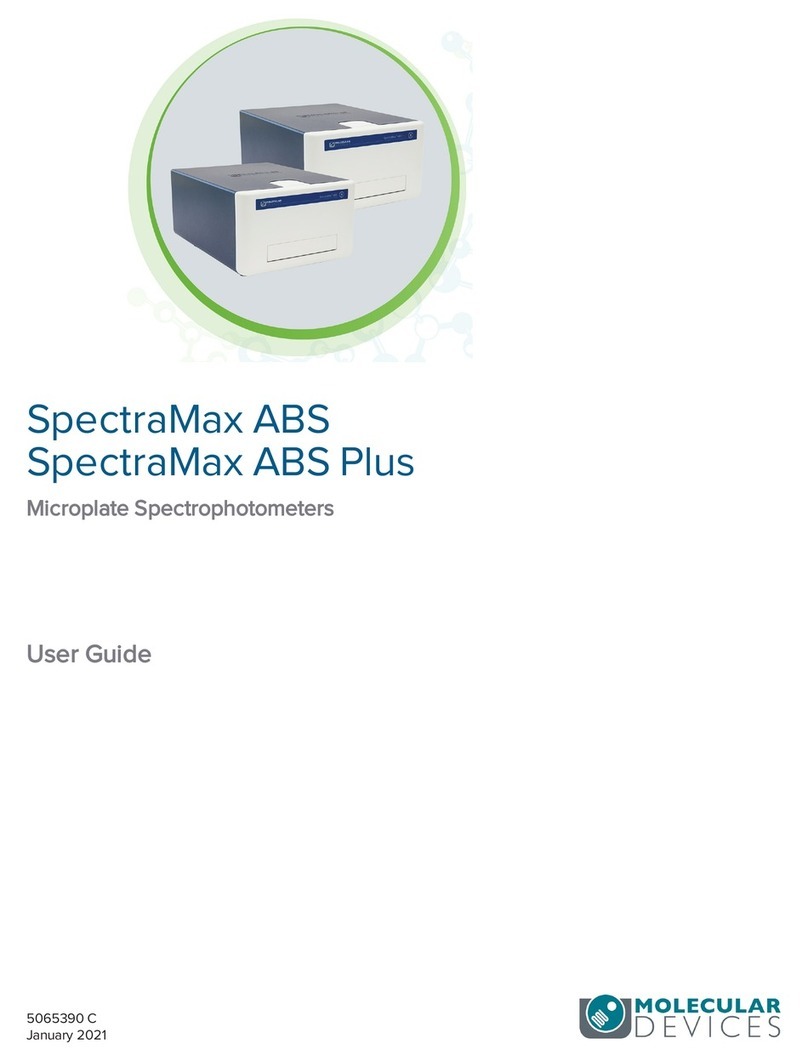
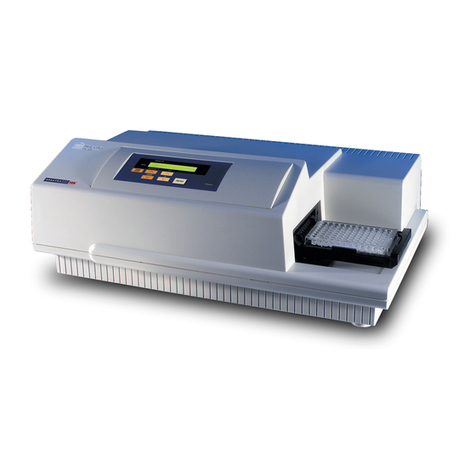
Molecular Devices SPECTRAmax PLUS 384 User manual

0112-0126 B
October 2018
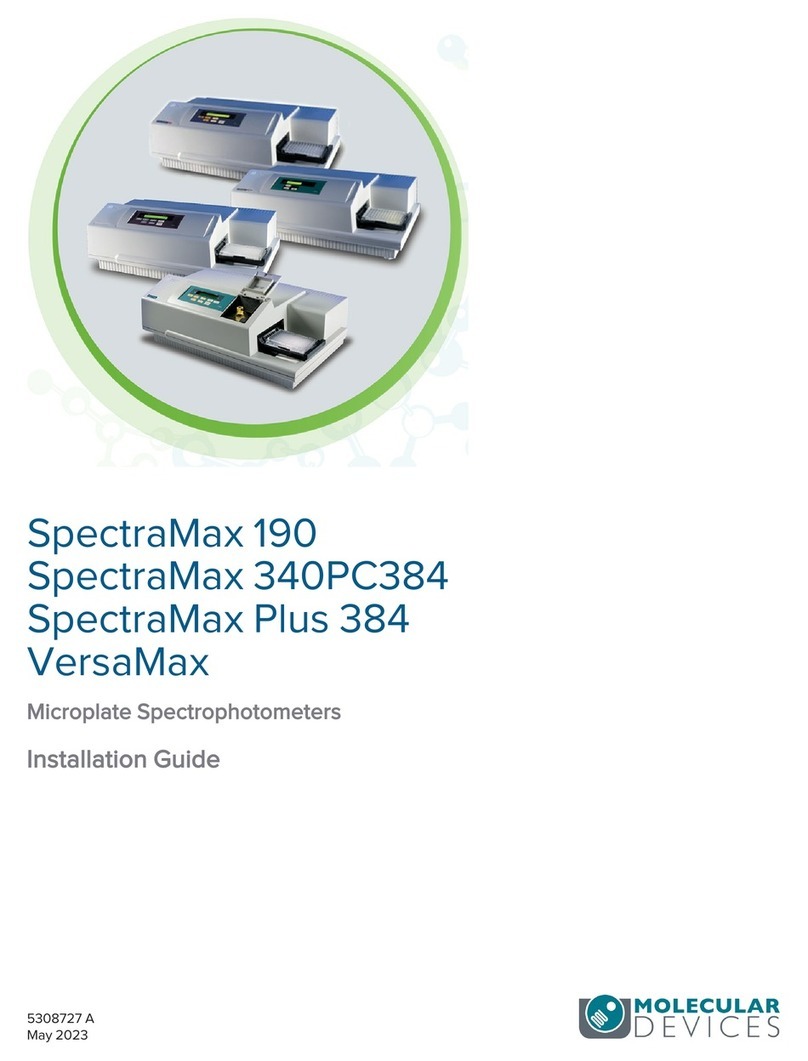
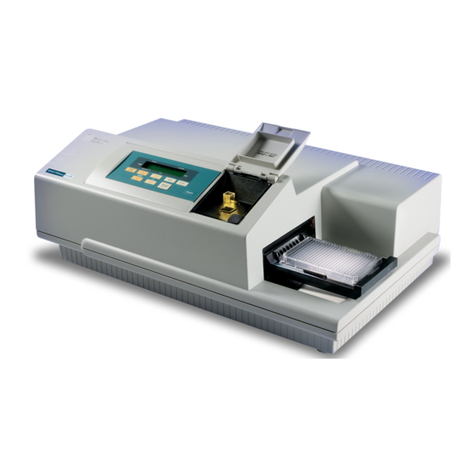
SpectraMax® Plus 384
SpectraMax® 190
SpectraMax® 340PC384
VersaMax™
Microplate Spectrophotometers
User Guide

VersaMax, SpectraMax 340PC384, 190, Plus 384 Microplate Readers User Guide
2 0112-0126 B
This document is provided to customers who have purchased Molecular Devices equipment, software,
reagents, and consumables to use in the operation of such Molecular Devices equipment, software,
reagents, and consumables. This document is copyright protected and any reproduction of this
document, in whole or any part, is strictly prohibited, except as Molecular Devices may authorize in
writing.
Software that may be described in this document is furnished under a non-transferrable license. It is
against the law to copy, modify, or distribute the software on any medium, except as specifically
allowed in the license agreement. Furthermore, the license agreement may prohibit the software
from being disassembled, reverse engineered, or decompiled for any purpose.
Portions of this document may make reference to other manufacturers and/or their products, which
may contain parts whose names are registered as trademarks and/or function as trademarks of their
respective owners. Any such usage is intended only to designate those manufacturers’ products as
supplied by Molecular Devices for incorporation into its equipment and does not imply any right and/or
license to use or permit others to use such manufacturers’ and/or their product names as trademarks.
Each product is shipped with documentation stating specifications and other technical information.
Molecular Devices products are warranted to meet the stated specifications. Molecular Devices makes
no other warranties or representations express or implied, including but not limited to, the fitness of
this product for any particular purpose and assumes no responsibility or contingent liability, including
indirect or consequential damages, for any use to which the purchaser may put the equipment
described herein, or for any adverse circumstances arising therefrom. The sole obligation of Molecular
Devices and the customer's sole remedy are limited to repair or replacement of the product in the
event that the product fails to do as warranted.
For research use only. Not for use in diagnostic procedures.
The trademarks mentioned herein are the property of Molecular Devices, LLC or their respective owners. These trademarks may not
be used in any type of promotion or advertising without the prior written permission of Molecular Devices, LLC.
Patents: http://www.moleculardevices.com/patents
Product manufactured by Molecular Devices, LLC.
3860 N. First Street, San Jose, California, 95134, United States of America.
Molecular Devices, LLC is ISO 9001 registered.
©2018Molecular Devices, LLC.
All rights reserved.

0112-0126 B 3
Contents
Safety Information 4
Warnings, Cautions, Notes, and Tips 4
Chapter 1: Introduction 8
Computer Integration 8
Plate Controls 9
Temperature Regulation 11
Chapter 2: Setting Up the Instrument 13
Connecting Instrument Cables 14
Chapter 3: Getting Started 16
Control Panel 16
General Workflow 17
Chapter 4: Absorbance Read Mode 19
PathCheck Pathlength Measurement Technology 20
Read Types 24
Chapter 5: Maintenance 25
Cleaning the Instrument 25
Replacing Fuses 26
Before You Move the Instrument 28
Chapter 6: Troubleshooting 29
Opening the Drawer Manually 33
Obtaining Support 34
Appendix A: Instrument Specifications 35
SpectraMax Plus 384 Specifications 36
SpectraMax 340PC384 Specifications 41
SpectraMax 190 Specifications 45
VersaMax Specifications 49
Electromagnetic Compatibility 52
Appendix B: Accessories 53

VersaMax, SpectraMax 340PC384, 190, Plus 384 Microplate Readers User Guide
4 0112-0126 B
Safety Information
Information about the safe use of the instrument from Molecular Devices® includes an
understanding of the user-attention statements in this guide, the safety labels on the
instrument, precautions to follow before you operate the instrument, and precautions to
follow while you operate the instrument.
Make sure that everyone involved with the operation of the instrument has:
Received instruction in general safety practices for laboratories.
Received instruction in specific safety practices for the instrument.
Read and understood all Safety Data Sheets (SDS) for all materials being used.
Read and observe all warnings, cautions, and instructions. The most important key to safety
is to operate the instrument with care.
WARNING! If the instrument is used in a manner not specified by Molecular
Devices, the protection provided by the equipment might be impaired.
Warnings, Cautions, Notes, and Tips
All warning symbols are framed within a yellow triangle. An exclamation mark is used for
most warnings. Other symbols can warn of other types of hazards such as biohazard,
electrical, or laser safety warnings as are described in the text of the warning. Follow the
related safety information.
The following user attention statements might be displayed in the text of Molecular Devices
user documentation. Each statement implies the amount of observation or recommended
procedure.
WARNING! A warning indicates a situation or operation that could cause
personal injury if precautions are not followed.
CAUTION! A caution indicates a situation or operation that could cause damage to
the instrument or loss of data if correct procedures are not followed.
Note: A note calls attention to significant information.
Tip: A tip provides useful information or a shortcut, but is not essential to the
completion of a procedure.

Safety Information
0112-0126 B 5
Symbols on the Instrument
Each safety label found on the instrument contains an alert symbol that indicates the type of
potential safety hazard.
Symbol Indication
Consult the product documentation.
Potential biohazard.
Potential lifting hazard. To prevent injury, use a minimum of two people to lift the
instrument.
Potential heat hazard.
Required in accordance with the Waste Electrical and Electronic Equipment (WEEE)
Directive of the European Union. It indicates that you must not discard this electrical or
electronic product or its components in domestic household waste or in the municipal
waste collection system.
For products under the requirement of the WEEE directive, contact your dealer or
local Molecular Devices office for the procedures to facilitate the proper collection,
treatment, recovery, recycling, and safe disposal of the device.
- - California proposition 65 requires businesses to provide
warnings to Californians about significant exposures to chemicals that cause cancer, birth
defects, or other reproductive harm.

VersaMax, SpectraMax 340PC384, 190, Plus 384 Microplate Readers User Guide
6 0112-0126 B
Electrical Safety
To prevent electrical injuries and property damage, inspect all electrical equipment before
use and report all electrical deficiencies. Contact Molecular Devices technical support for
equipment service that requires the removal of covers or panels.
To prevent electrical shock, use the supplied power cord and connect to a properly
grounded wall outlet.
To ensure sufficient ventilation and provide access to disconnect power from the
instrument, maintain a 20cm to 30cm (7.9in. to 11.8in.) gap between the rear of the
instrument and the wall.
Power off the instrument when not in use.
Chemical and Biological Safety
Normal operation of the instrument can involve the use of materials that are toxic,
flammable, or otherwise biologically harmful. When you use such materials, observe the
following precautions:
Handle infectious samples based on good laboratory procedures and methods to
prevent the spread of disease.
Observe all cautionary information printed on the original containers of solutions before
their use.
Dispose of all waste solutions based on the waste disposal procedures of your facility.
Operate the instrument in accordance with the instructions outlined in this guide, and
take all the required precautions when using pathological, toxic, or radioactive materials.
Splashing of liquids can occur. Take applicable safety precautions, such as using safety
glasses and wearing protective clothing, when working with potentially hazardous
liquids.
Observe the applicable cautionary procedures as defined by your safety officer when
using hazardous materials, flammable solvents, toxic, pathological, or radioactive
materials in or near a powered-up instrument.
WARNING! Never use the instrument in an environment where potentially
damaging liquids or gases are present.

Safety Information
0112-0126 B 7
Moving Parts Safety
The instrument contains moving parts that can cause injury. Under normal conditions, the
instrument is designed to protect you from these moving parts.
WARNING! If the instrument is used in a manner not specified by Molecular
Devices, the protection provided by the equipment might be impaired.
To prevent injury:
Never try to exchange labware, reagents, or tools while the instrument is operating.
Never try to physically restrict the moving components of the instrument.
Note: Observe all warnings and cautions listed for all external devices attached to or in
use during the operation of the instrument. See the applicable user guide for the
operating and safety procedures of that device.
CAUTION! Never touch the optic mirrors, lenses, filters, or cables. The optics are
extremely delicate, and critical to the function of the instrument.

0112-0126 B 8
Chapter 1: Introduction
The SpectraMax® 340PC384, SpectraMax® 190, and VersaMax™ microplate
spectrophotometers provide rapid and sensitive measurements of a variety of analytes
across a wide range of concentrations. The SpectraMax® Plus 384 adds the ability to read
cuvettes. These instruments measure the optical density (OD) of samples at selected
wavelengths in a single read mode.
SpectraMax Plus 384 reads 96-well plates, 384-well plates, and cuvettes.
SpectraMax 190 reads 96-well plates.
SpectraMax 340PC384 reads 96-well plates and 384-well plates.
VersaMax reads 96-well plates.
The high sensitivity and flexibility of these instruments make them useful for applications in
the fields of biochemistry, cell biology, immunology, molecular biology, and microbiology.
Typical applications include ELISA, nucleic acid, protein, enzymatic type homogeneous and
heterogeneous assays, microbial growth, endotoxin testing, and pipettor calibration.
The instruments support the UV and Visible Absorbance read mode with the following read
types.
Endpoint: at a single point in time.
Kinetic: over a specified period of time.
Spectrum: over a specified wavelength range.
The shake feature enables you to mix the contents of the wells in a plate before each read
cycle, which makes it possible to perform kinetic analysis of solid-phase, enzyme-mediated
reactions (shake is not critical for liquid-phase reactions).
Temperature controls enable the instrument to regulate the temperature of the plate
chamber from 4°C above ambient to 45°C.
Documentation
Computer Integration
Each Molecular Devices microplate reader is shipped with a license key for the SoftMax® Pro
Data Acquisition and Analysis Software that you install on the computer that you use to
operate the instrument. The SoftMax Pro Software provides integrated instrument control,
data display, and statistical data analysis.
You should install the SoftMax Pro Software on the computer before you set up the
instrument. Please be aware that some updates to the SoftMax Pro Software require a
purchase. Contact Molecular Devices before you update the software. To download the
latest version of the software, visit:
https://www.moleculardevices.com/products/microplate-readers/acquisition-and-analysis-
software/softmax-pro-software#Order.
1

VersaMax, SpectraMax 340PC384, 190, Plus 384 Microplate Readers User Guide
9 0112-0126 B
Note: For information about the computer specifications that are required to run the
software, the software installation and licensing instructions, and the directions to
create the software connection between the computer and the instrument, see the
SoftMax Pro Data Acquisition and Analysis Software Installation Guide.
To prevent data loss, turn off all sleep and hibernation settings for the hard disk, the CPU,
and the USB ports. Disable automatic Windows updates. Update Windows manually when
you do not use the computer to control an instrument. You can set these options in
Windows Control Panel.
You can connect the instrument to a printer and operate the instrument in stand alone
mode to run basic Absorbance read mode Endpoint read type protocols. In stand alone
mode, the instrument control panel enables you to adjust the temperature and the
wavelength to do fixed point plate reads. For the SpectraMax Plus 384 you can do fixed point
cuvette reads. Stand alone mode is not available for the VersaMax.
To run protocols that require advanced acquisition settings or to run Absorbance read mode
Kinetic read type and Spectrum read type protocols, you must connect the instrument to a
computer and use the SoftMax Pro Software to operate the instrument.
Plate Controls
The plate drawer is located on the right side of the instrument and slides in and out of the
plate chamber. Use the instrument control panel or the SoftMax Pro Software to open and
close the plate drawer.
The arrow in the following image points to the plastic pusher that holds the plate in place
when the drawer is closed. Located in the front left corner of the drawer, this is also where
well A1 should be for reads.
Plate drawer operation is dependent on the incubator setting:
The drawer closes for each read.
When you open the drawer, if the incubator is off, the drawer remains open.
When you open the drawer, if the incubator is on, the drawer closes after approximately
10 seconds to maintain temperature control within the plate chamber.
Do not obstruct the movement of the drawer. If you must retrieve a plate after an error
condition or power outage and the drawer does not open, you can open the drawer
manually. See Opening the Drawer Manually on page 33.

Chapter 1: Introduction
0112-0126 B 10
SpectraMax Plus 384 reads 96-well plates, 384-well plates and strip-well plates, and
cuvettes.
SpectraMax 190 reads 96-well and strip-well plates.
SpectraMax 340PC384 reads 96-well plates and 384-well plates and strip-well plates.
VersaMax reads 96-well and strip-well plates.
When you do reads at wavelengths below 340 nm, you must use special UV-transparent,
disposable or quartz plates to allow transmission of the deep UV spectra.
Not all manufacturers' plates are the same with regard to design, materials, or configuration.
Temperature uniformity within the plate may vary depending on the type of plate used.
CAUTION! To prevent damage to the instrument, the height of the plate must not
exceed 25mm, including the lid if the plate is lidded.
Shake
The software enables you to define settings to shake the plate linearly along the long axis at
preset intervals to mix of the contents of the wells.
Endpoint read type: Settings enable you to shake the plate for a definable number of
seconds and then read at all selected wavelengths.
Kinetic read type: Settings enable you to shake the plate for a definable number of
seconds before the initial read, and/or for a definable number of seconds before each
subsequent read.
Use of shake is recommended for ELISAs and other solid-phase, enzyme-mediated reactions
to enhance accuracy.
Cuvette Chamber
The cuvette chamber on the SpectraMax Plus 384 is located at the right front of the
instrument. You manually lift up the lid over the chamber to insert or remove a cuvette. The
chamber contains springs that position the cuvette in the proper alignment for a read. You
must manually close the cuvette door before you initiate a read.
Handle cuvettes on the frosted sides only. Place the cuvette into the chamber so that the
“reading” (clear) sides face left and right.

VersaMax, SpectraMax 340PC384, 190, Plus 384 Microplate Readers User Guide
11 0112-0126 B
The guidelines for cuvette use in the instrument are the same as those that apply to any
high-quality spectrophotometer. You must ensure that the meniscus is comfortably above
the light beam in standard cuvettes and that the sample chamber in a microcuvette is
aligned properly with the beam. The light beam is 0.625 in (15.87 mm) above the cuvette
bottom.
The instrument can accommodate standard-height (45 mm), 1-cm cuvettes and 12 x 75 mm
test tubes when used with the test tube cover. The instrument does not accept short (25
mm high) microcuvettes. See Accessories on page 53.
Not all manufacturers’ cuvettes are the same with regard to design, materials, or
configuration. Temperature uniformity within the cuvette may vary depending on the type
of cuvette you use.
Temperature Regulation
The instrument contains an incubator that enables you to control the temperature in the
plate chamber for Endpoint read type protocols. When you power on the instrument the
incubator is off. The temperature in the plate chamber is ambient and isothermal.
The instrument is designed to regulate the temperature of the plate chamber from 4°C
above ambient to 45°C. The instrument control panel and the SoftMax Pro Software enable
you to turn the incubator on and off to adjust the plate chamber temperature. The
temperature set point defaults to 37.0°C at start-up.
The instrument control panel displays the temperature in the plate chamber except for the
SpectraMax Plus 384 where the instrument control panel displays the cuvette chamber
temperature. Use the SoftMax Pro Software to view the plate chamber temperature for the
SpectraMax Plus 384.
Typically, the plate chamber reaches 37.0°C in less than 30 minutes. The plate chamber
temperature is maintained at the set point until you to turn temperature regulation off.
Temperature regulation and control of the plate chamber is achieved through electric
heaters, a fan, efficient insulation, and temperature sensors. The heaters are located in the
plate chamber, which is insulated to maintain the temperature set point. The sensors are
mounted inside the chamber and measure the air temperature.
Accuracy of the temperature set point is guaranteed only if the set point is at least 4°C above
ambient. If the temperature set point is lower than the ambient temperature, the chamber
temperature remains at ambient. Temperature regulation is controlled by heaters only and,
therefore, cannot cool the temperature to a setting lower than ambient. Additionally, the
highest setting (45°C) can be achieved only if the ambient temperature is greater than 20°C.
Should you turn the incubator back on after a momentary shutdown, allow about ten
minutes for the control algorithm to fully stabilize the plate chamber temperature.
The temperature feedback closed-loop control algorithms measure the chamber air
temperature, compare it to the temperature set point, and use the difference to calculate
the regulation of the heating cycles. This technique results in accurate, precise control of the
chamber temperature with a temperature variation of the air inside the chamber of less than
1.0°C. The temperature uniformity within the plate depends on its design and composition.

Chapter 1: Introduction
0112-0126 B 12
The temperature sensors detect the temperature of the air inside the chamber, not the
temperature of the samples in the plate. If you use the instrument to warm the samples, use
a seal or lid on the plate to prevent evaporation of the sample. The seal or lid also helps to
maintain a uniform temperature. It can take an hour or more for a prepared sample to
equilibrate inside the plate chamber. You can speed up equilibration by pre-warming the
sample and the assay reagents to the desired temperature before you place the plate in the
chamber. Validate the data quality to determine whether the seal or lid can stay on the plate
for the read.

0112-0126 B 13
Chapter 2: Setting Up the Instrument
Before you unpack and set up the instrument, prepare a dry, flat work area that has
sufficient space for the instrument, host computer, and required cables. To provide access
for disconnecting power from the instrument, maintain a 20cm to 30cm (7.9in. to 11.8in.)
gap between the rear of the instrument and the wall. To ensure sufficient ventilation, do not
block the ventilation grid on the right side of the instrument.
WARNING! Potential lifting hazard. To prevent injury, use a minimum of two
people to lift the instrument.
The package contains the instrument and accessories to set up the instrument:
SoftMax Pro Software, product key, and installation guide
Instrument Installation Guide
USB computer connection cable
AC power adapter
Parallel printer connection cable
For a complete list of the package contents, see the enclosed packing list.
The packaging is designed to protect the instrument during shipment. Tape is placed on the
cuvette door and the plate drawer to protect the instrument from damage during shipment.
CAUTION! Do not touch or loosen screws or parts other than those specifically
designated in the instructions. Doing so could cause misalignment and possibly void
the warranty.
Note: Retain the shipping box and all packing materials for future transport needs.
CAUTION! When transporting the instrument, warranty claims are void if damage
during transport is caused by improper packaging.
To unpack the instrument:
1. Check the box for damage that occurred during transportation. Inform the supplier
immediately and keep the damaged packaging.
2. Open the top of the box.
3. Lift the accessories tool box and the instrument from the package and place the
instrument on a level surface.
4. Remove the packing material from both ends of the instrument and set the instrument
down carefully.
2

VersaMax, SpectraMax 340PC384, 190, Plus 384 Microplate Readers User Guide
14 0112-0126 B
Connecting Instrument Cables
The power cord and USB cable connect to the ports on the rear of the instrument.
Illustration Part Number Description
5064799 USB computer connection cable, 3meter (9.8foot)
4400-0002 or 4400-0036 Power cord, 1meter (3.3foot)
Note: Before you connect or disconnect the power cord, make sure that the power
switch that is on the rear of the instrument is in the Off position.
1. Make sure that the power switch that is on the rear of the instrument is in the
Offposition.
2. To use a computer to operate the instrument, connect the appropriate end of the
supplied USB cable to the USB port that is on the rear of the instrument, and then
connect the other end to a USB port on the computer.
3. To operate the instrument in standalone mode, connect one end of the 25-pin parallel
cable to the printer port, and then connect the other end to the printer.
4. Load paper into the printer according to the manufacturer's instructions and connect
the printer's power cord.
5. Connect the supplied power adapter to the power port that is on the rear of the
instrument, and then connect the other end to a grounded electrical wall outlet.

Chapter 2: Setting Up the Instrument
0112-0126 B 15
6. Turn the instrument around so that the front of the instrument now faces you.
Note: Ensure no cables run beneath the instrument.
7. Remove the tape from the cuvette door on the SpectraMax Plus 384.
8. Power on the instrument and wait for the plate drawer to open.
9. Remove the tape and protective covering from the drawer subplate.

0112-0126 B 16
Chapter 3: Getting Started
Now that you installed the SoftMax Pro Software software on the computer, removed the
tape from the drawer and the cuvette port, and connected the cables, it is time to get
started.
WARNING! Never use the instrument in an environment where potentially
damaging liquids or gases are present.
1. Set the power switch on the rear of the instrument to the On position. Wait for the
instrument to complete its diagnostic check and the plate drawer opens.
2. Start the software on the computer. To start the software under normal conditions, wait
for the instrument to complete the start-up sequence, and then double-click the
SoftMax Pro icon on the desktop to start the program.
Power off the instrument when not in use.
Control Panel
When you connect the instrument to a computer that runs the SoftMax Pro Software, you
use the computer to define most instrument settings within the software. You can optionally
use the instrument control panel in conjunction with the SoftMax Pro Software to open the
plate drawer, to adjust the temperature, and to adjust the wavelength settings. See the
SoftMax Pro Data Acquisition and Analysis Software User Guide.
When you connect the instrument to a printer and operate it in stand alone mode, the
instrument control panel enables you to run basic Absorbance read mode protocols. The
instrument control panel consists of a 2-x-20-character LCD and the following buttons.
Temp On/Off - For the Endpoint read type, press to turn the incubator on or off. When
the incubator is on, the set temperature and the actual temperature display in the LCD.
Temperature settings are not applicable for the Kinetic and Spectrum read types.
Temp and - Press to adjust the plate chamber temperature by 0.1°C increments.
Press and hold to rapidly adjust the temperature in 1°C increments.
λand - Press to adjust the wavelength by 1 nm. Press and hold to rapidly adjust the
wavelength in 10 nm increments. Wavelength settings are not available for the
VersaMax.
96/384 - For the SpectraMax 340PC384, press to select to read a 96-well plate or a 384-
well plate.
REF - For the SpectraMax Plus 384, press to do a Cuvette Reference correction method
read of buffer, water, or air taken in the cuvette that is used as I0to calculate Absorbance
or % Transmittance with the PathCheck Pathlength Measurement Technology. If no
reference read is taken, the instrument uses the I0values stored in the instrument
firmware. See PathCheck Pathlength Measurement Technology on page 20.
3

VersaMax, SpectraMax 340PC384, 190, Plus 384 Microplate Readers User Guide
17 0112-0126 B
Read Cuvette - For the SpectraMax Plus 384, press to initiate the sample read of the
cuvette.
Read - For the SpectraMax 190 and SpectraMax 340PC384, press to initiate the plate read
when you operate the instrument in stand alone mode. Data is sent to the printer port.
% T/A - For the SpectraMax Plus 384, press to change the display of cuvette data
between percent transmission and absorbance.
Drawer - Press to open or close the plate drawer.
General Workflow
Now that you have powered on the instrument and are familiar with the control panel you
are ready to use the instrument.
CAUTION! Use of organic solvents can cause harm to the optics in the instrument.
Extreme caution is recommended when you use organic solvents. Always use a plate
lid and do not place a plate that contains these materials in the plate chamber for
prolonged periods of time. Damage caused by the use of incompatible or aggressive
solvents is NOT covered by the instrument warranty.
SoftMax Pro Software Workflow
For this workflow you connect the instrument to the computer on which you install the
SoftMax Pro Software. See the SoftMax Pro Data Acquisition and Analysis Software User
Guide or application help for detailed instructions.
1. Power on the computer.
2. Start the SoftMax Pro Software and connect the software to the instrument.
3. Use the computer to define the protocol settings including read type, wavelengths, plate
type, read area, detection speed, temperature, shake, and kinetic timing.
4. Use the computer to open the plate drawer or manually lift the cuvette chamber door. If
you adjust the chamber temperature, the drawer closes after approximately 10 seconds
to maintain temperature control.
5. Place the plate on the plate slide for a plate read (well A1 on the front left of the drawer)
or place the cuvette into the cuvette chamber for a cuvette read (springs hold the
cuvette in place). Handle cuvettes on the frosted sides only. Place the cuvette into the
chamber so that the “reading” (clear) sides face left and right.
6. Use the computer to close the plate drawer or manually close the cuvette door.
7. Use the computer to start the read.
8. The computer displays the read data and the plate drawer opens.

Chapter 3: Getting Started
0112-0126 B 18
Stand Alone Mode
For this workflow you connect the instrument to a printer. The instrument control panel on
the SpectraMax 190 and the SpectraMax 340PC384 enable you to do an Absorbance read
mode Endpoint read type of a plate. The instrument control panel on the SpectraMax Plus
384 enables you to do an Absorbance read mode Endpoint read type of a cuvette. Stand
alone mode is not available for the VersaMax.
Note: Due to the continuous changes in printer technology and printer obsolescence,
Molecular Devices does not recommend relying on printing in standalone mode.
1. Power on the instrument and the connected printer.
2. Use the instrument control panel to set the wavelength and temperature for the read.
Wait for the plate chamber or cuvette chamber to reach the set temperature.
3. Use the instrument control panel to open the plate drawer or manually lift the cuvette
chamber door. If you adjust the chamber temperature, the drawer closes after
approximately 10 seconds to maintain temperature control.
4. Place the plate on the plate slide for a plate read (well A1 on the front left of the drawer)
or place the cuvette into the cuvette chamber for a cuvette read (springs hold the
cuvette in place). Handle cuvettes on the frosted sides only. Place the cuvette into the
chamber so that the “reading” (clear) sides face left and right.
5. Use the instrument control panel to close the plate drawer or manually close the cuvette
door.
6. Use the instrument control panel to start the read.

0112-0126 B 19
Chapter 4: Absorbance Read Mode
The instrument uses the Absorbance (ABS) read mode to measure the Optical Density (OD)
of the sample solutions.
Absorbance is the quantity of light absorbed by a solution. To measure absorbance
accurately, it is necessary to eliminate light scatter. If there is no turbidity, then
absorbance=optical density.
A=log10(I0/I)=–log10(I/I0)
where I0is intensity of the incident light before it enters the sample divided by the light after
it passes through the sample, and Ais the measured absorbance.
The temperature-independent PathCheck® Pathlength Measurement Technology
normalizes your absorbance values to a 1cm path length based on the near-infrared
absorbance of water.
The instrument enables you to choose whether to display absorbance data as Optical
Density (OD) or %Transmittance (%T) in the Reduction dialog.
Optical Density
Optical density (OD)is the quantity of light passing through a sample to a detector relative to
the total quantity of light available. Optical Density includes absorbance of the sample plus
light scatter from turbidity and background. You can compensate for background using
blanks.
A blank well contains everything used with the sample wells except the chromophore and
sample-specific compounds. Do not use an empty well for a blank.
Some applications are designed for turbid samples, such as algae or other micro-organisms
in suspension. The reported OD values for turbid samples are likely to be different when read
by different instruments.
For optimal results, you should run replicates for all blanks, controls, and samples. In this
case, the blank value that will be subtracted is the average value of all blanks.
% Transmittance
%Transmittance is the ratio of transmitted light to the incident light for absorbance reads.
T=I/I0
%T=100T
where Iis the intensity of light after it passes through the sample and I0is incident light
before it enters the sample.
Optical Density and %Transmittance are related by the following formulas:
%T=102–OD
OD=2–log10(%T)
The factor of two comes from the fact that %T is expressed as a percent of the transmitted
light and log10(100)=2.
4

VersaMax, SpectraMax 340PC384, 190, Plus 384 Microplate Readers User Guide
20 0112-0126 B
When in %Transmittance analysis mode, the instrument converts the raw OD values
reported by the instrument to %Transmittance using the above formula. All subsequent
calculations are done on the converted numbers.
Applications of Absorbance
Absorbance-based detection is commonly used to evaluate changes in color or turbidity,
permitting widespread use including ELISAs, protein quantitation, endotoxin assays, and
cytotoxicity assays.
PathCheck Pathlength Measurement Technology
The temperature-independent PathCheck® Pathlength Measurement Technology
normalizes your absorbance values to a 1cm path length based on the near-infrared
absorbance of water.
The Beer–Lambert law states that absorbance is proportional to the distance that light
travels through the sample:
A = εcL
where Ais the absorbance, εis the molar absorptivity of the sample, cis the concentration of
the sample, and Lis the pathlength. The longer the pathlength, the higher the absorbance.
Microplate readers use a vertical light path so the distance of the light through the sample
depends on the volume. This variable pathlength makes it difficult to do extinction-based
assays and makes it confusing to compare results between microplate readers and
spectrophotometers.
The standard pathlength of a 1 cm cuvette is the conventional basis to quantify the unique
absorptivity properties of compounds in solution. Quantitative analysis can be done on the
basis of extinction coefficients, without standard curves (for example, NADH-based enzyme
assays). When you use a cuvette, the pathlength is known and is independent of sample
volume, so absorbance is directly proportional to concentration when there is no
background interference.
In a plate, pathlength is dependent on the liquid volume, so absorbance is proportional to
both the concentration and the pathlength of the sample. Standard curves are often used to
determine analyte concentrations in vertical-beam photometry of unknowns, yet errors can
still occur from pipetting the samples and standards. The PathCheck technology determines
the pathlength of aqueous samples in the plate and normalizes the absorbance in each well
to a pathlength of 1cm. This way of correcting the microwell absorbance values is accurate
to within ±4% of the values obtained directly in a 1cm cuvette.
Other manuals for SPECTRAmax PLUS 384
1
This manual suits for next models
3
Table of contents
Other Molecular Devices Measuring Instrument manuals
Molecular Devices
Molecular Devices FlexStation II User manual

Molecular Devices
Molecular Devices MiniDigi User manual

Molecular Devices
Molecular Devices SpectraMax i3x User manual

Molecular Devices
Molecular Devices SpectraMax 340PC384 User manual

Molecular Devices
Molecular Devices SPECTRAmax 340PC User manual
Molecular Devices
Molecular Devices SpectraMax 190 User manual

Molecular Devices
Molecular Devices SpectraMax ABS User manual

Molecular Devices
Molecular Devices SPECTRAmax PLUS 384 User manual
Molecular Devices
Molecular Devices Digidata 1550B User manual