Molift Mover 300 User manual

Rev E 24/09/2013 BM06101 Molift MOVER 300 English Page 1 of 20

Page 2 of 20 BM06101 Molift MOVER 300 English Rev E 24/09/2013
Table of content
About Molift Mover 300.......................3
Before using the patient lifter .................... 3
Explanation of symbols ............................. 3
General safety precautions..................4
General ..................................................... 4
Lift and transfer ......................................... 4
Assembly and disassembly..................5
Unpacking ................................................. 5
Assembly................................................... 5
Disassembly.............................................. 6
Storage...................................................... 6
Checklist before use .............................7
Molift Mover 300 - use..........................7
Lift and transfer ....................................8
Use of spread legs .................................... 8
Using lifting slings ..................................... 8
Safety devices .......................................9
Emergency stop and lowering................... 9
Battery and charger system.............. 10
Battery care and charging ....................... 10
Battery capacity....................................... 10
Electronics............................................... 10
Technical data .................................... 11
Labelling.................................................. 12
Accessories......................................... 12
Lifting sling .............................................. 12
Equipment.......................................... 14
Quick release suspensions ..................... 14
Castor with directional lock ..................... 14
Integrated charger................................... 14
Suspension with scale............................. 14
Molift Stretcher ........................................ 14
Troubleshooting ................................ 15
Maintenance ...................................... 16
Cleaning .................................................. 16
Monthly inspection .................................. 16
Periodic inspection .................................. 16
Service .................................................... 17
Checklist for periodic inspection.............. 18
CE Declaration ........................................ 19
Etac AS
Etac Supply Gjøvik
Hadelandsveien 2
2816 Gjøvik

Rev E 24/09/2013 BM06101 Molift MOVER 300 English Page 3 of 20
About Molift Mover 300
Molift Mover 300 is a mobile lifter intended for lift-
ing and transferring persons to/from bed, oor,
chair or similar, wheelchair and toilet. The lift-
er is made out of light-weight materials, has cas-
tors and is powered by a battery. It has electrically
adjustable legs and a lifting capacity of as much
as 300 kg (660 lbs). It is therefore ideal for insti-
tutional care settings but can also be used in pri-
vates homes and nursing homes. The lifter should
only be used for transfers across short distances,
such as between a chair and a bed or into bath-
room/rest room and cannot replace a wheelchair
or similar.
The Molift Mover 300 with accessories as de-
scribed in this manual are CE marked according
to the Council Directive concerning medical de-
vices (93/42/EEC). The lifter is classied as medi-
cal equipment class 1, and tested and veried by
a third party, according to standards IEC 60601-1,
IEC 60601-1-2 and NS-EN ISO 10535:2006.
Before using the patient lifter
See page 5 for mounting description.
Before using a patient lifter, the operator should
be trained accordingly. Practice lifting a colleague,
and be lifted by others. It is important not only to
know how to move another person using the lift-
er, but also how it is to be lifted. Try and practice
using the relevant slings for the dierent types of
lifts and movement you may encounter. Before
lifting a person, you should explain the procedure.
When using the lifter, it’s also important to use the
correct sling and accessories according to:
• type of disability
• size
• weight
• type of movement
If a fault associated with the operational safe-
ty and reliability is identified, the lifter must
be taken out of use immediately and marked
“Out of order” or not put into use at all.
Explanation of symbols
This symbol is used to point out instructions
and information related to workplace safety
where injury may occur if the information is
disregarded or ignored. Follow these instruc-
tions, be careful and attentive at all times.
This symbol indicates important and useful
information. If taken into consideration, it
will help the operator of the lifter to work
eciently. It may help simplify routines and
to explain complicated facts.

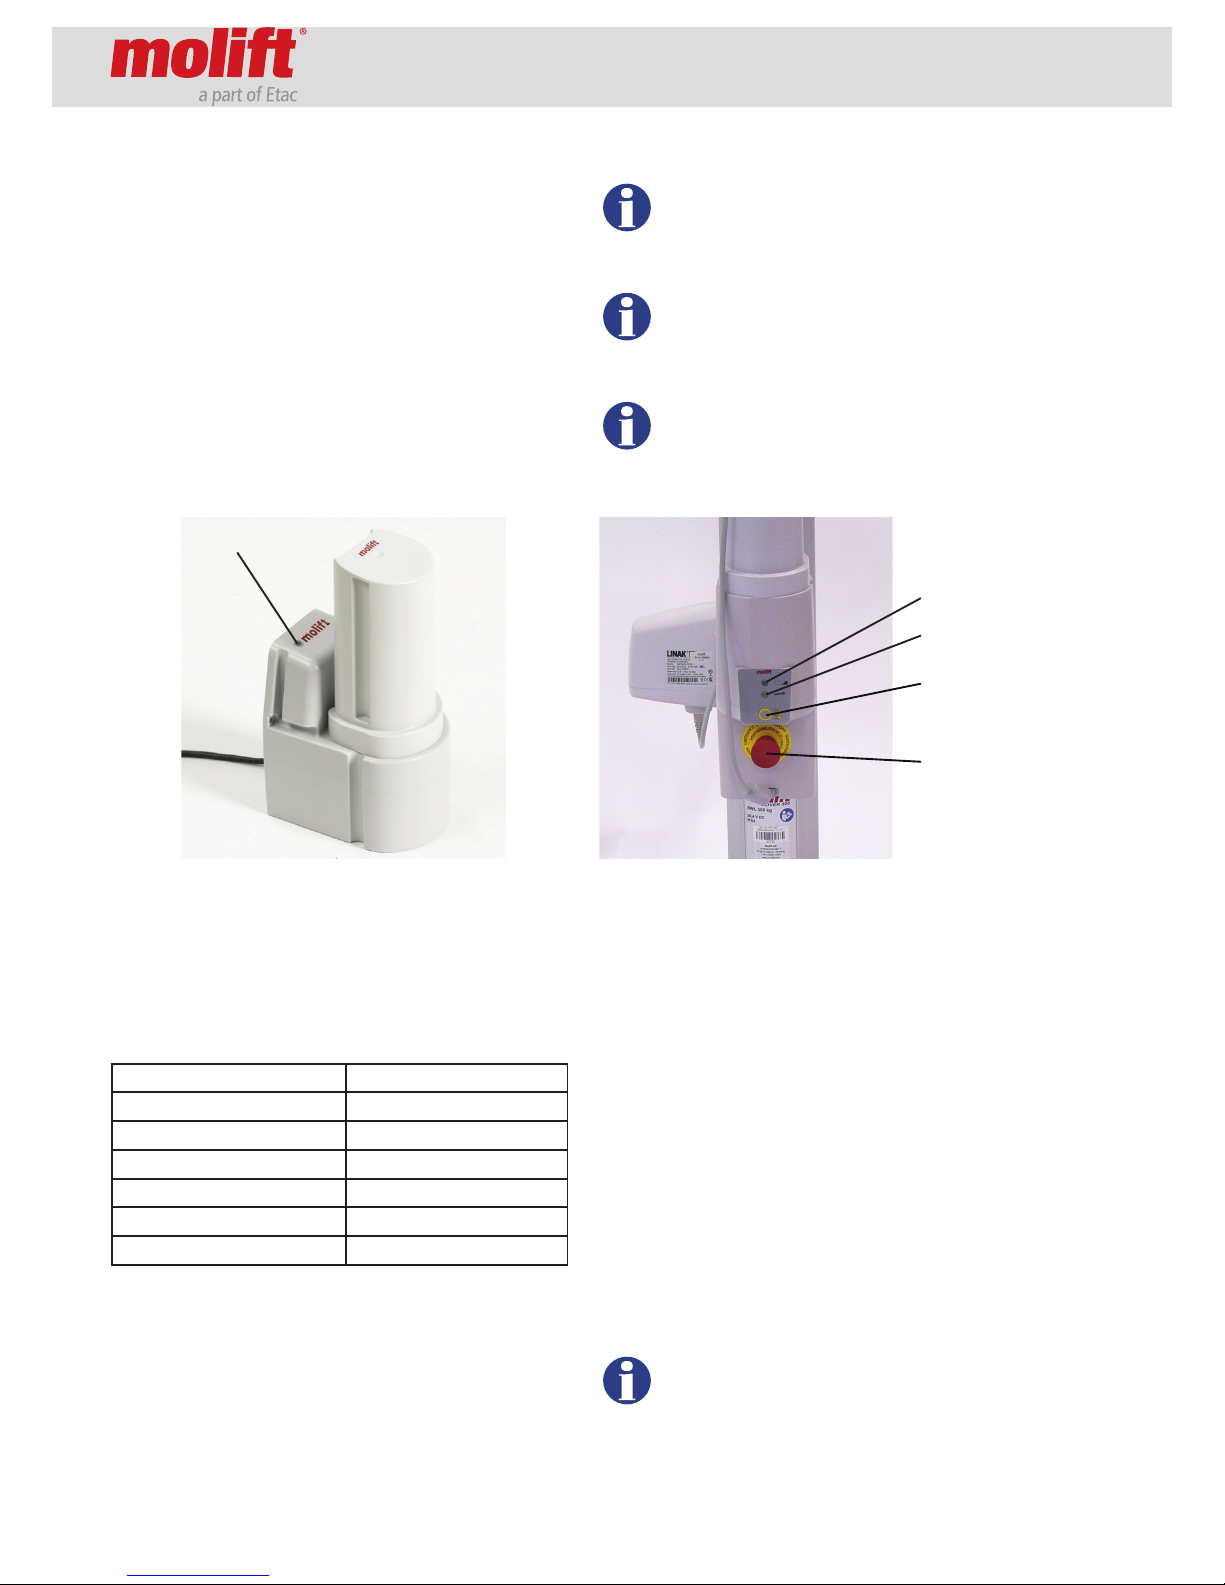
Page 4 of 20 BM06101 Molift MOVER 300 English Rev E 24/09/2013
General safety precautions
General
Before putting a Molift Mover 300 into operation,
the operator must ensure that the lifter and acces-
sories are in good working order, especially with
regards to safety.
A Molift Mover 300 shall only be used when all
safety devices and equipment is in place and fully
operational.
The lifter must be taken out of service immediate-
ly, or not returned to service, if faults and/or irreg-
ularities that may have inuence on the safety are
discovered.
The lifter has an expected lifetime of 10 years
or 30 000 lifts with max load (SWL), when all
recommended service is performed.
Injury to personnel or equipment may occur if
Molift Mover 300 is used in an incorrect manner
and if i.e.:
• covers are removed by unauthorised personnel
• used incorrectly
• insucient maintenance
• load exceeds maximum limit. The maximum
load stated in this manual and on the lifter is
the maximum load.
• unauthorised repair of electrical devices or ca-
bles.
Lift and transfer
The Molift Mover 300 has a Safe Working
Load of 300 kg/660 lbs, meaning that it is
tested and approved for lifting of patients
up to 300 kg/660 lbs. Attempts to lift patients
above SWL may damage the lifter and lead to
personal injury.
The patient lifter may tip over if used incor-
rectly! Ignorance of warnings and instruc-
tions may lead to personnel injury. Read in-
structions carefully before attempting to lift
anyone.
Pay close attention to your actions. Ensure
that all four loops of the sling are securely fas-
tened to avoid the user slipping or falling.
Use the push handle to manoeuvre the lift, do
not attempt to manoeuvre the lift by pushing
on the lifting arm, actuator or arm.
Torn, cut, frayed or broken slings can fail, re-
sulting in serious injury to the user. Use slings
in good condition only. Destroy and discard
old, unusable slings.
Molift slings shall only be used to lift persons.
Never use sling to lift and/or move objects of
any kind.
Molift Mover 300 should not be run con-
stantly for more than 2 minutes (with maxi-
mum load), and rest for minimum 18 min-
utes.
If the lifting movement does not start
when the corresponding button is pressed,
please consult the fault nding table in the
maintenance chapter to locate the fault.
Several factors have to be considered during
movement of the lifter. Stand to the side of the lift-
er when lifting. Ensure that arms and legs are clear
of the lift, chair, bed etc. try to maintain eye con-
tact with the user - this will help the user feel safe
and comfortable.
Medical electrical equipment requires spe-
cial precautions regarding electromagnet-
ic compatibility (EMC). Portable or mobile
radio communication equipment may af-
fect the medical electrical equipment, and
should be kept minimum 25 cm (10 inches)
from the lifters electronics

Rev E 24/09/2013 BM06101 Molift MOVER 300 English Page 5 of 20
Assembly and disassembly
Unpacking
• The lifter comes in one cardboard box. Verify
that the box has no apparent damage. If dam-
aged, check the content and contact your deal-
er for assistance if components are damaged.
• The box contains one complete Molift Mover
300 lifter with hand control, battery and bat-
tery charger with mains cable.
Assembly
• The chassis should be rolled out of the box.
• Charge the battery, see page 10.
Note! The battery must not be in the battery
holder during assembly!
• Place the column in the attachment on the
chassis, and push the column down as shown
below. The screw in front of the column should
t in the slot inside the chassis.
• Make sure that the red arrow on the lower part
of the column corresponds with the lock han-
dle. Fix the column with the lock handle. If the
column is not placed correct the lifter will not
work.
• Fix the column by
pushing the lock han-
dle on the back all the
way down
• Connect the hand control cable to the con-
tact on the underside of the battery holder. The
hand control has a hook that makes it possi-
ble to hang it on the drive handle or the plastic
hooks on the column.
• Place the battery in the holder with the con-
nectors facing down. Release the emergency
stop and run each function of the lifter to verify
proper function. (Always charge batteries be-
fore the lifter is ut into service).
• Mount the suspension by turning the opening
in the end cover upwards, and slide the attach-
ment fork in place (as shown below).
Check that the lifter is mounted correctly with
no loose parts or damages. Ensure that the
suspension and lifting column are properly
fixed.
Checklist after mounting
• Check the lifter according to checklist before
use on page 7.

Page 6 of 20 BM06101 Molift MOVER 300 English Rev E 24/09/2013
Disassembly
• Remove the suspension.
• Run the lifting arm all the way down.
• Remove the battery to avoid it from falling out
during transport.
• Release the lock handle on the chassis end re-
move the complete column with lifting arm.
• Place the hand control on the drive handle.
Storage
For long time storage it is recommended that the
battery is removed and the emergency stop but-
ton is activated. The lifter can be stored and trans-
ported under the following conditions:
Pressure: 70 - 106 kPa
Humidity: 15 - 93 %
Temperature: -25 - 70 °C
The lifter is designed for use at standard room
temperatures (+5 to +40°C). Following storage or
transport at other temperatures leave the lifter in
a room with a suitable temperature until it reaches
a safe operating temperature.

Rev E 24/09/2013 BM06101 Molift MOVER 300 English Page 7 of 20
Checklist before use
1. Check that the lifter has no apparent damage
or other faults.
2. Ensure that the lifting arm and lifting column
are properly xed and that there are no loose
parts on the lifter.
3. Check that the emergency button is deactivat-
ed and that the lifter works.
4. Check that you have suciently charged bat-
teries to complete the task you have planned
(no lights on the battery lamps).
5. Check that the service lamp gives a green light
indicating it is ready for use. If the service lamp
gives a yellow or red light, the lifter needs serv-
ice.
6. If faults or irregularities are discovered, the lift-
er should be taken out of service. Contact your
service partner or local Molift representative.
Molift Mover 300 - use
The Molift Mover 300 hand control has four but-
tons, two buttons for up and down, and two but-
tons for adjusting the adjustable legs in and out.
In addition there is a LED battery lamp which illu-
minates when the battery needs charging.
Emergency
stop
Electrical
emergency
lowering
Battery
Battery
lamp
Up
Down
Service lamp
Battery lamp
Hand control
Suspension
Drive handle
Chassis
Battery
FRONT
(direction of driving)
Lifting arm
Battery holder incl.
control electronics
and electrical emer-
gency lowering
Emergency stop
Motor/actuator
Lifting column
Legs
BACK
Legs outLegs in

Page 8 of 20 BM06101 Molift MOVER 300 English Rev E 24/09/2013
Lift and transfer
The suspension shall always be positioned across
the user as shown left in the illustration below.
Check that the sling is properly fastened to all
four hooks on the suspension to make sure
the patient is nor sliding or falling out.
Try to position the user as low as possible (prefer-
ably resting the feet on the chassis) when transfer-
ring the lifter with a suspended user. In this way,
the centre of gravity will be as low as possible and
therefore reducing the risk of instability. The lifter
should be manoeuvred with spread legs in outer
position to achieve the highest possible stability.
Be careful during movement - the suspended user
may swing somewhat during turns, stops and
starts. Be particularly careful when manoeuvring
close to furniture to prevent the suspended user
from colliding with these objects.
The lifter shall not be used to lift or move us-
ers on sloping surfaces.
Avoid deep pile carpets, high thresholds, uneven
surfaces or other obstacles that may block the cas-
tors. The lifter may become unstable if forced over
such obstacles increasing the risk of tipping over.
The lifter shall only be used for movement
over short distances. It is not a replacement
for wheelchair or similar.
Use of spread legs
Use wide legs wherever appropriate, for instance
to position the lifter around wheelchairs, toilets etc.
The leg spreading mechanism has a safety function
preventing it from squeezing with high force. This
may lead the motor to stop if changing direction
quickly. Push another button to start again.
Using lifting slings
The Molift lifting slings are easy to use. Please see
the user manual that comes with the sling for spe-
cic instructions.
It is recommended to use Molift Easy slings.
Slings from other manufacturers may have
other specifications leading to unexpected
instability and possible injury to personnel.
Torn, cut, frayed or broken slings can fail, re-
sulting in serious injury to the user. Use slings
in good condition only. Destroy and discard
old, unusable slings.
Molift Easy sling
Fold the sling as indicated above before use. The
grey side should be facing away from the user
when putting the sling in place. The sling should
be held by one hand, leaving the other free to
move and support the user.

Rev E 24/09/2013 BM06101 Molift MOVER 300 English Page 9 of 20
Safety devices
Molift Mover 300 is equipped with several safety
devices, which are intended to prevent damage to
personnel and equipment in the case of incorrect
use.
• The lifter has an overload sensor preventing
the lifter to be operated with more than safe
working load, 300 kg/660 lbs. If the load ex-
ceeds the SWL, the lifter will stop the move-
ment.
• The lifting arm is hinged to prevent the arm
and suspension from squeezing the patient if it
is lowered too much. The actuator will not pro-
duce any force when moving downwards.
• The suspension has safety hooks to prevent the
sling loops to fall o.
• The electronics are disabled if the temperature
rises beyond a critical limit. Wait until the lifter
has cooled down before using it again.
Emergency stop and lowering
Contact your Molift service partner if the rea-
son for failure causing an emergency lower-
ing is unknown or if it is a result of failed com-
ponents or parts.
Emergency stop
The emergency stop will cut the power to the ac-
tuator, and is situated on the battery holder on the
lifting column. Turning it clockwise until it pops
out will reset the emergency button.
Electrical emergency lowering
It is possible to perform an emergency lowering of
the lifting arm in case of a general malfunction of
the control electronics. The button can be found
on the battery holder. If you need to perform an
emergency lowering, move the lifter to a suitable
location to lower the user.
• Press the emergency lowering button. The lift-
ing arm will then perform a smooth downward
movement. The emergency stop button can
not be activated when performing electrical
emergency lowering.
• If the lifter still does not work, change battery
and try the emergency lowering procedure
again.
• If it still does not work, the suspended user
must be lifted out manually either by using the
manual lowering function or by requesting as-
sistance.
Manually emergency lowering
The manually lowering function on the actuator is
only to be used when the electrical lowering does
not work.
Turn clockwise (see arrow on top) to lower the lift-
ing arm carefully until the patient is safely placed
in a bed or a chair.
Emergency
stop
Electrical
emergency
lowering
Manual emer-
gency lower-
ing

Page 10 of 20 BM06101 Molift MOVER 300 English Rev E 24/09/2013
Battery and charger system
Battery care and charging
Molift Mover 300 is supplied with a battery with a
26,4 V cell unit that is placed in the battery hold-
er on the lift. A battery charger is also supplied to
be located easily accessible, either stand-alone or
mounted on the wall. Connect the charger mains
cable to the wall socket when charging the bat-
tery. The Charger must be placed or installed in
a way that makes it easy to disconnect mains ca-
ble plug. Disconnect the charger mains cable plug
when the charger is not in use. Take care not to
damage the cable
Place the battery in the charger. After a few sec-
onds the LED will change from yellow to orange,
indicating that the battery is charging. When the
LED gives a constant green light the battery is fully
charged. The charger LED (Light Emitting Diode)
is indicating the status of the battery as described
below:
Charger LED Mode
Yellow No battery
Yellow Initiation (10 sec)
Red Fast charge
Green/Yellow Top-off charge
Green Trickle charge
Red/Green Error
Battery capacity
The battery lamp on the hand control and on the
battery holder will illuminate if the voltage of the
battery falls below a certain level, indicating the
need for charging. There will also be an audible
signal. There is still enough capacity to perform
3-5 lift cycles (75 kg/ 165 lbs) at this point.
If the battery is discharged during a lift, it
is always enough power to lower the user
down again.
New batteries will not achieve full capaci-
ty before it has been fully charged and dis-
charged a couple of times.
The battery lifetime is about 500 charging
cycles.
Electronics
There is a counter implemented in the electronic
system of the lifter, registering the number of lifts.
This number can be read by using the Molift Serv-
ice tool, and a service lamp indicates when the lift-
er needs service consisting of exchange of the lift-
ing motor. See the chapter “Maintenance”.
The electronic system has a power save-function
which makes the system sleep after a while with
no activity. All lights will go out. Activate the sys-
tem by pushing one of the buttons on the hand
control.
If the lifter is run up and down constantly for a
longer period, the electronics may be overheated
and the lifter will stop. Wait until the lifter is cooled
down enough for further use.
Discarded lifters and batteries should be
handled as electronic waste and collected
separately according to local laws and reg-
ulations.
Emergency
stop
Electrical
emergency
lowering
Service lamp
Battery lamp
Charger LED

Rev E 24/09/2013 BM06101 Molift MOVER 300 English Page 11 of 20
Technical data
Weight, total:
Ex. battery and suspension; 36 kg / 79 lbs
Chassis: 19 kg / 42 lbs
Lifting column: 17 kg / 37 lbs
Battery: 1.6 kg / 3.7 lbs
Suspension: 3.3 kg / 7.3 lbs
Material:
Steel, aluminium and composite plastic
Motor:
Lifting motor/actuator: 24 V DC
Leg spreading motor: 12 V DC
Battery:
Art.no: 1341000
26,4 V NiMH 2,2 Ah,
ATO Fuse 20 A
Battery charger:
Mascot type 2215,
10-22 cells NiCd/NiMH
Protection:
IP24
Number of lifts with fully charged battery:
50 lifts ( 75 kg / 165 lbs
up/down 50 cm / 20 inches)
Safe Working Load (SWL):
300 kg / 660 lbs
Lifting speed:
27 mm/sek /1.06 inch/sec
Sound level, max A-weighted sound power level:
LWA = 63,2 dB
Operating forces:
Buttons on hand control: 3,4 N
Turning diameter:
1400 mm (55.1 inches)
Measurements:
1322 x 702 x 1388 mm (LxWxH)
52,0 x 27,6 x 54,6 inches (LxWxH)
1 Highest position 2070 mm
2 Maximum reach position 1340 mm
3 Lowest position 650 mm
A Maximum reach at 600 mm 1340 mm
B Maximum reach from base 630 mm
C Reach from base with legs spread
to 700 mm
180 mm
D Base height 115 mm
E Base clearance 43 mm
R
M
1
2
3
A
B
L
H
G
F
K
Q
C
w=700
P
E
D
h=600
F Min. distance from wall to CSP (1) 710 mm
G Min. distance from wall to CSP (2) 295 mm
H Min. distance from wall to CSP (3) 640 mm
K Maximum height of CSP 2070 mm
L Minimum height of CSP 650 mm
M Hoisting range 1420 mm
P Maximum internal width 1065 mm
Q Internal width at maximum reach 950 mm
R Minimum internal width 58,5 mm

Page 12 of 20 BM06101 Molift MOVER 300 English Rev E 24/09/2013
Labelling
The main label is placed on the bottom of the col-
umn.
The control label is placed on the right side of the
battery holder
Manufacturer
Read the
user manual
Safe Working Load
For indoors
use
Model name
Part number and
year/week of pro-
duction
Serial number /
barcode
Nominal battery
voltage
Type BF Applied
Part
Separate waste collection
Periodical inspection
each 12 month
Control lifter accord-
ing to checklist
on page 18
Designated area for
calendar and signed
label for periodical
inspection
READ THE USER
MANUAL!
Accessories
Lifting sling
Molift Easy Paediatric Sling
Size No head support With head support
XXS Part no 3005050 Part no 3006050
XS Part no 3005000 Part no 3006000
Easy Toilet Sling and Basic Bathing Sling for kids,
see the tables below, size XXS and XS.
Molift Easy Sling
Size No head support With head support
XS Part no 3025000 Part no 3026000
S Part no 3025100 Part no 3026100
M Part no 3025200 Part no 3026200
L Part no 3025300 Part no 3026300
XL Part no 3025400 Part no 3026400
XXL Part no 3025500 Part no 3026500
Molift Basic Sling
Size No head support With head support
XXS Part no 3021050 Part no 3022050
XS Part no 3021000 Part no 3022000
S Part no 3021100 Part no 3022100
M Part no 3021200 Part no 3022200
L Part no 3021300 Part no 3022300
XL Part no 3021400 Part no 3022400
XXL Part no 3021500 Part no 3022500
Molift Basic Bathing Sling
Size No head support With head support
XXS Part no 3023050 Part no 3024050
XS Part no 3023000 Part no 3024000
S Part no 3023100 Part no 3024100
M Part no 3023200 Part no 3024200
L Part no 3023300 Part no 3024300
XL Part no 3023400 Part no 3024400
XXL Part no 3023500 Part no 3024500
Molift Basic Full Sling
Size With head support
S Part no 3047010
M Part no 3074011
L Part no 3047012

Rev E 24/09/2013 BM06101 Molift MOVER 300 English Page 13 of 20
Molift Easy Toilet Sling
Size No head support With head support
XXS Part no 3032050 Part no 3033050
XS Part no 3032000 Part no 3033000
S Part no 3032100 Part no 3033100
M Part no 3032200 Part no 3033200
L Part no 3032300 Part no 3033300
XL Part no 3032400 Part no 3033400
XXL Part no 3032500 Part no 3033500
Molift Easy Toilet Sling Comfort
Size No head support Separate
head support
XXS Part no 3016050 Part no 3016055
XS Part no 3016000 Part no 3016001
S Part no 3016100 Part no 3016111
M Part no 3016200 Part no 3016222
L Part no 3016300 Part no 3016333
XL Part no 3016400 Part no 3016444
XXL Part no 3016500 Part no 3016555
Molift Easy Amputee Sling
Size No head support With head support
XXS Part no 3027050 Part no 3028050
XS Part no 3027000 Part no 3028000
S Part no 3027100 Part no 3028100
M Part no 3027200 Part no 3028200
L Part no 3027300 Part no 3028300
XL Part no 3027400 Part no 3028400
XXL Part no 3027500 Part no 3028500
Molift Patient Specic Sling
Size With head support
S Part no 3050100
M Part no 3050200
L Part no 3050300
XL Part no 3050400
Read the user manual that comes with the
sling for specic instructions
Bag for slings - Part no 3048000
Sling size guide
Easy and Basic Slings
Size Color
code
Recomm.
weight
(Kg)
A
(cm)
B
(cm)
C
(cm)
XXL White 230-300 86 130 68
XL Blue 160-240 76 115 66
LGreen 90-160 66 100 64
MYellow 45-95 56 85 62
SRed 25-50 51 75 60
XS Light blue 17-25 46 65 58
XXS Pink 12-17 41 55 56
Choice of sling size depends on both user weight
and shape/size of user.
A
B
C

Page 14 of 20 BM06101 Molift MOVER 300 English Rev E 24/09/2013
Equipment
Quick release suspensions
Steel suspensions
• 4 point steel, Large, size 560x350 mm,
Part no: 1430002
• 4 point steel, Medium, size 450x300 mm,
Part no: 1430001
• 4 point steel, Small, size 350x240 mm
Part no: 1430009
• 2 points steel, Large, size 560 mm,
Part no: 1430007
• 2 points steel, Medium, size 450 mm,
Part no: 1430006
• 2 points steel, Small, size 350
Part no: 1430008
The suspensions can be used on other Molift lift-
ers with the same quick release. If the suspension
is mounted on a lifter with lower SWL, the lowest
SWL will apply!
Castor with directional lock
- Part no 1320140
The castor can be changed according to descrip-
tion in Technical Manual by authorized personnel.
This castor has no brake, therefore we recom-
mend to change only one of the castors. Push the
red handle down to lock the direction. Release by
pulling the handle up.
Integrated charger
• Part no 1340101
The charger can be mounted on the lifter perma-
nently. Park the lifter and connect to a wall socket
to charge the battery.
Suspension with scale
• Scale with 4 point steel suspension, Large,
Part no: 1431001
• Scale with 4 point steel suspension, Medium,
Part no: 1431002
Read the user manual that comes with the
Scale before use.
Change to suspension with scale with quick re-
lease as you change to any other suspension.
Molift Stretcher
• Molift Stretcher (excl loops), Part. no: 2150103
Standard set of lifting loops, Part no: 2150357
Set of auto strap collector, Part no: 2150356
Set of Safety belt, Part no: 2150355
The Molift stretcher can be used in combina-
tion with all Molift 4-point suspensions on
Molift Partner 205.
• Molift Stretcher MR compatible
Part no: 2150108
Only available with Standard set of lifting
loops, Part no : 2150357
Read the operating manual that comes to-
gether with the stretcher before use.

Rev E 24/09/2013 BM06101 Molift MOVER 300 English Page 15 of 20
Troubleshooting
Faults on lifters that do not function as they should
after assembly (page 5) or after the check before
use has been completed (page 8), can be localized
using the troubleshooting table below.
Symptom Possible cause/action
The lifting column
is wobbly
The lifting column is not cor-
rectly positioned in the chassis
or the locking handle is not fully
locked / verify position of lift-
ing column and locking handle
acc. to mounting instructions on
page 5.
The lifter moves
unevenly on a
plane surface
The castors move unevenly be-
cause of pile and dust / clean
castors as described on page
16.
Fault in the leg spreading
mechanism / contact local rep-
resentative for service.
The lifter only
moves in one di-
rection/ adjustable
legs only moves in
one direction
Hand control has failed / test
with another hand control and
change if defective.
The control electronics has
failed / contact local representa-
tive for service and use manu-
ally emergency lowering, where
necessary.
The lifter moves
uncontrolled /
adjustable legs
moves uncon-
trolled
Short circuit between hand con-
trol and lifter / clean hand con-
trol plug surfaced with alcohol
to remove grease
Defective hand control / replace
hand control / contact local rep-
resentative for service
The control electronics has
failed / contact local representa-
tive for service
Symptom Possible cause/action
The lifting arm
does not move
Emergency stop button is acti-
vated / turn button clockwise to
reset emergency stop, see p. 9.
Battery is empty / change to
new battery or recharge battery,
see page 10.
The control electronics of the
lifter is overheated / Leave lifter
to cool down, see page 10
The lifter is overloaded / make
sure the load does not exceed
300 kg, see page 9
The hand control cable is un-
plugged / reconnect plug
Hand control has failed / re-
place hand control / contact lo-
cal representative for service
Defective control electronics /
contact local representative for
service
Battery does not
recharge
Faulty battery / try another bat-
tery / replace battery
Faulty battery charger / try an-
other charger / contact local
representative for service
If you have access to more than one lifter, it may
be helpful to change parts across lifters to help
identify any faults. For instance, if you suspect the
fault to be inside the hand control, exchange the
hand control with at functional one from another
similar lifter to see if the problem is xed.
If you are not able to solve the fault or problems
by yourself using this manual, please contact lo-
cal authorised service representative. If you do
not know whom to contact locally, please contact
your dealer or Etac Supply Gjøvik to get help.

Page 16 of 20 BM06101 Molift MOVER 300 English Rev E 24/09/2013
Maintenance
Maintenance of the lifter consists of check be-
fore use, cleaning, inspection and service. Check
the lifter according to the checklist before use on
page 7, to reveal faults or errors. In regularly in-
spections of the lifter, which as a minimum should
be monthly inspections and annual (periodic) in-
spections.
Cleaning
Detergents must be pH-neutral. Do not use
solvents or strong liquids - this may dam-
age surfaces on the lifter. For disinfection
when needed; use isopropyl alcohol. Avoid
abrasive cleaning products.
• Clean surfaces with a damp cloth using an ap-
propriate detergent.
• Remove hair and pile from the castors and ver-
ify that the castors rotates without abnormal
friction.
• Clean contact and hand control with spirit or
similar to remove grease and dirt.
• Regular cleaning is recommended and should
be implemented in the suitable cleaning rou-
tines.
Monthly inspection
Assemble the lifter before inspection.
• Check the lifter according to the checklist be-
fore use on page 7.
• Clean the lifter as described above.
• Verify that the contacts of the hand control and
charger is rmly in place, and verify that the ca-
bles for the hand control, actuator and charger
are intact.
• Run the lifter up and down to verify that it runs
normally and without any abnormal noise.
• The lifter must be taken out of service imme-
diately and marked “Out of order”, or not taken
into service, if faults and/or irregularities are
discovered.
Periodic inspection
Etac Supply Gjøvik recommends periodic inspec-
tion once a year, alternatively more often if re-
quired by local regulations. Use the checklist for
periodic inspection on page 18.
Inspection is to be performed by authorized per-
sonnel. The owner is responsible to ensure prop-
er logging and written verication of each inspec-
tion.

Rev E 24/09/2013 BM06101 Molift MOVER 300 English Page 17 of 20
Service
Molift Mover 300 has a LED on the battery holder
indicating if the lifter needs service. The LED gives
a green light when the lifter is ready for use.
The electronics logs how much the lifter is being
used, and the load it is used with. After a given
time of usage there will be given a signal that the
lifter needs service to the service LED. The LED will
rst give a yellow light, then red. Take contact with
your local service representative and order serv-
ice. If there is a sound together with the light, it
means the lifter needs service immediately.
Service lamp Status
No light Power save
Green Ready for use
Yellow Order service, lifter still
works
Red Perform service
Red + sound Perform service imme-
diately
Service consists of replacing the lifting motor and
check/replacement of worn or damaged parts.
Service and repair shall be performed only by an
authorised service representative according to
procedures in the technical manual.
The service partner uses the Molift Service Tool to
read the data from the lifter, and for logging serv-
ice and resetting the service LED. The owner is re-
sponsible to ensure proper logging and written
verication performed by authorised service part-
ner.
A list of spare parts is avalable on request
Battery lamp
Service lamp
Electrical emer-
gency lowering

Page 18 of 20 BM06101 Molift MOVER 300 English Rev E 24/09/2013
Checklist for periodic inspection
19.05.2011
Lifter serial no.: .............................. .................................. other ID no. (if any):.......................................................
Client: ............................................. ................................. ..................... ..................................................................
Inspection carried out by: (Block capitals) ........................ .............. from..................................................................
Molift certification no. (if any) for inspector/repairer: ........ ..................... ..................................................................
The equipment has been tested and is in full working order
Yes
No
Place: ................................... Date: ................ Signature: ..................... ..................................................................
Checklist for periodic inspection of Molift Patient Lifters
Molift Mover 300
Revision A –05/2011
COMPULSORY SAFETY CHECK (annual):
OK Fault Corrected Visual inspection
Whole lifter checked for damage, cracks and deformation and
found to be in good order. (Especially suspension, lifting arm,
lifting motor, wheels and all cables).
Lifter has been correctly assembled and no parts are missing.
(Especially column lock, column attachment and suspension).
Accessories have been checked. See separate form for sling.
Battery charger is an accessory.
List the accessories checked:……………….……………….……
Function checks
Emergency stop and hand control have been checked and are in
working order.
The lifter has been rolled over the floor (preferably under load)
and runs easily and steadily.
Leg spreading mechanism has been fully extended and
retracted (preferably under load), and moves evenly and without
noise (stops in correct positions).
The lifter has been fully raised and lowered (preferably under
load) and moves evenly, without noise, and the lifting motor
shows no runout.
Servicing required
Servicing unnecessary because the servicing lamp is on green
and the lifter is under 5 years old.
Completed Compulsory in case of faults under one of the above points:
The lifter has been removed from service and clearly marked "OUT OF
ORDER".
Certified personnel have been summoned to carry out repairs and servicing.
Name /Tel./ Fax:………………………………………………………………………
Completed Compulsory where lifter has been checked and approved:
The lifter has passed the safety check and been affixed with the Molift safety
check label, duly dated and signed.
The ticked and signed checklist has been passed to the client and a copy sent to
your Molift dealer.
Comments on faults and repairs:..................... ................. .....................................................
............................................. .......................... ................. .....................................................
............................................. .......................... ................. .....................................................

Rev E 24/09/2013 BM06101 Molift MOVER 300 English Page 19 of 20
CE Declaration

Find your distributor
visit Molift.com
Table of contents
Other Molift Lifting System manuals
Popular Lifting System manuals by other brands

Zenit
Zenit blueBOX Use and maintenance instructions

WHIP INDUSTRIES
WHIP INDUSTRIES WA102E Installation, operation & maintenance manual

morse
morse 195AM-A Operator's manual

Custom Equipment
Custom Equipment Hy-Brid Lifts I Series MAINTENANCE & TROUBLESHOOTING MANUAL

morse
morse MORStak 289F Operator's manual

Caldwell
Caldwell OMNI DRIVE installation instructions