Sabaj K-2 User manual

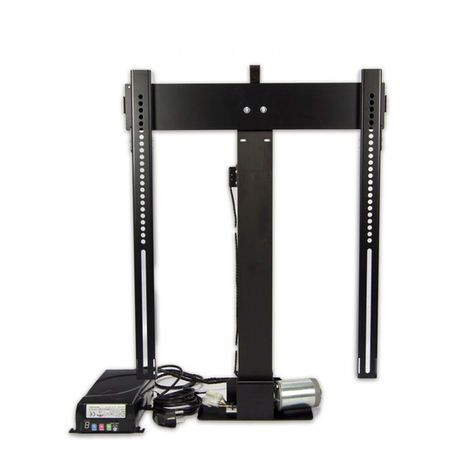
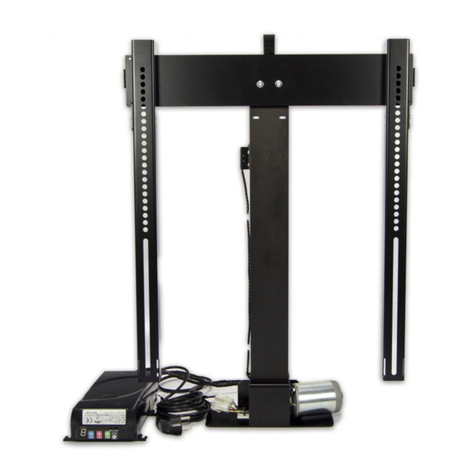
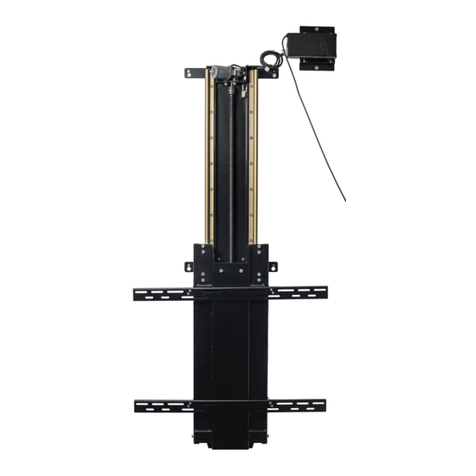
K-2 DOWN TV LIFT
User Manual

2
Wall mount:
Lift’s elements:
1. Connect the control box to the lift and launch the lift to the maximumhigh.
2. Install wall beam.
1 pc.
1 pc.
2 pcs.
POWER
2 pcs.

3
3. Mount the horizontal beams to screen.
4. Set the upper beam hooks and secure. Watch for max L Value
5. Mount the lift on the wall.

4
6. Hang TV on the beam hooks and secure.

5
Ceiling mount:
Lift’s elements:
1. Mount strengthening bracket.
2. Mount upper plate.
1 pc.
1 pc.
1 pc
1 pc
2 pcs.

6
3. Mount the beams to screen.
4. Set the upper beam hooks and secure.
5. Mount the lift to the ceiling.

7
6. Hang TV on the beam hooks and secure
.

CONTROL BOX MANUAL K-DOWN
The above image is of the lift Mechanism’s Control Unit’s keypad.
Programming the VP (Viewing Position)
ATTENTION! You have to set the VP it you want all of the lifts
functions to work properly To set the VP follow this procedure:
Press&Hold the SETUP button for about 3 seconds, until you will hear two short “beeps” and the red
SETUP light is lit
You are now in the programming mode:
Press&Hold the UP or DOWN button to set the preferred position. You can change the movement
speed in the setup mode, by pressing the SETUP button once. There are 2 movementspeeds.
ATTENTION! The safety system is turned off in the setup mode. The lift is moving slower than
normally
When you have set you preferred position, press&hold the SETUP button for about 3 seconds,
until you will hear two short “beeps” and the red SETUP light is down. The viewing position is
now set.
Remote Control assignment
To assign the remote control, press the SET button and then press any button and hold one of the
remotes buttons for about 1 second. If the remote is assigned, you will hear a short “beep”.
ATTENTION! the remote assignment mode is active for about 30 seconds after pressing&holding the
SET button. If the signal from the remote is not received during this time, the control box will quit the
remote assignment mode.
Display messages:
The numeric display shows the information about the lift operation. If the display shows :
“0” Blinking -electric motor overload (currentexceeded)
“1” Blinking –inactive
“2” Blinking – inactive
“3” Blinking -wiring loom not connected to the controlbox
“4” Blinking - lower limit switchactivated
“5” Blinking – upper limit switchactivated
„h” Blinking - no motor impulses
Pressing any button will delete the display message.
IR remote control assignment (IR version only)
DOWN
U
UP
P
SETUP
CODE
RCSET
SETUP

9
It is possible to assign two selected buttons of any infrared remote control (TV, CABLE, DVD, etc.). Selected
buttons will be used to control the movement of the elevator up and down (UP, DOWN)
To assign an infrared remote control, do the following:
• Connect an infrared receiver to raise the control box back.
• Press and hold the SETUP button (blue) for about 3 seconds until you hear a beep and the red SETUP indicator
lights up. Now you are in setup mode.
• Select the button on the IR remote control that you would like to move up. Aim the remote control at the
infrared receiver and press the selected button. The red Power LED dims once confirming the reception of the
remote control signal
• Select the button on the IR remote control that you would like to use for the DOWN movement. Aim the
remote control at the infrared receiver and press the desired key. Red, the power LED will go off twice,
confirming the reception of the remote control signal
• Press and hold the SETUP button (blue) for about 3 seconds until you hear two beeps and the red SETUP
indicator goes off. Your infrared remote control has been registered.
Setting RF control
The supplied RF remote control is already programmed with your TV-Lift. If you are programming yourself, use
the following steps:
press and hold the RC SET button for approx. 3 sec.
the lift will wait for a signal from the remote control for 15 seconds.
press any button on the remote control
the lift will save the new remote control, which will now be active
NOTE: The controller has memory for 8 pilots. If you want to program the 9th remote control, it will be
overwritten for the 1st.
Active RJ-45 socket
Your driver in the Premium version is equipped with an active RJ-45 socket, which allows you to connect
additional accessories supplied by Sabaj-System. NOTE: Only the original accessories manufactured by Sabaj-
System will be compatible with your driver. If you attempt to modify or connect other devices via the RJ-45 port,
you may damage or destroy the controller - this will void the warranty.

10
K-2 DOWN TV LIFT
Instrukcja montażu
Montaż Scienny:
Komponenty:

11
7. Podłącz sterownik do wiązki kablowej podnośnika I podnieś go na maksymalną wysokość .
[dodać zdjęcie podłączenia wiązki]
8. Zamontuj uchwyt ścienny.
1 pc.
1 pc.
2 pcs.
2 pcs.

12
9. Zamontuj uchwyty poziome do telewizora.
10. Ustaw górny uchwyt belki poziomej tak , aby mie przekroczyć wartośći max L w punkcie 3. Skręć uchwyty w szynach.
11. Zamontuj podnośnik na scianie.

13
12. Załóż telewizor na uchwytach i dokręć śruby zabezpieczające.

14
Montaż sufitowy:
Komponenty:
7. Zamontuj kątownik wzmacniający.
8. Do zmontowanego kompletu przykręć płytę montażową.
1 pc.
1 pc.
1 pc
1 pc
2 pcs.

15
9. Zamontuj uchwyty poziome do telewizora.
10. Ustaw górny uchwyt belki poziomej tak , aby mie przekroczyć wartośći max L w punkcie 3. Skręć uchwyty w
szynach
11. Przykręć podnośnik do sufitu

16
12. Załóż telewizor na uchwytach i dokręć śruby zabezpieczające
.

17
Programowanie pozycji do oglądania VP (VIEWING POSITION)
UWAGA! Aby wszystkie funkcje jednostki sterującej działały prawidłowo, należy
zaprogramować.
VP (VIEWING POSITION).
Aby ustawić VP, należy przeprowadzić następujące czynności:
Naciśnij i podtrzymaj przez około 3sekundy przycisk (niebieski) SETUP, aż usłyszysz dwa krótkie
sygnały
„beeps” i zapali się czerwona kontrolka SETUP. Teraz jesteś w trybie programowania VP.
Naciśnij i podtrzymaj przycisk UP tak długo, aż winda osiągnie maksymalne górne położenie
Naciśnij i podtrzymaj przycisk DOWN aby ustawić wymaganą pozycję VP. Są dostępne dwie
prędkości ruchu.
Możesz zmieniać prędkość poruszania się windy naciskając krótko przycisk SETUP.
Po ustawieniu pozycji VP, naciśnij i podtrzymaj przycisk SETUP przez około 3 sekundy, aż
usłyszysz dwa krótkie
sygnały „beeps” i czerwona kontrolka SETUP zgaśnie. Pozycja preferowana VP jest ustawiona.
Rejestracja do jednostki sterującej pilota zdalnego sterowania
Aby zaprogramować pilota naciśnij przycisk RCSET, a następnie naciśnij i podtrzymaj przez około 1
sekundę dowolny
przycisk na pilocie. Jeśli pilot zostanie zarejestrowany usłyszysz krótki sygnał „beep”.
UWAGA! Tryb programowania pilota jest aktywny przez około 30 sekund od naciśnięcia
przycisku RCSET.
Po tym czasie jednostka kontrolna samoczynnie przechodzi do trybu normalnej pracy.
Wyświetlane komunikaty:
Wyświetlacz informuje o stanie pracy windy. Jeśli na wyświetlaczu pojawi się :
“0” pulsujące – przeciążenie silnika (przekroczony dopuszczalny prąd silnika)
“1” pulsujące –
“2” pulsujące –
“3” pulsujące – kable od windy nie są podłączone do jednostki sterującej
“4” pulsujące - sprawdź wyłącznik krańcowy górny i zaprogramuj VP (VIEWING POSITION)
“h” pulsujące – uszkodzona wiązka silnika –skontaktuj się z serwisem
Naciśnięcie dowolnego przycisku kasuje wyświetlany komunikat.
UP
DOWN
U
UP
P
SETUP
CODE
RCSET
SETUP POWER

18
Przypisanie pilota IR (tylko wersja IR)
Możliwe jest przypisanie dwóch wybranych przycisków dowolnego pilota na podczerwień (TV, KABEL, DVD
itp.). Wybrane przyciski będą używane do sterowania ruchem podnośnika w górę iw dół (GÓRA, DÓŁ)
Aby przypisać pilota na podczerwień, należy wykonać następujące czynności:
• Podłącz odbiornik podczerwieni, aby podnieść skrzynkę kontrolną z powrotem.
• Naciśnij i przytrzymaj przycisk SETUP (niebieski) przez około 3 sekundy, aż usłyszysz sygnał dźwiękowy i
zaświeci się czerwony wskaźnik SETUP. Teraz jesteś w trybie ustawień.
• Wybierz przycisk na pilocie IR, który chciałbyś przesunąć w górę. Skieruj pilota na odbiornik podczerwieni i
naciśnij wybrany przycisk. Czerwona dioda LED Power przyciemnia się raz, potwierdzając odbiór sygnału z
pilota
• Wybierz przycisk na pilocie IR, który chciałbyś użyć do ruchu DOWN. Skieruj pilota na odbiornik
podczerwieni i naciśnij żądany klawisz. Czerwona, dioda zasilania zgaśnie dwukrotnie, potwierdzając odbiór
sygnału z pilota
• Naciśnij i przytrzymaj przycisk SETUP (niebieski) przez około 3 sekundy, aż usłyszysz dwa sygnały dźwiękowe
i czerwona kontrolka SETUP zgaśnie. Twój pilot na podczerwień został zarejestrowany.
Ustawianie kontroli RF
Dostarczony pilot RF jest już zaprogramowany z Twoim TV-Liftem. W przypadku samodzielnego
programowania wykorzystaj poniższe kroki:
naciśnij i przytrzymaj przycisk RC SET przez ok. 3 sek.
podnośnik będzie czekał na sygnał z pilota przez 15 sek.
naciśnij dowolny przycisk na pilocie
podnośnik zapisze nowego pilota, który od teraz będzie aktywny
UWAGA: Sterownik posiada pamięć dla 8 pilotów. Jeśli chcesz zaprogramować 9-go pilota,
zostanie on nadpisany za 1-go.
Aktywne gniazdko RJ-45
Twój sterownik w wersji Premium jest wyposażony w aktywne gniazdo RJ-45, które pozwala na podłączenie
dodatkowych akcesoriów dostarczanych przez firmę Sabaj-System.UWAGA: Tylko oryginalne akcesoria
produkowane przez Sabaj-System będą kompatybilne z Twoim sterownikiem. Jeśli podejmiesz próbe
modyfikacji lub podłączenia innych urządzeń przez port RJ-45, możesz uszkodzić lub zniszczyć sterownik -
skutuje to utratą gwarancji.
Table of contents
Languages:
Other Sabaj Lifting System manuals

Sabaj
Sabaj K-DOWN User instructions

Sabaj
Sabaj WP-560 User instructions

Sabaj
Sabaj MOBILIFT ECO 650 User instructions

Sabaj
Sabaj K-1 Rotolift User instructions

Sabaj
Sabaj K-1 Rotolift+AutoLid User instructions

Sabaj
Sabaj Premium K Series User manual
Sabaj
Sabaj M Series User instructions
Sabaj
Sabaj K Series User manual