manuals.online logo
Brands
  1. Home
  2. •
  3. Brands
  4. •
  5. Monacor
  6. •
  7. Speakers System
  8. •
  9. Monacor EDL-222/ WS User manual

Monacor EDL-222/ WS User manual

®
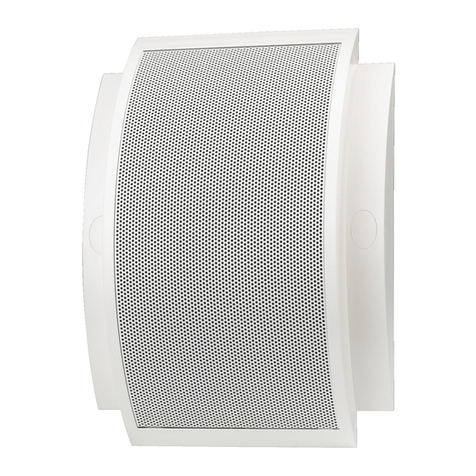
ELA-Wand- und
Deckenlautsprecher
Bitte lesen Sie diese Anleitung vor der Installation gründlich
durch und heben Sie sie für ein späteres Nachlesen auf.
1 Verwendungsmöglichkeiten
Dieser ELA-Lautsprecher ist speziell für den Einsatz in
Beschallungsanlagen konzipiert, die mit 100-V-Technik
arbeiten. Zur Abstrahlung des Schalls in zwei Richtungen
sind zwei Lautsprecherchassis im Gehäuse angeordnet.
Der Lautsprecher ist wetterfest (IP 65) und lässt sich
darum auch im Außenbereich einsetzen.
Das Gehäuse besteht aus ABS-Kunststoff und
ist entsprechend der Brennbarkeitsklasse UL 94 V-0
selbstlöschend. Eine Thermosicherung an den Anschluss-
klemmen trennt den Lautsprecher bei einem Brand von
der Lautsprecherleitung, damit die übrigen Lautsprecher
und der Verstärker funktionsfähig bleiben.
2 Wichtige Hinweise für den Gebrauch
Der Lautsprecher entspricht allen relevanten Richtlinien
der EU und ist deshalb mit gekennzeichnet.
G
Schützen Sie den Lautsprecher vor großer Hitze und
Kälte (zulässiger Einsatztemperaturbereich
-
20 °C bis
+50 °C).
GVerwenden Sie zum Reinigen nur ein trockenes, oder
angefeuchtetes, weiches Tuch, niemals aggressive
Reinigungsmittel oder Chemikalien.
GWird der Lautsprecher zweckentfremdet, nicht fachge-
recht montiert, falsch angeschlossen oder überlastet,
kann keine Haftung für daraus resultierende Sach- oder
Personenschäden und keine Garantie für den Laut-
sprecher übernommen werden.
3 Installation
1) Vor der Installation des Lautsprechers den ELA-Ver-
stärker ausschalten, damit die Lautsprecherleitung
spannungsfrei ist!
2) Um die Halterung (c) einzeln anschrauben zu können,
die Muttern (b) und (f) lösen. An geeigneter Stelle die
Halterung festschrauben.
WARNUNG Im Betrieb liegt berührungsgefährliche
Spannung bis 100 V an der Lautsprecherlei-
tung an. Die Installation darf nur durch
Fachpersonal erfolgen.
Isolieren Sie unbedingt die nichtbenutzten Anschluss-
drähte. An ihnen liegt berührungsgefährliche Spannung
an.
Achten Sie auf die Belastung des ELA-Verstärkers durch
die Lautsprecher. Eine Überlastung kann den Verstärker
beschädigen! Die Summe der Leistungen aller ange-
schlossenen Lautsprecher darf die Verstärkerleistung
nicht überschreiten.
Soll der Lautsprecher endgültig aus dem Betrieb
genommen werden, übergeben Sie ihn zur
umweltgerechten Entsorgung einem örtlichen
Recyclingbetrieb.
3) Das Halteseil in den Haken (e) der Halterung einhän-
gen, damit der Lautsprecher beim Anschließen nicht
festgehalten werden muss.
4) Den Keramik-Klemmenblock des Lautsprechers über
die Lautsprecherleitung an den ELA-Verstärker an-
schließen: Klemme „+“ = Plusanschluss, Klemme „0“ =
Minusanschluss.
5) Ab Werk ist der Lautsprecher auf eine Nennleistung
von 20 W eingestellt. Um eine geringere Leistung
(Lautstärke) zu erhalten, anstelle der roten Ader eine
der anderen farbigen Adern mit dem Klemmenblock
verbinden. Die Thermosicherung muss dabei immer in
Reihe geschaltet bleiben!
Beim Anschluss von mehreren Lautsprechern darauf
achten, dass die Lautsprecher alle gleich gepolt wer-
den (Klemme „0“ = Minusanschluss).
6) Das Distanzrohr (d) mit dem Lautsprecher zurück in die
Halterung (c) führen und mit der Mutter (f) sichern. Die
Abdeckkappe (a) mit der Überwurfmutter (b) fest-
schrauben.
Änderungen vorbehalten.
Aderfarbe Nennleistung
schwarz gemeinsamer Anschluss
weiß 2,5 W
gelb 5W
blau 10 W
rot 20 W
PA Wall and Ceiling Speaker
Please read these operating instructions carefully prior to
installation and keep them for later reference.
1 Applications
This PA speaker is specially designed for 100 V applica-
tions in PA systems. Two speakers are provided inside the
housing to radiate sound in two directions. The speaker is
weatherproof (IP 65) and therefore also suitable for out-
door installation.
The speaker is made of ABS plastic. It is self-extin-
guishing according to the flammability standard UL 94 V-0.
In case of fire, a thermal fuse at the terminals will discon-
nect the speaker from the speaker cable so that the other
speakers and the amplifier will still be operable.
2 Important Notes
The speaker corresponds to all relevant directives of the
EU and is therefore marked with .
GProtect the speaker against extreme temperatures
(admissible ambient temperature range
-
20 °C to
+50 °C
).
GFor cleaning only use a soft cloth, dry or slightly wet;
never use aggressive detergents or chemicals.
GNo guarantee claims for the speaker and no liability for
any resulting personal damage or material damage will
be accepted if the speaker is used for other purposes
than originally intended, if it is not correctly installed or
connected, or if it is overloaded.
3 Installation
1) Prior to installing the speaker, switch off the PA ampli-
fier so that the speaker cable will not carry any voltage!
2) To screw on the support (c) separately, release the nuts
(b) and (f). Find a suitable place and screw on the sup-
port.
3) Attach the safety rope to the hook (e) of the support.
This will allow you to connect the speaker without hold-
ing it.
WARNING During operation, there is a hazard of con-
tact with a dangerous voltage up to 100 V at
the speaker cable. The installation must
always be carried out by skilled personnel.
Always insulate the connection wires that are not used.
Dangerous voltage!
Observe the load of the speakers on the PA amplifier. An
overload may damage the amplifier! The total power of
all speakers connected must not exceed the amplifier
power.
If the speaker is to be put out of operation defin-
itively, take it to a local recycling plant for a dis-
posal which will not be harmful to the environ-
ment.
4) Connect the ceramic terminal block of the speaker via
the speaker cable to the PAamplifier: terminal “+” = pos-
itive connection, terminal “0” = negative connection.
5) In the factory, the speaker is set to a power rating of
20 W. To reduce the power (volume), instead of con-
necting the red core, connect one of the other coloured
cores to the terminal block. Make sure that the thermal
fuse is always connected in series!
When connecting several speakers, make sure that all
speakers have the same polarity (terminal “0” = nega-
tive connection).
6) Put the distance tube (d) with the speaker back into the
support (c) and secure with the nut (f). Fasten the cover
(a) with the cap nut (b).
Subject to technical modification.
Core colour Power rating
black common connection
white 2.5 W
yellow 5W
blue 10 W
red 20 W
EDL-222/WS Bestell-Nr. 16.2690
MONACOR INTERNATIONAL GmbH & Co. KG • Zum Falsch 36 • 28307 Bremen • Germany
Copyright©by MONACOR INTERNATIONAL. All rights reserved. A-1156.99.02.08.2013
®
D A CH
GB
Technische Daten Specifications EDL-222/WS
Nennbelastbarkeit Power rating 20/10/5/2,5 WRMS
Frequenzbereich Frequency range 70 – 20 000 Hz
Mittlerer Schalldruck (1 W/1 m) SPL (1 W/1 m) 86 dB
Lautsprechergröße Speaker size ∅130 cm
Gehäuseschutzart Protection class of housing IP 65
Gewicht Weight 3,9 kg
®
Haut-parleur Public Adress
pour plafond et mur
Veuillez lire la présente notice avec attention avant lʼins-
tallation et conservez-la pour pouvoir vous y reporter ulté-
rieurement.
1 Possibilités dʼutilisation
Ce haut-parleur Public Adress est spécialement conçu
pour une utilisation dans des installations de sonorisation
fonctionnant en ligne 100 V. Deux haut-parleurs sont ins-
tallés dans le boîtier pour une diffusion du son dans deux
directions. Il est résistant aux intempéries (IP 65) et peut
donc être utilisé en extérieur.
Le boîtier est en ABS et est auto-extinguible, selon la
norme UL 94 V-0. En cas dʼincendie, un thermofusible aux
bornes de branchement sépare le haut-parleur du câble
haut-parleur pour que les autres haut-parleurs et lʼamplifi-
cateur restent fonctionnels.
2 Conseils importants dʼutilisation
Le haut-parleur répond à toutes les directives nécessaires
de lʼUnion européenne et porte donc le symbole .
GProtégez le haut-parleur de températures extrêmes
(température ambiante admissible
-
20 °C à +50 °C
).
GPour le nettoyage, utilisez uniquement un chiffon doux,
sec ou légèrement humide, en aucun cas de produits
chimiques ou de détergents abrasifs.
GNous déclinons toute responsabilité en cas de dom-
mages matériels ou corporels résultants si le haut-par-
leur est utilisé dans un but autre que celui pour lequel il
a été conçu, sʼil nʼest pas correctement installé, bran-
ché ou sʼil y a surcharge ; en outre, la garantie devien-
drait caduque.
3 Installation
1) Avant dʼinstaller le haut-parleur, éteignez lʼamplifica-
teur Public Adress pour que le câble haut-parleur ne
soit pas porteur de tension !
2) Pour pouvoir visser séparément le support (c), desser-
rez les écrous (b) et (f). Vissez le support à lʼendroit
adéquat.
AVERTISSEMENT Pendant le fonctionnement, une ten-
sion de contact dangereuse jusquʼà
100 V est présente au câble haut-par-
leur. Seul un personnel qualifié peut
effectuer lʼinstallation.
Isolez impérativement les fils de branchement non utili-
sés, une tension dangereuse y est présente.
Faites attention à la charge de lʼamplificateur PA par les
haut-parleurs. Une surcharge peut endommager lʼampli-
ficateur ! La somme des puissances de lʼensemble des
haut-parleurs reliés ne doit pas dépasser la puissance de
lʼamplificateur.
Lorsque le haut-parleur est définitivement retiré
du service, vous devez le déposer dans une
usine de recyclage adaptée pour contribuer à
son élimination non polluante.
3) Accrochez lʼélingue de sécurité dans le crochet (e) du
support pour ne pas avoir à tenir le haut-parleur
lorsque vous réalisez le branchement.
4) Reliez le bloc céramique de bornes du haut-parleur via
le câble haut-parleur à lʼamplificateur Public Adress :
borne “+” = branchement plus, borne “0” = branche-
ment moins.
5) En usine, le haut-parleur est réglé sur une puissance
nominale de 20 W. Pour une puissance inférieure
(volume), reliez à la place du conducteur rouge, un des
conducteurs de couleur au bloc de bornes. Le thermo-
fusible doit rester toujours branché en série !
Si vous branchez plusieurs haut-parleurs, veuillez à ce
quʼils aient tous la même polarité (borne “0” = bran-
chement moins).
6) Faites passer le tube de distance (d) avec le haut-par-
leur dans le support (c) et vissez lʼécrou (f). Vissez le
couvercle (a) avec lʼécrou (b).
Tout droit de modification réservé.
Couleur conducteur Puissance nominale
noir branchement commun
blanc 2,5 W
jaune 5W
bleu 10 W
rouge 20 W
Diffusore PA da parete e soffitto
Vi preghiamo di leggere attentamente le presenti istruzioni
prima dellʼinstallazione e di conservarle per un uso futuro.
1 Possibilità dʼimpiego
Questo diffusore PA è stato realizzato specialmente per
lʼimpiego in impianti di sonorizzazioni che funzionano con
uscita audio 100 V. Per irradiare il suono in due direzioni,
nella cassa sono disposti due altoparlanti. Il diffusore è
resistente alle intemperie (IP 65) e perciò può essere
impiegato anche allʼesterno.
La cassa è fatta di plastica ABS ed è autoestinguente
secondo la classe UL 94 V-0. Un termofusibile ai morsetti
di collegamento separa il diffusore in caso dʼincendio dalla
linea per altoparlanti in modo che gli altri diffusori e lʼam-
plificatore rimangano funzionanti.
2 Avvertenze importanti per lʼuso
Il diffusore è conforme a tutte le direttive rilevanti dellʼUE e
pertanto porta la sigla .
GProteggere il diffusore da forte calore e freddo (tempe-
ratura dʼimpiego ammessa fra
-
20 °C a +50 °C
).
GPer la pulizia usare solo un panno morbido, asciutto o
inumidito; non impiegare in nessun caso detergenti
aggressivi o prodotti chimici.
GNel caso dʼuso improprio, di montaggio sbagliato, di
collegamento scorretto o di sovraccarico del diffusore,
non si assume nessuna responsabilità per eventuali
danni consequenziali a persone o a cose e non si
assume nessuna garanzia per il diffusore.
3 Installazione
1) Prima dellʼinstallazione del diffusore spegnere lʼampli-
ficatore PA perché la linea degli altoparlanti sia esente
da tensione!
2) Per potere avvitare il supporto (c) singolarmente, allen-
tare i dadi (b) e (f). Avvitare il supporto in un posto adatto.
3) Appendere la fune di trattenuta al gancio (e) del sup-
porto per non dover tener fermo il diffusore durante il
collegamento.
AVVERTIMENTO Durante il funzionamento, nel cavo di
collegamento è presente una tensione
fino a 100 V, pericolosa in caso di con-
tatto. Lʼinstallazione deve essere ese-
guita solo da personale specializzato.
Isolare assolutamente i conduttori liberi di collegamento
ai quali è presente una tensione pericolosa in caso di
contatto.
Tener presente il carico dellʼamplificatore da parte degli
altoparlanti. Un sovraccarico può danneggiare lʼamplifi-
catore! La somma delle potenze di tutti gli altoparlanti col-
legati non deve superare la potenza dellʼamplificatore.
Se si desidera eliminare il diffusore definitiva-
mente, consegnarlo per lo smaltimento ad
unʼistituzione locale per il riciclaggio.
4) Collegare il blocco di morsetti di ceramica del diffusore
con lʼamplificatore PA per mezzo del cavo per altopar-
lanti: morsetto “+” = contatto positivo, morsetto “0” =
contatto negativo.
5) Dalla fabbrica, il diffusore è regolato con una potenza
nominale di 20 W. Per ridurre la potenza (il volume), al
posto del conduttore rosso collegare un conduttore di
un altro colore con il blocco dei morsetti. Il termofusibile
deve sempre rimanere collegato in serie!
Collegando più diffusori fare attenzione alla polarità
identica per tutti (morsetto “0” = contatto negativo).
6) Riportare il tubo distanziatore (d) nel supporto (c)
insieme al diffusore e fissarlo con il dado (f). Avvitare la
copertura (a) con il dado di accoppiamento (b).
Con riserva di modifiche tecniche.
Colore del conduttore Potenza nominale
nero contatto comune
bianco 2,5 W
giallo 5W
blu 10 W
rosso 20 W
EDL-222/WS Bestell-Nr. 16.2690
MONACOR INTERNATIONAL GmbH & Co. KG • Zum Falsch 36 • 28307 Bremen • Germany
Copyright©by MONACOR INTERNATIONAL. All rights reserved. A-1156.99.02.08.2013
®
F
I
B CH
Caractéristiques technique Dati tecnici EDL-222/WS
Puissance nominale Potenza nominale 20/10/5/2,5 WRMS
Bande passante Gamma di frequenze 70 – 20 000 Hz
Pression sonore moyenne (1 W/1 m) Pressione sonora media (1 W/1 m) 86 dB
Taille haut-parleur Dimensioni dellʼaltoparlante ∅130 cm
Type protection boîtier Grado di protezione del contenitore IP 65
Poids Peso 3,9 kg

®
Altavoces de Pared y
de Techo para Megafonía
Lea atentamente estas instrucciones de funcionamiento
antes de la instalación y guárdelas para posteriores usos.
1 Aplicaciones
Este altavoz para megafonía está diseñado especial-
mente para aplicaciones de 100 V en sistemas de mega-
fonía. Hay dos altavoces provistos en el interior de la car-
casa para radiar el sonido en dos direcciones. El altavoz
está resistente a la intemperie (IP 65) y por lo tanto se
puede instalar también en exteriores.
El altavoz está hecho de plástico ABS. Es autoextin-
guible de acuerdo con los estándares de inflamabilidad
UL 94 V-0. En caso de incendio, un fusible térmico de los
terminales desconectará el altavoz del cable de altavoz de
modo que los demás altavoces y el amplificador seguirán
siendo utilizables.
2 Notas Importantes
El altavoz cumple con todas las directivas relevantes por
la UE y por lo tanto está marcado con el símbolo .
GProteja el altavoz de temperaturas extremas (tempera-
tura ambiente admisible:
-
20 °C a +50 °C
).
GUtilice sólo un paño suave, seco o ligeramente hume-
decido para la limpieza; no utilice nunca productos quí-
micos o detergentes agresivos.
GNo podrá reclamarse garantía o responsabilidad algu-
na por cualquier daño personal o material producido si
se utiliza el altavoz para fines diferentes a los original-
mente concebidos, si no se conecta o se instala correc-
tamente, o si se sobrecarga.
3 Instalación
1) ¡Antes de instalar el altavoz, desconecte el amplifica-
dor de megafonía de modo que el cable de altavoz no
contenga ningún voltaje!
2) Para atornillar el soporte (c) por separado, afloje las
tuercas (b) y (f). Encuentre un lugar adecuado para
atornillar el soporte.
ADVERTENCIA Durante el funcionamiento, existe el peli-
gro de contacto con un voltaje peligroso
de hasta 100 V en el cable de altavoz. La
instalación tiene que llevarse a cabo sólo
por el personal cualificado.
Aísle siempre los cables de conexión que no se utilicen.
¡Voltaje peligroso!
Preste atención la carga de los altavoces en el amplifi-
cador de megafonía. ¡Una sobrecarga puede dañar el
amplificador! La potencia total de todos los altavoces co-
nectados no puede sobrepasar la potencia del amplifica-
dor.
Si va a poner el altavoz fuera de servicio defini-
tivamente, llévelo a la planta de reciclaje más
cercana para que su eliminación no sea perjudi-
cial para el medioambiente.
3) Sujete el cable de seguridad con el gancho (e) del
soporte. Esto le permitirá conectar el altavoz sin tener
que sujetarlo.
4) Conecte el bloque de terminales cerámico del altavoz
mediante el cable de altavoz al amplificador de mega-
fonía: terminal “+” = conexión positiva, terminal “0” =
conexión negativa.
5) Como ajuste de fábrica, el altavoz viene ajustado con
una potencia de 20 W. Para reducir la potencia (volu-
men), en vez de conectar el conductor rojo, conecte
uno de los de otro color al bloque de terminales. ¡Ase-
gúrese de que el fusible térmico está siempre conec-
tado en serie!
Cuando conecte varios altavoces, asegúrese de que
todos los altavoces tienen la misma polaridad (Termi-
nal “0” = conexión negativa).
6) Ponga el tubo de distancia (d) con el altavoz de nuevo
en el soporte (c) y asegúrelo con la tuerca (f). Cierre la
tapa (a) con la rosca de la tuerca (b).
Sujeto a modificaciones técnicas.
Color de conductor Potencia nominal
negro conexión común
blanco 2,5 W
amarillo 5W
azul 10 W
rojo 20 W
Projektor dźwięku PA
Przed rozpoczęciem użytkowania prosimy o zapoznanie
się z instrukcją i zachowanie jej do wglądu.
1 Zastosowanie
Niniejszy głośnik przeznaczony jest do pracy w systemach
PAw technice 100 V. Wyposażony jest w dwa głośniki emi-
tujące dźwięk w przeciwnych kierunkach. Dzięki obudowie
odpornej na warunki atmosferyczne (IP 65) może praco-
wać na zewnątrz.
Obudowa wykonana jest z tworzywa sztucznego ABS
samogasnącego, zgodnie z normą UL 94 V-0. W przy-
padku pożaru, termiczny bezpiecznik na terminalach odłą-
cza głośnik od kabla, aby pozostałe głośniki oraz wzmac-
niacz mogły dalej pracować.
2 Środki bezpieczeństwa
Projektor dźwięku spełnia wszystkie wymagania norm UE
dzięki czemu został oznaczony symbolem .
GNależy chronić go przez wysokimi i niskimi temperatu-
rami (dopuszczalny zakres
-
20 °C do +50 °C
).
GDo czyszczenia należy używać suchej lub zwilżonej i
miękkiej ściereczki, nie używać silnych środków che-
micznych.
GProducent i dostawca nie ponoszą odpowiedzialności
za powstałe szkody: uszkodzenia sprzętu bądź obraże-
nia użytkownika, jeżeli projektor był używany niezgod-
nie z przeznaczeniem, niepoprawnie zainstalowany,
podłączony lub przeciążony.
3 Instalacja
1) Przed przystąpieniem do podłączania głośników
należy odłączyć zasilanie wzmacniacza, aby kabel
głośnikowy nie znajdował się pod napięciem!
2) W celu ułatwienia instalacji można odczepić uchwyt
montażowy (c). W tym celu, odkręcić nakrętki (b) oraz
(f). Zamontować uchwyt w odpowiednim miejscu.
3) Przymocować linkę zabezpieczającą do zaczepu (e)
na uchwycie. Pozwoli to na podłączenie głośnika bez
konieczności jego trzymania.
UWAGA W czasie pracy, na złączach występuje nie-
bezpieczne wysokie napięcie 100 V. Insta-
lacja powinna być wykonywana wyłącznie
przez osoby przeszkolone!
Należy zawsze zaizolować nieużywane końcówki kabla!
Należy zwrócić uwagę na obciążenie wzmacniacza przez
głośniki. Przeciążenie wzmacniacza spowoduje jego
uszkodzenie! Sumaryczna moc głośników nie może prze-
kraczać mocy wzmacniacza.
Jeśli projektor nie będzie już więcej używany,
wskazane jest przekazanie go do miejsca utyli-
zacji odpadów, aby został zniszczony bez
szkody dla środowiska.
4) Podłączyć kabel głośnikowy do ceramicznej kostki
głośnika, a następnie do wzmacniacza PA: terminal “+”
= dodatni biegun, terminal “0” = ujemny biegun.
5) Fabrycznie projektor jest ustawiony na moc 20 W. Aby
zmniejszyć jego moc (głośność), zamiast czerwonej
żyły podłączyć do terminala jedną z pozostałych.
Upewnić się że bezpiecznik jest podłączony szere-
gowo!
Przy podłączaniu kilku głośników, należy zwrócić
uwagę, aby wszystkie głośniki miały jednakową polary-
zację (np. terminal ”0” = ujemny biegun).
6) Założyć dystansownik (d) ponownie na uchwyt (c) i
dokręcić nakrętkę (f). Następnie przykręcić pokrywę
(a) nakrętką (b).
Z zastrzeżeniem możliwości zmian.
Kolor żyły Moc
czarna wspólne połączenie
biała 2,5 W
żółta 5W
niebieska 10 W
czerwona 20 W
EDL-222/WS Bestell-Nr. 16.2690
MONACOR INTERNATIONAL GmbH & Co. KG • Zum Falsch 36 • 28307 Bremen • Germany
Copyright©by MONACOR INTERNATIONAL. All rights reserved. A-1156.99.02.08.2013
®
E
PL
Especificaciones Specyfikacja EDL-222/WS
Potencia nominal Moc 20/10/5/2,5 WRMS
Banda pasante Pasmo przenoszenia 70 – 20 000 Hz
SPL (1 W/1 m) SPL (1 W/1 m) 86 dB
Tamaño del altavoz Typ głośnika ∅130 cm
Clase de protección de la carcasa Klasa szczelności IP 65
Peso Waga 3,9 kg

This manual suits for next models

1

Other Monacor Speakers System manuals

Monacor ESP-232/SW User manual

Monacor

Monacor ESP-232/SW User manual

Monacor EUL-42/SW User manual

Monacor

Monacor EUL-42/SW User manual

Monacor MEGA-110MK2 User manual

Monacor

Monacor MEGA-110MK2 User manual

Monacor EDL-412/WS User manual

Monacor

Monacor EDL-412/WS User manual

Monacor ESP-303/SW User manual

Monacor

Monacor ESP-303/SW User manual

Monacor IMG StageLine MEGA-110MK2 User manual

Monacor

Monacor IMG StageLine MEGA-110MK2 User manual

Monacor IMG STAGELINE PAK-312M/SW User manual

Monacor

Monacor IMG STAGELINE PAK-312M/SW User manual

Monacor EAM-17DT User manual

Monacor

Monacor EAM-17DT User manual

Monacor EDL-22/WS User manual

Monacor

Monacor EDL-22/WS User manual

Monacor EDL-115/WS User manual

Monacor

Monacor EDL-115/WS User manual

Monacor ESP-215/WS User manual

Monacor

Monacor ESP-215/WS User manual

Monacor ESP-62AB-WS User manual

Monacor

Monacor ESP-62AB-WS User manual

Monacor EDL-110/WS User manual

Monacor

Monacor EDL-110/WS User manual

Monacor TXA-604/SW User manual

Monacor

Monacor TXA-604/SW User manual

Monacor EDL-10TW User manual

Monacor

Monacor EDL-10TW User manual

Monacor JTS TG-10R/1 User manual

Monacor

Monacor JTS TG-10R/1 User manual

Monacor IMG Stage Line Triton 800 User manual

Monacor

Monacor IMG Stage Line Triton 800 User manual

Monacor PA ESP-232/SW User manual

Monacor

Monacor PA ESP-232/SW User manual

Monacor EDL-224AB User manual

Monacor

Monacor EDL-224AB User manual

Monacor EUL-30/SW User manual

Monacor

Monacor EUL-30/SW User manual

Monacor EUL-2 User manual

Monacor

Monacor EUL-2 User manual

Monacor PROEL TPR-8A User manual

Monacor

Monacor PROEL TPR-8A User manual

Monacor DN-4 User manual

Monacor

Monacor DN-4 User manual

Monacor EDL-110-WS User manual

Monacor

Monacor EDL-110-WS User manual

Popular Speakers System manuals by other brands

Pyle PDICBT57 user manual

Pyle

Pyle PDICBT57 user manual

Goldmund Logos Anatta user manual

Goldmund

Goldmund Logos Anatta user manual

AMX ACV-2100 ACENDO VIBE quick start guide

AMX

AMX ACV-2100 ACENDO VIBE quick start guide

RBH Sound SIGNATURE SERIES owner's manual

RBH Sound

RBH Sound SIGNATURE SERIES owner's manual

BLACKMORE BJC-15X2BT manual

BLACKMORE

BLACKMORE BJC-15X2BT manual

Bose SB600 manual

Bose

Bose SB600 manual

Nxg 52C owner's manual

Nxg

Nxg 52C owner's manual

Definitive Technology PowerMonitor 900 brochure

Definitive Technology

Definitive Technology PowerMonitor 900 brochure

Sony HT-A3000 Startup guide

Sony

Sony HT-A3000 Startup guide

Bang & Olufsen BeoSound 6 user manual

Bang & Olufsen

Bang & Olufsen BeoSound 6 user manual

Teufel Concept D 500 THX Technical description and operating instructions

Teufel

Teufel Concept D 500 THX Technical description and operating instructions

Okayo GPA-580 Series user manual

Okayo

Okayo GPA-580 Series user manual

MAJORITY SNO-BAR-BLK-2 Instruction guide

MAJORITY

MAJORITY SNO-BAR-BLK-2 Instruction guide

Varta MARINE S65 instruction manual

Varta

Varta MARINE S65 instruction manual

Karma TIGER 8A instruction manual

Karma

Karma TIGER 8A instruction manual

Bowers & Wilkins DM1600 instruction manual

Bowers & Wilkins

Bowers & Wilkins DM1600 instruction manual

Monkey Banana Turbo4 user manual

Monkey Banana

Monkey Banana Turbo4 user manual

LG AR502PS owner's manual

LG

LG AR502PS owner's manual

manuals.online logo
manuals.online logoBrands
  • About & Mission
  • Contact us
  • Privacy Policy
  • Terms and Conditions

Copyright 2025 Manuals.Online. All Rights Reserved.