manuals.online logo
Brands
  1. Home
  2. •
  3. Brands
  4. •
  5. Monacor
  6. •
  7. Speakers System
  8. •
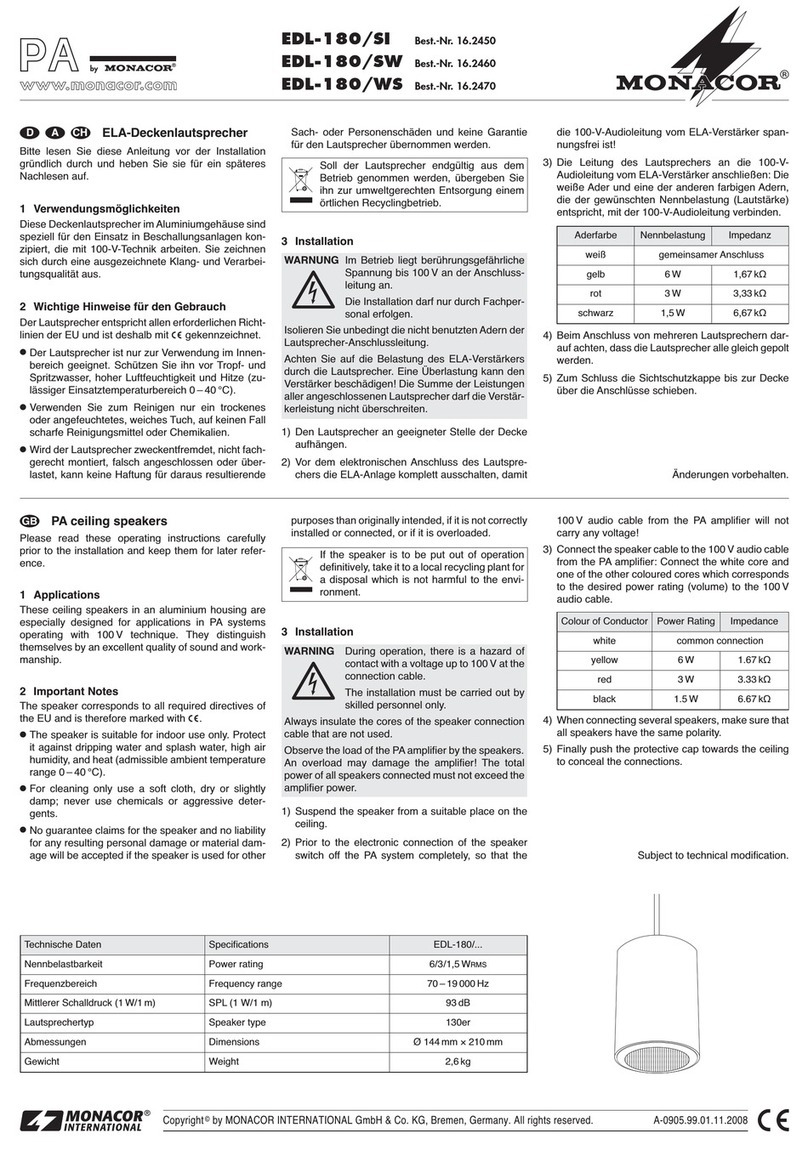
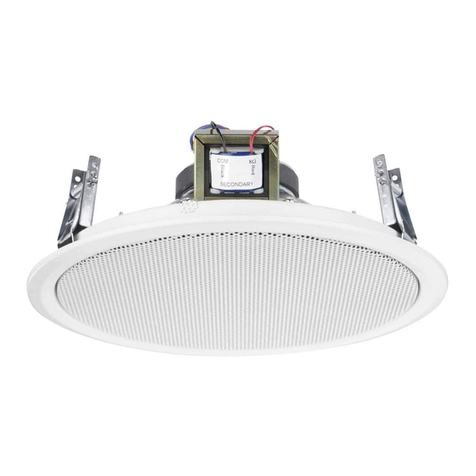
  9. Monacor EDL-224AB User manual

Monacor EDL-224AB User manual

®
ELA-Doppellautsprecher
Bitte lesen Sie diese Anleitung vor der Installation
gründlich durch und heben Sie sie für ein späteres
Nachlesen auf.
1 Verwendungsmöglichkeiten
Dieser Doppellautsprecher für die Deckenmontage ist
speziell für den Einsatz in Beschallungsanlagen kon-
zipiert, die mit 100-V-Technik arbeiten. Er verfügt über
zwei einzeln anschließbare 100-V-Lautsprecher und
eignet sich darum für ELA-Anlagen mit A/B-Verkabe-
lung nach EN-60849.
2 Wichtige Hinweise für den Gebrauch
Der Lautsprecher entspricht allen erforderlichen Richt-
linien der EU und ist deshalb mit gekennzeichnet.
GDer Lautsprecher ist nur zur Verwendung im Innen-
bereich geeignet. Schützen Sie ihn vor Tropf- und
Spritzwasser, hoher Luftfeuchtigkeit und Hitze (zu-
lässiger Einsatztemperaturbereich 0 – 40 °C).
GVerwenden Sie zum Reinigen nur ein trockenes,
weiches Tuch, auf keinen Fall Wasser oder Chemi-
kalien.
GWird der Lautsprecher zweckentfremdet, nicht fach-
gerecht montiert, falsch angeschlossen oder über-
lastet, kann keine Haftung für daraus resultierende
Sach- oder Personenschäden und keine Garantie
für den Lautsprecher übernommen werden.
3 Installation
1) In die Decke ein entsprechend großes Loch sägen
(siehe technische Daten).
2) Vor dem Anschluss der Lautsprecher die ELA-
Anlage komplett ausschalten, damit die 100-V-
Audioleitungen vom ELA-Verstärker spannungsfrei
sind!
WARNUNG Im Betrieb liegt berührungsgefährliche
Spannung bis 100 V an den Anschluss-
leitungen an.
Die Installation darf nur durch Fachper-
sonal erfolgen.
Achten Sie auf die Belastung des ELA-Verstärkers
durch die Lautsprecher. Eine Überlastung kann den
Verstärker beschädigen! Die Summe der Leistungen
aller angeschlossenen Lautsprecher darf die Verstär-
kerleistung nicht überschreiten.
Soll der Lautsprecher endgültig aus dem
Betrieb genommen werden, übergeben Sie
ihn zur umweltgerechten Entsorgung einem
örtlichen Recyclingbetrieb.
3) Die Lautsprecher über zwei getrennte Leitungen an
den ELA-Verstärker anschließen: Die weiße Ader
und eine der anderen farbigen Adern, die der
gewünschten Nennbelastung (Lautstärke) ent-
spricht, mit der 100-V-Audioleitung verbinden.
4) Die drei Klemmfedern nach oben biegen und den
Lautsprecher in die Deckenöffnung einsetzen, so
dass die Klemmfedern den Lautsprecher an der
Decke festklemmen.
VORSICHT Verletzungsgefahr!
Halten Sie die gespannten Federn gut fest!
5) Beim Anschluss von mehreren Lautsprechern
darauf achten, dass die Lautsprecher alle gleich
gepolt werden.
Änderungen vorbehalten.
Aderfarbe Nennbelastung Impedanz
weiß gemeinsamer Anschluss
gelb 6W 1,67 kΩ
rot 3W 3,33 kΩ
schwarz 1,5 W 6,67 kΩ
PA Dual Speaker
Please read these operating instructions carefully
prior to the installation and keep them for later refer-
ence.
1 Applications
This dual speaker for ceiling mounting is especially
designed for applications in PA systems operating with
100 V technique. It is equipped with two 100 V speak-
ers to be connected individually and is therefore suit-
able for PA systems with A/B cabling according to
EN-60849.
2 Important Notes
The speaker corresponds to all required directives of
the EU and is therefore marked with .
GThe speaker is suitable for indoor use only. Protect
it against dripping water and splash water, high air
humidity, and heat (admissible ambient temperature
range 0 – 40 °C).
GFor cleaning only use a soft, dry cloth, never use
water or chemicals.
GNo guarantee claims for the speaker and no liability
for any resulting personal damage or material dam-
age will be accepted if the speaker is used for other
purposes than originally intended, if it is not correctly
installed or connected, or if it is overloaded.
3 Installation
1) Saw a hole of corresponding size into the ceiling
(see specifications).
2) Prior to the connection of the speakers switch off
the PA system completely, so that the 100 V audio
cables from the PA amplifier will not carry any volt-
age!
WARNING During operation, there is a hazard of
contact with a voltage of up to 100 V at
the connection cables.
The installation must be carried out by
skilled personnel only.
Observe the load of the PA amplifier by the speakers.
An overload may damage the amplifier! The total
power of all speakers connected must not exceed the
amplifier power.
If the speaker is to be put out of operation
definitively, take it to a local recycling plant for
a disposal which is not harmful to the envi-
ronment.
3) Connect the speakers to the PA amplifier via two
separated lines: Connect the white conductor and
one of the other coloured conductors which corre-
sponds to the desired power rating (volume) to the
100 V audio cable.
4) Bend the three clamping springs upwards and
place the speaker into the ceiling cutout so that the
springs tightly clamp the speaker to the ceiling.
CAUTION Risk of injury!
The springs under tension must be held tight!
5) When connecting several speakers, make sure that
all speakers have the same polarity.
Subject to technical modification.
Colour of
Conductor Power Rating Impedance
white common connection
yellow 6W 1,67 kΩ
red 3W 3,33 kΩ
black 1.5 W 6,67 kΩ
EDL-224AB Best.-Nr. 16.2520
MONACOR INTERNATIONAL GmbH & Co. KG • Zum Falsch 36 • 28307 Bremen • Germany
Copyright©by MONACOR INTERNATIONAL. All rights reserved. A-0909.99.02.09.2011
®
D A CH
GB
Technische Daten Specifications EDL-224AB
Nennbelastbarkeit Power rating 2 × 6/3/1,5 WRMS
Frequenzbereich Frequency range 75 – 20 000 Hz
Lautsprechertyp Speaker type 2 × 100er
Einbauöffnung Mounting cutout ∅230 mm
Abmessungen Dimensions ∅252 mm × 42 mm
Gewicht Weight 1,5 kg
®
Haut-parleur
Public Adress double
Veuillez lire la présente notice avec attention avant
lʼinstallation et conservez-la pour pouvoir vous y
reporter ultérieurement.
1 Possibilités dʼutilisation
Ce haut-parleur double pour un montage au plafond
est spécialement conçus pour une utilisation dans des
installations de Public Adress fonctionnant en ligne
100 V. Il dispose de deux haut-parleurs 100 V reliables
individuellement et est donc adapté pour des installa-
tions de Public Adress avec câblage A/B selon la
norme EN-60849.
2 Conseils importants dʼutilisation
Le haut-parleur répond à toutes les directives néces-
saires de lʼunion européenne et porte donc le symbole
.
GLʼappareil nʼest conçu que pour une utilisation en
intérieur. Protégez-le des éclaboussures, de tout
type de projections dʼeau, dʼune humidité élevée de
lʼair et de la chaleur (température ambiante admissi-
ble 0 – 40 °C).
GPour le nettoyage, utilisez uniquement un chiffon
sec et doux, en aucun cas de produits chimiques ou
dʼeau.
GNous déclinons toute responsabilité en cas de dom-
mages matériels ou corporels résultants si le haut-
parleur est utilisé dans un but autre que celui pour
lequel il a été conçu, sʼil nʼest pas correctement ins-
tallé, branché ou sʼil y a surcharge ; en outre, la
garantie deviendrait caduque.
3 Installation
1) Découpez un trou de dimension adaptée dans le
plafond (voir caractéristiques techniques).
AVERTISSEMENT Pendant le fonctionnement, une
tension de contact dangereuse
jusquʼà 100 V est présente aux
câbles de branchement.
Seul un personnel qualifié peut
effectuer lʼinstallation.
Faites attention à la charge de lʼamplificateur PA par
les haut-parleurs. Une surcharge peut endommager
lʼamplificateur. La somme des puissances de lʼen-
semble des haut-parleurs reliés ne doit pas dépasser
la puissance de lʼamplificateur.
Lorsque le haut-parleur est définitivement
retiré du service, vous devez le déposer dans
une usine de recyclage adaptée pour contri-
buer à son élimination non polluante.
2) Eteignez lʼintégralité de lʼinstallation Public Adress
avant dʼeffectuer le branchement des haut-parleurs
pour que les câbles audio 100 V de lʼamplificateur
Public Adress ne soient pas porteurs de tension.
3) Branchez les haut-parleurs à lʼamplificateur Public
Adress via deux lignes distinctes ; reliez le conduc-
teur blanc et un des conducteurs de couleur diffé-
rente correspondant à la puissance nominale
(volume) souhaitée, au câble audio 100 V.
4) Tordez les trois ressorts à pince vers le haut, insé-
rez le haut-parleur dans la découpe de telle sorte
que les ressorts maintiennent le haut-parleur au
plafond.
AVERTISSEMENT ! Risque de blessure !
Tenez fermement les ressorts tendus !
5) Si vous branchez plusieurs haut-parleurs, veillez à
que quʼils aient tous la même polarité.
Tout droit de modification réservé.
Couleur du
conducteur
Puissance
nominale Impédance
blanc branchement commun
jaune 6W 1,67 kΩ
rouge 3W 3,33 kΩ
noir 1,5 W 6,67 kΩ
Diffusore PA doppio
Vi preghiamo di leggere attentamente le presenti istru-
zioni prima dellʼinstallazione e di conservarle per un
uso futuro.
1 Possibilità dʼimpiego
Questo diffusore doppio per il montaggio al soffitto è
stato realizzato particolarmente per lʼimpiego in
impianti di sonorizzazione che funzionano con uscita
audio 100 V. Dispone di due altoparlanti 100 V da col-
legare singolarmente e perciò è adatto per impianti PA
con cablaggio A/B secondo EN-60849.
2 Avvertenze importanti per lʼuso
Il diffusore è conforme a tutte le direttive richieste del-
lʼUE e pertanto porta la sigla .
GIl diffusore è previsto solo per lʼuso allʼinterno di
locali. Proteggerlo dallʼacqua gocciolante e dagli
spruzzi dʼacqua, da alta umidità dellʼaria e dal calore
(temperatura dʼimpiego ammessa fra 0 °C e 40 °C).
GPer la pulizia usare solo un panno morbido, asciutto;
non impiegare in nessun caso prodotti chimici o
acqua.
GNel caso dʼuso improprio, di montaggio non a regola
dʼarte, di collegamento sbagliato o di sovraccarico
del diffusore, non si assume nessuna responsabilità
per eventuali danni consequenziali a persone o a
cose e non si assume nessuna garanzia per il diffu-
sore.
3 Installazione
1) Segare nel soffitto un foro delle dimensioni ade-
guate (vedi dati tecnici).
AVVERTIMENTO Durante il funzionamento, nel
cavo di collegamento è presente
una tensione fino a 100 V, perico-
losa in caso di contatto.
Lʼinstallazione deve essere ese-
guita solo da personale specializ-
zato.
Tener presente anche la potenza dellʼamplificatore
PA rispetto agli altoparlanti. Un sovraccarico può
danneggiare lʼamplificatore! La somma delle potenze
di tutti gli altoparlanti collegati non deve superare la
potenza dellʼamplificatore.
Se si desidera eliminare il diffusore definiti-
vamente, consegnarlo per lo smaltimento ad
unʼistituzione locale per il riciclaggio.
2) Prima di effettuare il collegamento dellʼaltoparlante,
occorre spegnere completamente lʼimpianto PA,
affinché la linea audio 100 V dallʼamplificatore PA
sia esente di tensione!
3) Collegare di diffusori con lʼamplificatore PA per
mezzo di due linee separate: collegare il conduttore
bianco e uno dei conduttori colorati che corri-
sponde alla potenza nominale desiderata (volume)
con lʼuscita audio 100 V.
4) Piegare le tre molle verso lʼalto e inserire il diffusore
nellʼapertura del soffitto in modo che le molle fissino
il diffusore contro il soffitto.
ATTENZIONE Pericoli di ferirsi!
Fermare bene le molle tese!
5) Collegando più diffusori fare attenzione allʼidentica
polarità di tutti gli altoparlanti.
Con riserva di modifiche tecniche
Colore conduttore Potenza nominale Impedenza
bianco contatto comune
giallo 6W 1,67 kΩ
rosso 3W 3,33 kΩ
nero 1,5 W 6,67 kΩ
EDL-224AB Best.-Nr. 16.2520
MONACOR INTERNATIONAL GmbH & Co. KG • Zum Falsch 36 • 28307 Bremen • Germany
Copyright©by MONACOR INTERNATIONAL. All rights reserved. A-0909.99.02.09.2011
®
F
I
Caractéristiques techniques Dati tecnici EDL-224AB
Puissance nominale Potenza nominale 2 × 6/3/1,5 WRMS
Bande passante Gamma di frequenze 75 – 20 000 Hz
Type haut-parleur Tipo dʼaltoparlante 2 × 100er
Découpe de montage Apertura di montaggio ∅230 mm
Dimensions Dimensioni ∅252 mm × 42 mm
Poids Peso 1,5 kg
B CH
®
Altavoz Doble de Megafonía
Lea atentamente estas instrucciones de funciona-
miento antes de la instalación y guárdelas para poste-
riores usos.
1 Aplicaciones
Este altavoz doble para montaje en techo está dise-
ñado especialmente para aplicaciones en sistemas de
megafonía con línea de 100 V. Está equipado con dos
altavoces de 100 V que hay que conectar individual-
mente y por lo tanto está adecuado para sistemas de
megafonía con cableado A/B de acuerdo con la nor-
mativa EN-60849.
2 Notas Importantes
El altavoz cumple con todas las directivas requeridas
por la UE y por lo tanto está marcado con el símbolo
.
GEl altavoz está adecuado para utilizarlo sólo en inte-
riores. Proteja el aparato de goteos y de salpicadu-
ras, de la elevada humedad del aire y del calor (tem-
peratura ambiente admisible: 0 – 40 ºC).
GUtilice sólo un paño suave y seco para la limpieza;
no utilice nunca ni agua ni productos químicos.
GNo podrá reclamarse garantía o responsabilidad
alguna por cualquier daño personal o material pro-
ducido si se utiliza el altavoz para fines diferentes a
los originalmente concebidos, si no se instala o
conecta correctamente, o si se sobrecarga.
3 Instalación
1) Haga un agujero del tamaño correspondiente en el
techo (ver especificaciones).
2) Antes de la conexión de los altavoces, desconecte
el sistema de megafonía completamente de modo
ADVERTENCIA Durante el funcionamiento, existe
el peligro de contacto con un vol-
taje de hasta 100 V en la conexión
de los cables.
La instalación tiene que llevarse a
cabo sólo por el personal cualifi-
cado.
Observe la carga del amplificador de megafonía
mediante los altavoces. Una sobrecarga puede
dañar el amplificador. La potencia total de todos los
altavoces conectados no puede sobrepasar la poten-
cia del amplificador.
Si va a poner el altavoz definitivamente fuera
de servicio, llévelo a la planta de reciclaje
más cercana para que su eliminación no sea
perjudicial para el medioambiente.
que los cables de audio de 100 V del amplificador
de megafonía no contengan ningún voltaje.
3) Conecte los altavoces al amplificador de megafo-
nía mediante dos líneas separadas: Conecte el
conductor blanco y uno de los otros conductores
coloreados que se corresponda con el nivel de
potencia deseado (volumen) al cable de audio de
100 V.
4) Dirija los tres muelles con resorte hacia arriba y
coloque el altavoz en el agujero del techo de modo
que los muelles sujetan fuertemente el altavoz en
el techo.
PRECAUCIÓN ¡Riesgo de lesión!
Sujete fuertemente los muelles en tensión.
5) Cuando conecte varios altavoces, asegúrese de
que todos los altavoces tienen la misma polaridad.
Sujeto a modificaciones técnicas.
Color del
Conductor Nivel de potencia Impedancia
blanco conexión común
amarillo 6W 1,67 kΩ
rojo 3W 3,33 kΩ
negro 1,5 W 6,67 kΩ
Podwójny głośnik PA
Przed rozpoczęciem instalacji proszę dokładnie zapo-
znać się z niniejszą instrukcją i zachować ją do
wglądu.
1 Zastosowanie
Niniejszy podwójny głośnik sufitowy przeznaczony
jest do pracy w systemach PA w technice 100 V.
Wyposażony jest w dwa 100 V głośniki do podłączania
osobnych linii głośnikowych, dzięki czemu może pra-
cować w systemach z okablowaniem A/B, zgodnym z
normą EN-60849.
2 Środki bezpieczeństwa
Głośnik spełnia wszystkie wymagania norm UE dzięki
temu został oznaczony symbolem .
GGłośnik przeznaczony jest tylko do zastosowań
wewnętrznych. Należy chronić go przez wodą, dużą
wilgotnością oraz wysokimi temperaturami (dopusz-
czalny zakres 0 – 40 °C).
GDo czyszczenia należy używać suchej i miękkiej
ściereczki, nie używać wody ani środków chemicz-
nych.
GProducent i dostawca nie ponoszą odpowiedzialno-
ści za powstałe szkody: uszkodzenia sprzętu bądź
obrażenia użytkownika, jeżeli głośnik był używany
niezgodnie z przeznaczeniem, niepoprawnie zain-
stalowany, podłączony lub przeciążony.
3 Montaż
1) Wyciąć w suficie otwór (wymiary na rysunku).
2) Przed przystąpieniem do podłączania głośników
należy odłączyć zasilanie całego systemu PA, aby
kabel głośnikowy 100 V nie znajdował się pod
napięciem!
UWAGA W czasie pracy, na złączach występuje
niebezpieczne wysokie napięcie 100 V.
Instalacja powinna być wykonywana
wyłącznie przez przeszkolony perso-
nel!
Należy zwrócić uwagę na obciążenie wzmacniacza
przez głośniki. Przeciążenie wzmacniacza spowo-
duje jego uszkodzenie! Sumaryczna moc głośników
nie może przekraczać mocy wzmacniacza.
Jeśli głośnik nie będzie już więcej używany,
wskazane jest przekazanie go do miejsca
utylizacji odpadów, aby został zniszczony
bez szkody dla środowiska.
3) Podłączyć głośnik do kabla głośnikowego 100 V:
białą żyłę oraz jedną z pozostałych, w zależności
od żądanej mocy (głośności) głośnika.
4) Odchylić zaczepy montażowe do góry, a następnie
wsunąć głośnik w otwór w suficie. Po wsunięciu
głośnika, zaczepy sprężynowe zostaną zwolnione
mocując głośnik w suficie
UWAGA Uważać na palce!
Naciąg sprężyn jest silny!
5) Przy podłączaniu kilku głośników, należy zwrócić
uwagę, aby wszystkie głośniki miały jednakową
polaryzację.
Z zastrzeżeniem możliwości zmian.
Kolor żyły Moc Impedancja
biała wspólne podłączenie
żółta 6W 1,67 kΩ
czerwona 3W 3,33 kΩ
czarna 1,5 W 6,67 kΩ
EDL-224AB Best.-Nr. 16.2520
MONACOR INTERNATIONAL GmbH & Co. KG • Zum Falsch 36 • 28307 Bremen • Germany
Copyright©by MONACOR INTERNATIONAL. All rights reserved. A-0909.99.02.09.2011
®
E
PL
Especificaciones Specyfikacja EDL-224AB
Nivel de potencia Moc 2 × 6/3/1,5 WRMS
Banda pasante Pasmo przenoszeni 75 – 20 000 Hz
Tipo de altavoz Typ głośnika 2 × 100er
Corte de montaje Otwór montażowy ∅230 mm
Dimensiones Wymiary ∅252 mm × 42 mm
Peso Waga 1,5 kg

This manual suits for next models

1

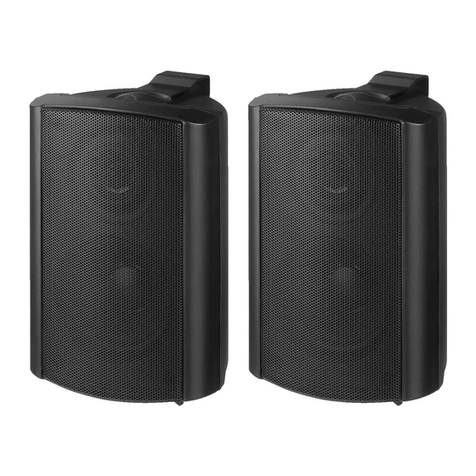
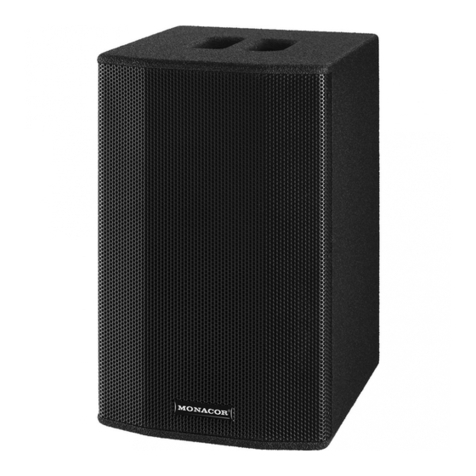
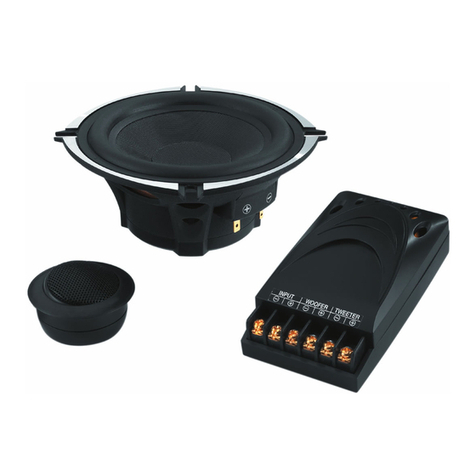
Other Monacor Speakers System manuals

Monacor EDL-112/WS User manual

Monacor

Monacor EDL-112/WS User manual

Monacor img Stage Line PSUB-600 User manual

Monacor

Monacor img Stage Line PSUB-600 User manual

Monacor EDL-110-WS User manual

Monacor

Monacor EDL-110-WS User manual

Monacor ESP-70/WS User manual

Monacor

Monacor ESP-70/WS User manual

Monacor IMG Stageline MCX-10 User manual

Monacor

Monacor IMG Stageline MCX-10 User manual

Monacor PA-1200M User manual

Monacor

Monacor PA-1200M User manual

Monacor ETS-515TW/SW User manual

Monacor

Monacor ETS-515TW/SW User manual

Monacor EDL-165AB-WS User manual

Monacor

Monacor EDL-165AB-WS User manual

Monacor TXA-624CD/SW User manual

Monacor

Monacor TXA-624CD/SW User manual

Monacor DN-200 User manual

Monacor

Monacor DN-200 User manual

Monacor IMG Stage Line Triton 800 User manual

Monacor

Monacor IMG Stage Line Triton 800 User manual

Monacor PA ESP-232/SW User manual

Monacor

Monacor PA ESP-232/SW User manual

Monacor DN-4 User manual

Monacor

Monacor DN-4 User manual

Monacor PAB-6WP/WS User manual

Monacor

Monacor PAB-6WP/WS User manual

Monacor ETS-515TW/SW User manual

Monacor

Monacor ETS-515TW/SW User manual

Monacor img Stage Line PROTON-15MK2 User manual

Monacor

Monacor img Stage Line PROTON-15MK2 User manual

Monacor DSM-26LAN User manual

Monacor

Monacor DSM-26LAN User manual

Monacor MKA-40SET/SW User manual

Monacor

Monacor MKA-40SET/SW User manual

Monacor EDL-170-AL User manual

Monacor

Monacor EDL-170-AL User manual

Monacor EUL-42/SW User manual

Monacor

Monacor EUL-42/SW User manual

Monacor PAB-6WP-WS User manual

Monacor

Monacor PAB-6WP-WS User manual

Monacor PA TXA-730CD User manual

Monacor

Monacor PA TXA-730CD User manual

Monacor ETS-410TW/WS User manual

Monacor

Monacor ETS-410TW/WS User manual

Monacor ESP-5HQ User manual

Monacor

Monacor ESP-5HQ User manual

Popular Speakers System manuals by other brands

Pyle PSBV200BT owner's manual

Pyle

Pyle PSBV200BT owner's manual

Ozaki C-Mouth EM98723 Instruction

Ozaki

Ozaki C-Mouth EM98723 Instruction

Qtx 178.866UK user manual

Qtx

Qtx 178.866UK user manual

Dolby Laboratories 136 owner's manual

Dolby Laboratories

Dolby Laboratories 136 owner's manual

Lynx LX-F6 user manual

Lynx

Lynx LX-F6 user manual

Onkyo D-30PC5X Service manual

Onkyo

Onkyo D-30PC5X Service manual

LG SP11RA manual

LG

LG SP11RA manual

Samsung HW-Q600C user manual

Samsung

Samsung HW-Q600C user manual

Steren BOC-2110 instruction manual

Steren

Steren BOC-2110 instruction manual

LENCO SBW-800 user manual

LENCO

LENCO SBW-800 user manual

Samsung HW-C450 user manual

Samsung

Samsung HW-C450 user manual

Bazooka RS10A installation manual

Bazooka

Bazooka RS10A installation manual

Rhaon iConyx CL-FR user manual

Rhaon

Rhaon iConyx CL-FR user manual

Panasonic SBLV500 operating instructions

Panasonic

Panasonic SBLV500 operating instructions

Elk Products ELK-870 user manual

Elk Products

Elk Products ELK-870 user manual

Focal Little Bird user manual

Focal

Focal Little Bird user manual

Amphony 1600 User and installation guide

Amphony

Amphony 1600 User and installation guide

Renkus-Heinz Iconyx IC8-R user manual

Renkus-Heinz

Renkus-Heinz Iconyx IC8-R user manual

manuals.online logo
manuals.online logoBrands
  • About & Mission
  • Contact us
  • Privacy Policy
  • Terms and Conditions

Copyright 2025 Manuals.Online. All Rights Reserved.