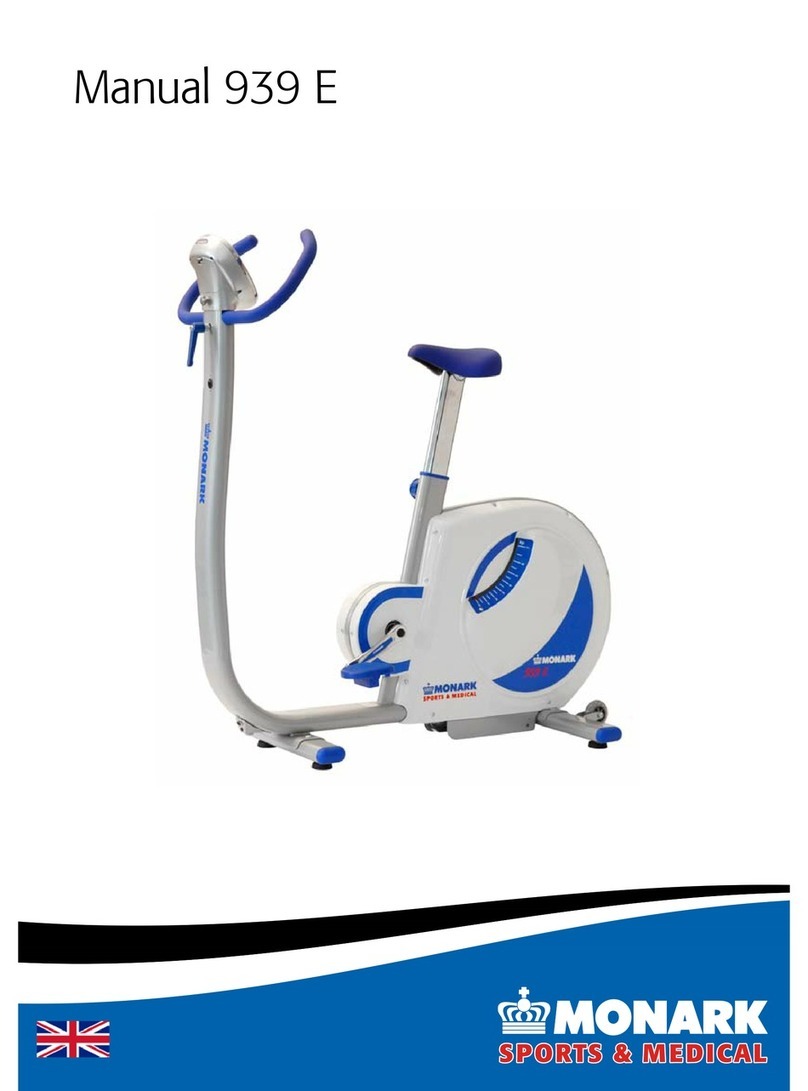
Monark 939 E User manual

Manual 939 E

Important
Read the manual carefully before using the cycle
and save it for future use.

Monark Exercise AB����������������������������������������������� 4
Product Information ����������������������������������������������� 5
Serial number������������������������������������������������������������������5
Facts �������������������������������������������������������������������������������5
Operating Instruction ��������������������������������������������� 6
Power on crank or ywheel���������������������������������������������6
Operation of the ergometer���������������������������������������������6
RPM meter ���������������������������������������������������������������������6
Measured quantities��������������������������������������������������������6
Connection to an external unit ����������������������������������������7
Initial operation����������������������������������������������������������������7
Cycle adjustments�����������������������������������������������������������7
Connection to controller���������������������������������������� 8
Setting of command type (PC or ECG device) ���������������8
What command type is set����������������������������������������������8
Connection to PC������������������������������������������������������������9
Connection to an external unit e.g. ECG device �����������10
Setting of terminal ���������������������������������������������������������11
Calibration������������������������������������������������������������� 12
Validation ����������������������������������������������������������������������12
Validation of force ���������������������������������������������������������12
Mechanical calibration ��������������������������������������������������13
Electronic calibration�����������������������������������������������������13
Scale - zero adjustment ������������������������������������������������14
Testing with Ergomedic 939 E����������������������������� 15
Heart rate (Telemetry system)���������������������������������������16
Monitoring of the test person ����������������������������������������16
Reviewing results����������������������������������������������������������17
Troubleshooting guide����������������������������������������� 18
Where to obtain additional information ������������� 19
Service������������������������������������������������������������������� 20
Warning�������������������������������������������������������������������������20
Warranty �����������������������������������������������������������������������20
Regular service inspection and maintenance ���������������20
Batteries������������������������������������������������������������������������21
Crank bearing ���������������������������������������������������������������21
Flywheel bearing�����������������������������������������������������������21
Transport�����������������������������������������������������������������������21
Replacement of brake belt ��������������������������������������������21
Brake belt contact surface ��������������������������������������������21
Chain 1/2“ x 1/8“ �����������������������������������������������������������22
Freewheel sprocket�������������������������������������������������������23
Spare parts������������������������������������������������������������ 24
2012 MONARK EXERCISE AB, Vansbro, Sweden
Contents

Monark 939 E
4
Monark Exercise AB
Monark has 100 years’ experience of bicycle production. The Monark tradition
has yielded know-how, experience, and a real feel for the product and quality. Since
the early 1900s, Monark’s cycles have been living proof of precision, reliability,
strength and service. These are the reasons why we are now the world leader
in cycle ergometers and the market leader in Scandinavia in transport cycles.
We manufacture, develop and market ergometers, exercise bikes, transport bikes and
specialized bicycles. Our largest customer groups are within health care, sports medicine,
public authorities, industry and postal services.
For more information: www.monarkexercise.se

1
Monark 939 E 5
Product Information
Congratulations on your new Ergometer!
The Monark 939 E is designed to perform stress tests
when connected to an ECG device. When connected
to a PC or terminal, the bike can be used to perform
Max and SubMax cardiovascular tests, calculate
VO2 capacity and more. The bike can also be used
for normal exercise.
Each 939 E is calibrated at the factory. This means
that you can begin to use the ergometer directly after
assembly. But as usual when the bike has been moved,
an electronic calibration must be done, see instruction
for “Calibration” in this manual.
Fig: Serial number (1)
NOTE!
Use of the product may involve considerable
physical stress. It is therefore recommended
people who are not accustomed to cardio or do
not feel completely healthy to consult a physician
for advice before use.
Facts
Controlled digital by ECG or PC with RS 232•
cable.
Connection of RS 232 cable in floor level.•
Large, well-balanced flywheel, 20 kg (44 lbs)•
Pendulum scale, easy to calibrate.•
Constant power mode.•
Adjustable saddle with quick release lever.•
Adjustable handlebar with quick release lever.•
Stable frame, solid steel tube.•
Rust protected and powder painted.•
Wheels for easy transport.•
Width:
550 mm (22”) at handlebar
620 mm (24”) at support tubes
Length
1240 mm (49”)
Height
1260 mm (50”) at handlebar
790-1160 mm (31-46”) at seat
Weight
58 kg (128 lbs)
Max user weight 250 kg (550 lbs)
Included
Calibration weight 4 kg•
Chestbelt for pulse detection (only PC-model)•
USB - serial adaptor (only PC-model)•
PC software•
Power adaptor/switching adaptor•
Tool kit•
Technical data power adaptor
Input voltage: 110-240V AC, 50/60Hz.
Current: 650mA.
Output voltage: 24V DC switching adaptor alt. 18V
AC.
(Sweden, 18V, Art. No: 9339-67, other countries incl.
USA, 24V, Art. No: 9339-66.)
Note: The power adaptor must be approved by your
national electrical authorities. In Europe, it must be
CE marked.
Serial number
The serial number of your Ergometer is placed
according to fig: Serial number.

Monark 939 E
6
Power on crank or flywheel
When the Ergomedic 939 E is adapted to fitness tests
it is set to measure the power on the flywheel.
When the Ergomedic 939 Medical is adapted to
ECG work tests it is set to measure the power on the
crank.
A sticker, placed on the display, see fig: RPM meter
and ECG-sticker, informs that the ergometer is set to
measure the power on the crank.
Fig: RPM meter
and ECG-sticker
Operating Instruction
RPM meter
The RPM figures on the LCD screen are large and
easy to read. The screen turns on automatically when
the pedals are moved and turns off after three minutes
of inactivity. See fig: RPM meter and ECG-sticker.
Operation of the ergometer
The Ergomedic 939 E is built on a stabile frame, a large
well balanced flywheel, a break belt and a pendulum
weight which measures the force. Pedals and a chain
drive are provided to spin the flywheel as a tension
device tightens the belt to regulate the braking force
applied to the wheel. The pendulum indicates the
applied force directly on the scale located on the left
side of the flywheel.
The computer system consists of one main unit and
one control unit (terminal, PC or ECG). The main
unit reads in the pedal speed, the applied force
and determines the subjects heart rate by a chest
transmitter. Additionally, the base controll activates
the motor to adjust the tension of the belt, thereby
regulating the applied braking force. The force may
be automatically varied in response to changes in
pedal speed to maintain a constant power workload.
For information about how respective control units
works, see respective sections.
The Monark Ergometer 939 E can be controlled
externally from a terminal, a computer or an ECG
device.
The control is performed over a serial line using ANSI/
ISO/ASCII format commands. The interface is a 9-pin
male D-sub connector, compatible with the RS232
standard, located on the front of the bike above the
front support tube. See fig: Connections.
It is also possible to use an analogue control from an
external source to set the workload. This is done by
the contacts b32 and z32 on the main connector on
the bike.
The ergometer need not be turned off prior to
connection of the external components, although
removing the power from all devices may prevent
erroneous data transfer between equipment during
interconnection. Caution must be exercised in the
connection of various types of equipment from
different manufactures to avoid electrical hazards and
physical damage. The user must be certain that the
instrument connector and the cable are designed for
the intended purpose. Serious injury to the user and/
or equipment may result if inappropriate connections
are attempted.
Distance meter, miles
Energy kcal
Heart rate beats/minute (bpm)
Force Newton (N), kp
Power Watts (W), kpm/min or
VO2ml/min/kg
Time min:sec
Weight kilogram (kg), pounds (lb)
Measured quantities
Hereareinstructionsforconnectionsandopportunities
for connection to external communication. The need
for advanced technical documentation / protocols
for systems building, contact Monark Exercise AB,
Sweden.
Batteries: 2 x 1.5 V, R14
Storing temperature: -10º C - +60º C
Operating temperature: 0º C - +50º C
1
2
2
3
1
1
Monark 939 E 7
Fig: Adjustments
1) Quick release bolt
2) Quick release lever
Fig: Connections
1) Power connector
2) Serial port connection, external unit
3) Switch (on/off)
Connection to an external unit
To use the bike it has to be connected to an external
device such as an ECG device or a PC. The external
unit is connected to the serial data connection port(2)
on the lower front of the bike. See fig: Connections.
The enclosed cable is to be used, or the USB-serial
adaptor which is included in the PC-model.
The bike has a default setting to be used/connected to
a PC or an ECG. It can also be used/connected to a
terminal (option, Art. No: 9339-51). For information
about the enclosed PC software please refer to the
software manual.
If the bike is going to be connected to an ECG device,
you must change the settings on its internal computer.
This setting can be changed directly on the bike with
the scale indicator on the left side of the bike or with
an external Terminal unit.
Cycle adjustments
Seat height should be adjusted to a comfortable
position. The appropriate height is to have the knee
slightly bent when the sole of the foot is centred over
the pedal axle with the pedal to the bottom position.
To adjust the seat height turn the quick release bolt(1)
on the saddle post approximately one revolution and
pull it out. See fig: Adjustments.
The handlebar setting should be in a comfortable
position when cycling. During longer exercise sessions
it is recommended to occasionally change handlebar
position. To adjust the handlebar, loosen the quick
release lever(2). See fig: Adjustments.
When using a Polar chestbelt it is important initially,
to identify the chestbelt with the pulse receiver by
standing close to it (max 60 cm).
Initial operation
Although all 939 E ergometers are 100 % calibrated
at the factory, the user may wish to verify this
by performing the mechanical calibration of the
pendulum weight. See section ”Calibration of
Pendulum Weight”.
Apply power to the ergometer by first connecting the
cable from the power adaptor to the ergometer at the
front connector, see fig: Connections. Then plug the
power adaptor into the wall outlet. Turn the power
switch to on position. A green LED indicates power
to the 939 E, see fig: LED.
Perform the electrical calibration as specified in section
”Calibration Electronics”.
Test ride the ergometer. The 939 E Ergometer is now
fully functional and ready to use.
Fig: LED (1)
(Left side in front of
rear support tube.)

2
3
1
1
Monark 939 E
8
First check the brake belt tension. If the belt is too
tight loosen it a little by moving the force indicator to
about 4 kp and hold it there for a few seconds. Then
the force-adjusting servo will loosen the belt tension.
To be sure that indicator positions are correct, do a
calibration. See ”Electronic calibration”.
Press the switch(2) to turn off the power, see1. fig:
Connections.
Adjust the scale mechanically so that 0-index on2.
the scale and indicator are in line.
Move the indicator to 6 kp and hold it there.3.
Turn on the power again. The green LED on the4.
lower left side of the bike is lit up when there is
power to the bike.
Hold the indicator at 6 kp until two beeps are5.
heard.
Move the indicator to the settings that6.
correspond with the type of external unit you are
connecting to:
0 = mode for use with PC or hand unit.
1 = mode for Siemens Megacart ECG
2 = mode for other ECG devices, alt 1.
3 = mode for other ECG devices, alt 2.
7. Hold at this position until two beeps are heard
and after that, move the indicator to 0 again.
The system will now restart in chosen mode.
Setting of command type (PC or ECG device)
From program version R15
Fig: Connections
1) Power connector
2) Serial port connection, external unit
3) Switch (on/off)
Alt. 1: ECG, Ergoline compatible command set,
requested load value.
Alt. 2: ECG, Ergoline compatible command set,
current load value.
Fig: LED (1)
(Left side in front of
rear support tube.)
What command type is set
Connect power to the bike and switch the power
switch to ”on” position without moving pendulum.1
beep = mode for PC or terminal, 2 beeps = mode for
ECG Siemens Megacart, 3 beeps = mode for other
ECG devices, alt 1 and alt 2.
Connection to controller

Monark 939 E 9
Connection to PC
To connect a PC to the ergometer, use a 0-modem
cable (RS232) with a 9-pin D-sub female at each end.
If no RS232 Serial port is available on the computer
use a USB serial RS232 converter.
Before installing the Monark Software for your ergo-
meter, you must take the following steps.
Locate the USB adaptor.1.
Inside the USB adaptor packaging, there is a mini-2.
CD.
Insert the mini-CD into the CD-ROM drive and3.
install the driver software. If there is no CD drive
on your computer, driver software is available for
down from the website (http://www.vscom.de/
USB-CD).
Finalize the driver software installation by inser-4.
ting the USB adaptor.
Install the Monark Software disk.5.
Connect the USB Adapter to the Serial Cable and6.
proceed with testing.
To control the ergometer use the PC software supplied
with the ergometer or other PC software made for the
Ergomedic 939 E.
From software version MEC3V11R14 and later
settings can be made from a PC in terminal mode
if the terminal is not available. Set PC in terminal
mode. A terminal emulator is normally available in
i.e. Windows under Accessories/Communication.
If no RS232 serial port is available on the PC use a
USB serial converter to connect to a USB port.
In terminal mode do the following settings:
Connect Ergometer and PC with the 0-modem cable
(normally used for the ergometer terminal).
Turn on power to the ergometer. The ergometer is
now checking what type of device is connected. When
finished a message appears on the PC screen.
Common commands:
Calibration: Type: cali[enter] and follow the•
instructions on the screen.
Setting to control ergometer from an external•
Siemens Megacart ECG device: Type: env
cmdtype=1[enter]
Setting to control ergometer from other external•
ECG devices: (most common setting) Type: env
cmdtype=2[enter]
To go back to control the ergometer with the
terminal.
Type: env cmdtype=[enter] or env cmdtype=0[enter]
9600 baud•
8 data bit•
1 stop bit•
no parity•
no flow control•
set terminal emulation to VT100•
set the• COM port number. A USB serial
converter is automatically assigned to a
COM port number by Windows. This
number is indicated under Startmenu /
Settings / Control Panel / System Hardware
/ Device Manager. The USB serial adaptor
should be listed in the Ports (COM & LPT)
section.

2
3
1
1
Monark 939 E
10
Connection to an external unit e.g. ECG device
First check the brake belt tension. If the belt is too
tight loosen it a little by moving the force indicator to
about 4 kp and hold it there for a few seconds. Then
the force-adjusting servo will loosen the belt tension.
To be sure that indicator positions are correct, do a
calibration. See ”Electronic calibration”.
Press the switch(2) to turn off the power, see1.
fig: Connections. Disconnect the cable from any
connected device.
Adjust the scale mechanically so that 0-index on2.
the scale and indicator are in line.
Move the indicator to 6 kp and hold it there.3.
Turn on the power again. (The green LED on the4.
lower left side of the bike is lit up when there is
power to the bike, see fig: LED.)
Hold the indicator at 6 kp until two beeps are5.
heard.
Move the indicator to the setting that6.
corresponds with the type of external unit you
are connecting to:
0 = mode for use with PC or hand unit.
1 = mode for Siemens Megacart ECG
2 = mode for other ECG devices, alt 1.
3 = mode for other ECG devices, alt 2.
Hold at this position until two beeps are heard7.
and after that, move the indicator to 0 again.
The system will now restart in chosen mode.
Reconnect the proper cable between the external8.
device (ECG Siemens Megacart requires a special
cable) and the bike.
The bike is now controlled digitally from the9.
external device.
These settings can also be done using the PC or the
terminal. Follow the instructions described in the
respective manuals.
Reset the Ergometer to use with terminal/PC.
Follow steps 1 – 7. At step 7 press ’0’ and then ENTER.
The Ergometer can now be controlled again from the
terminal or an external PC.
Alt. 1: ECG, Ergoline compatible command set,
requested load value.
Alt. 2: ECG, Ergoline compatible command set,
current load value.
Fig: Connections
1) Power connector
2) Serial port connection, external unit
3) Switch (on/off)
Fig: LED (1)
(Left side in front of
rear support tube.)

- 0 Terminal/PC
-1-3 see manual
- (0) _
Monark 939 E 11
Setting of terminal
When using a terminal (Art. No: 9339-51) do as
follows:
Connect the terminal to the bike using the1.
enclosed cable.
Connect power to the bike.2.
When the main menu is displayed on the LCD-3.
screen press 99 and the hidden service menu
appears.
Press 6, ”Settings”.4.
Press ENTER (normally 13 times) until the5.
display ”Command type” appears.
a) Press 1 and ENTER if the bike is connected
to a Siemens Megacart ECG device.
b) Press 2 and ENTER if the bike is connected
to other ECG device with an Ergoline
protocol for communication, alt 1.
c) Press 3 and ENTER if the bike is connected
to other ECG device with an Ergoline protocol
for communication, alt 2.
d) Press 0 if the bike is connected to a terminal
or PC.
6. After that press 0 twice to go back to main
menu.

Monark 939 E
12
The 939 E is a mechanically weighted and braked
ergometer, making performance validation a simple
procedure. The work performed on the ergometer is
the product of the weight lifted times the numbers of
revolutions (factored). Validation includes both me-
chanical and electronic procedures. If the ergometer
fails to pass any section of the validation, proceed to
the calibration and/or service menu (99 in the main
menu).
Inspection of all mechanical components is suggested
after any repair, or component service. The following
validation should be performed annually:
Remove the cover from the flywheel.1.
Loosen the brake belt at the balancing spring.2.
Wait until the flywheel is no longer moving.3.
The pendulum weight index should be aligned4.
with “0“ on the scale.
Attach the calibration weight to the point at which5.
the spring was attached.
The known weight should match the value on the6.
scale. If not see section “Calibration of Pendulum
Weight “.
Reattach the tension belt.7.
Reassemble the cover.8.
Proceed to the validation to complete.
Calibration Validation
The following procedure will assure the user that the
ergometer is performing properly on a daily basis.
The test exercises the mechanical braking, pedalling
and speed detecting systems as well as the computer
regulation and sensing capability of the mechanical
system.
Additionally, if a calibrated ECG simulator is avail-
able, it may be used to verify the heart rate measur-
ing system. Whether the simulator is used or not, the
heart rate system may be validated by simply taking a
pulse point rate measurement at the neck for example.
While a patient is at rest and has been prepared for
chest belt electrodes or an ear sensor, the pulse indi-
cator flashes once per pulse beat. The displayed rate,
should agree with the manually detected pulse rate. If
not, check the patient electrode connection and skin
preparation prior to requesting service.
Validation of force
From main menu go to any start display with Newtons
(N).
With the pendulum at zero, the display should1.
read “ 0“.
Move the pendulum weight to the 4 kp position2.
and the display should read “39“ Newtons.
Decrease the position of the weight by steps of 1 kp.3.
The display should read correctly at all positions.
NB: The brake belt will become loose and because of
this it will take a few seconds before normal workload
is obtained the first time the ergometer is used.

1
2
3
6
5
4
Monark 939 E 13
Electronic calibration
First check the brake belt tension. If the belt is too
tight, loosen it a little by moving the force indicator to
about 4 kp and hold it there for a few seconds. Then
the force adjusting servo loosens the belt tension.
To be sure the indicator positions are correct do a
calibration as follows.
1. Press the switch(2) to turn off the power, see
fig: Connections in part ”Connection to an
external unit”.
2. Adjust the scale mechanically so that 0-index
on the scale and indicator are in line.
3. Move the indicator to 4 kp and hold it there.
4. Turn on the power again. (The green LED on
the lower left side of the bike is lit up when
there is power to the bike.)
5. Hold the indicator at 4 kp until one beep is
heard.
6. Move the indicator to 0 kp and wait for one
beep.
7. Move the indicator to 2 kp and wait for one
beep.
8. Move the indicator to 4 kp and wait for one
beep.
9. Move the indicator to 6 kp and wait for two
beeps.
10. Move the indicator to 0 again.
Calibration is done.
The indicator can now be used to set the bike in
different modes.
Fig: Calibration
1) The pointer’s 0-position
2) Adjusting weight of sinker
3) Locking screw
4) Calibration weight
5) Hook to the calibration weight
6) Pointer at 4 kp
Mechanical calibration
Although all Ergometers are calibrated at the factory
the user may wish to verify this by performing a
mechanical scale calibration. If so please do the
following.
Loosen possible tension in the brake. See ”Scale - zero
adjustment”. Check that scale 0-index is in line with
the pointer(1). See fig: Calibration. If adjustment is
needed adjust according to ”Scale -zero adjustment”.
A checked and approved weight(4), 4 kg (Art. No:
9000-211), is attached at(5). See fig: Calibration.
At the correct calibration, the indicator should point
to 4 kp on the scale.
If there is a deviation adjust the pointer to the
correct position by adjusting the weight inside the
pendulum(2). To do this the left cover has to be
removed. To adjust the position of the weight, the
locking screw, in the center of the pendulum(3), must
be loosened.
If the pointer shows too low, the internal weight must
be moved upwards. If the pointer shows too high, the
adjustment weight is moved down. This process is
repeated until pointer is in the correct position.
Check the scale calibration once a year or if required
due to service.

1
Monark 939 E
14
Scale - zero adjustment
Connect power to the bike. Loosen possible tension in
the brake belt by moving the indicator to 4 kp. Hold
it there until the belt feels loose. Then move the indi-
cator to 0 again. Now check if the indicator is aligned
with the 0-index on the scale. If adjustment is needed,
loosen the locknut(1) and then change the position of
the scale board, so that it will have its 0-index in line
with the indicator/moving pointer. Tighten the lock-
nut after the adjustment. See fig: Scale adjustment.
Fig: Scale adjustment
1) Lock nut

Monark 939 E 15
The versatility of the 939 E/939 Medical Ergometer
enable it to be utilized in a variety of testing
environments. The precision and reproducibility of
measurements made with the ergometer in conjunction
with the ease of testing, allow it to be employed in
clinical exercise stress facilities, corporate fitness
programs and health clubs. The backgrounds of both
the individuals being tested and those administering
the test may be vastly different in these widely varying
testing situations.
In general, whether in a clinical laboratory or a health
club, the subject may be exercised quite strenuously,
depending on workloads which have been selected. As
a precaution, it may be advisable, prior to beginning
an exercise protocol, that each subject consult with
a physician. Before testing, the operator should
review the entire protocol operation with the test
person, explaining the work which will be required
and the duration of the procedure. A system of
communicating fatigue, chest pain or other abnormal
physical response to the exercise should be discussed.
The test person should not engage in heavy physical
activity for several hours prior to testing to establish
maximum oxygen consumption. In addition, all
testing and exercise protocols should be performed
a reasonable time after meals. The test person should
also refrain from smoking within an hour of the
testing period.
The test person should be prepared for riding the
ergometer, including the selection of proper clothing
which neither interferes with the physical activity
nor endangers the health of the test person. The test
person may need some general education concerning
the pedalling of the ergometer. The saddle and the
handlebars should be adjusted for comfort and
proper mechanical distance. The appropriate height
of the saddle is when the knee is slightly bent when
the sole of the foot is centred over the pedal axle with
the pedal to the bottom position.
The operation of the speed metronome and over/under
display should be reviewed. The maintenance of the
proper speed should be practiced at a low workload.
Finally, the chestbelt should be applied and monitored
to check for proper heart rate operation. The baseline
heart rate may also be of assistance in determining the
nervousness of the test person. The test person should
exhibit a relatively stable resting heart rate prior to
starting the protocol.
Testing with Ergomedic 939 E
Power calculation
1 rpm = 6 m on the flywheel brake surface.
50 rpm = 300 m
2 kp force makes 2 x 300 = 600 kpm/min
100 rpm= 600 m
1 kp force makes 1 x 600 = 600 kpm/min
(watt = rpm x kp)

1
Monark 939 E
16
Heart rate (Telemetry system)
The test person’s heart rate can be monitored by
chestbelt telemetry system. The system with chestbelt
electrodes is standard equipment.
Fuss-free HR measurement requires that the belt is
correctly placed. When it is correctly fitted the logo
on the belt will be central and readable, outward
and upright, by another person. Before putting on
the belt, clean the skin where the belt is to be placed.
The chest belt should be secured at a comfortable
tension around the mid section, just below the breast
muscle, see Fig: Placement of the chest belt. Moisten
the electrodes before use, see Fig: Electrodes on the
back of the chest belt. To make contact with the HR
receiver on the bike, the distance should not be more
than 100 cm. It is especially important when first used
to identify the chest belt with the sensor, by standing
close to get the HR (maximum 60 cm). This relates
especially to the Polar heart rate belt.
NOTE! Electromagnetic waves can interfere with the
telemetry system. Cellular phones are not allowed to
be used near the bike during test.
In case of problems, turn off WiFi, Bluetooth and
similar on computers nearby.
If the ergometer is to be used without a chestbelt note
that max heart alarm should be set in “off” position
so that external noise cannot cause a random max
pulse or higher. This switch is in “on” position by
default. If the heart rate exceeds the maximum level
set, the alarm will sound and the ergometer braking
force will decrease until the heart rate drops below
the alarm level.
Monitoring of the test person
The ergometer performs automated tests virtually by
itself, requiring minimal intervention by the operator.
This allows the operator to pay careful attention to
the test person without distraction. The response to
the exercise protocol can be accurately estimated
and appropriate action to assist the test person, if
necessary, may be given. The rider is subjected to
considerable exercise in certain advanced protocol
stages. The effect on the test person should not be
underestimated.
During the testing, the general appearance and heart
rate may be the most crucial factors to monitor. The
testing should be stopped immediately if the test
person reports chest pain, difficulty breathing, etc. A
system of prompt medical attention should be set up
prior to testing, in case of emergency.
The test person may also show difficulty in regulating
the speed of the ergometer. The power will be properly
regulated regardless of the speed, assuming that the
protocol work type is not force and that the speed is
maintained above the pedal low setting (default is 30
rpm).
In addition, some test persons may become sensitive
to the display on the terminal. If this is suspected, the
controller may be removed from its cradle and located
out of view. Similarly, the pulse LED may disturb the
test person and may be disabled.
Fig: Placement of the chest belt Fig: Electrodes on the back of the chest belt (1)

Monark 939 E 17
Fitness Rating Index - Males
Maximum Oxygen Consumption ml/kg/min
Fitness Rating Index - Females
Maximum Oxygen Consumption ml/kg/min
Rating Rating
-36 yrs 36-45 yrs 45- yrs -36 yrs 36-45 yrs 45- yrs
Excellent 54 53 43 Excellent 55 49 46
Good 49 45 38 Good 45 43 38
Above Average 46 39 34 Above Average 39 37 32
Average 36 33 30 Average 34 33 27
Below Average 32 29 27 Below Average 30 29 24
Fair 28 25 24 Fair 26 26 20
Poor 24 23 20 Poor 20 22 18
See also table 7 in “ Work tests with the Bicycle Ergometer“ by P O Astrand.
Reviewing results
The maximum oxygen uptake is the standard
measurement of cardiopulmonary fitness. Dependent
on the linear relationship between work and oxygen
uptake and between work and heart rate, the heart
rate response to work may be used to estimate the
oxygen consumption. If the maximum heart rate is
considered, the maximum oxygen consumption may
be determined.
The YMCA and Åstrand protocols estimate
the maximum oxygen consumption, based on a
submaximal workload while all others report the
oxygen consumption required by the final workload.
The Bruce and Naughton protocols require that the
test person exercise at a workload level for a minimum
of one minute to establish the oxygen consumption.
If less than one minute is observed, the previous
workload value is used.
The estimated maximum oxygen consumption
derived from some of the ergometer tests is subject
to the error of the “age related predicted maximum
heart rate“. Although there is a definite and linear
relationship between work and oxygen uptake, there
are some differences in actual oxygen uptake based on
individual work efficiency. Test persons who are less
familiar with bicycle exercise and those individuals
who are less fit, are more likely be less efficient than
those who ride bicycles frequently.
It should be noted that these results are estimates or
predictions of maximal response and have a greater
chance of being in error than if the individual were
tested to their actual maximum value. Interpretation
should therefore be made more carefully with an
understanding of the possibility of errors in the
methodology.
A relative fitness index can be obtained from the
following tables:

Monark 939 E
18
Troubleshooting guide
Symptom Probable Cause/Corrective Action
LED does not light up No current in the outlet. Check the fuses.
Right trafo? Check so that the trafo information in section
“Facts” is in accordance with the trafo used.
No connection to PC Check cable.
Right COM port?
Drivers missing when using the USB-serial adaptor. CD with
drivers is included.
Is the right type cmd set?
Does not load work Check rpm (no force is applied if rpm is less than the pedal low
ref. Default 30 rpm)
Check calibration
No heart rate Check the chestbelt (battery). Wet the thumbs and place them
on the electrodes. A low clicking sound will appear near battery
lid while you click on the electrodes with one thumb.
Use another external HR monitor to check the belt.
Check that the chestbelt is positioned correctly on test person
and tight enough.
Check that the electrodes are wet, in some cases it is necessary
to use a contact gel or a mixture of water with a few drops of
washing-up liquid.
The level for HR signal can vary from person to person. Put
chestbelt on another known person who has a good pulse
rendering.
Check for loose cables or jack if you have a plug-in receiver.
Use another pulse receiver (pulse watch or test bike monitor) to
check the chestbelt.
Check that it is the correct receiver and that it is in the correct
place. If it has a round Polar-sticker it should be placed straight.
Uneven heart rate Use an external unit, for example a pulse watch, to check if it
also indicates irregular pulse. If this is the case, there is probably
disturbance in the room. Magnetic fields from high voltage
cables, elevators, fluorescent tube etc can cause the disturbance.
Other electronic equipment could be placed too close.
If irregular pulse remains we recommend measuring HR
manually. If HR still remains irregular at workload, test
person’s health needs to be examined.
No rpm reading Check cable.
Unable to calibrate force Potentiometer belt may be slipping or broken. Replace if
damaged.
Potentiometer misadjusted.
Reboot memory from service menu (99). Set default (3).
There is a click noise with every pedal
revolution (increases with the weight)
The pedals are not tight. Tighten them or change pedals.
The crank arms is loose. Check, tighten.
The base bearing is loose. Contact your dealer for service.
Scratching sound is heard when pedalling Check that the carriage block is taken off and that none of the
covers is scratching.
There is a click noise and a squeak noise
when pedalling.
Loosen the chain.

Monark 939 E 19
Operation interferences
It is normally considered that about 70 % of all shutdowns on small computers are caused by mains interferences,
i.e. at shot over voltage. These interferences can often be caused by different machinery, which is started or
stopped. The processor in the computer is then reacting incorrectly or is not working at all. The problems can be
solved by means of a mains interference protector, which is connected between the mains and the transformer.
References
Åstrand I, ”Aerobic work capacity in men and women with special reference to age”, Acta Physiol Scand.1.
49 (suppl. 169), 1960.
Åstrand P-O, ”Experimental studies of physical working capacity in relation to sex2. and age”, Munksgaard,
Köpenhamn, 1952.
Åstrand P-O, Rodahl K, ”Textbook ofWork Physiology”, McGraw-Hill, New York,3. 1970.
Bruce RA, Kusumi F, Hosmer D, ”Maximal oxygen intake and nomographic as4. sessment of functional
aerobic impairment in cardiovascular disease”, Am Heart J 85:546-562,1973.
Naughton J, ”Exercise Testing and Exercise Training in Coronary Heart Disease”,5. Academic Press, New
York, 1973.
Golding L. A. Myers C. R, Sinning W. E, ”Y´s way to physical fitness” YMCA of6. the USA, Rosemont, IL,
1982.
Wilson P. K, Bell C. W, Norton A. C, ”Rehabilitation of the heart and lungs”, Beckman7. instruments,
1980.
Åstrand P-O, ”Ergometri - konditionsprov”, Monark, Sverige.8.
Where to obtain additional information
The user may require more information concerning several areas of the ergometer usage. This manual was
intended to instruct the reader primarily in the operation of the ergometer. References are made to related topics
in the discussions concerning the testing procedures and the protocol operation sections. The following literature
may provide some greater insight to ergometer-based testing without confusing the reader with technical medical
terms. Both texts were written specifically to provide basic understanding of the testing methodology and results.
Attention is paid to details concerning programme set-up and management.
Golding L. A, Myers C. R, Sinning W. E, Y´s way to physical fitness“, YMCA of the USA, Rosemont, IL,•
1982
Åstrand P-O, “Work Tests with the Bicycle Ergometer“, Monark AB, Varberg, Sweden•
For more technical details, see the section entitled “Reference“.

Warranty
EU countries - Private use
If you are a consumer living in the EU you will have
a minimum level of protection against defects in
accordance with EC Directive 1999/44/EC. In short,
the directive states for that your Monark Dealer will
be liable for any defects, which existed at the time of
delivery. In case of defects, you will be entitled to have
the defect remedied within a reasonable time, free of
charge, by repair or replacement.
EU countries - Professional use
Monark Exercise products and parts are guaranteed
against defects in materials and workmanship for a
period of one year from the initial date of purchase
of the unit. In the event of a defect in material or
workmanship during that period, Monark Exercise
willrepairorreplacetheproduct.Monark Exercise will
not, however, refund costs for labour or shipping.
Other countries
Monark Exercise products and parts are guaranteed
against defects in materials and workmanship for a
period of one year from the initial date of purchase
of the unit. In the event of a defect in material or
workmanship during that period above, Monark
Exercise will repair or replace (at its option) the
product. Monark Exercise will as above for labour
or shipping.
Service
Warning
Make sure the voltage indicated on the appliance
corresponds to the local mains voltage before making
connections.
Note that the text about service and maintenance is
universal and that all parts may not be applied to
your bike.
Regular service inspection and maintenance
It is important to carry out a regular service on your
ergometer, to ensure it is kept in good condition.
Always keep the bike clean and well lubricated.
Service action:
We recommend isopropyl alcohol to disinfect the•
surface of the bike. Use a damp but not wet cloth to
clean the surface you wish to disinfect.
Surface treatment with a rust inhibitor, especially•
when the bike is clean and the surfaces are dry This
is done to protect the chrome and zinc parts as well
as the painted parts (4 times per year).
Check now and then that both pedals are firmly•
tightened. If not the threading in the pedal arms
will be damaged. When the Ergometer is new it is
important to tighten the pedals after 5 hours of ped-
alling (4 times per year).
Check that the pedal crank is secure to the crank•
axle (4 times per year).
Be sure that the pedals are moving smoothly, and•
that the pedal axle is clear of dirt and fibres (4 times
per year).
When cleaning and lubricating be sure to check that•
all screws and nuts are properly tightened (twice a
year).
Check that the chain is snug and there is no play in•
the pedal crank (twice a year).
Check that pedals, chain and freewheel sprocket are•
lubricated (twice a year).
Be sure that the brake belt does not show significant•
signs of wear (twice a year).
Check that the handlebars and seat adjustment•
screws are lubricated (2 times per year).
Be sure that all moving parts, crank and flywheel•
are working normal and that no abnormal play or
sound exists. I.e. play in bearings causes fast wear-
ing and with that follows a highly reduced lifetime.
Check that the flywheel is placed in the center and•
with plane rotation.
Grind the brake belt contact surface, see section•
"Brake belt contact surface" (once a year).
Monark 939 E
20
Other manuals for 939 E
1
Table of contents
Other Monark Fitness Equipment manuals

Monark
Monark CARDIO COMFORT 837 E User manual

Monark
Monark 891 E Wingate Option User manual

Monark
Monark 939 E User manual

Monark
Monark Compact Rehab 871 E User manual

Monark
Monark cardio care 827 x User manual

Monark
Monark CARDIO COMFORT 837 E User manual

Monark
Monark Ergomedic 831 E User manual

Monark
Monark 928 E User manual

Monark
Monark 881E User manual

Monark
Monark Compact Rehab 871 E User manual