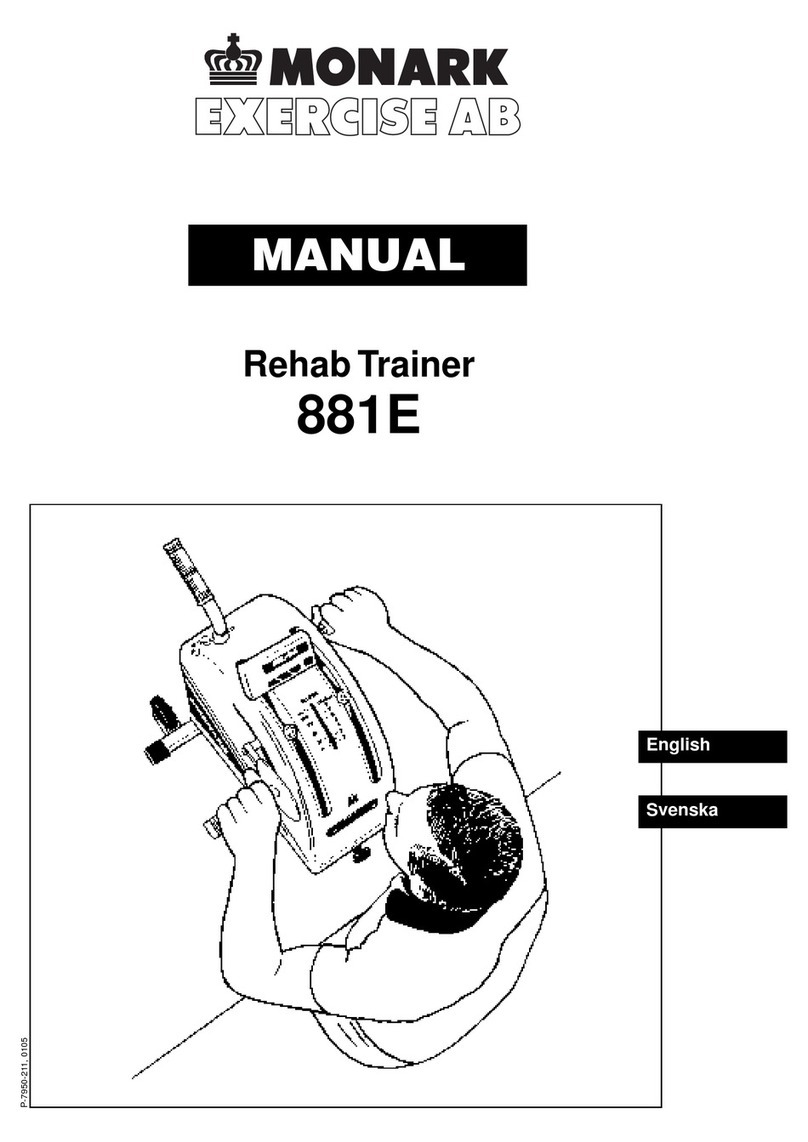
Monark 881E User manual

MANUAL
English/Svensk

2

Congratulations on your decision to purchase a product manufactured by MONARK EXERCISE in
Sweden. Monark has been the world´s leading manufacturer of high quality ergometers and execise
cycles for more than 40 years.
Contents
Assembly instructions 4
Calibration 6
Operating istructions 7
Batteries 11
Comparison 12
References 12
3

Assembly instructions
The parts shown below are not assembled
Transport handle
Pedal, right hand
Marked: ”R”
Pedal, left hand
Marked: ”L”
Crank handle,
right hand
Marked: ”R”
Hand guard
Crank handle,
left hand.
Marked: ”L”
Hand guard
Crank arm,
left hand.
Marked: ”L”
Supporting tube
Electronic meter
Crank arm,
right hand.
Marked: ”R”
Fig 1.
4

Assembly instructions
Supporting tube
Assemble supporting tube with two screws M6 x 27
and two spring washers. See fig 2
Transport handle
Pull out the pin and assemble the transport handle.
Put the transport handle in its upper position when
the Rehab Trainer is moved on the transport wheels.
See fig 3.
Crank arm
Assemble crank arm marked: “R” (Right) including
two star locks and bolt M8 x 40 on the right hand
side. Crank arm marked: “L” (Left) including two
star locks and bolt M8 x 40 to be assembled on the
left hand side.
Pedals
Assemble the pedal marked “R” (Right) on the right
hand side. The pedal axle has a right hand thread
and must be threaded onto the crank clockwise. The
pedal marked “L” (Left) on the left hand side. The
pedal axle has a left hand thread and must be thread-
ed onto the crank counter clockwise. See fig 1
Crank handles
The crank handle marked “R” (Right) is to be ass-
sembled on the right hand side with the hand guard
placed on the axle. The axle has a right hand thread
and must be threaded onto the crank clockwise. The
crank handle marked “L” (Left) is to be asssembled
on the left hand side with the hand guard placed on
the axle. The axle has a left hand thread and must be
threaded onto the crank counter clockwise. See fig 1.
NOTE! The pedals or the crank handles can be as-
sembled in three different positions on the crank
arms. See page 6, fig 7.
Screw M6 x 27
Spring washer
Fig 2.
Transport handle Pin
Fig 3.
5

Calibration
6
Calibration is done at the factory. If you for some
reason want to check the calibration, do as fol-
lows:
Tighten the brake belt through turning the control
knob so that pointer goes up to about 25-50 Watt
at rotation of the crank.
Put the Rehab Trainer at the edge of a table as
shown in fig 5.
Loosen the screws for the clamping plate, so that
the end of the belt is loose. See fig 5.
Fasten a 2 kg weight (our # 9000-212) to the
brake belt . See fig 5. This weight should now be
read on the scale at 2 kp. See fig 6.
Should there be a deviation between the position
of the pointer and the 2 kp marked on the scale,
adjust the loading spring by turning the adjusting
screw until the correct position is obtained. See
fig 5 and 6. Turn clockwise if the pointer is pla-
ced too high and turn counter colockwise if the
pointer is placed too low.
Remove the weight and fasten the brake belt
with the screw for the clamping plate so that the
pointer does not go below the zero (“0”) marked
on the scale.
The height level of the cranks is adjustable when
loosen the nuts according to fig 6. Set the crank
arms at the desired position and fasten with the
nuts.
If the cranks are not in line, adjust these. First set
the left hand crank straight upwards. Then loosen
the right hand crank by undoing the crank arm
screw. See fig 7. Adjust the position of the right
hand crank so it is in line with left hand crank
and tighten the screw.
Adjusting screw
Screw for clamping plate
Brake belt
Fig 5.
Fig 6.
Fig 7.
3 different positions
Crank arm screw
Graduated scale
Nuts

Operating instructions
7
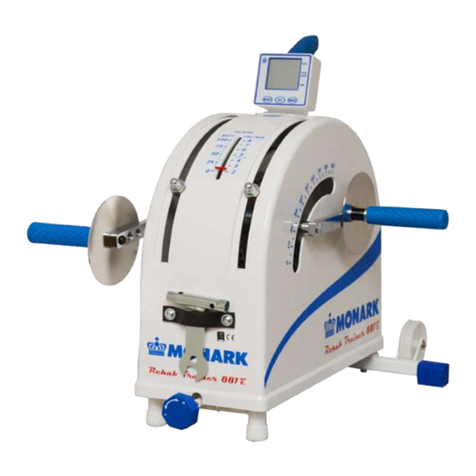
Monark Rehab Trainer model 881E is an arm
and leg ergometer provided with a brake belt.
The power can be read in Watts at 50 pedal
rpm moreover, the work can be read in kilo-
pondmeters (kpm). The Rehab Trainer is also
equipped wih an electronic meter, showing
pedal revolutions per minute (RPM), the total
pedal revolutions (TOTAL COUNT) and time
(TIME) function.
When cycling the test person put supplies the
flywheel into kinetic energy. This is braked
by means of a brake belt wich runs around the
bigger part of the brake surface of the fly-
wheel.
The workload is changed either by using
another pedalling speed or by increasing or
decreasing the tension of the brake belt against
the flywheel by means of the work load control
knob.
Fig. 8
F
ig. 11. Leg exercise in a lying position at the same level as the ergometer
Arm exercise in a sitting
position with the ergometer
placed on a table
Leg exercise in a sitting posi-
tion with the ergometer placed
on the floor.
Fig 9.
Fig 10.
Graduated scale
Control knob
for adjustment
of work load
Electronic meter
Arm exercise with the ergometer hang-
ing on the wall bars.
Fig 12.
Fig 13.
Ergometer placed on a
table for wall bars.

Operation instructions
8
Digital meter
TIME Timer (up/down) min:sec
RPM Pedal pedal rev./min
TOTAL COUNT Pedal (up/down) pedal rev. total
Keys and functions
1. MODE key
Use the MODE key to cycle through the functions.
2. SET key
Pressing this key will make it possible to set TIME and TOTAL COUNT. If you hold down this key for 2 seconds
you can advance the function value at a faster rate.
Programming TIME:
Press MODE key to advance to TIME function, and use SET to enter your desired time.
Each press of SET will advance time by one minute. When pedaling is started, measurement of remaining exer-
cise time will begin and the unit will count down to 0 at which time beeper will sound for 5 seconds.
Programming TOTAL COUNT:
Press MODE key to advance to TOTAL COUNT function, and use SET to enter your desired value.
Each press of SET will advance value by 10. When pedaling is started, measurement of remaining revolutions
will begin and the unit will count down to 0 at which time beeper will sound for 5 seconds.
3. RESET key
The RESET key will clear the values for TIME and TOTAL COUNT individually.
NOTE:
1. Display will reurn to normal when not pressed any key for 5 seconds, or trainer is not used.
2. The computer starts automatically when one of the keys is pressed or when the trainer is used, that is meter
gets rpm indication.
3. Auto shut off function when not pressed any key or device not used for 4 minutes.

9
Operation instructions
The batteries, 2 x 1.5V size AA(R6), which
are placed in a holder inside of the meter.
These can easily be changed.
Remove the battery hatch and take out the
old batteries and replace them with new ones.
NOTE! Be careful to put in the new batteries
with + and - correctly positioned
Put on the hatch.
SERVICE ROUTINE
Check the:
pedal crank is secure to the crank axle
pedals are moving smoothly, and pedal axle are clear of dirt and fibres
pedals are securely fitted to the pedal crank
flywheel rotating smoothly
brake belt does not show significant signs of wear
handles/pedals and chain are lubricated
LUBRICATION OF THE FREEWHEELING SPROCKET
The sprocket should be lubricated with a few drops of oil once a year. Tilt the device somewhat to make it easier for the oil
to reach the bearing.
Chain 1/2” x 1/8”
It´s strongly recommended that a chain solvent is used to keep the chain clean. Much dirt built up on the chain will cause
excess wear. A chain lubricant and solvent for normal road bikes may be used.
Check the lubrication and tension of the chain at regular intervals. In the middle of its free length the chain should have a
minimum play of 5 mm. When the play in the chain is about 20 mm (< 1inch) the chain must be tightened otherwise it will
cause unnormal wear of the chain and chainwheels. When the chain has become so long that it can no longer be adjusted, it
is worn out and shall be reolaced with a new one.
CRANK BEARING
The crank bearing is long term greased and needs normally no supplementary lubrication. If problem arises, please contact
your Monark dealer.
FLYWHEEL BEARING
The bearings in the flywheel are lifetime greased and require normally no maintenance. If problem arises, please contact
your Monark dealer.

THE IMPORTANCE OF REGULAR EXERCISE
The human body is built for action – not for rest. Once upon a time this was a necessity: the struggle for survival
demanded good physical condition. But optimal function can only be achieved by regularly exposing the heart,
circulation, muscles, tendons, skeleton and nervous system to some loading, i.e. training.
In the old days the body got its exercise both in work and at leisure. In our modern society, however, machines
have taken over an ever increasing share of the tasks which were formerly accomplished with muscular power
alone. Our life has at an accelerated tempo been dominated by sitting, riding and lying. Thus, the natural and
vital stimulation that tissues and internal organs receive through physical exercise has largely disappeared.
Certain tissues such as muscles, bone and blood and also a number of bodily functions can adapt to inactivity –
and to stress. Studies have proved that if you use 30 minutes for exercise like brisk walking, running, bicycling,
swimming or skiing 2-3 times a week, your condition has been improved by some 15 per cent after a few
months. The efficiency of the heart muscle will increase and joints and muscles grow in strength. The capillary
density increases in the trained muscle and their enzymatic activities are enhanced. The body adapts to the new
demands. The perceived exertion at a given rate of exercise becomes reduced.
With increased physical activity fatness is concentrated, the appetite functions “safer”, you can eat more without
risk for overweight and thereby the risk of lack of important essential food nutrients decreases. For many
individuals the effect of habitual physical activity also improves the wellbeing and it is a good feeling to have a
potential to cope with straining situations.
IN A FEW MONTHS YOU CAN GET 10-15 YEARS YOUNGER
If you cycle 30 minutes afew times a week you can lower your condition age with 10-15 years! Scientifically
this is described as a reduction on the biological age. Externally, you are your usual self. Internally, however,
you feel much younger. In other words: You can work harder. You feel more alert and healthy. Your ability to
handle stress and problems increases. There are few better ways to improve your physical condition than to
cycle. It does not over-tax your joints. It builds up your condition progressively and at your own pace – and
you can make your training fit weather conditions.
DO I LOOSE WEIGHT WHEN I CYCLING?
Yes! You do lose calories. A few miles on your bike every day over one year, you will have lost the equivalent
of 20 pounds of body fat. You will achieve best results if you combine exercise with healthier eating. A little
less sugar, less butter on your bread or less fat in your frying pan. And a few miles on your bike every day. In a
year you will have lost 20 pounds.
What kind of exercise to choose?
1. You should have fun when exercising. Choose something you find pleasure in doing regularly.
2. To get o good effect out of the training you should choose a form of exercise that engages large muscle
groups. Then the demand of increased blood flow and oxygen transport will be so great that heart will
increase its pump capacity. Jogging, calesthenics, aerobic dancing, bicycling, swimming, skiing and
walking are excellent examples of exercises meeting this requirement.
10
Comparison of arm work to leg work
When comparing arm ergometry or exercise to leg ergometry, there are several physiologic considerations. The
maxium work that a muscle is able to perform is related to its size. Obviously, the muscle mass of the arms is co-
siderably smaller than the legs and therefore the maximum work and maximum oxygen consumption of the legs
will be greater. Hersfeld and others added that the machanical differences in the shoulder and hip joints increase
metabolic demands when arm work is performed. (1)
Raybrouck and others found that at workloads below the “anaerobic threshold”, when adequate oxygen is supp-
lied too meet all the muscle´s requirments, the oxygen consumption from arm work matches closely the oxygen
consumption during equivalent leg work. (2) They noted that heart rate and ventilation were higher during arm
work at the same oxygen consumption in leg ergometry.
In rehabilitation or evaluation of disability, the expected sustained work capability of an invidual is approxima-
tely 40 % of maximum work and below the anaerobic threshold. (3) To use the equivalent work tables wich
hav been published (4), devide the VO2 at the subject´s workload by patient´s weight in kilograms. Divide this
VO2ml/kg by 3.5. This will give the equivalent METs and then evaluate the tasks of wich they are capable of
performing at that MET level.
DO I GET STRONGER?
Cycling strengthens the muscles of the back, abdomen and legs. Daily chores become easier. Cycling also makes
your heart stronger. Your pulse rate gets lower even when you exert yourself a little extra. Regular exercise also
has a favourable influence on high blood pressures.
HOW DO I TRAIN?
1. Warm up 3-5 minutes with a low pedal resistance. Pedal about 12 mph (20 km/h).
2. Increase the resistance until you feel the training “somewhat hard”. Keep the speed for 2-5 minutes. Get
off the Ergometer and rest a few minutes. Cycle again and then rest. Train at your own pace and with a
comfortable pedal resistance. After a few weeks you can increase the resistance.
3. Before ending, pedal a few minutes with a light resistance, in order to step down your training.
Total time about 30 minutes.
Strength training:
1. Give yourself a thorough warm-up.
2. Pedal with a heavy resistance for 5-10 seconds, then rest 45-60 seconds. Repeat this 5-10 times.
It is a good idea to combine your cycle training with gymnastics for 5 minutes, as this will give you a
physiologically well-balanced form of training.
(Elderly people and physically weak persons should consult a doctor before starting their training.)
References:
1. Hersfield S, et al. Relative effects on the heart by muscular work in the upper and lower
extremities. Arch Phys Med Rehab. Pages 249-257. May 1968
2. Reybrouck T, el al. Limitations to maximum oxygen upptake in arm, leg and combined
arm-leg ergometry. J App Physiol 38:774-669, 1975.
3. Becklage MR, Organic or functional impairment. Am Rev Resp Dis 129:S96-100, 1984.
4. Physician´s Handbook for Evauation and Physical Fitness. Tennesse Heart Association,
Physical Exercise Committee, 1972, pgs 44-45.
5. Jones NL, Campell EJM. Clinical exercise testing. WB Saunders Publishing, Phila, PA.
1975, pgs 86.
11

Notes:
12

13

Vi gratulerar till din nya motionsergometer. Monark har i mer än
40 år varit en världsledande tillverkare av ergometer- och mo-
tionscyklar med mycket hög kvalitet.
INNEHÅLL
Monteringsinstruktion 14
Kalibrering 16
Funktionsbeskrivning 17
Byte av batterier 21
14

15
Monteringsinstruktion
NEDANSTÅENDE DETALJER ÄR EJ MONTERADE.
Pedal, höger sida
Märkt: ”R”
Pedal, vänster sida
Märkt: ”L”
Handtag, höger sida
Märkt: ”R”
Handtag, vänster sida
Märkt: ”L”
Handskydd
Vev, höger sida
Märkt: ”R”
Vev, vänster sida
Märkt: ”L”
Elektronisk mätare
Transporthandtag
Stödrör
Handskydd
Stjärnlåsklack
Låsklack
Fig 1.

16
Monteringsinstruktion
Skruv M6 x 27
Fjäderbricka
Fig 2.
Stödrör
Montera stödrör med två skruvar M6 x 27 samt två fjä-
derbrickor. Se fig. 2
Transporthandtag
Drag ur sprinten och montera transporthandtaget. Trans-
porthandtaget skall sättas i sitt högsta läge när Rehab
Trainer förflyttas på transporthjulen. Se fig. 3.
Vevarmar
Vevarm märkt R (Right) inkl. två stjärnlåsklackar och
skruv M8 x 40 monteras på höger sida. Vevarm märkt
L (Left) inkl. låsklack och skruv M8 x 40 monteras på
vänster sida.
Pedaler
Pedal märkt R (Right) monteras på höger sida. Pedalax-
eln är högergängad och skall gängas på veven i riktning
medurs. Pedal märkt L (Left) monteras på vänster sida.
Pedalaxeln är vänstergängad och skall gängas på veven i
riktning moturs.
Vevhandtag
Vevhandtag märkt R (Right) monteras på höger sida,
med handskyddet placerat på axeln. Axeln är högergäng-
ad och skall gängas på veven i riktning medurs. Vev-
handtag märkt L (Left) monteras på vänster sida, med
handskyddet placerat på axeln. Axeln är vänstergängad
och skall gängas på veven i riktning moturs.
OBS! Pedaler och vevhandtag kan monteras i tre olika
lägen på vevarmarna. Se sid. 16, fig. 7
Fig 3.
Transporthandtag Sprint

Kalibrering
Justeringsskruv
Skruv för klämplatta
Bromsband
Fig 5.
Kalibrering är gjord på fabrik. Vill man av någon anled-
ning kontrollera kalibreringen, gör men enligt följande:
Spänn upp bromsremmen genom att vrida åt belastnings-
ratten, så att vid rotation av veven visaren går upp till
mellan 25 och 50 Watt.
Placera Rehab-Trainer vid kanten av ett bord enl. fig. 5
Lossa skruvarna för klämplattan, så att bromsremmen sit-
ter löst. Se fig. 5
Fäst en vikt på 2 kg (vårt art.nr. 9000-212) i bromsrem-
men enl. fig. 5. Denna vikt skall nu kunna avläsas på
skalan vid 2 kp. Se fig. 6.
Stämmer inte visarens läge med skalans 2 kp markering,
justera belastningsfjädern genom att vrida justerskruven
för belastningsfjädern till detta stämmer. Se fig. 5 och 6.
Vrid medurs om visaren står för högt och moturs om visa-
ren står för lågt.
Tag bort vikten och fäst bromsrem med skruv och kläm-
platta i ett läge där visarn inte kan gå längre ner än till 0
på skalan.
Vevarnas höjdläge är justerbart, när muttrarna enligt fig. 7
lossas. Ställ in vevarmarnas gradtal som önskas och drag
fast med muttrarna.
Om vevarna inte ligger i linje måste dessa justeras. Ställ
först in vänster vev rakt uppåt. Lossa därefter höger vev
genom att lossa skruven enligt fig. 7. Justera högervevens
läge, så att den ligger i linje med vänster vev och drag fast
skruven.
Fig 6.
Fig 7.
Skruv för vevarm
Tre olika lägen
Gradtal
Muttrar
17

Funktionsbeskrivning
Fig 10.
Monark Rehab Trainer, modell 881E, är en
arm- och benergometer försedd med broms,
vars effekt kan avläsas i Watt vid 50 pedal-
varv per minut. Dessutom kan arbetet avlä-
sas i kilopondmeter (kpm). Rehab Trainern
är också utrustad med en elektronisk mätare
som visar pedalvarvtal per minut, pedal-
varvtal totalt samt en tidsfunktion.
Genom cykling tillför testpersonen broms-
hjulet en viss rörelseenergi som bromsas ut
med ett bromsband som löper runt större
delen av bromshjulets bromsbana.
Ändringar av bromseffekten sker antingen
genom annan tramphastighet eller att med
belastningsratten öka eller minska broms-
bandets spänning mot bromshjulet.
Armträning sittande, med er-
gometer placerad på ett bord
Benträning sittande, med
ergometern stående på
golvet.
Armträning med ergometern hängade i
ribbstol.
Ergometer placerad på
ett fällbord avsett för
ribbstol.
Fig 9.
Fig 12.
Fig 11.
Benträning liggande i samma nivå som
ergometern står placerad.
Fig 8.
Graderad skala
Belastningsratt
Elektronisk mätare
Fig 13.
18

Funktionsbeskrivning
19
OBS:
1. Om någon knapp inte tryckts ner
på 5 sekunder kommer displayen att
återgå till normalläge.
2. Mätaren startar automatiskt när
någon knapp trycks ner eller om
apparaten används och därmed får
indikation på pedalrörelse.
3. Mätaren stängs automatiskt av om
inte apparaten använts på 4 minuter.
Digital mätare
TIME Tid (up/ner-räkning) min:sek
RPM Pedal pedalvarv/minut
TOTAL COUNT Pedal (up/ner-räkning) pedalvarv totalt
Knappar och funktioner
1. MODE knappen
Använd MODE knappen för att “bläddra” igenom funktionerna.
2. SET knappen
Ett tryck på denna knapp när mätaren står i läge TIME gör att displayen börjar blinka och visar därmed att en
önskad träningstid kan ställas in. Om denna knapp hålls nere i mer än 2 sekunder kan värden ställas in i en
snabbare takt.
Programmering av tränings tid:
Tryck på MODE knappen för att gå till TIME funktionen, och använd därefter SET för att ställa in den öns-
kade tiden. Varje tryck på SET kommer att öka på tiden med en minut. Vid rotation av pedalerna/ handtagen
kommer nerräkning av tid automatiskt att starta och räkna ner till 0:00 varvid ett pip kommer att höras i 5
sekunder.
Programmering av räknare:
Tryck på MODE knappen för att gå till TOTAL COUNT funktionen, och använd därefter SET för att ställa in
önskat värde. Varje tryck på SET kommer att öka värdet med 10. Vid rotation av pedalerna/ handtagen kommer
nerräkning av antal varv automatiskt att starta och räkna ner till 0 varvid ett pip kommer att höras i 5 sekunder.
3. RESET knappen
RESET knappen nollställer individuellt värden för TIME, TOTAL COUNT.

Funktionsbeskrivning
20
Batterierna, 2 x 1.5V storlek AA (R6), är
placerade i en hållare på baksidan av
mätaren.
Lyft locket och ta ur de gamla batterierna.
Sätt i de nya batterierna och tänk på att polvända dem
rätt enl markering i batterihållaren.
Sätt tillbaka locket.
SERVICE
Kontrollera:
att kedjan går jämnt och att det inte finns något glapp i vevlagringen
att vevarmarna sitter ordentligt fast på vevaxeln
att vevarna roterar mjukt och att pedalaxeln är ren från diverse smuts
att pedalaxlarna sitter ordentligt fast i vevarmarna
att bromshjulet roterar jämnt
att bromsbandet inte visar på förslitningsskador
att vevar och kedja är smorda
SMÖRJNING FRIGÅNGSKRANS
Frigångskransen smörjs med olja någon gång per år. Luta cykeln något så att
oljan lättare rinner in i lagringen.
Kedja 1/2” x 1/8”
Kontrollera med jämna mellanrum att kedjan är lagom smord.
I annat fall orsakas onormal förslitning både på kedja och kedjehjul.
BROMSHJULSLAGRING
Lagren i bromshjulet är livstidssmorda och fordrar normalt inga åtgärder.
Om fel i lagren misstänks eller konstateras, vänd Er till fackman för byte.
VEVLAGER
Vevaxellagringen är av typ kasettlager och fordrar normalt inga åtgärder.
Om fel i lagringen konstateras eller misstänks, vänd Er till fackman för byte.
Bromsband
Smutsbeläggning på bromsbandet och bromshjulets bromsbana kan ge ryck i belastningsanordningen.
Bromshjulets bromsbana bör då slipas med fin slipduk och sedan torkas av med en trasa eller dylikt.
Ojämnheter i bromsbanan tas också bort med ett fint slippapper eller slipduk.
I annat fall slits bandet onödigt hårt, samtidigt som oljud uppstår.
Byt gärna bromsband i samband med rengöring av bromsbanan.
Håll alltid bromsbanan torr och ren. Något smörjmedel får absolut inte användas.
Bromsbandet bör regelbundet kontrolleras med avseende på slitage.
Om det ser slitet ut bör det bytas ut.
Other manuals for 881E
4
Table of contents
Languages:
Other Monark Fitness Equipment manuals

Monark
Monark 891 E Wingate Option User manual

Monark
Monark Compact Rehab 871 E User manual

Monark
Monark Ergomedic 891 E User manual

Monark
Monark crosstrainer x200 User manual

Monark
Monark CARDIO COMFORT 837 E User manual

Monark
Monark 939 E User manual

Monark
Monark 881E User manual

Monark
Monark CARDIO COMFORT 837 E User manual

Monark
Monark Ergomedic 831 E User manual

Monark
Monark 927 E Cardio Care User manual