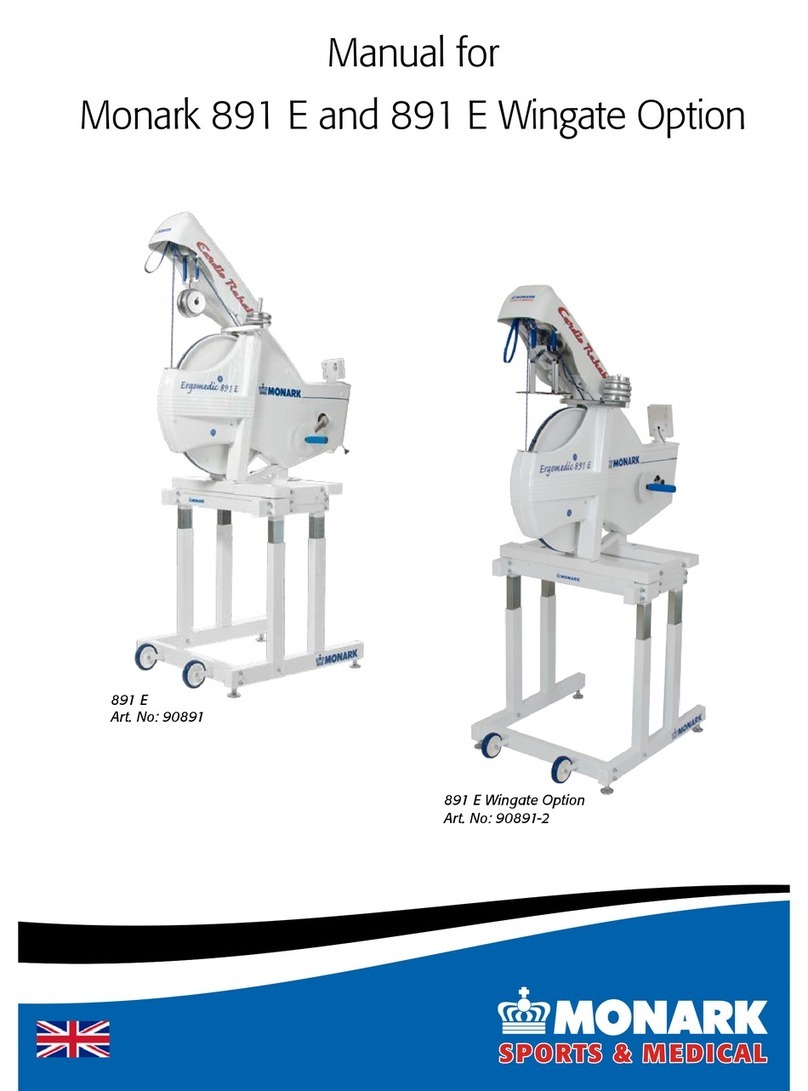
Monark Ergomedic 891 E User manual

MANUAL
English/Svensk

Congratulations on your new exercise device.
Designed by MONARK EXERCISE AB, Sweden.
Monark has been the world´s leading manufacturer of
high ergometers and exercise cycles for more than 40 years.
Contents Page
Assembly instructions 3 - 4
Battery replacement 7
Brake belt – brake surface 8
Brake belt – replacement/adjustment 7 - 8
Chain 9
Crank bearing 11
Digital meter 6
Flywheel bearing 10
General 3
General about exercise 11 - 12
Operation instruction 5 – 7
Service checklist 10 – 11
Warrenty 3
Ergomedic 891 / 2

891-004
Ergomedic 891 / 3
It is important that you keep your exercise device clean and properly lubricated. Most important is to
protect the chromed and zinced parts, but also painted parts benet from the same protection.
When cleaning and lubricating, be sure to check that all screws and nuts are proerly tightened. Be sure
that all moving parts as crank and ywheel is working normal and that no unnormal play or sound ex-
cists. I.e. play in bearings causes fast waring and with that follows a highly reduced lifetime.
PLEASE NOTE: The production number of you exercise device is placed according to g 3, page 4.
GENERAL
As on any quality product there may be an exceptional fault due to material or manufacture. If such a
fault should arise on your exercise cycle, please return to the place of purchase for necessary repair.
Monark products and parts are guaranteed against defects in materials and workmanship for a period of
one year from the initial date of purchase of the unit.
Parts found to need replacement due to normal wear and tear, such as brake belts, are not covered. This
guarantee covers parts only, not labor costs associated with the repair.
This guarantee does not apply to cases of abuse or vandalism, nor does it extend to any injury or loss to
person or property caused directly or indirectly by any Monark products.
In the event of a defect in material or workmanship during the warranty period, Monark Exercise will re-
pair or replace (at its option) the product. Monark Exercise will do so at its expense for the cost of mate-
rials but not for labour or shipping
WARRENTY
Crank handle, right hand
Marked: R
Hand guard
Crank handle, left hand
Marked: L
Hand guard
Weight bracket
Nut M6 locking
PARTS BELOW ARE NOT ASSEMBLED
Assemble crank handle marked R (Right) on to the right hand side. The crank handle axel has a right
hand thread and must be threaded onto the crank clockwise.
Assemble crank handle marked L (Left) on to the left hand side. The crank handle axel has a left hand
thread and must be threaded onto the crank counter clockwise.
Untighten the two nuts on the frame for equipment. mount the weight holder and remount the nuts
tightly.
Fig. 1.

ASSEMBLY
Assemble the stand
Assemble rst the support stand
as shown to the right.
Mount all the screws and nuts
before you tightend them.
Mount the device on the stand
Asssemble rst the device to the
help frame with four locking nuts
and two screws (MVBF M8) as
shown to the right.
Mount the help frame to the
support stand with four screws,
washer and nuts.
Screw MVBF
M8 (2X)
Nut Locking
M8 (4X)
Production
number
Fig. 2.
Fig. 3.

Ergomedic 891 / 5
OPERATING INSTRUCTIONS
NOTE!
When using the Cardio Rehab 891E severe fysical tension can occur.
Therefore is it recomendable that persons, who are not used to tness training or
don’t feel well, contacts a doctor/physician for consultations.
Monark Exercise Ergometer device Model 891E is a test device, applied with a braking system, where the
brake force can be adjusted with weights on a weight carrier.
Weights are avalible ni 0,1 kg, 0,5 kg and 1,0 kg.
Note: 0,1 kg is the minimum weight, which is the weight of the weight carrier. The weight carrier can
also be placed in an upper level and then will no braking force be applied. Disengage by pushing the
knob. See g below.
When pedaling the subject stores energy in the ywheel. This is braked by means of a brake belt wich
runs around the bigger part of the brake of the ywheel. The workload is changed either by using other
pedaling speed or increasing or decreasing the tension of the brake belt against the ywheel by means of
the workload tension device.
NOTE!
At transport the tension device should be somwhat tightened to prevent the brake
belt from falling off the ywheel.
Electronic meter
Disengagement knob
Fig. 4.

Ergomedic 891 / 6
OPERATING INSTRUCTIONS
Fig. 8
ELECTRONIC METER
SPECIFICATIONS:
RPM: 0 - 199 pedalrev./min
HR: 50 - 240 bpm
TIME: 0:00 - 99.59 min:sek
SPEED: 0 - 99 km/h or mph
DISTANCE: 0.0 - 99.9 km or mile
FORCE 0.0 - 7.0 kp
CALORIES 0 - 999 kcal
WATT 0 - 7 x rpm watt
Batteries: 1.5 V x 2 AA(R6)
Storing temp.: -10ºC - +60ºC
Operating temp.: 0ºC - 50ºC
Setting KM or MILE
Km and km/h is the dafault setting from the factory.
If you want to make a setting in mile take the meter out of the panel.
Turn off the meter by taking out one battery.
On the back side is a switch with two settings - 1 and ON. See g. 9.
1 is equal to km and km/h and is the default setting.
ON is equal to mile and mph. Choose position and install the battery again.
Put the meter back again into the panel.
FUNCTION
Press any button or move the pedal to turn on the meter.
At the display for heart rate (HR) a ♥ is lit which means that the meter is trying to nd a pulse signal from
an external source (chestbelt with electrodes, our part.no 9339-91).
If the meter can not nd such a signal this HR function is automatically turned of after 30 seconds. When the
function is turned off the ♥ symbol is not lit any more.
The heart rate function can be turned on again by preessing a button.
Timer starts automatically when pedals are moved. Meter values for Time, Distance and Calories can be set
to zero by pressing the RESET button for more than 2 seconds.
To get correct raedings for calories and watts the kp value on the electronic meter has to be set to the same
value as the workload that is the weight of the basket including the weights in it.
Example: The workload is 3 kg (weight basket 1 kg + 2 x 1kg weight). Press the kp button to the left on the
meter. The lower display window is now ashing and showing gures in kp. Increase or decrease in steps of
0.1 kp by pressing the kp button() or the RESET button() until the reading is corresponding with the ac-
tual or desired kp values (workload) from the weight basket. After that press the CAL/WATT button to either
show the CAL or WATT gures.
The watt reading in the display is depending on the pedalling speed. The watts can accordingly be adjusted
by increasing or decreasing the pedalling speed.
Calories are calculated all the time.
Do not expose the tness computer to direct sunlight or extremely high temperature. Do not use any dissol-
vents when cleaning. Use only dry cloth.

Ergomedic 891 / 7
OPERATING INSTRUCTIONS
891-008
Replacement of batteries
Pull the connector out of the housing and
take the lid panel of.
The batteries, 2 x 1,5 V, size AA (R6), which
are placed in a holder on the backsize of the
panel, can easily be changed.
Replacement of brake belt/cord
Removed the front cover over the weight carrier by
losen the screws on each side of the cover.
Take the return strap, see g. 8, 9, and lift up the
weight basket until it locks in its upper postion.
Loosen the cord/belt bracket, see g. 9, and take
away the brake from the tension hub.
Loosen or cut away the knot or tie up the knot at
the other end of the belt. After that take the belt
from the device.
When assembling a new brake cord/belt, rst enter
one end into the hole in the tension hub, see g. 7,
and tie a knot and let the knot fall into the bigger
part of the hole.
Then assemble the new belt exactly as the old one.
NOTE: When replacing the brake cord/belt it is
recommended to clean the brake surface.
See BRAKE SURFACE - BRAKE BELT.
Adjusting the brake cord/belt tension
At rst check that the brake belt is lying correct on the ywheel surface.
Put 1 kg in the weightt basket. Rotate the ywheel by hand. the basket shall now lift up so the distance
to the ywheel is at least 40 mm, and maximum 80 mm. If this is the case, the brake belt has to be
loosened or tightened a little at the tension center hub. If the basket i too low shorten the belt somewhat
and if the basket is too high leghten the cord somewhat.
Lock the weight basket in its upper postion and after that loosen the cord bracket somewhat so that the
cord length can be adjusted. Tighten the bracket again, release and check if the measurment above ar
OK when the ywheel is rotated by hand.
Repeat the above if necessary.
NOTE: The basket will always give the correct workload wherever it hangs between the upper stop posi-
tion and the lower stop just above the ywheel. The measurments above just gives a good margin - in
each direction
Fig. 7.

Ergomedic 891 / 8
Brake belt contact surface - brake belt
BRAKEBELT CONTACT SURFACE
The brake belt should be checked now and then to ensure that it has not suffered execessive wear.
If it looks worn it should be replaced.
Deposits of dirt on the brake belt and on the contact suface may cause the unit to operate unevenly and
will also wear out the brake belt. The brake belt contact of the ywheel surface should then be ground of
with a ne sandpaper and any dust removed with a clean dry cloth.
Dismantle cover, see ”Replacement brake belt”.
Set the weight basket in its upper position.
Take off the brake belt to the side.
Grind with a ne sandpaper. see g. 10.
Grinding is easier to preformif a second individual cautiosly and carefull pedals the device.
Irregulaties on the brake belt contact surface are removed by means of a ne sandpaper or an abrasive
cloth. Otherwise unnecessary wear on the brake occur and the unit can become noisy.
Always keep the brake belt contact surface clean and dry. No lubricant is allowed to be used.
891-009
Brake belt contact surface
Sandpaper
Return strap
Tension center
Lock washer
Stop lever
Stop
Fig. 8. Fig. 9.
Fig. 10.

Ergomedic 891 / 9
Chain 1/2” x 1/8”
It is strongly recommended that a chain solvent be used to keep the chain clean. Excess dirt
built up on the chain will cause excess wear. A chain lubricant and solvent for normal road bikes
may be uaed.
Check the lubrication and tension of the chain at regular intervals. In the middle of its free
length the chain should have a minimum play of 5 mm. See g 11. When the play in the chain
is about 20 mm (<1 inch) the chain must be tightened otherwise it will cause unnormal wear
of the chin and chainwheels. Because of this it is always recommende to keep the chain play as
little as possible. When the chain has become so long that it can no longer be tightened with
the chain adjusters it is worn out and shall be replaced with a new one.
ADJUSTING CHAIN
Remove left and right frame cover.
To adjust the chain the hub nuts should be loosened. Loosening or tightening the nuts on the
chain adjusters will then move the hub and axle forward or backward. Adjust according to abo-
ve recommendation. Then tighten the nuts on the hub axle again. See g 13.
CHAIN REPLACEMENT
Loosen the chain adjusteras much as possible. Dismantle the cahinlock and remove the chain.
Put on a new chain and assemble the chain lock.The spring of the chain lock should be assemb-
led with the closed end in the movement direction of the chain. Use a pair of tongs for dismant-
ling and assembling the spring. See g 12.
Adjust chain adjusters to chainplay according to above. Tighten axle nuts rmly.
Put on frame covers again.
NOTE: At assembly the ywheel has to be parallell with the center line of the frame
Otherwise the chain and chainwheels makes a lot of noise and wears out
very rapidly.
891-010
Chain play
Axle nut
Chain adjuster
Chain lock
Movment of the chain
Fig. 11.
Fig. 12.

Ergomedic 891 / 10
Service and maintenance
REPLACEMENT OF THE FREEWHEELING SPROCKET
Remove left and right frame cover. See ”REPLACEMENT OF BRAKE BELT”.
Dismantle the chain as described on page 9.
Loosen the axle nuts and lift off the ywheel. Remove the axle nut, washer, chain adjuster and
spacer on the freewheel side. Place the special remover (part No. 9100-14) in the adapter and
place the spacer and axle nut outside. See g 14.
NOTE: Do not tighten the axle nut completely. It must be possible to loosen the adapter-
sprocket half a turn.
Replace sprocket-adapter and assemble the new parts in reverse order according to the above.
LUBRICATION SPROCKET
The sprocket should be lubricated with a few drops of oil once a year. Incline the cycle so-
mewhat to make it easier for the oil to reach the bearing. See g 15.
Fig. 13.
Fig. 14.
Fig. 15.

Ergomedic 891 / 11
Service checklist
CRANK BEARING
The crank bearing is long term greased and needs normally no supplementary lubrication. If
problem arises, please contact your Monark dealer.
FLYWHEEL BEARING
The bearings in the ywheel are lifetime greased and require normally no maintenance.
If problem arises, please contact your Monark dealer.
SERVICE CHECKLIST
Check the:
chain is snug and there is no play on the pedal crank
pedal crank is secure to the crank axle
pedals moving smoothly, and is the pedal axle clear of dirt and bres
pedals are securely tted to the pedal crank
ywheel rotating smoothly and central
handlebars screws lubricated
brake belt does not show signicant signs of wear
pedals and chain are lubricated
THE IMPORTANCE OF REGULAR EXERCISE
The human body is built for action – not for rest. Once upon a time this was a necessity: the
struggle for survival demanded good physical condition. But optimal function can only be achie-
ved by regularly exposing the heart, circulation, muscles, tendons, skeleton and nervous sys-
tem to some loading, i.e. training.
In the old days the body got its exercise both in work and at leisure. In our modern society,
however, machines have taken over an ever increasing share of the tasks which were formerly
accomplished with muscular power alone. Our life has at an accelerated tempo been domina-
ted by sitting, riding and lying. Thus, the natural and vital stimulation that tissues and inter-
nal organs receive through physical exercise has largely disappeared. Certain tissues such as
muscles, bone and blood and also a number of bodily functions can adapt to inactivity – and to
stress. Studies have proved that if you use 30 minutes for exercise like brisk walking, running,
bicycling, swimming or skiing 2-3 times a week, your condition has been improved by some
15 per cent after a few months. The efciency of the heart muscle will increase and joints and
muscles grow in strength. The capillary density increases in the trained muscle and their enzy-
matic activities are enhanced. The body adapts to the new demands. The perceived exertion at
a given rate of exercise becomes reduced.
With increased physical activity fatness is concentrated, the appetite functions “safer”, you can
eat more without risk for overweight and thereby the risk of lack of important essential food
nutrients decreases. For many individuals the effect of habitual physical activity also improves
the wellbeing and it is a good feeling to have a potential to cope with straining situations.

Ergomedic 891 / 12
DO I GET STRONGER?
Cycling strengthens the muscles of the back, abdomen and legs. Daily chores become easier.
Cycling also makes your heart stronger. Your pulse rate gets lower even when you exert your-
self a little extra. Regular exercise also has a favourable inuence on high blood pressures.
HOW DO I TRAIN?
1. Warm up 3-5 minutes with a low pedal resistance. Pedal about 12 mph (20 km/h).
2. Increase the resistance until you feel the training “somewhat hard”. Keep the speed for 2-5
minutes. Get off the Ergometer and rest a few minutes. Cycle again and then rest. Train at
your own pace and with a comfortable pedal resistance. After a few weeks you can increase
the resistance.
3. Before ending, pedal a few minutes with a light resistance, in order to step down your train-
ing.
Total time about 30 minutes.
Strength training:
1. Give yourself a thorough warm-up.
2. Pedal with a heavy resistance for 5-10 seconds, then rest 45-60 seconds. Repeat this 5-10
times.
It is a good idea to combine your cycle training with gymnastics for 5 minutes, as this will give
you a physiologically well-balanced form of training.
(Elderly people and physically weak persons should consult a doctor before starting
their training.)
What kind of exercise to choose?
1. You should have fun when exercising. Choose something you nd pleasure in doing regu-
larly.
2. To get o good effect out of the training you should choose a form of exercise that engages
large muscle groups. Then the demand of increased blood ow and oxygen transport will be
so great that heart will increase its pump capacity. Jogging, calesthenics, aerobic dancing,
bicycling, swimming, skiing and walking are excellent examples of exercises meeting this re-
quirement.
IN A FEW MONTHS YOU CAN GET 10-15 YEARS YOUNGER
If you cycle 30 minutes a few times a week you can lower your condition age with 10-15 years!
Scientically this is described as a reduction on the biological age. Externally, you are your usu-
al self. Internally, however, you feel much younger. In other words: You can work harder.
You feel more alert and healthy. Your ability to handle stress and problems increases. There
are few better ways to improve your physical condition than to cycle. It does not over-tax your
joints. It builds up your condition progressively and at your own pace – and you can make your
training t weather conditions.
DO I LOOSE WEIGHT WHEN I CYCLING?
Yes! You do lose calories. A few miles on your bike every day over one year, you will have lost
the equivalent of 20 pounds of body fat. You will achieve best results if you combine exercise
with healthier eating. A little less sugar, less butter on your bread or less fat in your frying pan.
And a few miles on your bike every day. In a year you will have lost 20 pounds.

Ergomedic 891 / 13
Notes:

Ergomedic 891 / 14
Vi gratulerar till Din nya Ergometer.
Monark har i mer än 40 år varit världsledande
tillverkare av ergometer- och motionscyklar med
mycket hög kvalité
Innehållsförteckning
Sida
Allmänt 15
Allmänt om motion 23
Batteribyte 19
Bromsrem - bromsbana 19 - 20
Bromsrem - byte/justering 19
Delar ej monterade 15 - 16
Digitalmätare 18
Frigångskrans - smörjning 22
Funktionsbeskrivning 17 - 19
Garanti 15
Kedja 21
Montering 16
Service och underhåll 22 - 23
Vevlager 23

Ergomedic 891 / 15
Allmänt
Håll alltid träningsapparaten ren och välsmord. Ytbehandla då och då med något rostskyddsmedel, spe-
ciellt när den är rengjord och ytorna är torra. Främst bör man skydda kromade och zinkade delar, men
ävenlackerade delar mår bra av samma skydd.
I samband med rengöring och smörjning kontrollera också att alla skruvar och muttrar är ordentligt
åtdragna. Försäkra Dig om att alla rörliga delar såsom vevaxel och svänghjul fungerar normalt och att
inget onormalt glapp nns. Glapp i t. ex. lager orsakar snabb förslitning och därmed kraftigt reducerad
livslängd.
Ergometerns tillverkningsnummer är placerat enl. g.3 sid. 16
GARANTI
Även på en kvalitetsprodukt kan det vid enstaka fall uppstå material- och fabrikationsfel som omfattas av
garantin. Om ett sådant fel skulle uppstå på Din armergometer skall Du - enl. konsumentköplagen - vän-
da Dig till det ställe där den är inköpt.
Delar ej monterade
Vevhandtag märkt R (Right), monteras på cykeln högra sida (ked-
jehjulssidan).
Vevhandtagsaxel är högergängad och skall gängas på veven i
riktning medurs. Drag åt ordentligt.
Vevhandtag märkt L (Left), monteras på cykeln vänstra sida.
Vevhandtagsaxel är vänstergängad och skall gängas på veven i
riktning moturs. Drag åt ordentligt.
Lossa de två undre muttrarna på belastningsramen.
Trä på vikthållaren fästöron. Sätt på och dra fast muttrarna or-
dentligt igen.
891-004
Vevhandtag, höger
Märkt: R
Handskydd
Vikthållare
Mutter M6 locking
Vevhandtag, vänster
Märkt: L
Handskydd
Fig. 1.

Montering
Montage av stativet
Sätt ihop först stativet enligt gu-
ren till höger.
Montera alla skruvar och muttrar
innan de dras åt.
Montera apparaten på stativet
Montera först apparaten på hjälpra-
men med fyra muttrar (M8 Locking)
och två skruvar (MVBF M8).
Montera hjälpramen på stativet med
fyra skruvar, brickor och muttrar. Skruv MVBF
M8 (2X)
Mutter
Locking M8
(4X)
Tillv. nr.
Ergomedic 891 / 16
Fig. 2.
Fig. 3.

Ergomedic 891 / 17
Funktionsbeskrivning
Digitalmätare
Utlösningsreglage
OBS!
Då användning av Ergomedic 891E kan innebära ansenlig fysisk påfrestning rekom-
menderas personer som inte är vana vid konditionsträning alt. ej känner sig helt
friska att först kontakta en läkare för rådgivning.
Monark Ergomedic 891E är en testcykel, försedd med en broms, vars bromskraft regleras med
vikter som hängs i en viktkorg. Vikterna nns i storlekarna 0,1 kg, 0,5 kg och 1,0 kg. Detta
gör att bromsbelastningen kan varieras 0,1 kg. OBS: 0,1 kg är den minsta belastning som kan
erhållas, då detta är korgens egenvikt. Viktkorgen kan också hängas i sitt övre stoppläge och
ger då ingen belastning alls. Viktkorgen lösgörs genom att trycka in utlösningsreglaget. Se g.
4 nedan.
Genom cykling tillförs rörelseenergi till bromshjulet som bromsas upp med en bromslina vilken
löper runt större delen av bromshjulets bromsbana. Ändring av bromseffekten sker antingen
genom annan vevhastighet eller att med hjälp av vikterna öka eller minska bromslinans spän-
ning mot bromshjulet.
OBS:
Vid transport se till att bromslinan är något spänd runt bromshjulet vilket gör att den inte åker
av.
Fig. 4.

Ergomedic 891 / 18
Funktionsbeskrivning
ELEKTRONISK MÄTARE - FUNKTIONSBESKRIVNING
Vid tryck på någon knapp eller vid rörelse på veven ges en signal till mätaren som aktiverar samtliga funktioner.
Vid fönstret för hjärtfrekvens (HR) tänds ett ♥vilket betyder att mätaren söker efter en pulssignal från en yttre
sändare (bröstbälte med elektroder, art.nr 9339-98, levereras med cykeln).
Kan mätaren inte hitta någon signal kopplas funktionen för mätning av hjärtfrekvens automatiskt bort efter 30
sekunder. Detta syns genom att ♥−symbolen slocknar.
Denna funktion kan åter startas upp genom att trycka på någon knapp.
Tid börjar räknas automatiskt i och med att pedalerna trampas runt.
Värden för tid (TIME) och körsträcka (DISTANCE) samt kalorier (CAL) kan nollställas genom att trycka på
RESET-knappen i mer än 2 sekunder.
För att fönstret med kalorier och watt skall visa rätt värden skall kp (bromskraften) ställas in till det belastnings-
värde som motsvaras av viktkorgen (pålagda vikter + korgens vikt 1 kg). Exempel: Korg + vikter väger 3 kg.
Tryck på kp-knappen till vänster på mätaren. Nedre displayfönstret visar nu kp värdet. Öka i steg om 0.1 med kp
knappen (pil upp) alt. minska med RESET knappen (pil ner) tills värdet stämmer överens med viktkorgens totala
vikt - i detta fallet 3.0. Tryck därefter på CAL/WATT knappen och cykelns bromseffekt i watt kommer att visas.
Vid ytterligare tryck på CAL/WATT hoppar visningen mellan kalorier alt. watt.
Det watt tal som visas kommer att vara beroende av trampvarvtalet på veven. Watt talet kan därför njusteras
genom att öka eller minska trampfrekvensen.
Kaloriförbrukningen räknas upp kontinuerligt.
Utsätt inte den elektroniska mätaren för direkt solljus eller extremt höga temperaturer. Använd inga lösningsme-
del vid rengöring, utan endast torr trasa.
ELEKTRONISK MÄTARE
Tekn. data:
Pedalvarv RPM: 0 - 250 varv/minut
Hjärtfrekvens HR: 50 - 240 slag/min
Tid TIME: 0:00 - 99.59 min:sek
Hastighet SPEED: 0 - 99 km/tim
Körsträcka DISTANCE: 0.0 - 99.9 km
Bromskraft kp 0.0 - 7.0 kp
Kalorier CAL 0 - 999 kcal
Effekt WATT 0- 7 x rpm watt
Batterier: 1.5 V x 2 R6 (AA)
Lagringstemp: -10ºC - +60ºC
Arbetstemperatur: 0ºC - 50ºC

Ergomedic 891 / 19
Funktionsbeskrivning
Batteribyte
Mätarens batterier ligger i en separat förpackning
vid leverans.
Om lagringstiden varit lång, kan batterieffekten
vara för låg för att få fram funktioner på mätaren.
Batterierna måste då bytas ut mot nya.
Dra ur kontakten på mätarens baksida och tag
därefter av batteriluckan. Var noga med att mon-
tera de nya batterierna rätt polvända. Sätt till-
baka locket och montera kontakten.
Byte bromsrem
Demontera kåpan över belastningsramen genom
att lossa skruvar på höger resp. vänster kåpsida.
Hissa upp viktkorgen i sitt övre stoppläge.
Lossa låsbygeln, se g. g 8-9, tag bort bromsli-
nan från spänncentrumet.
Lossa alt. klipp av knuten i andra linänden och tag
därefter bort hela linan från cykeln.
Vid montering av ny bromslina, kör först in ena
änden i spänncentrumets linhål samt gör en knut
och låt den därefter falla in i hålrummet. Montera
därefter linan enligt g. 7
Lås linänden med låsbygeln. Se g. 9
OBS! I samband med byte bromslina, bör broms-
banan göras ren.
Se: BROMSBANA - BROMSBAND
891-008
JUSTERING AV BROMSREMMENS SPÄNNING
Kontrollera först att bromslinan ligger rätt på bromsbanan, se g. 8 o 9.
Lossa stopparmen för spänncentrum.
Lägg därefter 1 kg i viktkorgen. se g. 8
Drag runt bromshjulet med handen. Korgen skall nu lyftas upp så att avståndet till bromshjulet
är minst 30 mm och max 80 mm. Sker inte detta måste bromslinan längd justeras vid spänn-
centrum.
Lås spänncentrum med stoppet och lossa därefter låsbygeln från bromsremmen något så att li-
nans längd kan justeras. Hänger korgen för lågt - sträck linan något alt. hängerkorgen för högt
- släpp något på linan. Lås därefter bygeln på nytt och kontrollera att korgen höjer sig mellan
30 och 80 mm när hjulet dras runt .
För att ge rätt belastning kan korgen, i princip, var som helst mellan bromshjulet och spänn-
cetrumets raminfästning. OBS: Spänncentrumets stopp får ej gå emot övre eller undre stopp-
läge med någomn del. I så fall sätts självjusterningen ur spel och därmed kan rätt bromsmot-
stånd ej erhållas.
Fig. 7.

Ergomedic 891 / 20
891-009
Bromsbana
Slipduk
Spänncentrum
Låsbygel
Stopparm
Stopp
Funktionsbeskrivning
BROMSBANA - BROMSREM
Smutsbeläggning på bromsbandet och bromshjulets bromsbana kan ge ryck i belastningsanord-
ningen. Bromshjulets bromsbana bör då slipas med n slipduk.
Demontera skydd Se BYTE BROMSREM.
Hissa upp viktkorgen i sitt övre stoppläge.
Kräng av remmen.
Slipa därefter bromsbanan med n slipduk, Se g 10.Torka sedan av med en trasa eller dyligt.
Slipning kan lättare genomföras om någon vevar försiktigt på cykeln. Ojämnheter i bromsba-
nan tas också bort med ett nt slippapper eller slipduk. I annat fall slits remmen onödigt hårt,
samtidigt som oljud uppstår.
Byt gärna bromsrem i samband med rengöring av bromsbanan. Se BYTE BROMSREM.
Håll alltid bromsbanan torr och ren. Något smörjmedel får absolut inte användas.
Bromsremmen bör regelbundet kontrolleras med avseende på slitage. Om den ser sliten ut bör
den bytas
Fig. 8. Fig. 9.
Fig. 10.
Table of contents
Languages:
Other Monark Fitness Equipment manuals

Monark
Monark 927 E Cardio Care User manual

Monark
Monark 881E User manual

Monark
Monark Compact Rehab 871 E User manual

Monark
Monark 939 E User manual

Monark
Monark CARDIO COMFORT 837 E User manual

Monark
Monark 881E User manual

Monark
Monark crosstrainer x200 User manual

Monark
Monark 928 E User manual

Monark
Monark 881E User manual

Monark
Monark Compact Rehab 871 E User manual