manuals.online logo
Brands
  1. Home
  2. •
  3. Brands
  4. •
  5. Monoprice
  6. •
  7. Switch
  8. •
  9. Monoprice HDX-301 User manual

Monoprice HDX-301 User manual

Other Monoprice Switch manuals
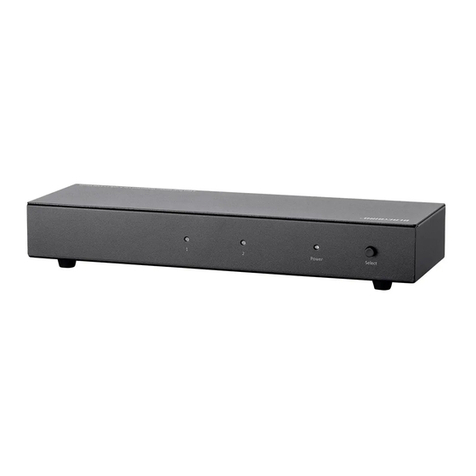
Monoprice 33416 User manual

Monoprice

Monoprice 33416 User manual

Monoprice 38296 User manual

Monoprice

Monoprice 38296 User manual

Monoprice PID 11752 User manual

Monoprice

Monoprice PID 11752 User manual

Monoprice 611680 User manual

Monoprice

Monoprice 611680 User manual

Monoprice 36650 User manual

Monoprice

Monoprice 36650 User manual

Monoprice 24280 User manual

Monoprice

Monoprice 24280 User manual

Monoprice HDX-201E User manual

Monoprice

Monoprice HDX-201E User manual

Monoprice 4x2 HDMI User manual

Monoprice

Monoprice 4x2 HDMI User manual

Monoprice Blackbird 39666 User manual

Monoprice

Monoprice Blackbird 39666 User manual

Monoprice Blackbird User manual

Monoprice

Monoprice Blackbird User manual

Monoprice Blackbird 36632 User manual

Monoprice

Monoprice Blackbird 36632 User manual

Monoprice Blackbird 39671 User manual

Monoprice

Monoprice Blackbird 39671 User manual

Monoprice 38295 User manual

Monoprice

Monoprice 38295 User manual

Monoprice 36653 User manual

Monoprice

Monoprice 36653 User manual

Monoprice 8146 User manual

Monoprice

Monoprice 8146 User manual

Monoprice PID 10530 User manual

Monoprice

Monoprice PID 10530 User manual

Monoprice 38294 User manual

Monoprice

Monoprice 38294 User manual

Monoprice 36652 User manual

Monoprice

Monoprice 36652 User manual

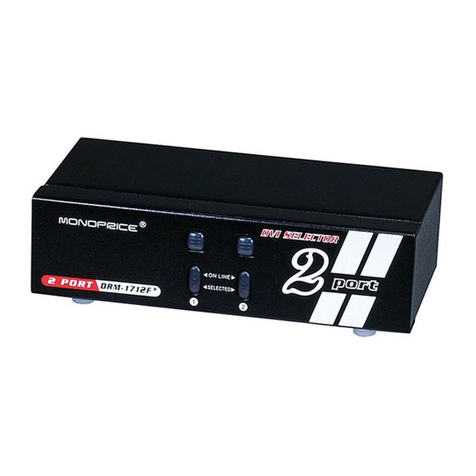
Monoprice DRM-1712F+ User manual

Monoprice

Monoprice DRM-1712F+ User manual

Monoprice Blackbird 43879 User manual

Monoprice

Monoprice Blackbird 43879 User manual

Monoprice 10320 User manual

Monoprice

Monoprice 10320 User manual

Monoprice Blackbird 21614 User manual

Monoprice

Monoprice Blackbird 21614 User manual

Monoprice Blackbird 33418 User manual

Monoprice

Monoprice Blackbird 33418 User manual

Monoprice MD-415ARC User manual

Monoprice

Monoprice MD-415ARC User manual

Popular Switch manuals by other brands

SMC Networks SMC6224M Technical specifications

SMC Networks

SMC Networks SMC6224M Technical specifications

Aeotec ZWA003-S operating manual

Aeotec

Aeotec ZWA003-S operating manual

TRENDnet TK-209i Quick installation guide

TRENDnet

TRENDnet TK-209i Quick installation guide

Planet FGSW-2022VHP user manual

Planet

Planet FGSW-2022VHP user manual

Avocent AutoView 2000  AV2000BC AV2000BC Installer/user guide

Avocent

Avocent AutoView 2000 AV2000BC AV2000BC Installer/user guide

Moxa Technologies PT-7728 Series user manual

Moxa Technologies

Moxa Technologies PT-7728 Series user manual

Intos Electronic inLine 35392I operating instructions

Intos Electronic

Intos Electronic inLine 35392I operating instructions

Cisco Catalyst 3560-X-24T Technical specifications

Cisco

Cisco Catalyst 3560-X-24T Technical specifications

Asante IntraCore IC3648 Specifications

Asante

Asante IntraCore IC3648 Specifications

Siemens SIRIUS 3SE7310-1AE Series Original operating instructions

Siemens

Siemens SIRIUS 3SE7310-1AE Series Original operating instructions

Edge-Core DCS520 quick start guide

Edge-Core

Edge-Core DCS520 quick start guide

RGBLE S00203 user manual

RGBLE

RGBLE S00203 user manual

Thrustmaster FLIGHT SIMULATOR X quick guide

Thrustmaster

Thrustmaster FLIGHT SIMULATOR X quick guide

Southwire SURGE GUARD 41390 RVC troubleshooting guide

Southwire

Southwire SURGE GUARD 41390 RVC troubleshooting guide

Buhler Nivotemp NT 61 Brief instructions

Buhler

Buhler Nivotemp NT 61 Brief instructions

Kramer VS-41HDCP user manual

Kramer

Kramer VS-41HDCP user manual

Techly IDATA AU-270 user manual

Techly

Techly IDATA AU-270 user manual

Belkin F1U109 user manual

Belkin

Belkin F1U109 user manual

manuals.online logo
manuals.online logoBrands
  • About & Mission
  • Contact us
  • Privacy Policy
  • Terms and Conditions

Copyright 2025 Manuals.Online. All Rights Reserved.

<D
Select
the
desired
input
as
follows
:
^
From
the
switcher
front
panel
-
press
the
"Input
Select"
button
repeatedly
until
the
desired
input
is
selected.
Each
press
will
cycle
to
the
next
input
in
turn
-
ie
1-2-3
then
back
to
1.
The
current
input
can
be
identified
by
the
lighted
LED
on
the
front
panel.
^
From
the
remote
control
-
O
Open
remote
control
cover
and
the
batteries
package;
0
Install
the
batteries
into
the
Remote
control;
€>
Press
the
desired
input
button
to
go
directly
to
the
desired
input
(1-3),
or
O
Press
the"
<"
or"
►
"button
to
select
the
previous/next
input.
Warranty
LIMITED
WARRANTY
TO
ORIGINAL
PURCHASER
MONOPRICE
warrants
the
equipment
it
manufactures
to
be
free
from
defects
in
material
and
workmanship
for
the
following
limited
warranty
period:
Twelve
(12)
months
parts
and
labor
If
equipment
fails
because
of
such
defects
and
MONOPRICE
is
notified
within
twelve
(12)
months
from
the
date
of
shipment,
MONOPRICE
will,
at
its
option,
repair
or
replace
the
equipment
provided
that
the
equipment
has
not
been
subjected
to
mechanical,
electrical,
or other
abuse
or
modifications.
Equipment
that
fails
under
conditions
other
than
those
covered
will
be
repaired
at
the
current
price
of
parts
and
labor
in
effect at
the
repair.
Such
repairs
are
warranted
for
ninety
(90)
days
from
the
day
of
reshipment
to
the
buyer
This
warranty
is
in
lieu
of
all
other
warranties
expressed
or
implied,
including
without
limitation,
any
implied
warranty
or
merchantability
or
fitness
for
any
particular
purpose,
all
of
which
are
expressly
disclaimed.
The
information
in
this
manual
has
been
carefully
checked
and
is
believed
to
be
accurate.
However,
MONOPRICE
assumes
no
responsibility
for
any
inaccuracies
that
may
be
contained
in
this
manual.
In
no
event
will
MONOPRICE,
be
liable
for
direct,
indirect,
special,
incidental,
or
consequential
damages
resulting
from
any
defect
or
omission
in
this
manual,
even
if
advised
of
the
possibility
of
such
damages,
The
technical
information
contained
herein
regarding
HDMI
switcher
features
and
specifications
is
subject
to
change
without
notice.
OWNERS
MANUAL
MOMORBICZE
HDX-301
3
input,
1
output
HDMI
Switcher
Note:
Mount
the
switcher
away
from
sources
of
electromagnetic
or
radio
frequency
interference,
and
also
away
from
heat
and
moisture.
To
ensure
optimum
performance,
you
should
use
MONOPRICE's
high
quality
cables
with
this
product.
Package
Contents
HDX-301
3
input,
1
output
HDMI
Switcher
Thank
you
for
purchasing
the
HDMI
switcher
We
always
strive
to
offer
the
finest
quality
product
at
the
best
possible
price,
and
your
complete
satisfaction
is
very
important
to
us.
The
HDMI
switcher
is
designed
to
make
your
A/V
equipment use
simpler,
more
productive,
and
less
expensive.
The
HDMI
switcher
offers
solutions
for
Home
Theater,
AV
installation
,
data
center,
information
distribution,
conference
room
presentation,
and
school
and
corporate
training
environments.
The
HDMI
switcher
allows
three(3)
HDMI
source
devices
to
be
switched
easily
into
an
HDMI
compatible
monitor
or
projector.
Simply
connect
your
HDTV
display
to
the
switcher's
display
output.
The
HDMI
switcher
will
equalize
the
HDMI
signal
and
supports
long
length
cable
applications.
Features
and
Characteristics
+
Connect
up
to
three
HDMI
sources
to
one
HDTV
display
device
+
Maintains
480p,
720p,
10801
and
1080p
video
formats
+
Maintains
highest
HDMI
single
link
video
resolution
and
digital
audio
signal
+
Supports
HDCP
compliant
devices
+
Both
HDMI-HDMI
and
DVI-HDMI
cables
can
be used
to
connect
the
inputs
and
switcher
output
+
Inputs
can
be
selected
from
either
the
IR
remote
controller
(supplied)
or
via
the
front
panel
"Input
Select"
button
Specifications
Video
Amplifier
Bandwidth
1.63GBps
Input
Video
Signal
Specification
v1.2
Input
Connector
type
HDMI
19pin
female
Output
Connector
type
HDMI
19pin
female
Power
Consumption
3.0W
Max
Power
Supply
6VDC,
1A
Dimensions
(mm)
181.6(L)x77.1(W)x237(H)
Product
Weight
(Net)
350g
+
1
x
HDMI
3x1
Switcher
+
1
x
6V
DC
1A
power
supply
+
1
x
Infrared
Remote
Controller
+
2
x
AAA
batteries
for
remote
control
+
1
x
Instruction
booklet
Installation
Front
Panel
Rear
Panel
IR
Receiver
Current
Input
Input
Select
Power
Indication
Button
Indicatio
Power
in
Port
to
sink
Direcl
Input
Select
Ncxi/Prcvious
Input
Select
Bottom
Base:
Ports
for
HDMI
Source
in
w
80mm
Remote
Control
Keystone
Slots
Wall
Screw
Wall
Connecting
and
Operating
the
HDMI
Switcher
G)
You
can
mount
the
switcher
either
on
a
flat
horizontal
surface
or
on
a
vertical
surface
using
the
keystone
slots
in
the
base
of
the
unit:
O
Install
two screws
on
the
wall
as
shown
in
above
figure;
O
Carefully
slide
the
HDMI
switcher
upon
the
two
fixed
screws.
<D
Connect
the
HDMI
cables
from
the
HDMI
source
devices
to
the
HDMI
switcher
inputs.
<D
Connect
the
HDMI
cable
from
your
display
(monitor
or
projector)
into
the
HDMI
out
of
the
HDMI
switcher
<D
Plug
the
6V
DC
power
supply
into
the
HDMI
switcher